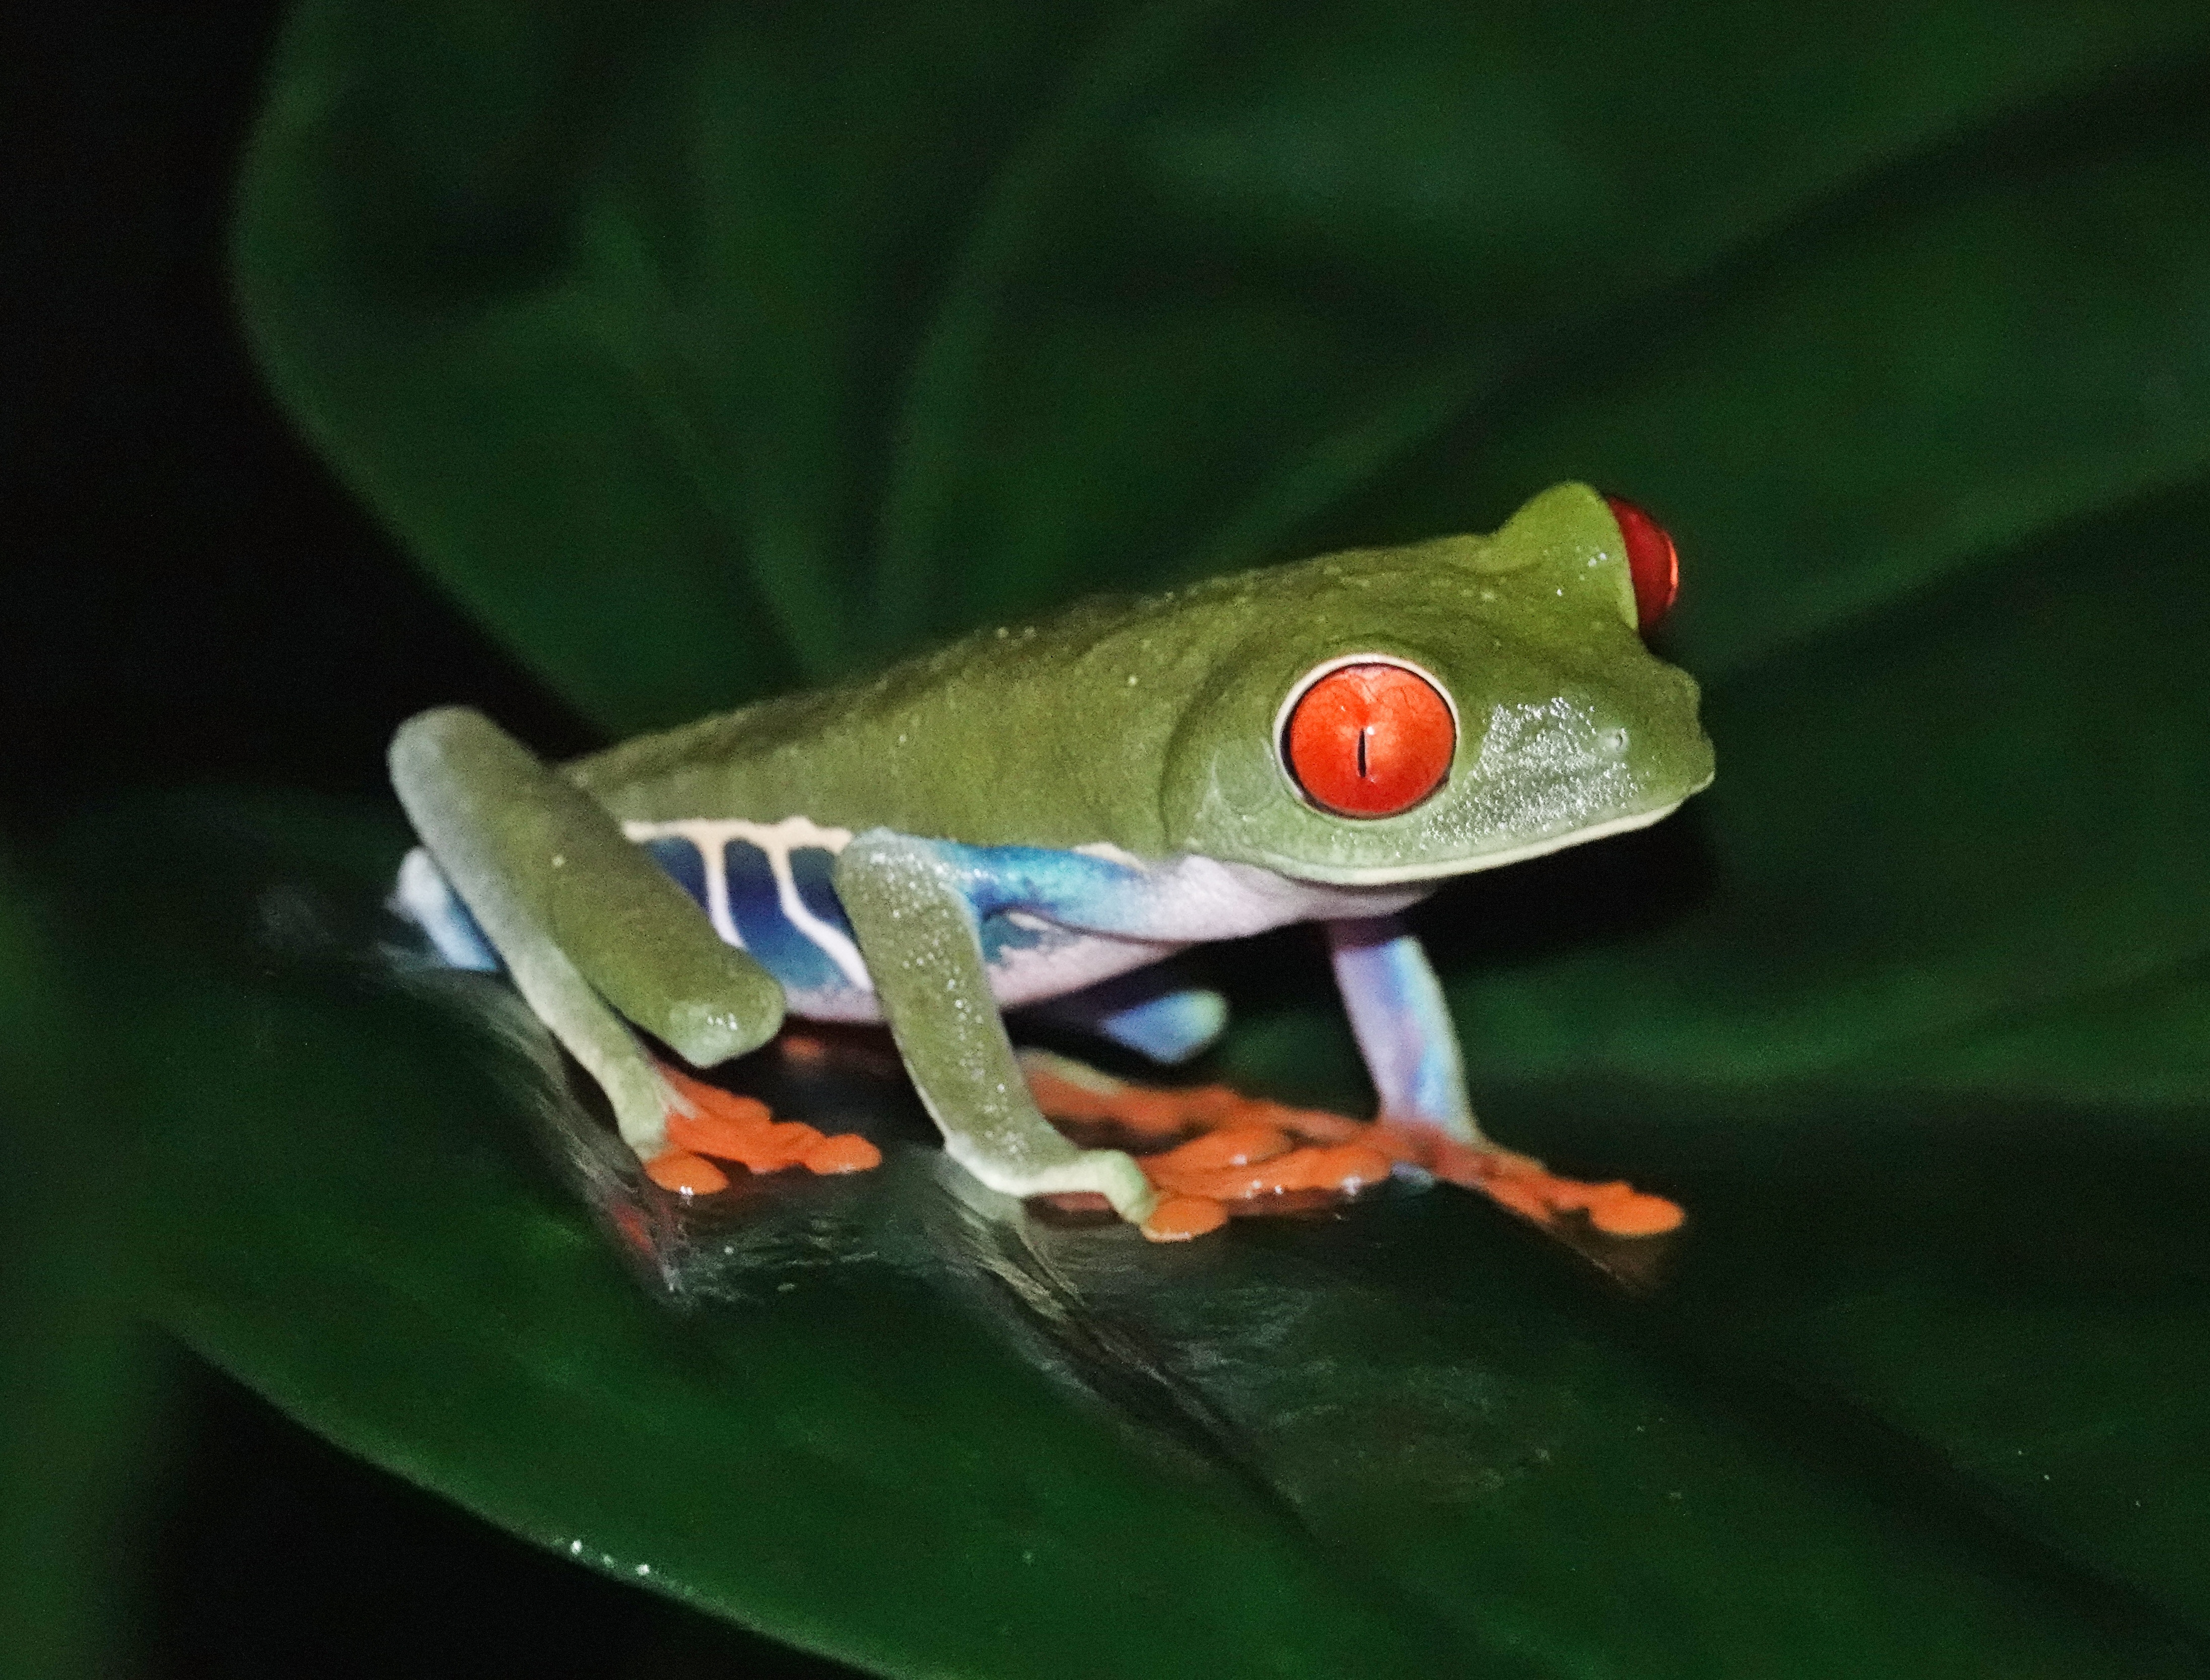
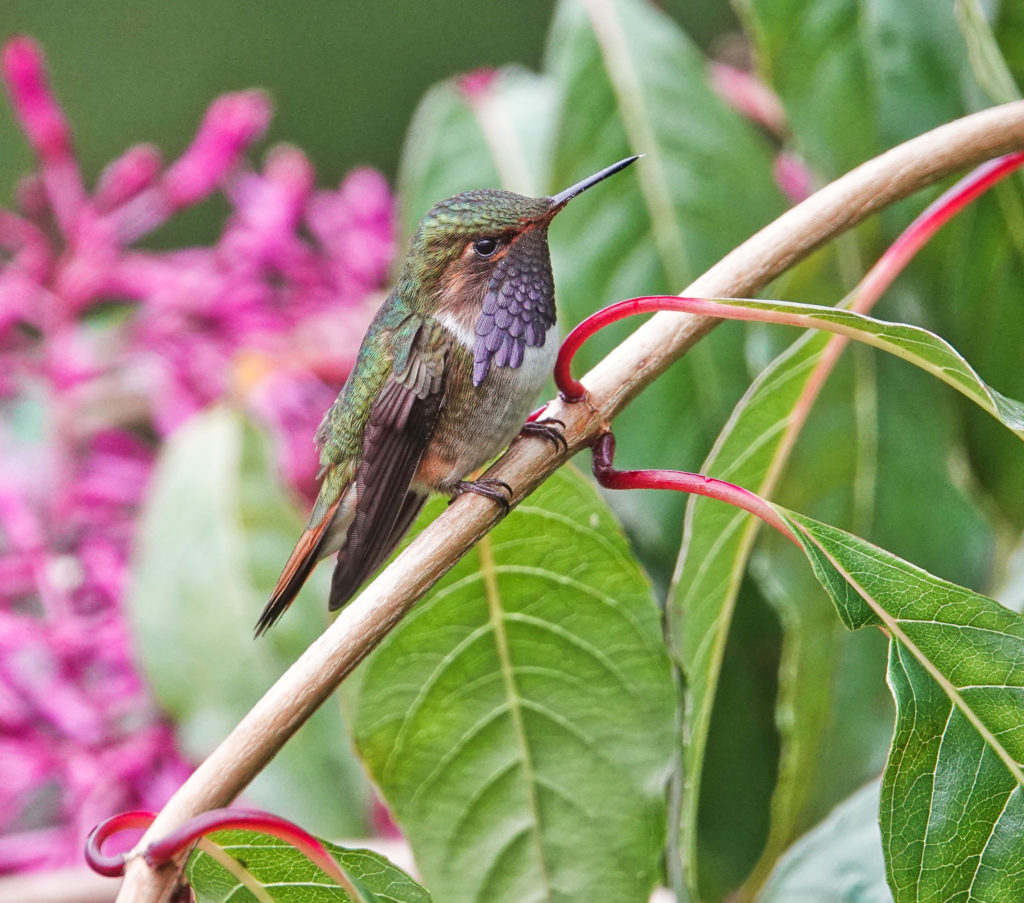
In Costa Rica, you are not allowed to use flash at night when photographing frogs (to avoid damaging their eyes and disrupting their night time routine…in fact flash is discouraged in wildlife photography of any kind in Costa Rica…where it is not actually illegal). In the past I have used a good led flashlight, most recently a Everready daylight balanced flashlight, held beside my camera, with the camera set in “Anti Motion Blur” mode. I have gotten some good shots, but in Anti-motion Blur mode it is not possible to adjust Exposure Compensation and keeping the whites on the Red-eyed Leaf Frogs in check has been difficult. At close distances I often had to turn the flashlight down or shine it slightly off to the side, which pushed my ISO’s higher than they needed to be.
On this year’s Point and Shoot Nature Photography Adventure in Costa Rica, I made two changes to my technique.
1) Inspired by ads for a similar, but much more expensive, device on Facebook, I searched Amazon and bought a little light cube, normally used for shooting video. It mounts in the flash shoe of the Rx10iv and has three levels of adjustable illumination. It was under $30 and came with the flash shoe mount and a set of color filters to change the color temperature. It is roughly daylight balanced as it is.
light cube from Amazon
2) I experimented with “multi-frame-noise-reduction” instead of anti-motion-blur. It does not have the motion processing of AMB but it still takes 3-4 images at a lower ISO and stacks them. Since high ISO noise in an image is random, stacking 3 images tends to ”average out” the noise. I was concerned that if the frog moved…or, more likely, if I moved the camera, the multiple frames would not stack correctly…but in practice it worked better than I expected. MFNR allowed me to dial in the EV for best results and, if I was very careful with motion, to even use Clear Image Zoom. In fact, MFNR did a better job of stacking exposures and I did not have to use much EV compensation at all.
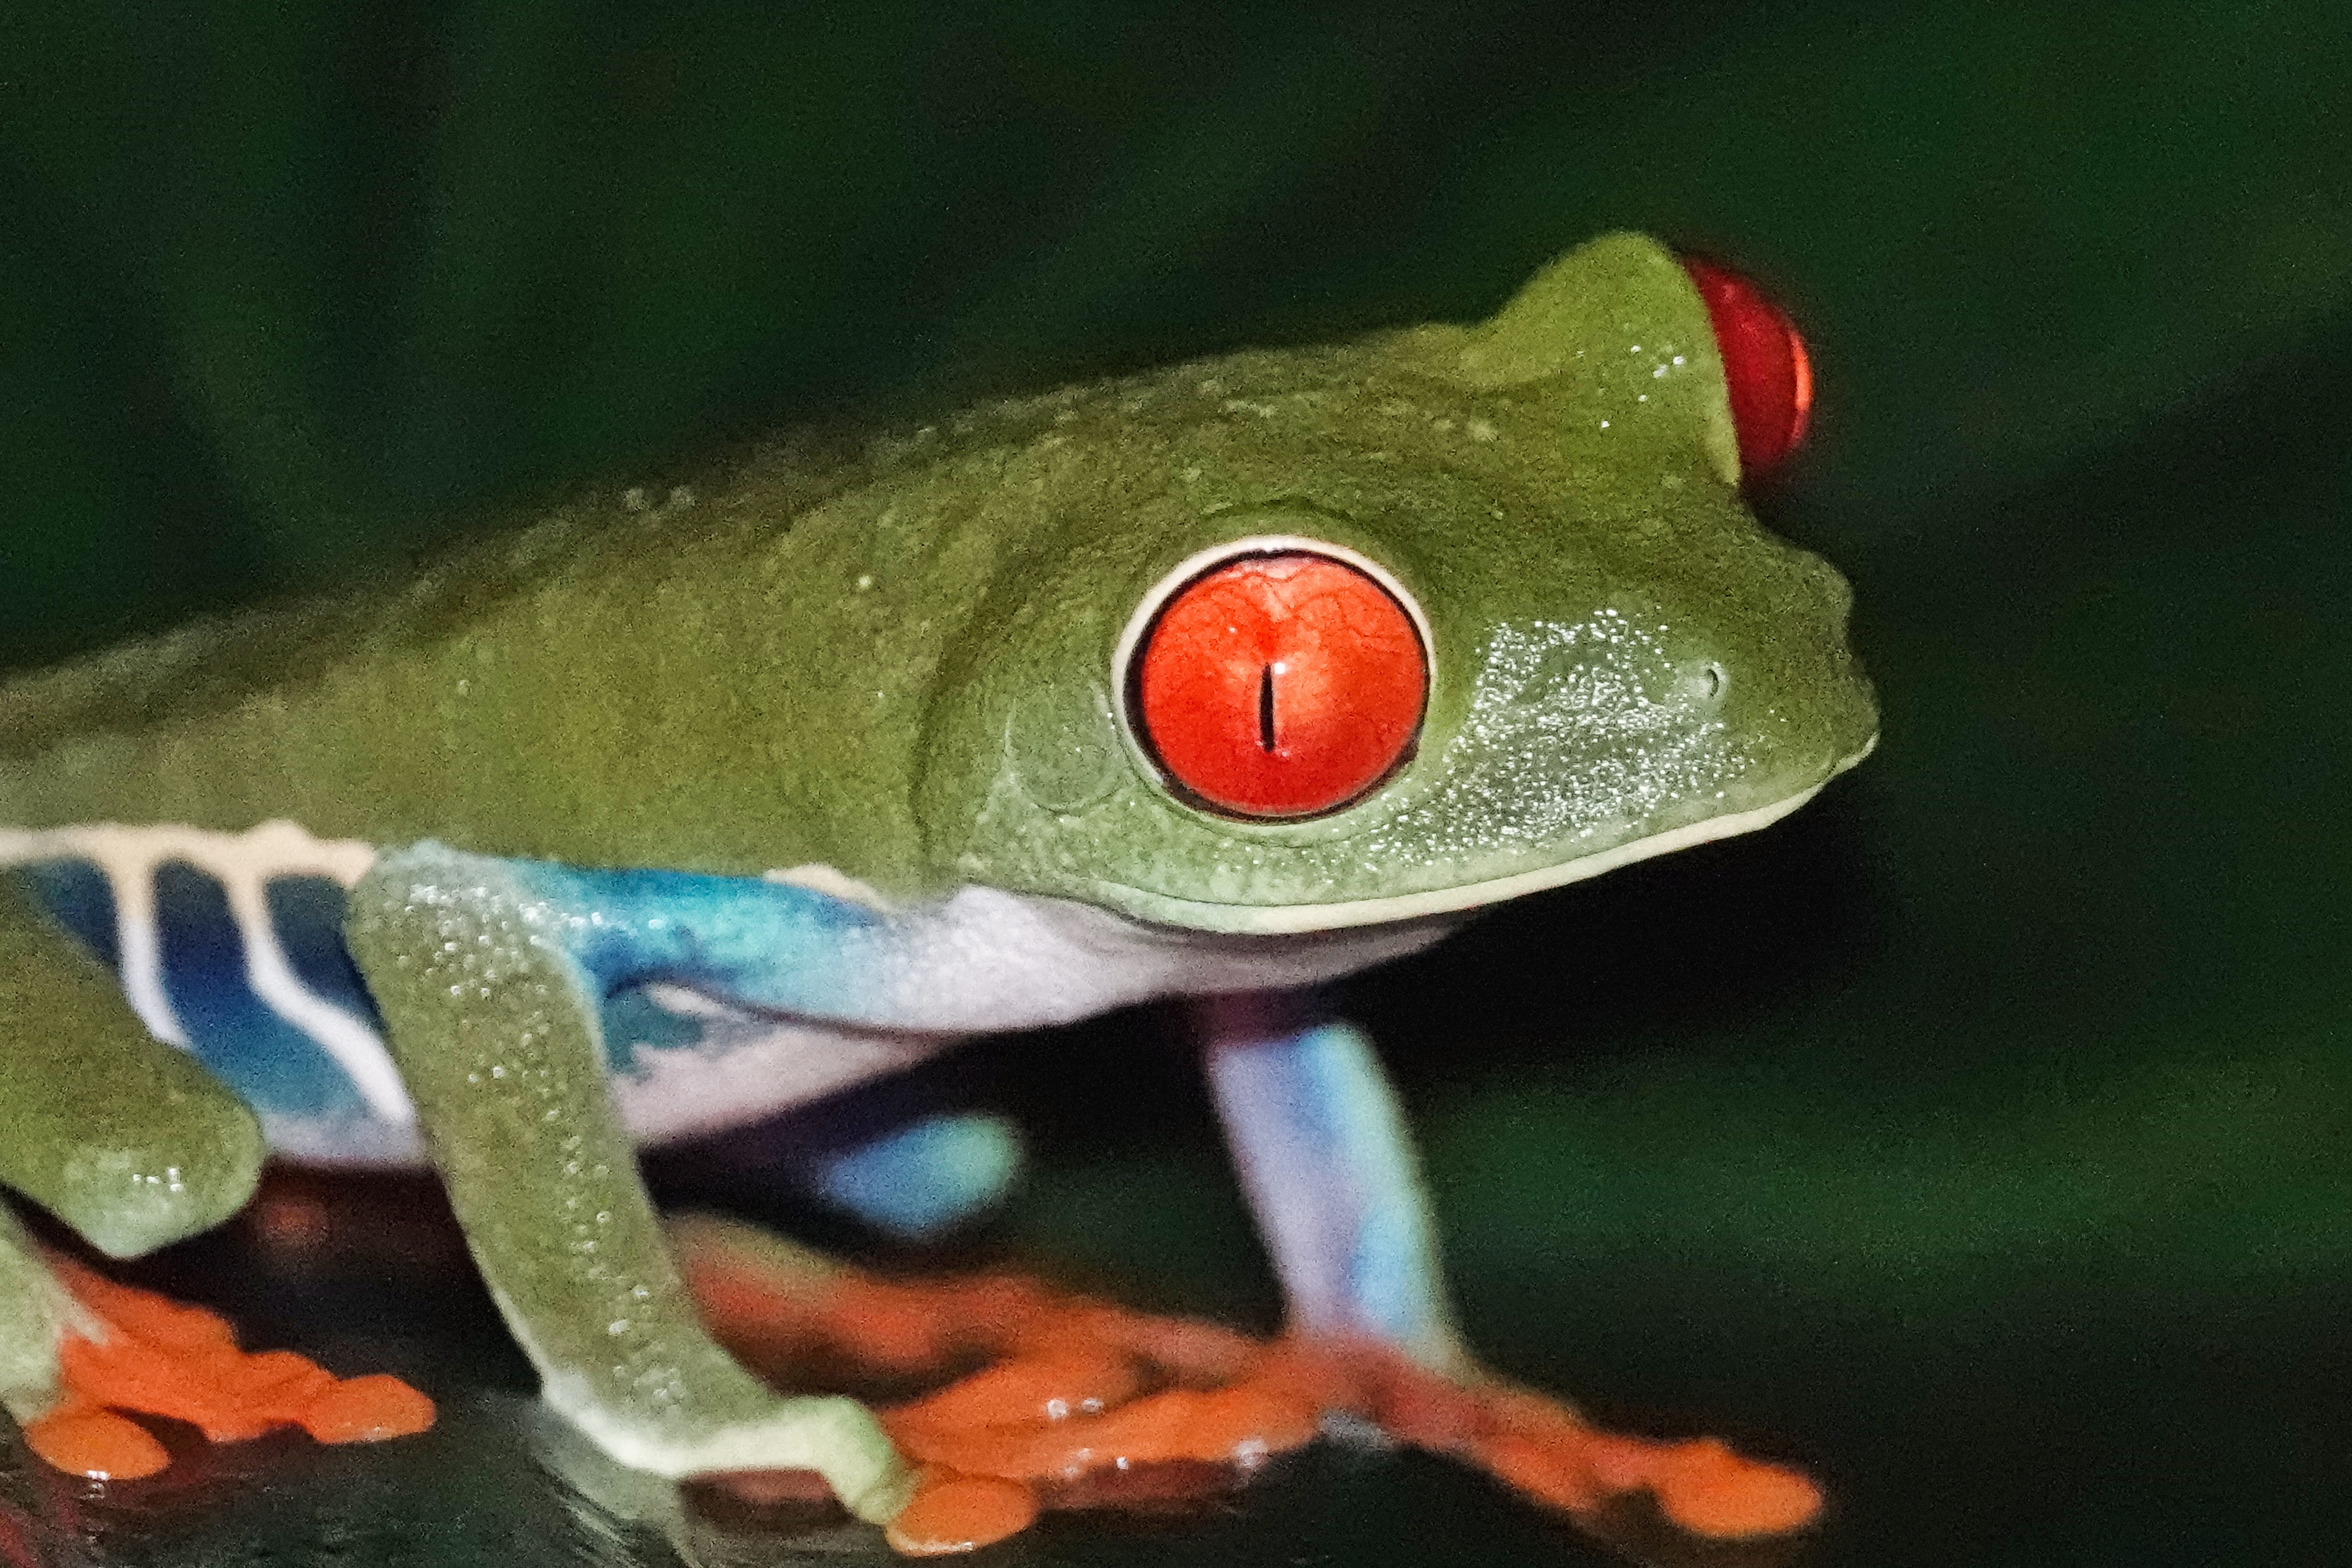
With some Clear Image Zoom, for an extreme close up from about 5 feet.
What I also found was that the daylight balanced light cube did not disturb the frogs at all. With flashlights, the frogs first shut their eyes and then hunker down to make themselves as small as possible. You have to be quick to get a shot before they respond. With the light cube I could work a frog for many moments and it did not even close its eyes, much less hunker down.
If you do any night photography, I highly recommend you check out a light cube. They are available from a number of vendors on Amazon, and are inexpensive. They are also way easier to work with an a separate hand held flashlight, and seem to disturb the subject less. What is not to like?
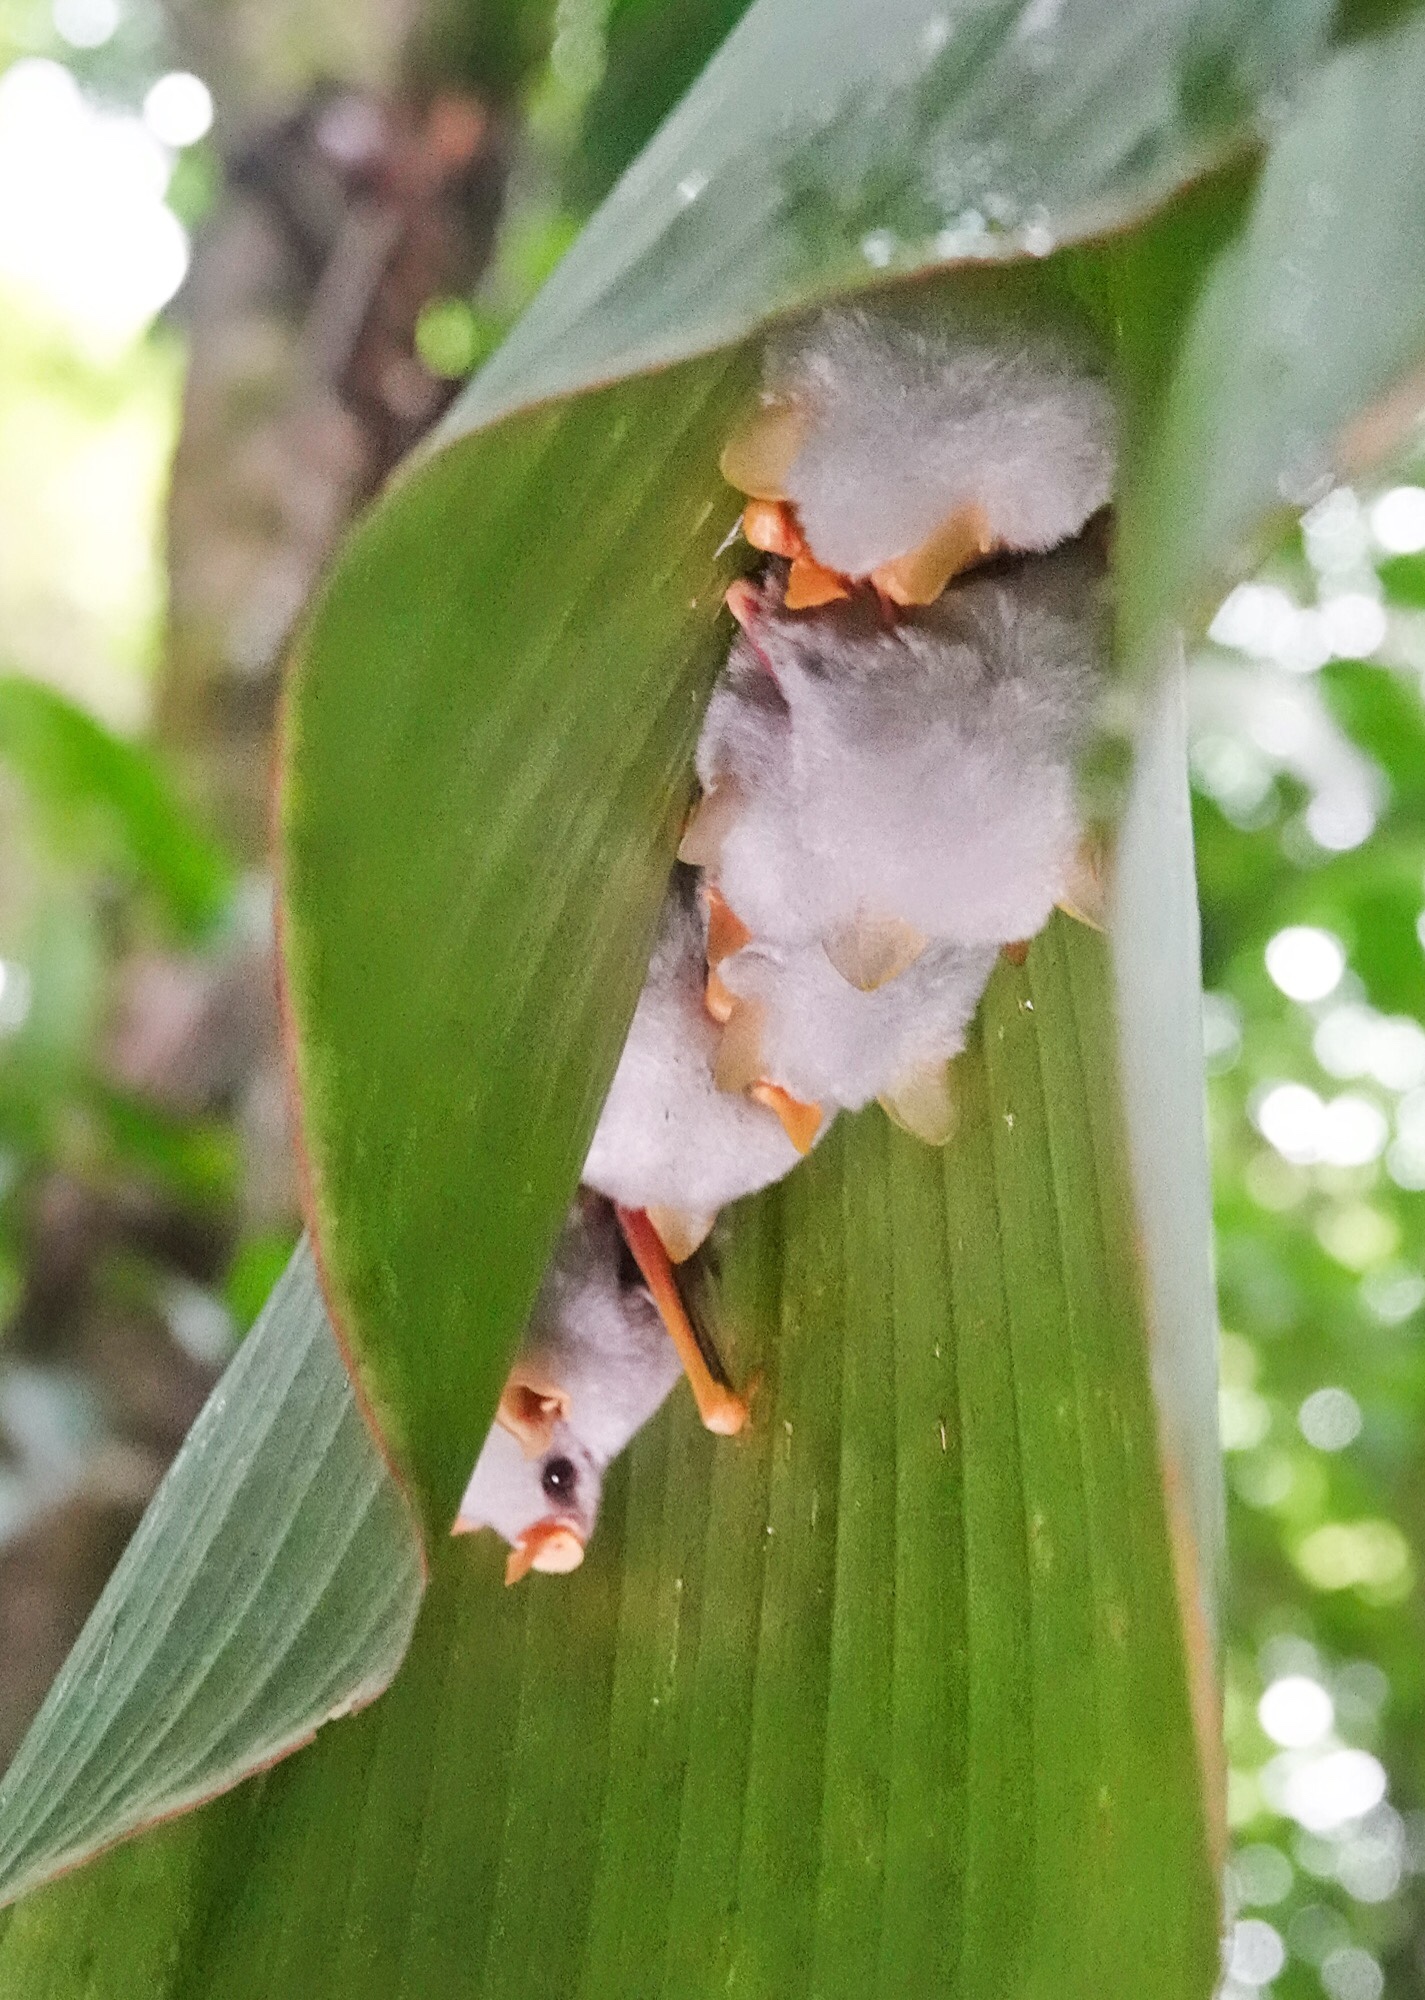
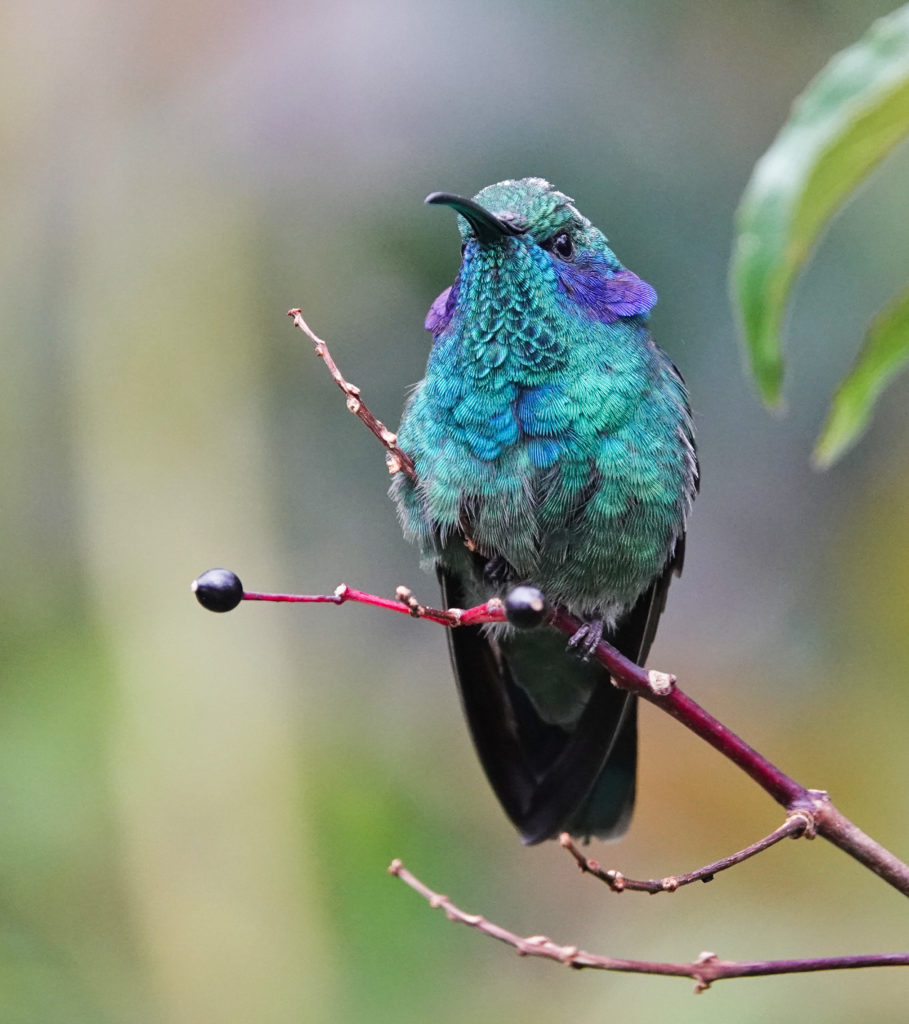
As a final note, while in Costa Rica I worked with Cope, an artist and naturalist who lives in La Union (Donde Cope). He was using an LED array…also sold for video work…with over 150 leds. It seemed to provide a very non-directional light source, much like natural daylight, and would, I think, be very useful for hummingbirds and other birds in low light. That will be my next experiment. This shot of Honduran White Tent-making Bats up under a leaf under heavy canopy was taken using his hand held Led Array, but they do mount in your flashshoe as well. Note how natural the shadows look.
I am just back from a month of travel which took me and my trusty RX10iv to southern Portugal, the Dry Tortugas, and the Erie shore of Northern Ohio (for migrant birds). I am still experimenting with focus modes to get the most out this camera in different situations.
In southern Portugal, has in most places in Europe, it is hard to get close to birds. Many of the birds you see are either small and distant, or big and really distant (as in eagles flying high on the thermals). Also, at least where we were, by mid-morning there is significant heat shimmer over the fields and pastures and seashore, which makes any auto-focus mode problematic. In those conditions, I found, after experimenting with several different modes, that wide-frame tracking auto focus worked as well as anything. I was able, when needed, to pin the initial focus point down by touching the screen, but most of the time the camera locked on to the subject within a few seconds and held long enough for a series of shots. Keeping the camera in wide area tracking also allowed me to swing up for birds overhead without changing any settings.
a tight crop of a very distant bird in heat haze…even expanded spot flexible focus could not provide reliable focus under these conditions. Great Bustard, one of most sought after European birds
keeping the camera in wide area tracking auto focus allowed me to swing up for BIF. Iberian Magpie.
In the Dry Tortugas, the birds were somewhat closer, and the light was blindingly bright. Again, I found that, in most cases, wide area tracking auto focus did as well as any other setting, and better than most, at focusing on the bird. It takes some getting used to, as the camera often takes a second to seek and find the most obvious target, but if the target is moving at all, as even in a preening bird, it will lock on. And again, you have the advantage of being able to swing to birds in flight without changing any settings.
wide area tracking auto focus in great light in the Dry Tortugas . Brown Noddies.
Not a perfect shot but impossible without wide area tracking auto focus. Sooty Tern
But then I went to Ohio…the famous Magee Marsh boardwalk for migrating warblers and other singing birds. The birds are close…often less then 10 feet…very small and very active. And they are in dense cover…the trees are beginning to leave out, and there are always twigs and brush in the way. In those conditions, I had to revert to my preferred Expanded Spot Flexible Focus (without any tracking). It was the only way to get on the close, active, and too often particularly hidden, birds. On occasion I even had to switch to DMF and focus through foreground foliage and twigs.
Expanded flexible spot was needed here with the bird in a confused surround. Female Cape May Warbler
DMF allowed me to focus right through obscuring foreground foliage. Not a great shot but effective. Northern Oriole.
By the way, when using DMF, I do it backwards. I use the focus ring to get close to focus and then half press the shutter release to kick in auto focus. Only on really rare occasions do I half press to enlarge the subject and focus completely manually.
So, the take away is that no one focus mode works best all the time. You have to adapt to the situation. And the Sony RX10iv has the options you need in almost any situation.
This will appear as an added chapter in my Sony RX10iv ebook soon.
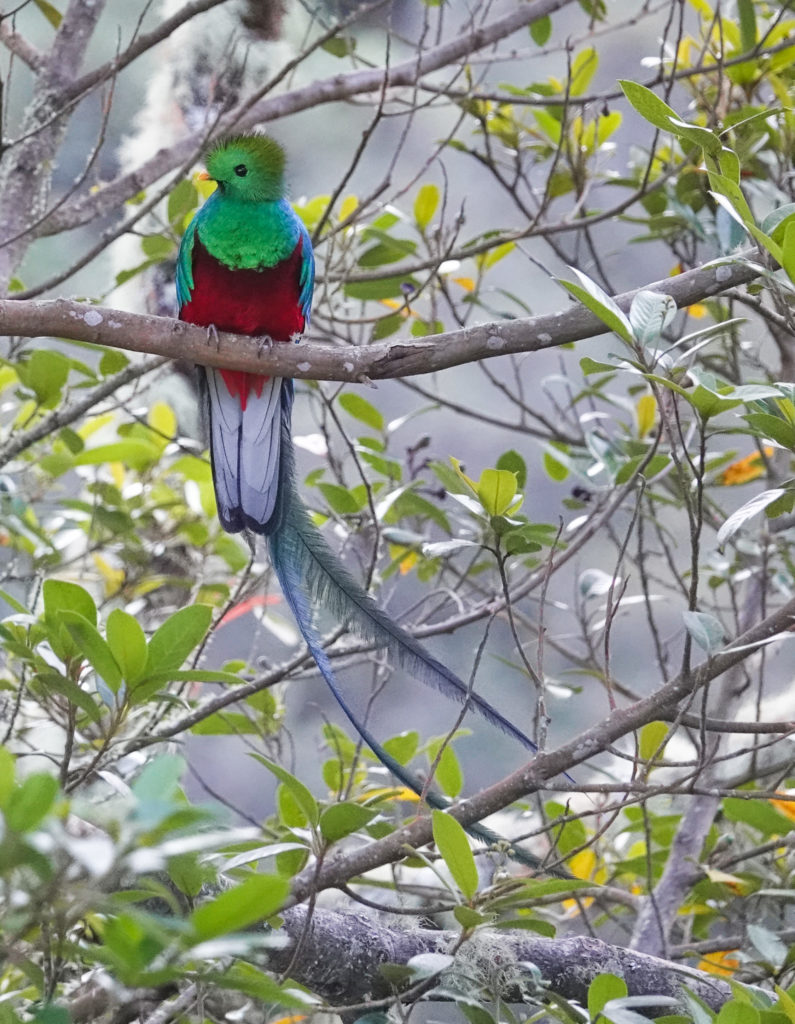
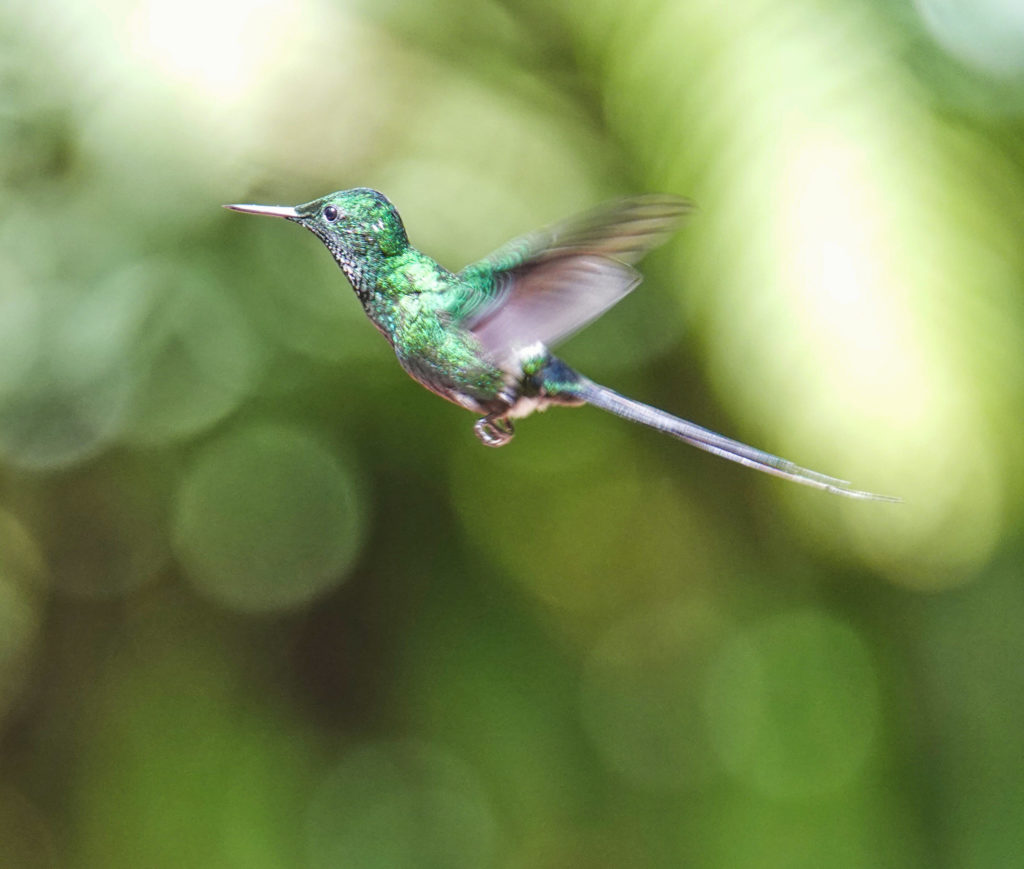
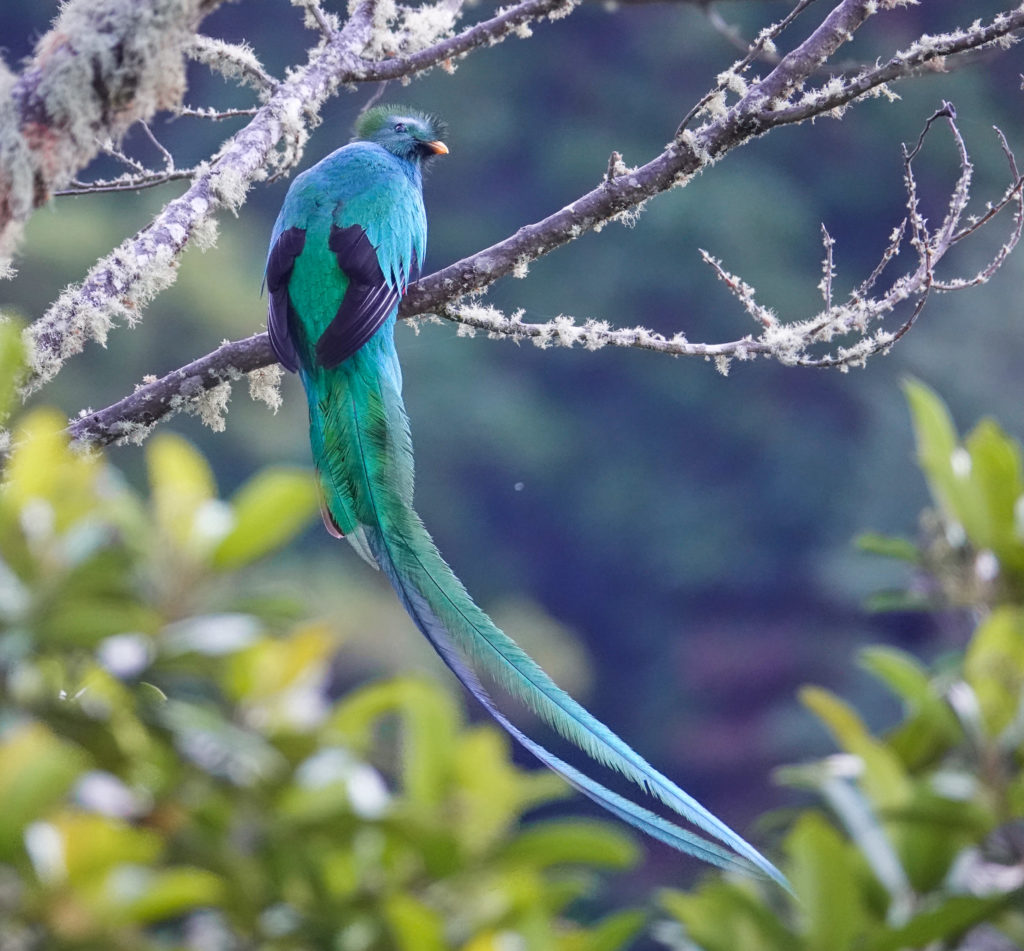
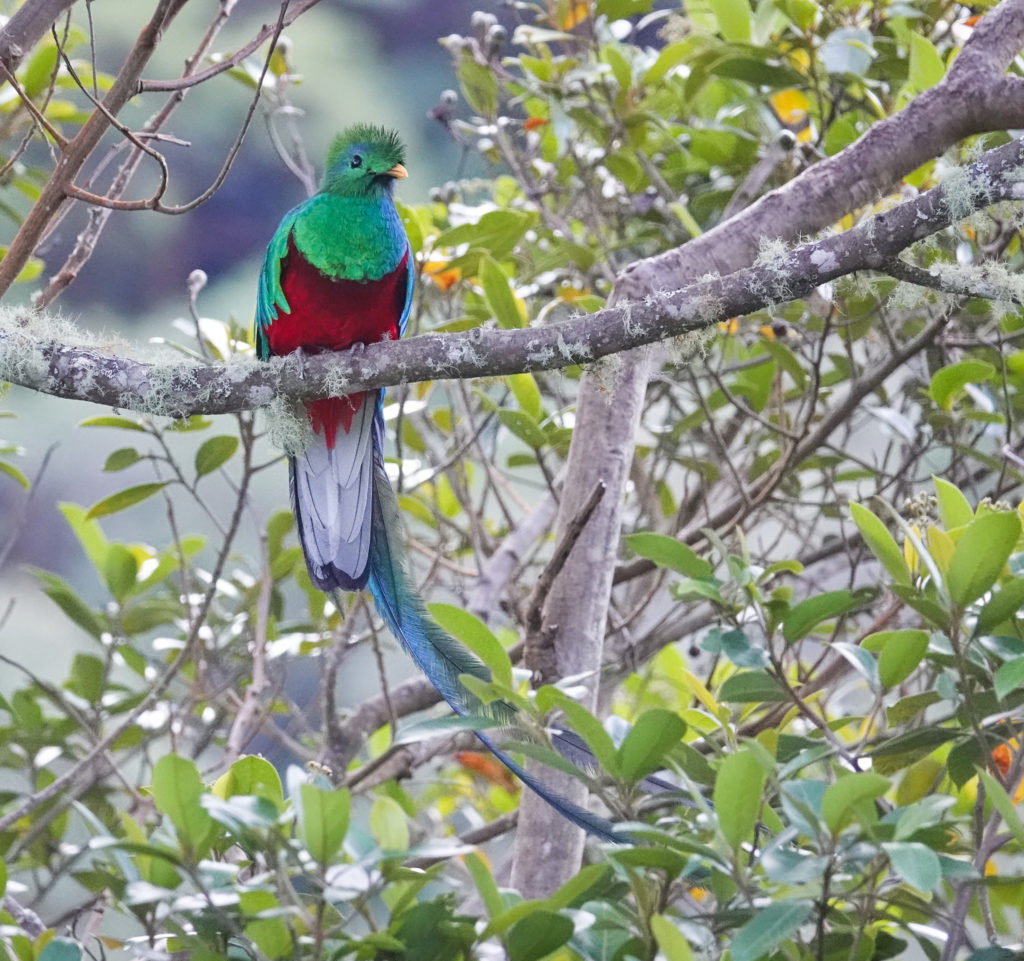
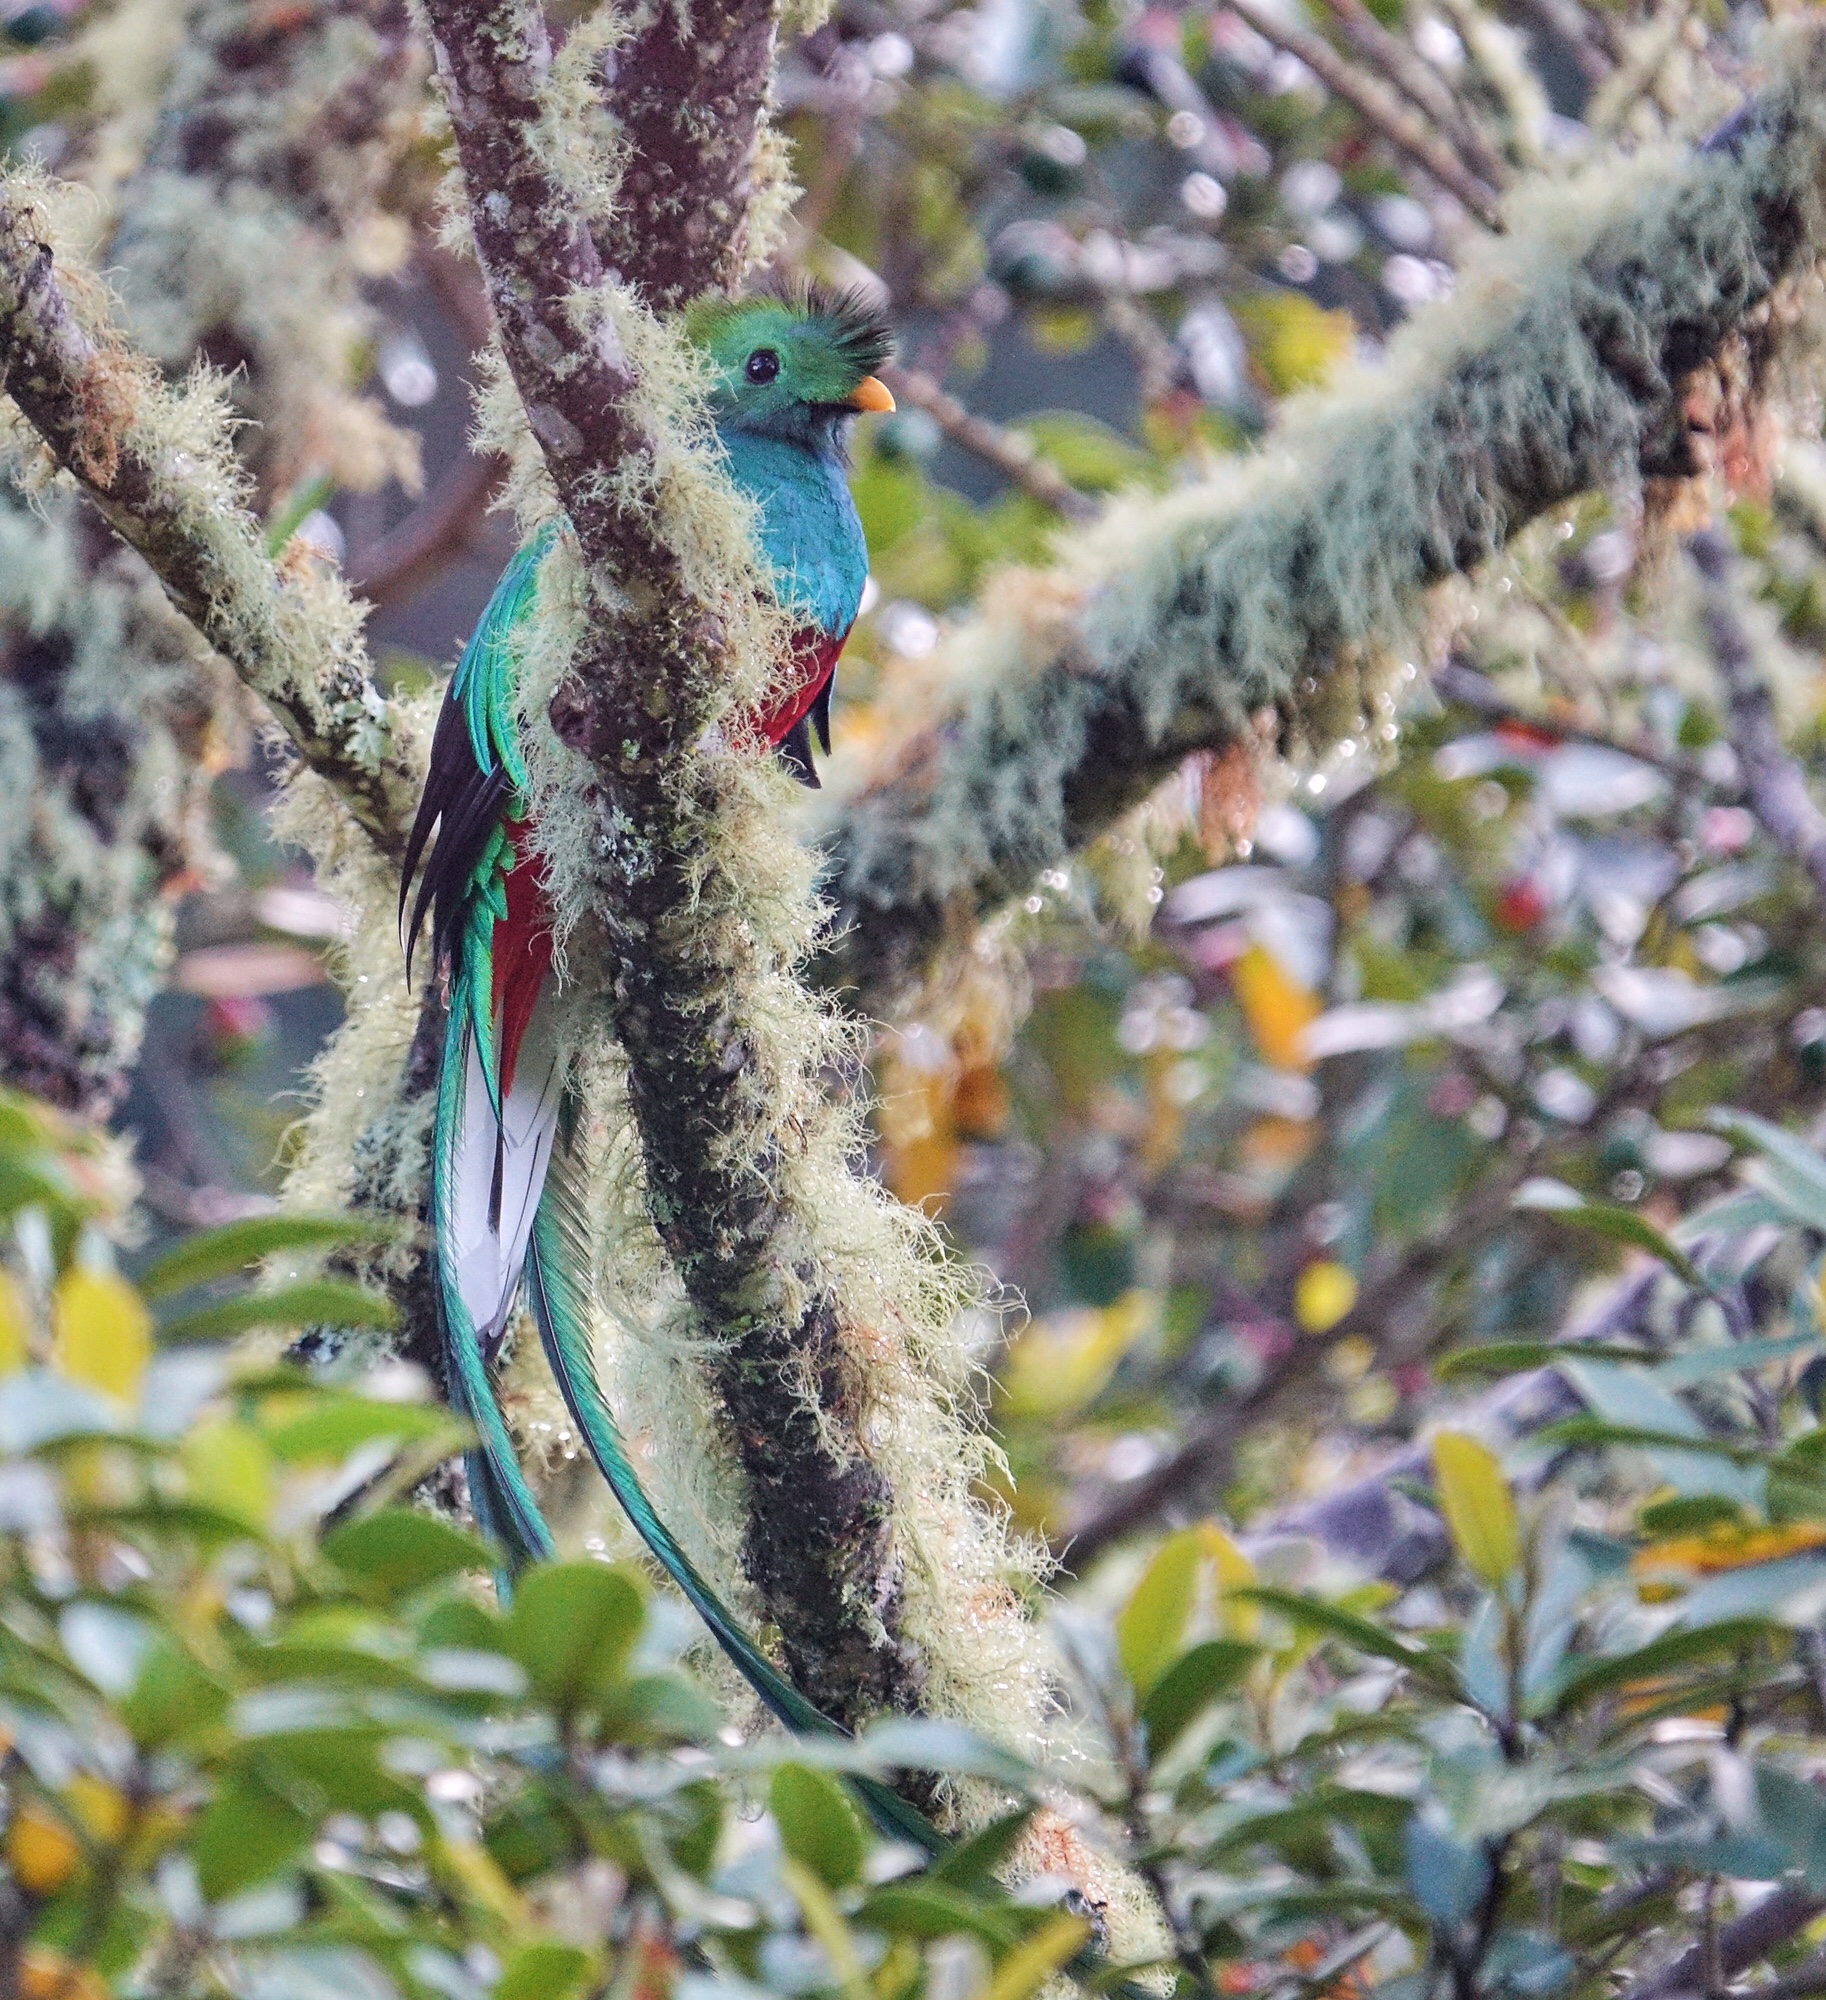
Resplendent Quetzal, San Gerardo de Dota, Costa Rica
In December 2018, I took 10 Point and Shoot Nature Photographers to Costa Rica for 9 days. We visited two of my favorite lodges and several excellent photo venues around those lodges. Here is a gallery of shots from the trip, and a link to a pdf e-book detailing the journey.
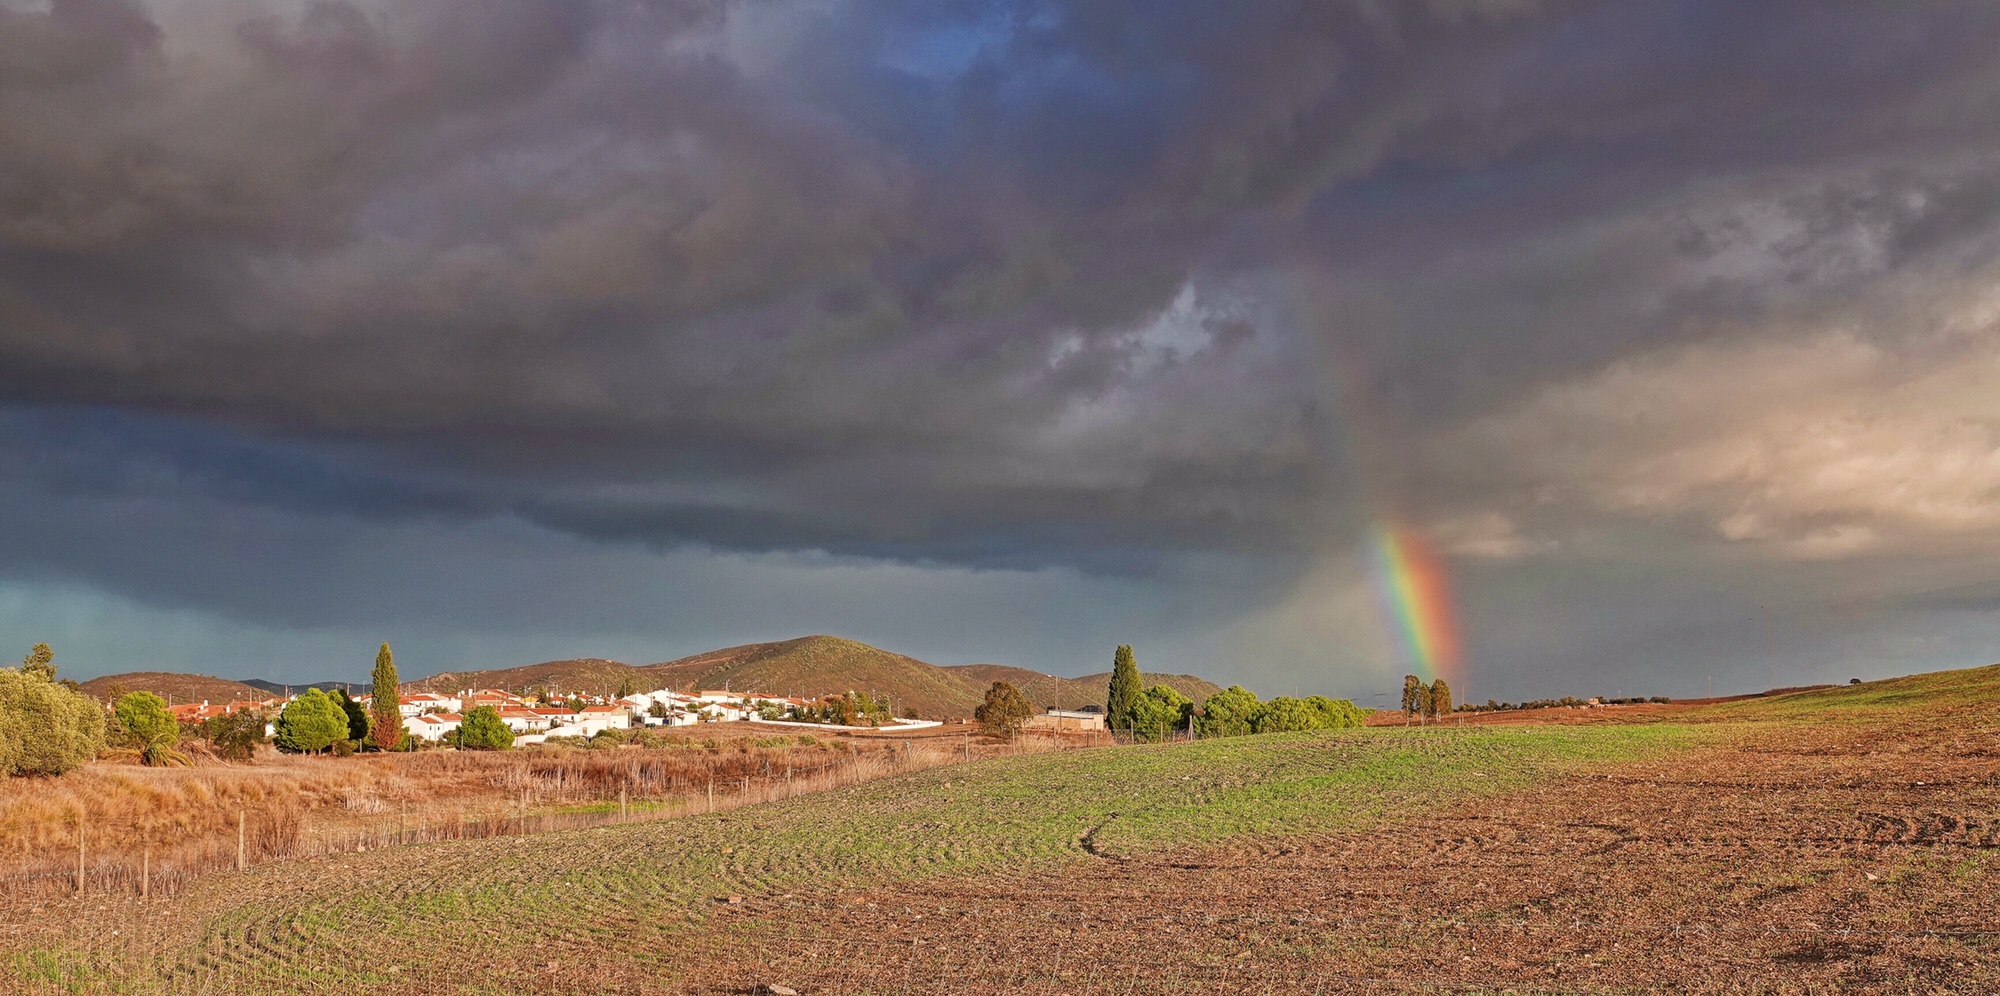
Rainbow over Alvares, Portugal. Sony RX10iv in-camera HDR. Processed in Polarr.
If you read my review of the Sony RX10iii, published about 20 months ago, you know that I really liked the camera, despite its hefty price and relatively short zoom. Since that review the RX10iii as been to Panama, Honduras twice, South Africa, Cuba, Peru (the Amazon River), Ecuador (the Galapagos), England, and Costa Rica…as well as Florida, New Mexico, California, Ohio, Pennsylvania, Massachusetts, and Maine. I have carried it so far and so much that the LCD is beginning to show signs of wear and the markings on a few buttons is beginning to wear off. It has been my constant photographic companion and more than gotten the job done wherever I have traveled. It has been a joy to use…a camera I am always happy to pick up…and one that I could be supremely confident of in the field in any situation. Even around home, its Anti-motion Blur mode made photographing family gatherings a joy. What a camera!
So when I say that the Sony RX10iv is everything that the iii was, and considerably more, you will get the idea. The engineers at Sony listened to the feedback over the 18 months of the iii’s run, and attacked every possible weakness, to produce what may well be the greatest compact fixed-zoom camera ever made. I can not imagine a better camera for travel, wildlife, general nature photography, and day to day family photography. It is nothing short of brilliant in any situation you might find yourself in. I thought the RX10iii had been designed specifically for me…and I never complained about any shortcomings, but it is really like the engineers at Sony read my mind, and offered a solution for almost all my niggling doubts about the iii. I am amazed!
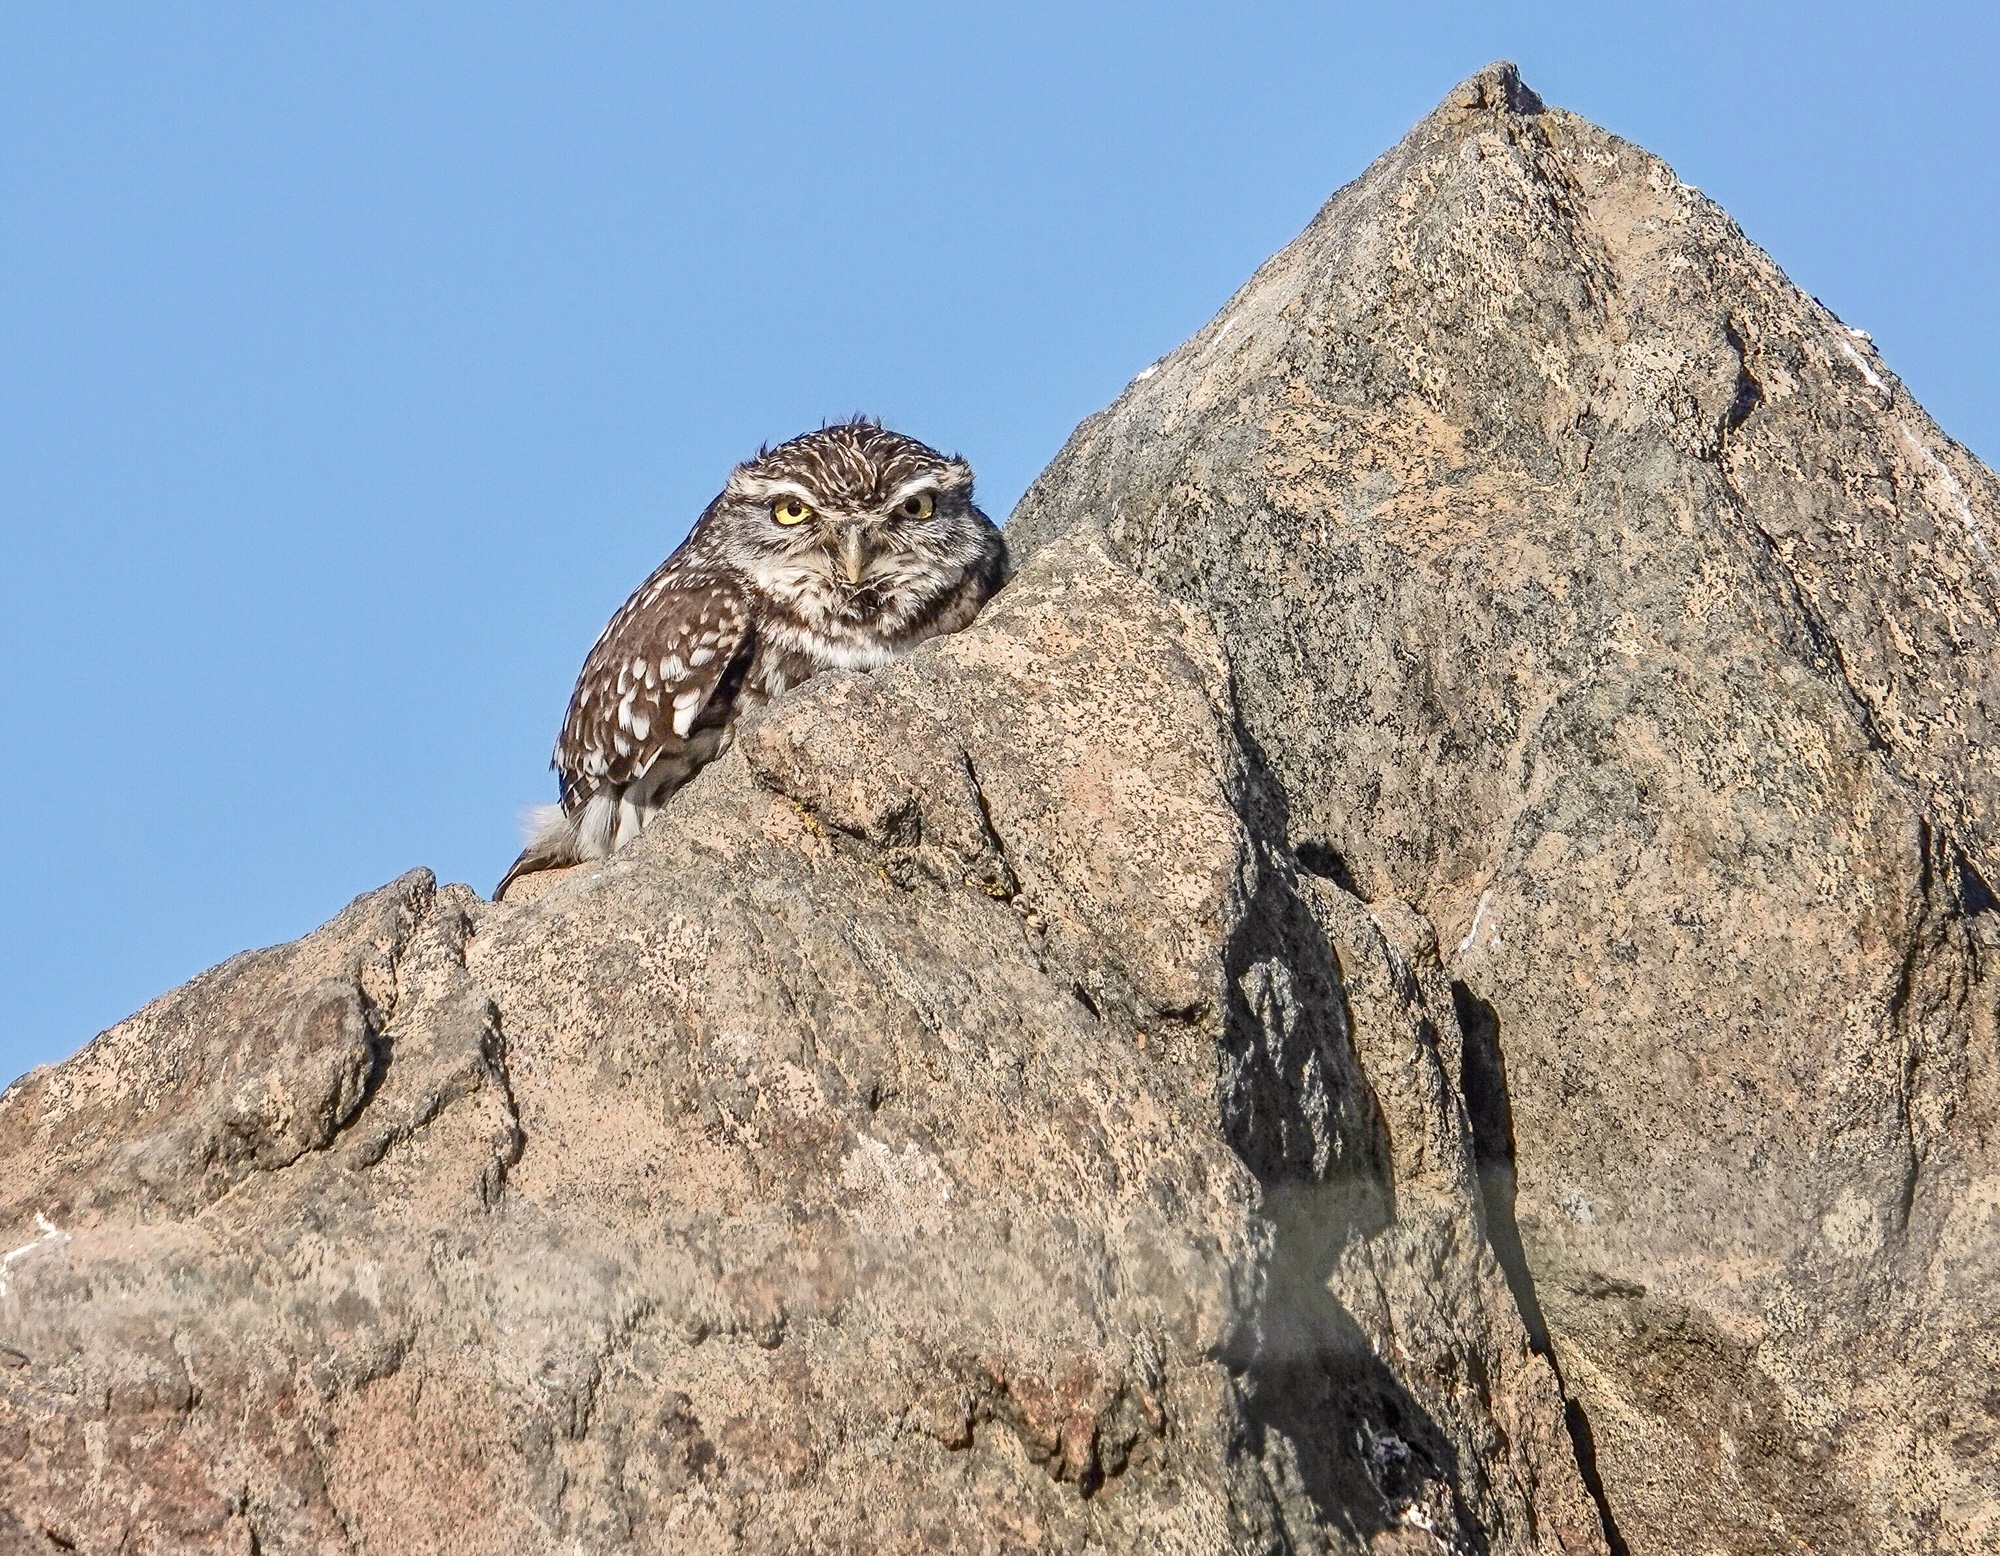
Little Owl, Portugal. Sony RX10iv at 600mm and f4. Razor sharp.
First, the body on the iv is identical to the iii, with all the same customizable buttons and the same amazingly sharp 24-600mm equivalent ZEISS Vario Sonnor zoom lens. The lens alone is worth the price of the camera. It is bright, f2.4-f4, and at its sharpest wide open at any zoom length. It really comes into its own in the rainforest or other lowlight situations where a lessor lens would simply not get the shot. Yes, I often wish for more than 600mm, but I am almost always able to crop to a satisfying frame and image, even when the birds and wildlife are distant. At 24mm it produces stunning landscapes and effective indoor shots. Really I would not trade it’s quality for more reach (unless somehow I could get the same quality at a longer focal length…something that just might defy the laws of physics, or push the camera to a size that would not be comfortable to carry in the field).
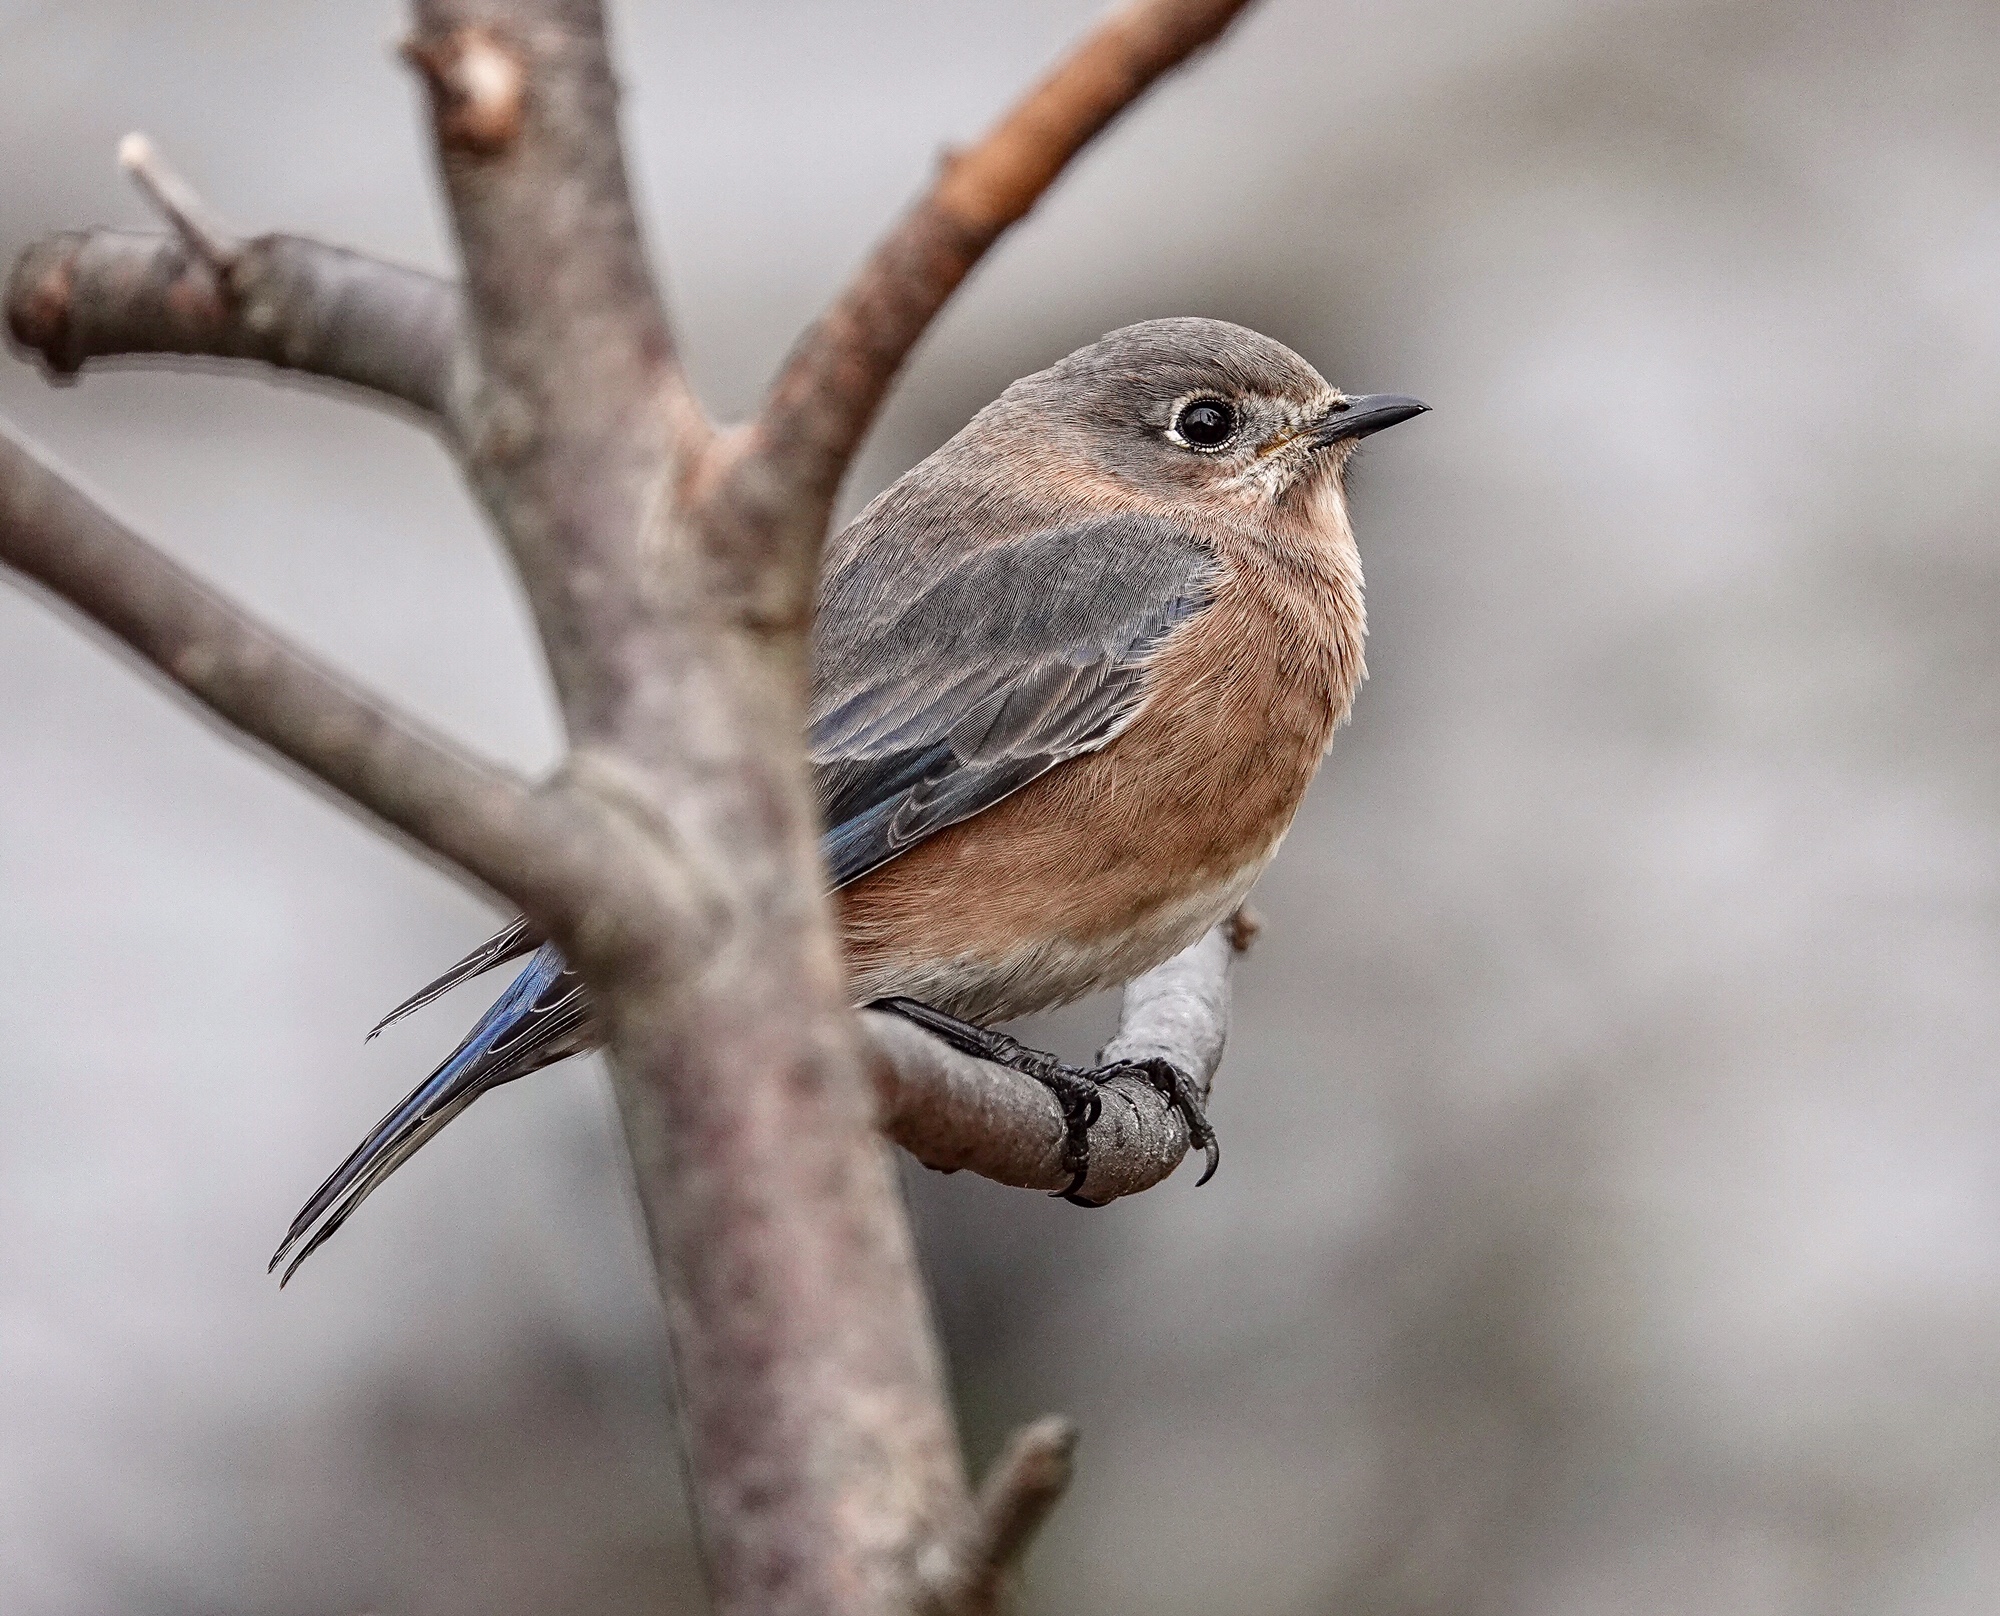
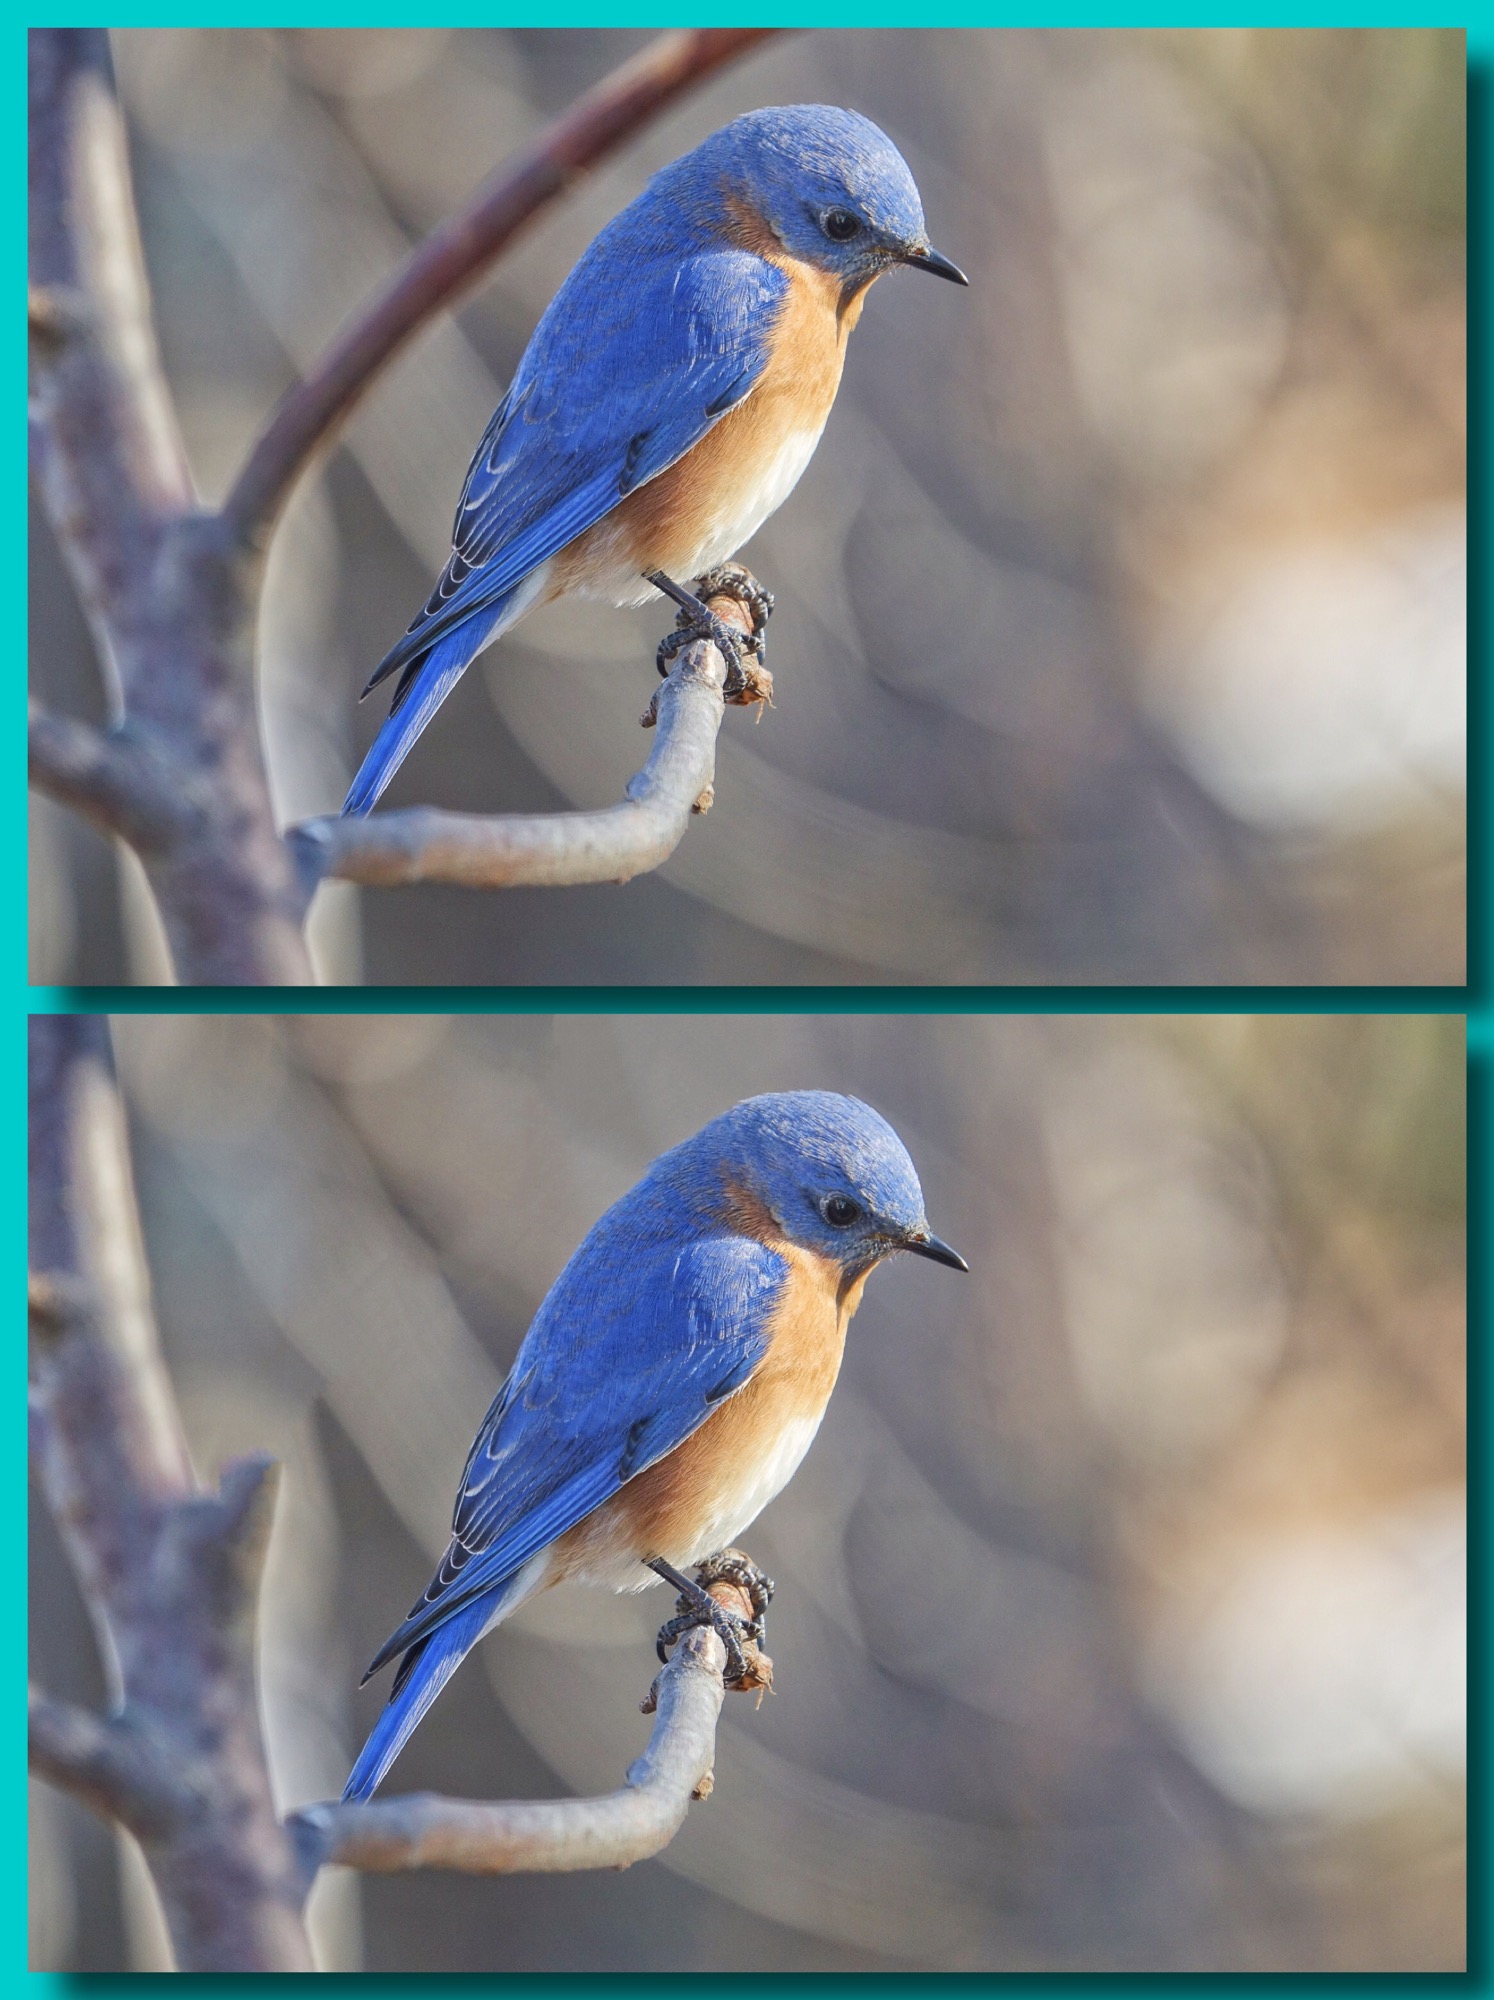
Eastern Bluebird at our back deck feeder. About 12 feet. 600mm. F4 @ ISO 320. Amazing feather detail.
The real change is in the sensor and processing engine. This might be the same sensor, with hybrid focus and 325 phase detection focus points, as Sony used in the RX100V, but it is processing engine from the top of the line A9 full frame camera. Combine that processing engine with that sensor and you get totally amazing focus capability. Birds in flight are embarrassingly easy. Yes. Embarrassingly easy. It used to be a real challenge with a Point and Shoot superzoom, even the RX10iii, to get even the occasional bird in flight. With the iv, you literally just point and shoot. You can use a specific focus area in the center of the frame, which picks up birds in flight easily against most backgrounds, and the camera will focus between frames even at 24 frames per second (though I never use more than 10 frames per second). The iii locked focus on the first frame, which made following birds in flight much more difficult, often impossible. In fact, I use this center frame focus setting for general wildlife photography, so the camera is ready and able to pick up the unexpected flyover. For more dedicated birds in flight work, there is lock on tracking auto focus, which will pick up a bird anywhere near the center of the frame and lock on to follow the bird as you pan. Both work really well, depending on how large the bird is in the frame. Tracking works best with bigger birds and birds bigger in the frame. And, as far as wildlife action on the ground (or sports for that matter). the focus lock is amazingly fast and positive. I came back from Bosque del Apache this year with more satisfying Birds in Flight images, from just this year, than I have managed to get in all the years I have been going there with other cameras.
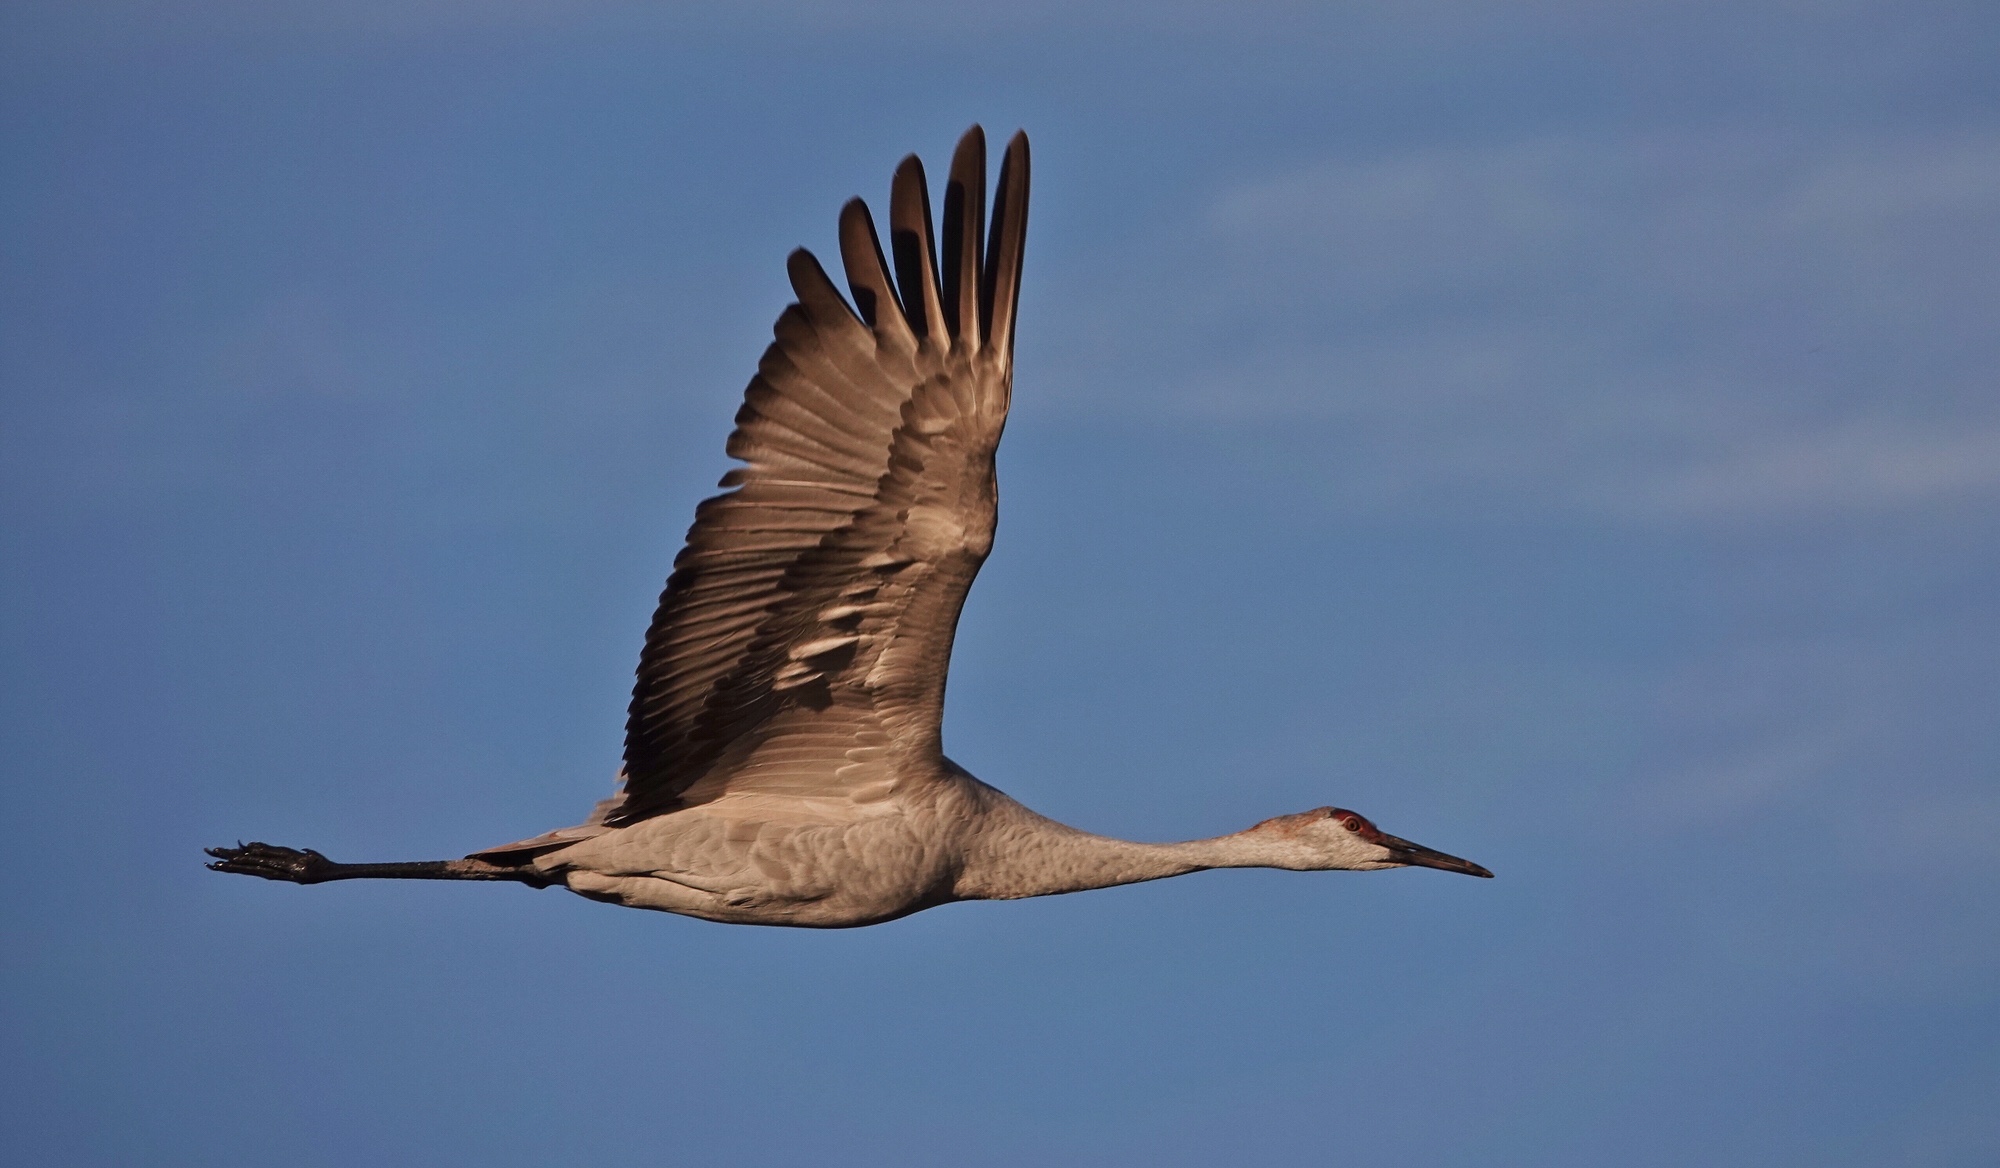
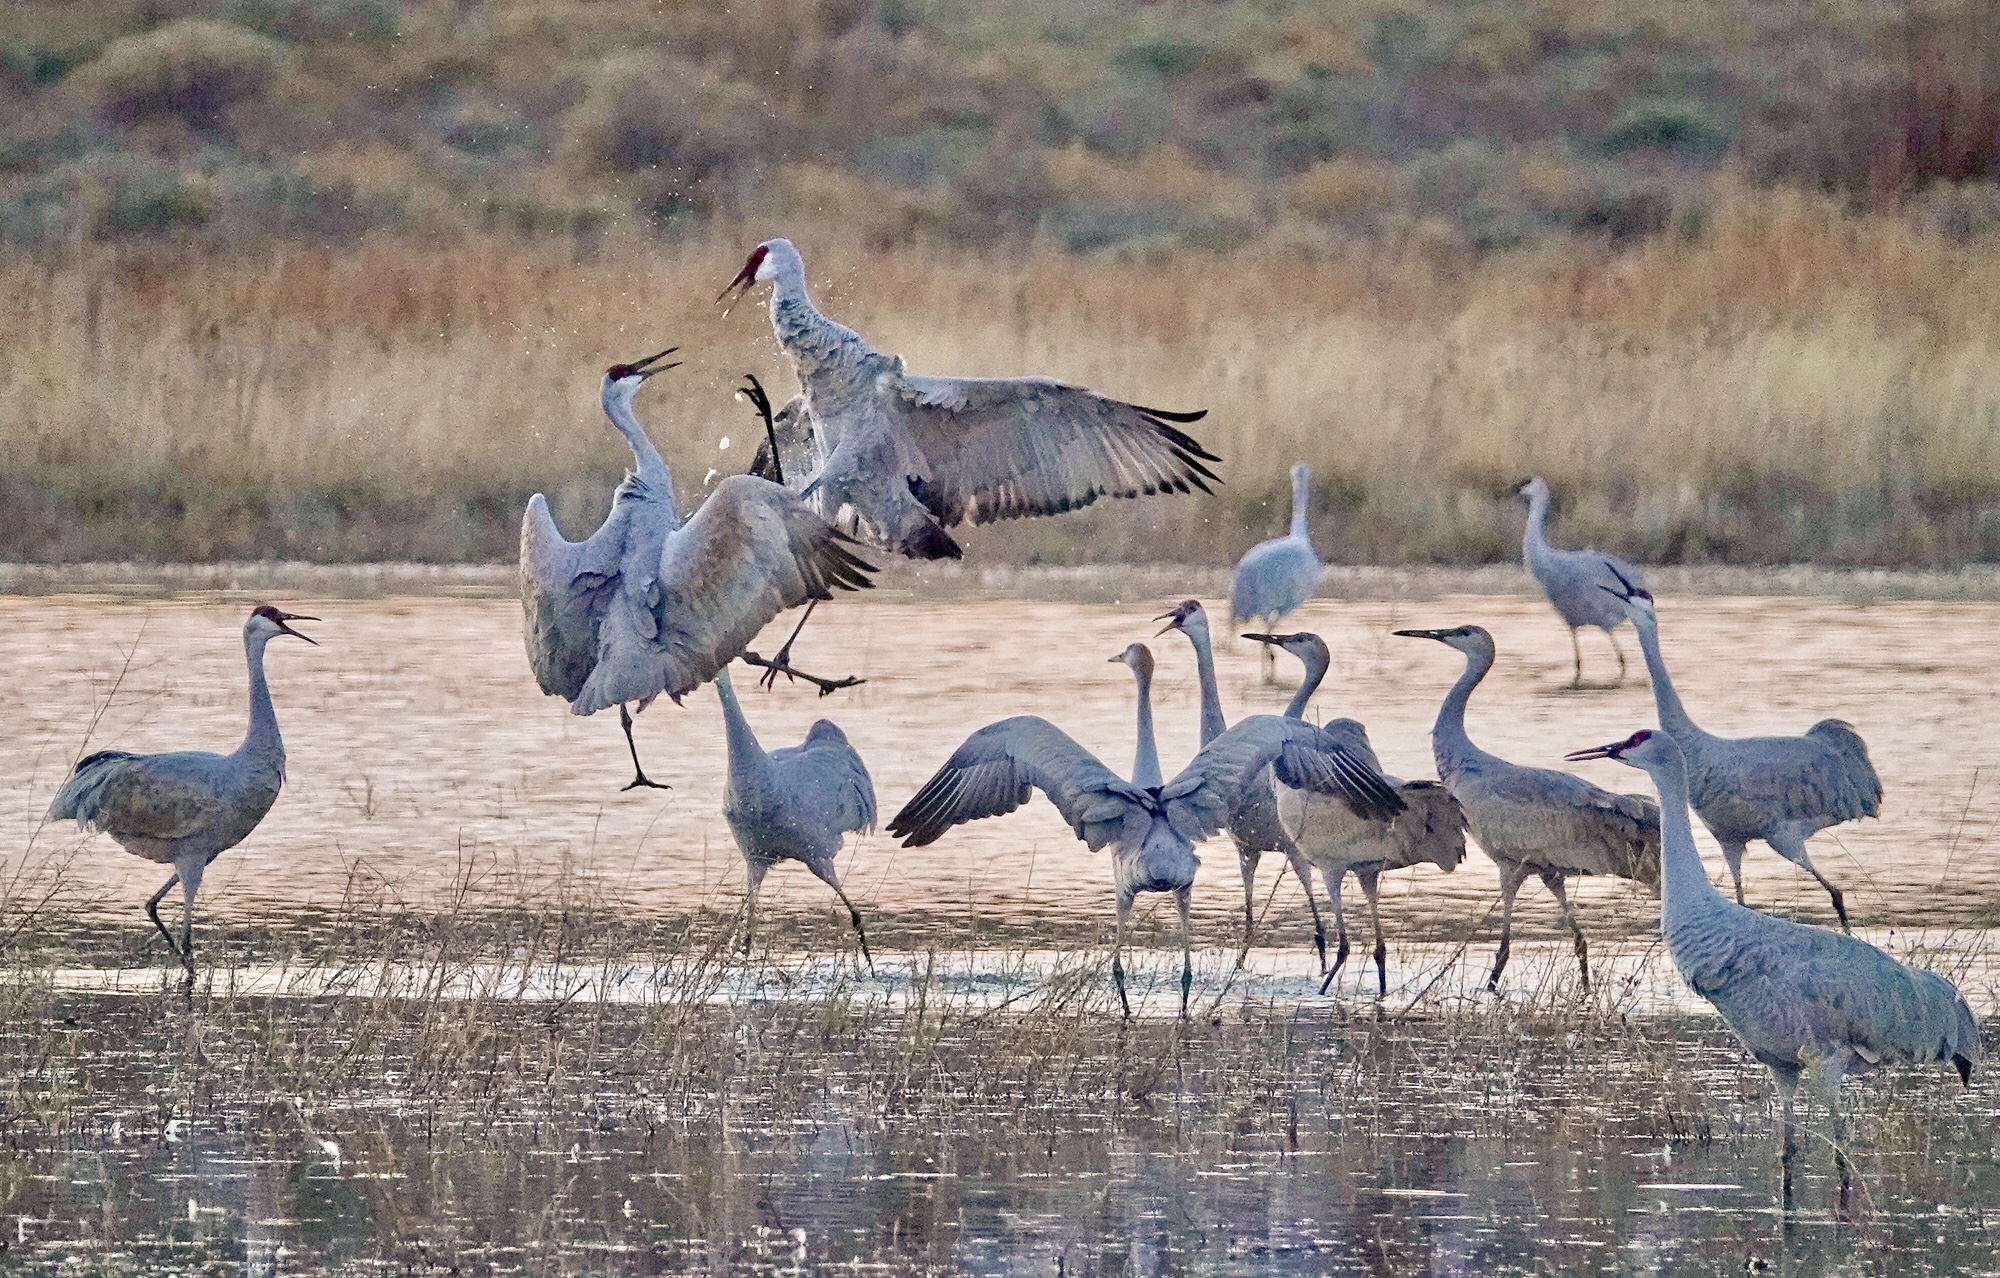
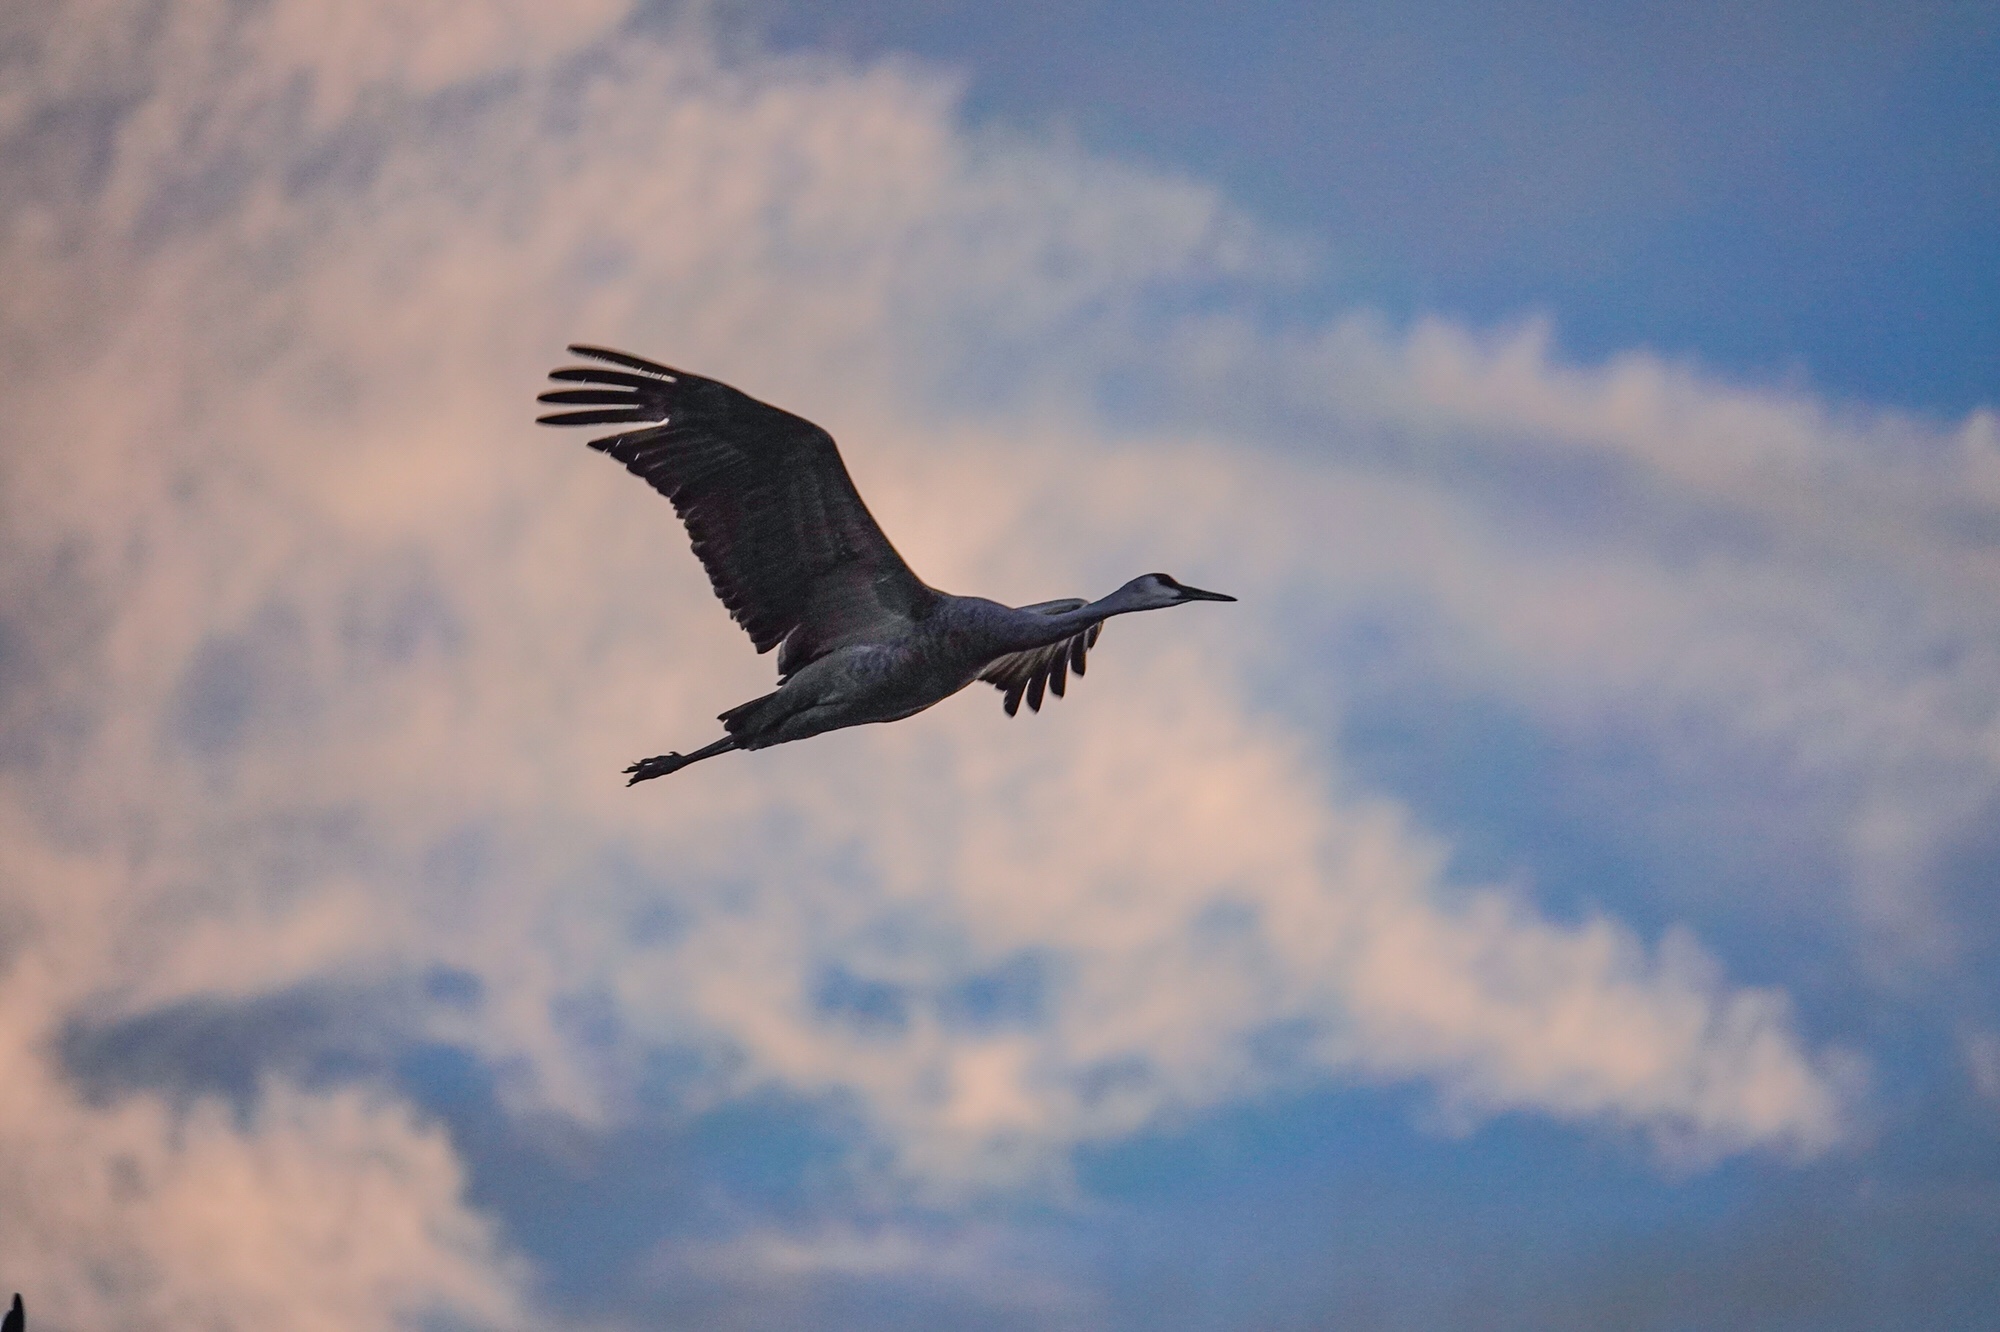
Sandhill Crane in flight. Bosque del Apache National Wildlife Refuge, Socorro, NM. 600mm. 1/1000th.
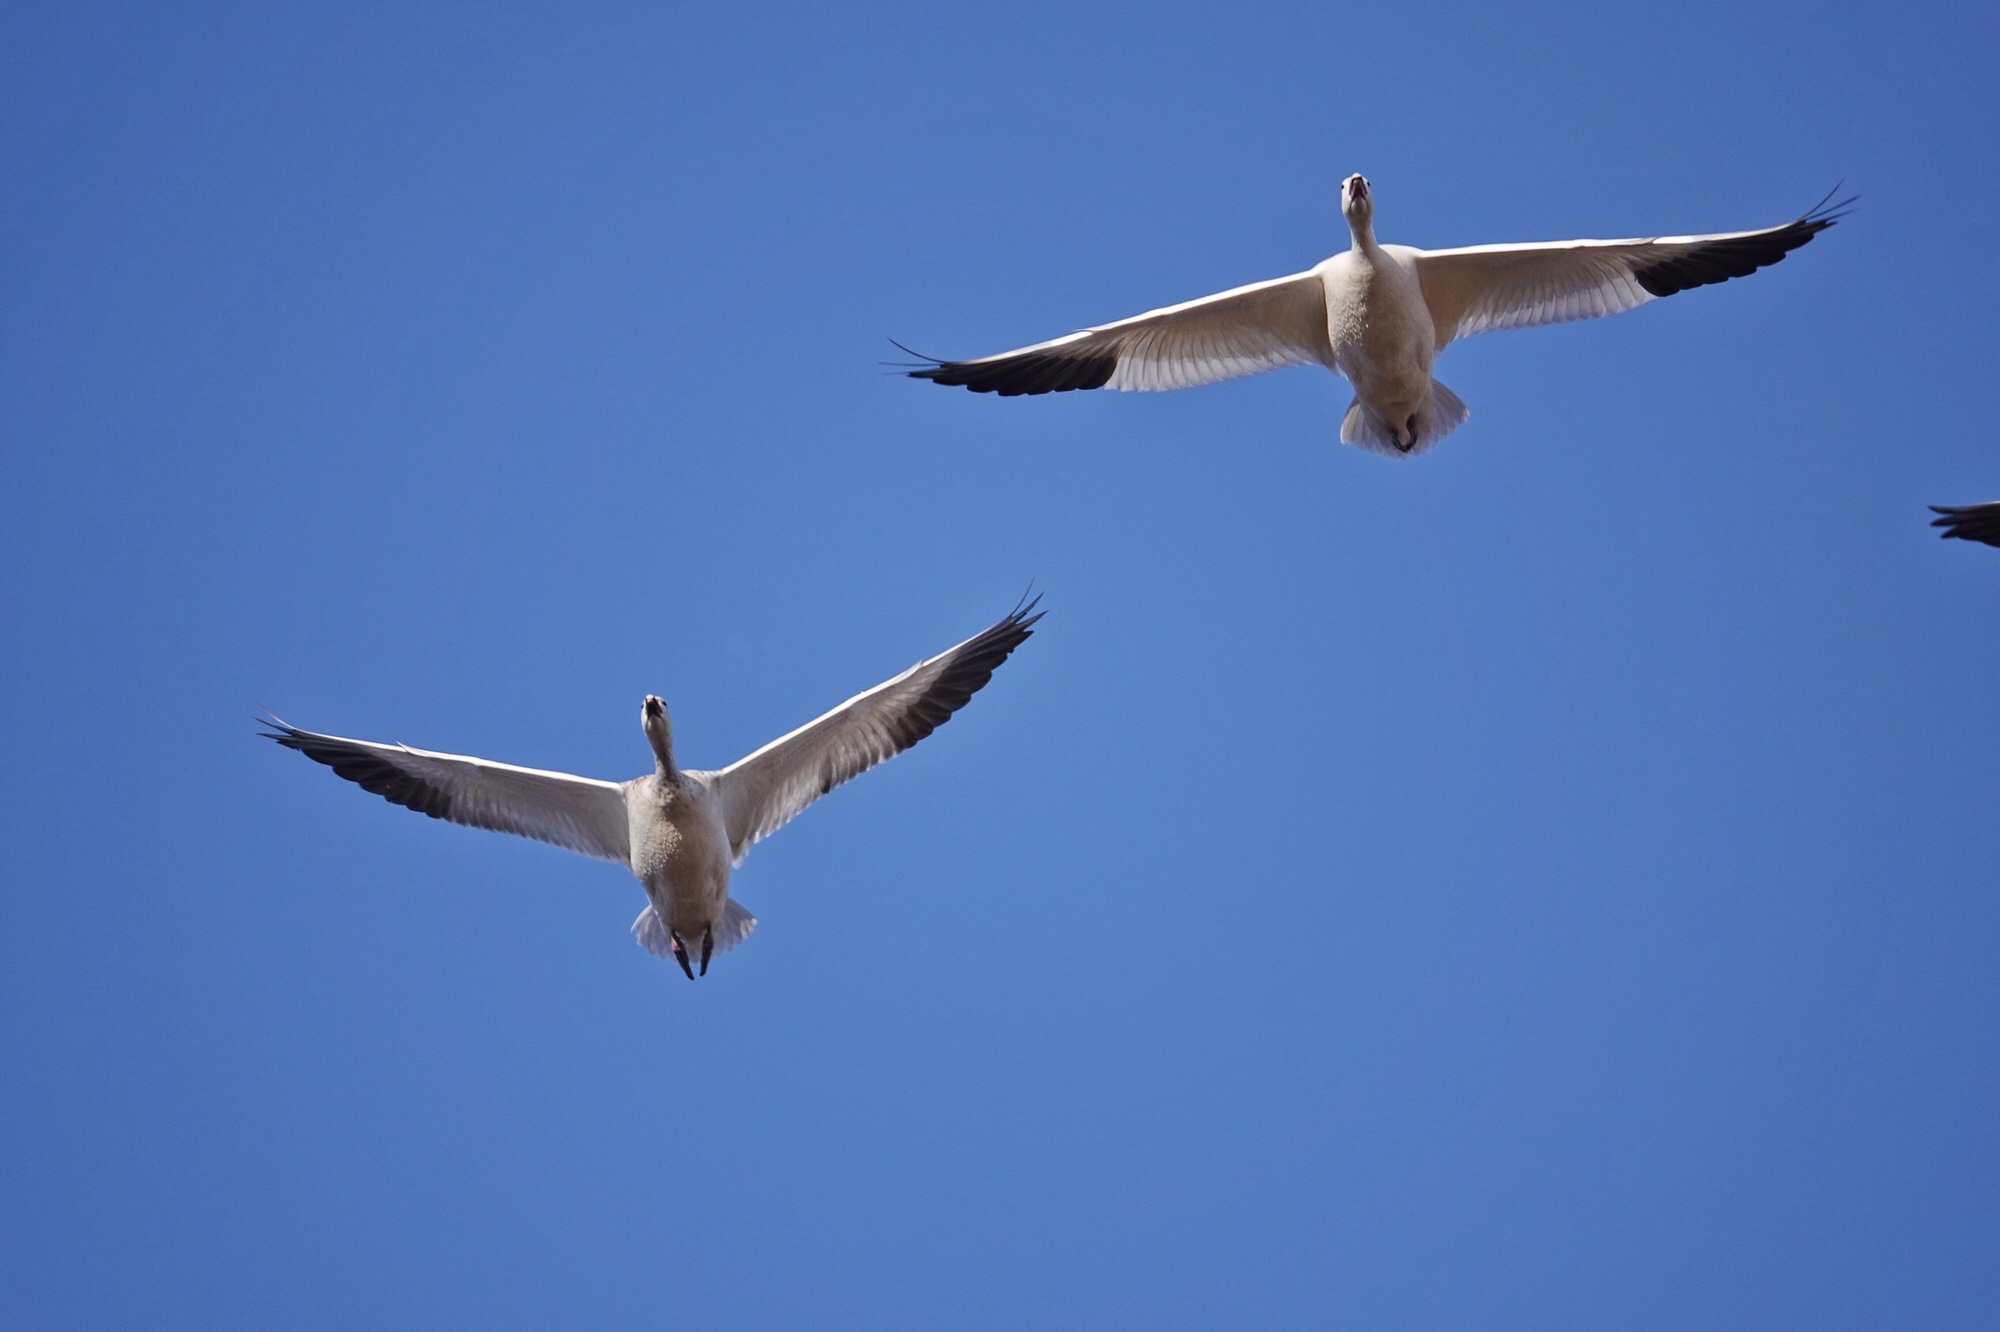
Snow Geese coming head on and passing close overhead. The RX10iv tracked these geese in as they came and held focus through over 50 frames at 24 fps. Totally amazing.
Sandhill Cranes in confrontation after sunset. 600mm, 1/1000th @ ISO 1600. An amazing shot with any camera.
In general wildlife shooting, occasionally the iii would hunt when trying to get a bird or beast in lower light, especially with a confusing background. Not the iv. I recommend keeping the camera set to “continuous focus”, which seems to turn on the Phase Detection Focus points for faster focus. The focus is so fast that you quickly forget to even think about it. Point and shoot!
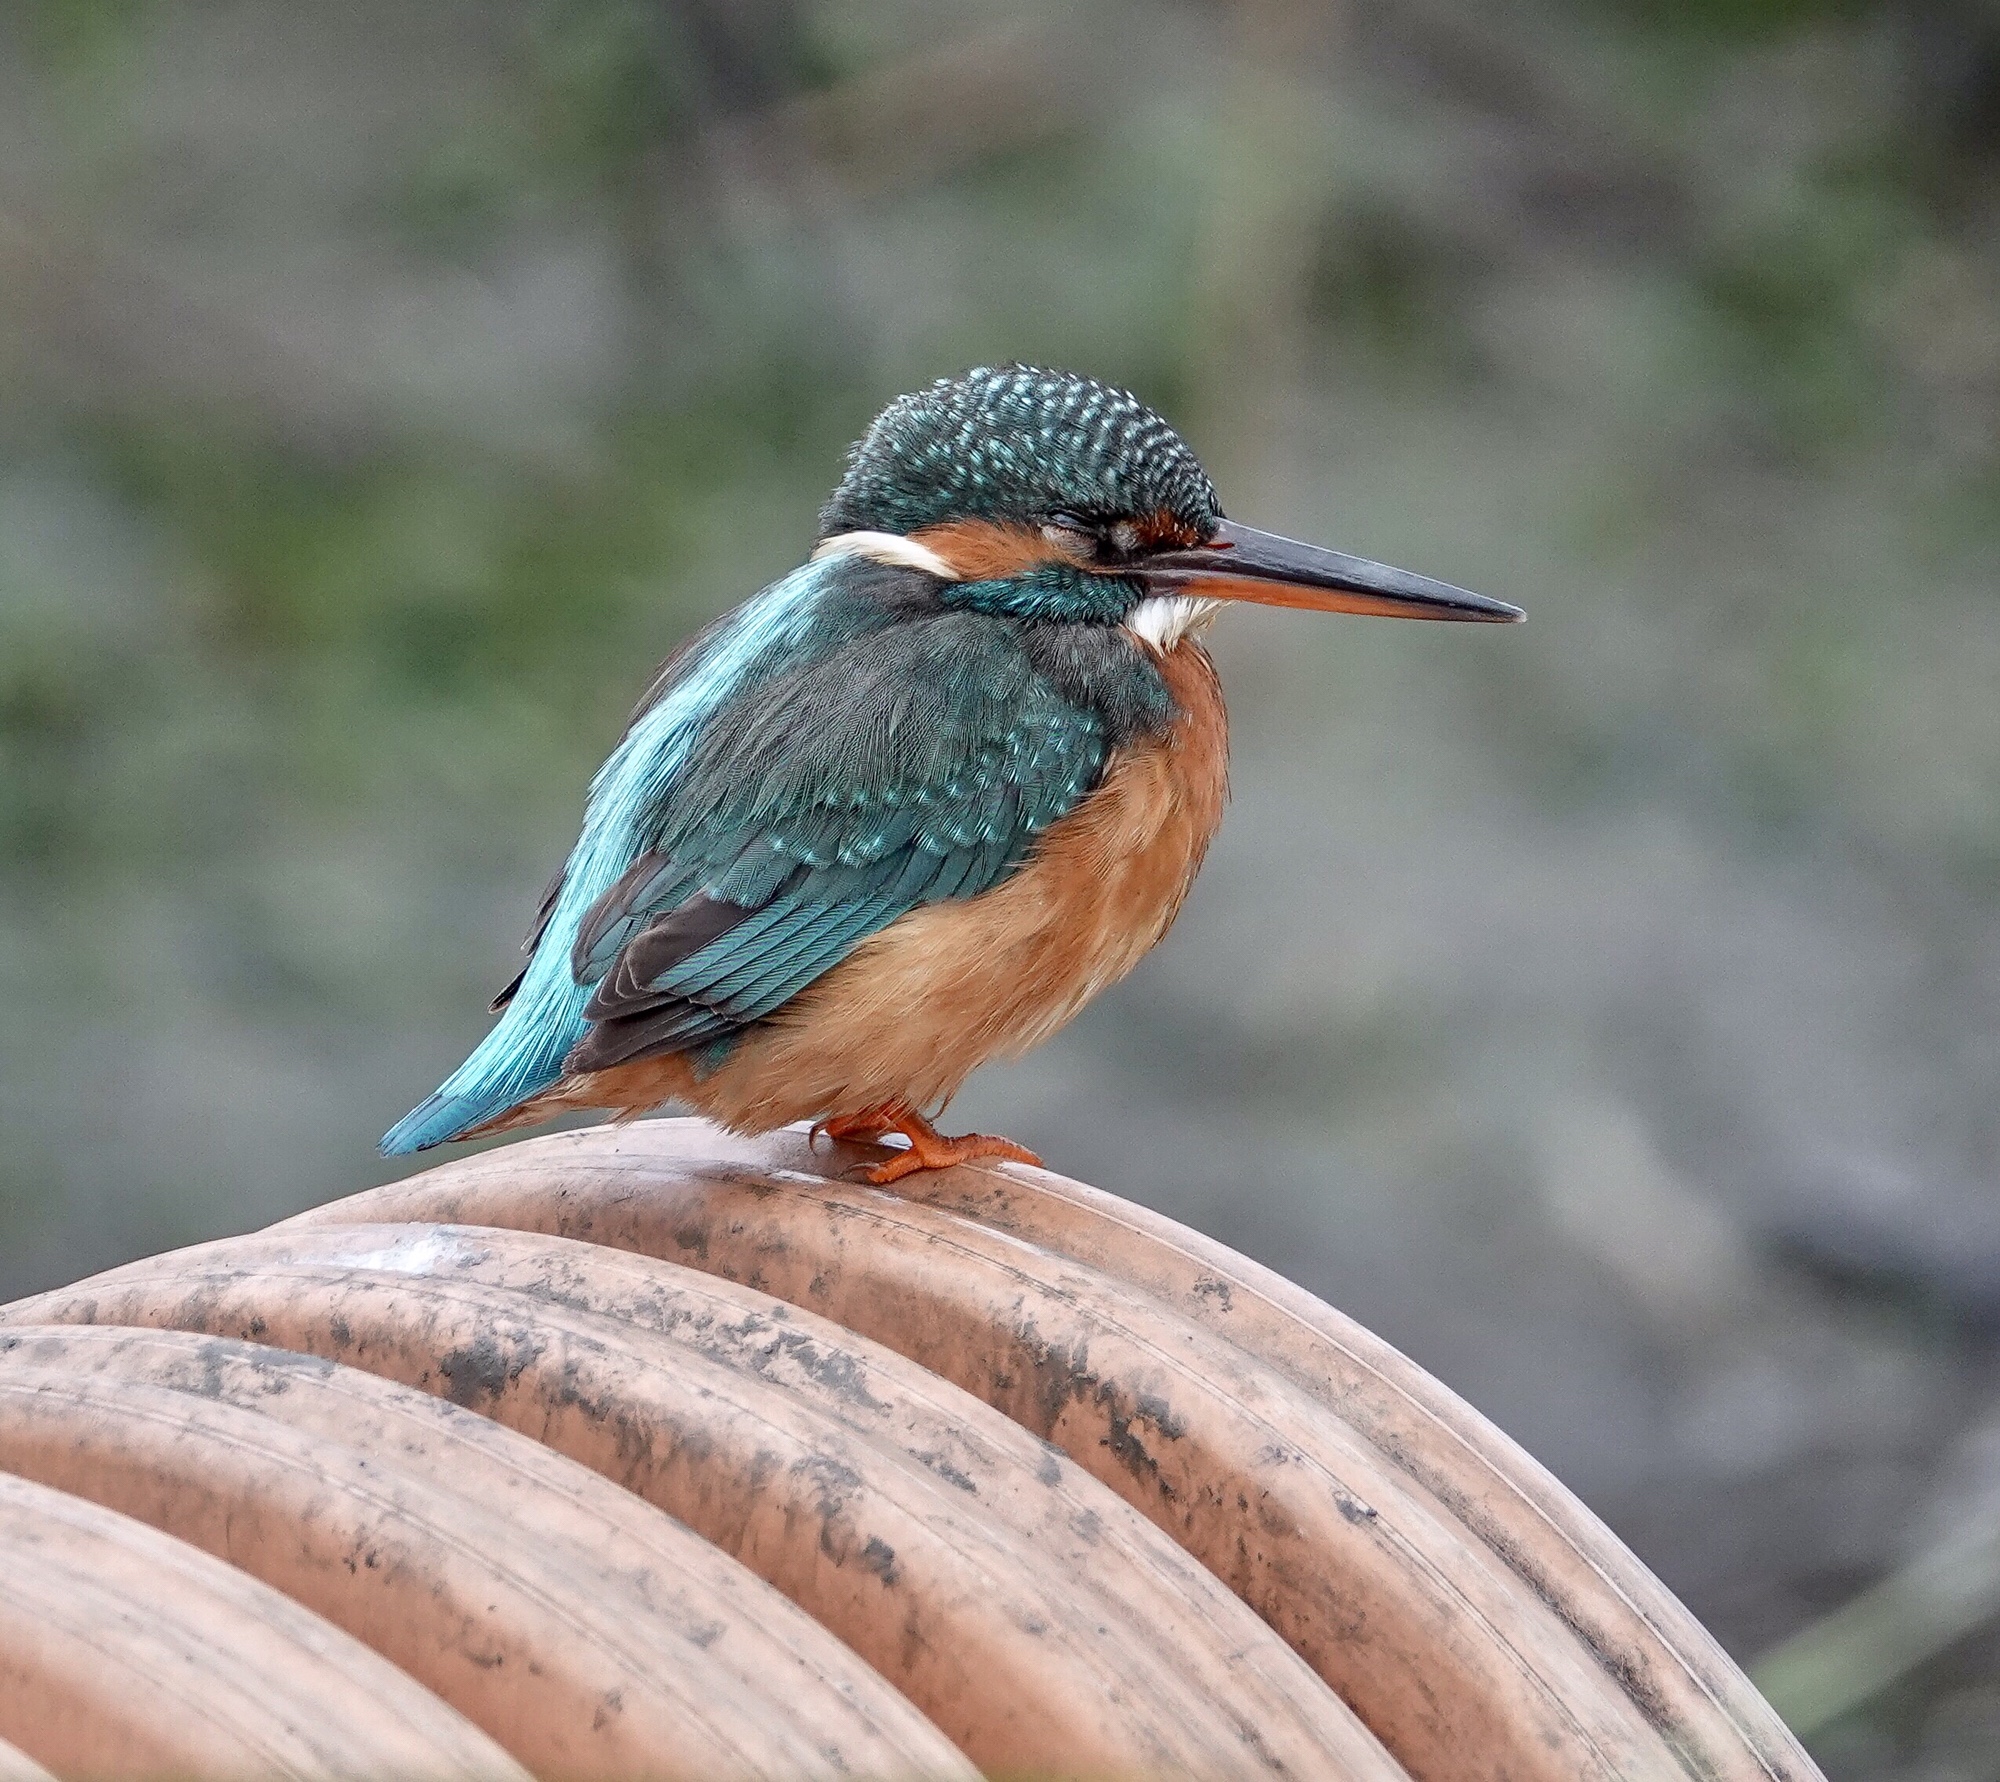
European Kingfisher, Tagus Estuary, Portugal. Early morning in low light.
The new processing engine has also enabled some refinements which I am only beginning to appreciate as I use the iv more. Auto HDR has been improved to the extent that I rarely use any of the other HDR settings (you can still set 1EV to 6EV differences) and, if you are careful, you can shoot an HDR right out to 600mm on the zoom. The iii could not assemble an HDR much beyond 100mm. Highlights in Auto HDR are now very well controlled. They were not in the iii. That does not sound like much, but since I use In-camera HDR a lot, it means that I do not have to think about adjusting my HDR settings as often. As a Point and Shoot photographer I am all for that!
600mm in-camera HDR. Not possible with most cameras.
Another more subtitle improvement is the menu system. There are still a bewildering number of options and menu screens, but menu items are now grouped in more logical manner on each menu screen, with each screen clearly labeled so you know where you are. I use the excellent function button and function menu almost exclusively when in the field, so I never minded the Sony menu system, but I know that some did. 🙂 The changes should make it easier for folks to find what they are looking for, but I still recommend using the function menu whenever possible.
Some folks are excited about the 24 frames per second (with focus between frames!) capability of the RX10iv. That is essentially movie frame rate, and you can capture action sequences in the equivalent of a 20 mega pixel per frame video. I have not yet found a use for it. Somehow even the 10 fps “medium” speed seems faster and smoother than the 10 fps top speed on the RX10iii did…and focus between frames is just a wonderful improvement. They have also added a 2 fps slow speed continuous. And the size of the image buffer is amazing. I think I read that you can take over 300 frames before the camera freezes up to clear the buffer. (While I have tested the limits, one thing I discovered is that, though you can continue shooting, the buffer is clearing in the background, and you can not make changes in the settings of the camera until the buffer completely clears.) I can tell you one thing…you can burn through an SD card really fast at 24 fps.
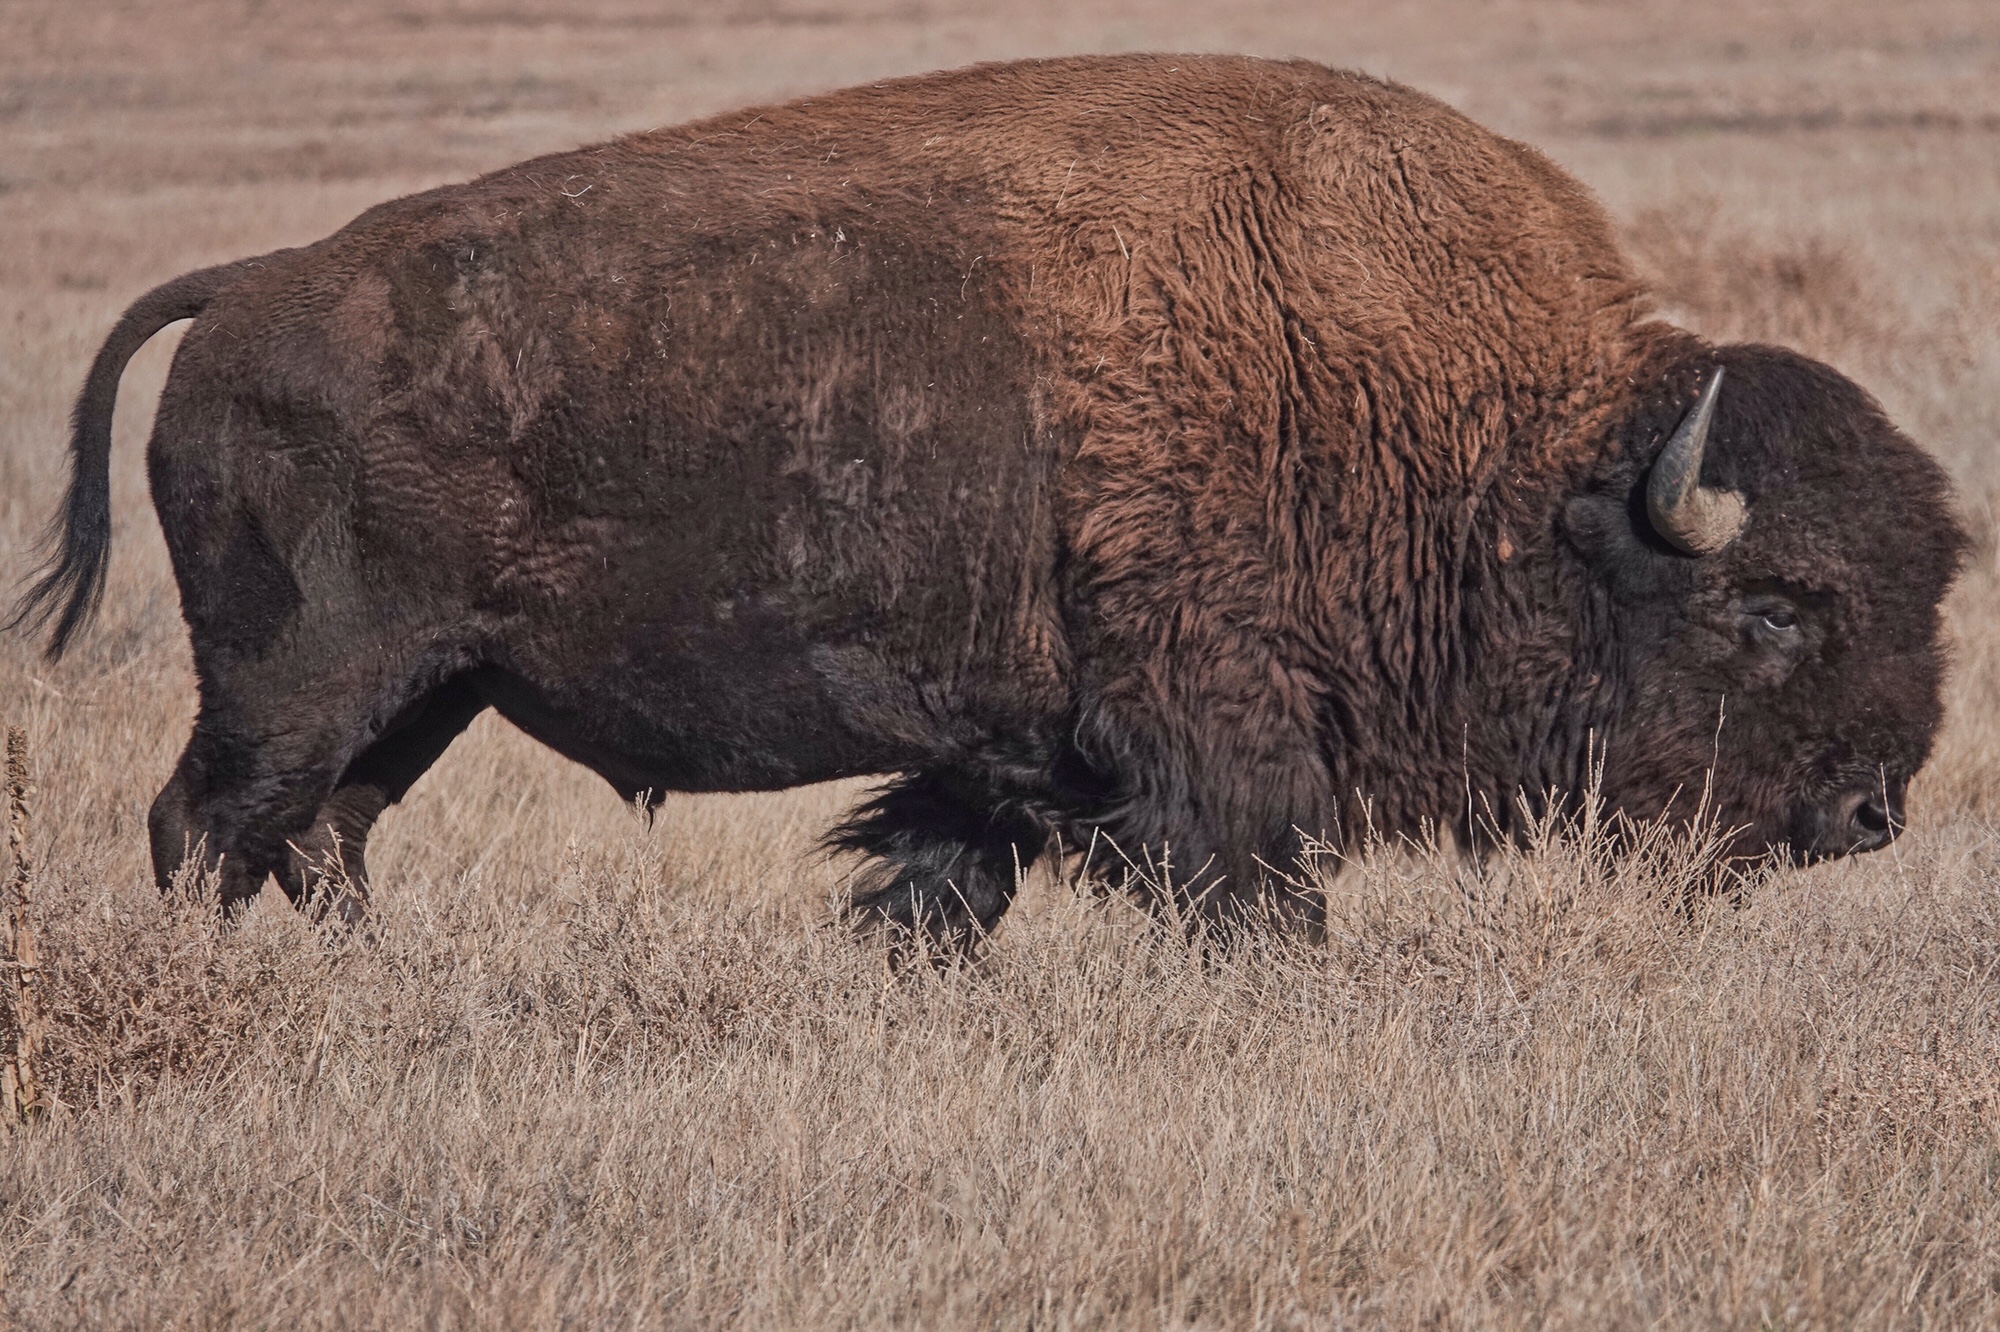
I used touch to focus to place the focus exactly over the Bison’s eye without reframing.
Another change is the addition of touch-to-focus on the new touch screen. It is actually more like touch-to-move-the-focus-area unless you have the camera in continuous focus mode…and it does not, like some implementations, actually take the image. You still have to use the shutter button for that. Many folks on the dpreview Sony Cybershot forum recommend turning touch to focus off, as you do sometimes accidentally move the focus point when handling the camera…however I find touch focus to be really useful. For instance, when shooting a American Bison at close range, I was able to touch the screen to instantly move the focus to the eye of the beast, where I wanted it. On close-ups of birds, I often just tap the screen, again to move the focus to the head or eye. When using Anti-motion-blur mode inside at parties, one of the things I disliked about the mode in the iii was that you lost control of the focus point. On the iv in the same mode, you just tap over the face you want in focus, and, presto, good to go.
My daughter Anna at graduation. Anti-motion blur mode for the low light, and touch to focus to make sure the camera focused on her face.
Actually touch to focus is one of the few things the new touch screen actually does. You can’t use it to set menu items or to navigate the menu system. You can, however, double tap an image in review mode to zoom it, and move the image around to view other parts with your finger. Strange choices on the part of the Sony engineers…but they tried. And, despite the occasional fumble when I get the camera up to my eye and find that the focus square is way off in the upper left hand corner, I do find touch to focus worth getting used to.
It is hard to say for sure, but my impression is that the new sensor and processing engine have also improved higher ISO performance slightly. It was already pretty good on the iii, but in similar situations the iv just seems to do a bit better. And if you are not familiar with the image quality of the Sony 1 inch sensors in the RX series, all I can say is, be prepared to be impressed. Between the exceptional ZEISS glass and the Sony sensors and processing engines, the RX series in general, and RX10iv in particular, produce images that hold up very well, at normal viewing sizes and distances, to anything on the market, including full frame cameras and lenses many sizes larger than the relatively compact RXs. Certainly if you are using the Sony RX10iv as your all around travel, wildlife, landscape, and party camera, you will have nothing to apologize for when displaying your images (and much to be proud of).
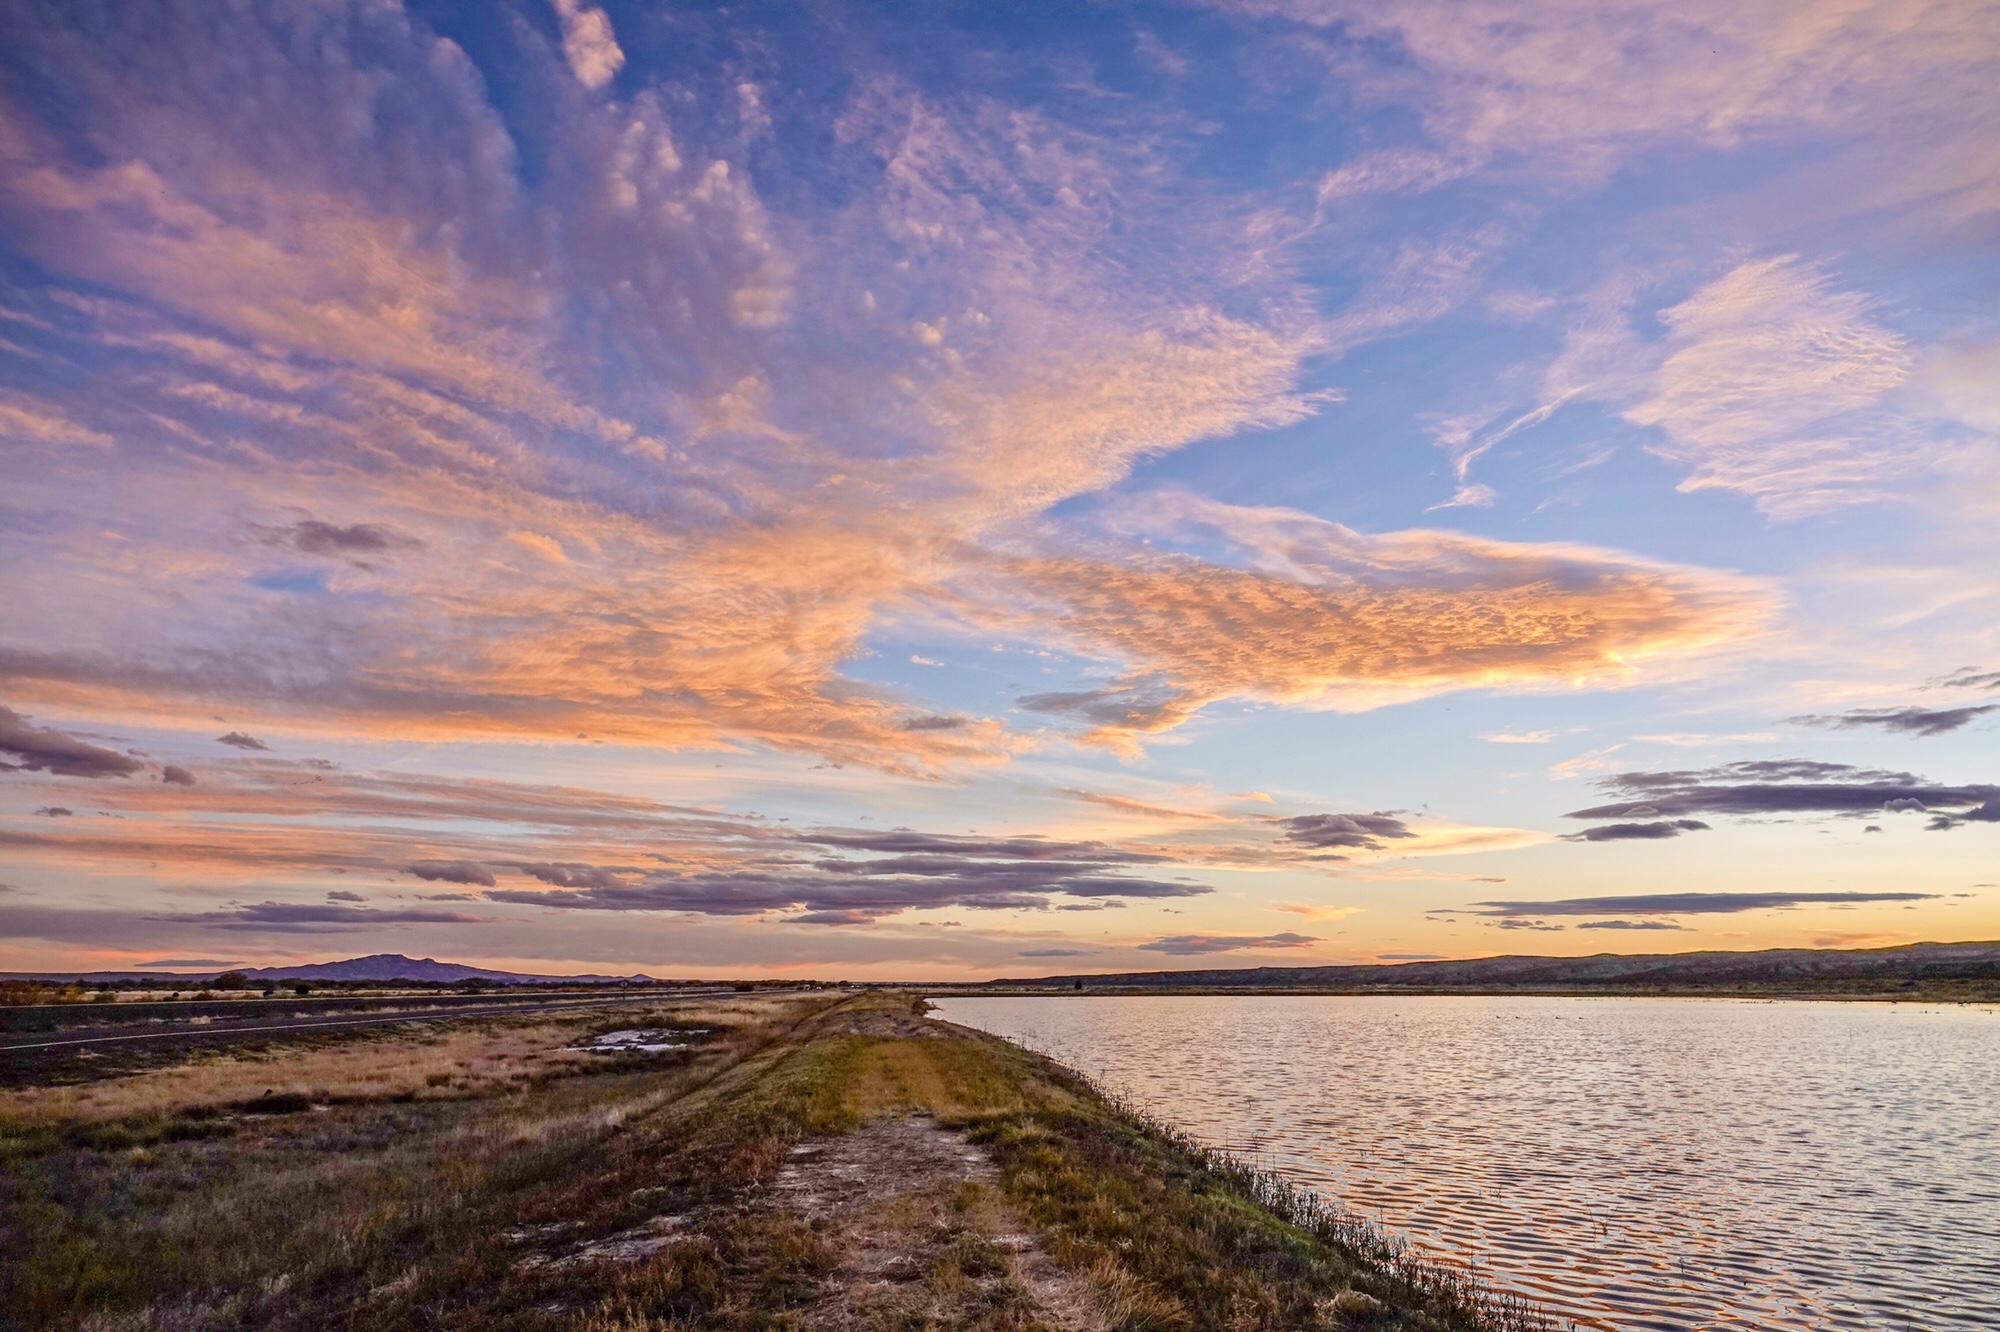
Crane against the sunset, Bosque del Apache, New Mexico. 600mm.
I already loved the RX10iii. It was the best camera I have ever had the pleasure of traveling with, and I owned it during 18 months when I visited so many wonderful places. I have only had the iv for a few months now (since a few days after it was released), but already I love it even more. It has not been as many places yet, but it will get there…and I know that when it does, it will bring back the images I want, day after day, time after time, amazing place after amazing place. I have no qualms about calling it the best fixed-zoom, superzoom, compact camera ever made. I plan on wearing it out before they come out with the RX10V (which will go to 800mm at f5.6 of course 🙂 This is my camera and I love it!
Lesson’s Motmot from the grounds of the Bougainvillea Hotel near San Jose
Note: I am returning to Costa Rica in December 2018 for another amazing photo adventure. Join me there. Info.
I have been to Honduras seven times, and to Panama twice, but until this past October, I had never been to Costa Rica. No Central American traveler or photographer can afford to miss Costa Rica. Costa Rica offers rich and diverse bird and wildlife in a country with a well developed ecotourism structure, and an eco-friendly ethic that produces some of the finest observation and photography opportunities to be found in Central America. The lodges are well established and comfortable, the roads are, for the most part, good, there is a whole industry devoted to getting tourists around, the people are friendly, and at least the ones I met, are used to dealing with people who have come to enjoy the experience of wild Costa Rica. And Costa Ricans are proud of their country. They have more land devoted to National Parks and Reserves than most “developed” countries (over 25% of their country is within the National Park System), and their wildlife protection laws, mostly enacted a generation ago already, are a model for their neighbors. They take birds and wildlife, and those who come to see and photograph it, seriously.
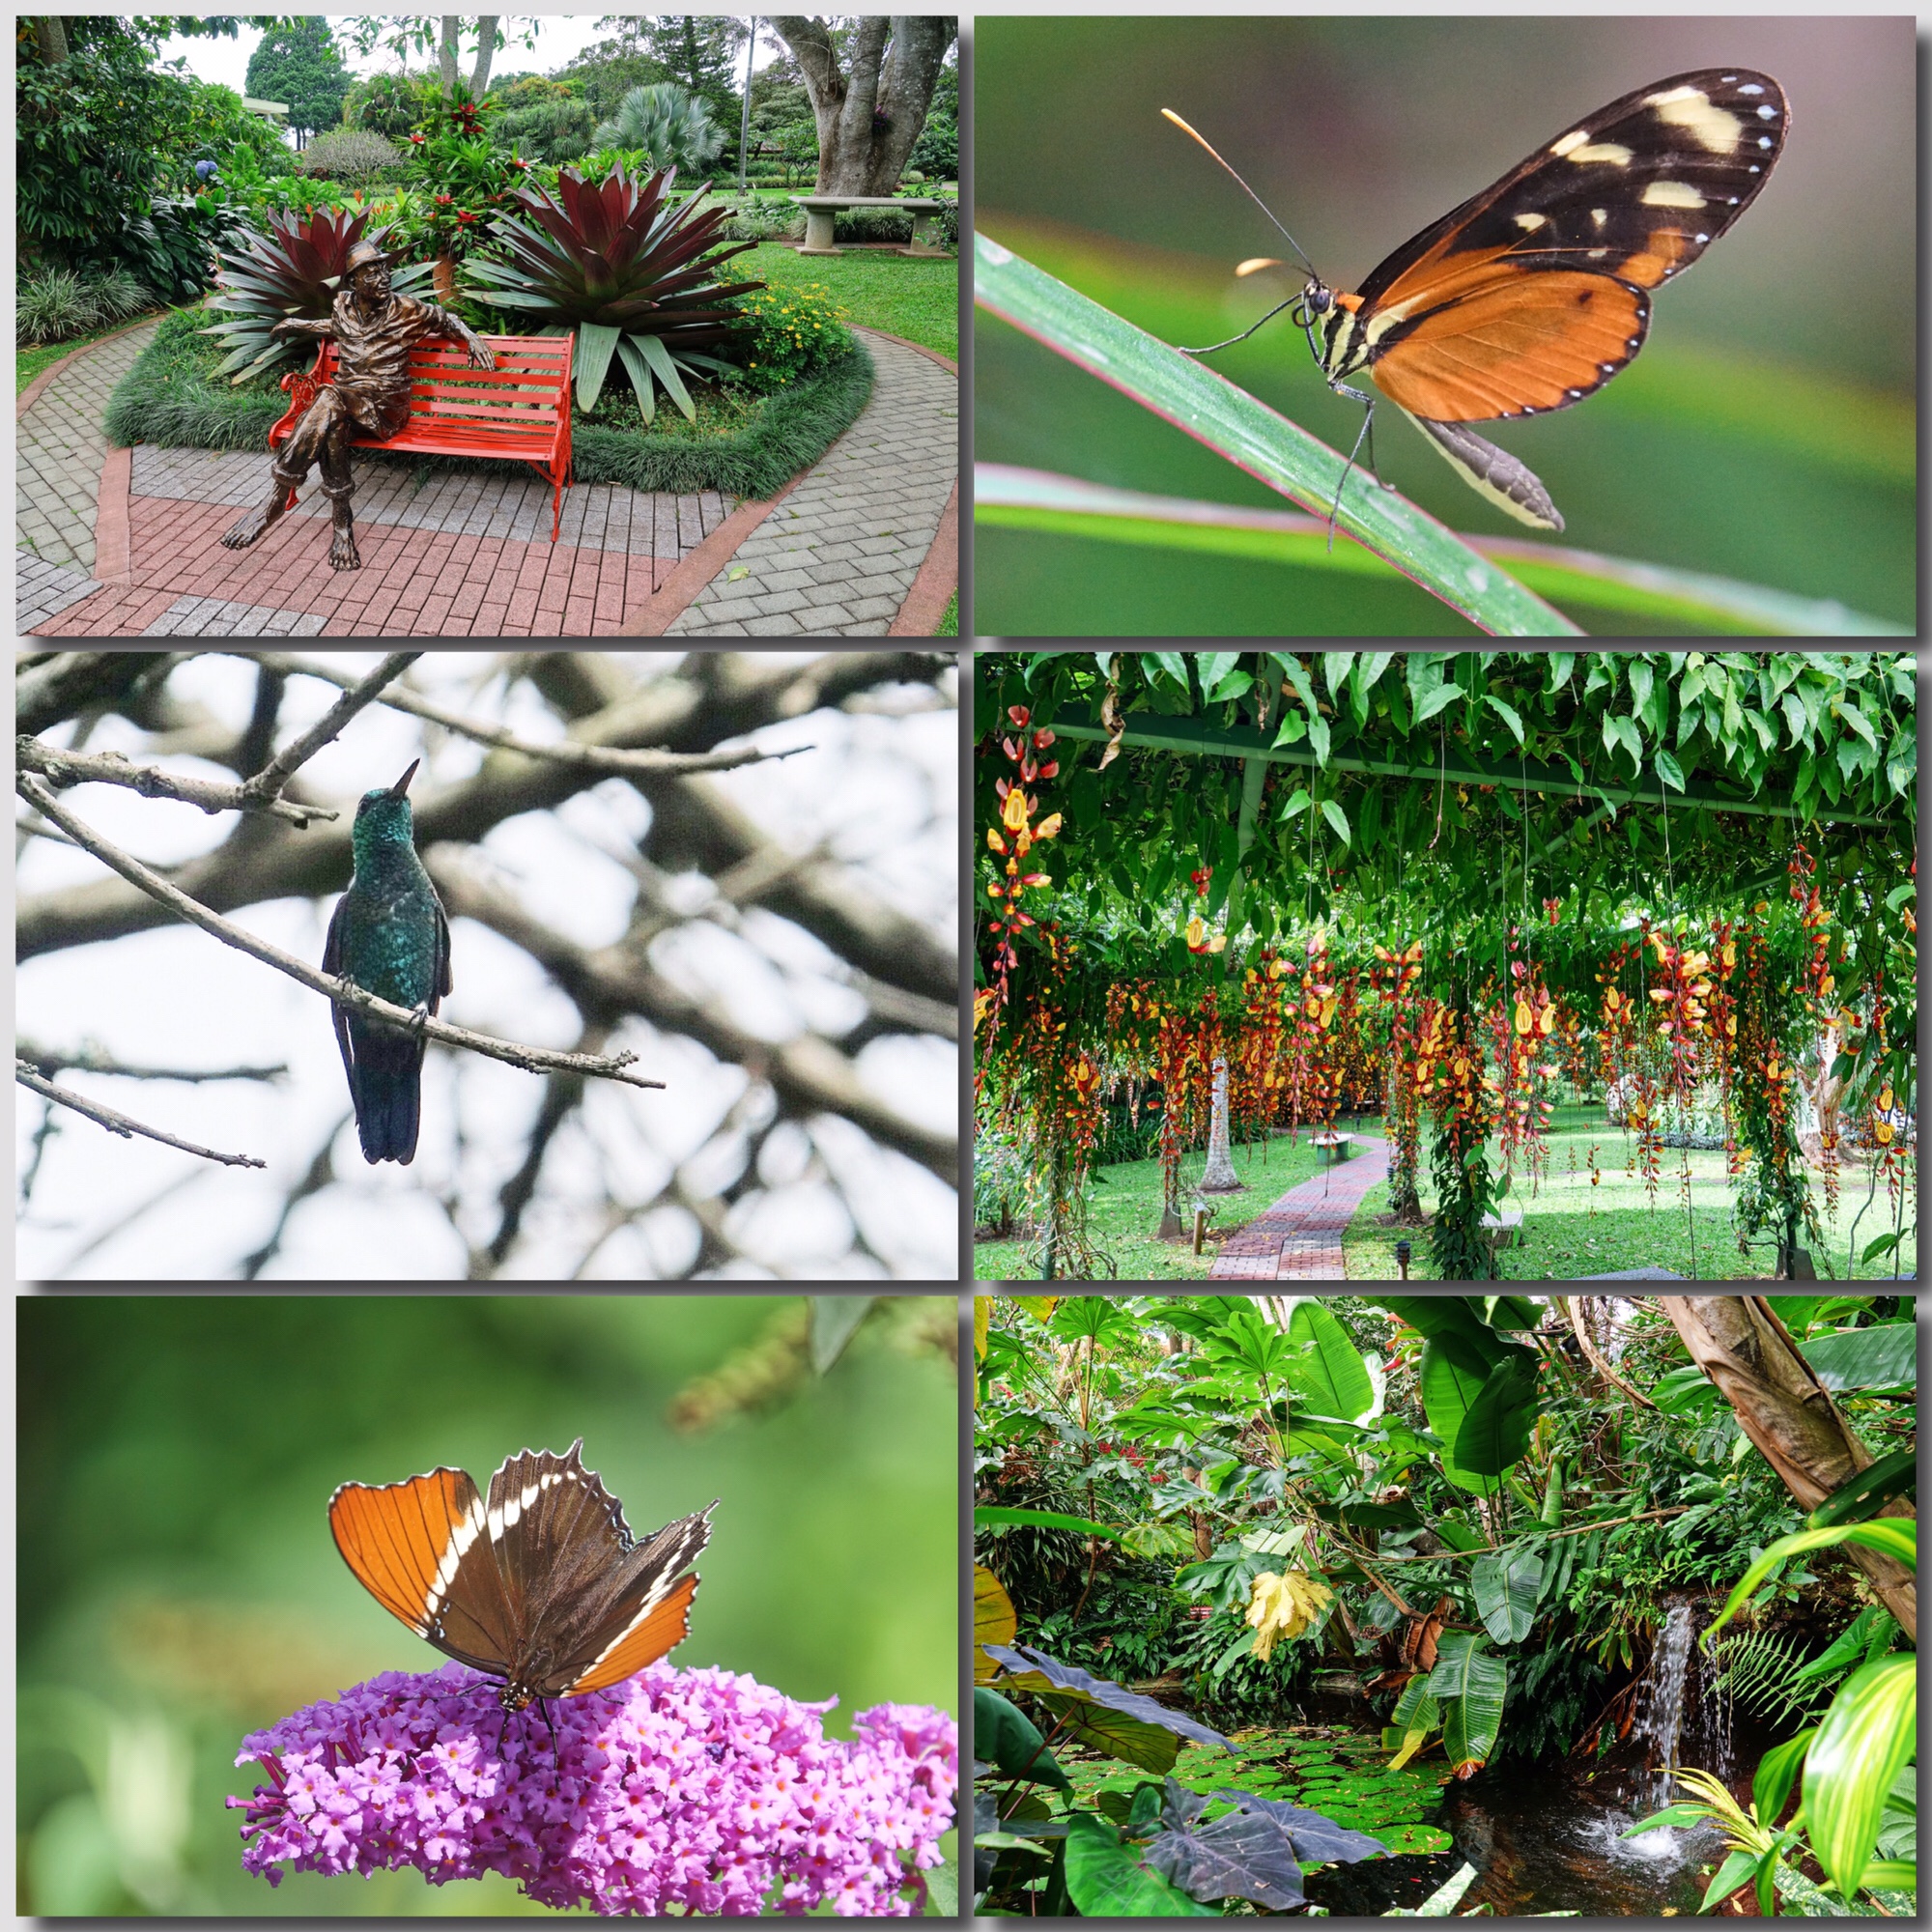
More from the gournds of the Bouganvillea Hotel: Beautiful gardens, Heliconian Butterfly, Steely-vented Hummingbird, Indian Pipevine, Rusty-tipped Page, water feature
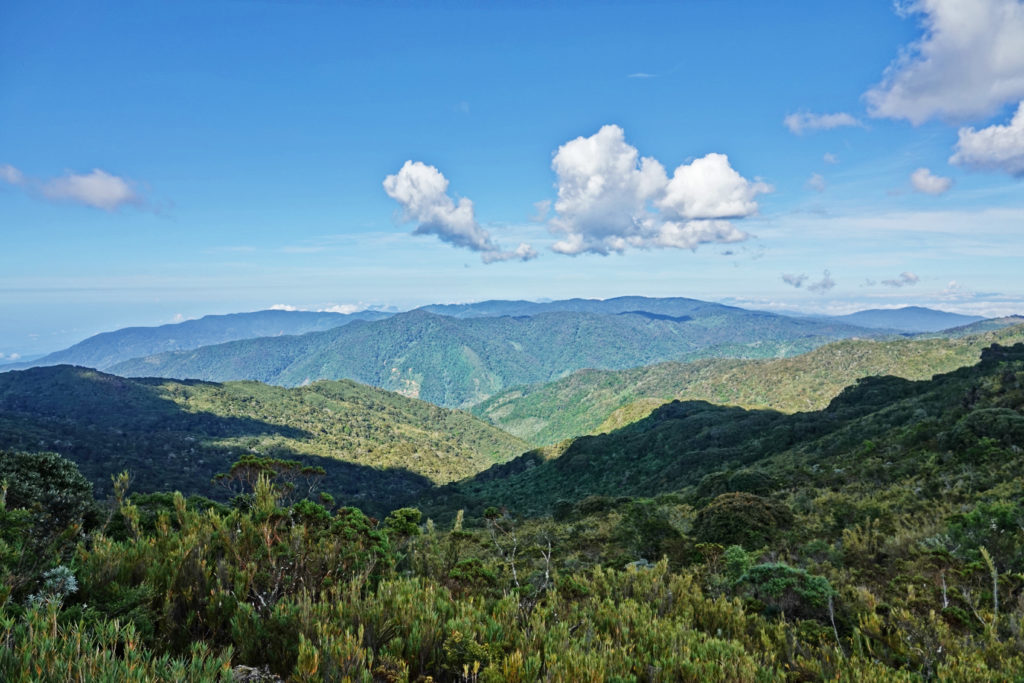
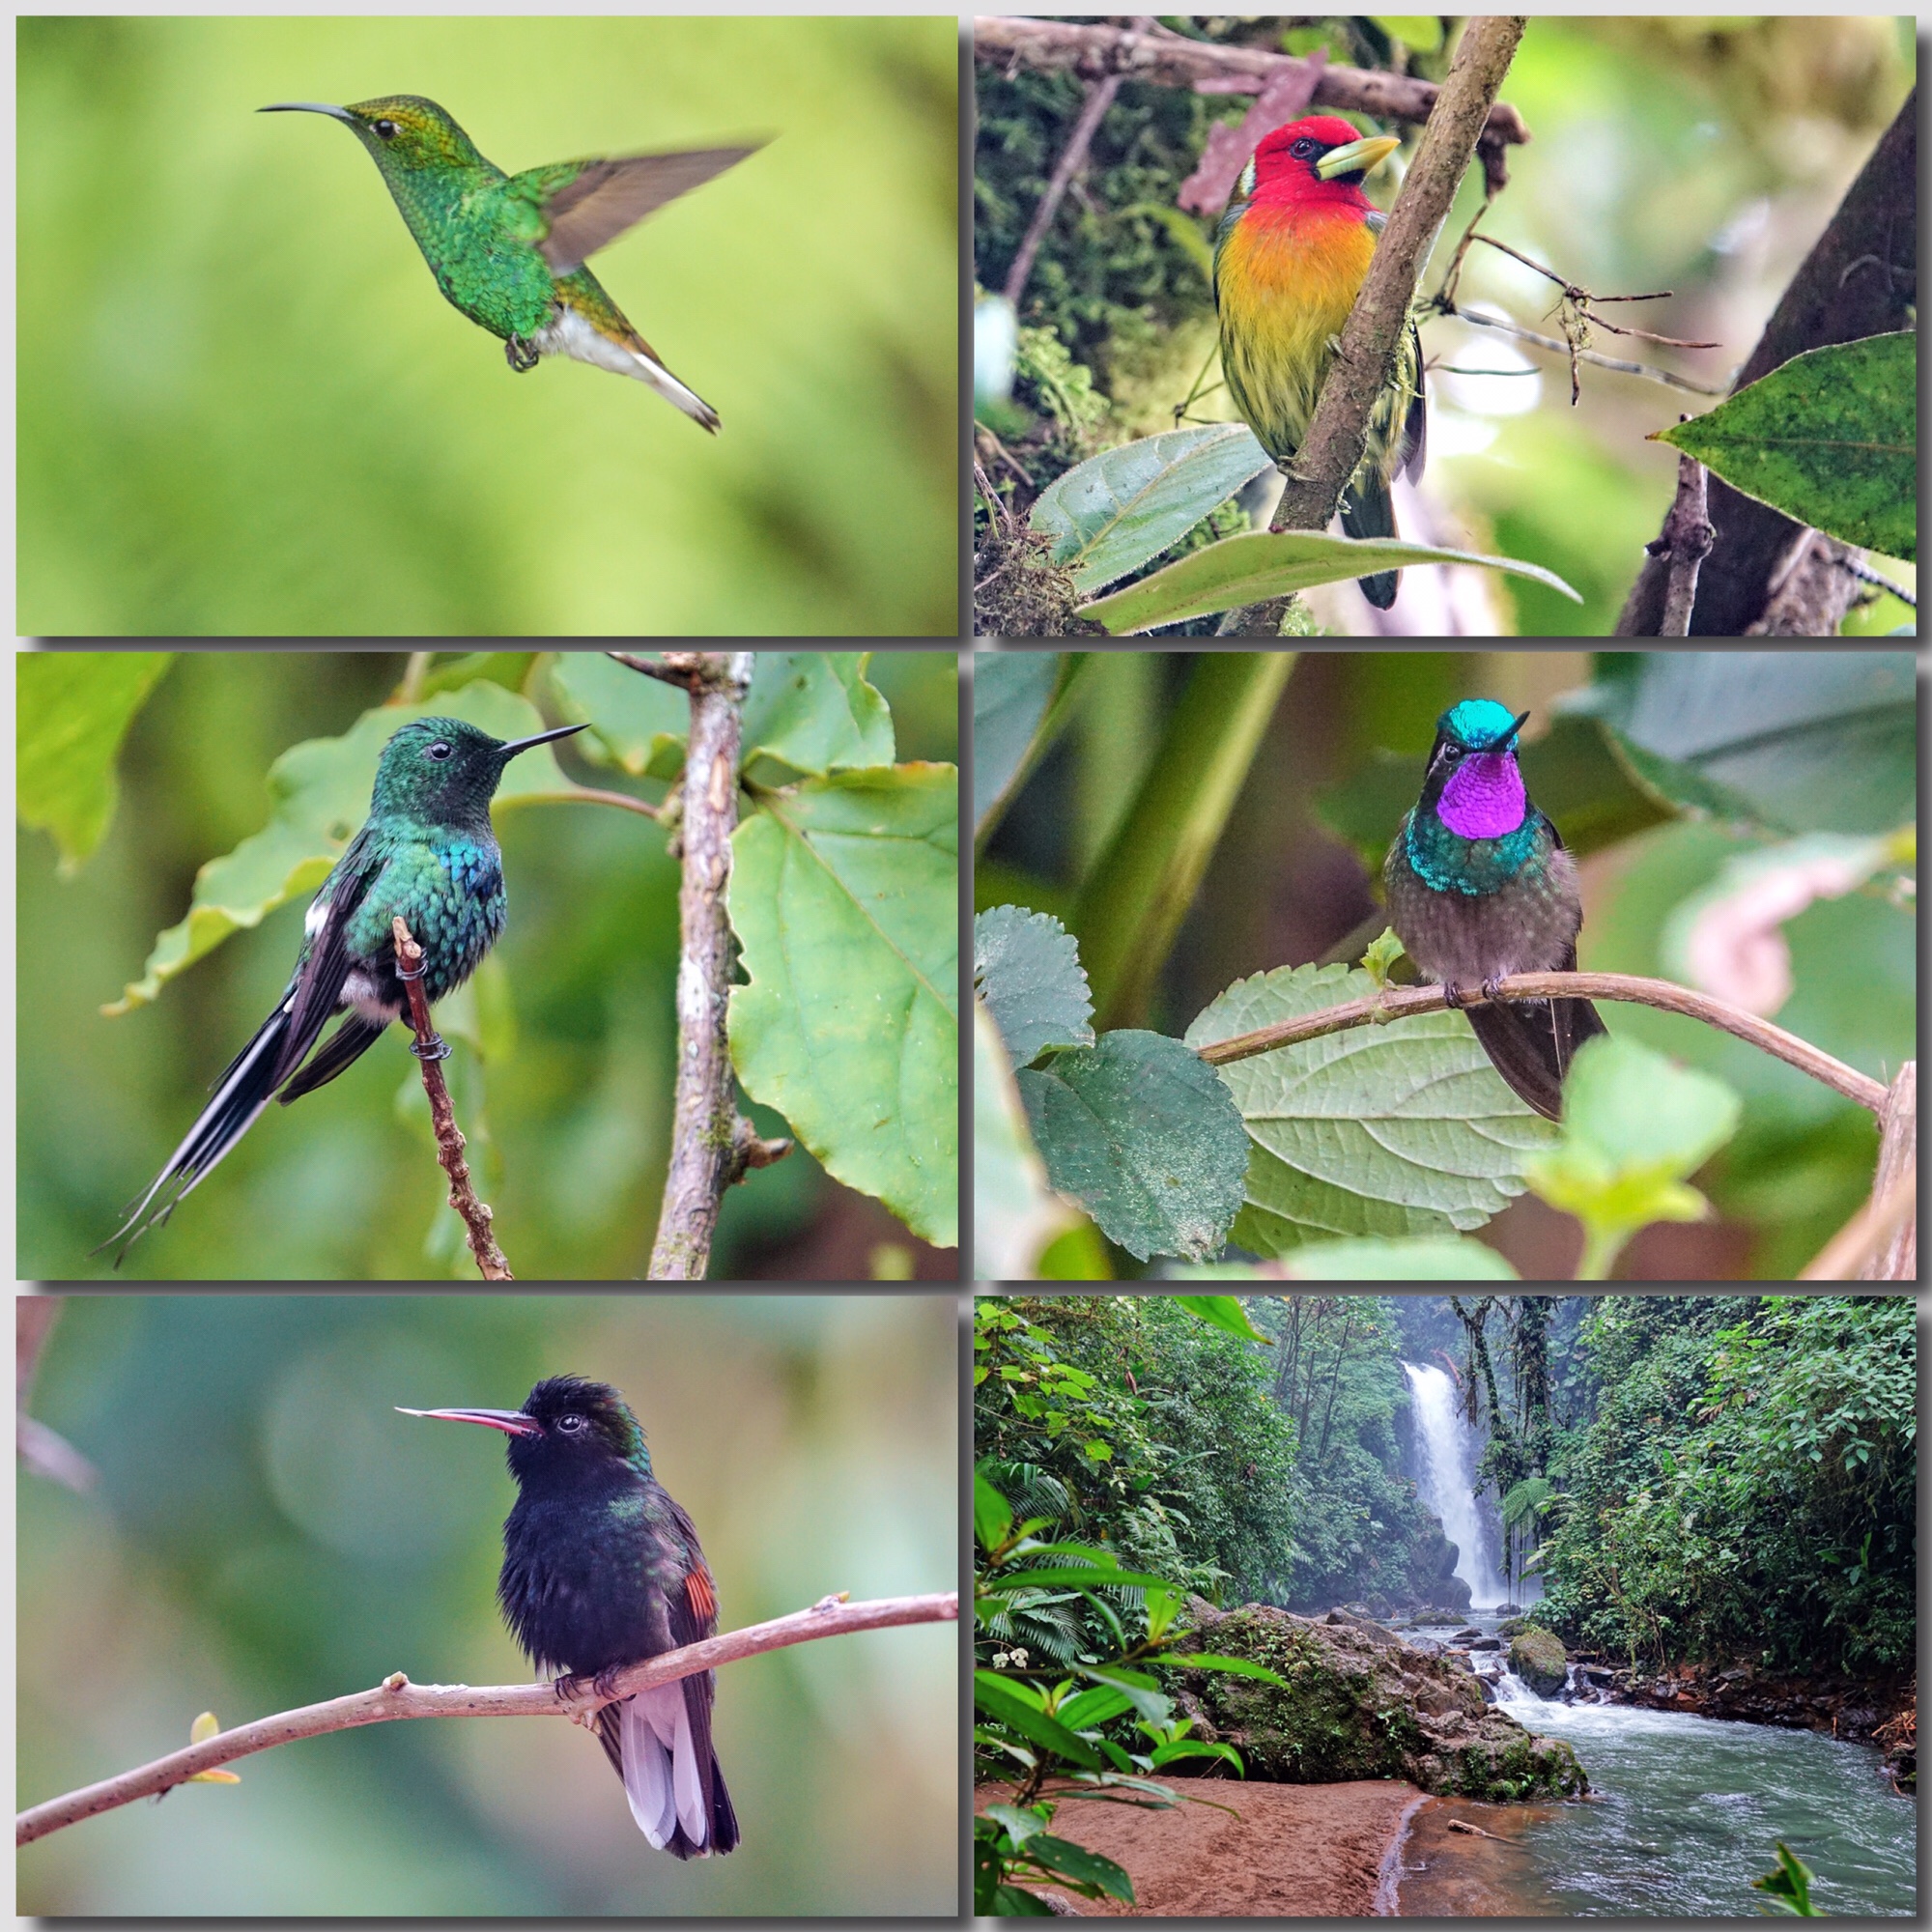
My trip to Costa Rica was arranged by Holbrook Travel (http://www.holbrooktravel.com/), and for most of my visit we stayed at Selva Verde, a rainforest lodge owned and operated by the Holbrook family. (http://www.selvaverde.com/ ) While the lodge itself offers great wildlife and birds, and many excellent photo opportunities, most days we went out to other well known birding and photography hot-spots in the valley of the Serapique River, and the surrounding foothills. The last three days I, and two other members of the group, went up into the mountains to the Savegre Hotel for an experience of the cloud forest and its birds (http://www.savegre.com/).
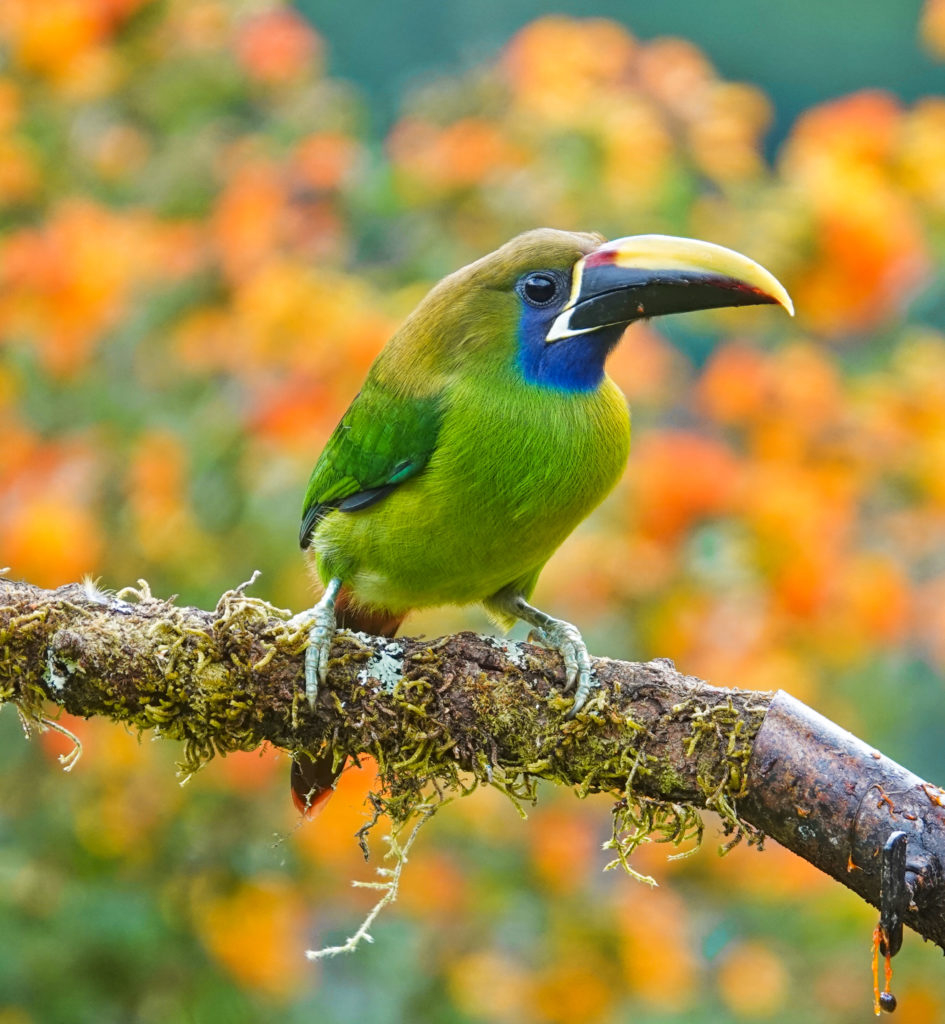
Bronze-headed Emerald, a Costa Rican endemic, Red-headed Barbet, Green Thorntail, Purple-throated Mountain Gem, Black-bellied Hummingbird and the upper falls, all at the La Paz Waterfall Gardens in the mountains above San Jose.
October is, perhaps, not the ideal month to visit Costa Rica. It is the rainiest month, and we had rain at least part of pretty much every day. In the mountains we had to detour around roads that were still closed due to mudslides from the recent tropical storm (a once in a generation phenomenon) and Sevegre had only reopened the day before we got there. The road in and out was still a bit sketchy, but we made it both ways. The rain did not discourage the wildlife or the birds, and we did not let it discourage us. Overall it was one of my most enjoyable tropical experiences. Still, next year’s Point and Shoot Nature Photographer tour of Costa Rica will be scheduled in early December, after the rainy season. 🙂
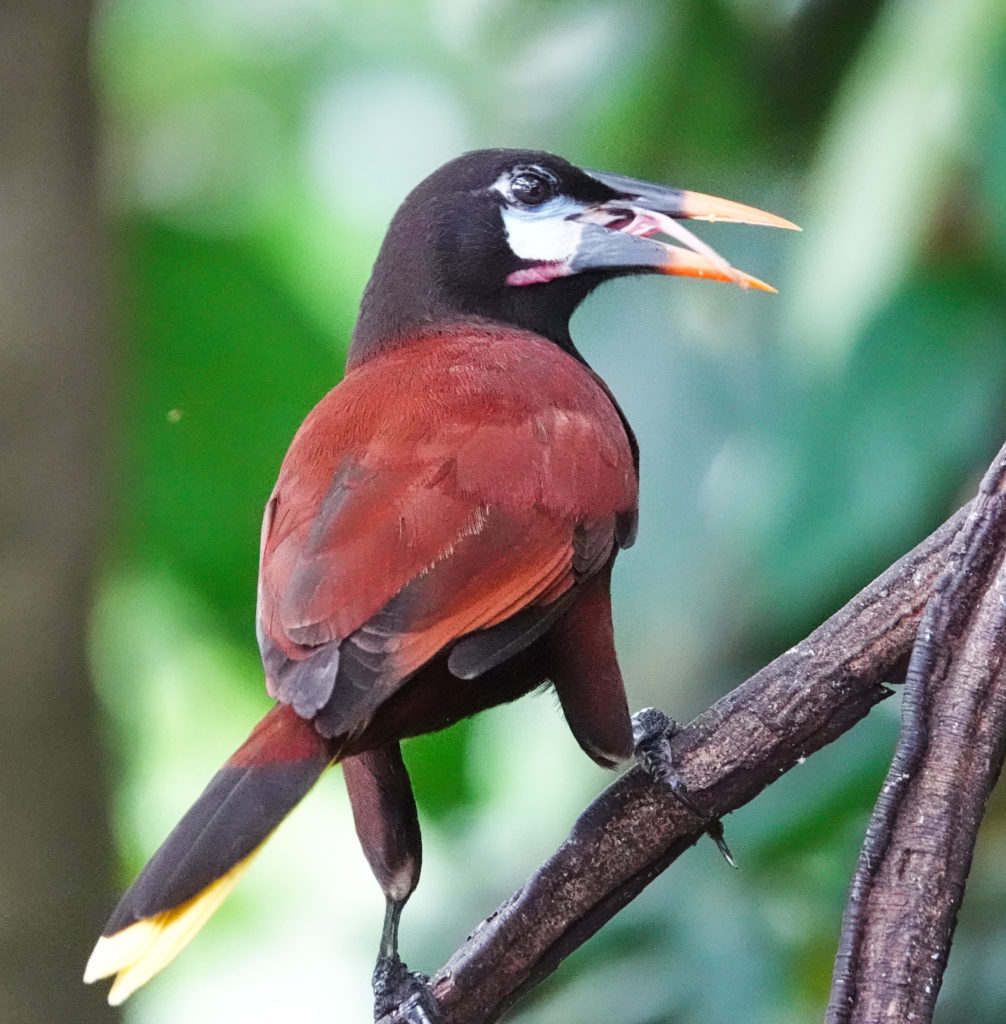
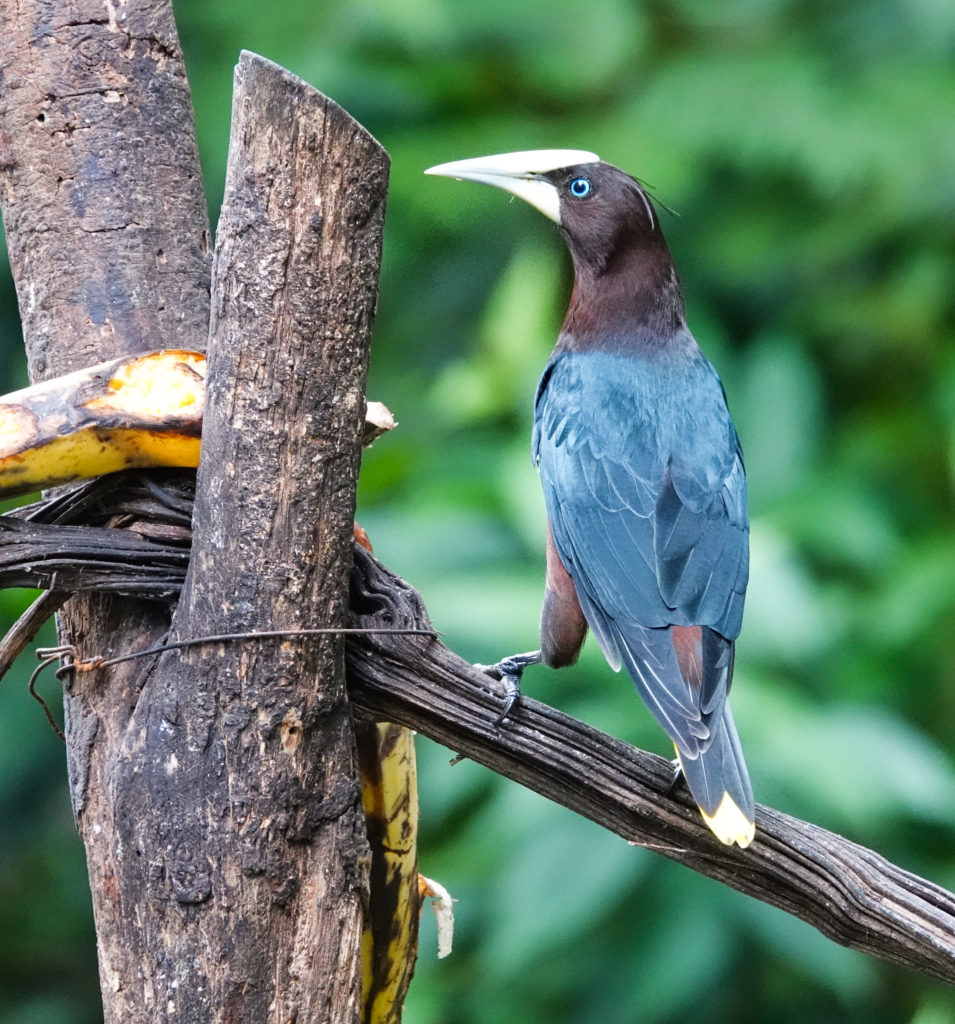
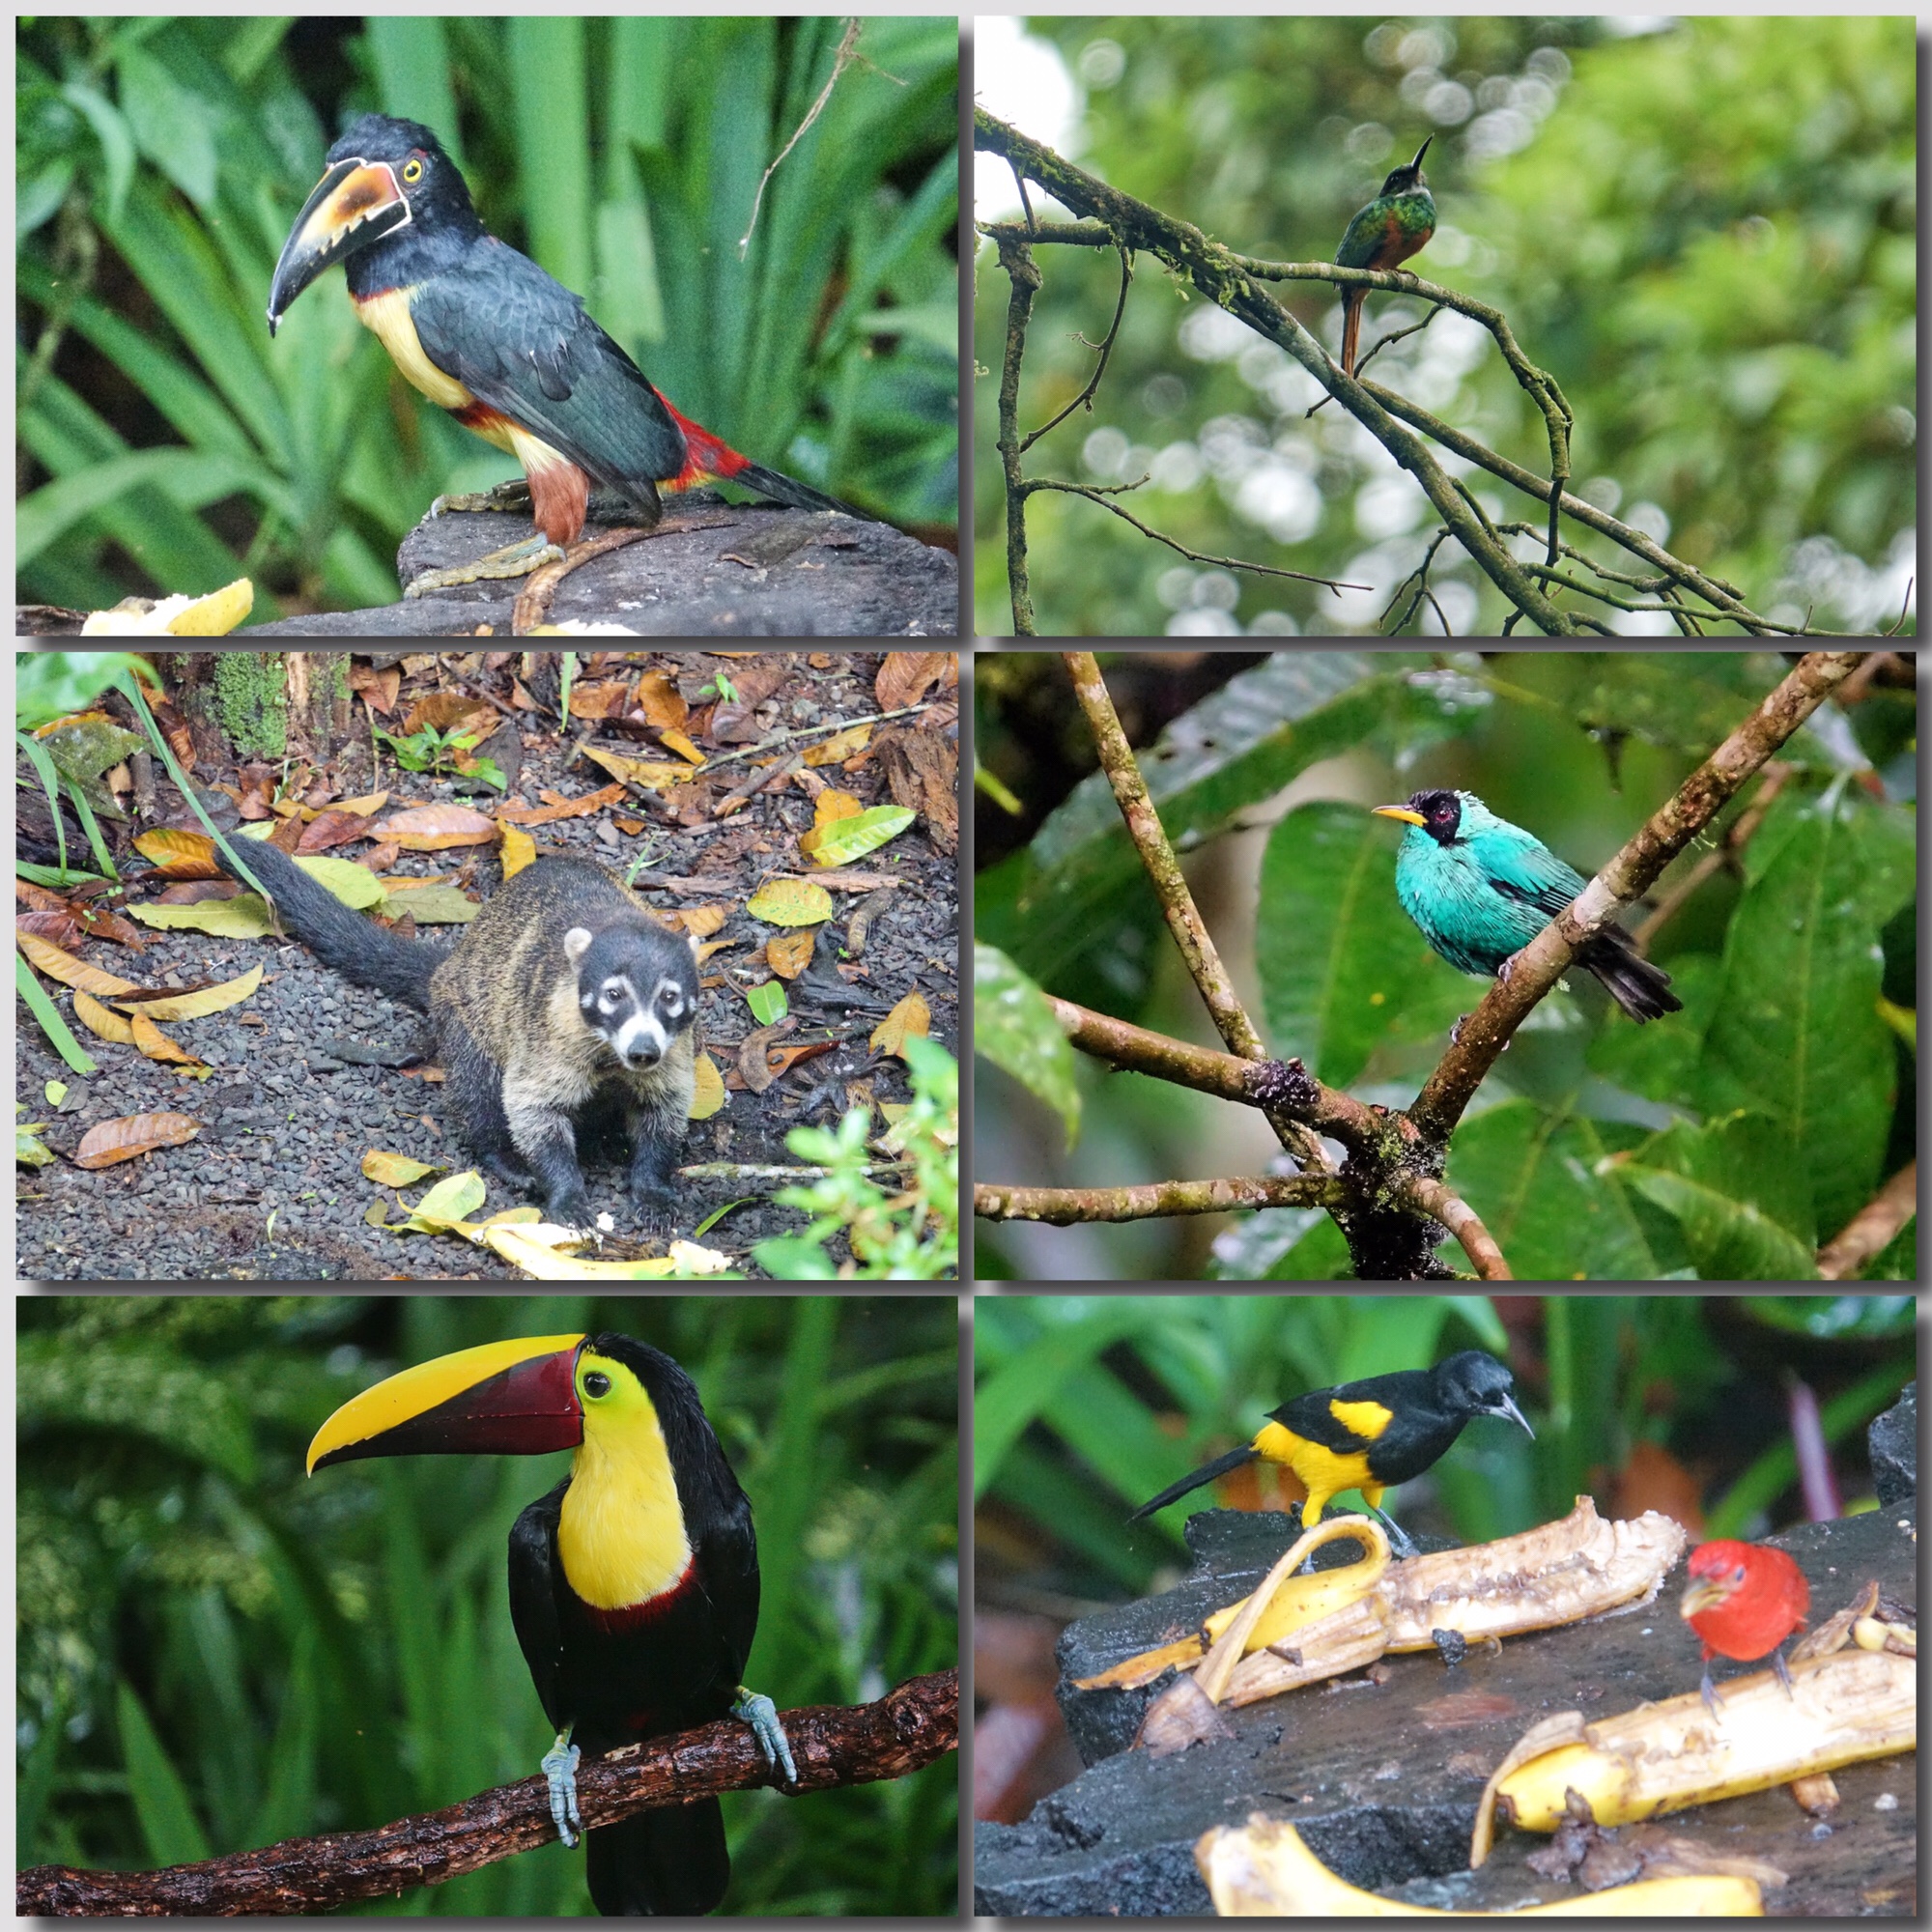
Around the feeders at Selva Verde: Collared Aracari, Rufous-tailed Jacamar, White-nosed Coati, Green Honeycreeper, Yellow-throated Toucan, Black-cowled Oriole and Summer Tanager.
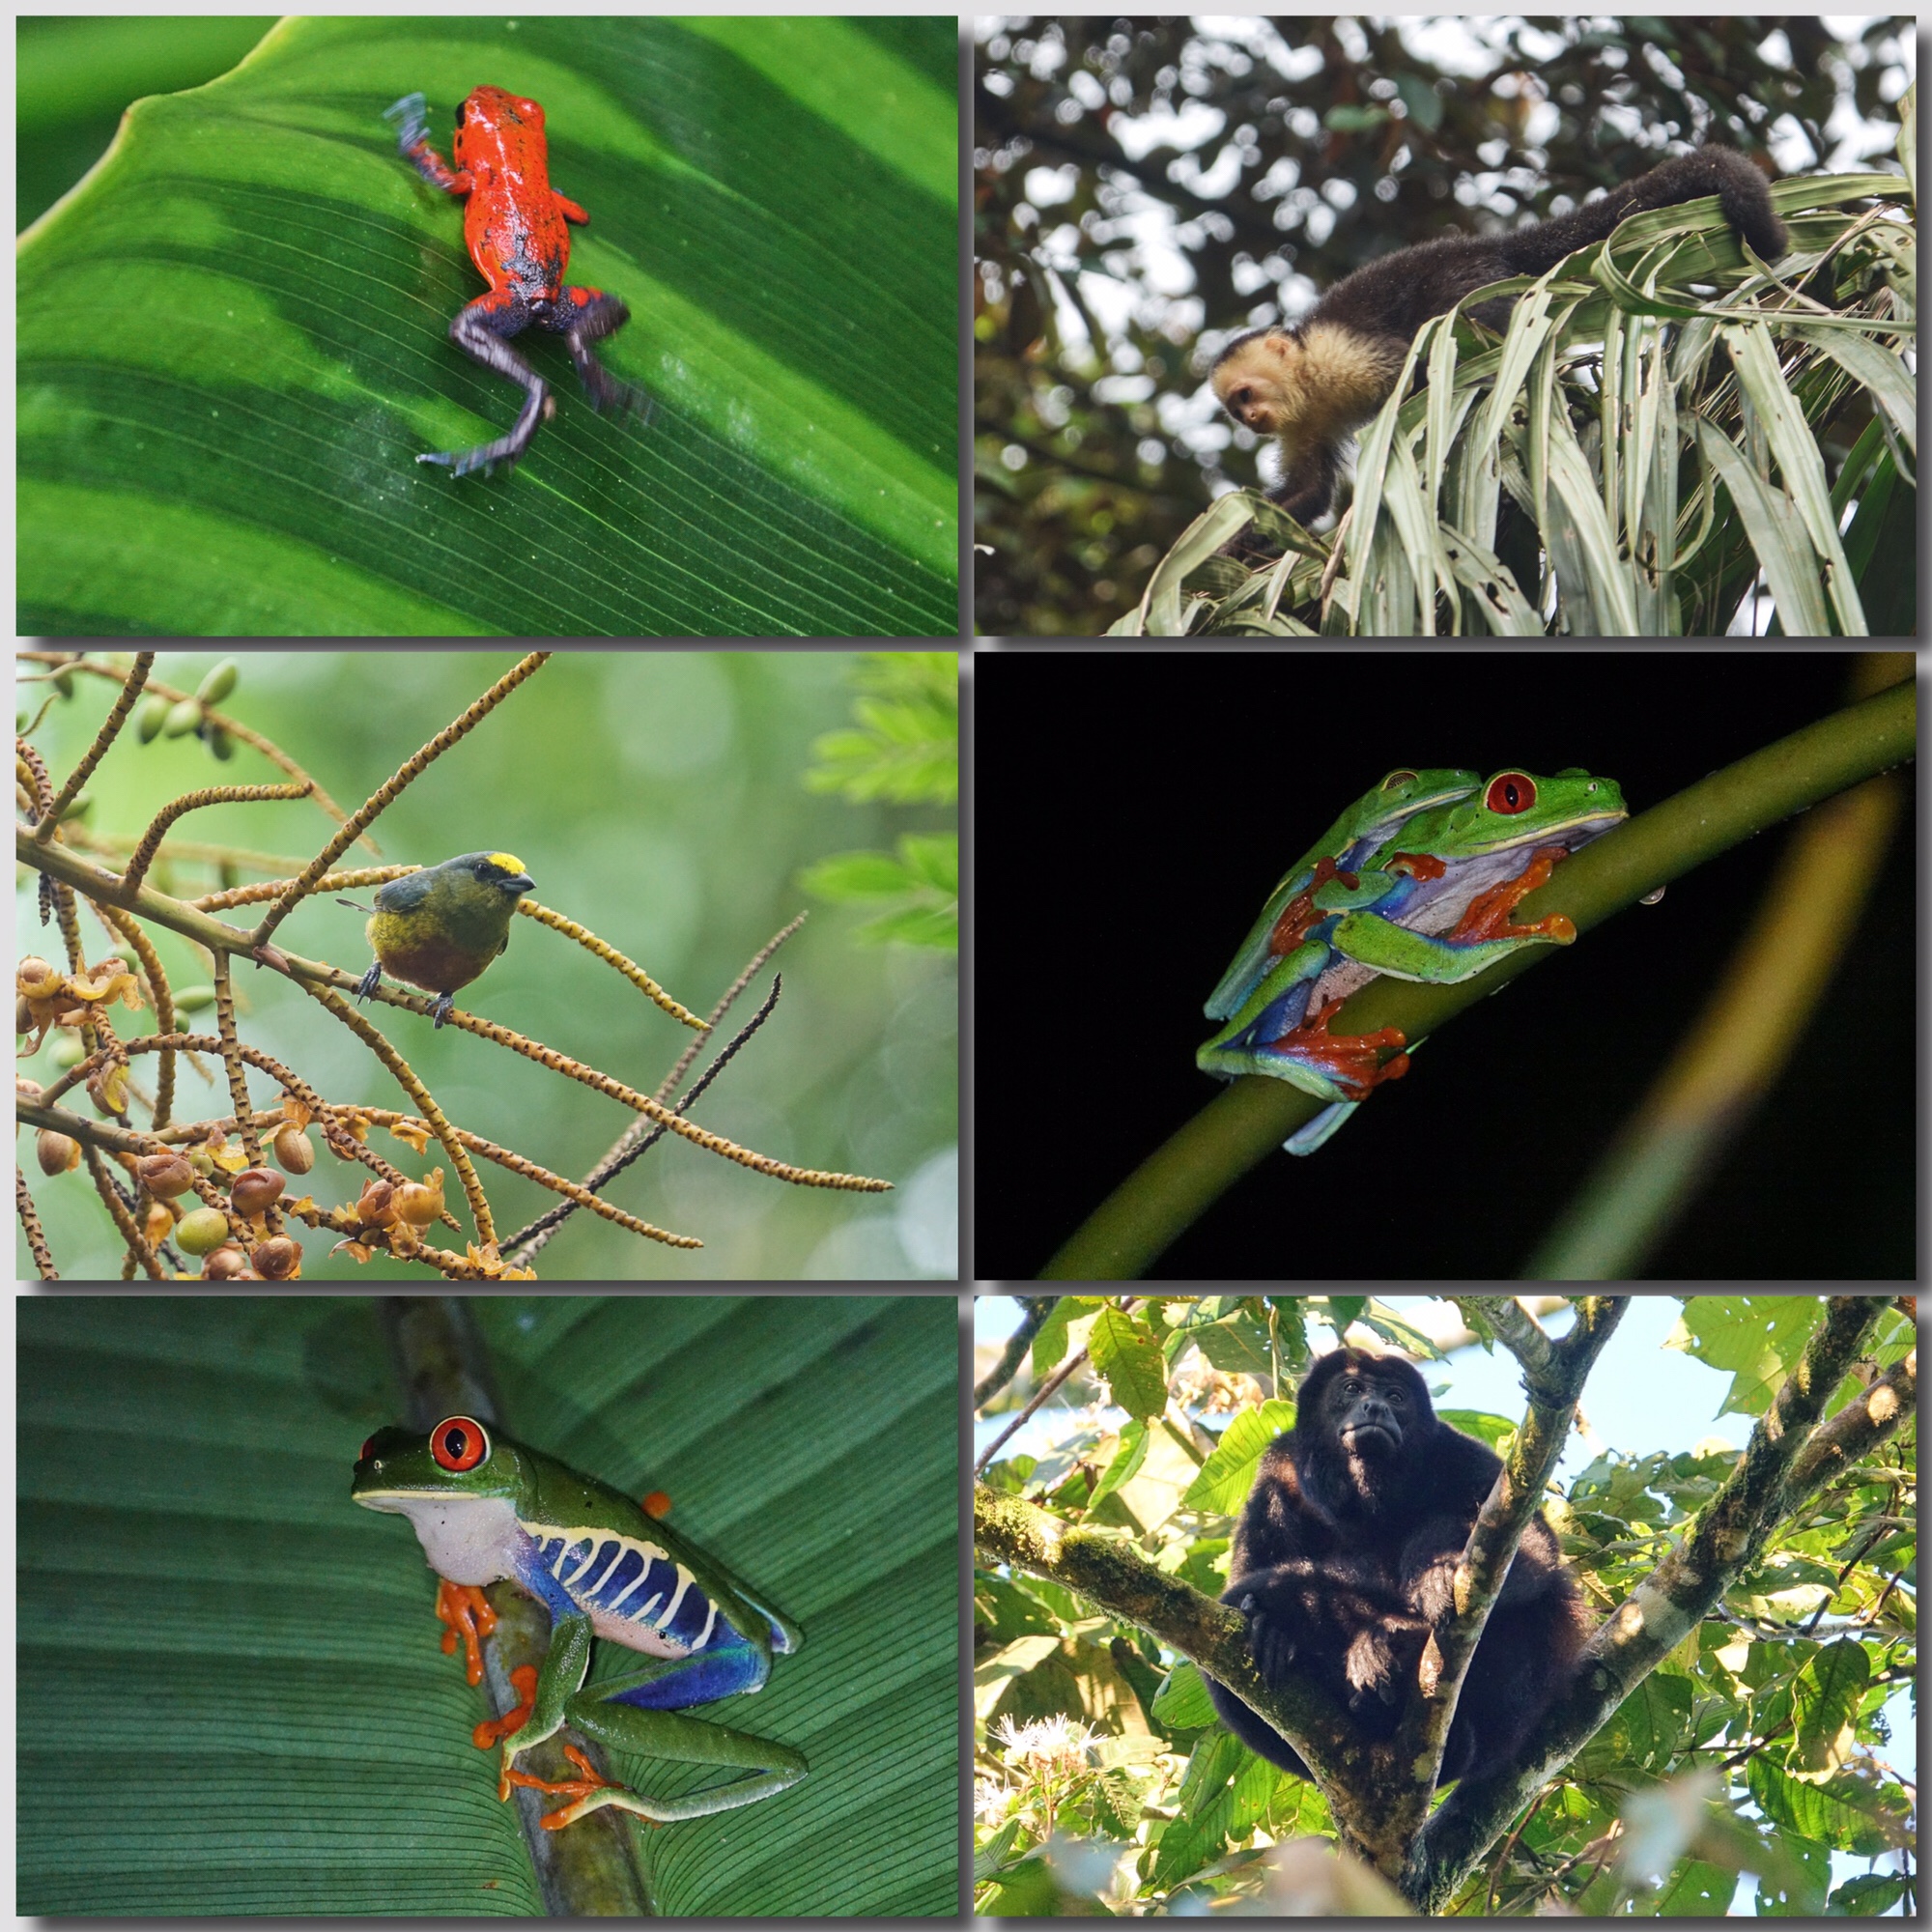
One of the most attractive aspects of birding and photography in Costa Rica is the number and variety of birds that come to the feeders and frequent the grounds at the lodges and private reserves. Selva Verde had three kinds of Toucans, at least a dozen bright Tanager species, woodpeckers, Variegated Squirrels and a White-nosed Coati coming to the feeders. There were Howler Monkeys in the trees above the cabins every day, and White-faced Caputians across the street in the gardens. There were also Motmots in the Gardens.
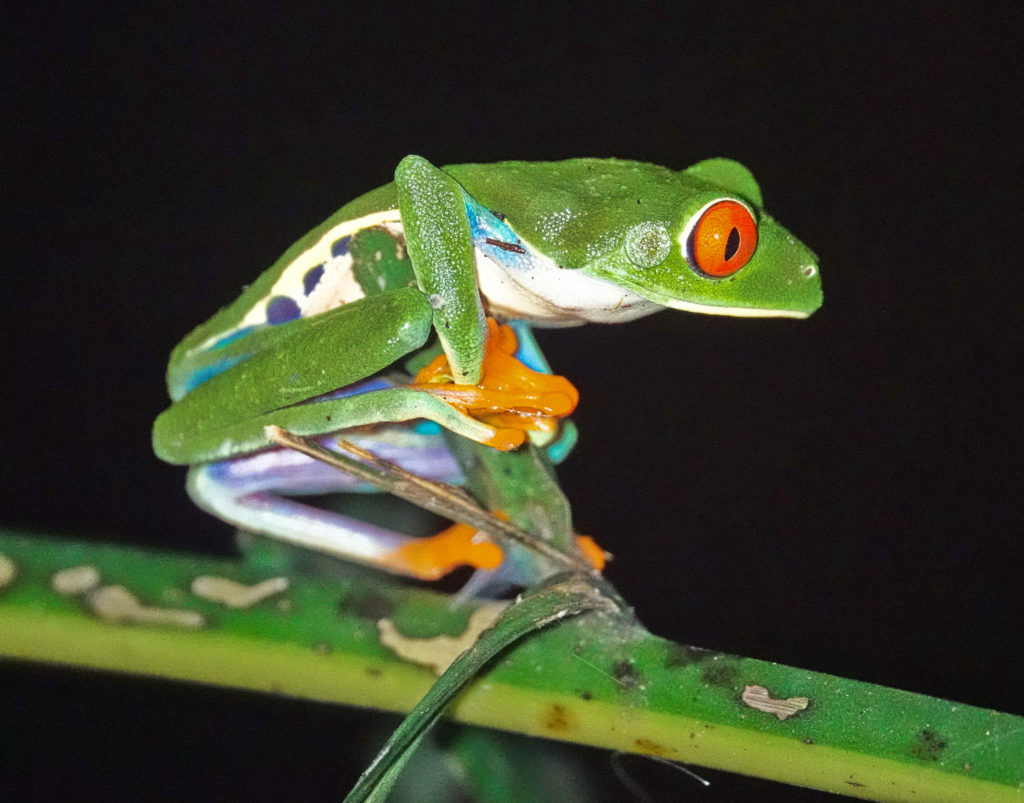
Out away from the feeders at Selva Verde: “Blue-jeans” Poison Dart Frog, White-faced Capuchin Monkey, Olive-backed Euphonia, Red-eyed Tree Frog, and another, from our night walk, Howler Monkey who woke me on our last day at Selva Verde
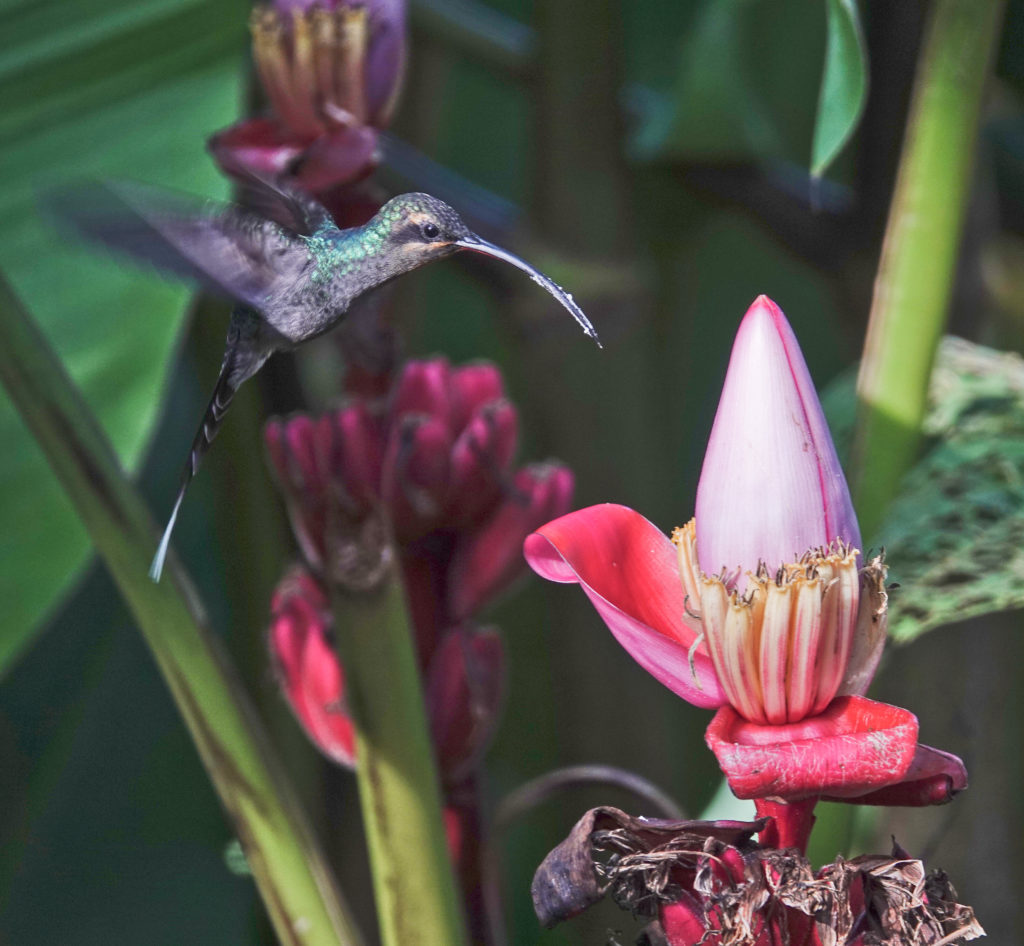
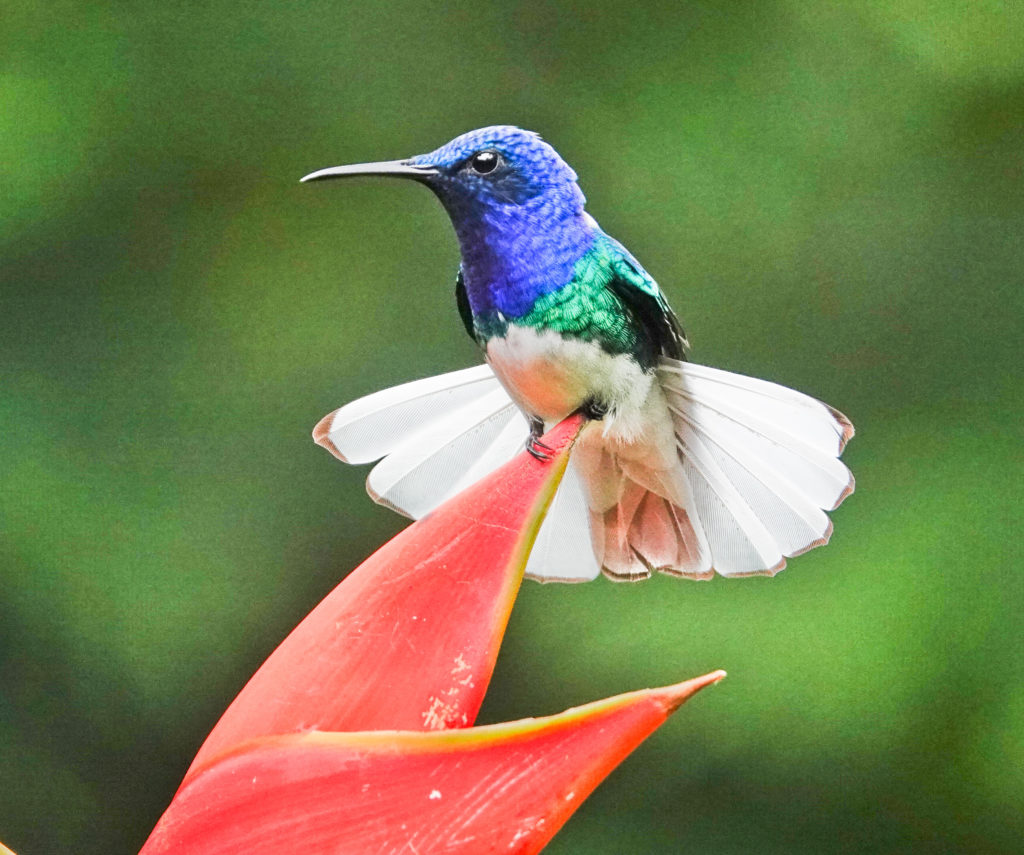
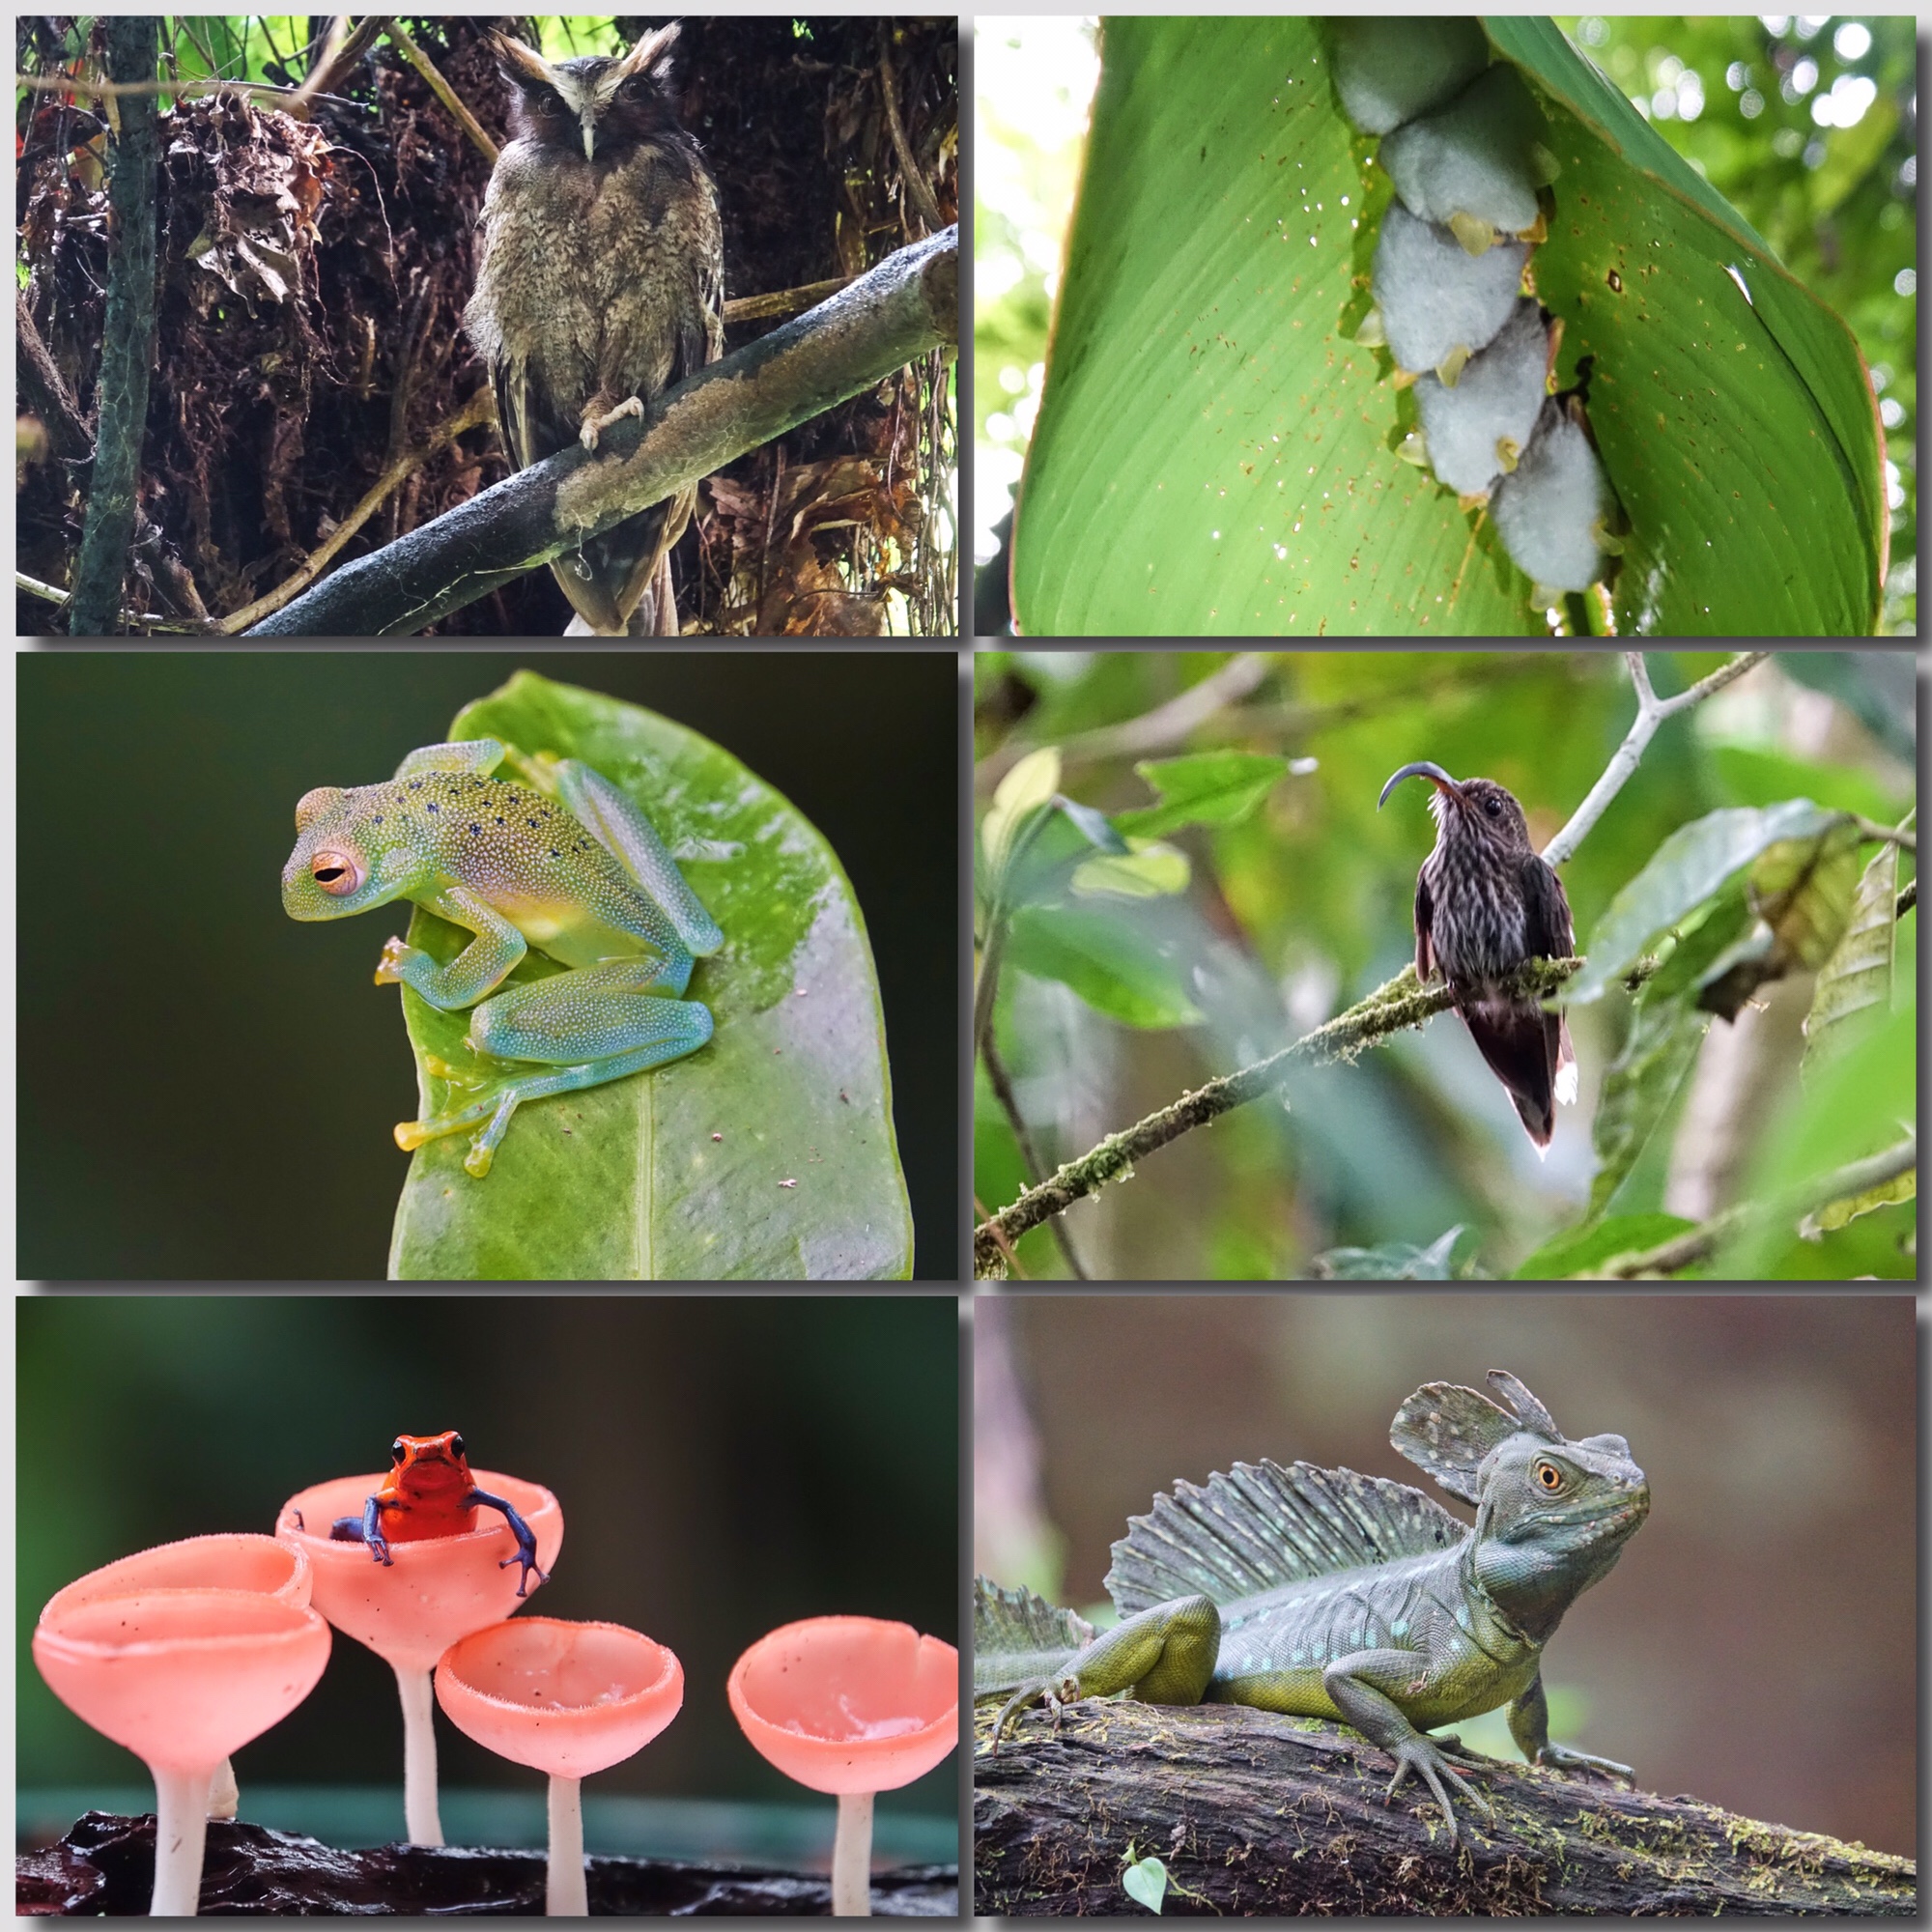
Before we even got to Selva Verde we visited the La Paz Waterfall Gardens on the mountain rim surrounding the high central valley and San Jose, where we saw a dozen different species of hummingbirds around the feeders and our first Barbets. Dave and Dave’s Costa Rican Nature Park, quite near Selva Verde lodge, has an array of carefully managed, natural looking, feeding stations that attracts Tanagers and Toucans, as well as a variety of rainforest hummingbirds. One afternoon we visited Cope, a native artist in La Union de Guápiles about 45 minutes from Selva Verde (http://copeartecr.com/) who not only showed us a Crested Owl in the rainforest, but took us back to his home, which he has transformed to something between a wildlife sanctuary and an outdoor photo studio, where he showed us all kinds of unique and interesting creatures, including a Glass Frog and the very rare White-tipped Sicklebill (hummingbird) which happens to come to his feeders.
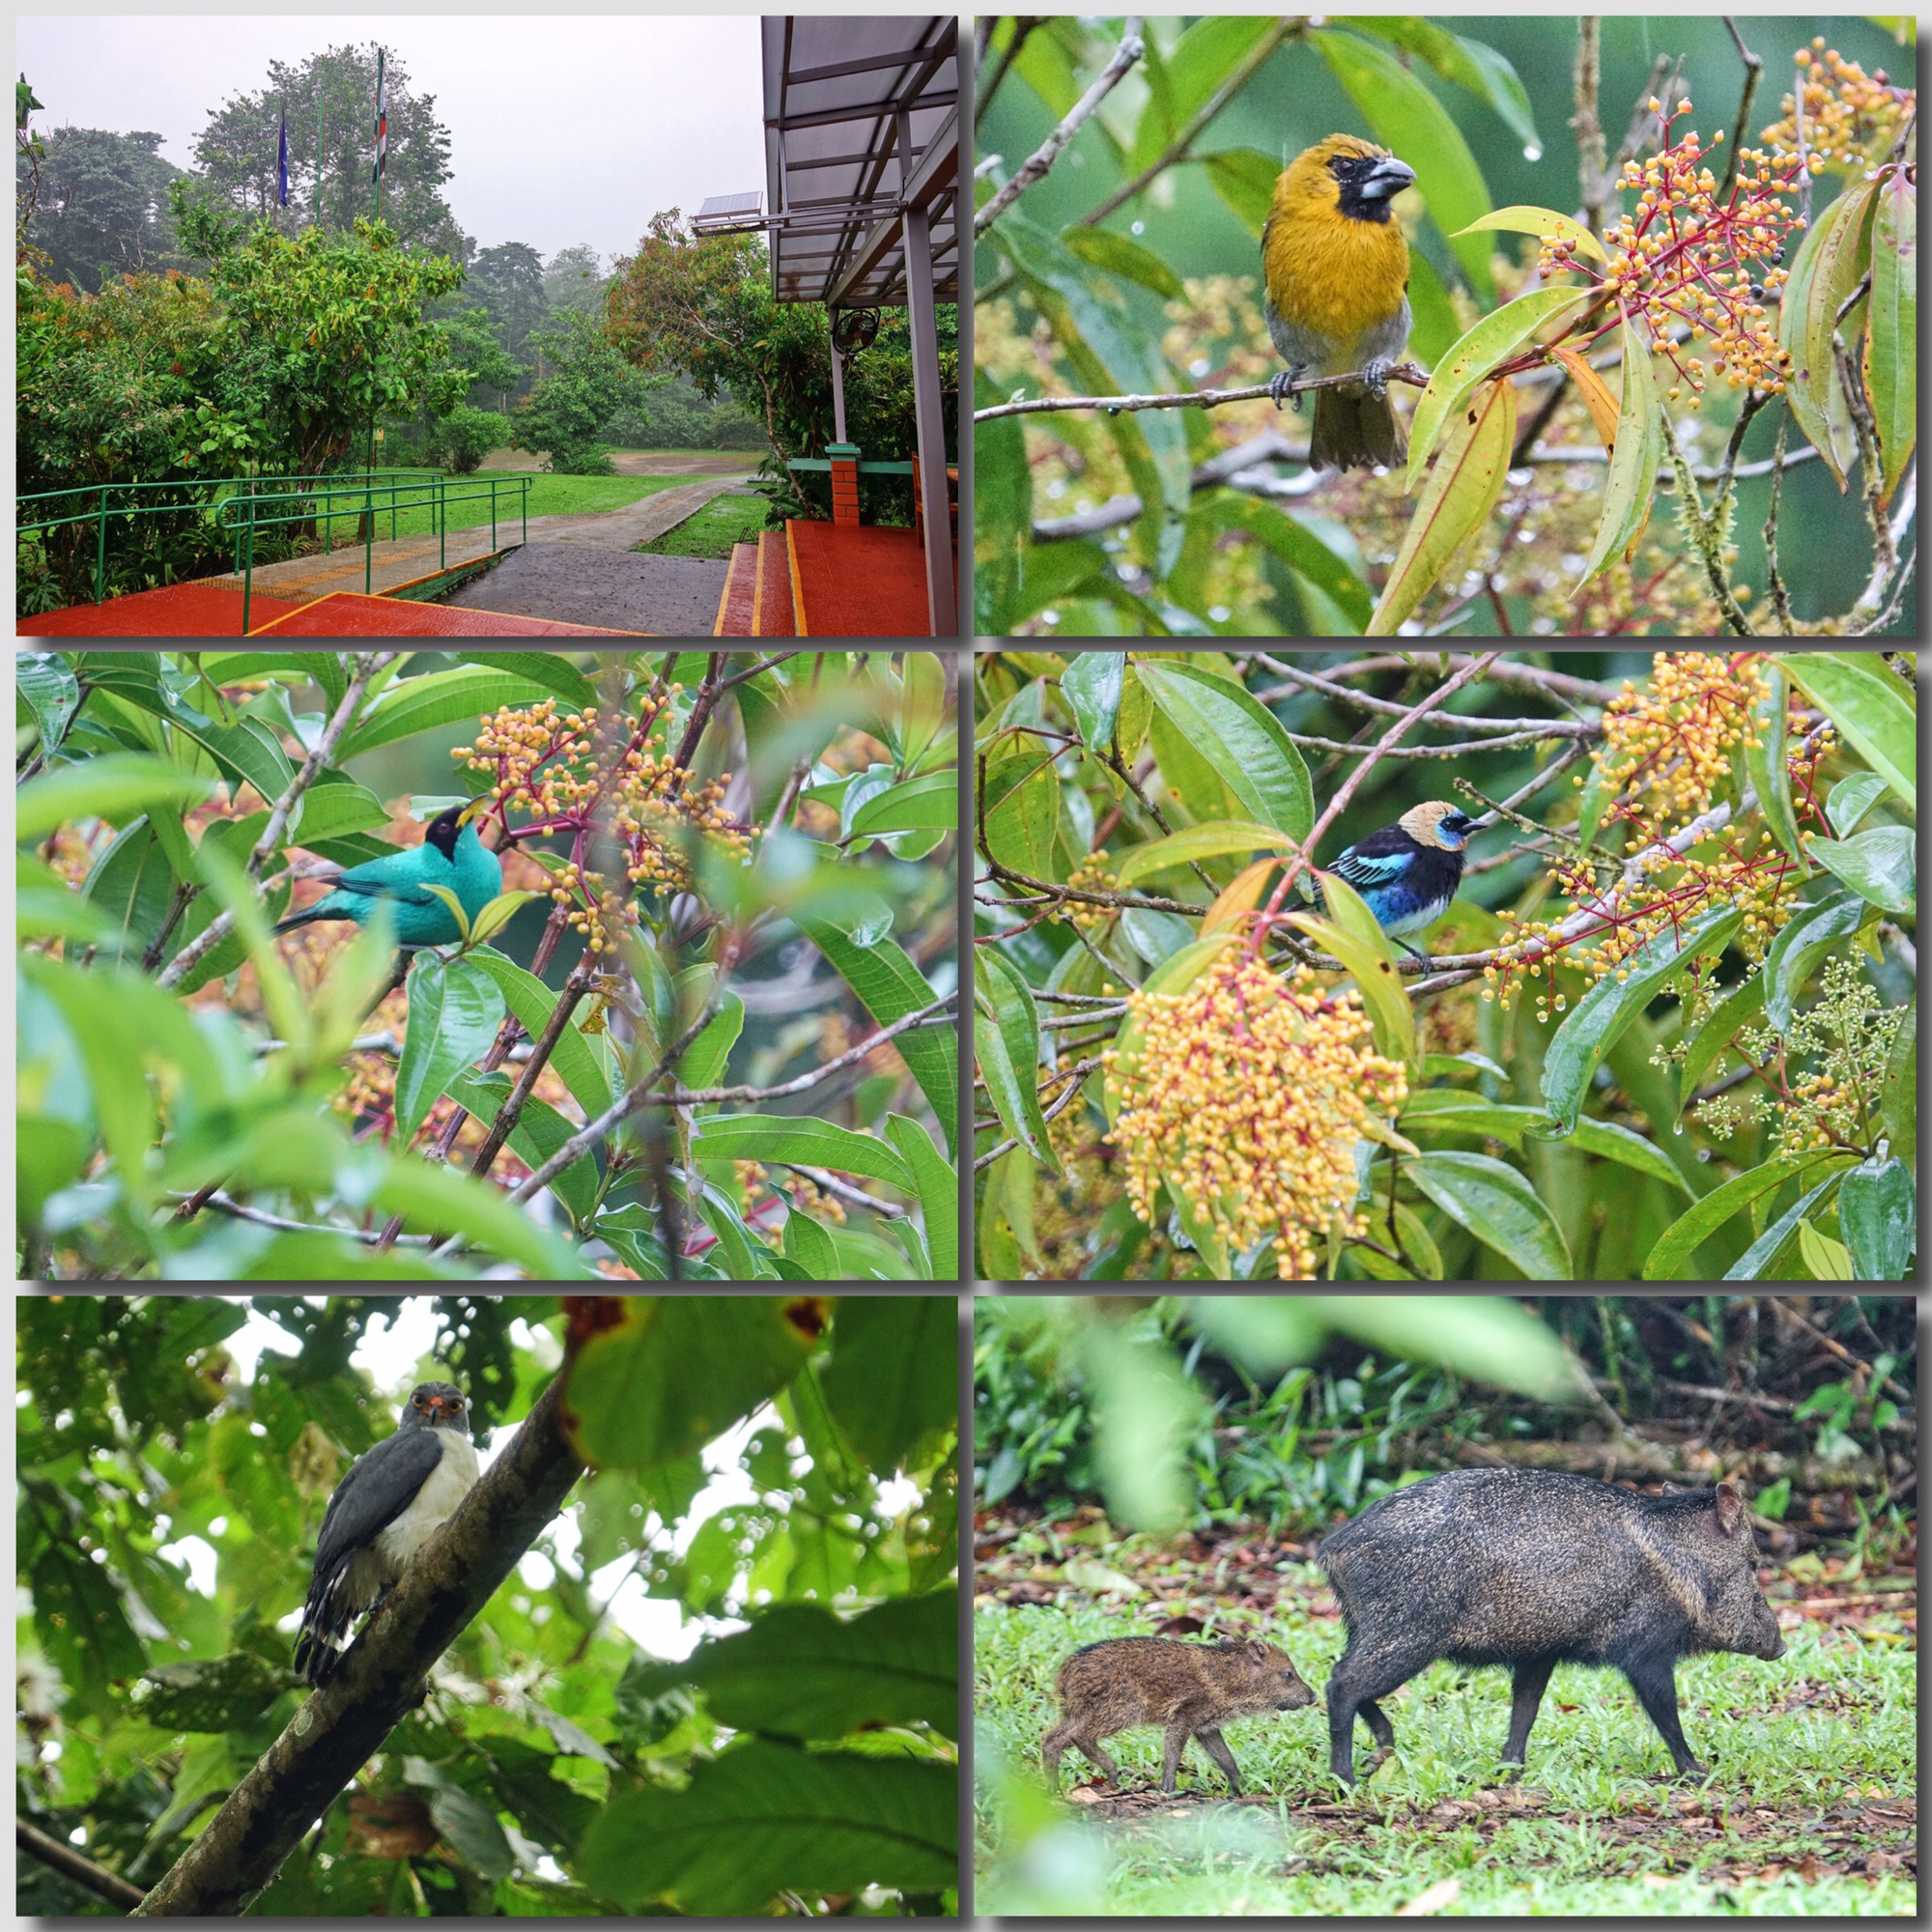
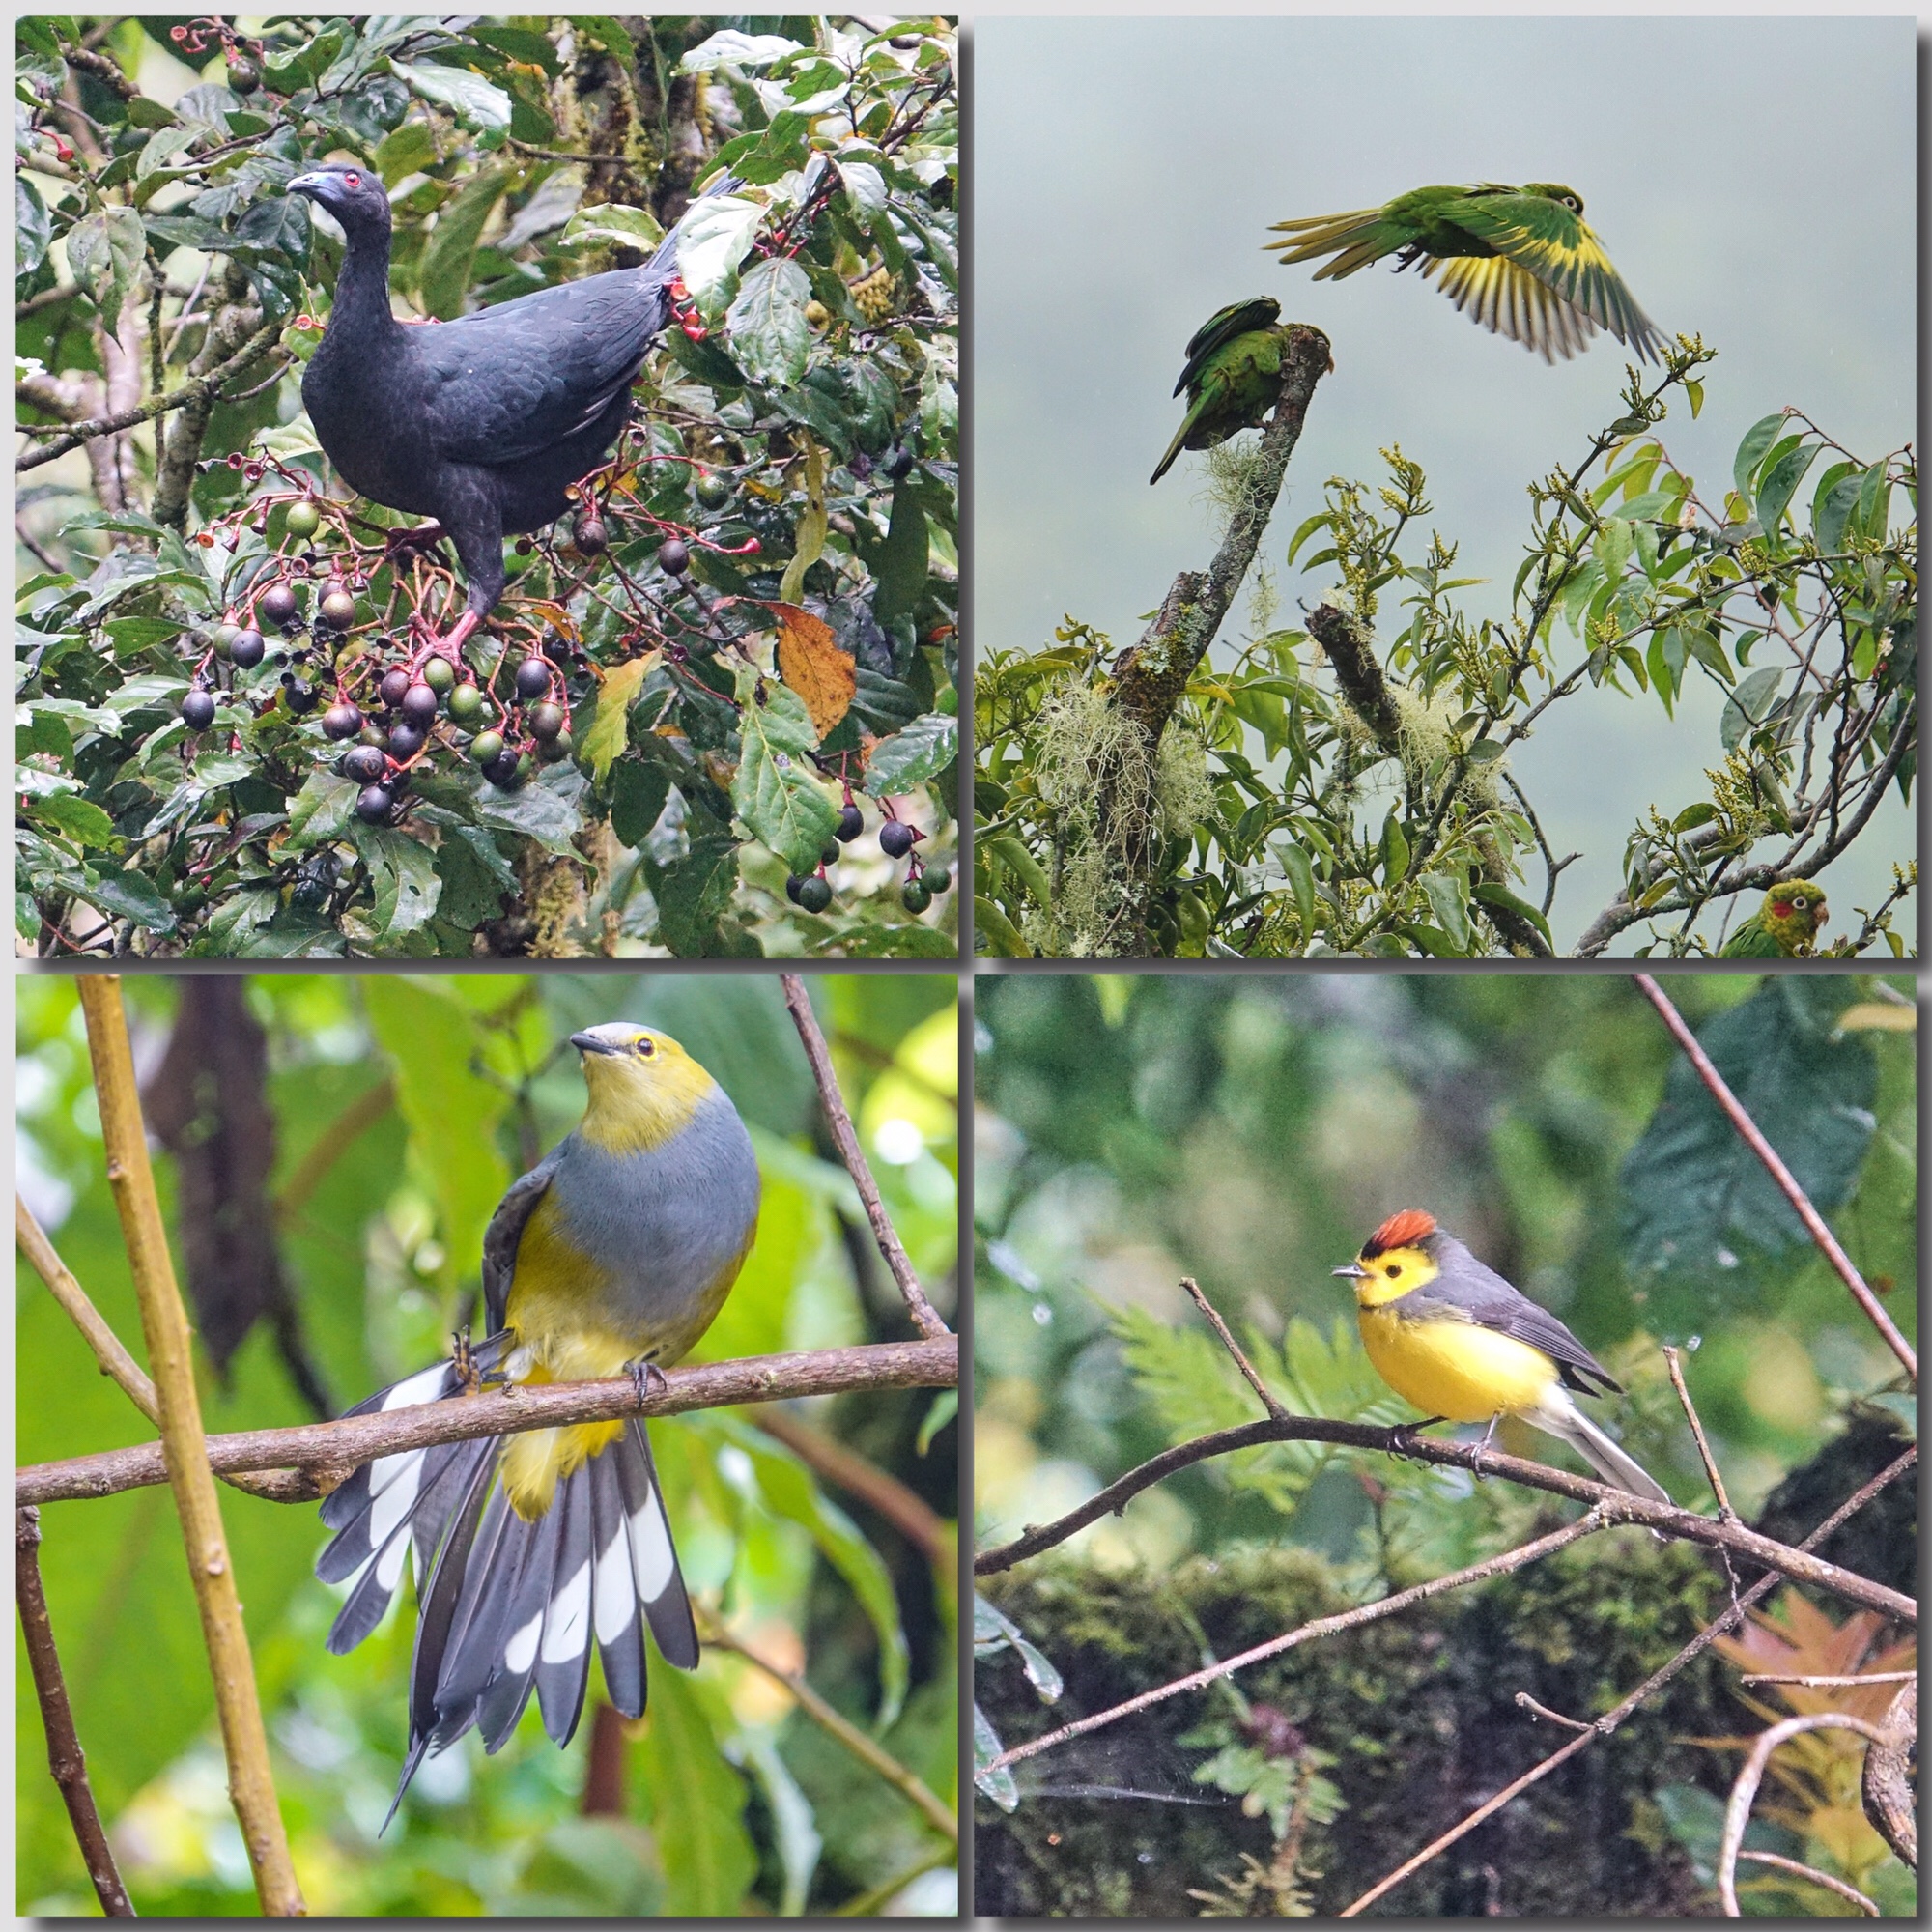
La Selva Biological Research Center is one of the most famous birding locations in Central America (or the world depending on who you talk to): Our day there was rainy and dark, but we still saw interesting birds right outside the restaurant patio. Black-faced Grossbeak, Green Honeycreeper, and Golden-headed Tanager. La Selva is one of the reserves that does not feed birds, but the native plants bring the birds in just the same. We later walked the paved forest trails and found this Semiplumbeous Hawk, and, near the research residences, a Collarded Peccary with young.
Some of the more “official,” publicly supported, reserves and research stations do not have bird feeders on principle…as they feel it keeps wildlife from the plants they would otherwise pollinate and may produce dependency on human resources. They rely on native plantings to bring the birds and wildlife in close. Dave and Dave’s or Cope’s are good examples, I think, of responsible feeding. At Dave and Dave’s they only put out banana slices (a low priority food for most birds) on natural vines hung around the photo patio, and backed by native flowering and fruiting plants. Their hummingbird feeders are kept to a 15 to 1 solution, with much less sugar than the natural nectars of the abundant native plants. The feeders bring the hummers in, but they spend most of their time, as I can attest, feeding on natural sources. Natural perches are provided and fresh Heliconia flowers daily where the hummers can drink. Dave and Dave are certainly very aware of their impact on the birds that they feed, and have made extraordinary efforts to restore native plants, fruits and flowers, on their property over the years they have owned it. In the process they provide some of the best photo opportunities for bird photographers to be found in the Serapique region. (http://sarapiquieco-observatory.com/welcome)
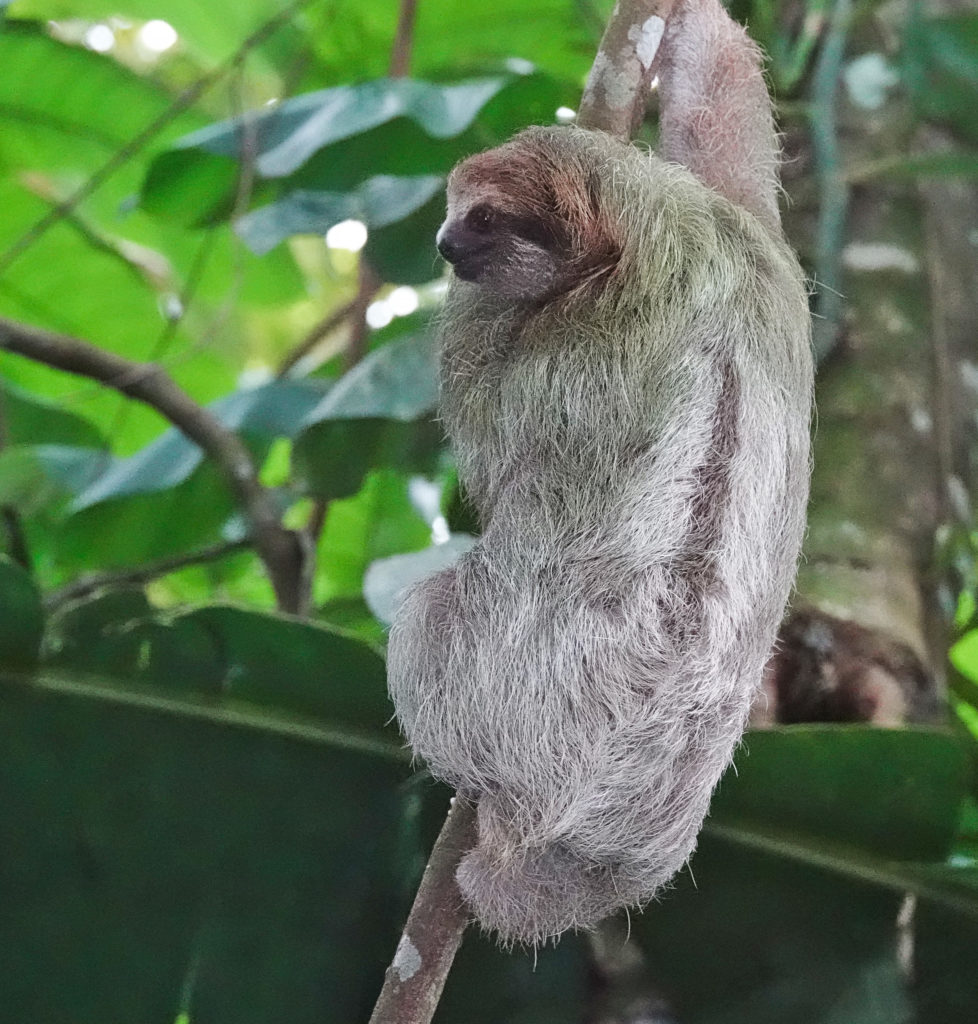
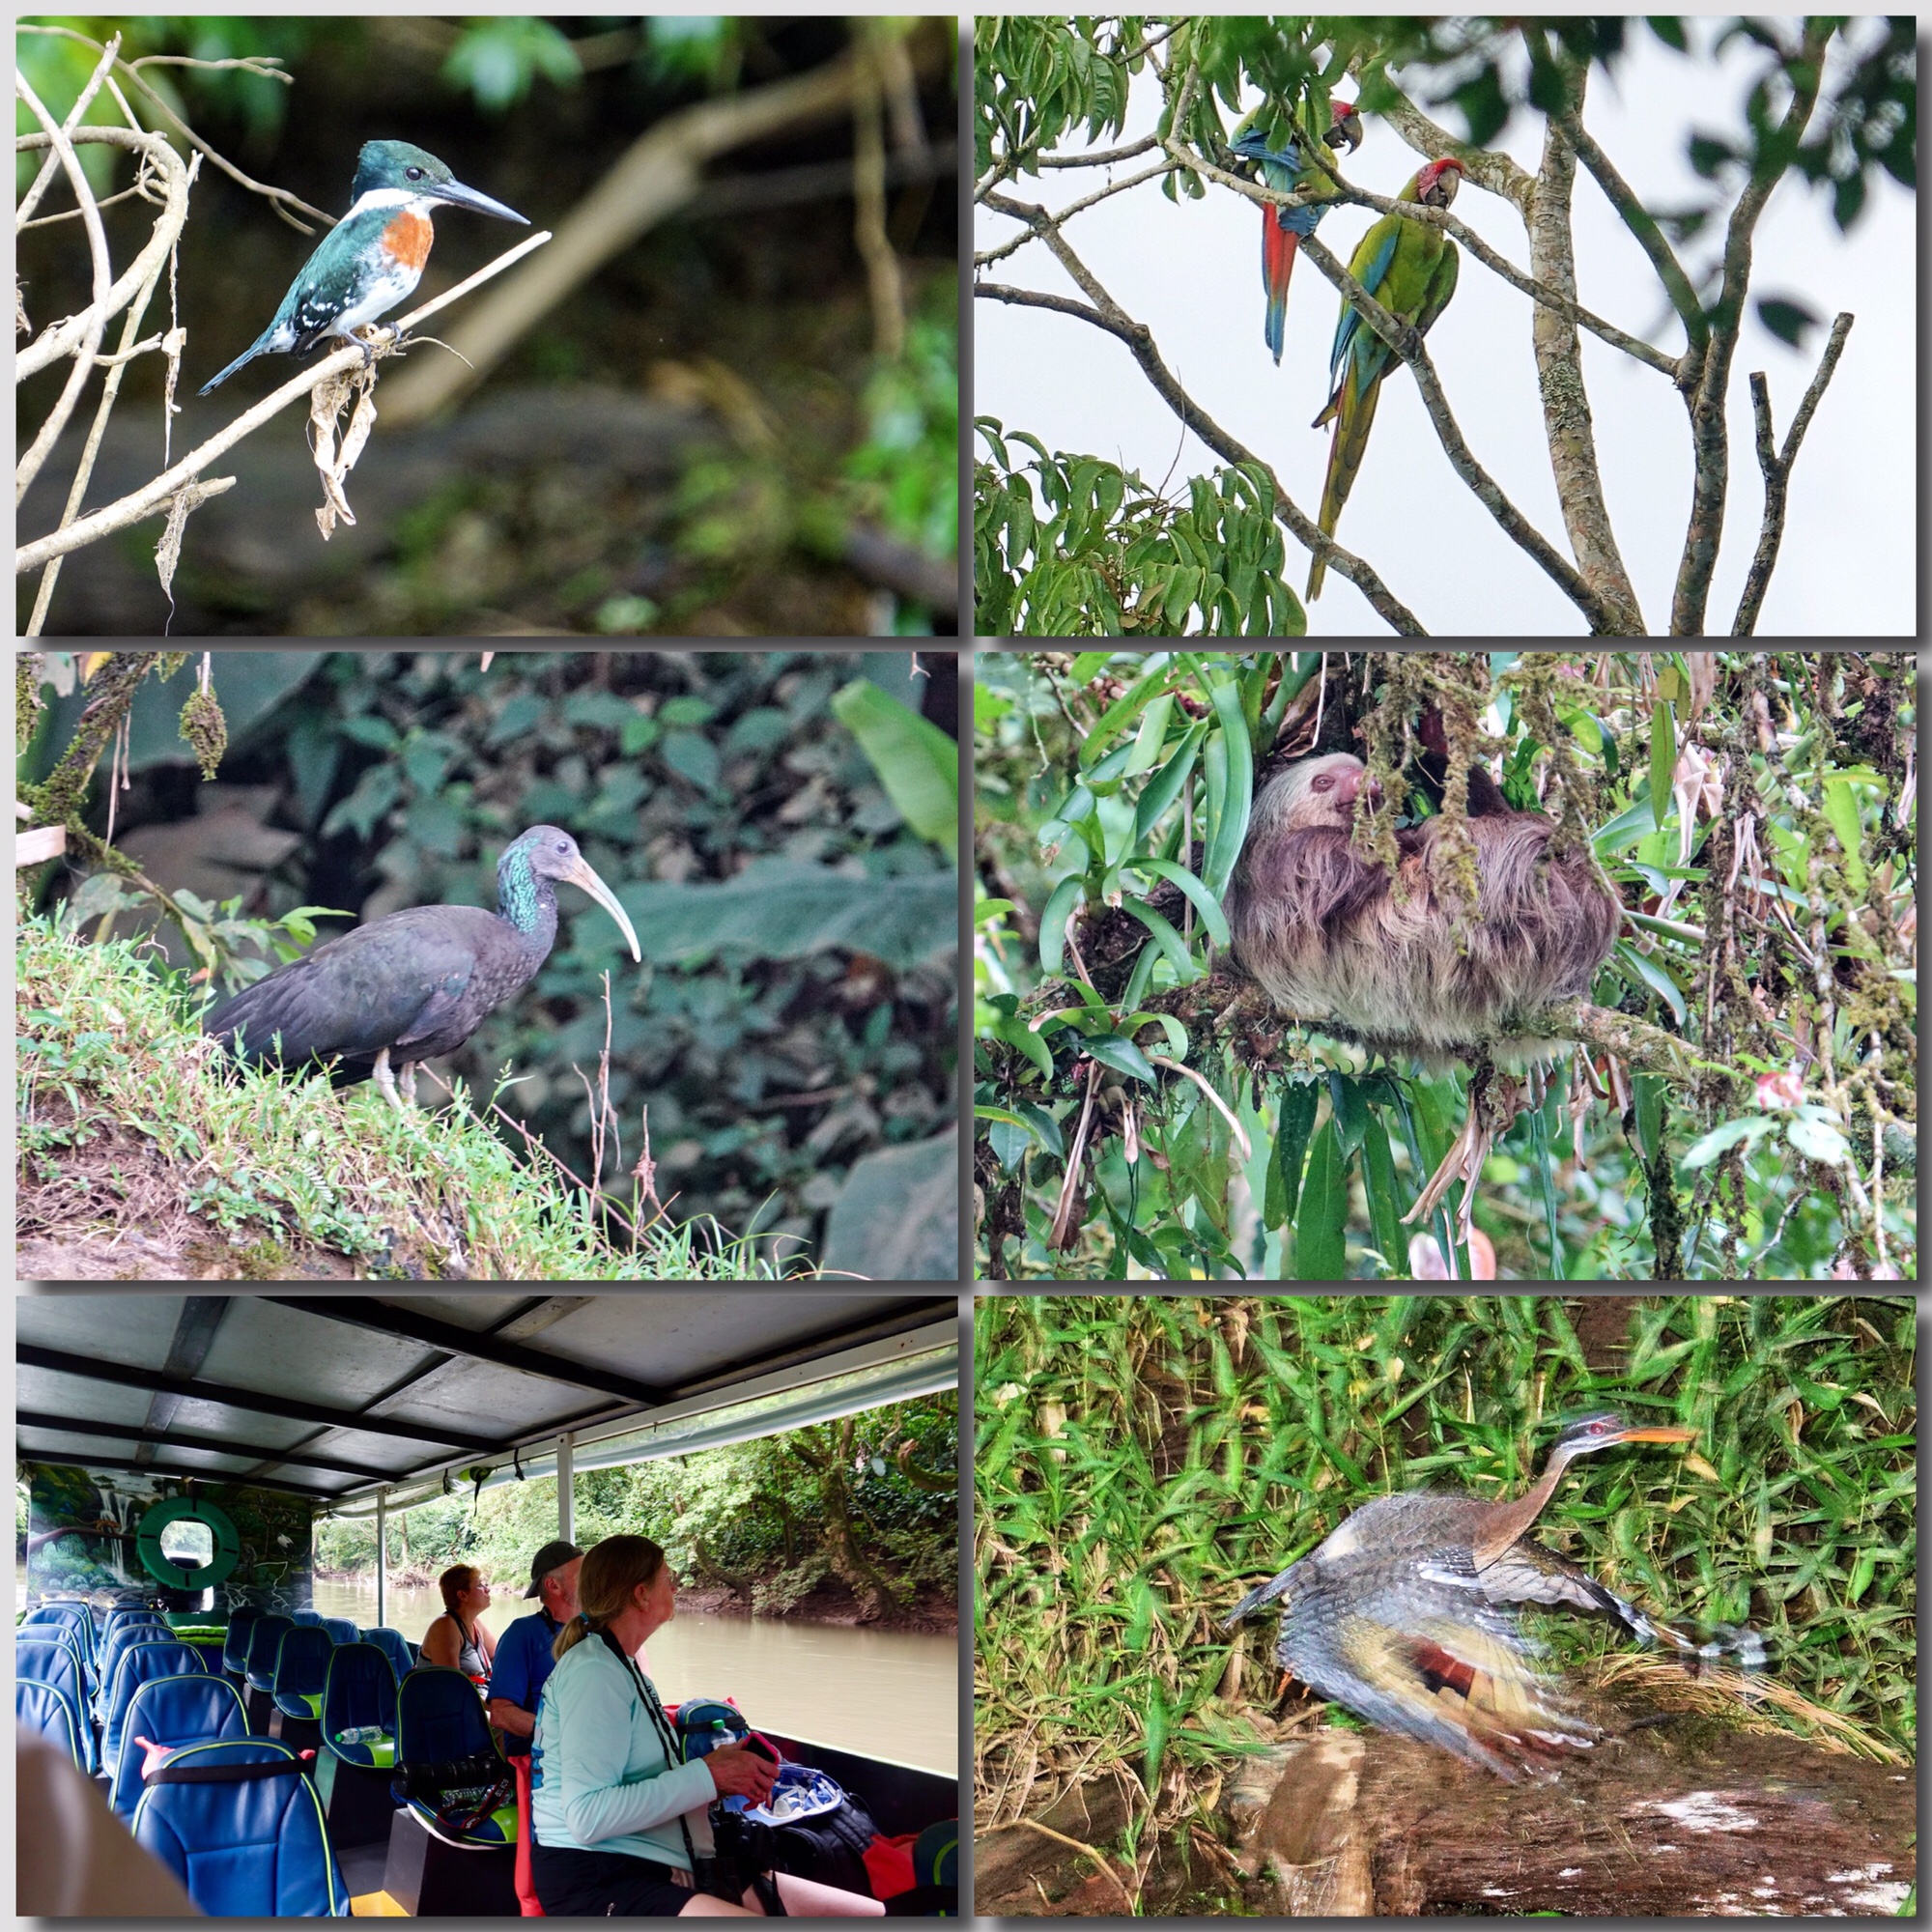
An afternoon on the Sarapique and Puerto Viejo Rivers: Amazon Kingfisher, Great Green Macaws (our closest and only perched views), Green Ibis, Sloth (with baby), well equipped and excellently captained tour boat, Sungrebe in flight (the highlight of the boat tour, seen as we were losing the light)
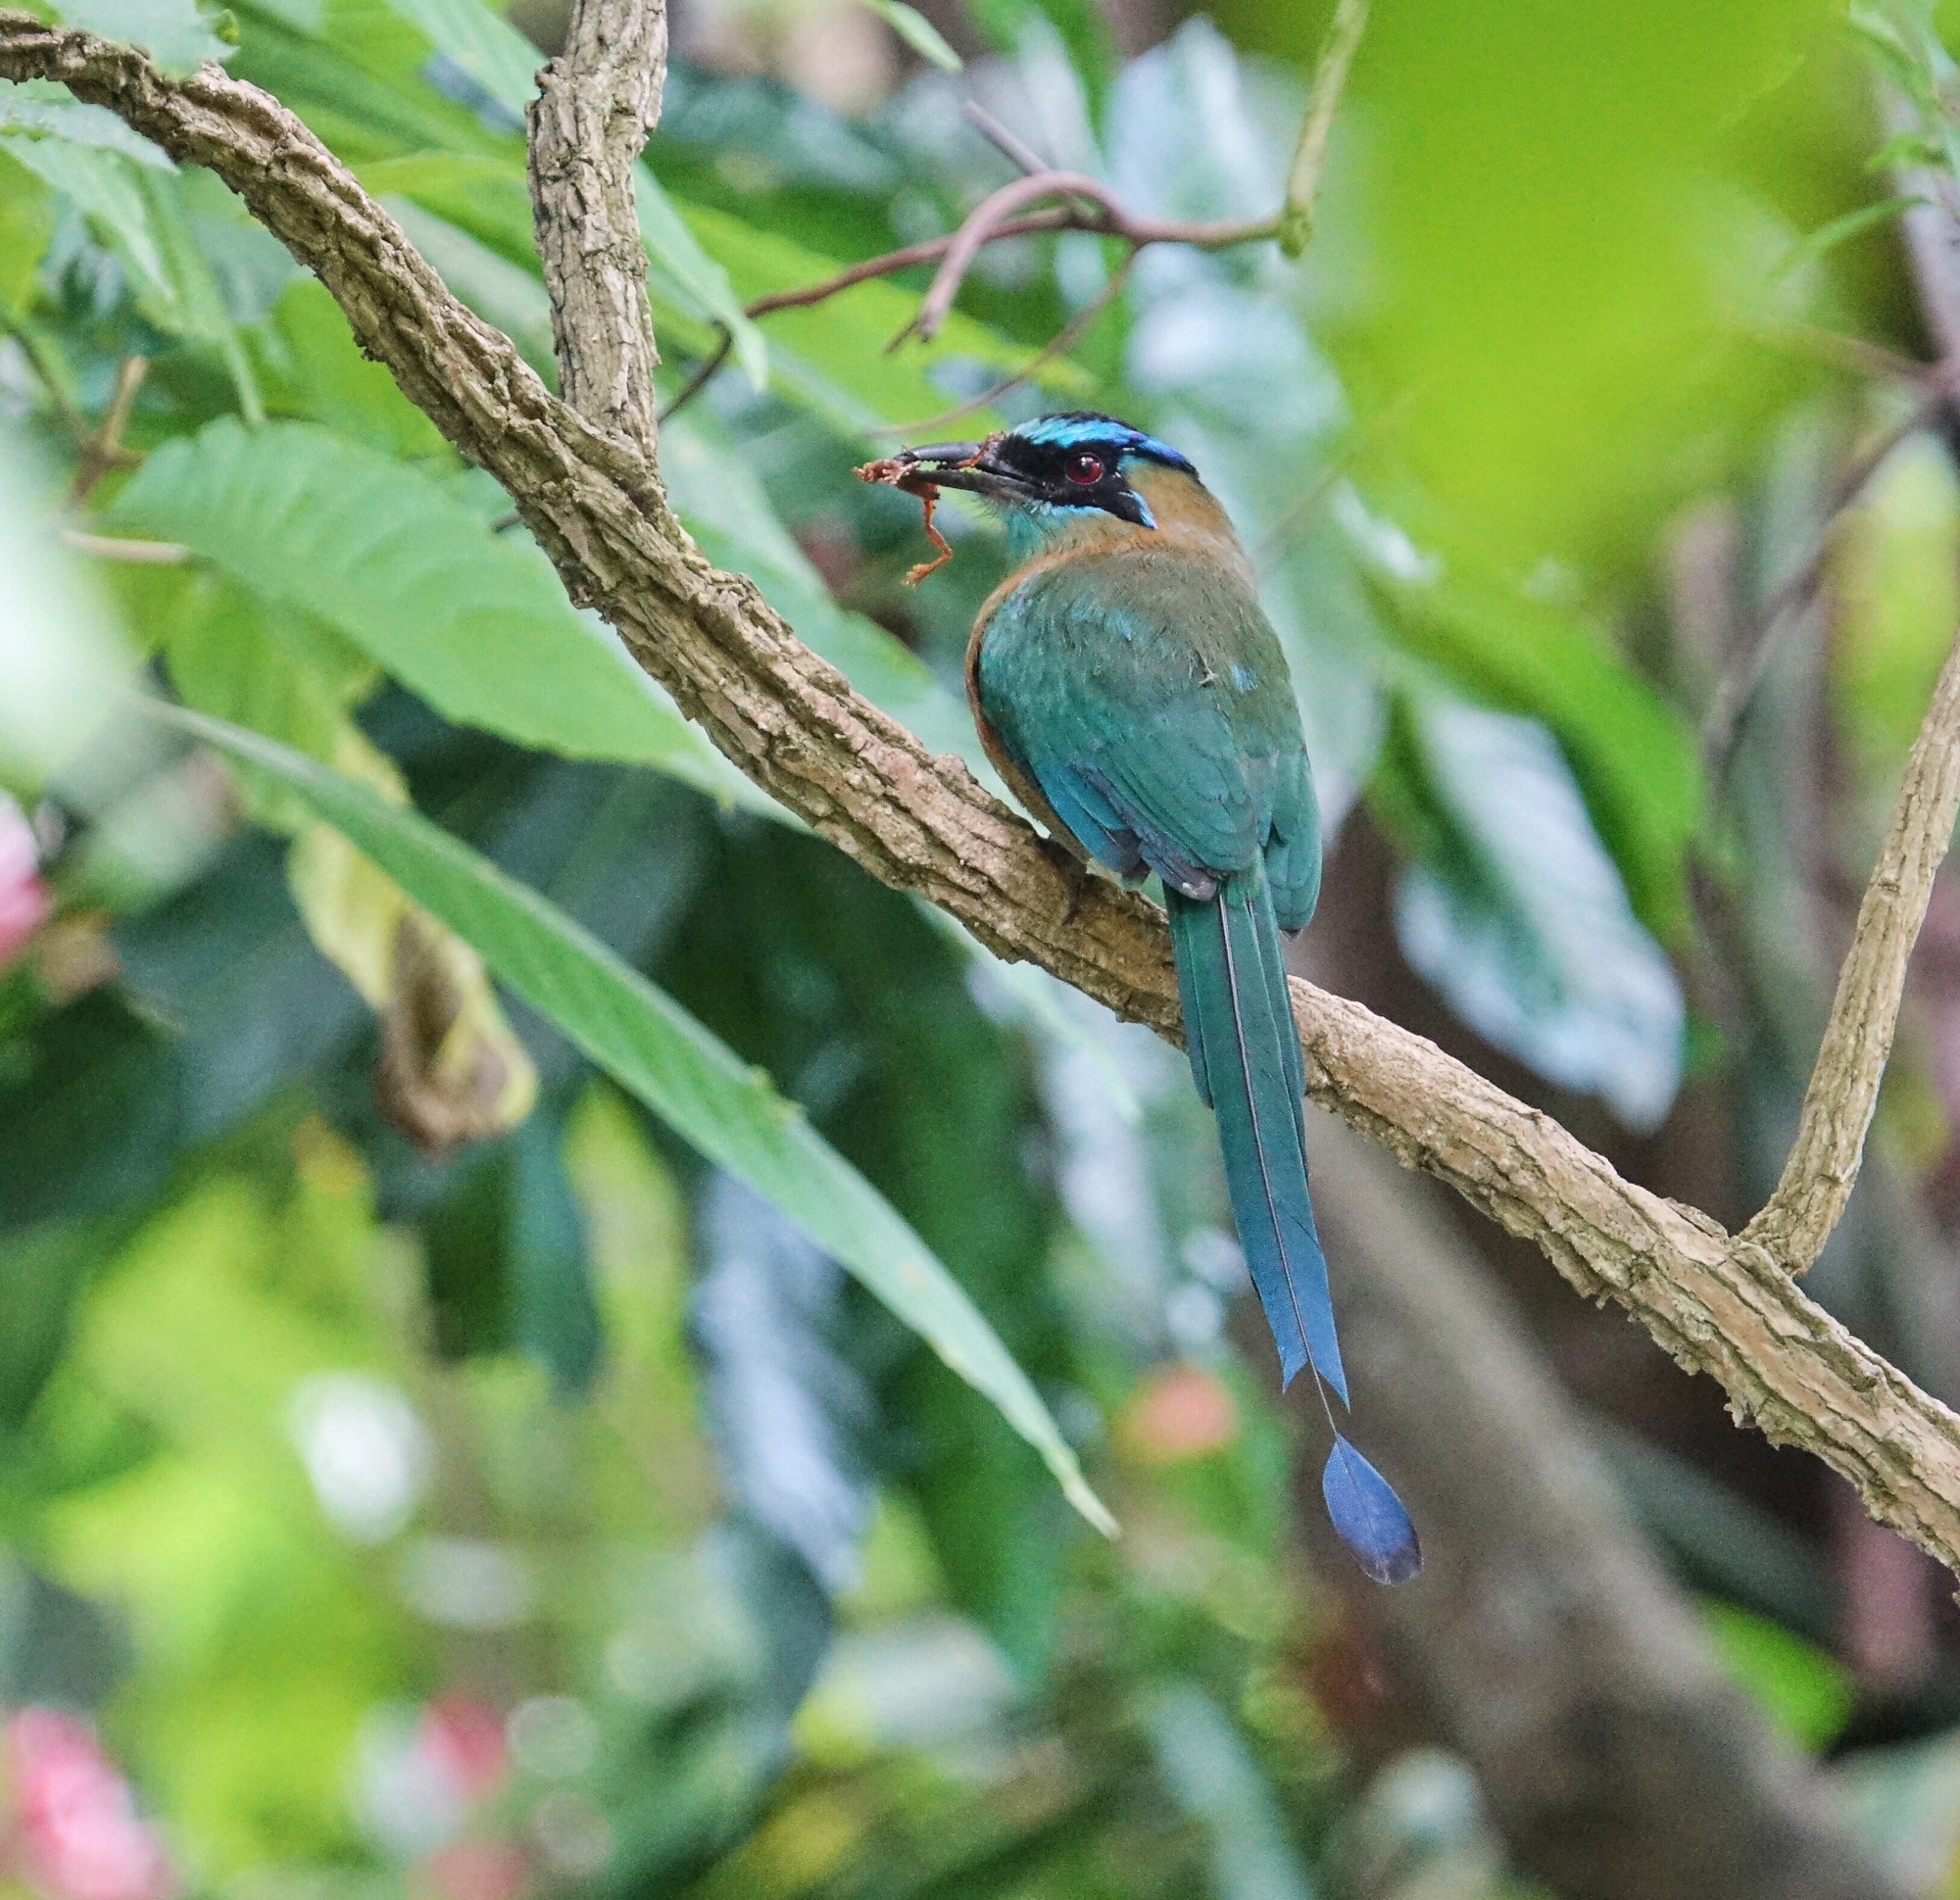
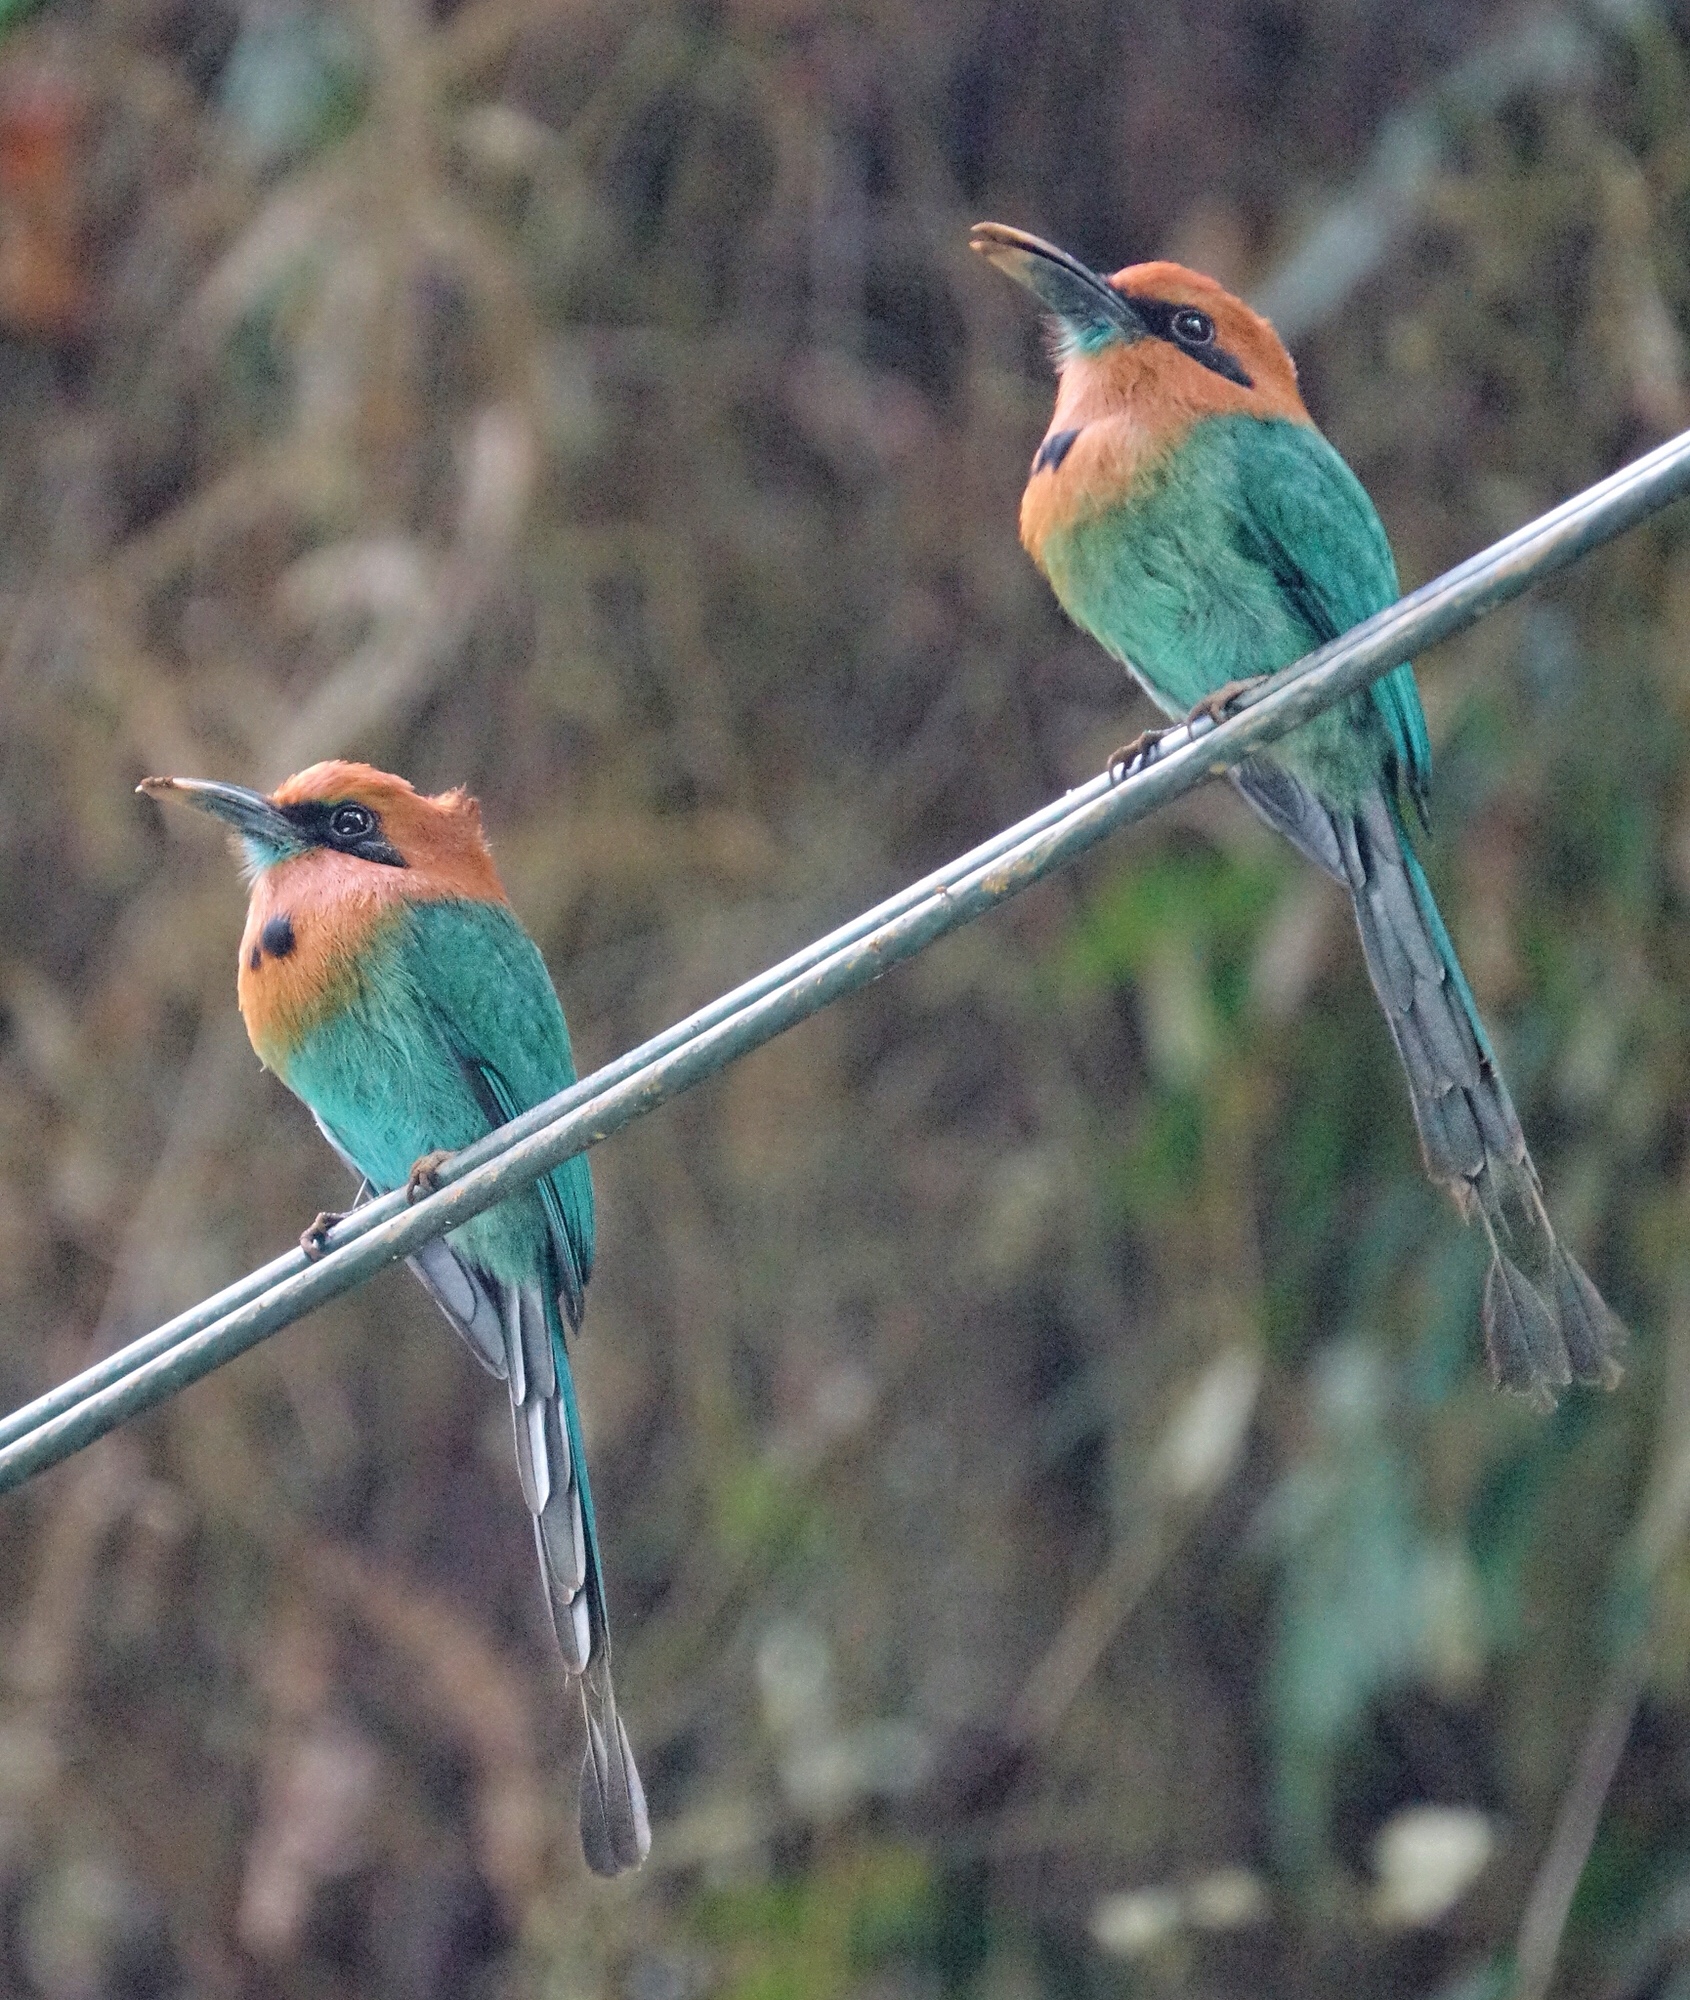
Broad-billed Motmots from the mid-level mountains near Socorro Costa Rica
Another factor that makes Costa Rica such a great ecotourism destination is the ease of access to such a wide variety of habitats. There are lodges, hotels, and reserves in every region, from dry forest in the north west, to the rainforest of the Caribbean lowlands, to the mid-level forest on the volcanic rims in the coffee country, to cloud forest at the higher elevations…all accessible by well maintained roads. And much of it is no more than 2-3 hours from San Jose’s international airport.
With Cope in the rainforest to find the Crested Owl and Honduran White Tent-making Bats, and then at his home for some exotic photography. He had collected the frogs the night before (Glass Frog and Poison Dart Frog) and set them up in his outside studio for natural looking shots. The White-tipped Sicklebill, one of the rarest hummingbirds in Costa Rica, comes to his feeders daily, and he has been photographing this big male Basilisk Lizard for over 10 years.
And everywhere you go, the people of Costa Rica are ready to show off their country and their wildlife. Near Savegre Hotel there is a tree up on a hillside that is famous for its Resplendent Quetzals. Right tree, right place. The farmer who owns the land has built a rough trail up the all but vertical slope, complete with hand-rails, and chopped out a platform on the hillside across from the tree where birders and photographers can stand to watch and photograph the Quetzals as they come in to feed. The day we visited, he met us at the foot of the trail and accompanied us up to the platform, as delighted as we were with the birds, though he sees them every day. He collects a small fee from birders and photographers who want to see “his” Quetzals, that helps his family to survive (hopefully more than survive) and gives him incentive to keep the land as natural as possible. He could easily rip out the wild avocado trees otherwise, and plant coffee or corn.
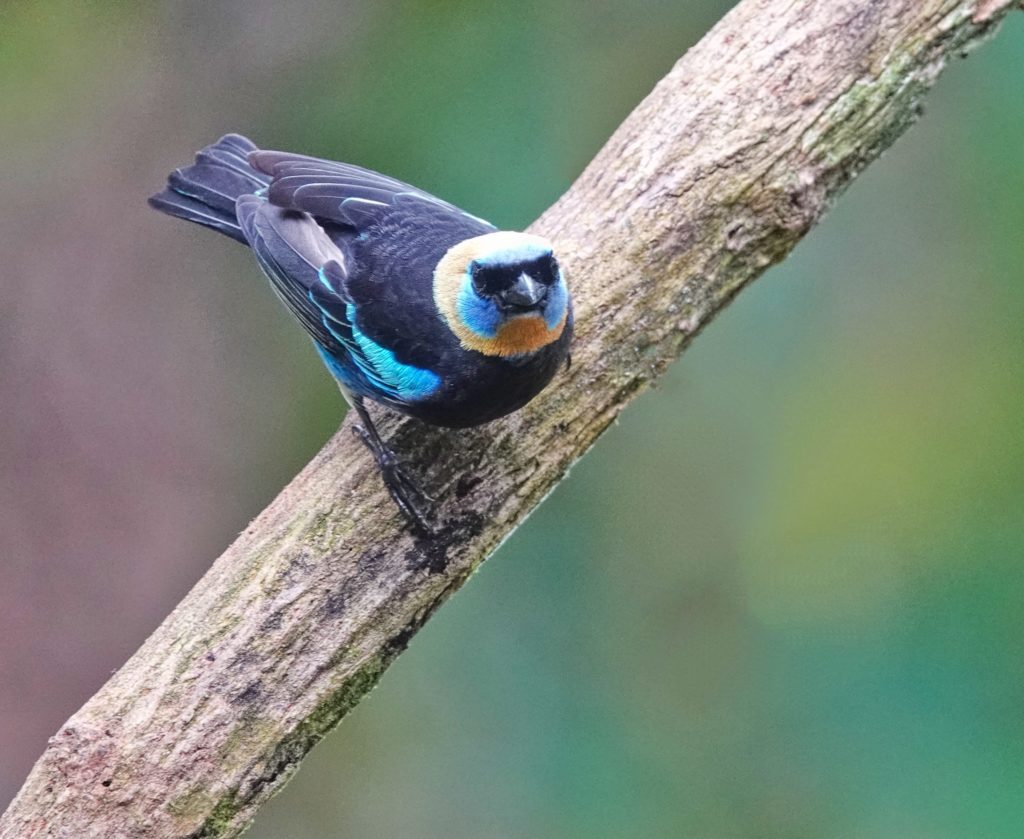
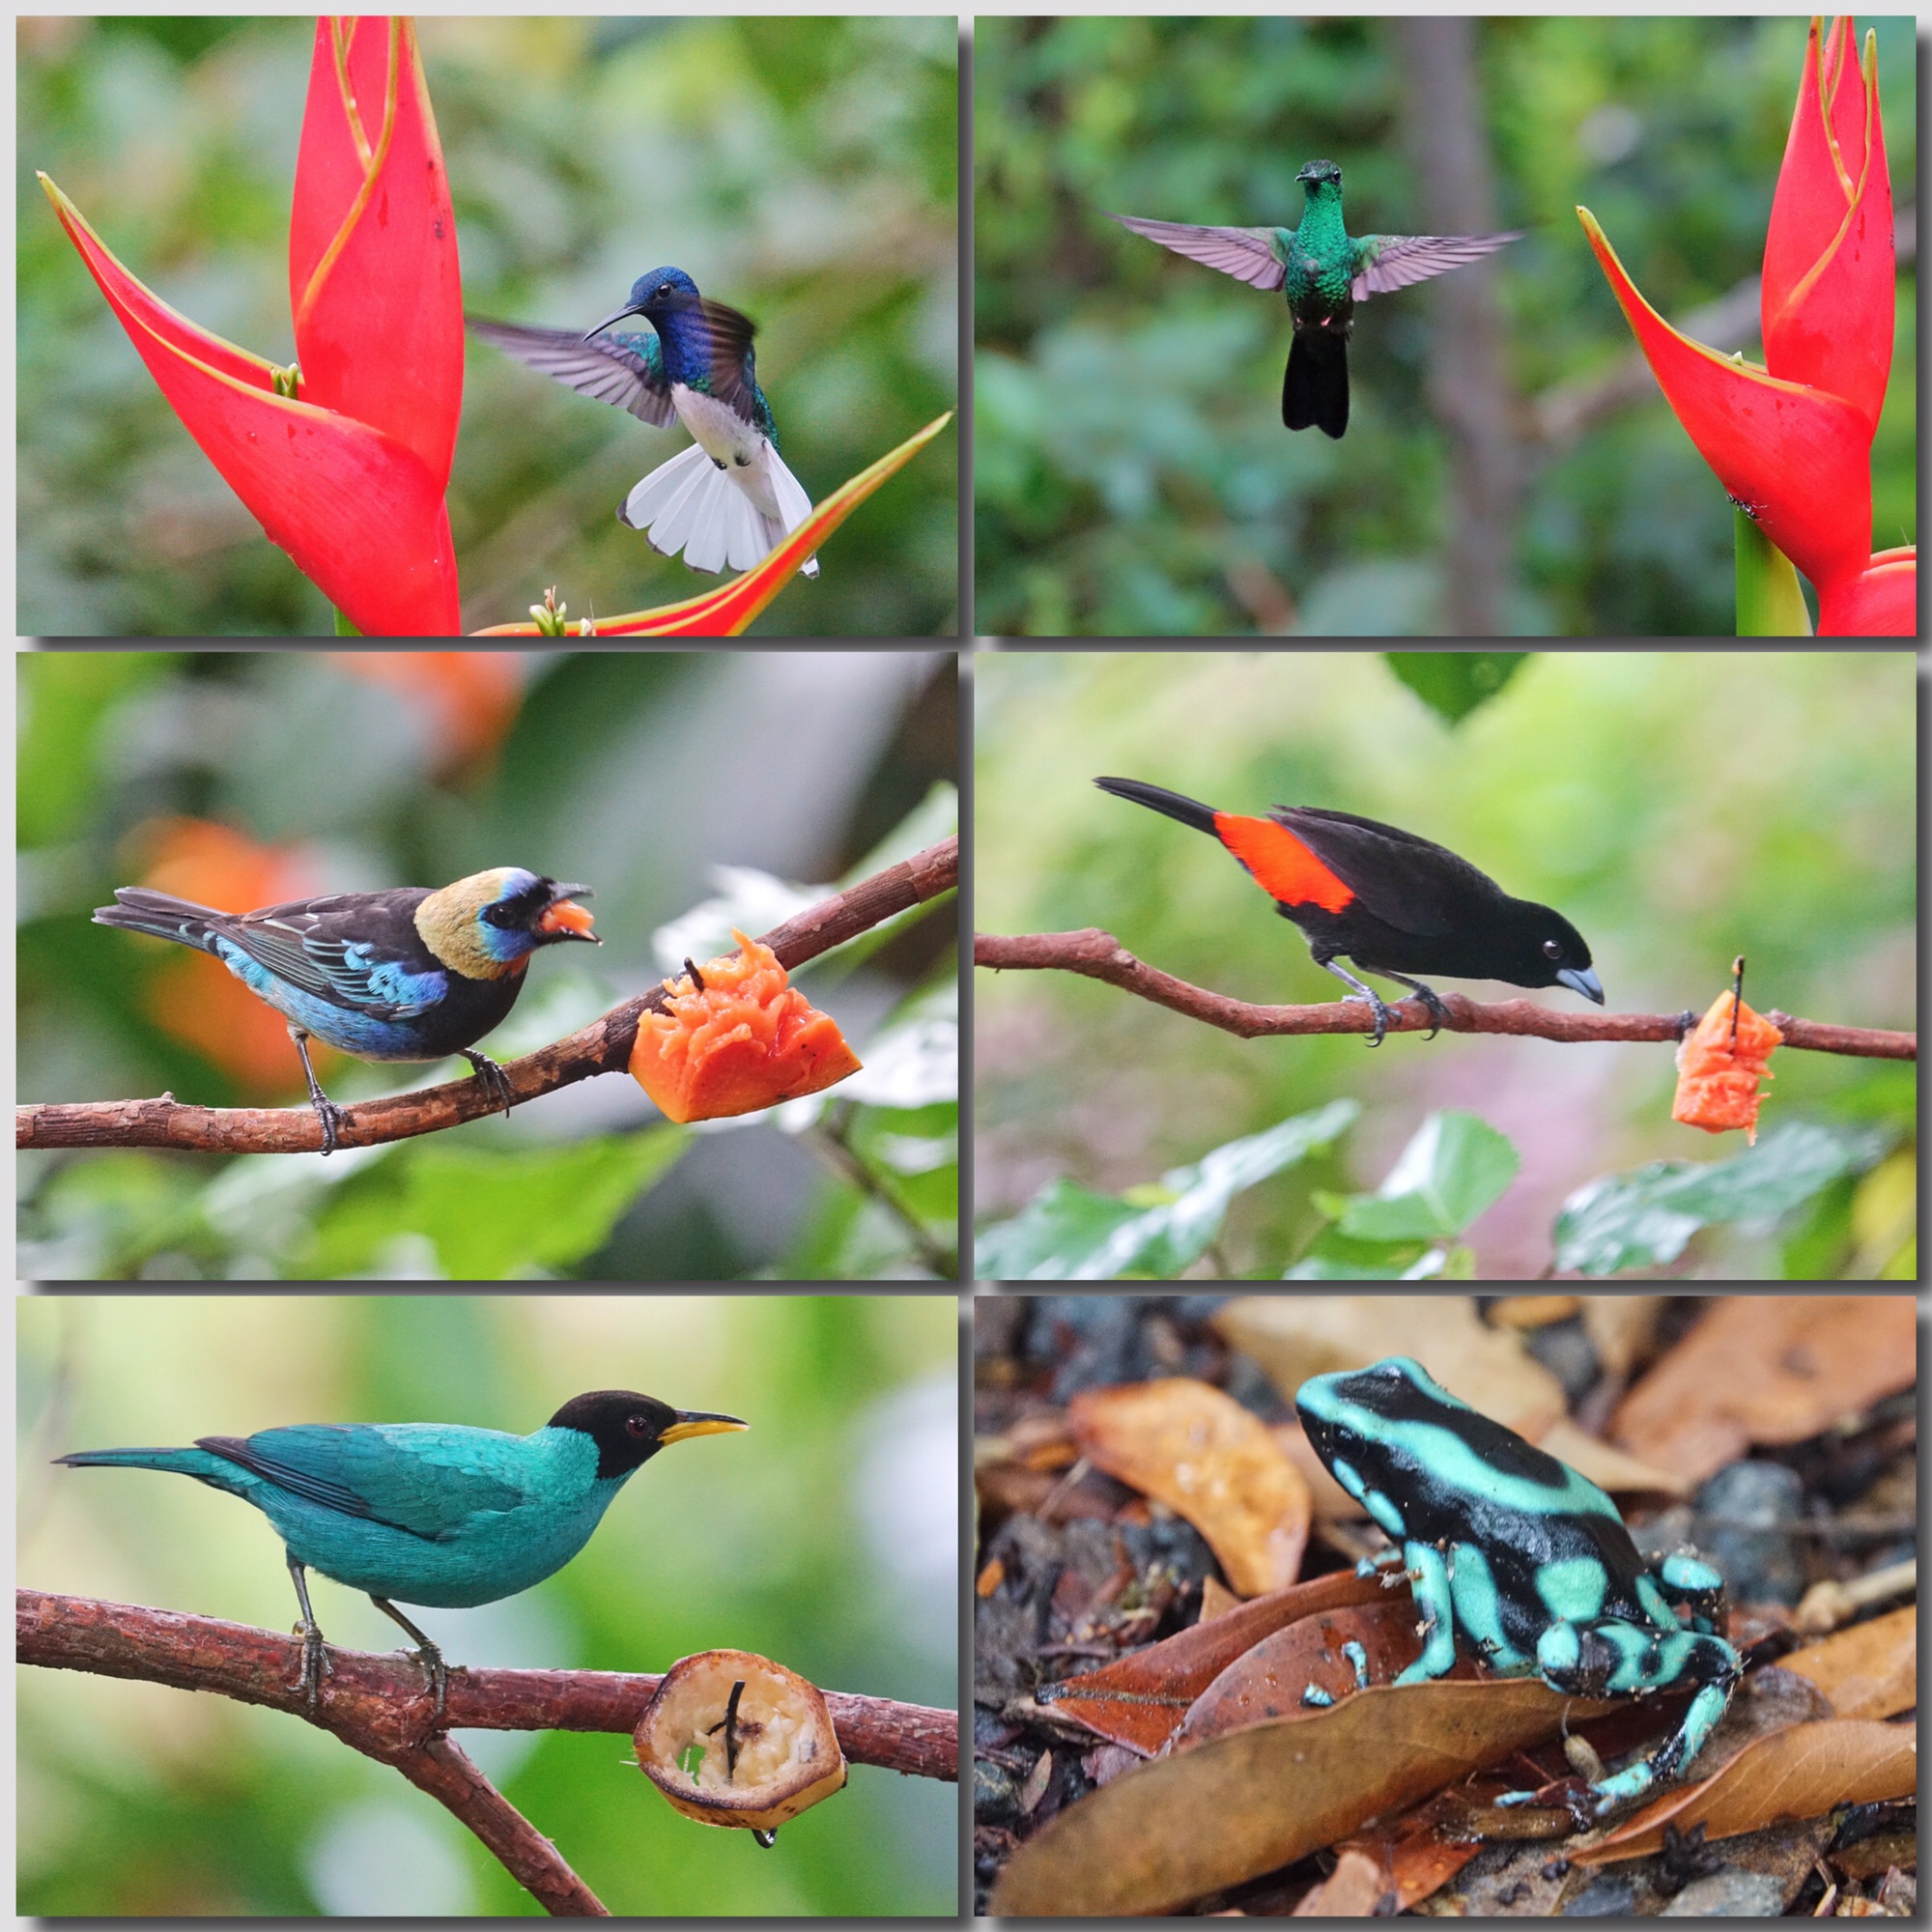
Dave and Dave’s Costa Rican Nature Park is a small private reserve with exceptional photo opportunities. White-necked Jacobin at Heliconia flower, Bronze-tailed Plumeleteer, Golden-headed Tanager, Passerini’s Tanager, Green Honeycreeper, Poison Dart Frog.
More from Dave and Dave’s. Shining Honeycreeper and Plain-colored Tanager, Crimson-collared Tanager, Blue-grey Tanager, Female White-necked Jacobin
All of the native guides and naturalists we met and worked with were well trained, knowledgeable, and delighted to be of help in our understanding of what we saw and experienced. Costa Rica does have an extensive and through guide training program that includes ornithology, biology, botany, geography, history, ecology, and first aid…and, of course, the interpreters at the official research stations are generally graduate-students or research assistants, experts in their fields. If you work with an experienced tour company like Holbrook, you can be confident that you will be in good hands while in Costa Rica.
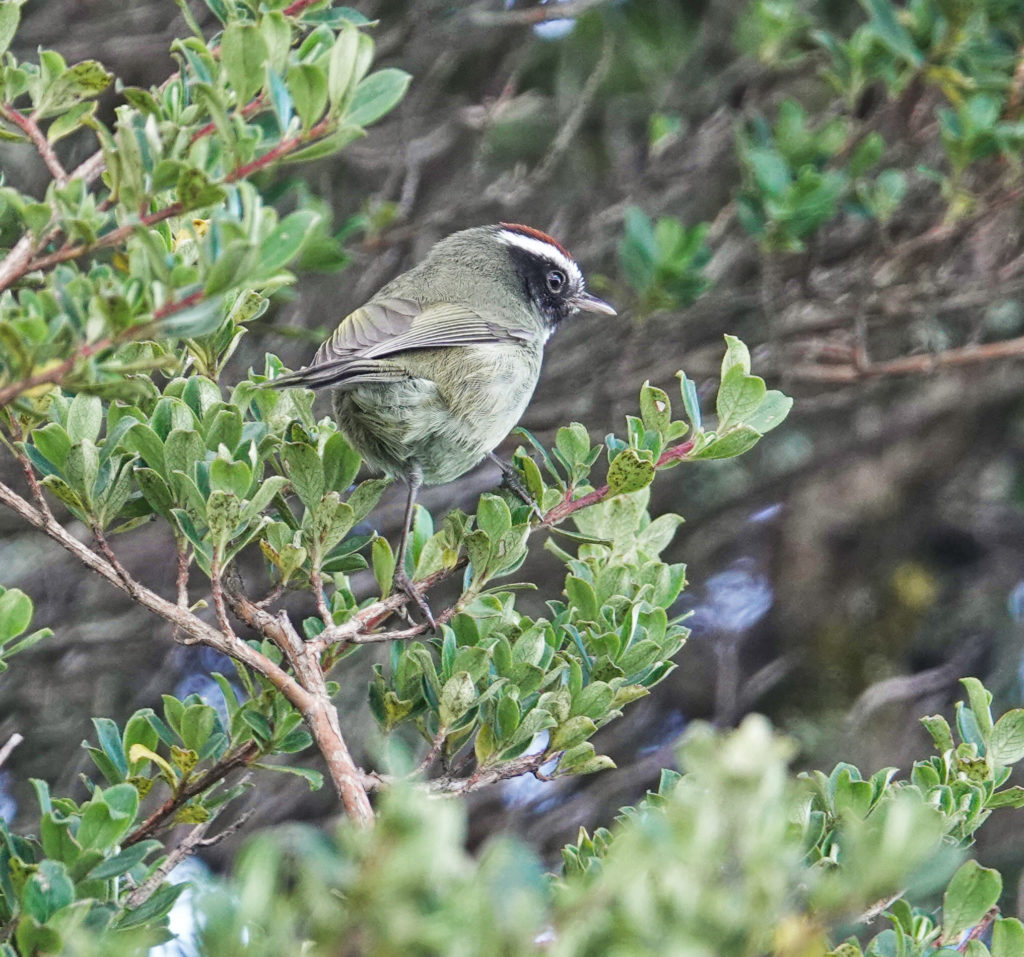
Cloud Forest and mountain specialties around the Savegre Hotel: Volcano Hummingbird (another Costa Rican endemic), Flame-colored Tanager, Slaty Flowerpiercer, Firey-throated Hummingbird, Julia Heliconian, Snow-bellied Hummingbird.
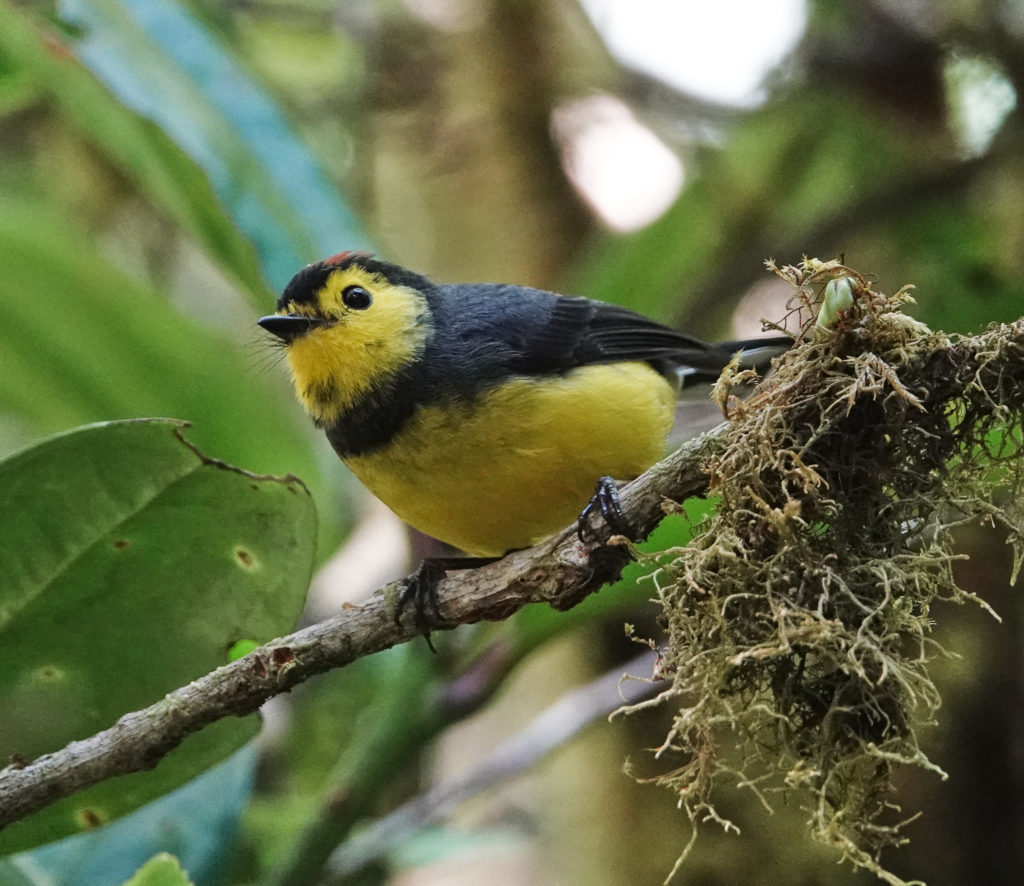
Black Guan, Sulpher-winged Parakeet, Long-tailed Silky Flycatcher, Collared Redstart
I was impressed enough with the potential (and the reality) of Costa Rica to plan to return with another group next year. I can not imagine any birder or photographer going there and not wanting to go back. A amazing country, amazing wildlife, an amazing experience, and amazing memories. That is what Costa Rica has to offer.
Resplendent Quetzal, near Savegre Hotel in the cloud forests of Costa Rica. Worth the trip all on its own.
All of the photographs in this article were taken with the Sony RX10iii and processed in Polarr on my iPad Pro.
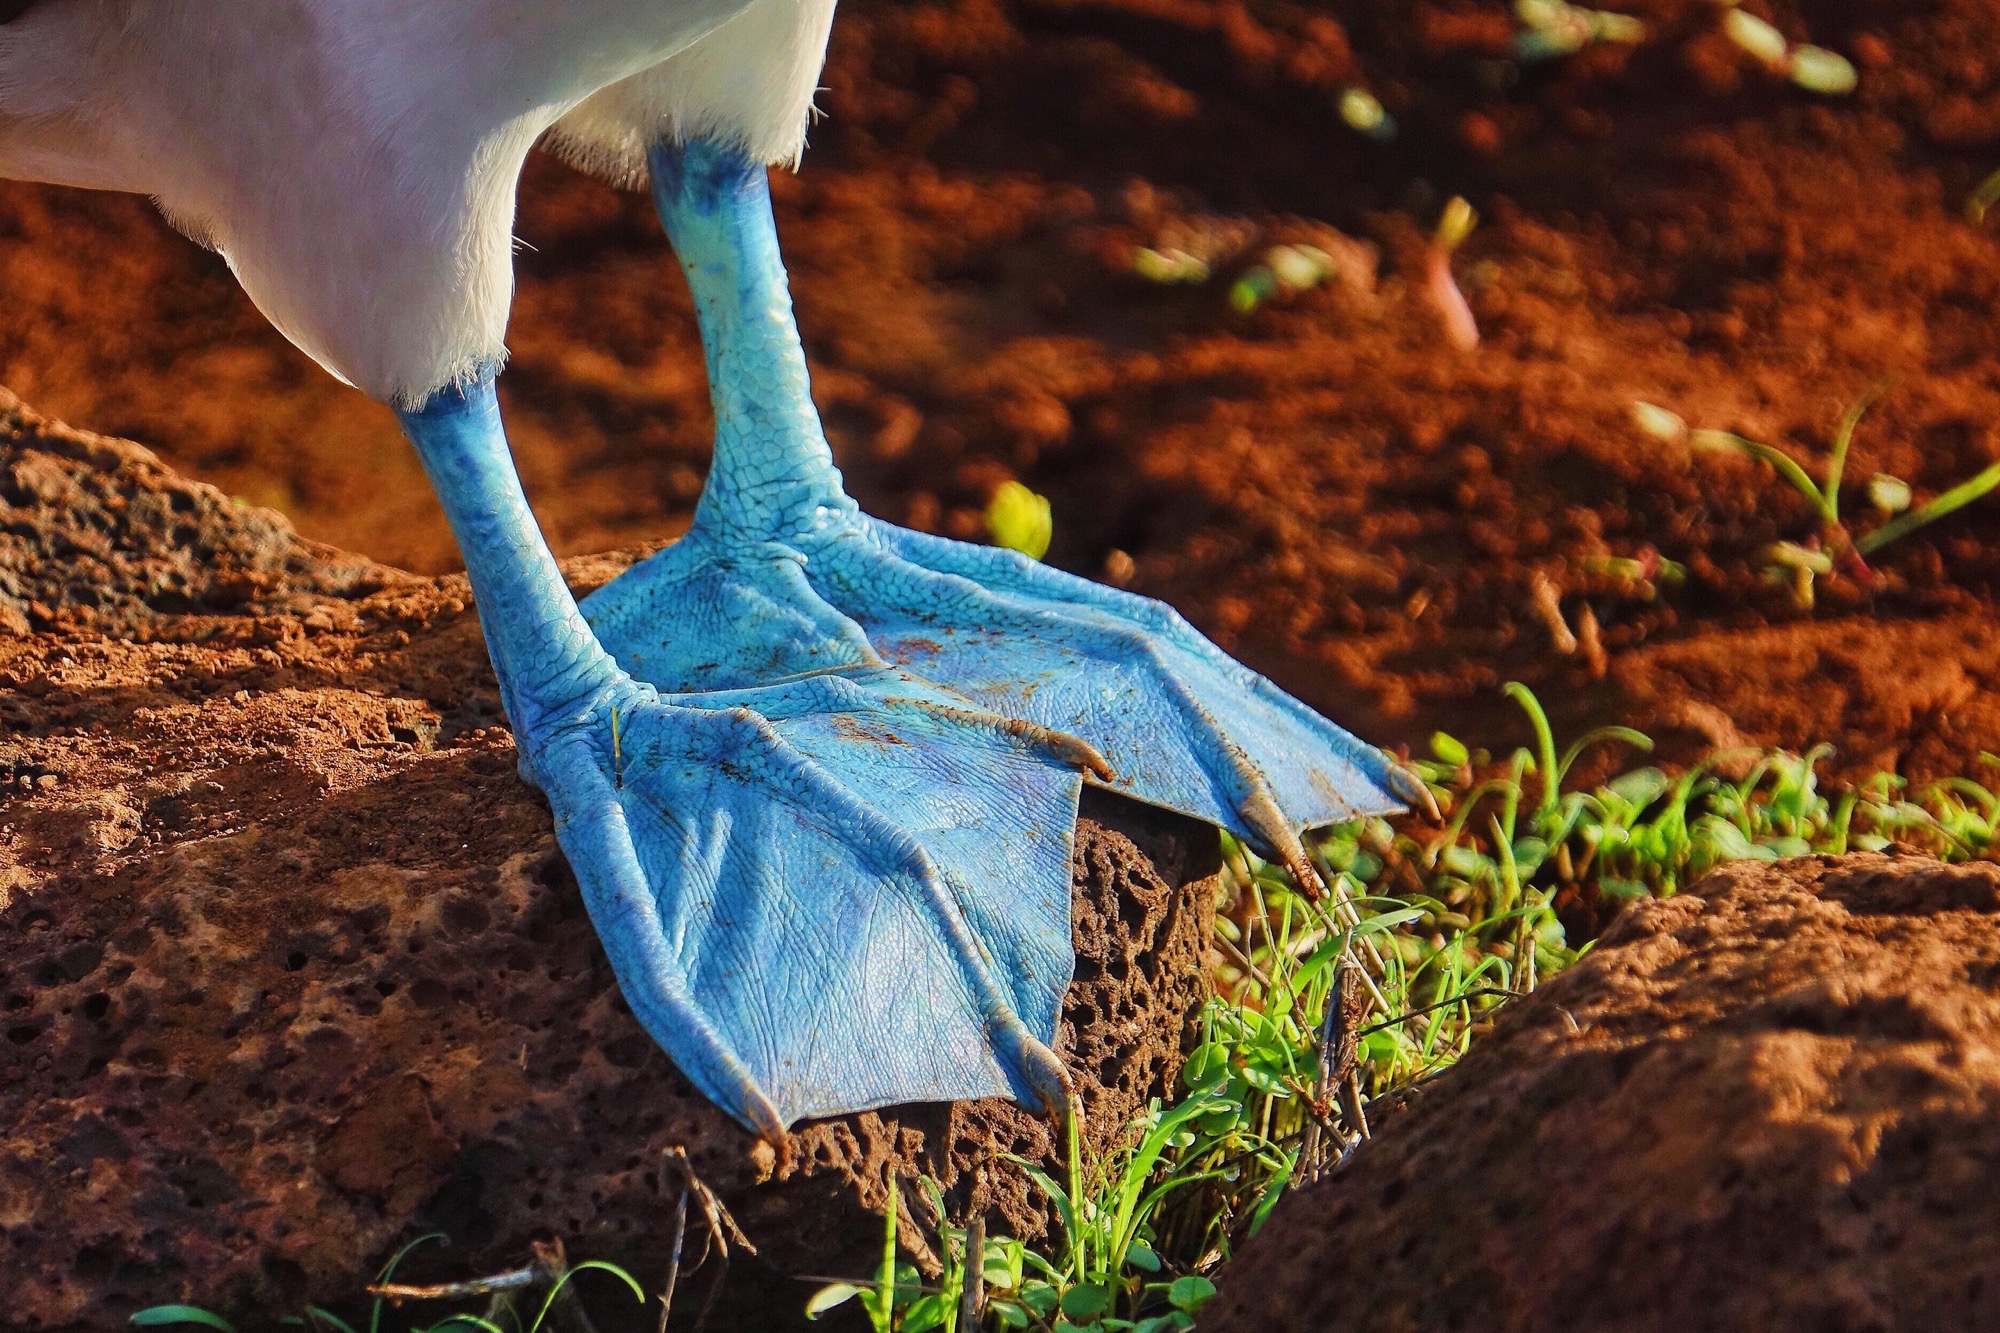
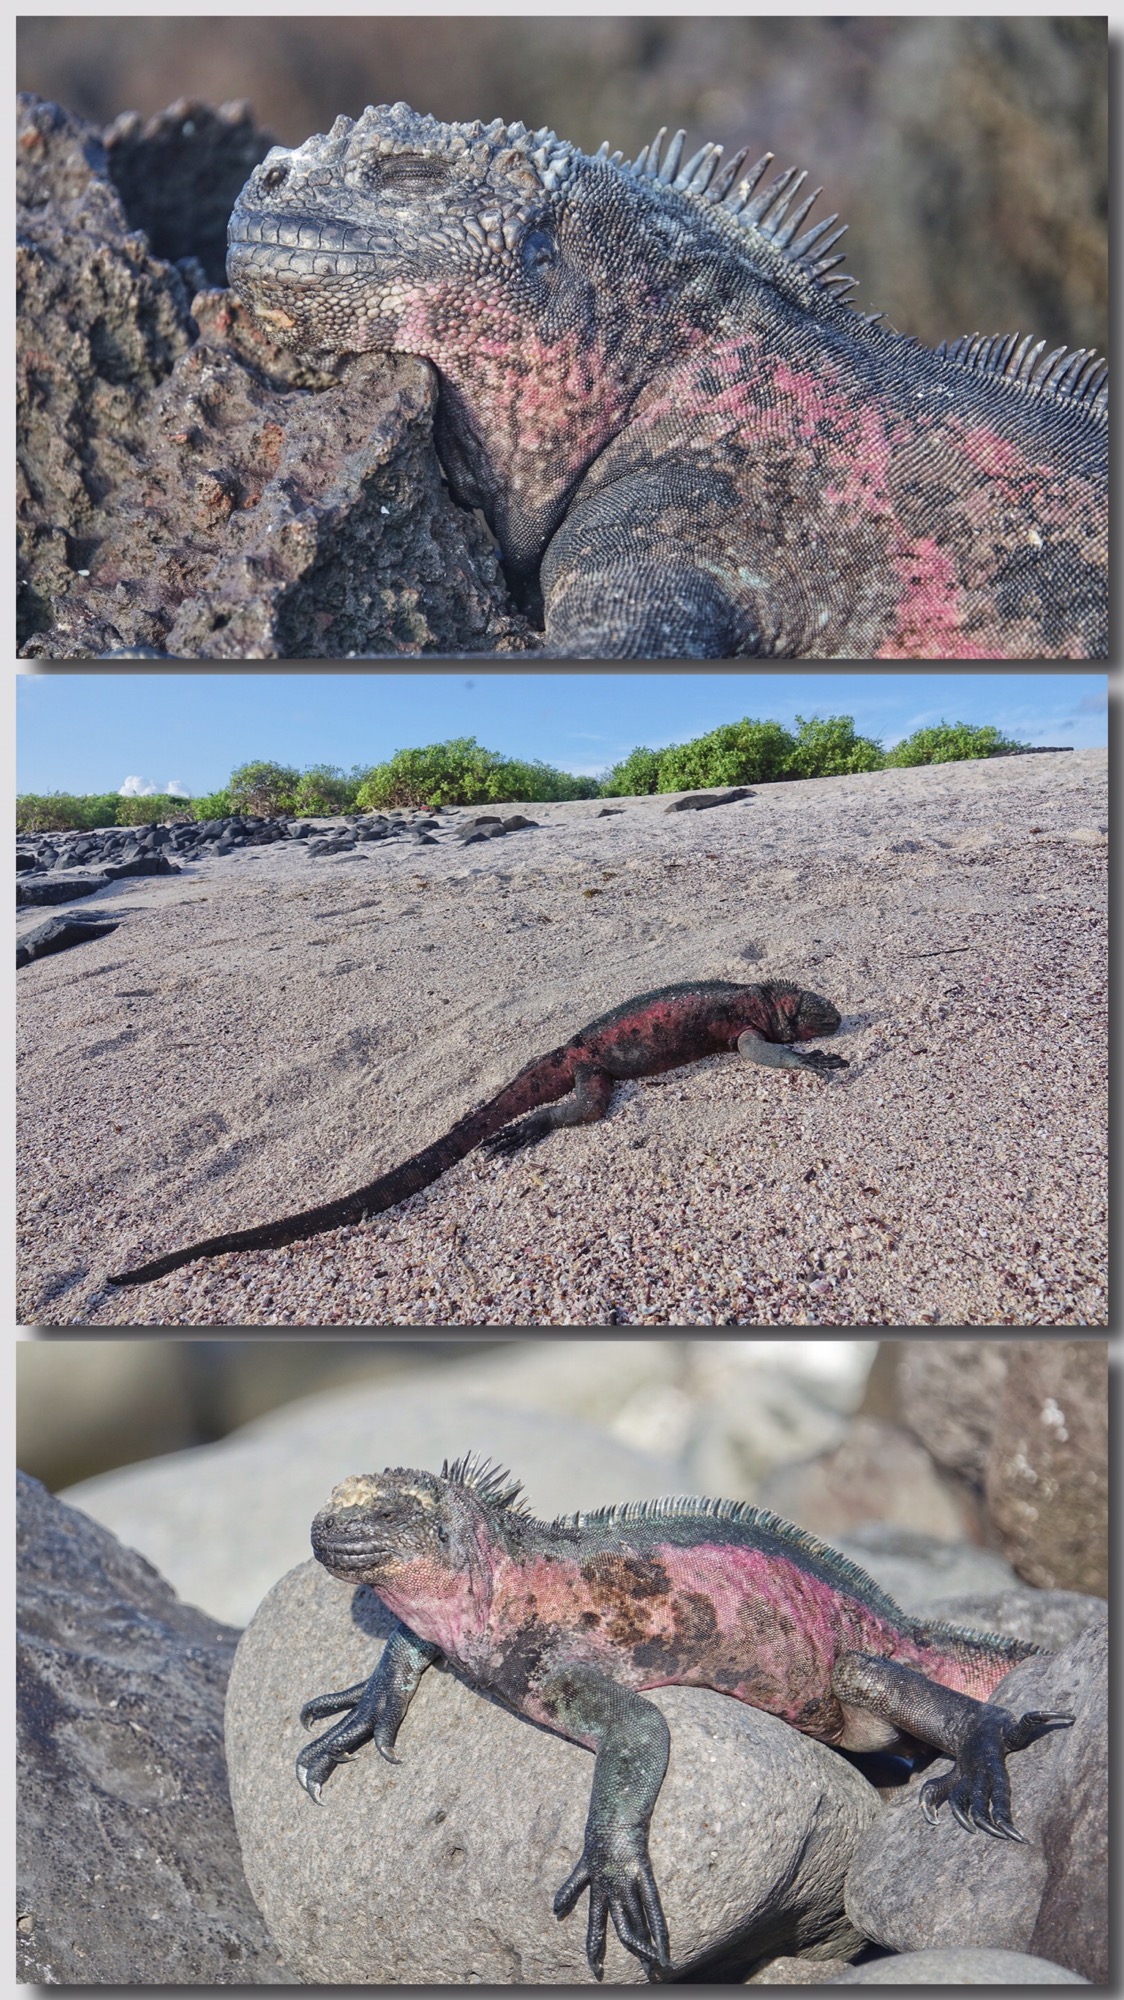
Blue Booby’s feet. A must do image from the Galapagos
The Galapagos has to be on any nature photographer’s short list of most wanted places to go…it is on the bucket list for those who simply appreciate nature, and many a pure tourist longs to tick it off the list. I know it is a cliche but there is truely no place like it in the world. The Galápagos Islands sit right on the equator, in the middle of the Humbolt Current, just far enough off-shore from Ecuador to maintain a totally unique habitat. There are certainly birds and animals there that you can see no-where else…but the real magic is in how close you can approach all of the island residents. Combine that with some of the most stunning seascapes and landscapes imaginable…sunrise to sunset…and why wouldn’t anyone want to travel there?
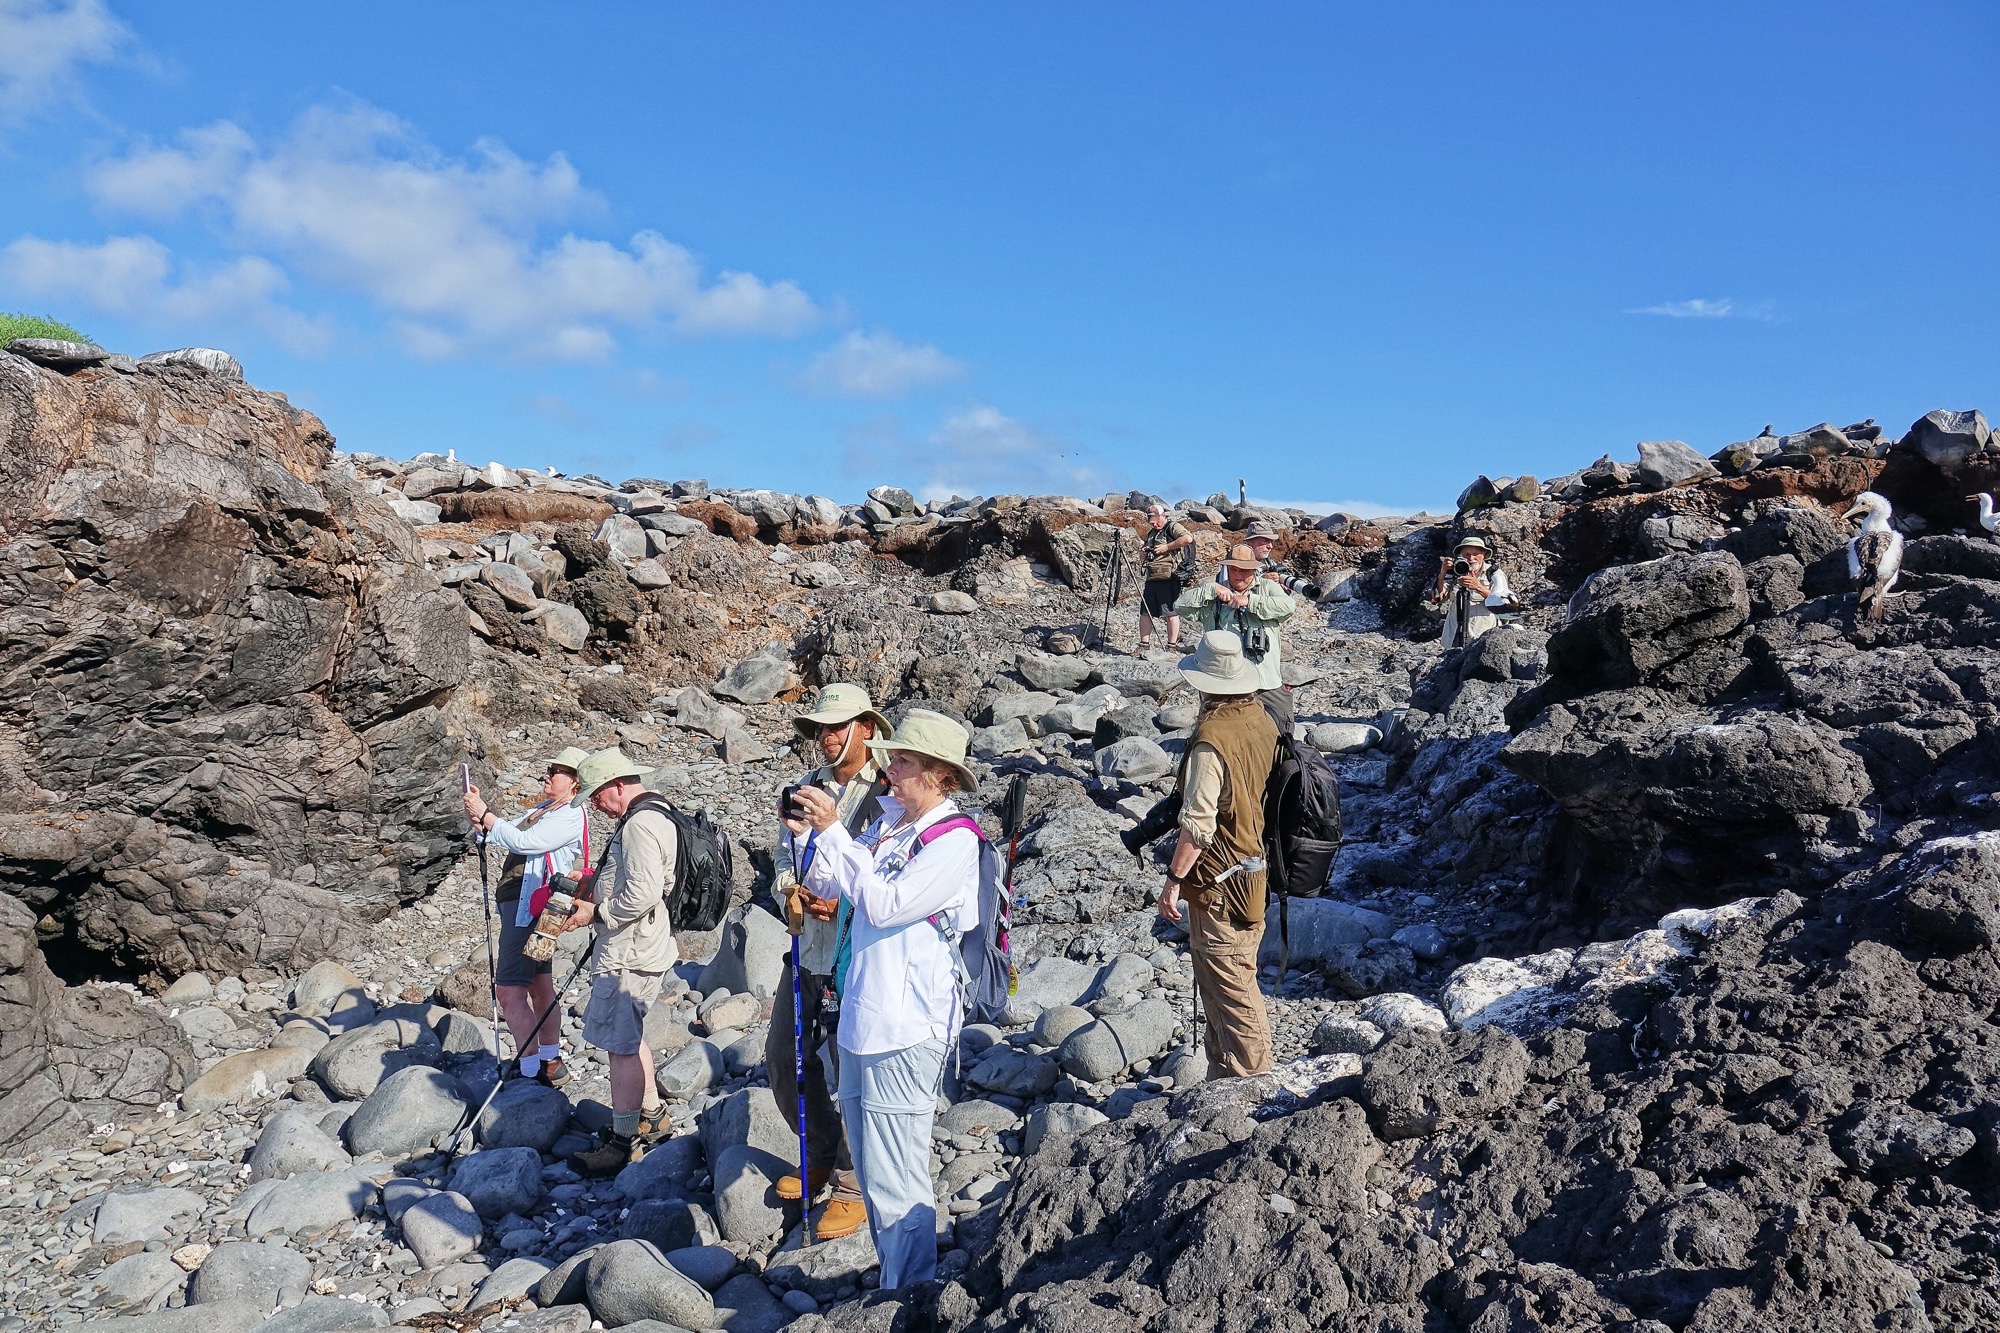
Since I was already in South America for the Wildside Nature Tours Amazon Riverboat Adventure, I was also invited to participate in a special, small-boat, 7 day trip to the Galapagos. Kevin Loughlin, the major partner in Wildside Nature Tours, does the islands at least twice a year. Our trip was his 24th. He knows the best boats, the best guides, and the islands themselves as well as anyone in the business…better than most. His tours, generally limited to 12 people, spend more time ashore on the islands than any others. Land time on any island is limited to 4 hours per boat, and no more than 20 people. We got to spend the whole 4 hours on each trip ashore, while most boats had to fit several groups in that same time frame. We got to sit with good subjects for the perfect shot, and take all the time we wanted to appreciate the scenery.
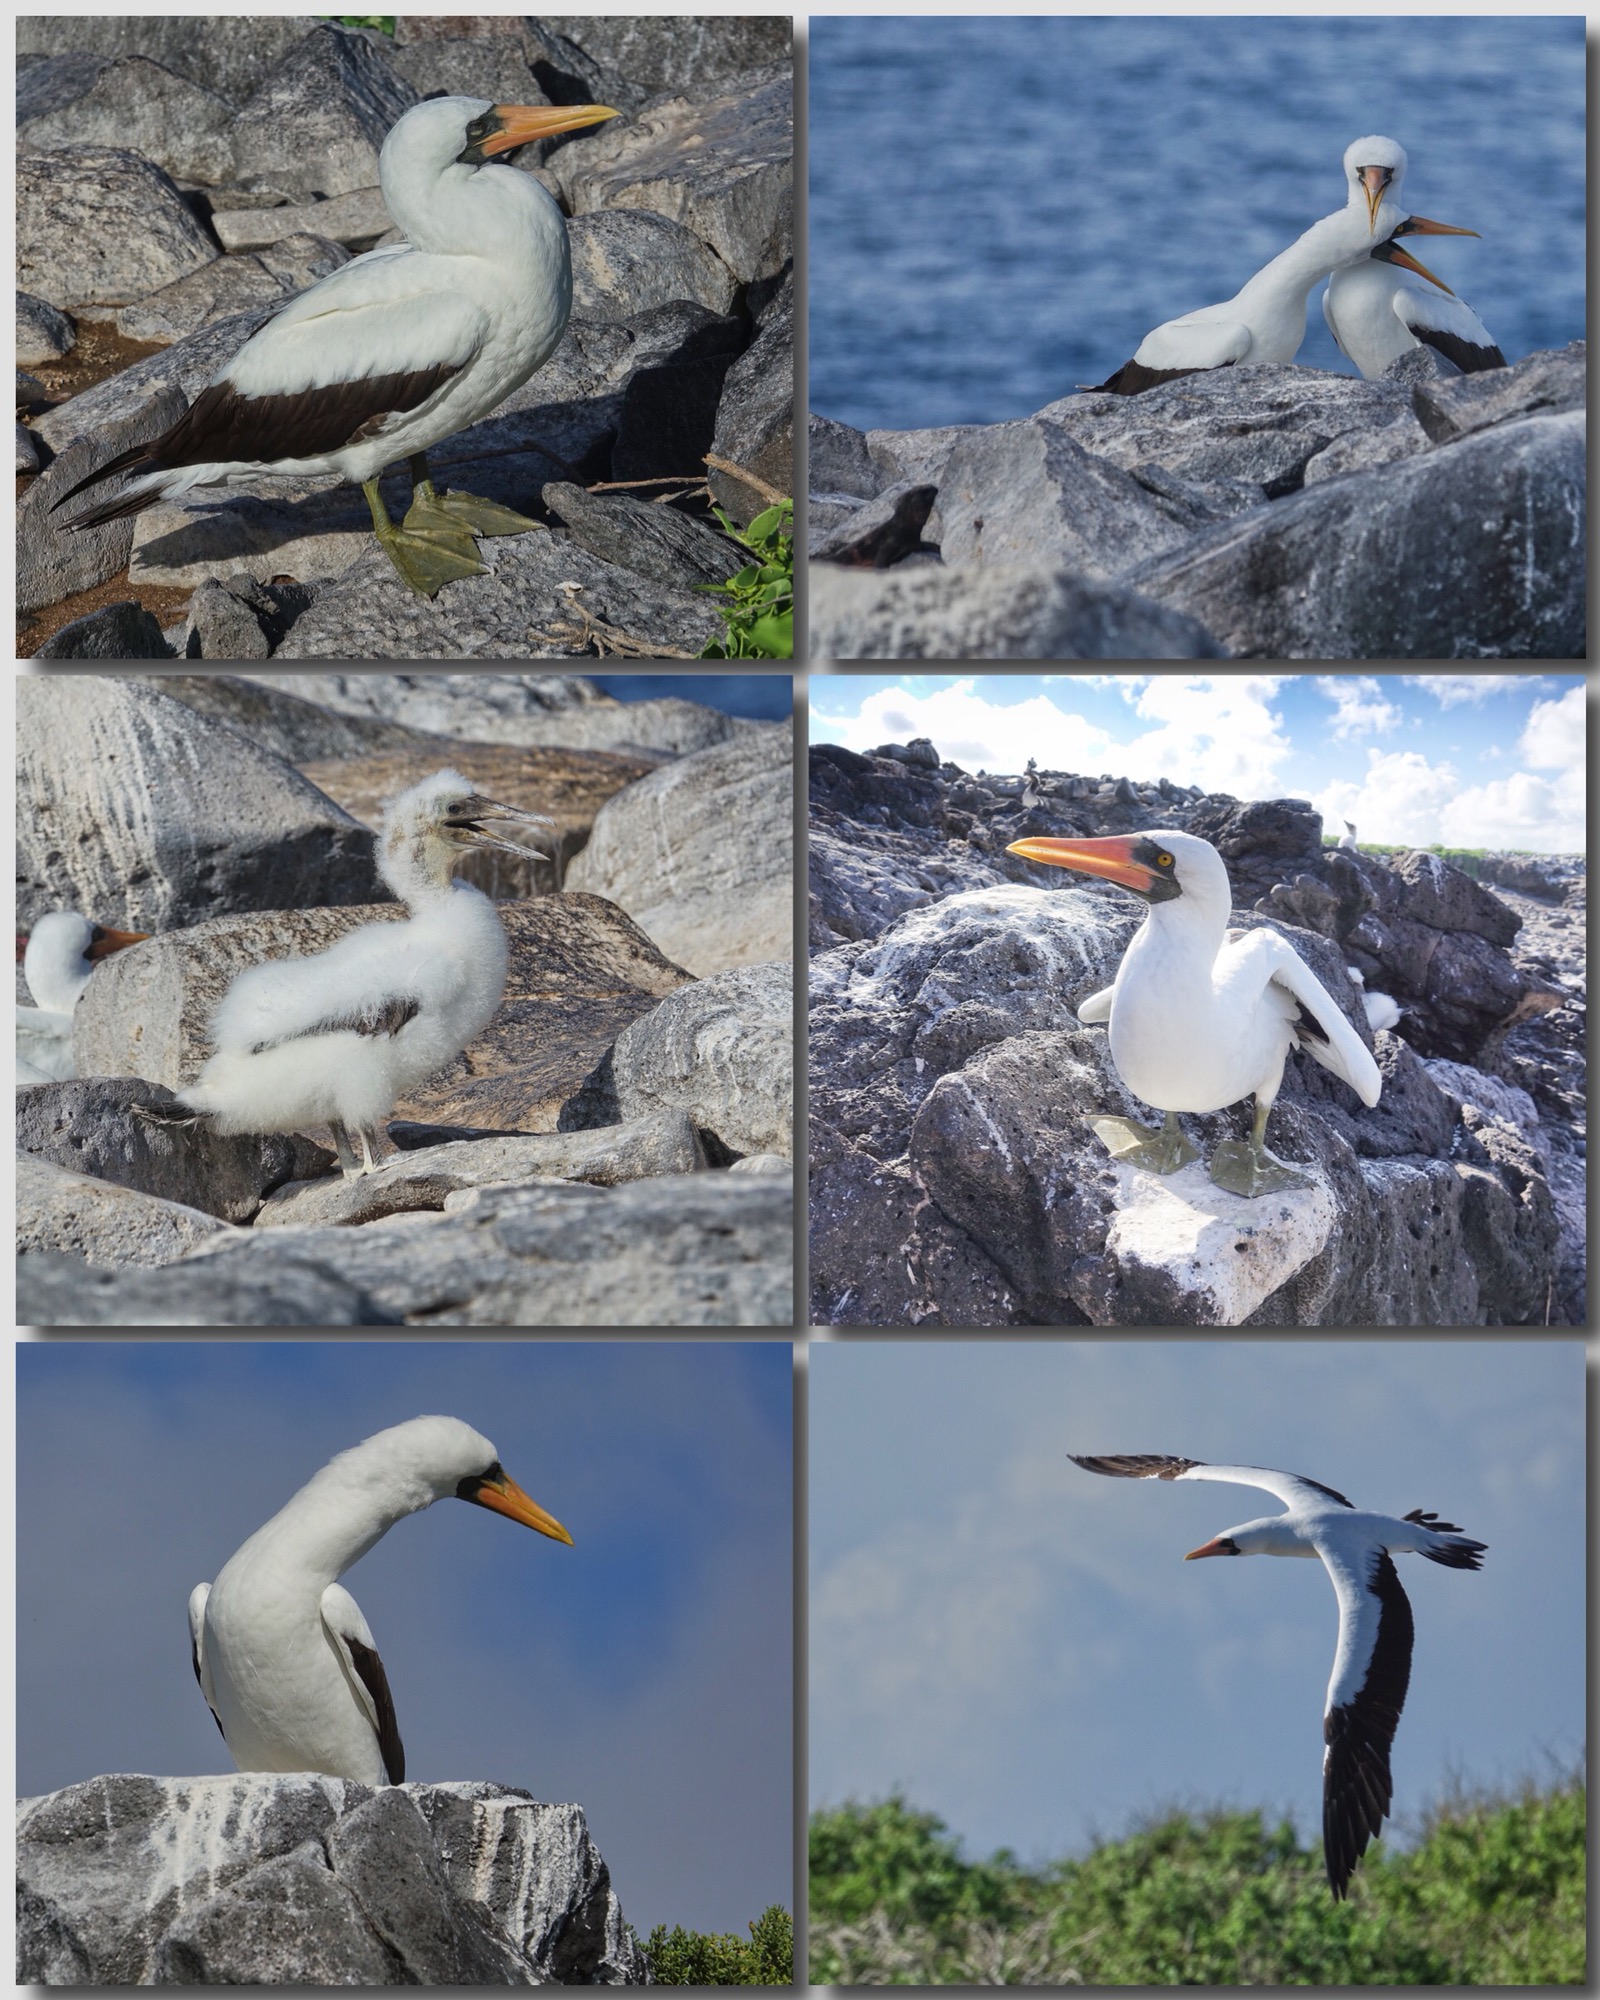
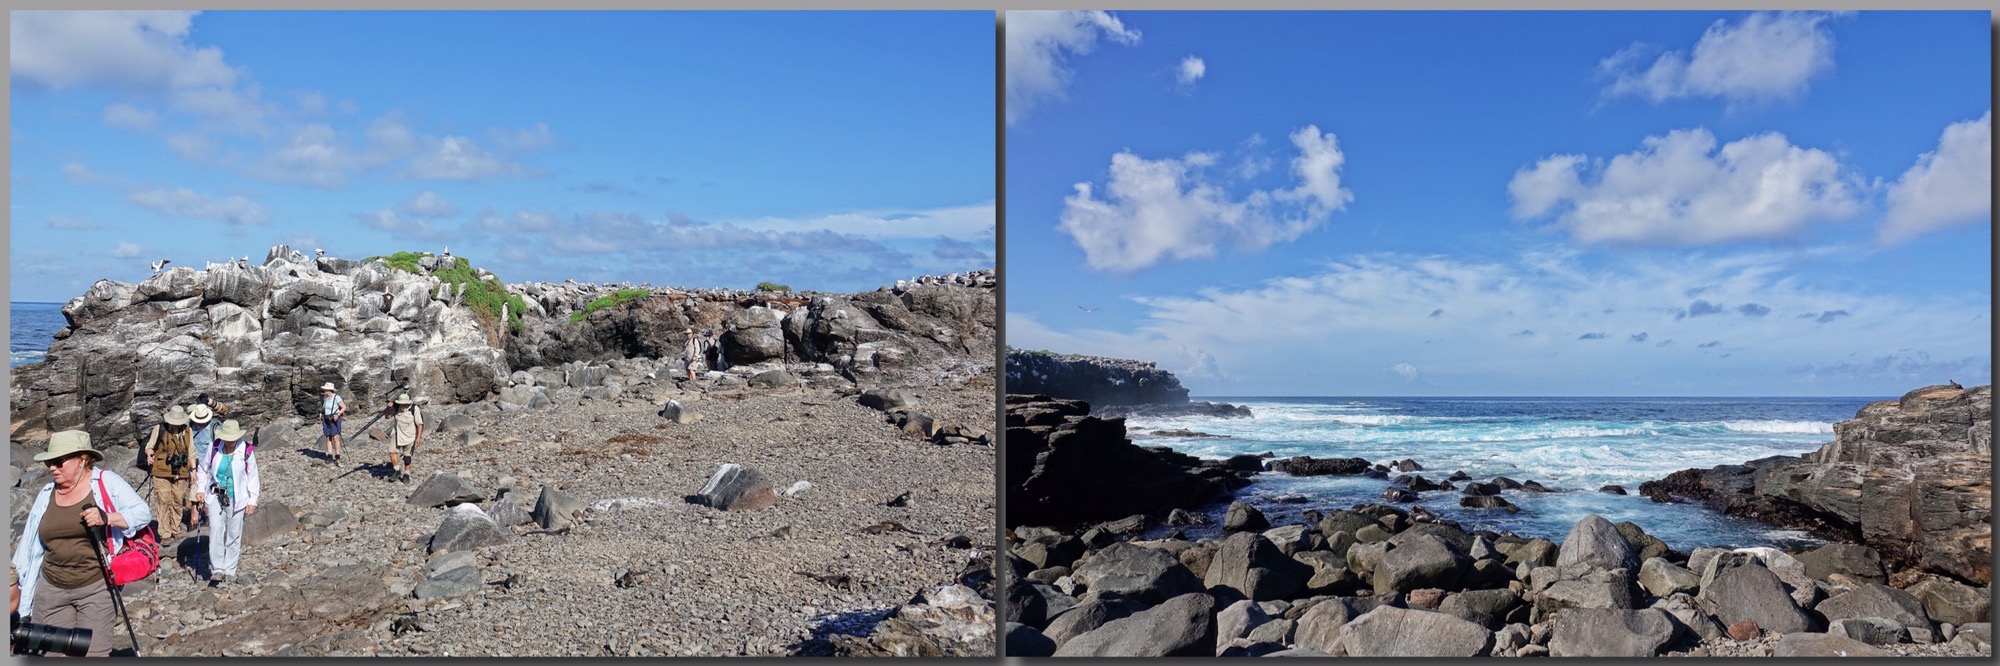
Walking through a nesting colony of Nazca (formerly “masked”) Boobies
On this trip again, I used only the Sony Rx10iii. It’s 24-600mm zoom covers the ideal range for the islands. Much of the time I had to zoom back from 600mm. The birds and animals were just that close. And the Sony in-camera HDR was perfect for the sunrise and sunsets, and the amazing island and seascapes. Then too, most of the other folks on the trip were carrying 20-40 pounds of camera equipment ashore each day. My Sony, with the same kind of capability as their whole outfits, was much easier to carry, and fit in a small wet-bag for the wet landings. I really appreciated it by the end of 4 hours in the equatorial heat of the islands.
We spent our first night in Ecuador at the Garden Hotel near the airport in Quito. Wonderful grounds and a great atmosphere. And the first of my Ecuadorian Hummingbirds.
Black-tailed Trainbearer, Garden Hotel, Quito
The next morning we were off early again to catch a two-hop flight to the Galapagos…though you stay on the same plane there is a short layover in Guayaquil. Having realized the shortcomings of my packing while on the Amazon, I spent the time at the airport in Quito searching, successfully, for a small day-pack to carry my camera on the wet landings (I already had a dry bag to go inside).
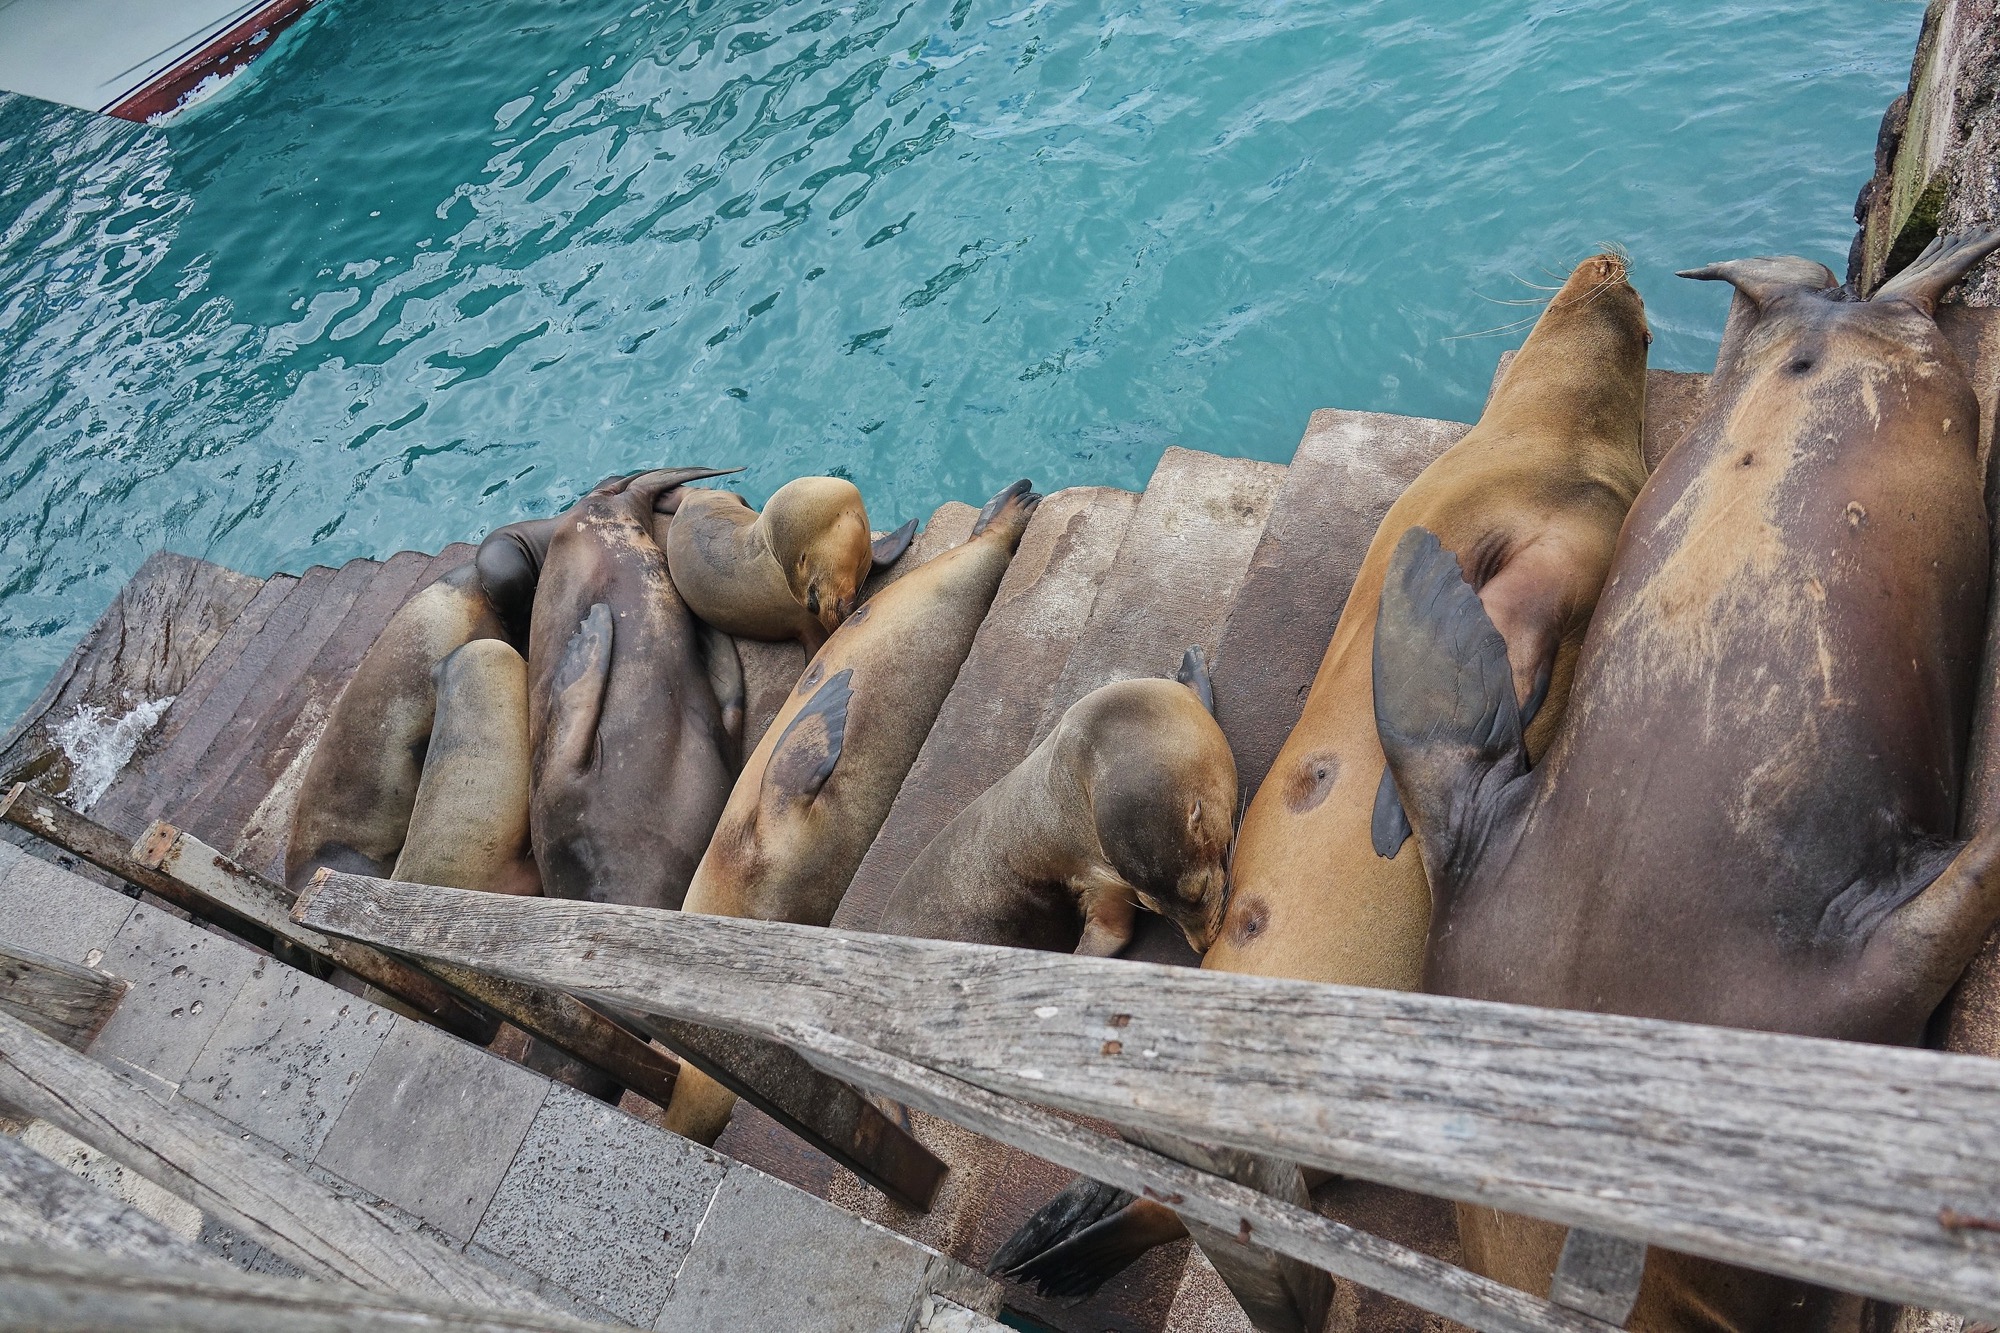
When we landed in San Cristobal, Kevin advised us not to try to photograph the birds at the airport. Tempting as it was, he assured us we would have better opportunities on the other islands we were to visit. Still, when you get to the dock to board the pangas (rubber zodiac like boats) that take you out to your yacht, it is impossible to resist the sea lions who greet you, or would greet you if they were awake.
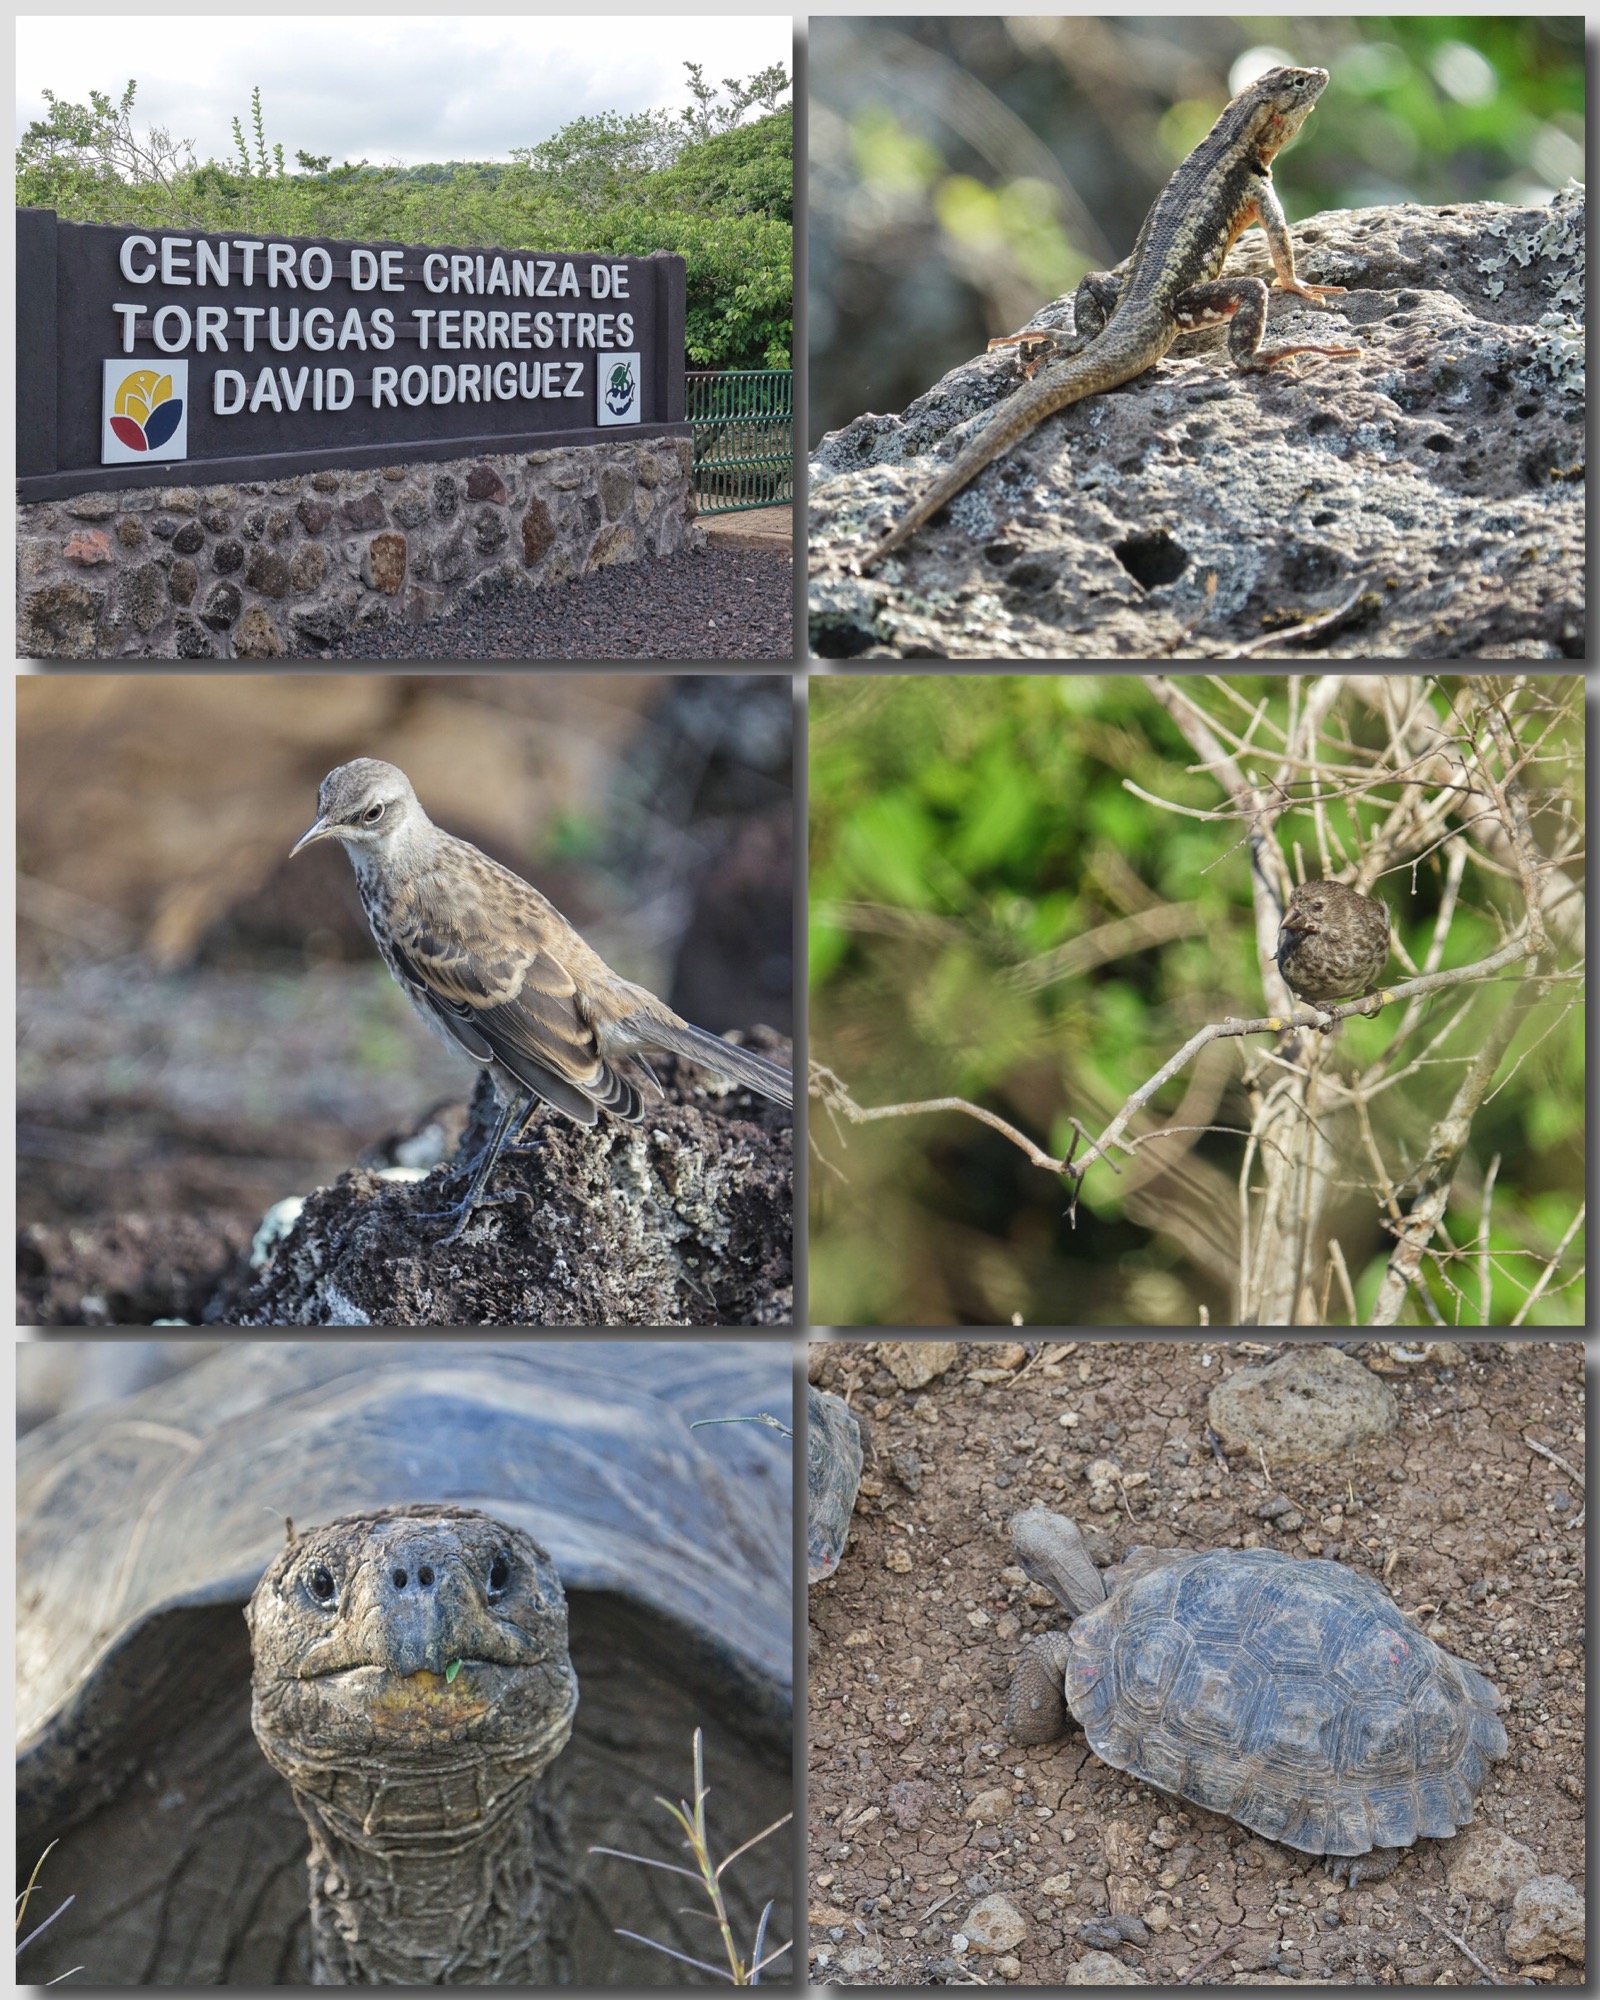
After room assignments and lunch on the yacht, we returned to San Cristobal to take a bus up over the top of the island for a visit to a Tortoise Reserve and Breeding Station, for our first looks at unique Galapagos wildlife. We saw the giant Tortoises of course, but while there we also had our first encounters with one of the 4 species of endemic Mockingbirds of the islands, one of the Lava Lizards, and one of Darwin’s Finches.
Turtle Reserve, Lava Lizard, San Cristobal Mockingbird, Darwin’s Finch, Land Tortoise, young Land Tortoise
We returned to San Cristobal town in time for sunset, a little shopping, and back to our yacht for the first of many excellent dinners.
To make the most of your time in the islands, the yacht moves at night, while you are sleeping. It takes some getting used to, as the waters around the islands, stirred by the Humboldt Current, can be quite choppy…but it is a small price to pay for paradise. We woke on our first full day in the Galapagos to a stunning sunrise…the first of many…and, after a hearty breakfast, boarded the pangas for a short ride to Espanola Island. Every trip to the Galapagos is a mixture of dry and wet landings. Some islands have landing jetties, and on some you run the pangas up to the beach and climb out knee deep in water to wade ashore. Kevin insists on good wading sandals for the wet landings. I also invested in two pairs of sand socks…lycra crew-style socks with neoprene soles and heels. The sand socks keep the sand out from between my toes and my feet and the sandals. Before the end of the trip could have gotten several times their cost if I had been willing to sell them. Highly recommended.
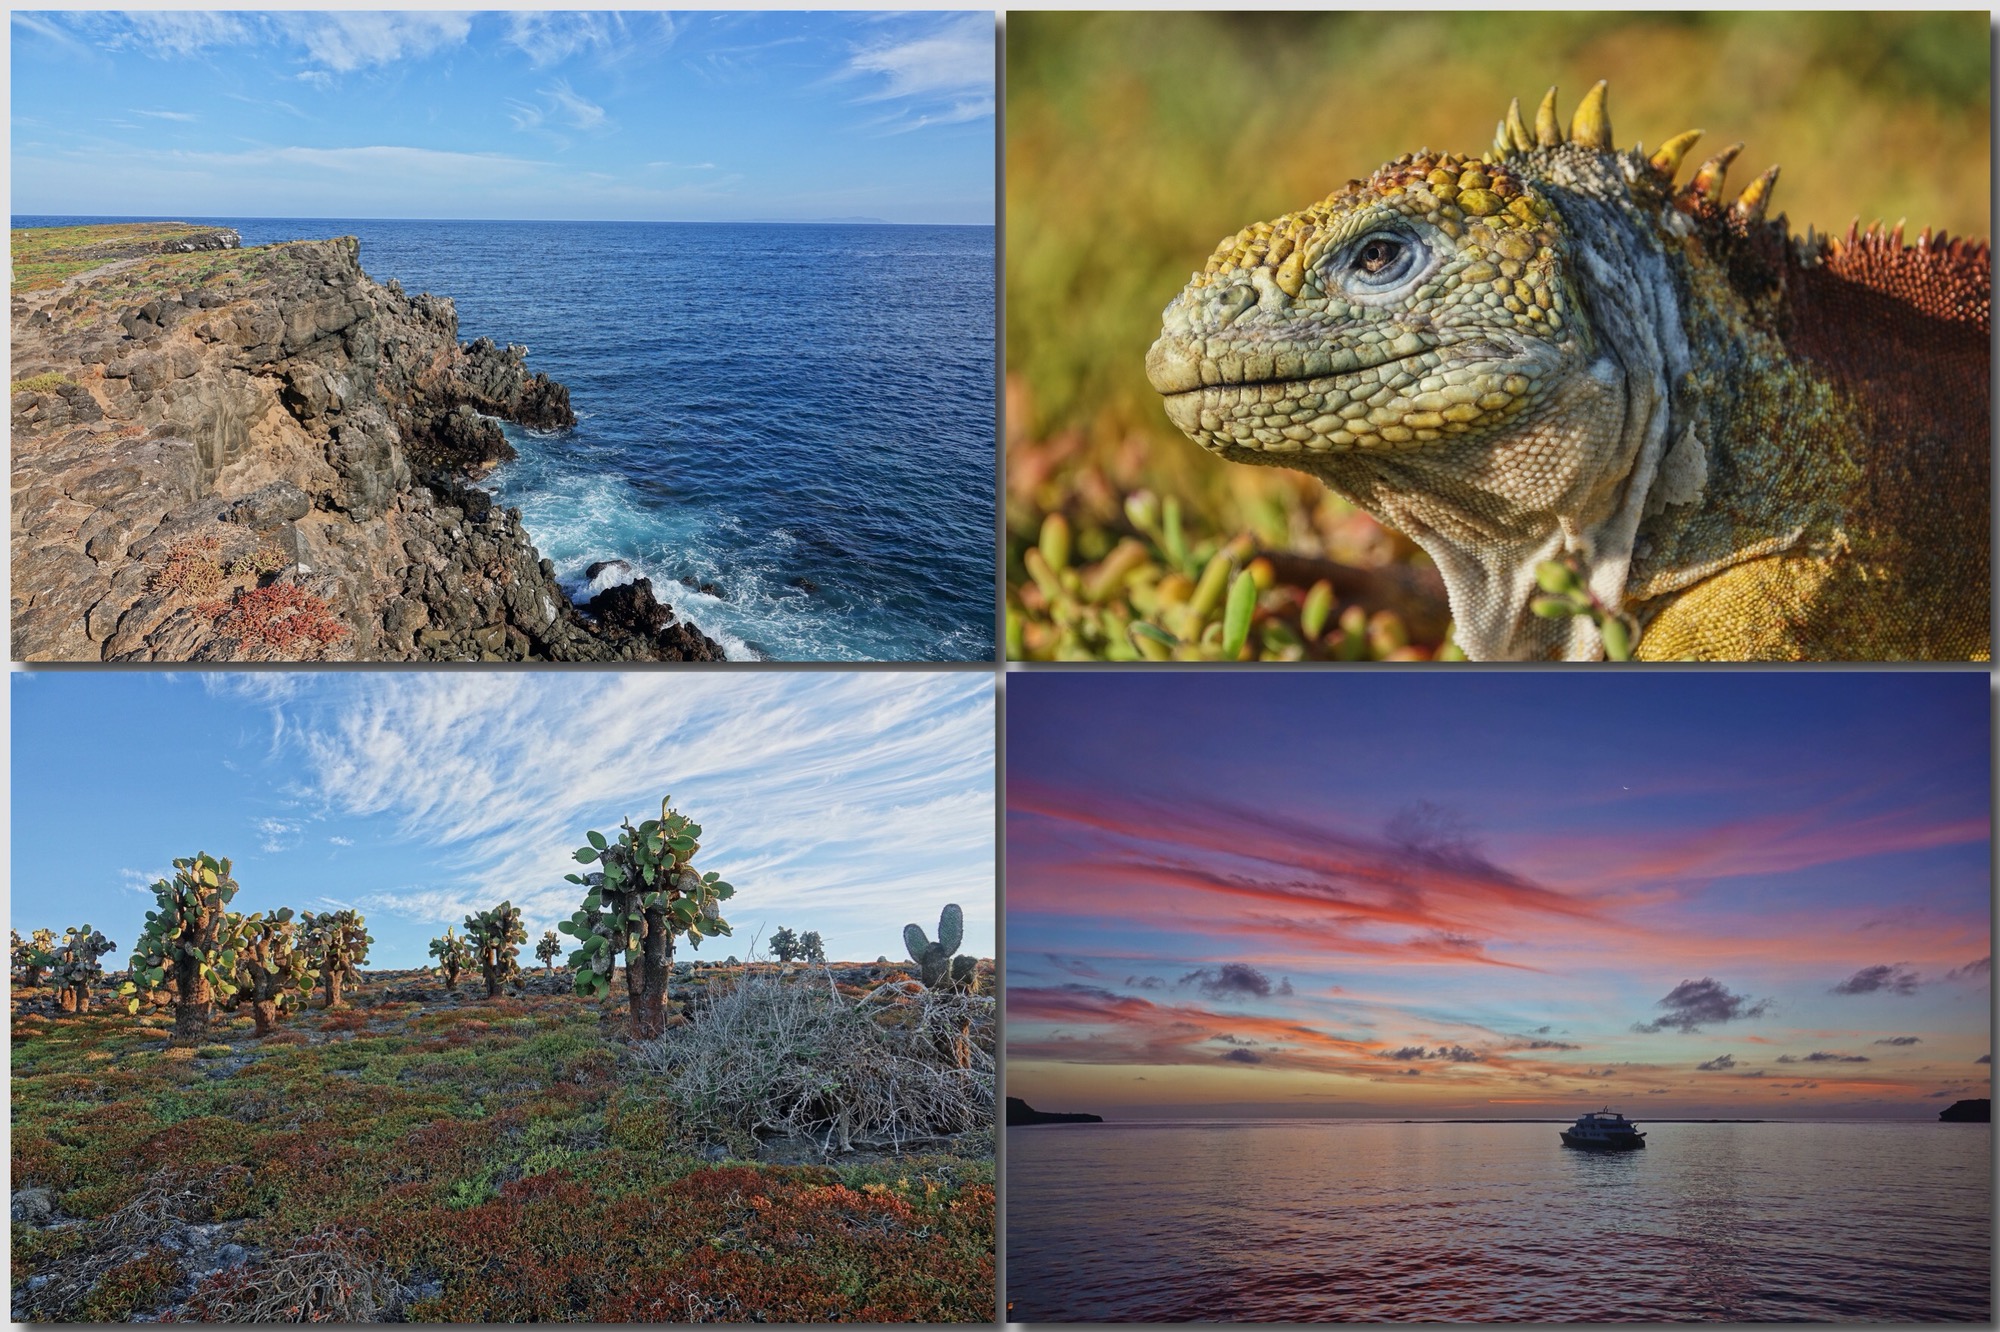
The Galapagos are all volcanic islands, but they are mixture of what I think of as short islands and tall islands. Espanola is one of short islands…essentially a slab of lava raised maybe 70 feet above the sea at its highest point. The trails are pretty rough, with loose lava underfoot and no soft landings if you fall…but both the scenery and the wildlife are totally worth the hike.
Dawn on the first day. A yacht similar to ours that was on the same schedule as we were.
Nazca Boobies in the nesting colony on Espanola
Another view of our group in the nesting colony, the view out over the sea from Espanola
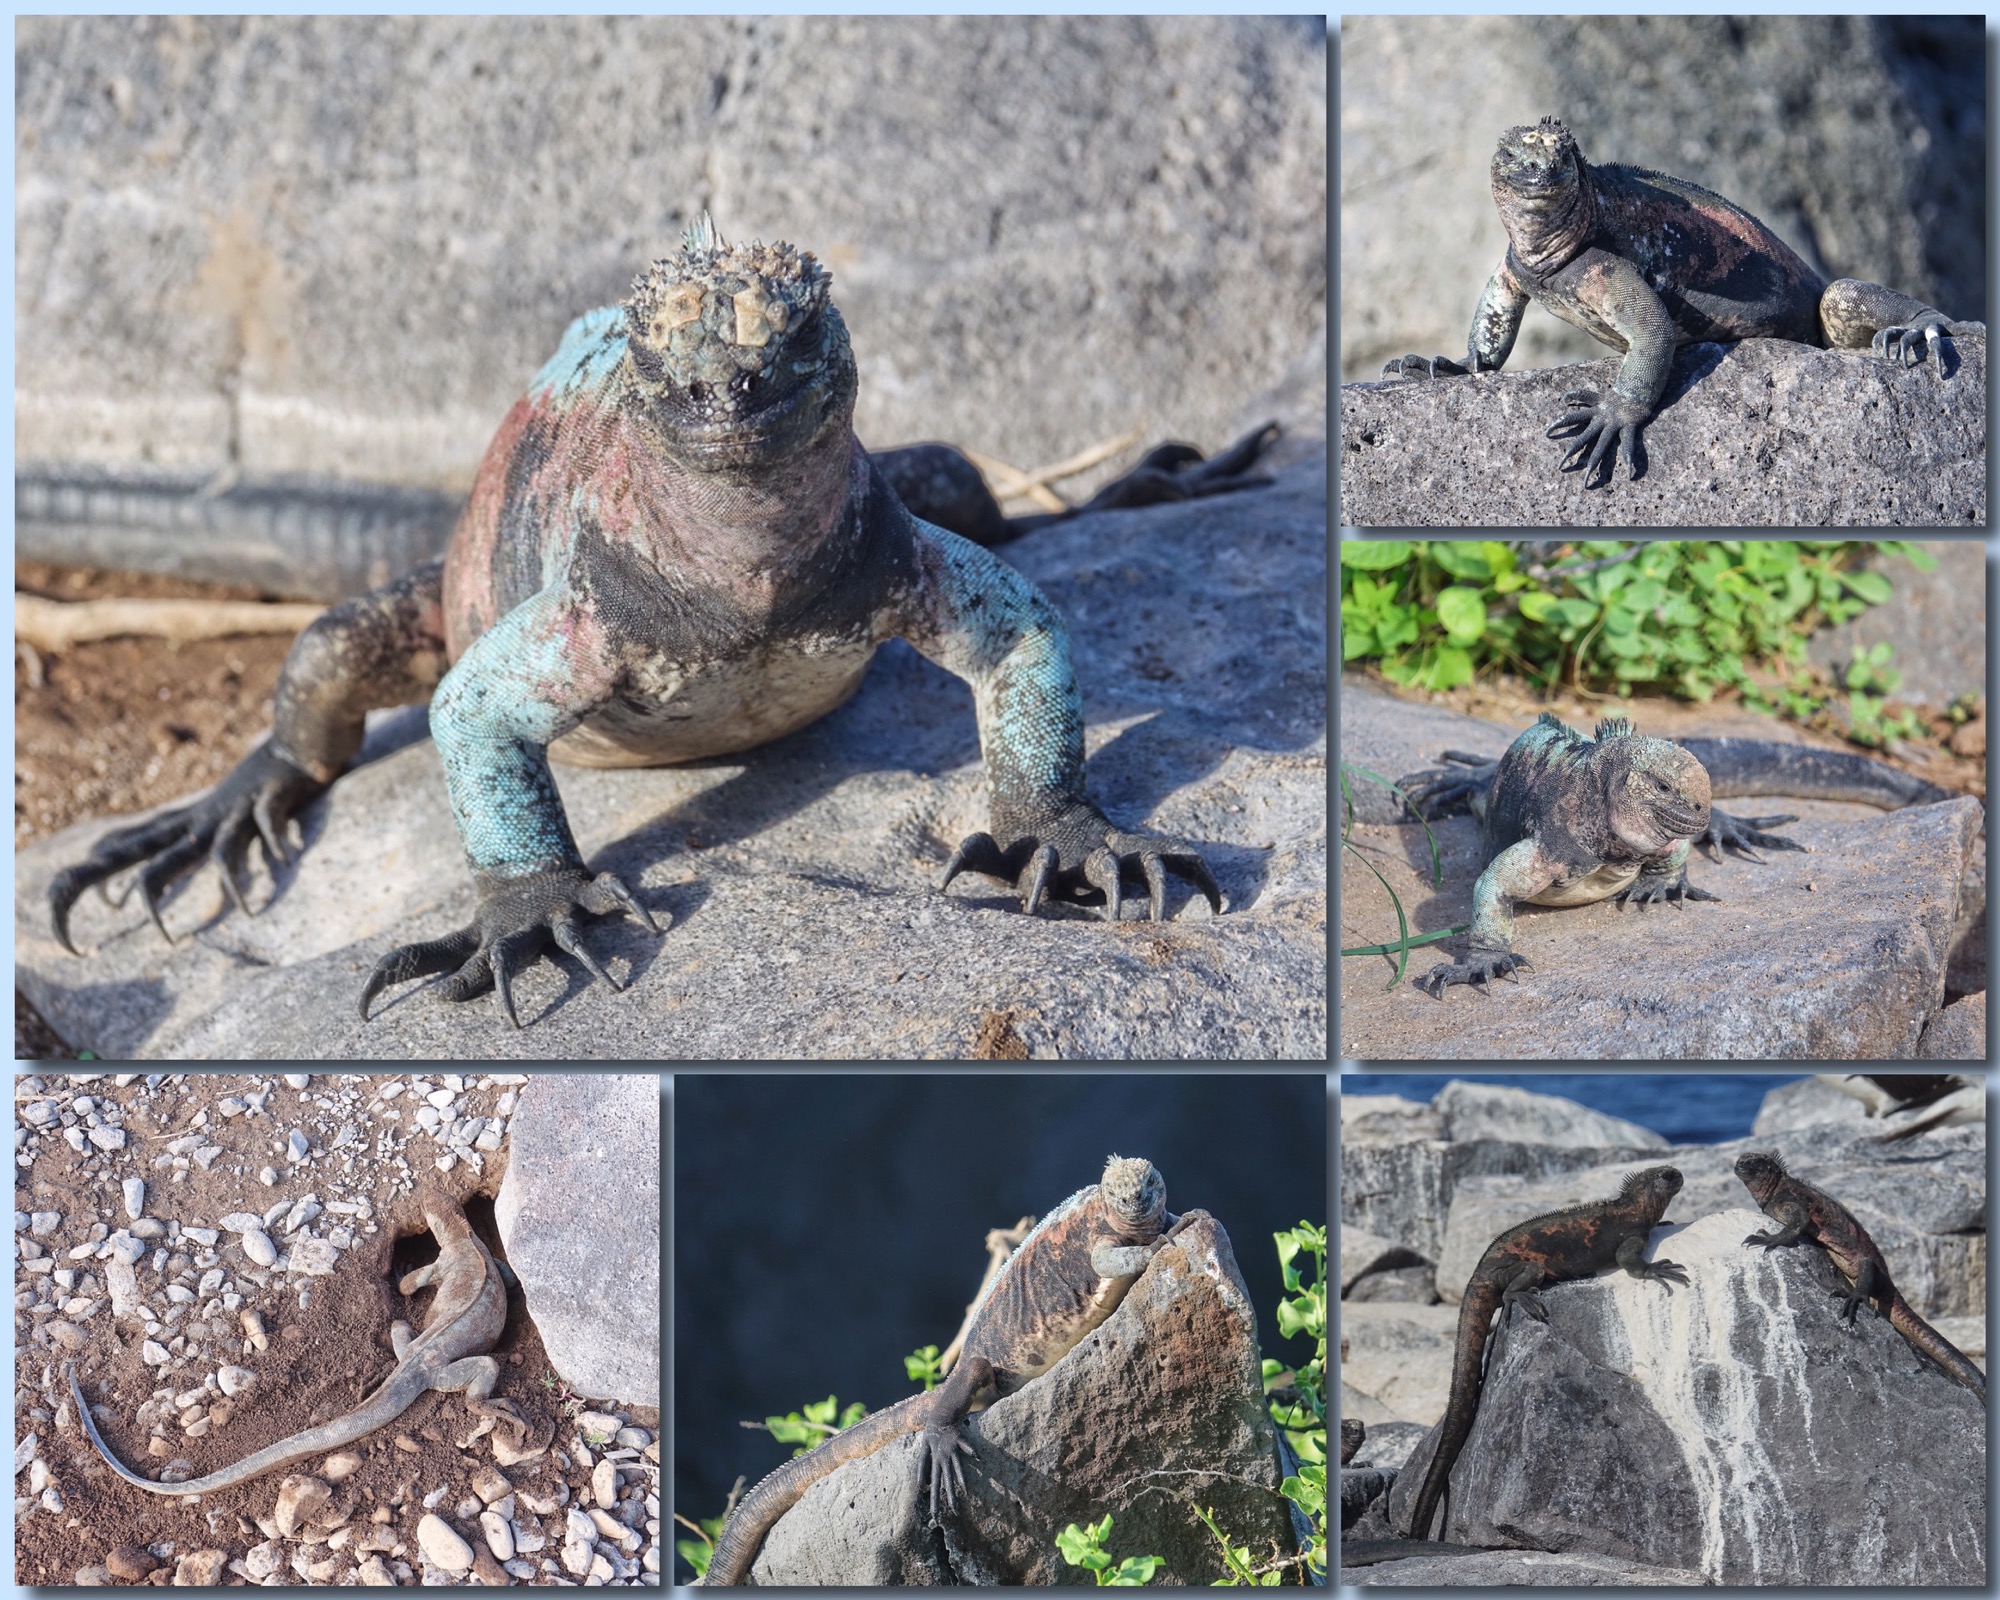
Marine Iguanas. They dive deep in the cold sea to feed on plants and spend much time on land warming themselves. The colors are salt deposits.
Our first and best views of the Galapagos Hawk were on Espanola
Each day there were several activities, with snorkeling generally in the late morning after time on one of the islands. I had never snorkeled before this trip, but I came equipped with an underwater camera. Unfortunately after one disastrous attempt I did not get in the water again, so I missed part of the Galapagos experience. Maybe next time…after a few lessons.
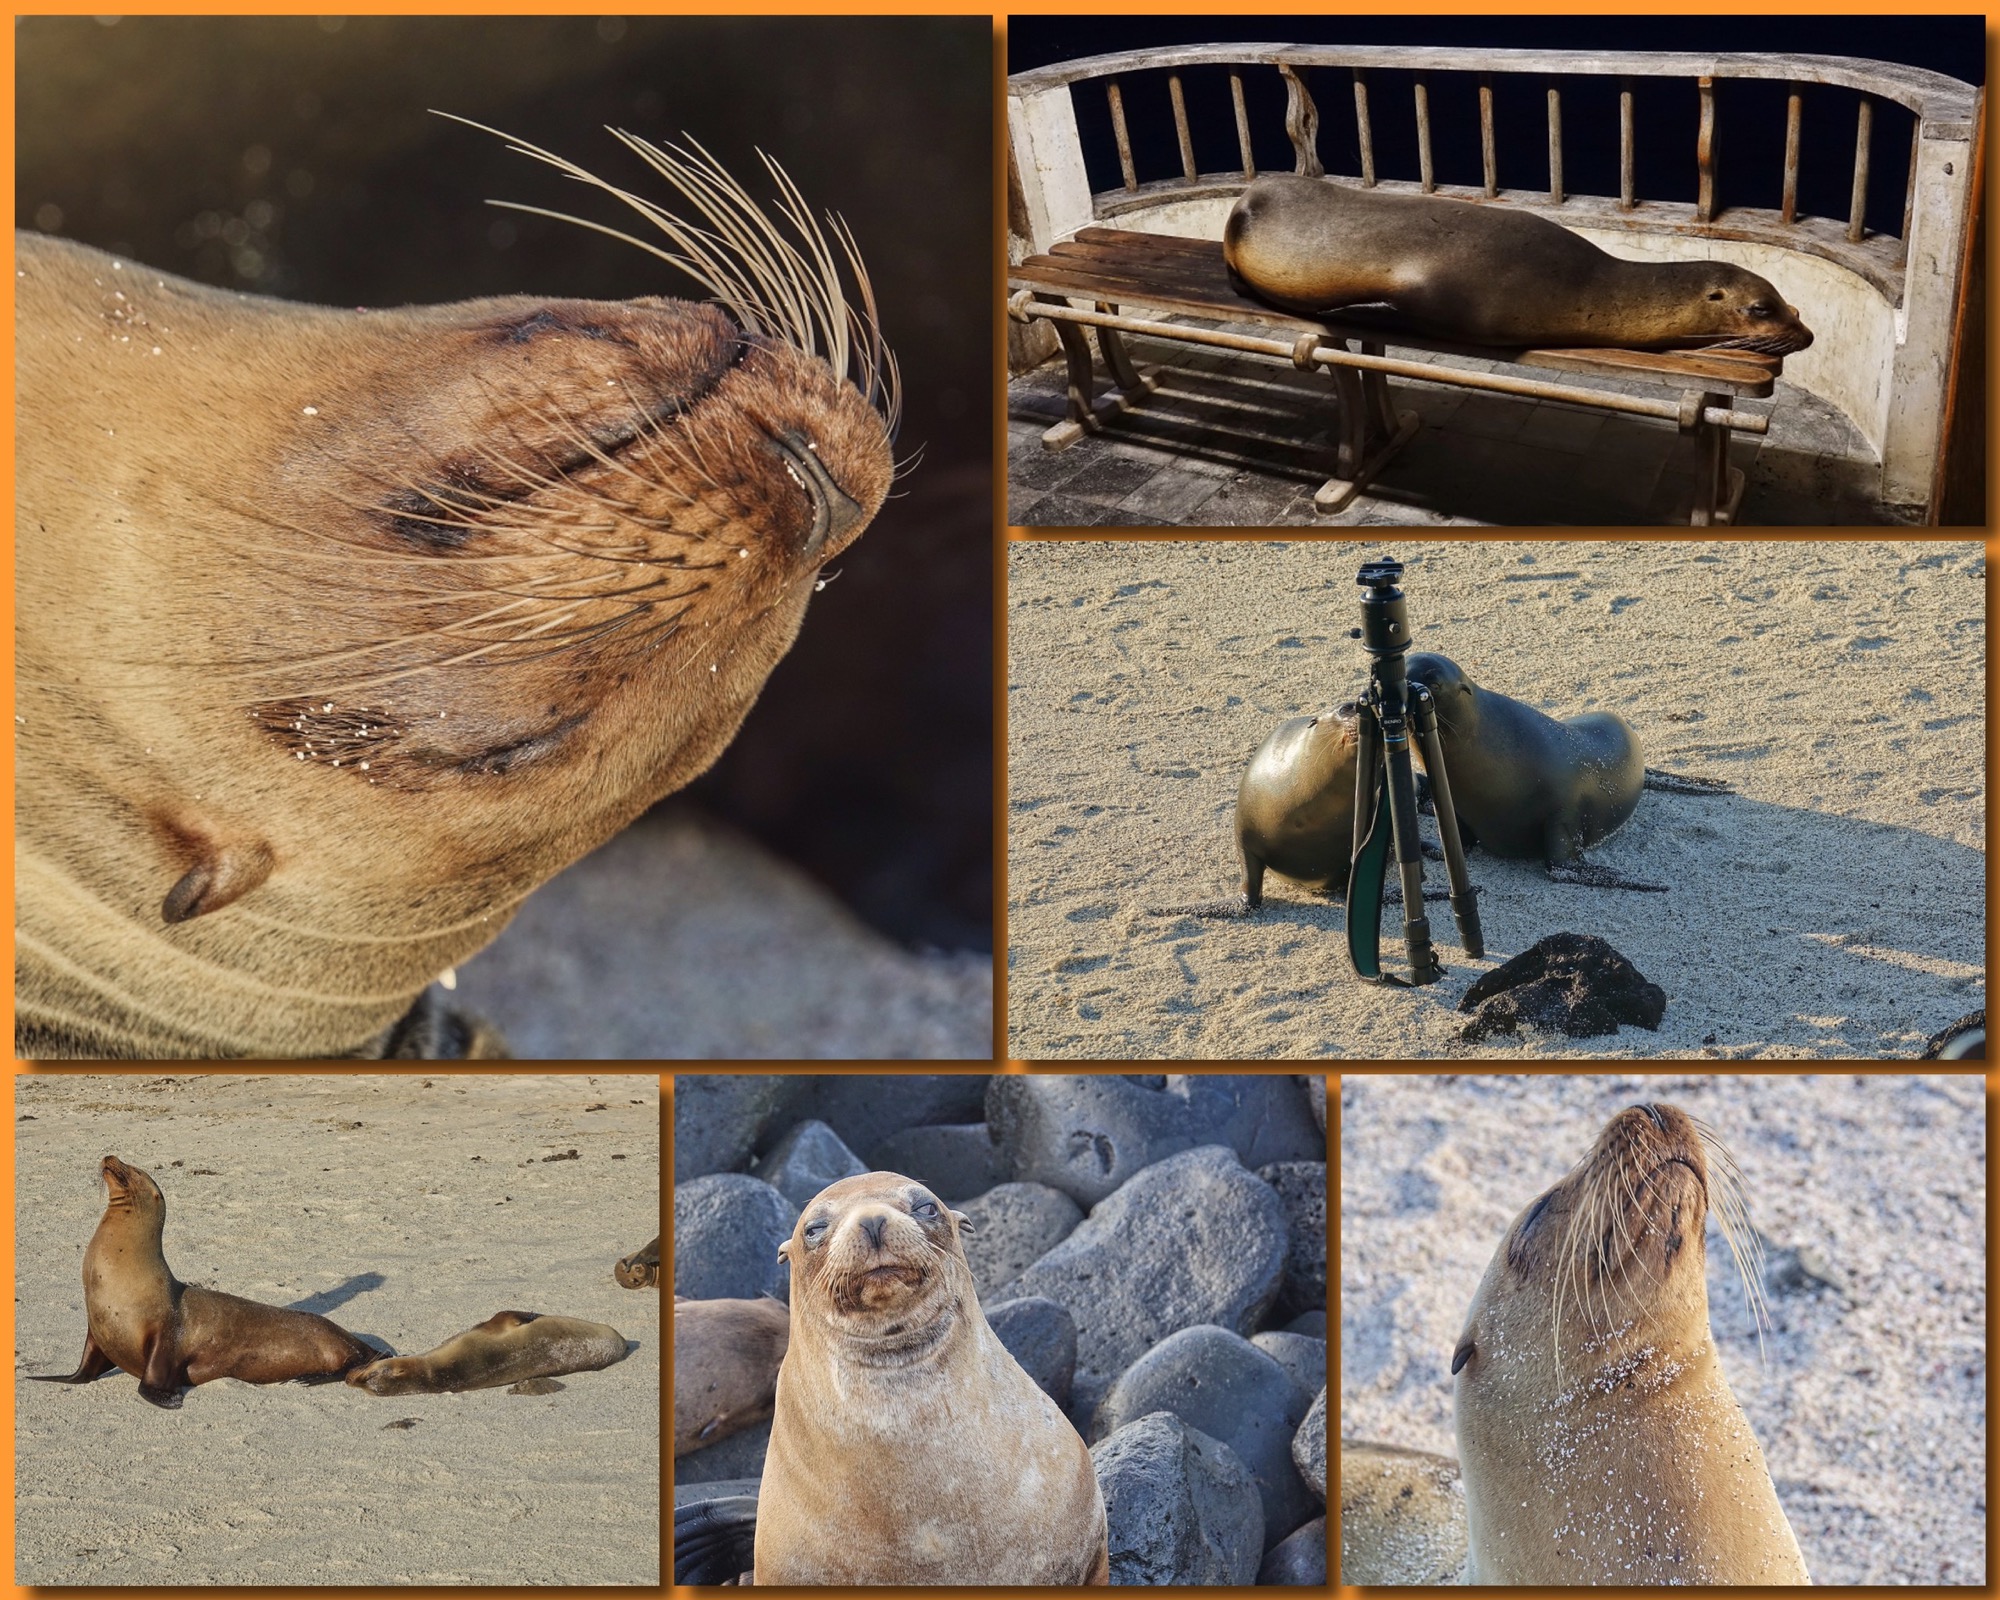
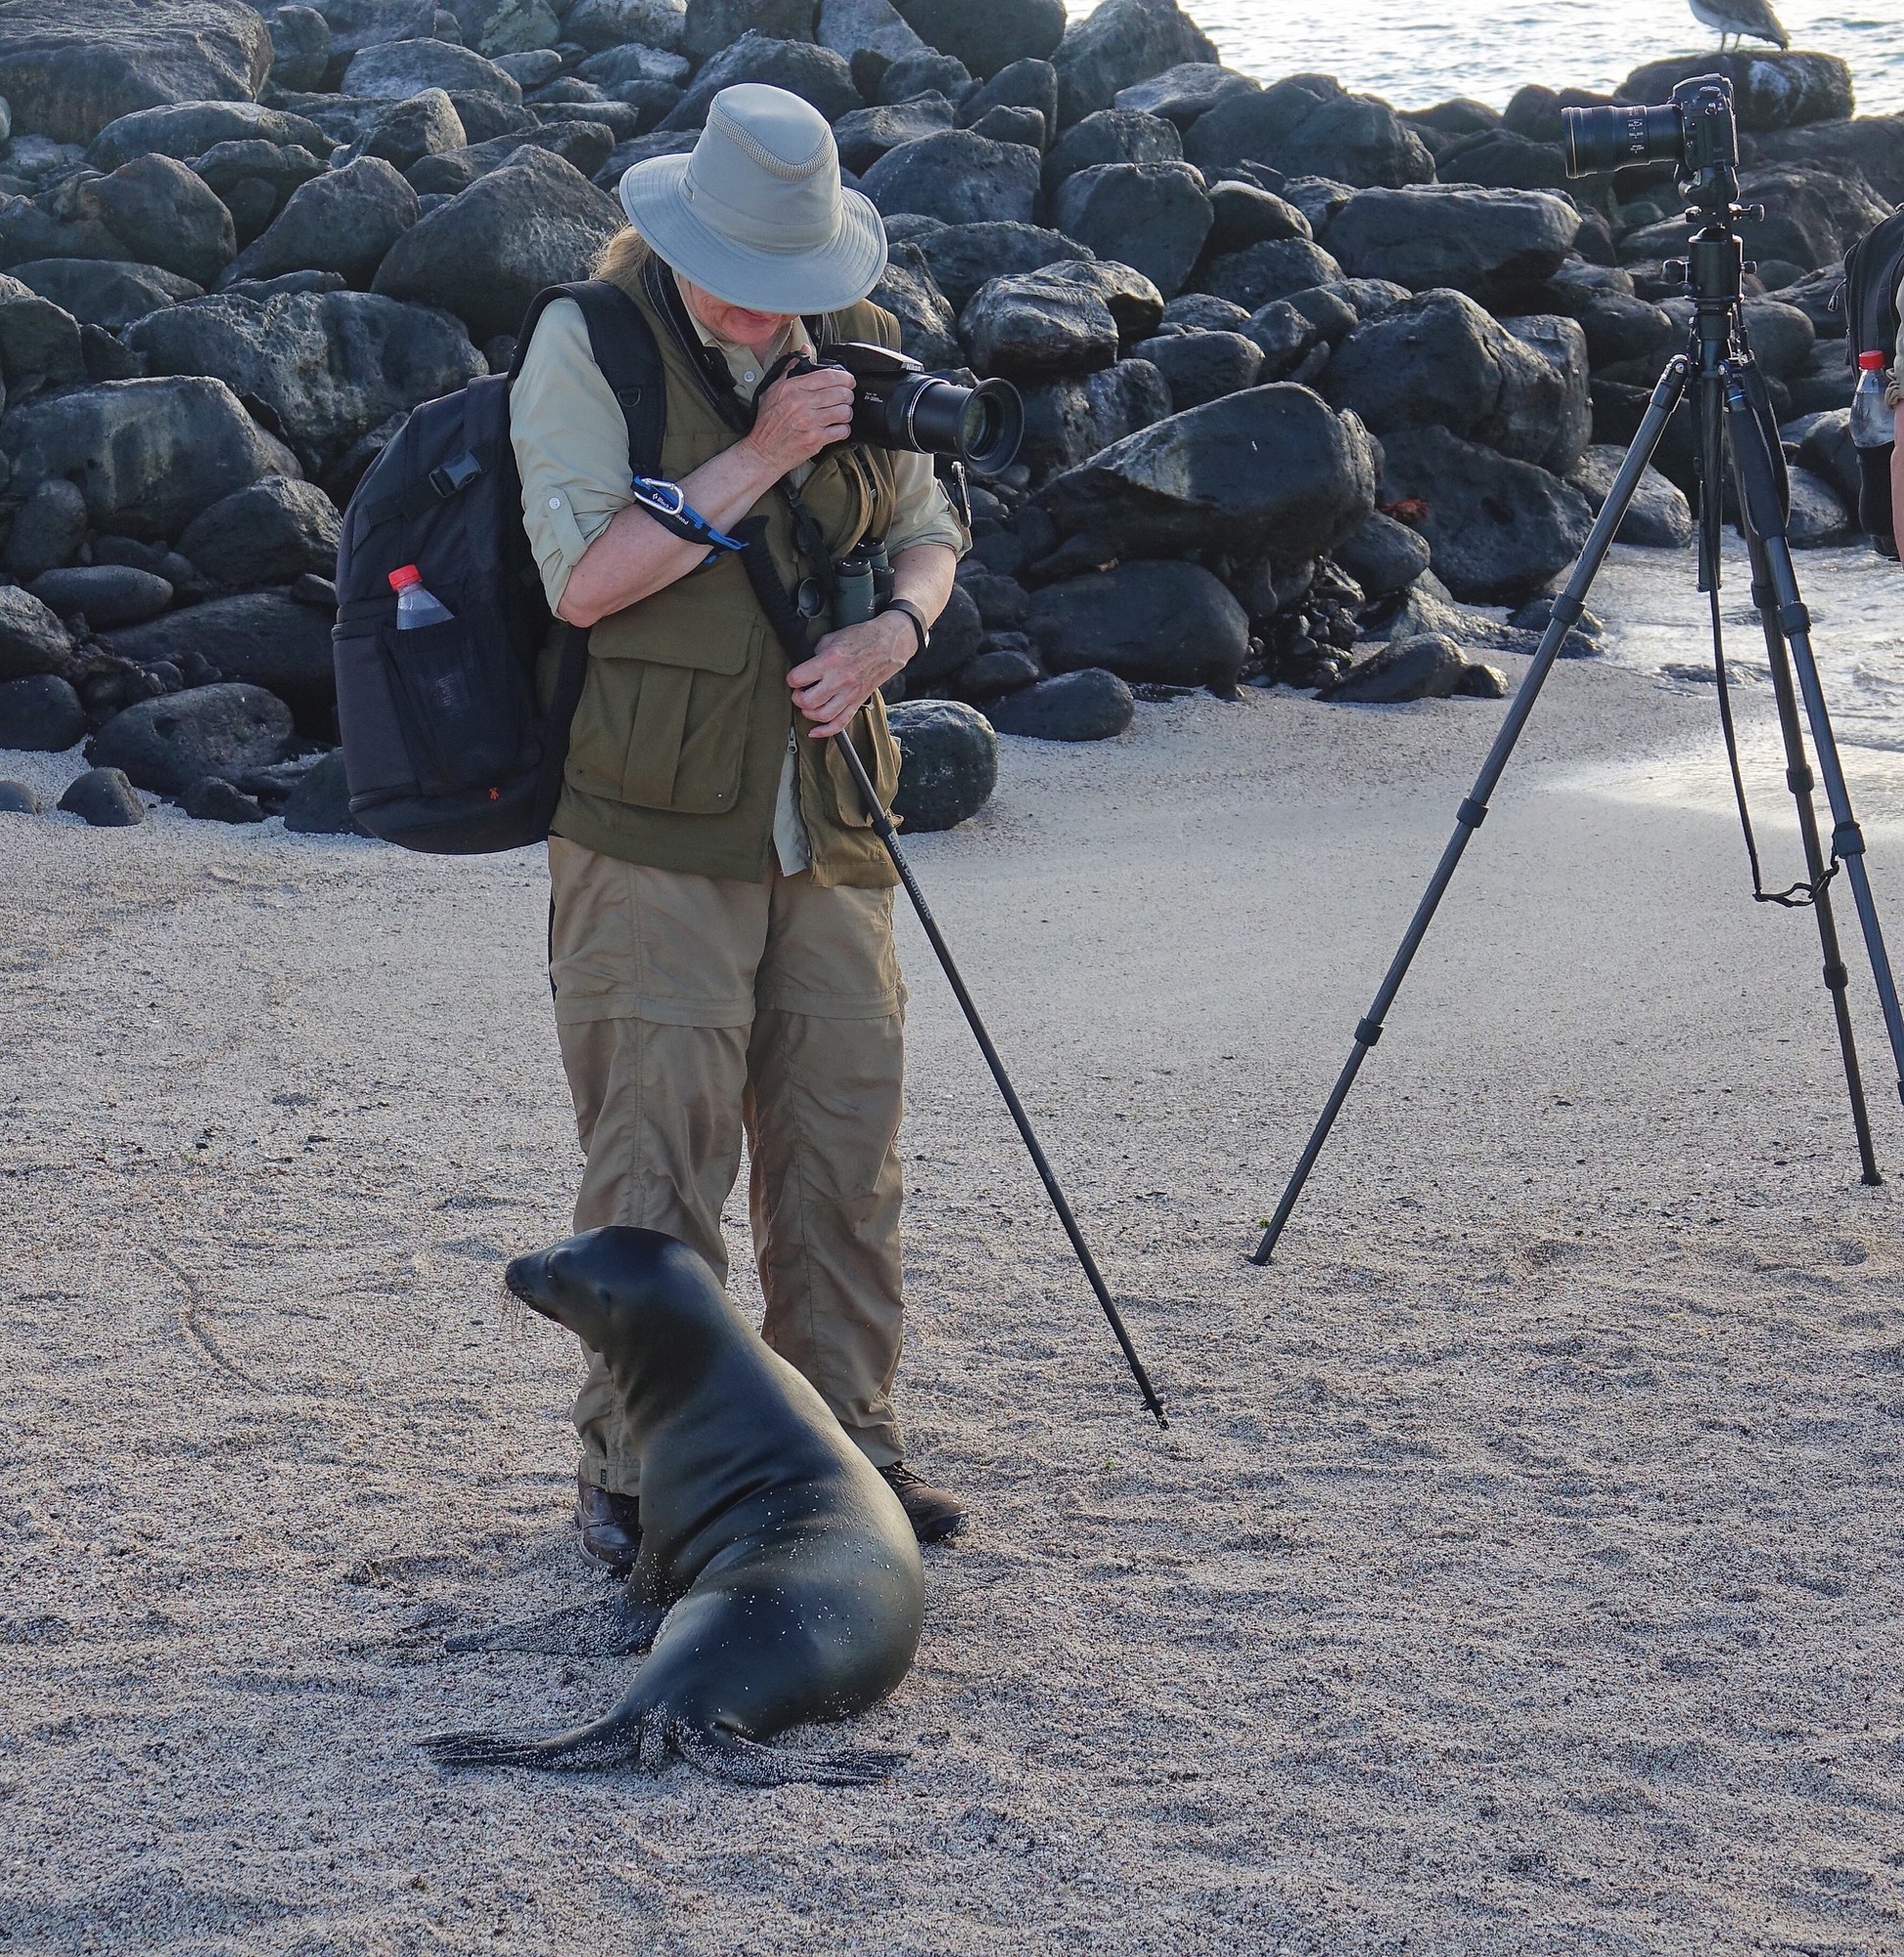
This is as good a place as any to highlight the sealions of the Galapagos. They are everywhere, from tiny pups to great beach-master bulls. They have absolutely no fear of human beings, and on several occasions we had pups come up and get very familiar with both our gear and our persons.
the sealions of the Galapagos
are very friendly 🙂
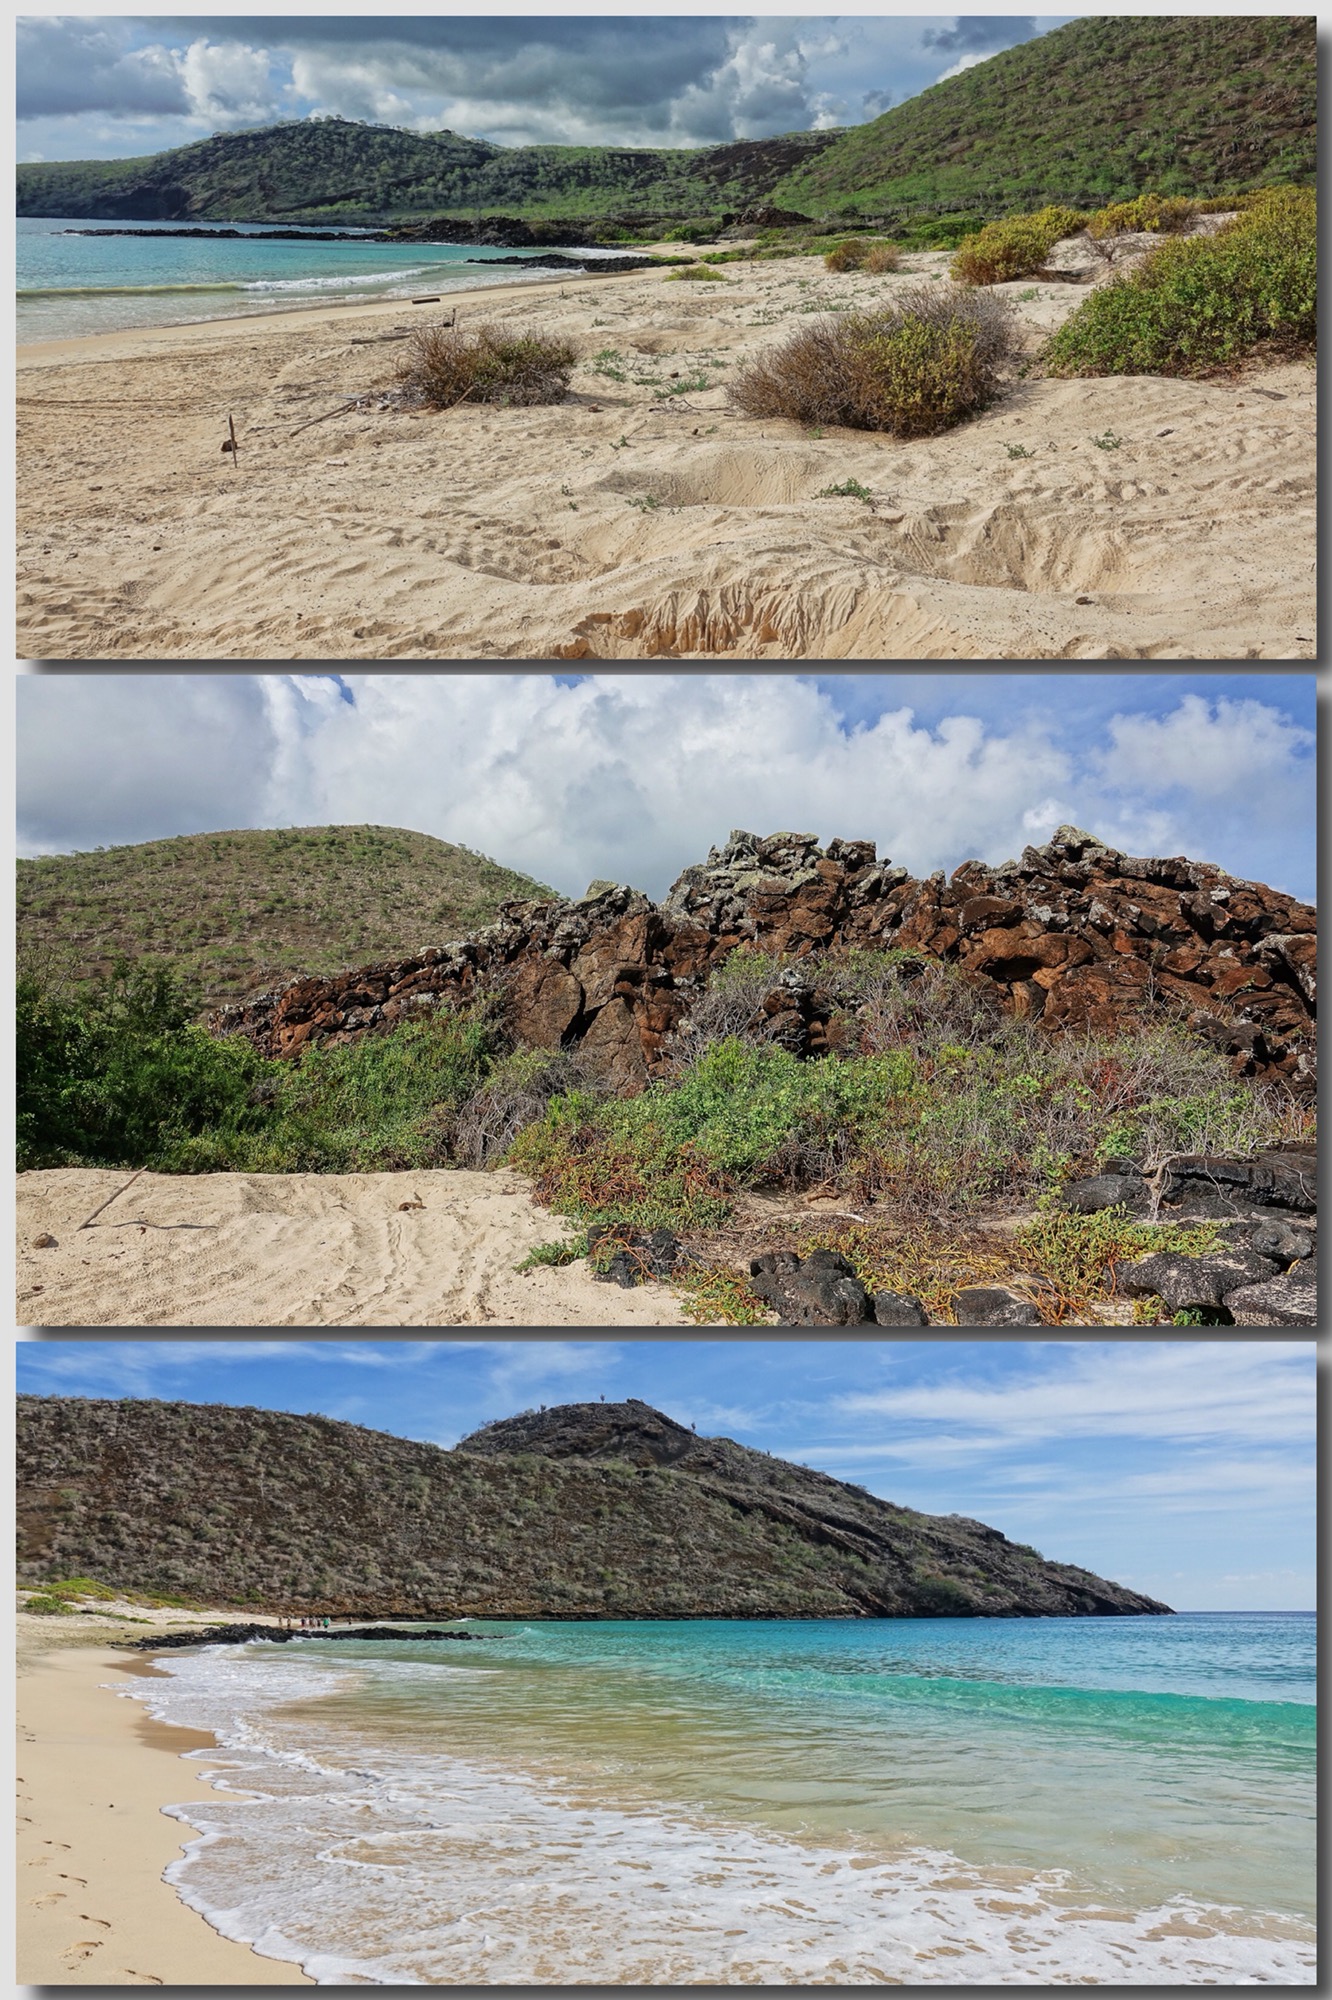
Our next day was spent on Floreana Island, one of the high islands of the Galapagos, and one with gorgeous beaches were Green Sea Turtles nest and rays swim in the surf. We did not see the turtles, but we certainly saw their excavations and tracks on the beach.
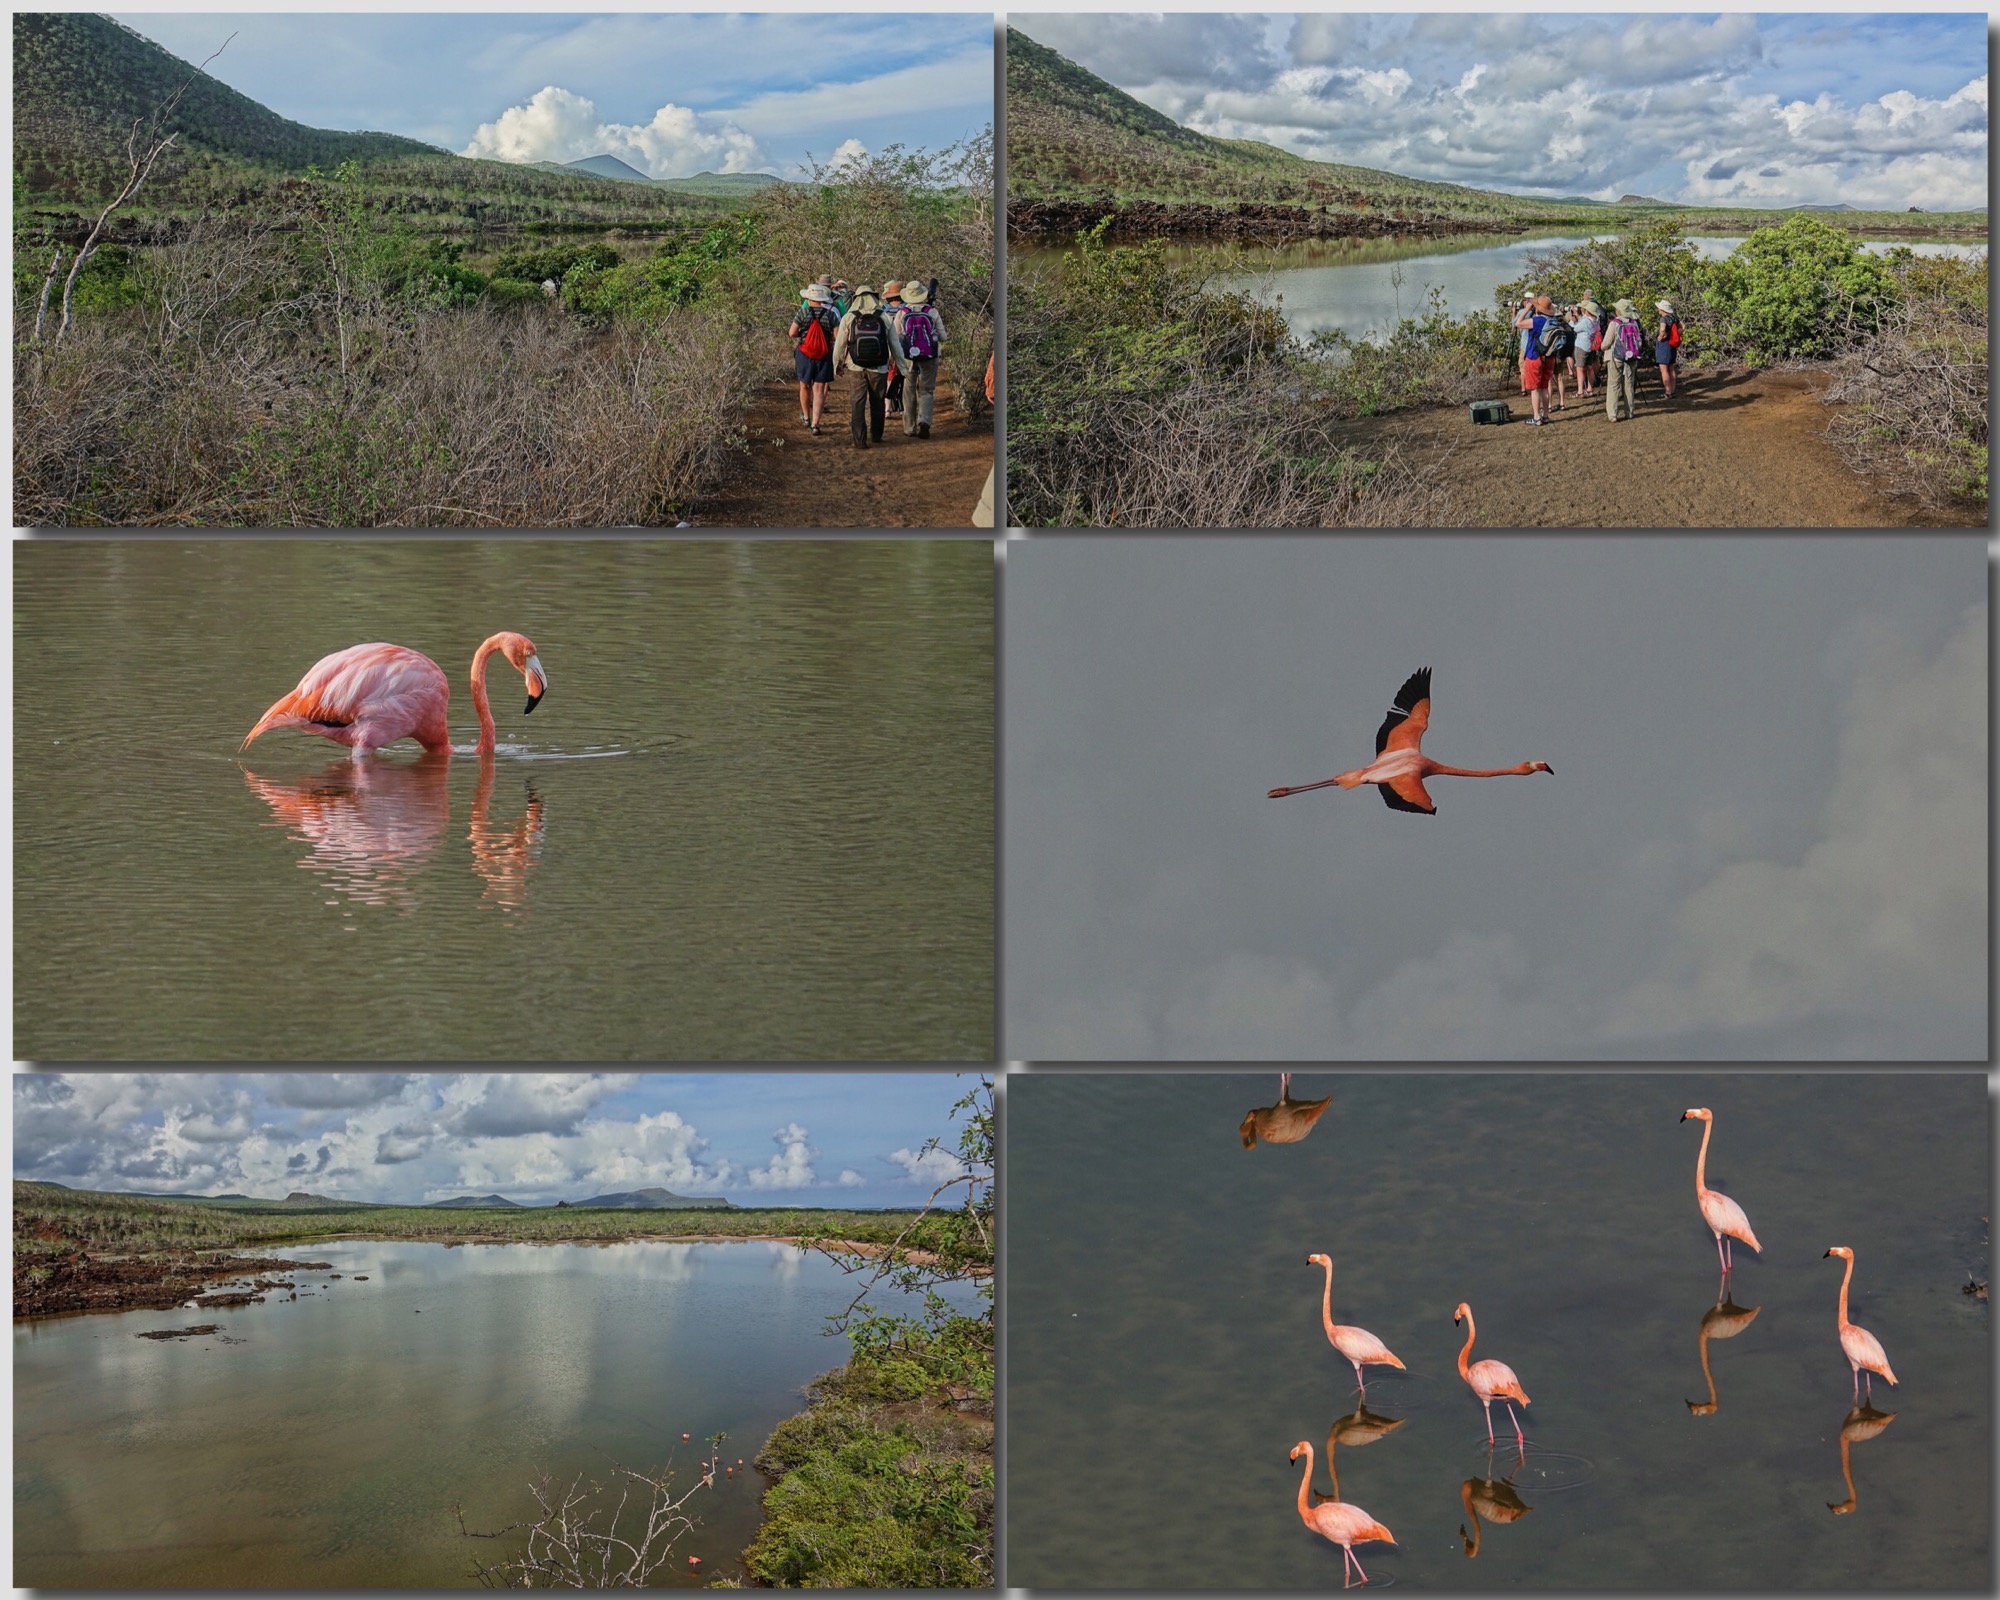
the stunningly beautiful landscape and the bright Flamingos of Floreana Island
Turtle tracks on the beach at Floreana, and the surf.
In the two panels above you can appreciate the real versatility of the Sony RX10iii (and soon to be iv). Flamingos at 600mm, in flight, and landscapes worth bringing home and showing off.
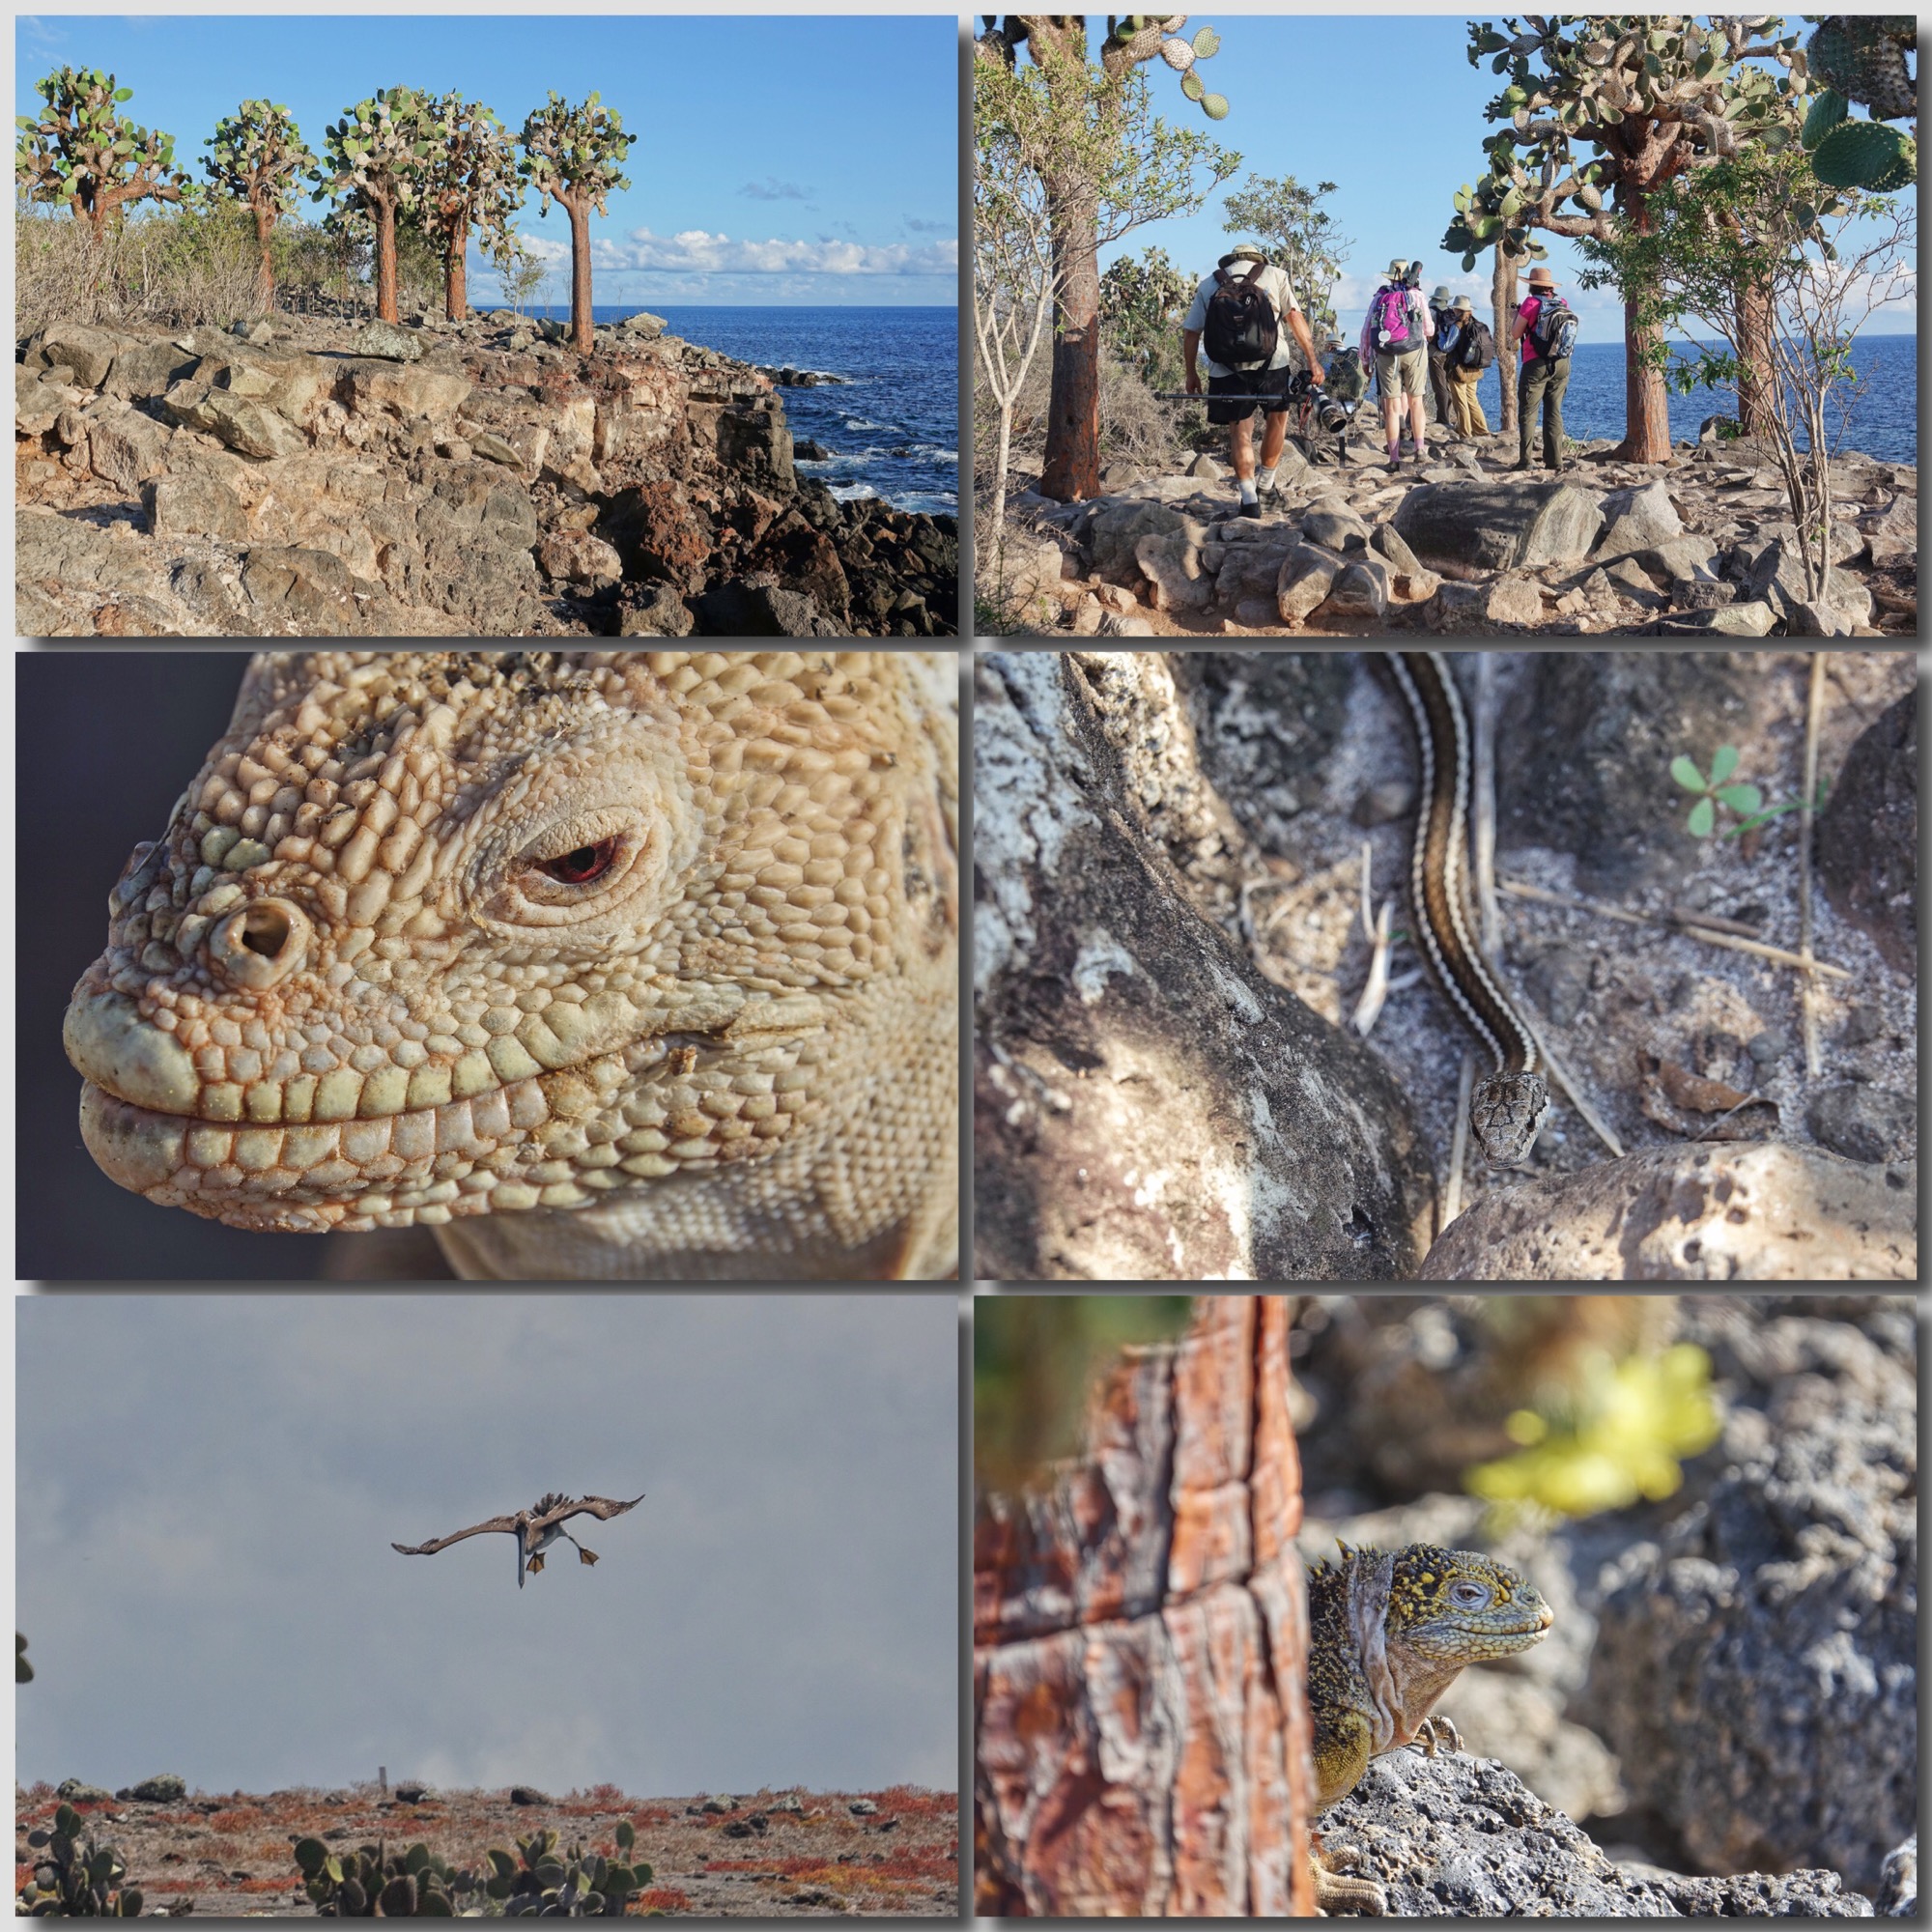
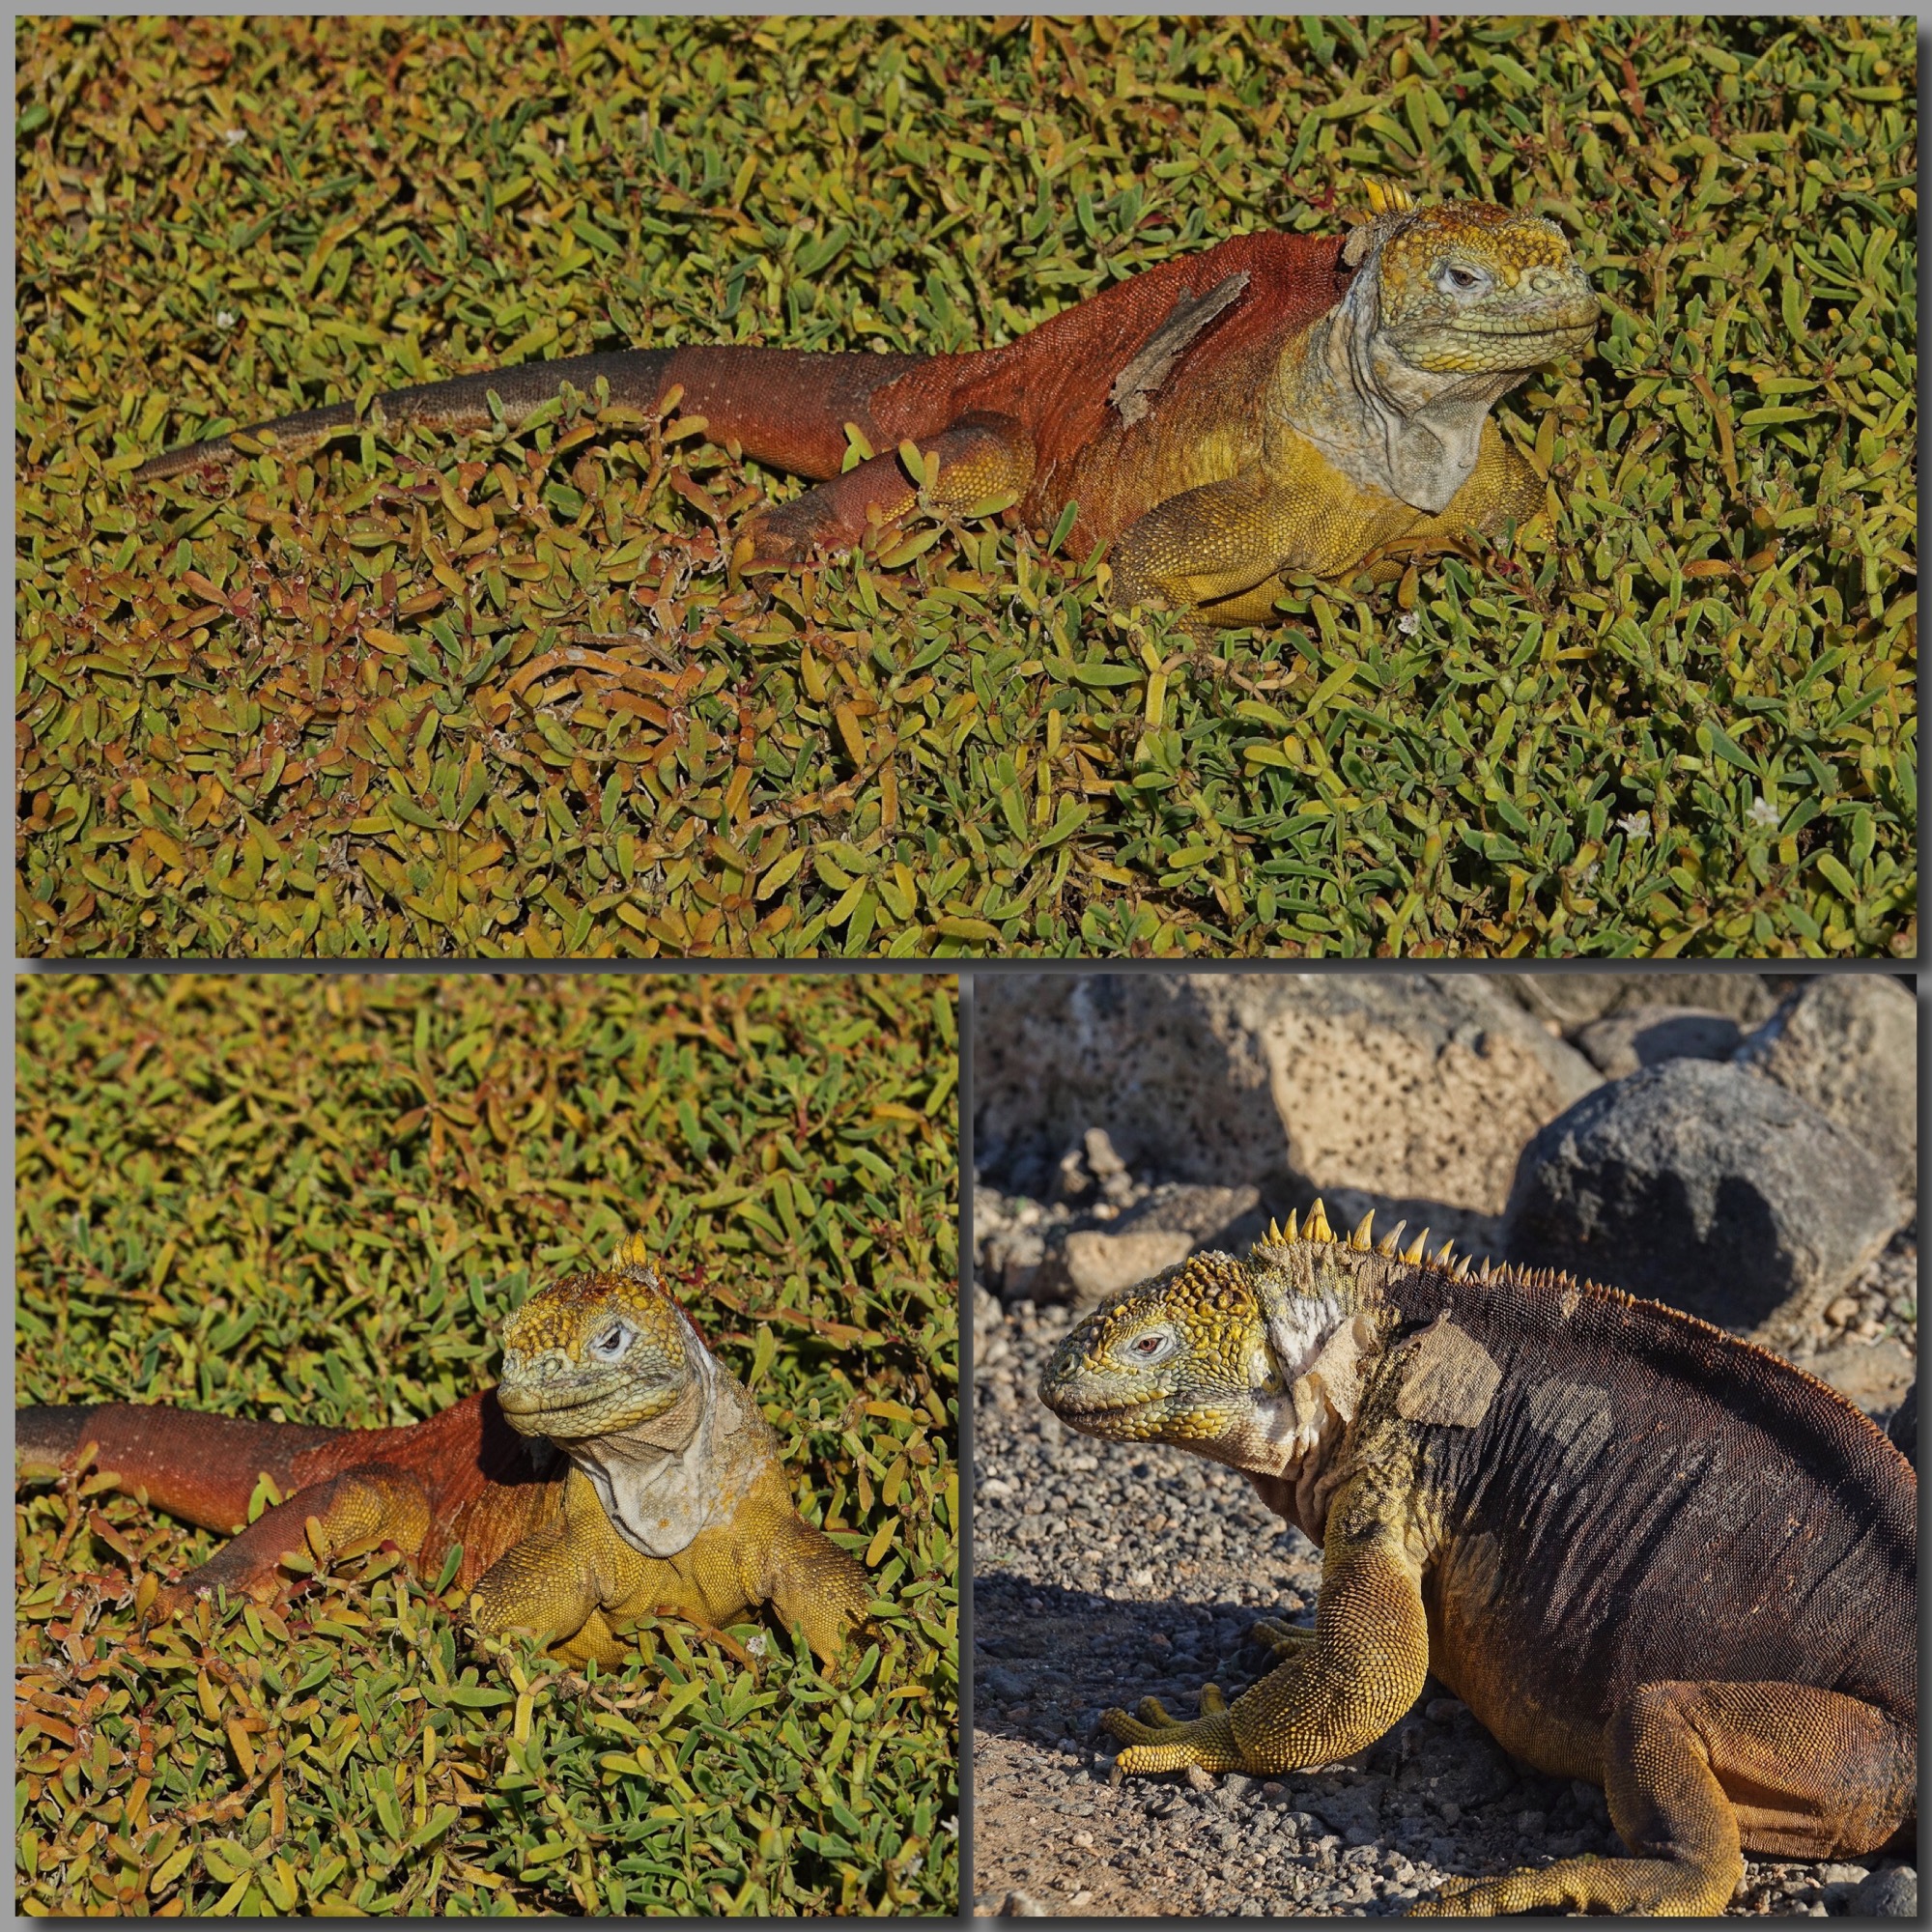
Overnight the boat moves us across the Humboldt Current once more to South Plaza, another short island…and indeed very plaza like. Here we had our fist encounters with the Giant Prickly Pears and Land Iguanas.
Giant Prickly Pear trees, and Land Iguanas. Galapagos Racer Snake.
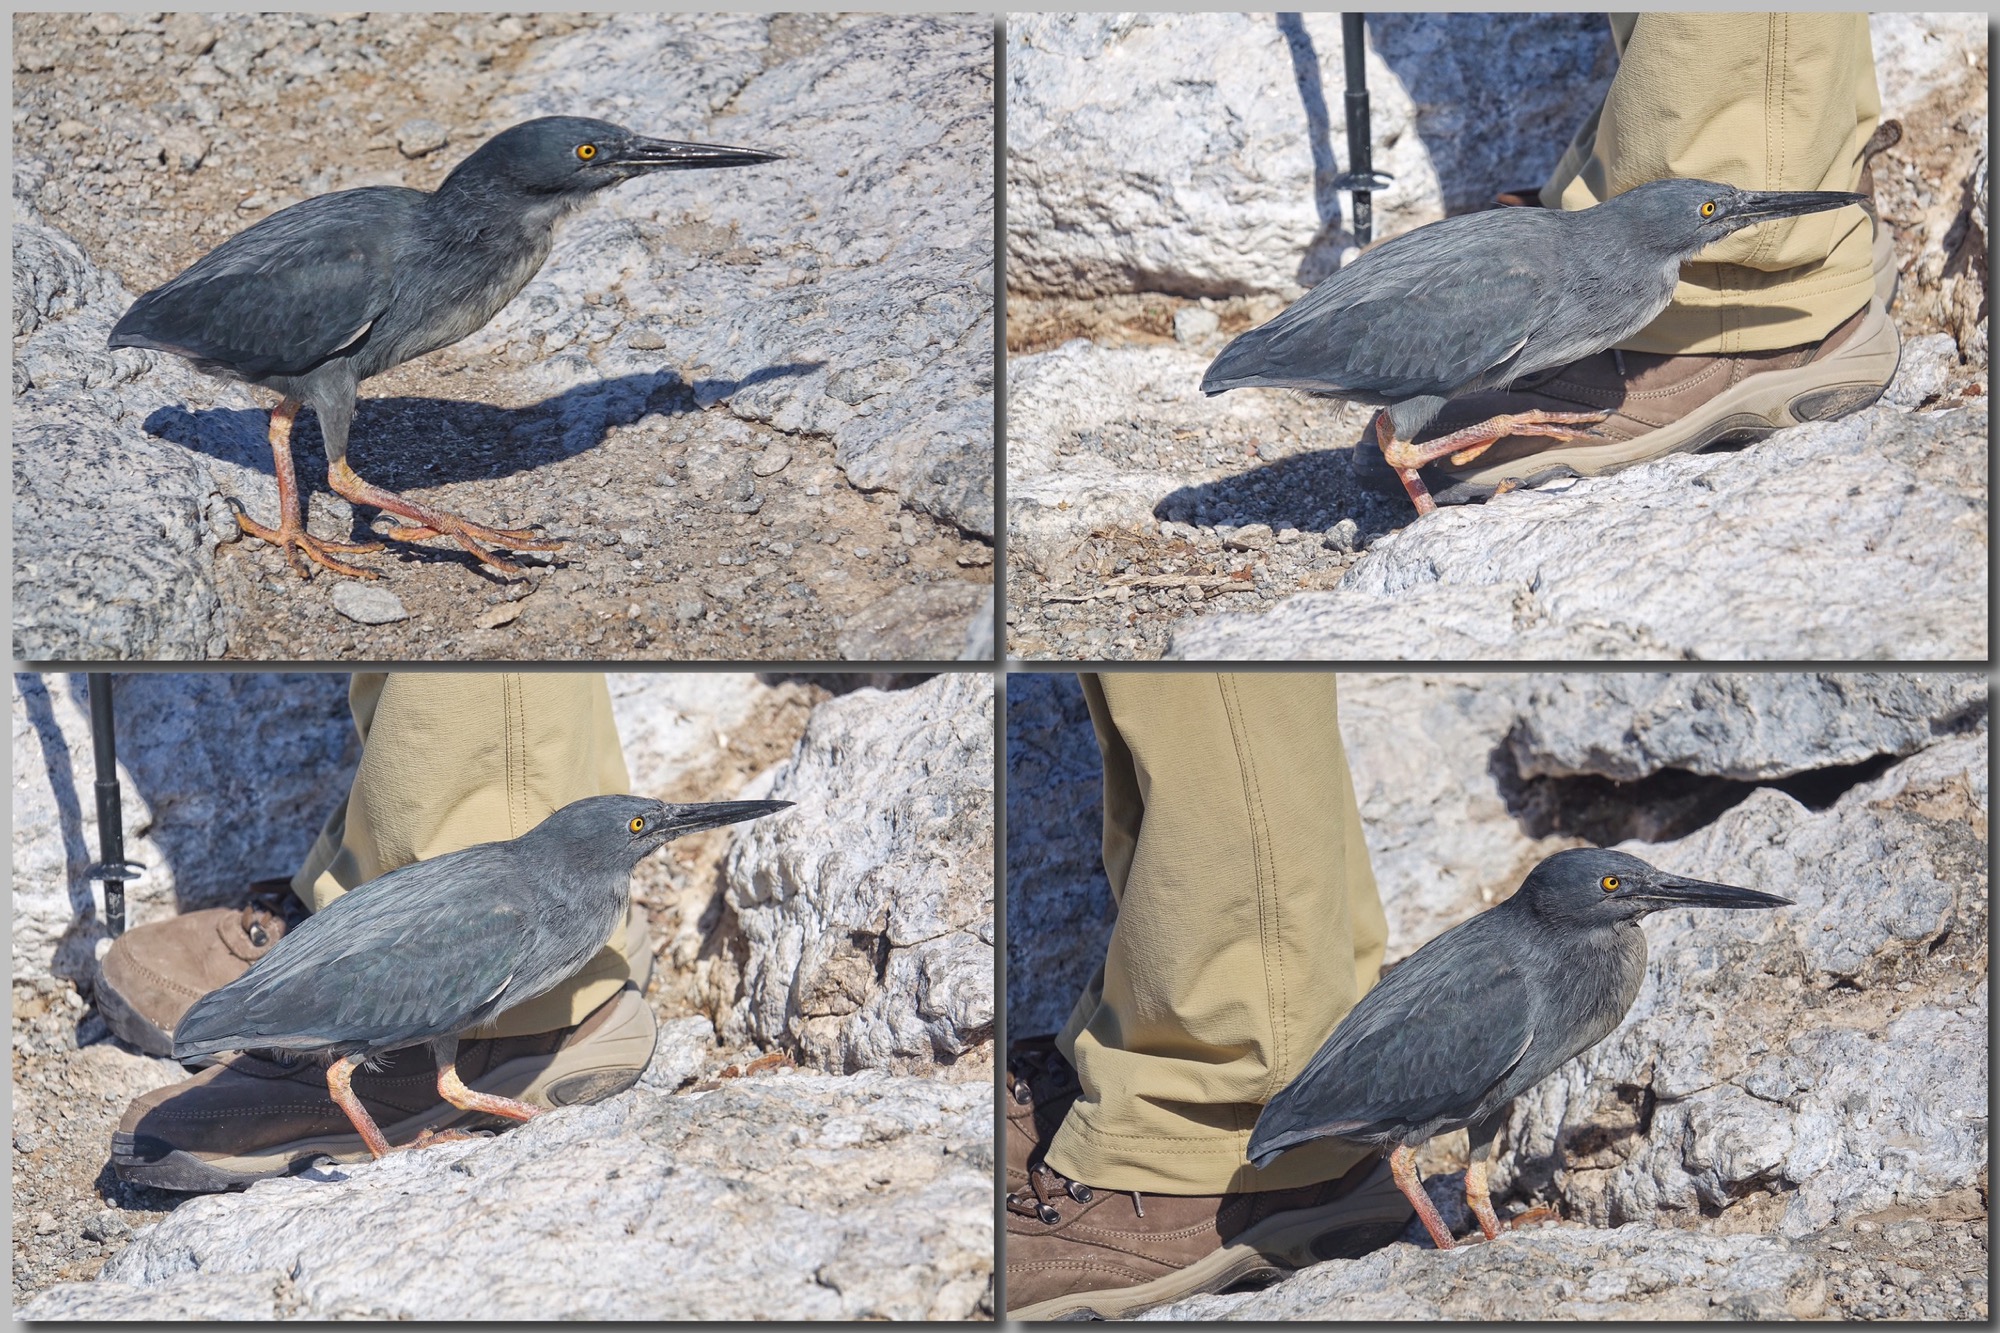
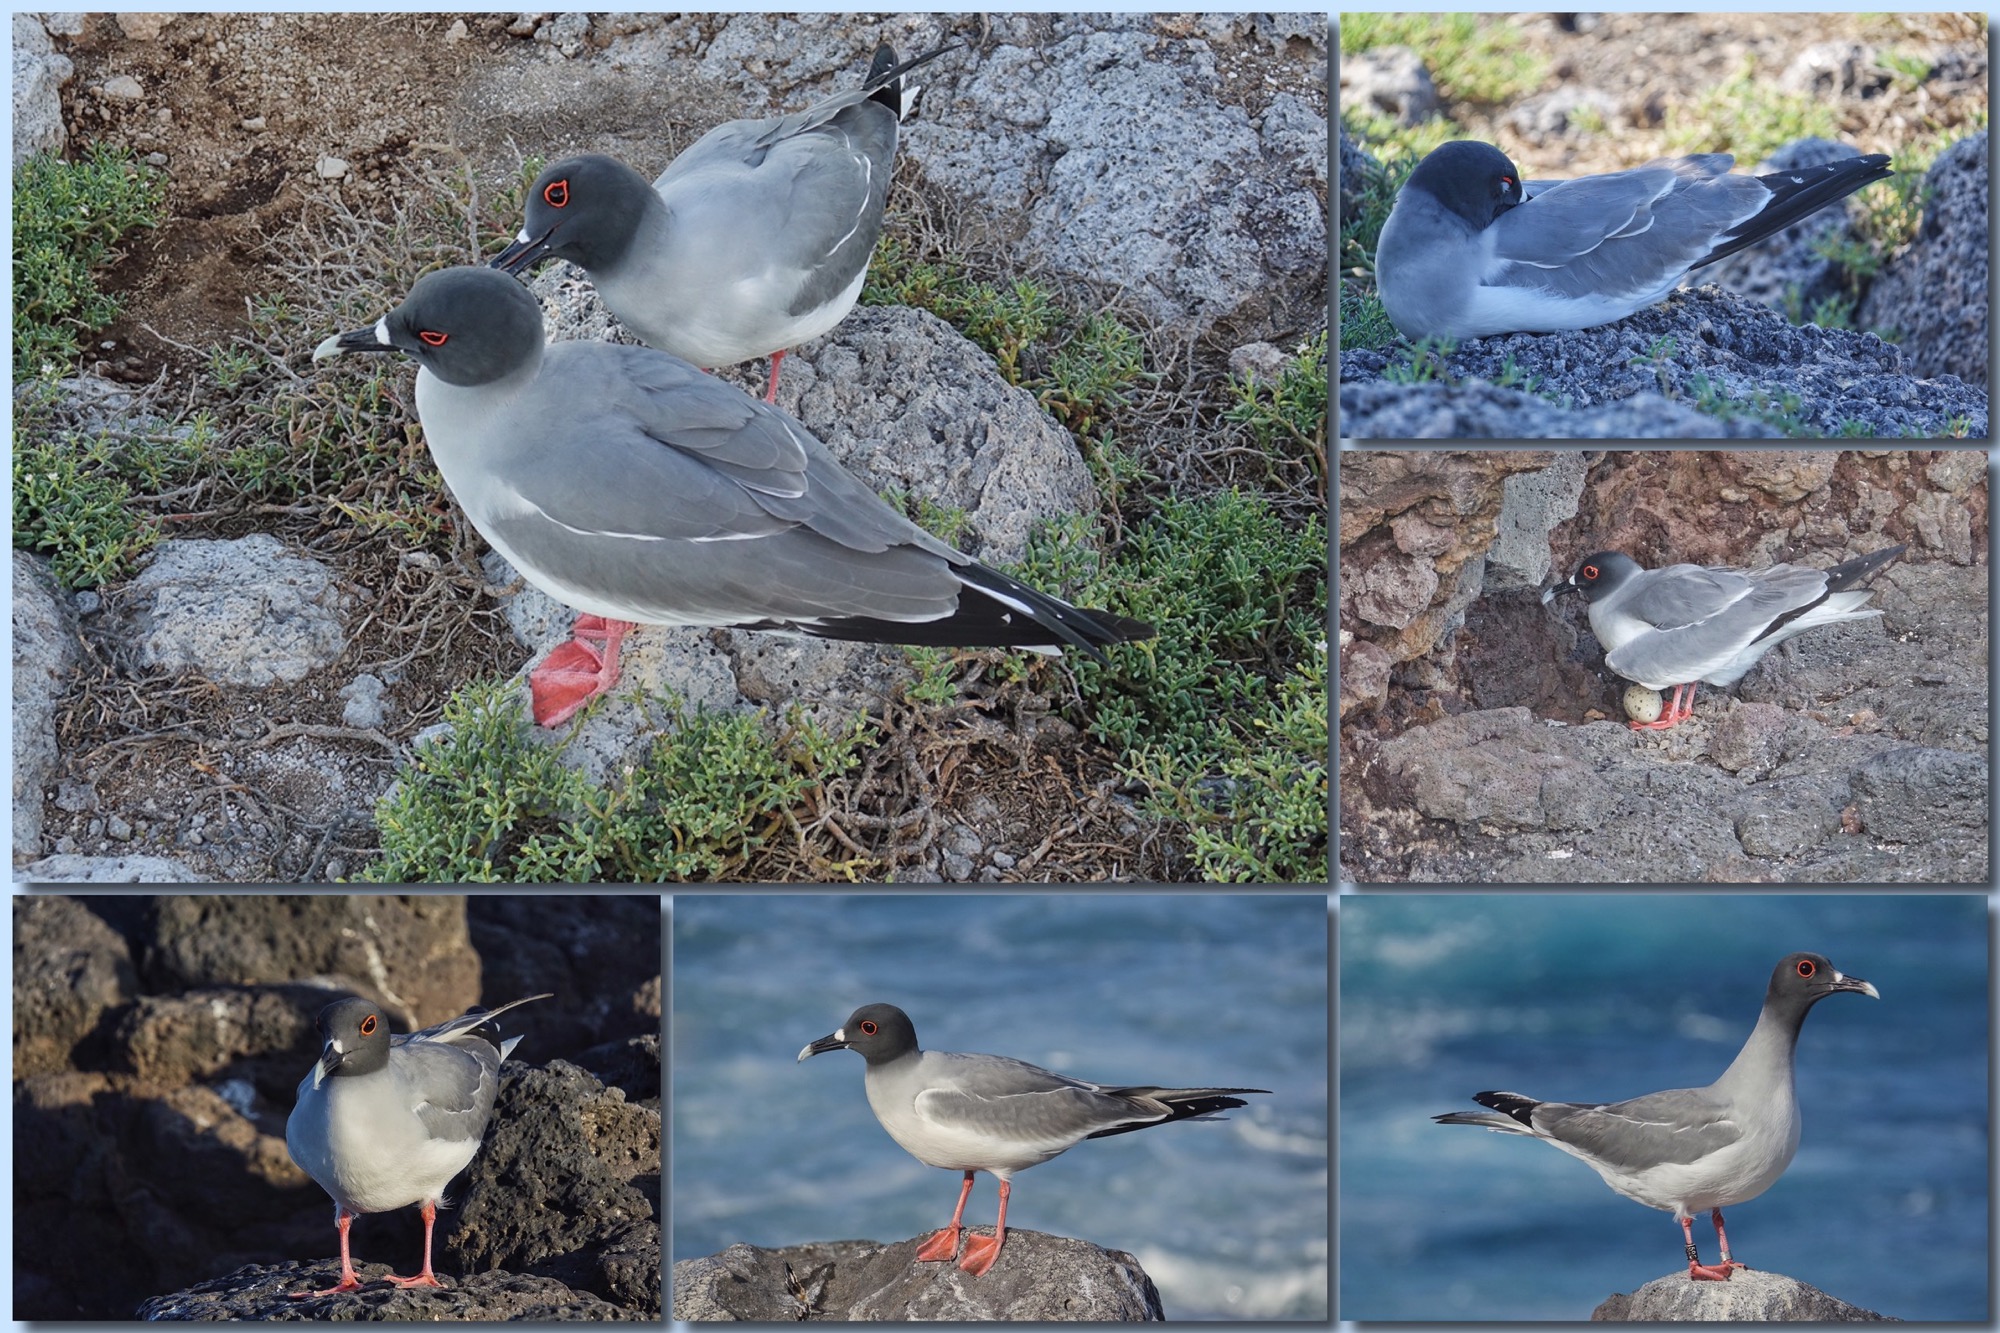
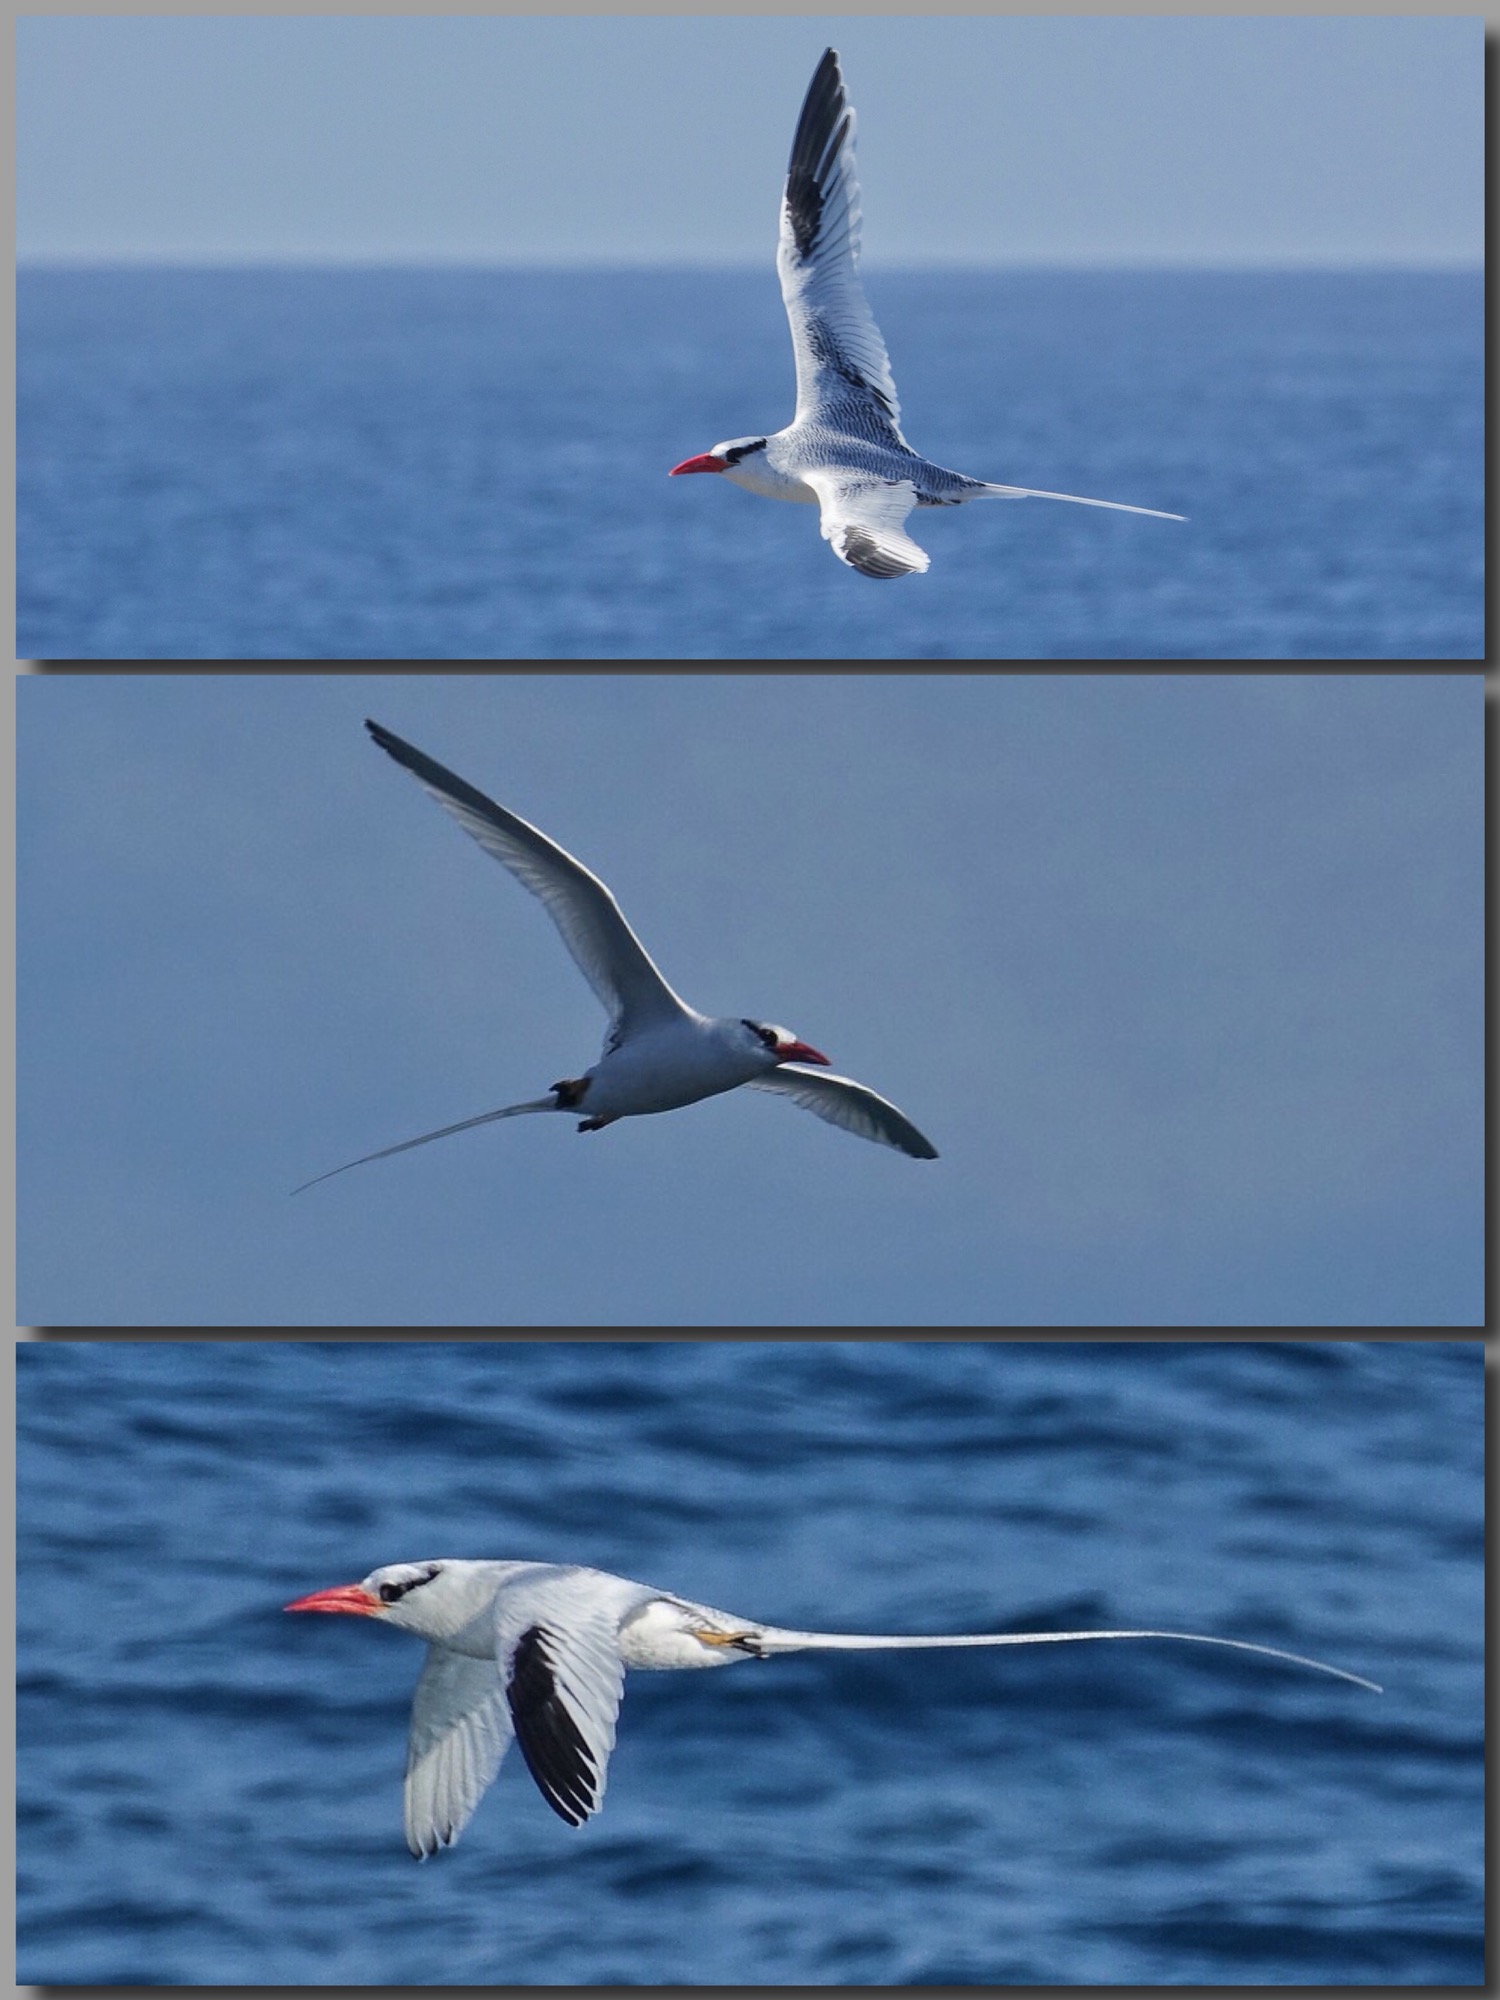
The afternoon was spent on Santa Fe Island, with more Land Iguanas, chances to photograph Tropic Birds from the cliffs, wonderful views of Swallow-tail Gulls, and a close encounter with a Lava Heron…as well as stunning landscapes.
Lava Heron. Totally fearless…
Land Iguanas
Swallow-tail Gull, in my opinion, one of the most attractive gulls
Red-billed Tropic Birds, Santa Fe Island
Santa Fe Island, Land Iguana, Prickly Pears, sunset!
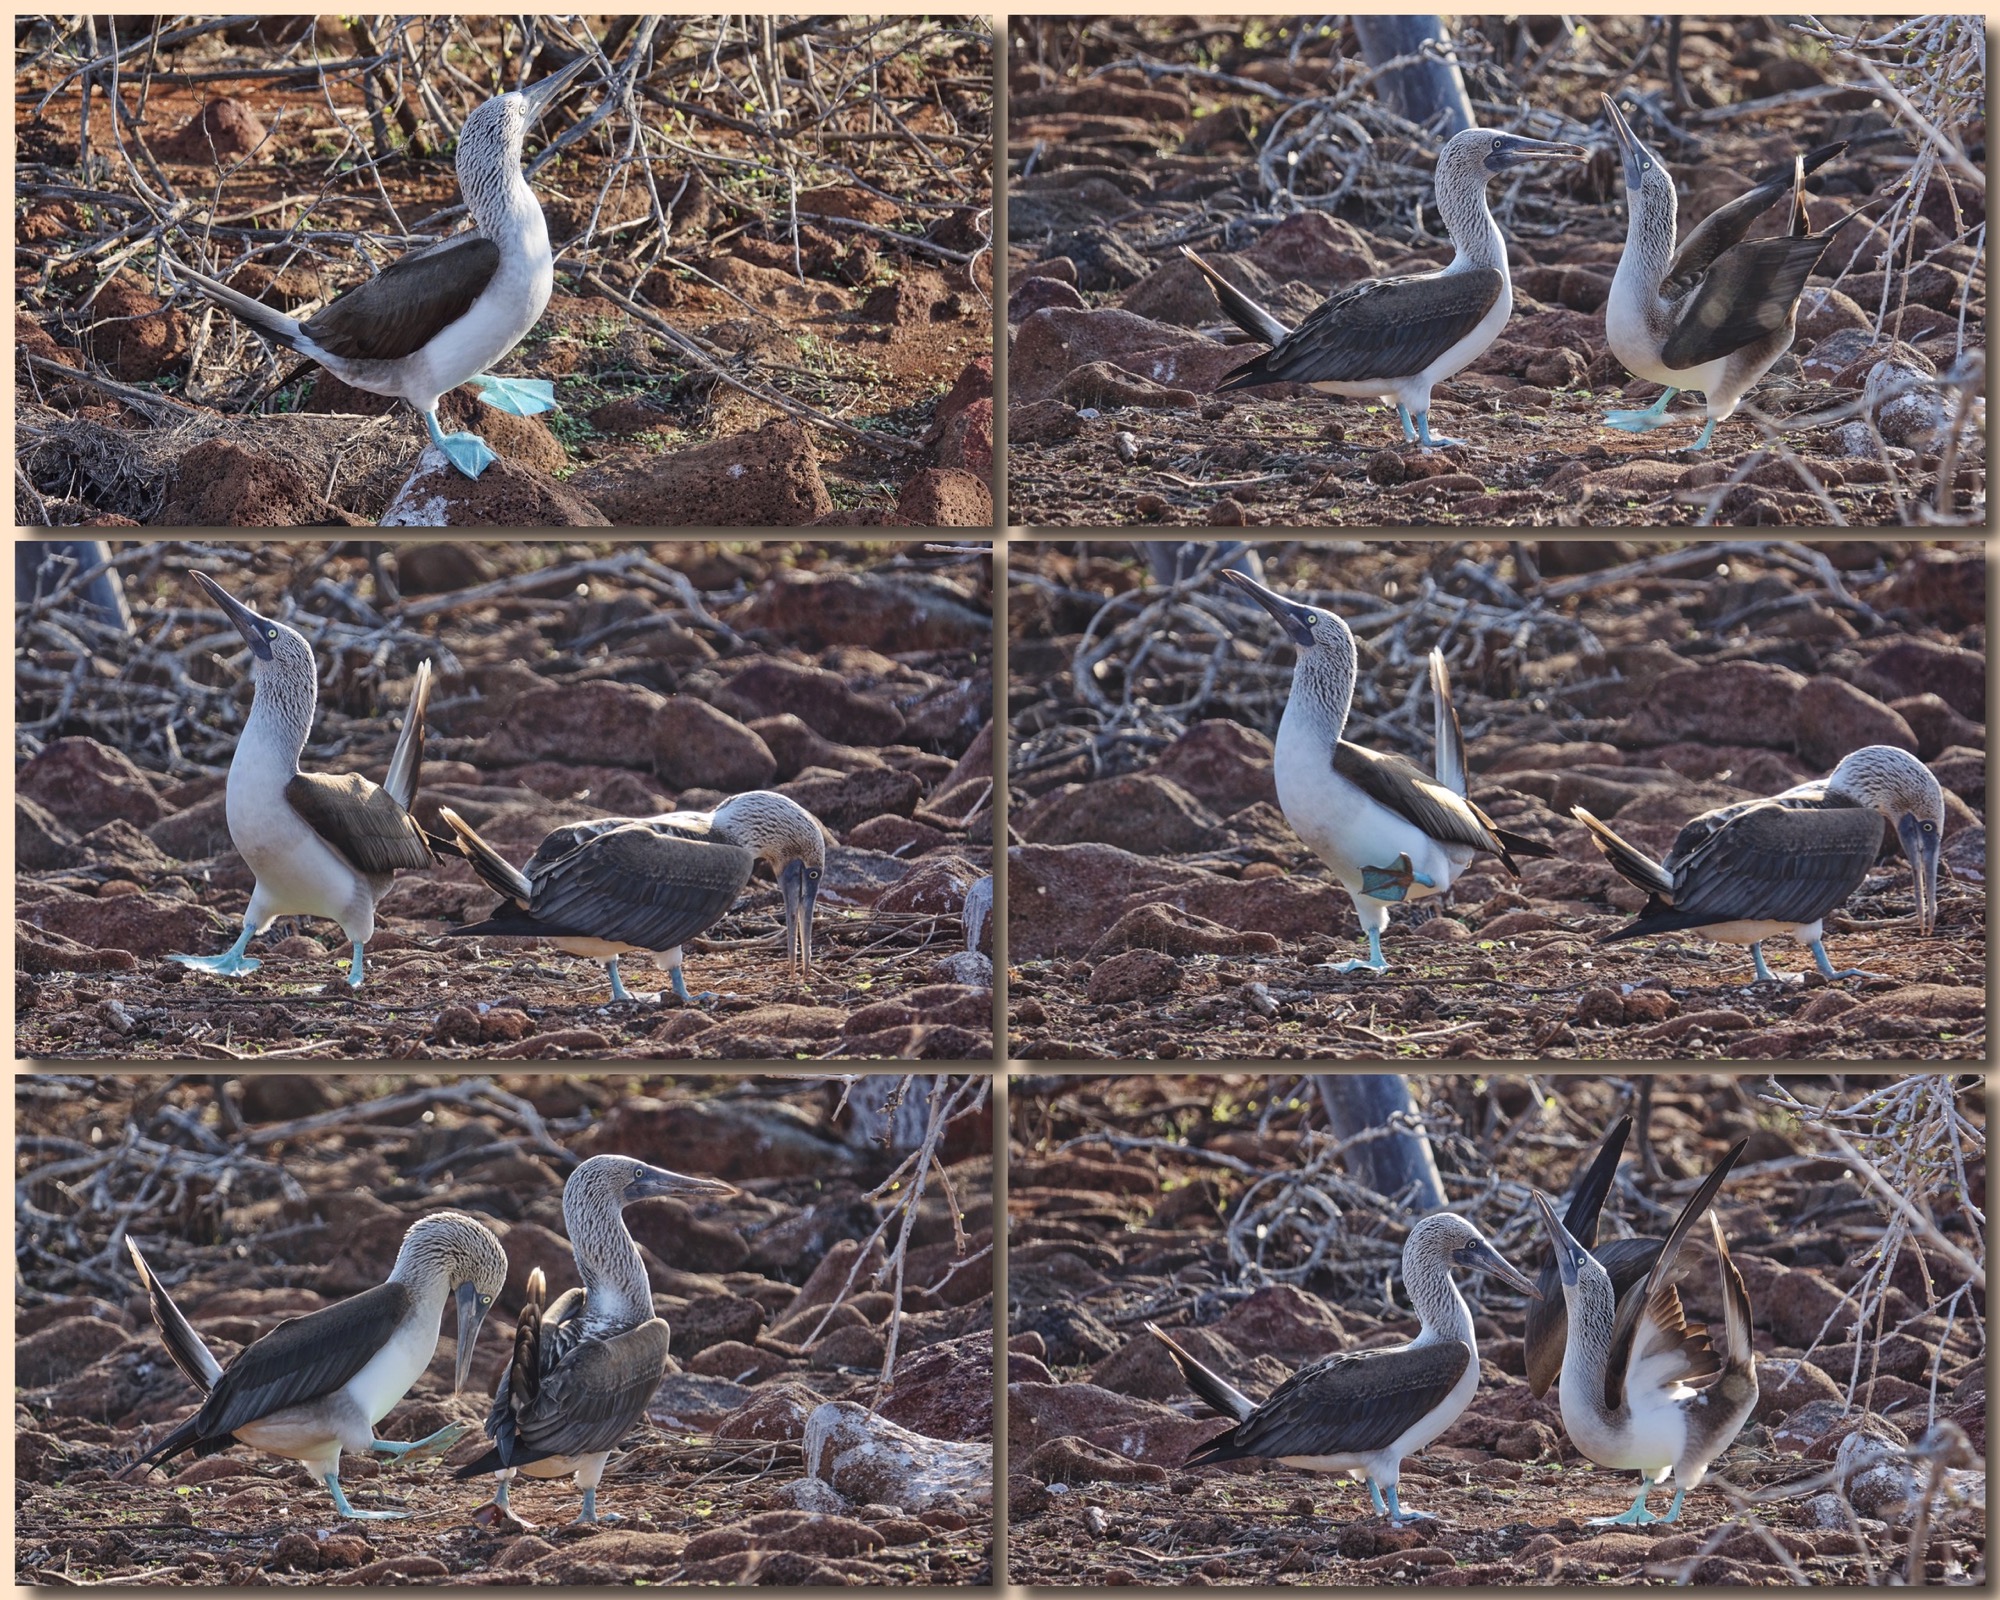
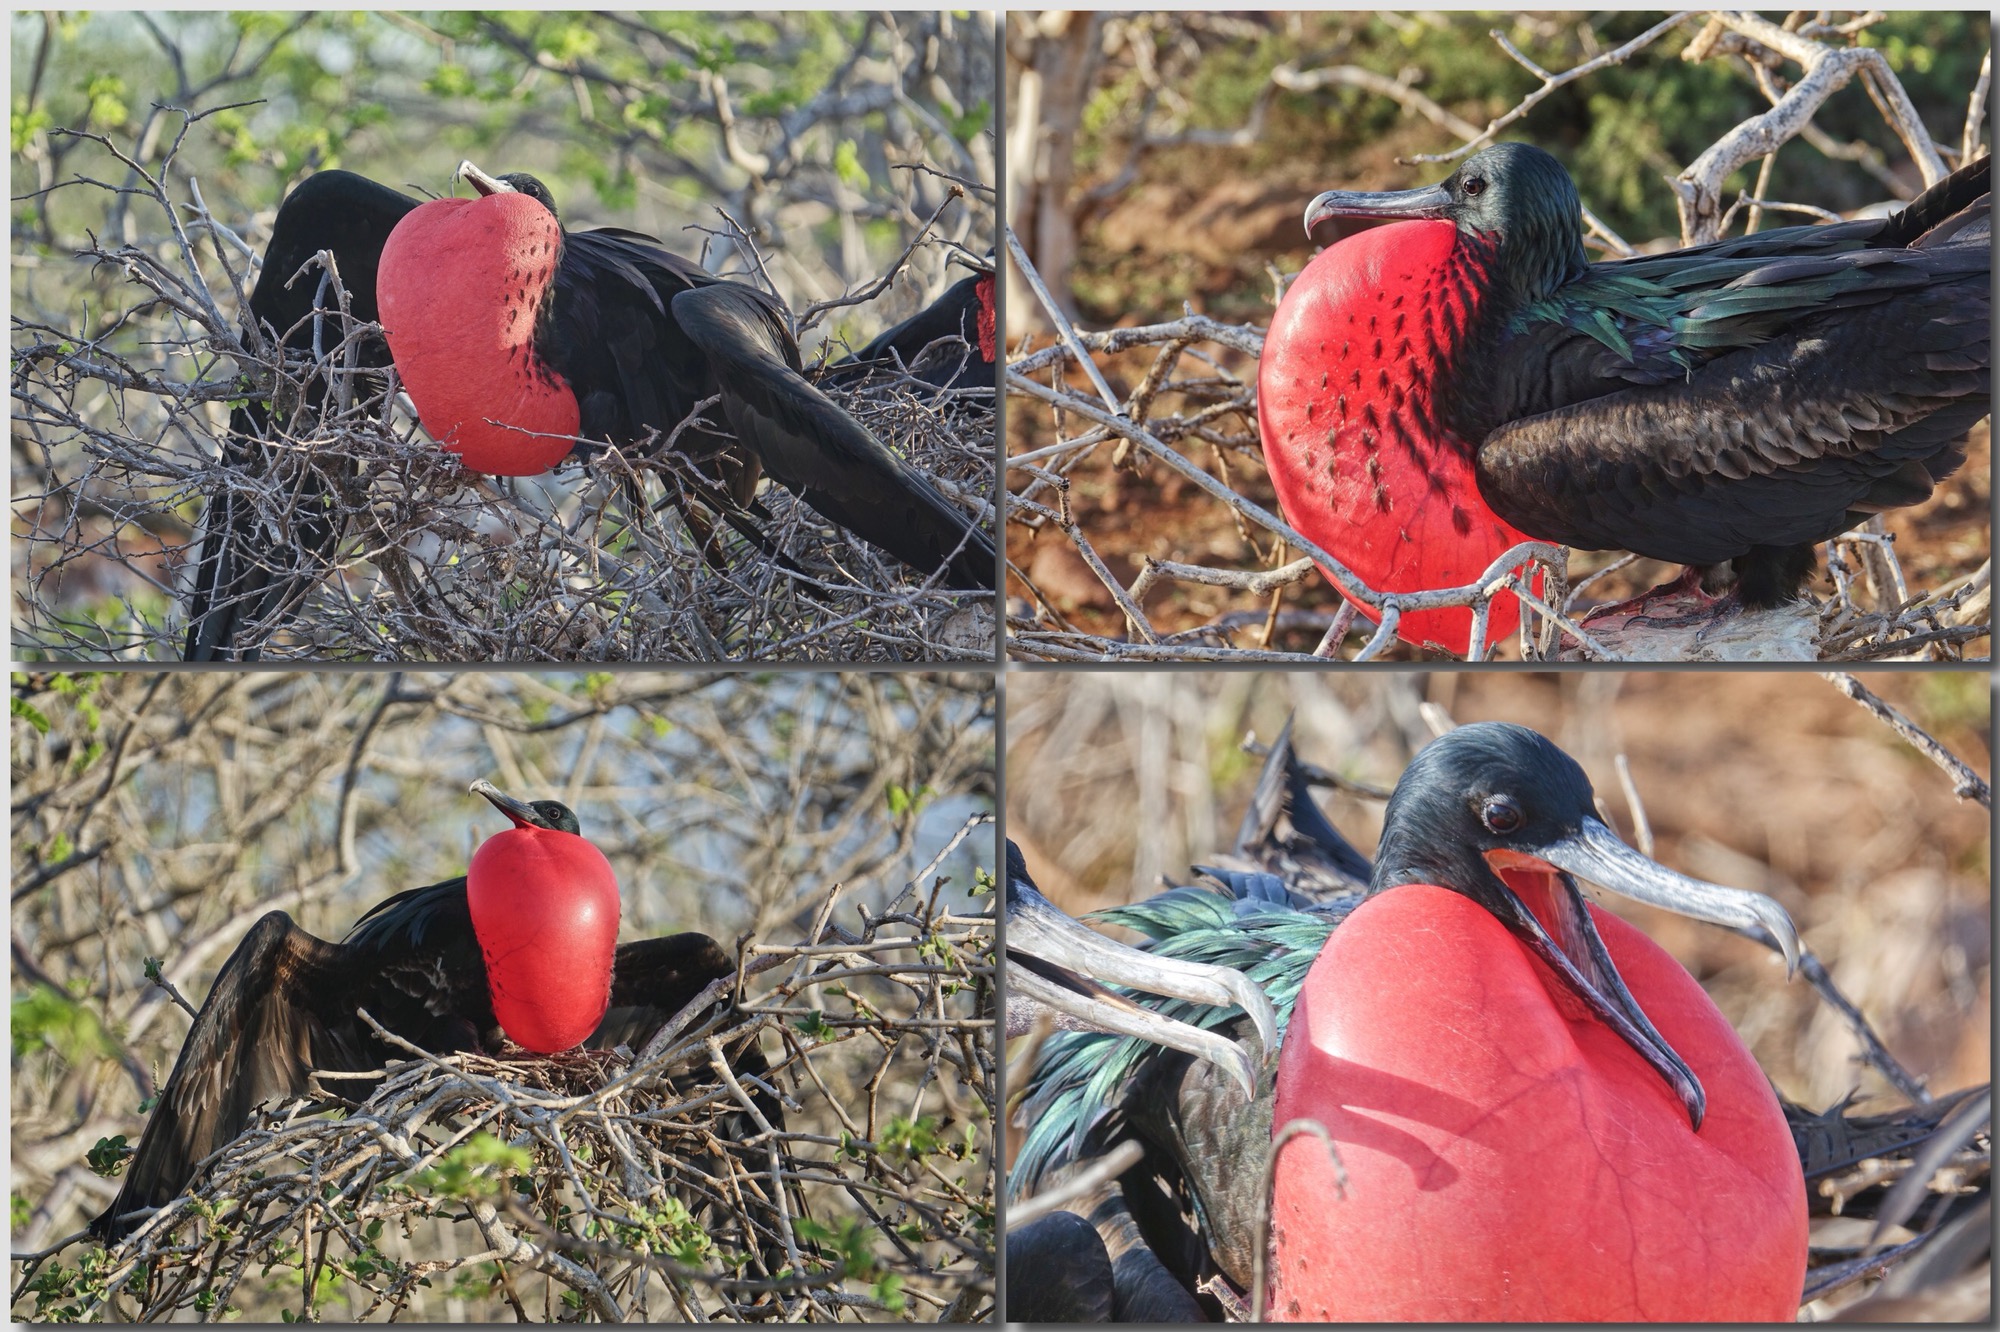
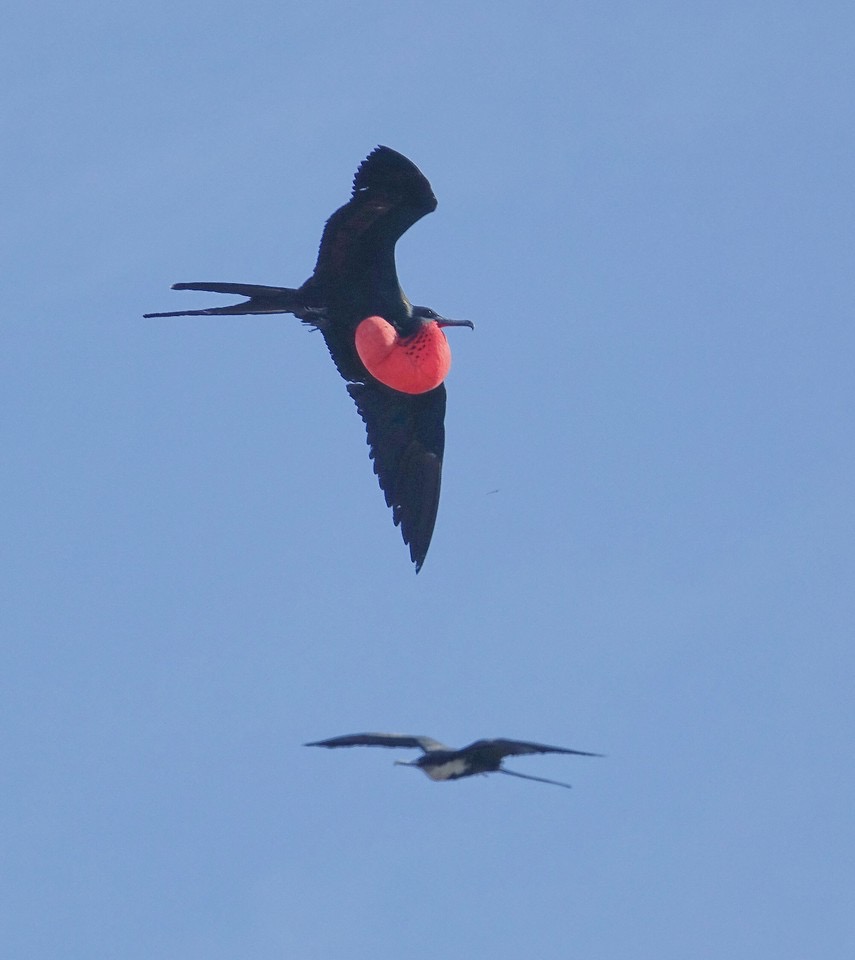
North Seymour Island was our next to last stop…saving the best for last. North Seymour has nesting colonies of Blue-footed Boobies and a mixed colony of both Magnificent and Great Frigatebirds. The Boobies are everywhere, underfoot, nesting in the trail, beside the trail…so close you sometimes have to walk around them. And they are displaying…doing their booby dance in pairs. The Frigatebirds are almost as close, nesting in taller brush wherever they can find space…and the males are in full display (or were when we visited). It is a totally amazing experience.
Blue-footed Boobies, North Seymour Island
The booby dance!
Nesting Great or Magnificent Frigatebirds. The Great have more green sheen on the neck but they are hard to tell apart.
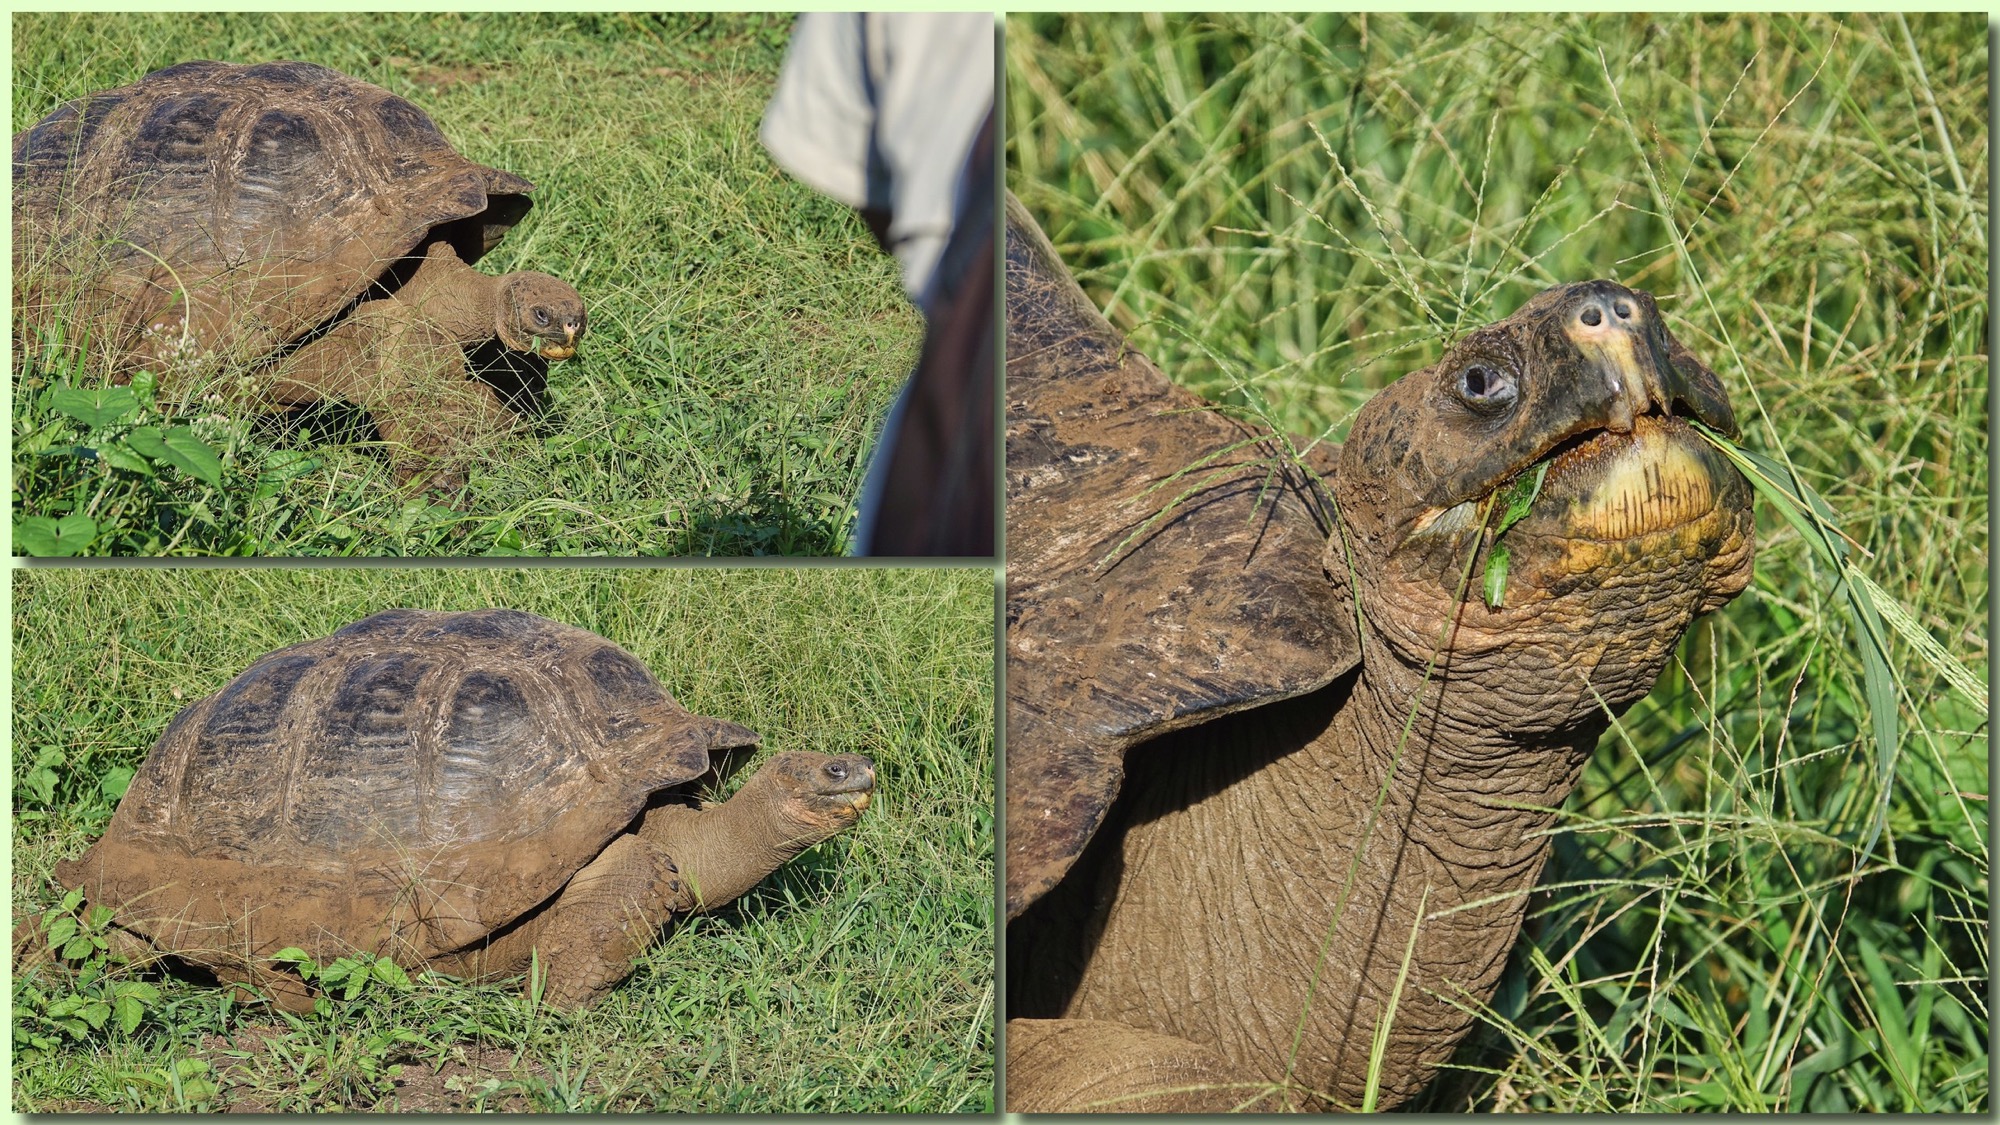
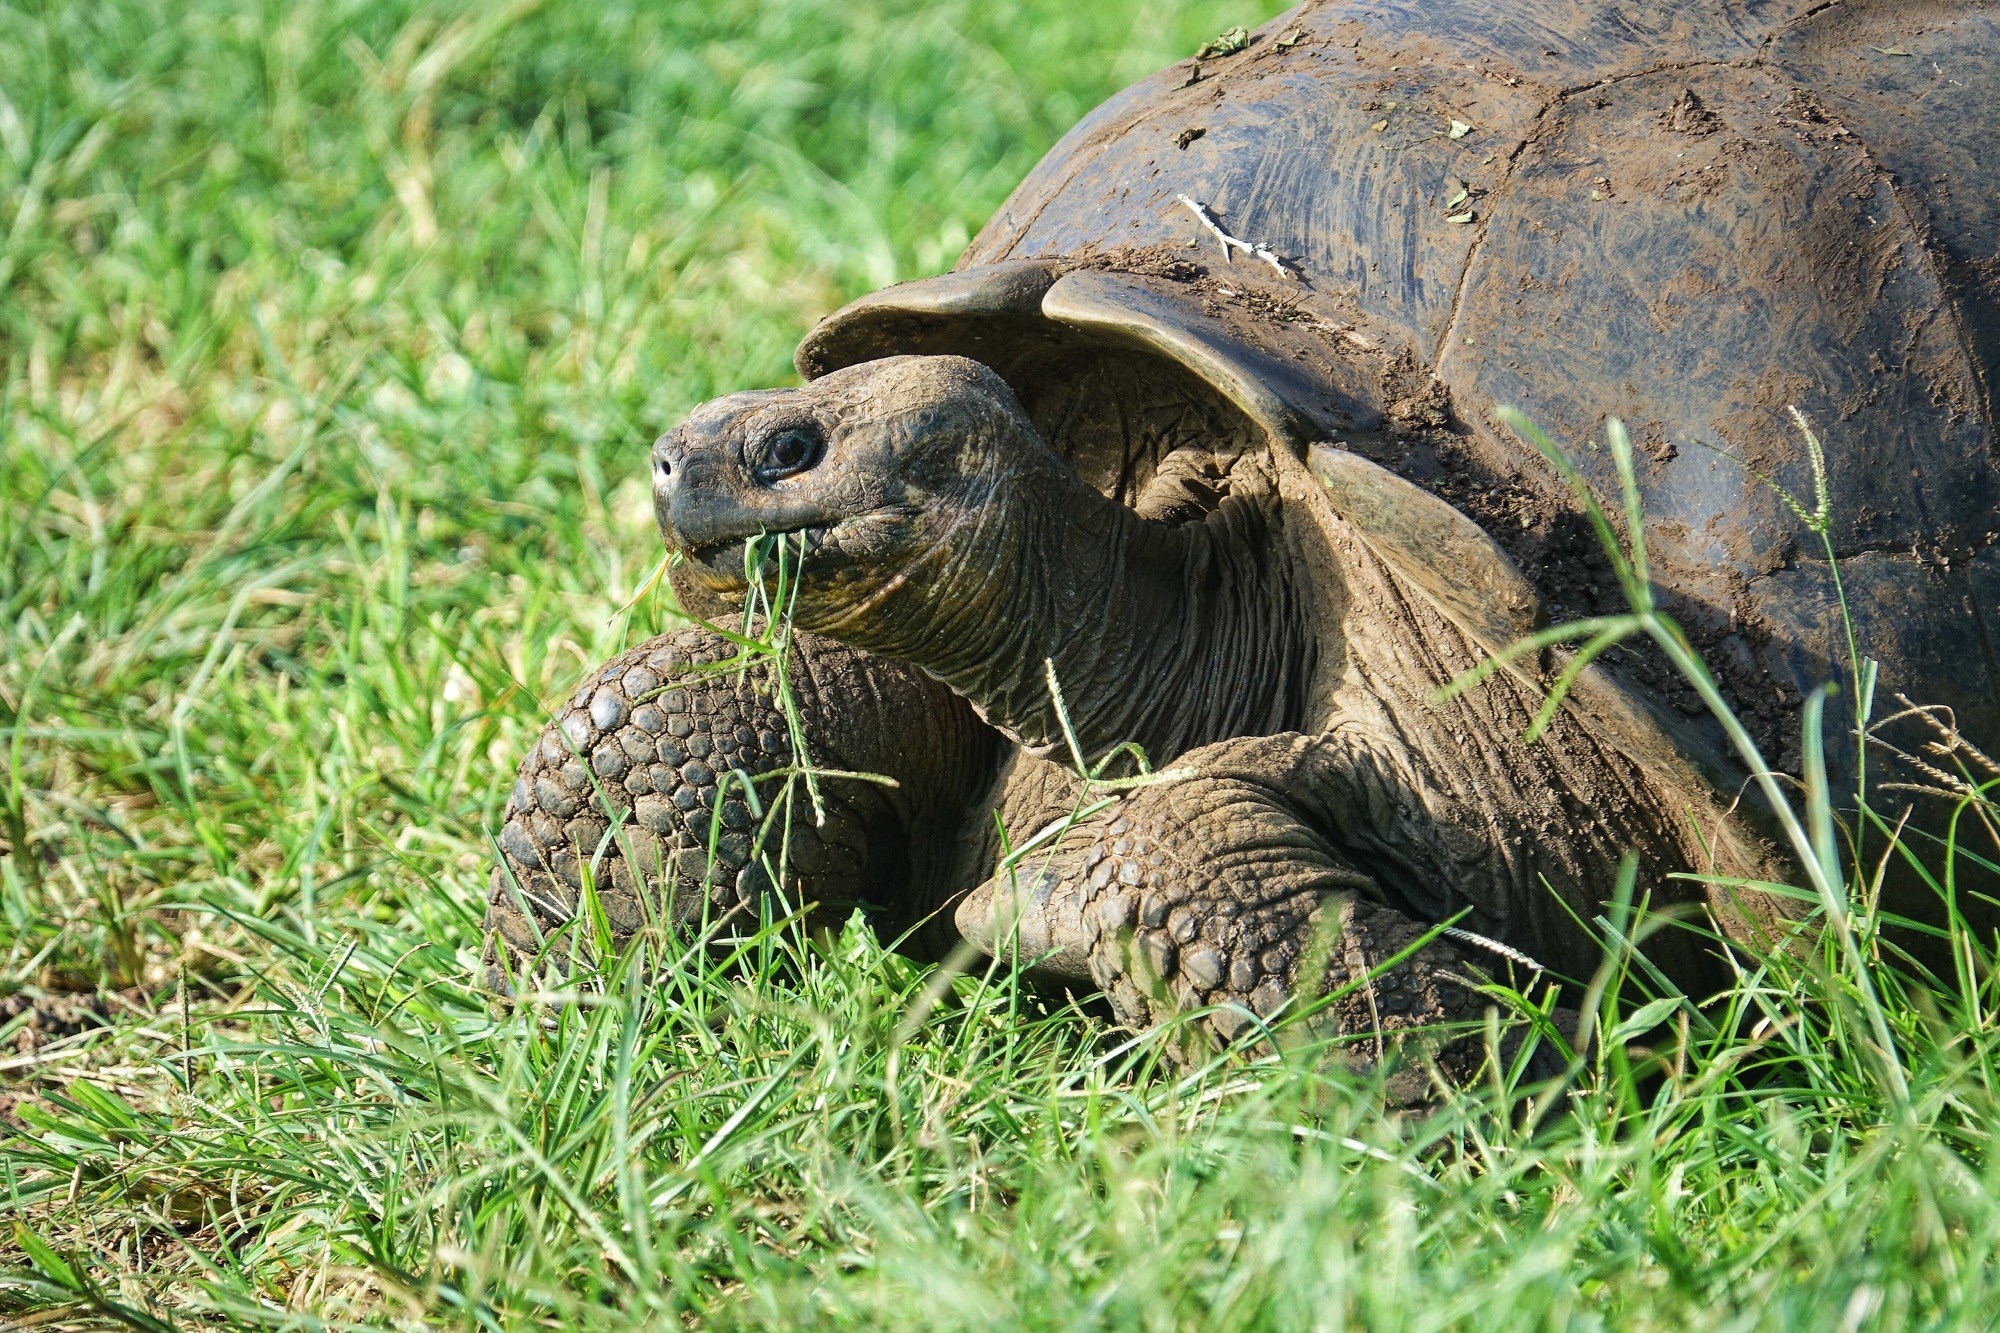
On our last full day in the islands we visited Santa Cruz, and traveled by bus up into the highlands to visit the largest of the Giant Land Tortoises that inhabit the Galapagos. We stopped along the way for some birding and sightseeing around a huge sink-hole, a common feature of volcanic islands.
It is hard to imagine just how big the Giant Land Tortoise is. When they move through the brush they are like a bulldozer…nothing stops them…and yet this giant grass eater is among the gentlest creatures on earth. Too gentle perhaps as hundreds of thousands of them were collected each year, before they were protected, by passing ships and consigned to life in the hold until the crew was hungry for fresh meat. Since protection their numbers are slowly growing on the islands and most of the high islands have reserves.
Giant Land Tortoise
Gentle giant.
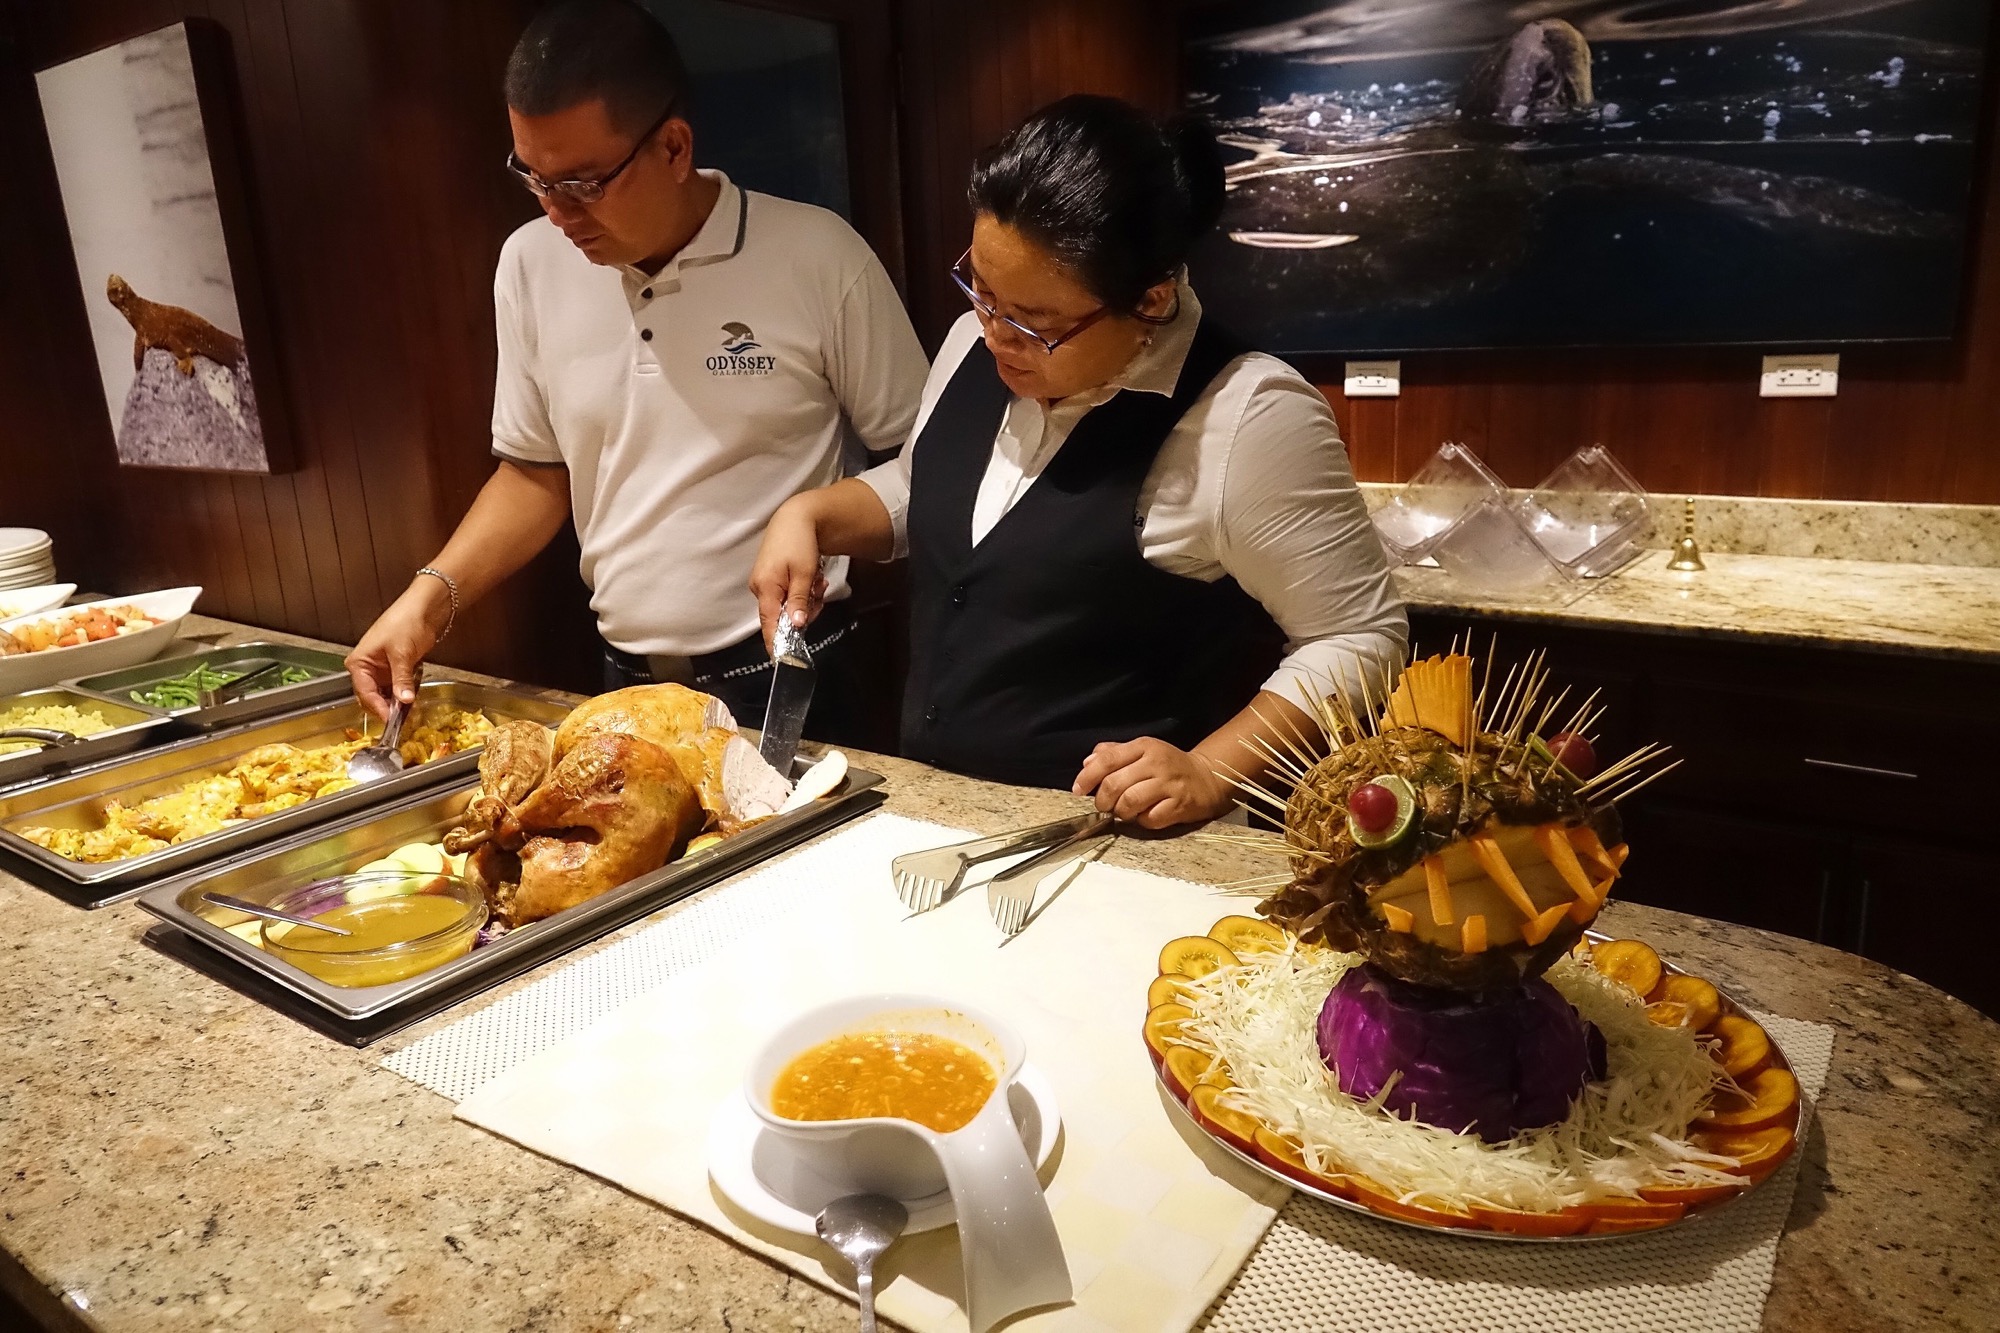
The meal on our last night on the yacht was a thanksgiving spread, complete will all the fixing, and a edible puffer fish sculpture.
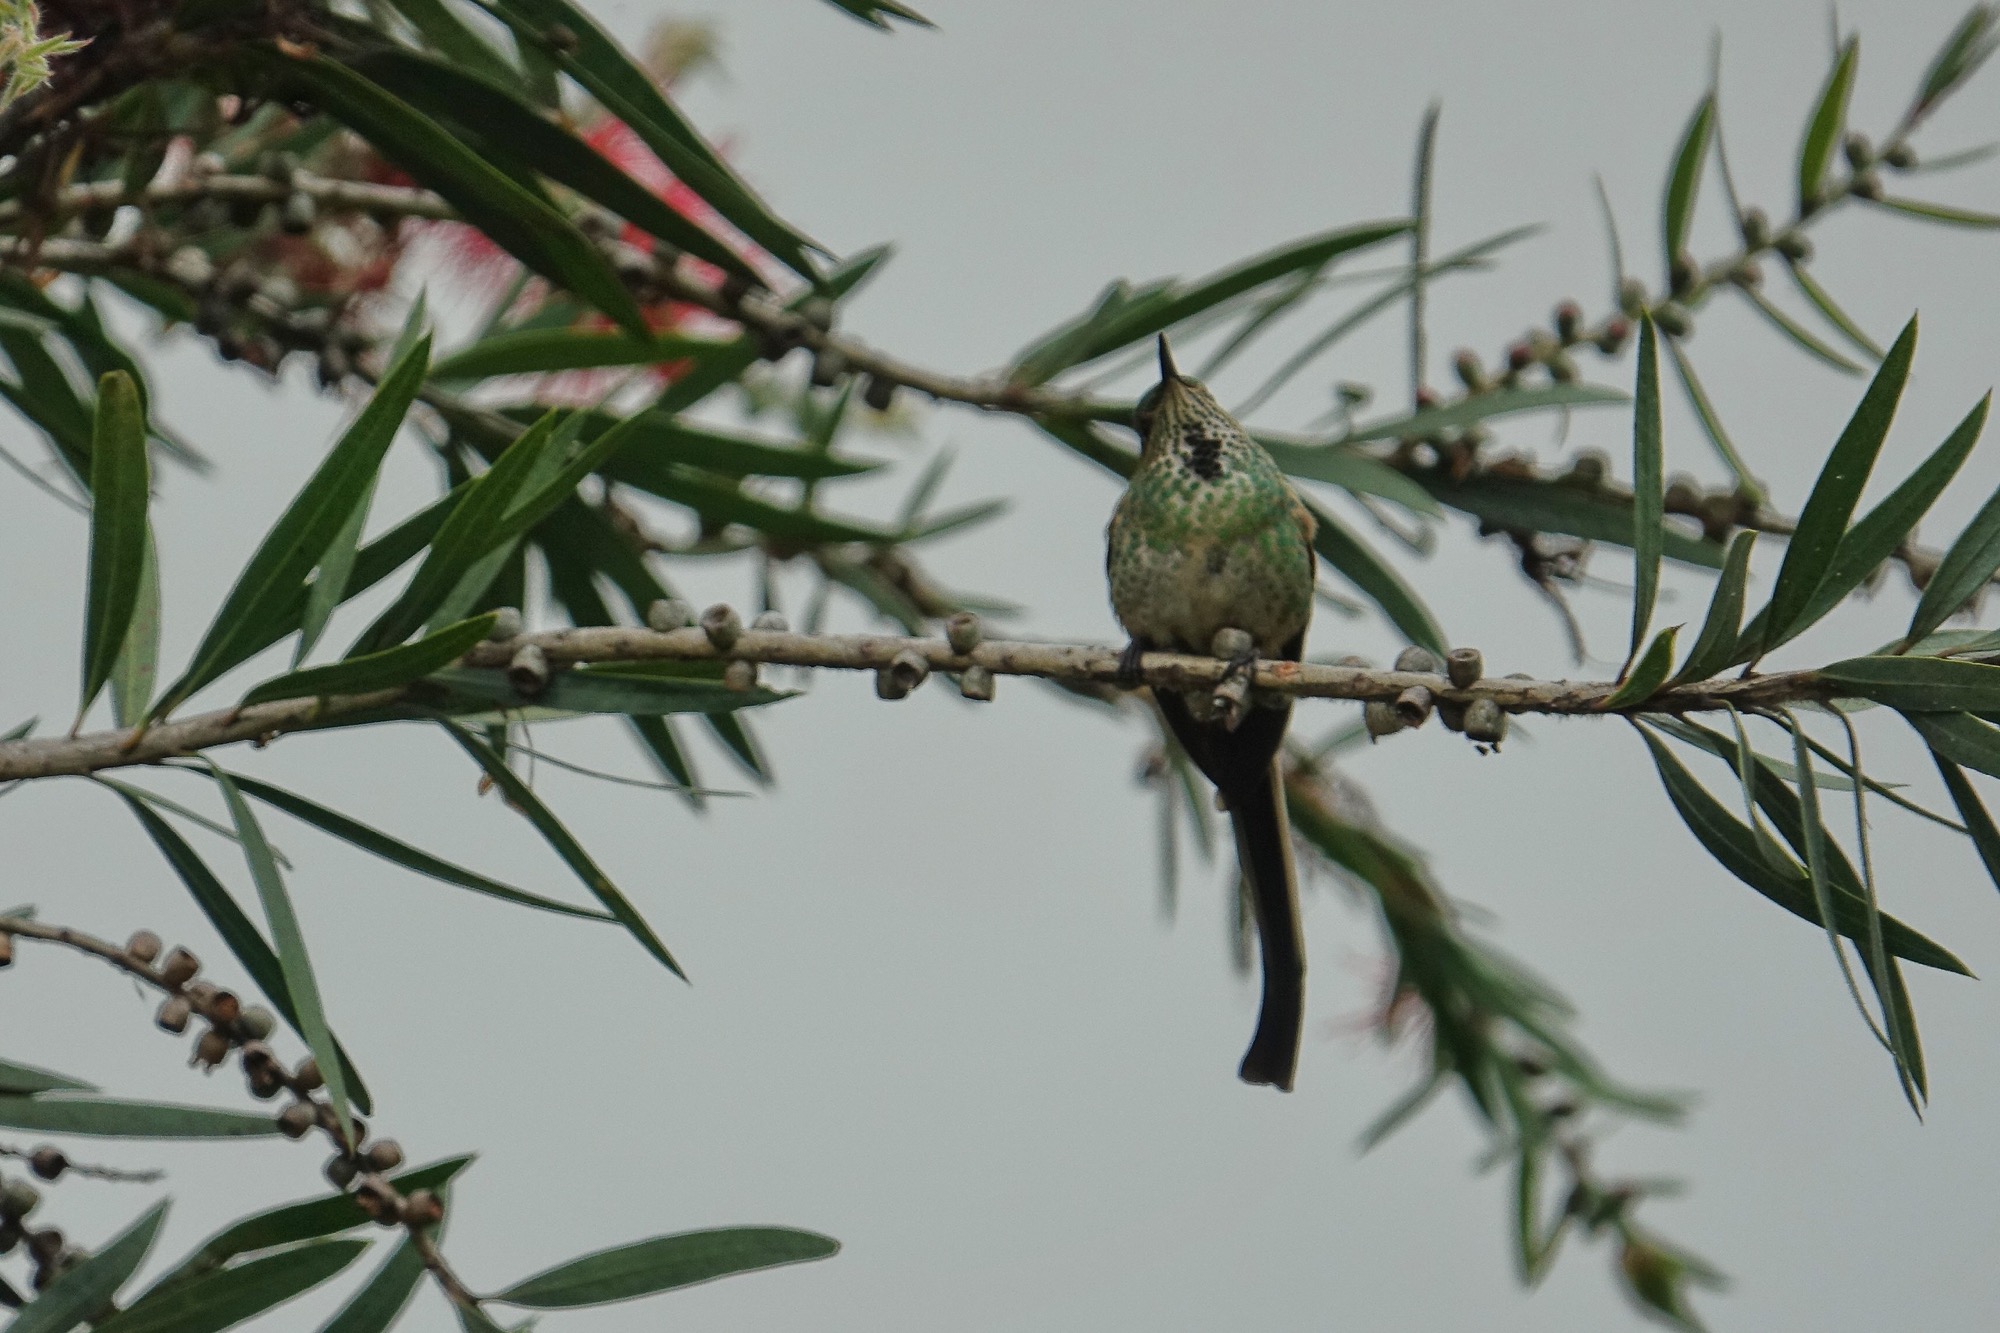
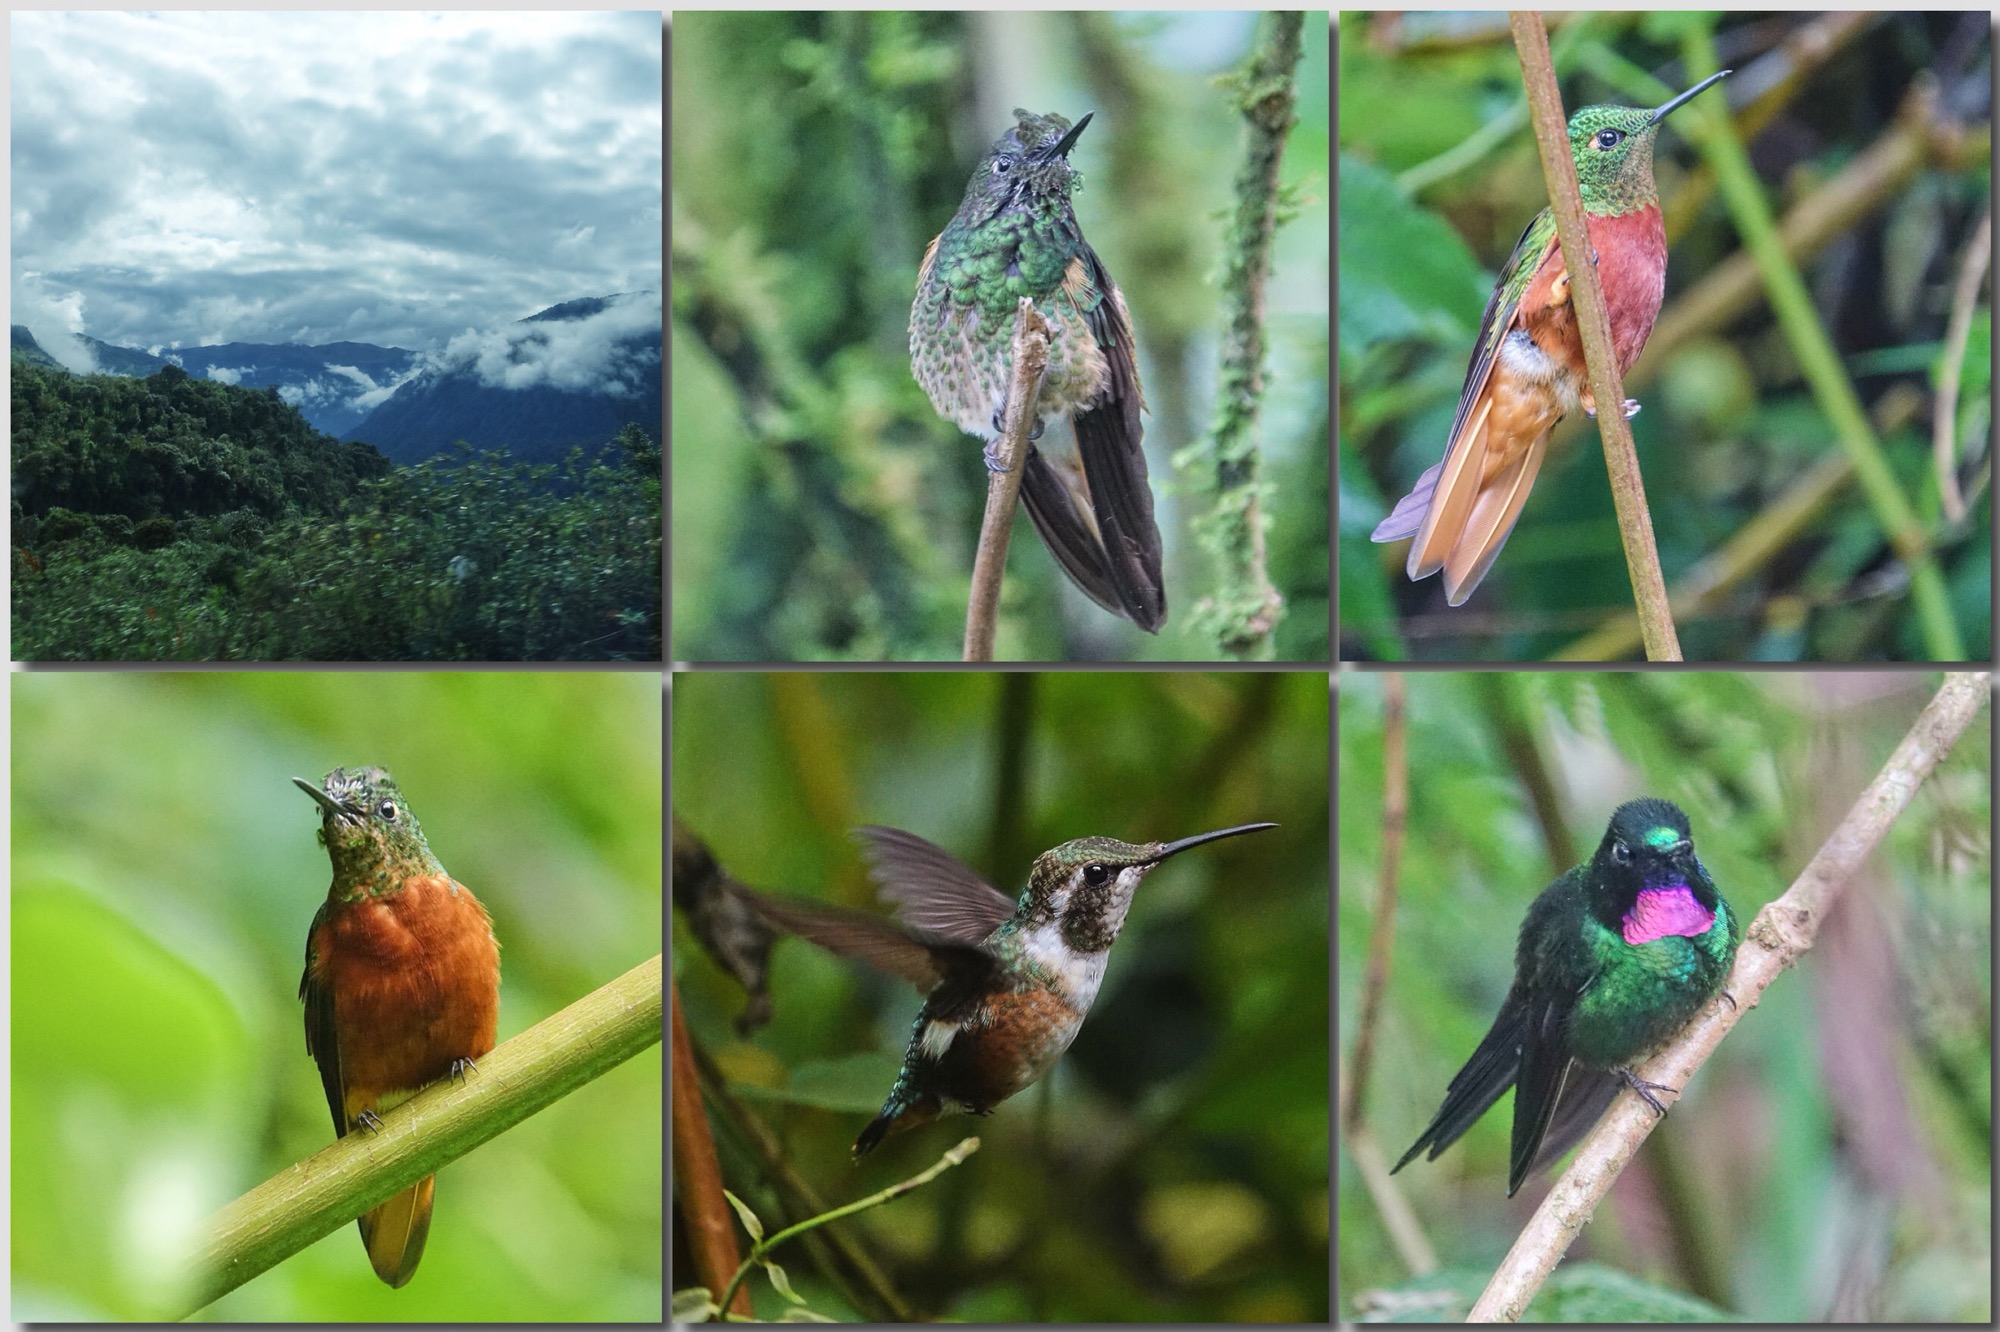
We flew back to Quito for another night at the Garden Hotel, but since most of us had night flights out, we spent our last day in Ecuador traveling to the high Andes above the city and over the other side for Andean hummingbirds. We visited a lodge that specializes in hummers and spent a slightly rainy day photographing them, and sharing a traditional Ecuadorian meal.
The Sony RX10iii really came through on the hummingbirds in low light.
Top of the Andes, Buff-tailed Coronet, Chestnut-breasted Coronet, White-bellied Woodstar, Tourmaline Sunangel
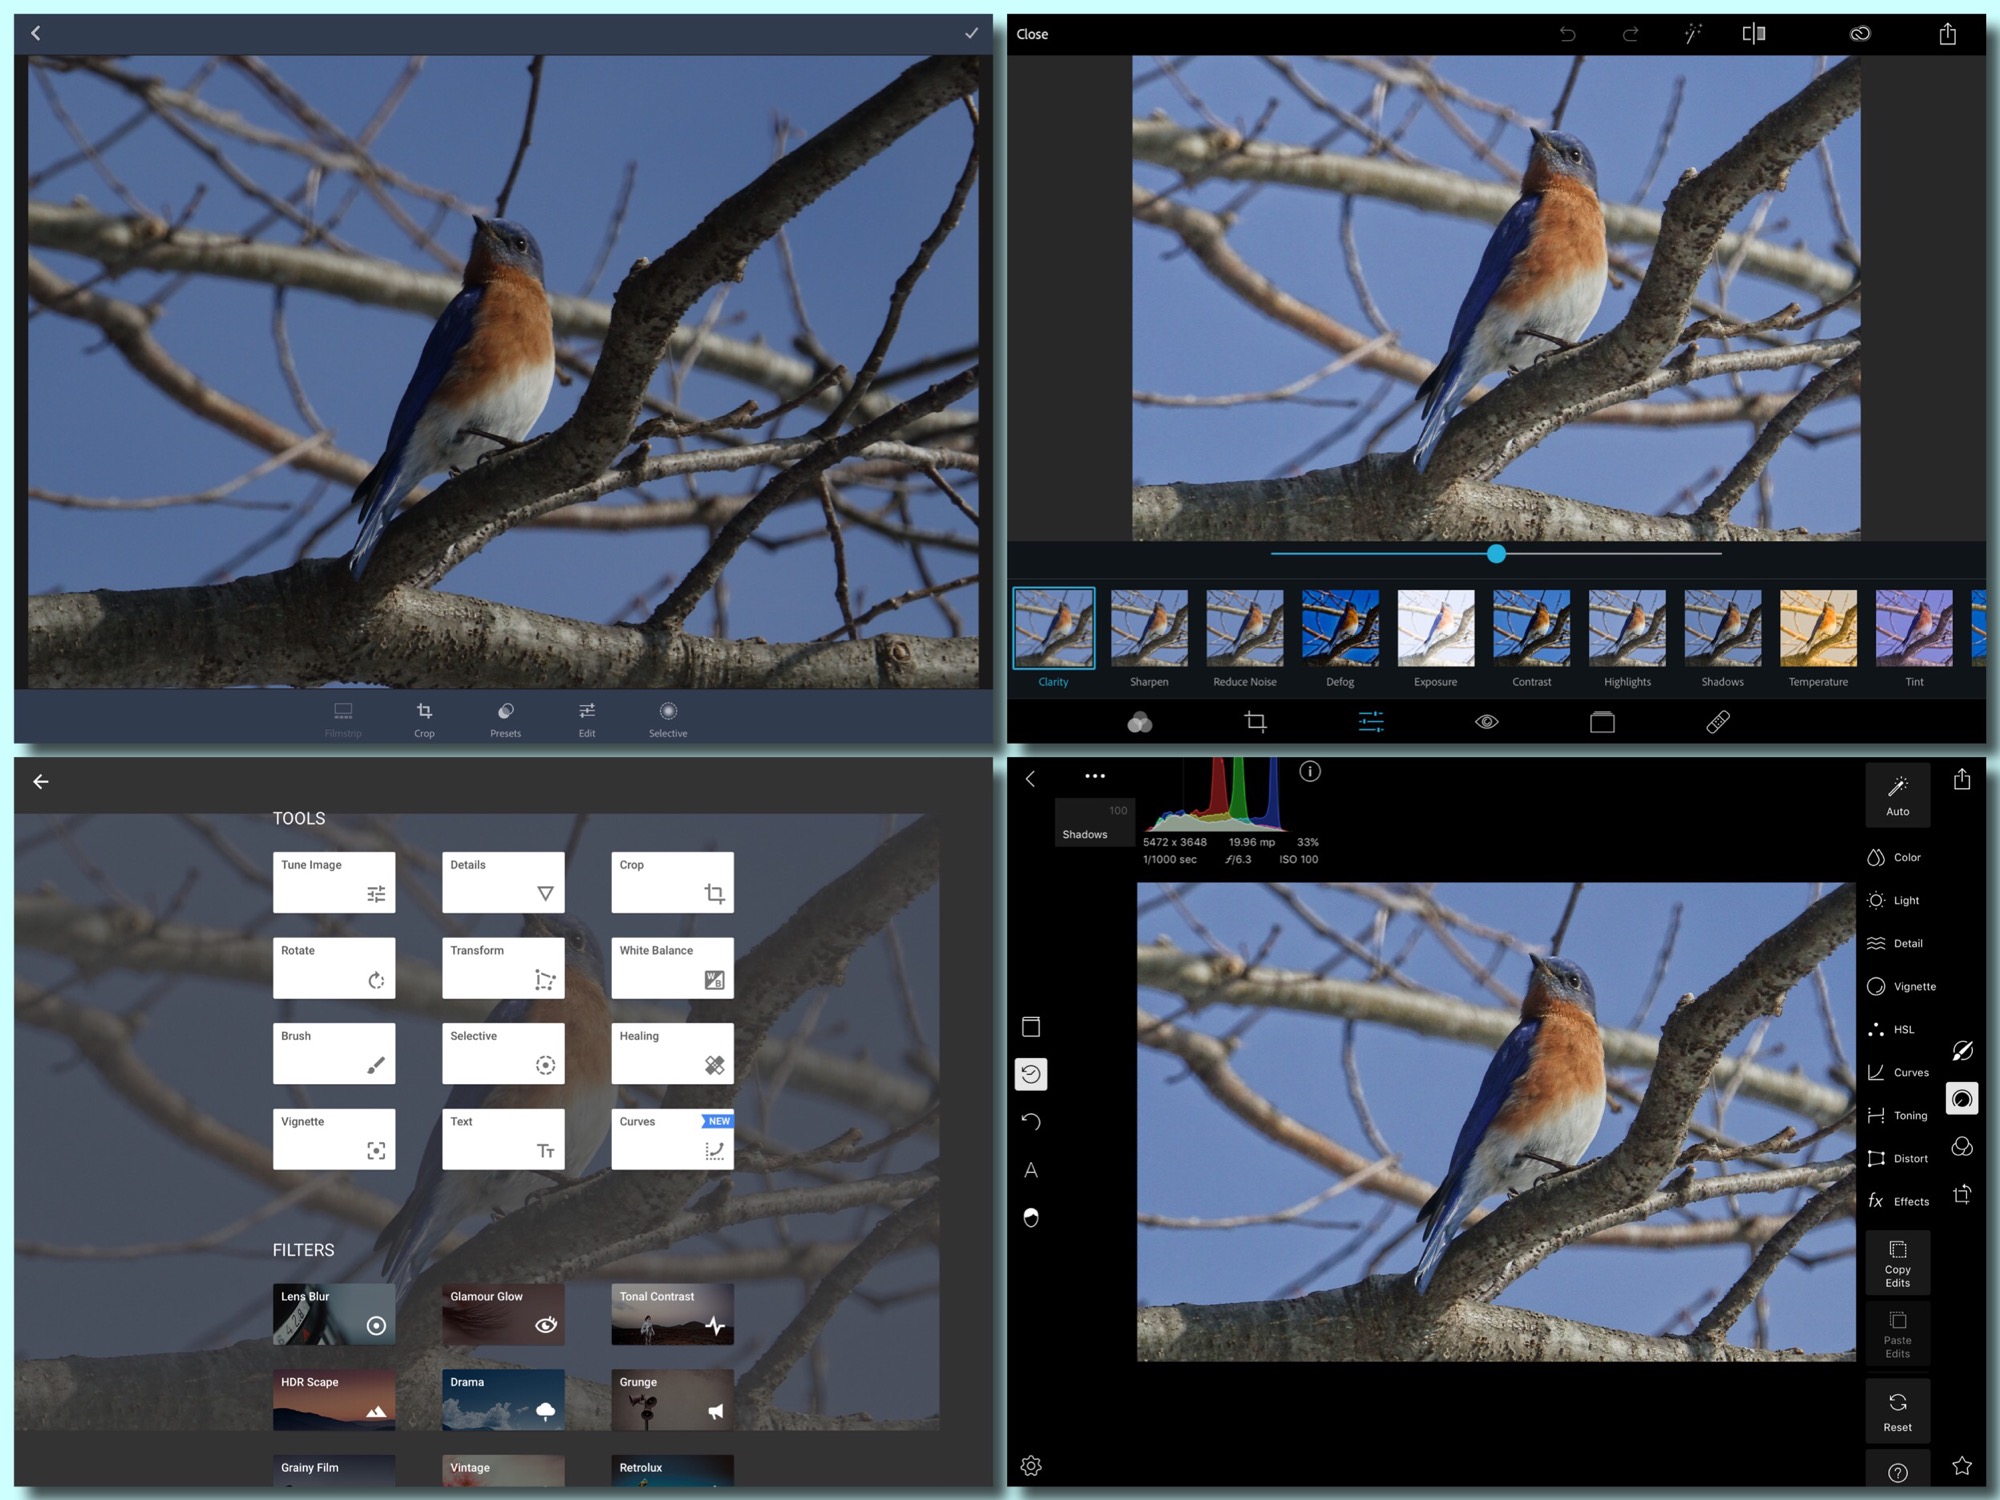
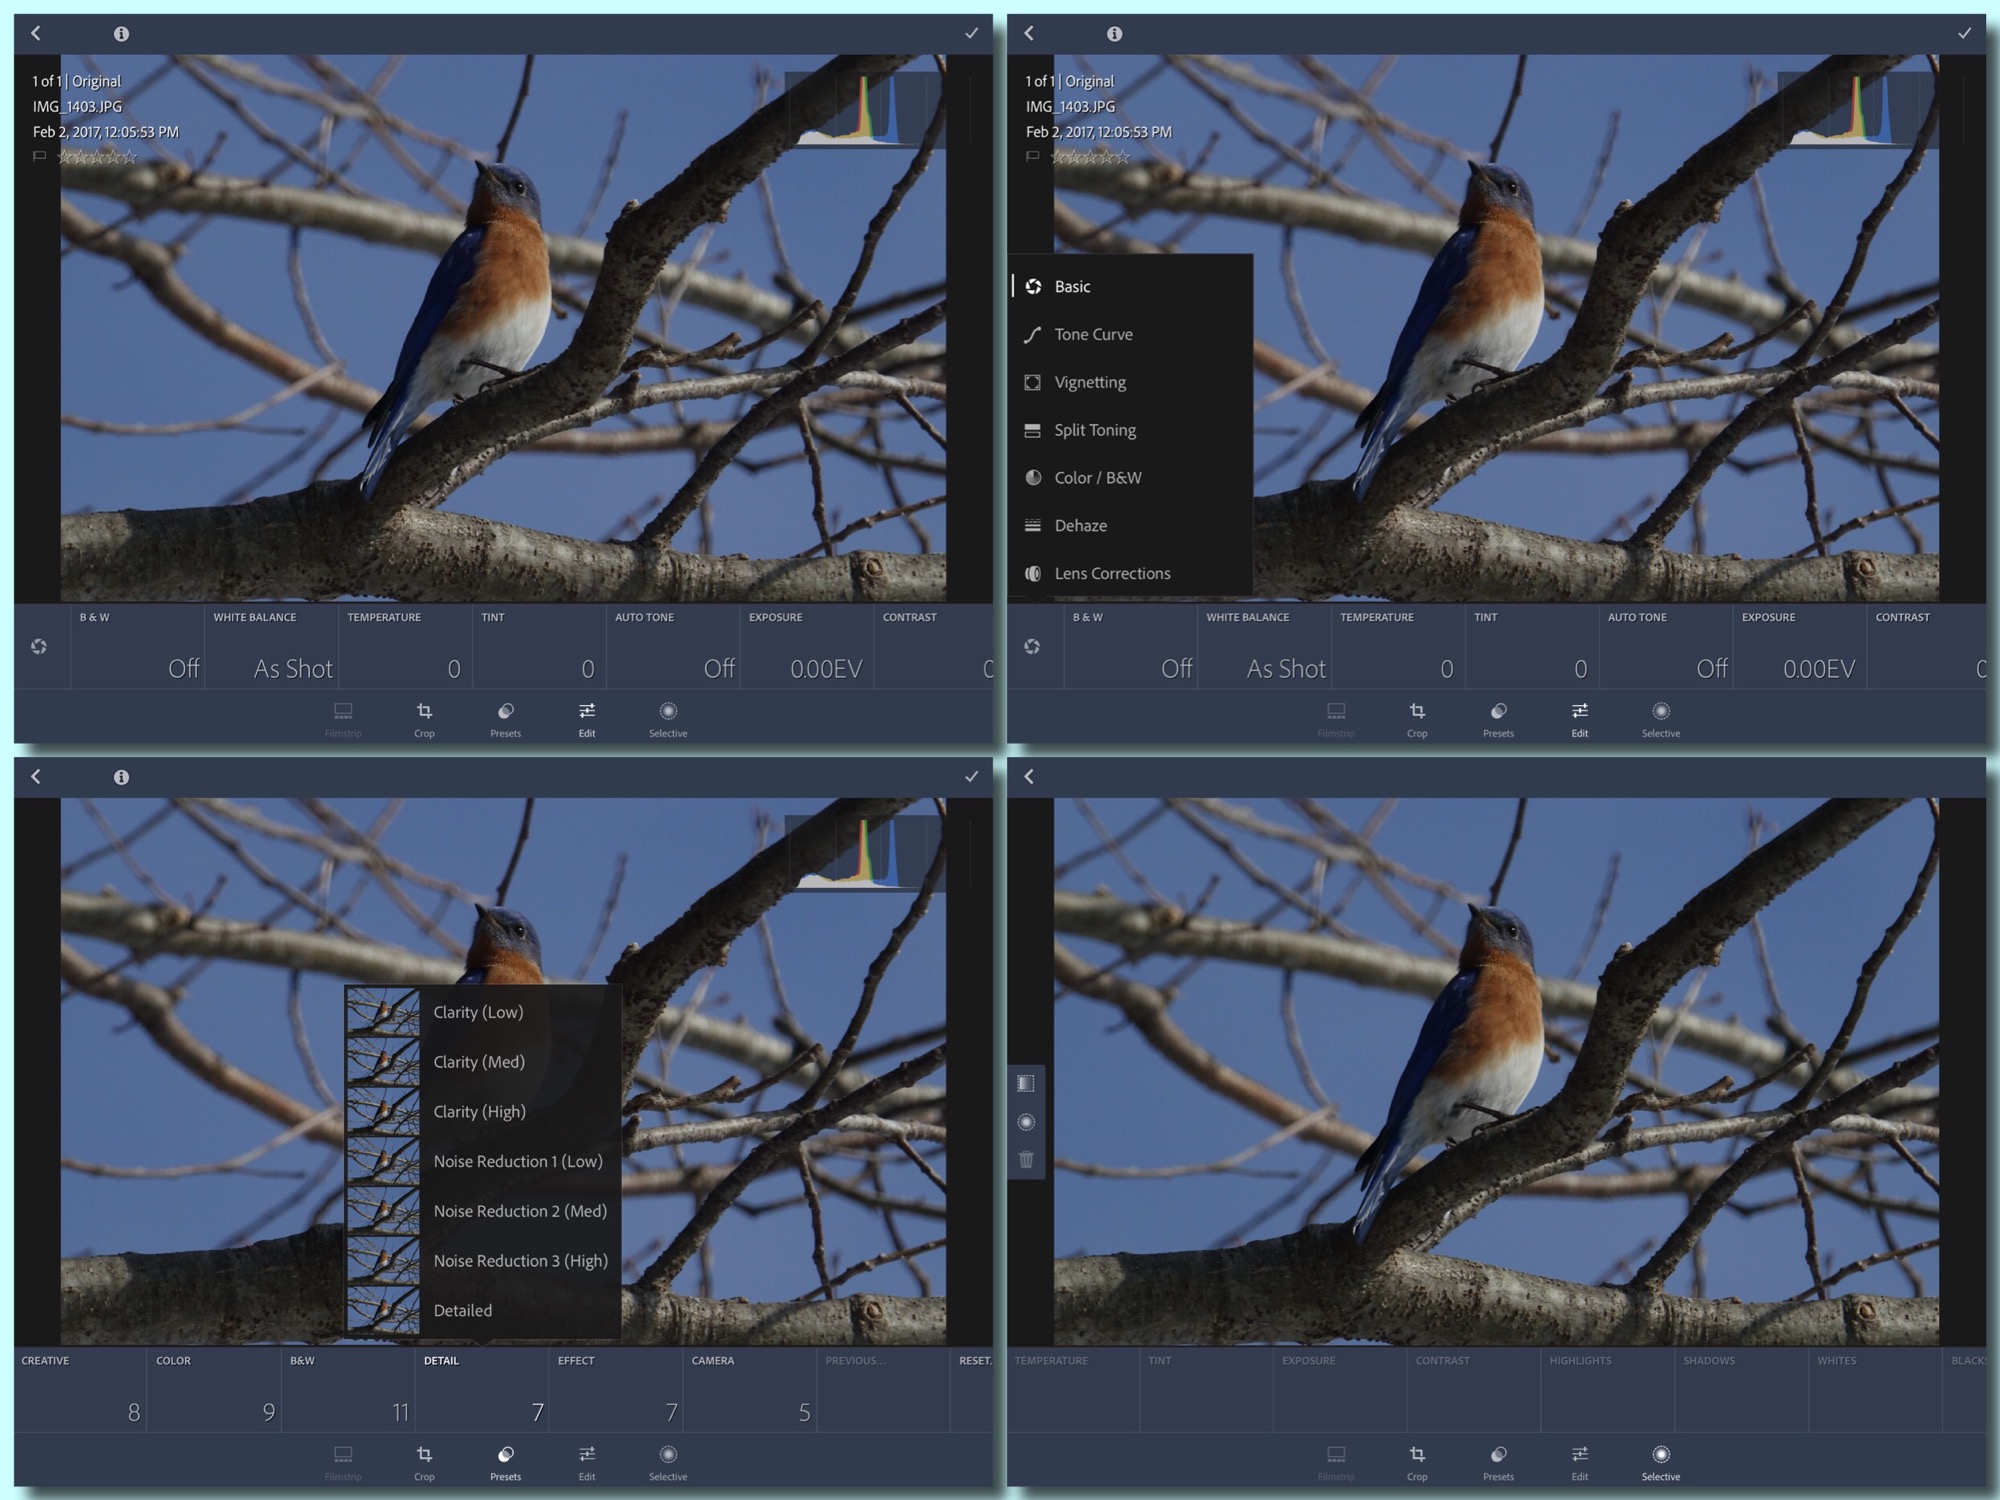
If you have your camera set up to produce consistent, correctly exposed, jpegs…using all the available auto, program, and special modes for a wide variety of situations, then post-processing does not need to be either a mystery or a chore. In fact, once your camera is set up, you will find that most of your photos of any particular kind (wildlife, birds, macros…landscapes or people) will require exactly the same processing…so much so that if your chosen post-processing program or app allows you to create presets or save a set of edits, you will be able to process most images by choosing the right “one-touch” preset.
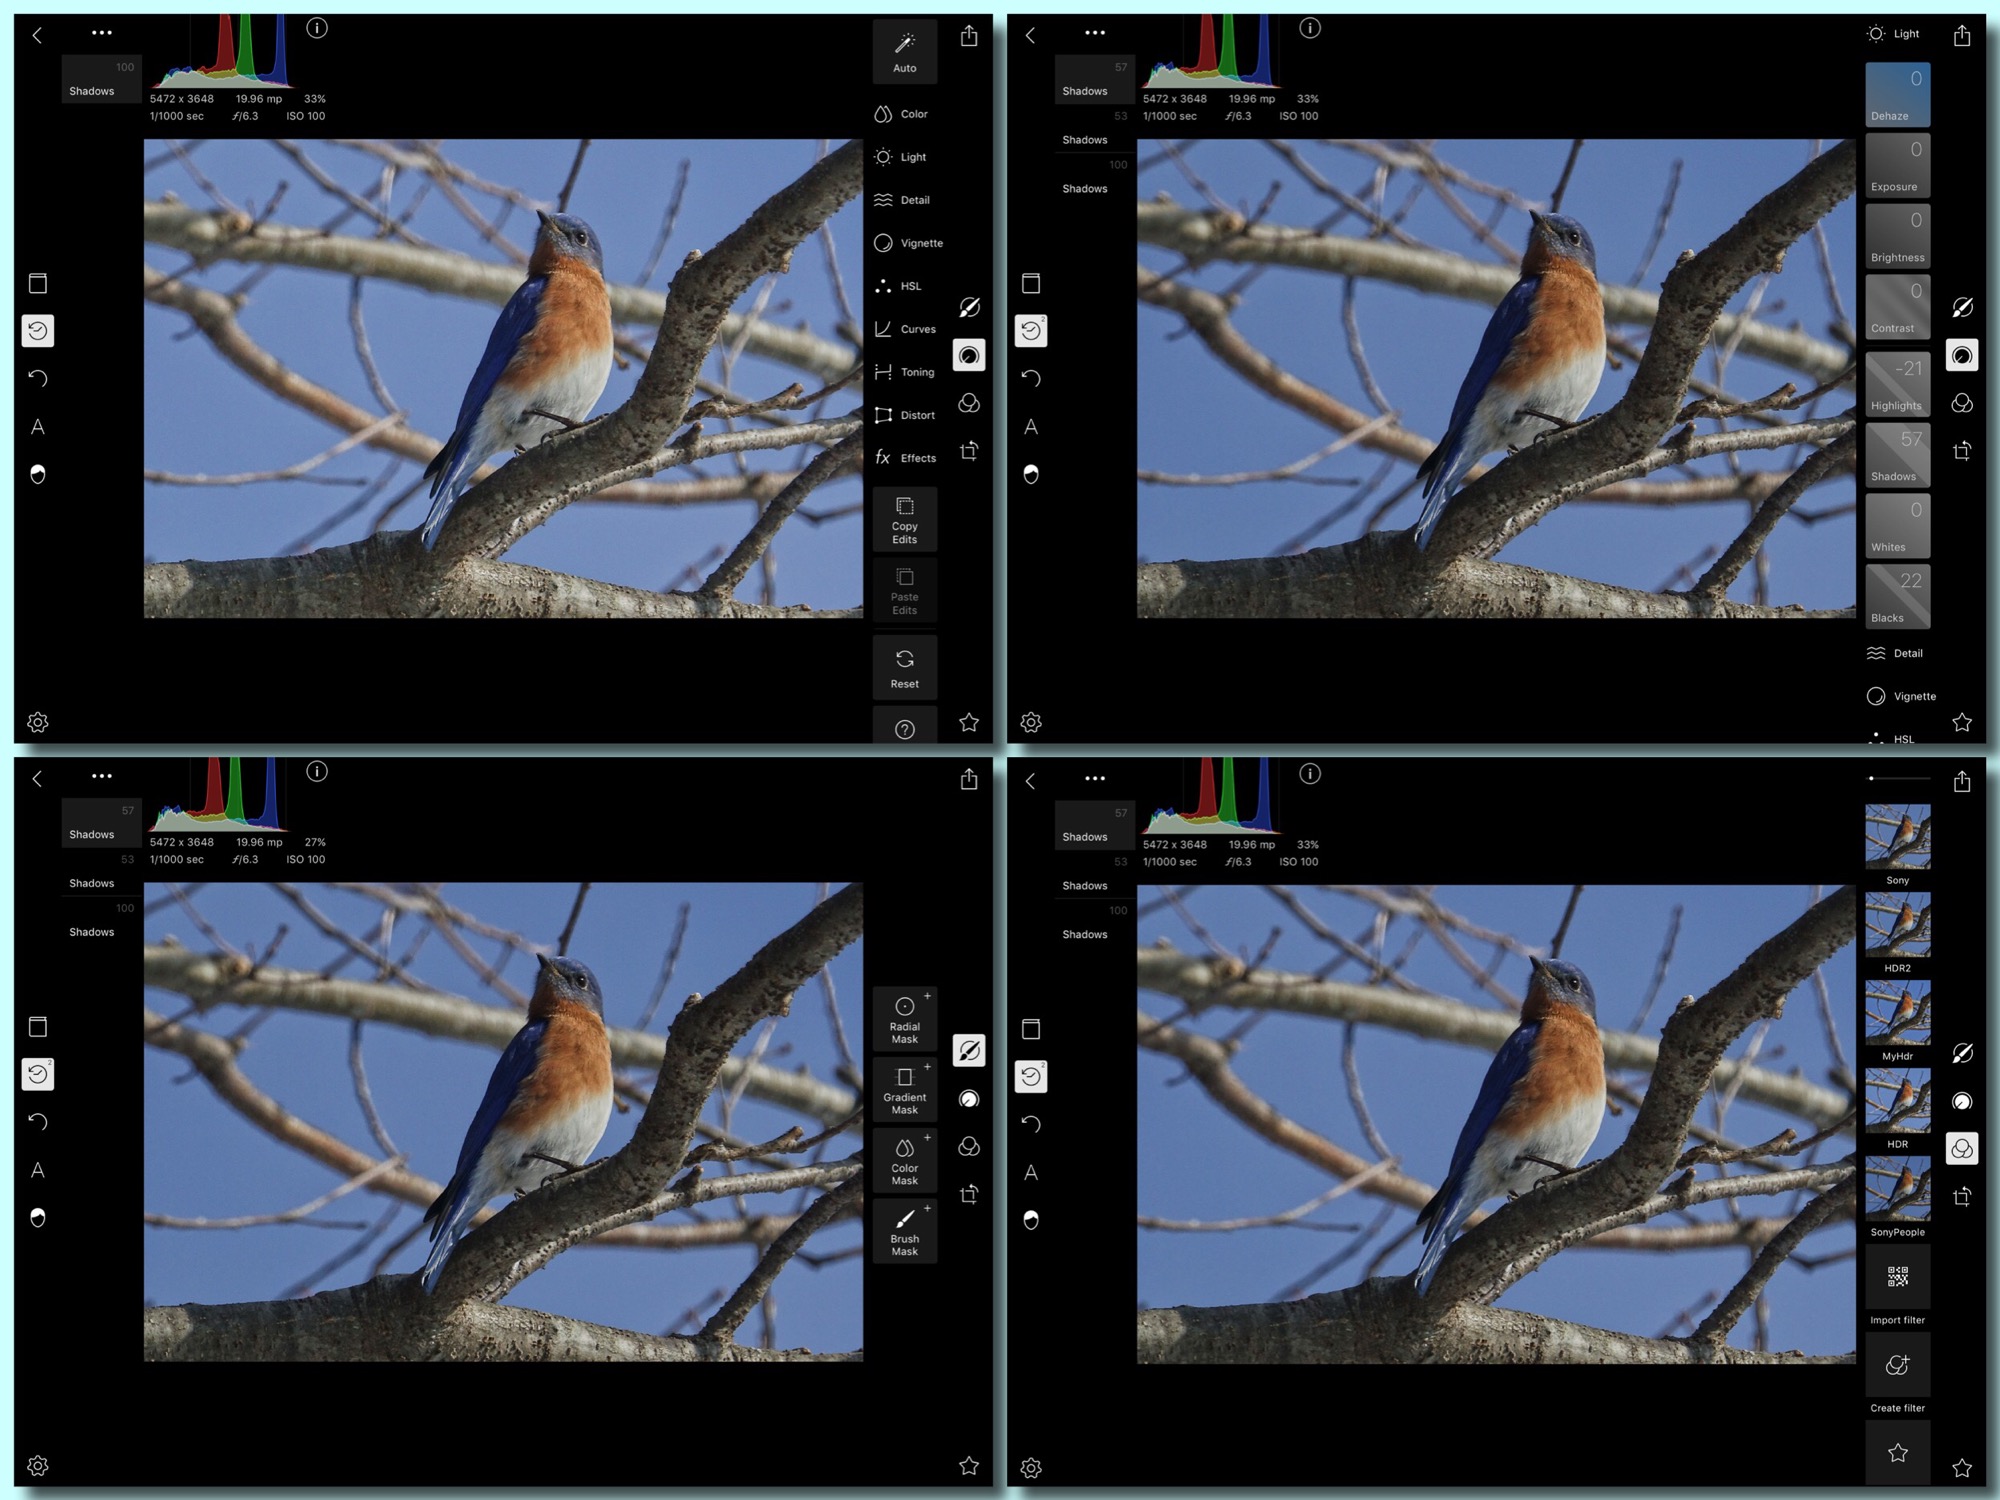
Basic controls: Lightroom, PhotoShop Express, Snapseed, Polarr. Touch or click to enlarge. For more control shots see below.
Why do you need to post-process at all? The reality of digital photography is that any good image can be made better with a few tweaks. I am going to cover the basic edits here, as they are done in the more modern apps and programs, both on the mobile and desk and lap-top platforms: Snapseed, Lightroom, PhotoShop Express, and Polarr on phones and tablets, and Lightroom or PhotoShop Elements on desk and lap-tops. You can make these edits in PhotoShop itself as well, but it might take a combination of settings to duplicate the effects of a simple slider in one of the more modern programs.
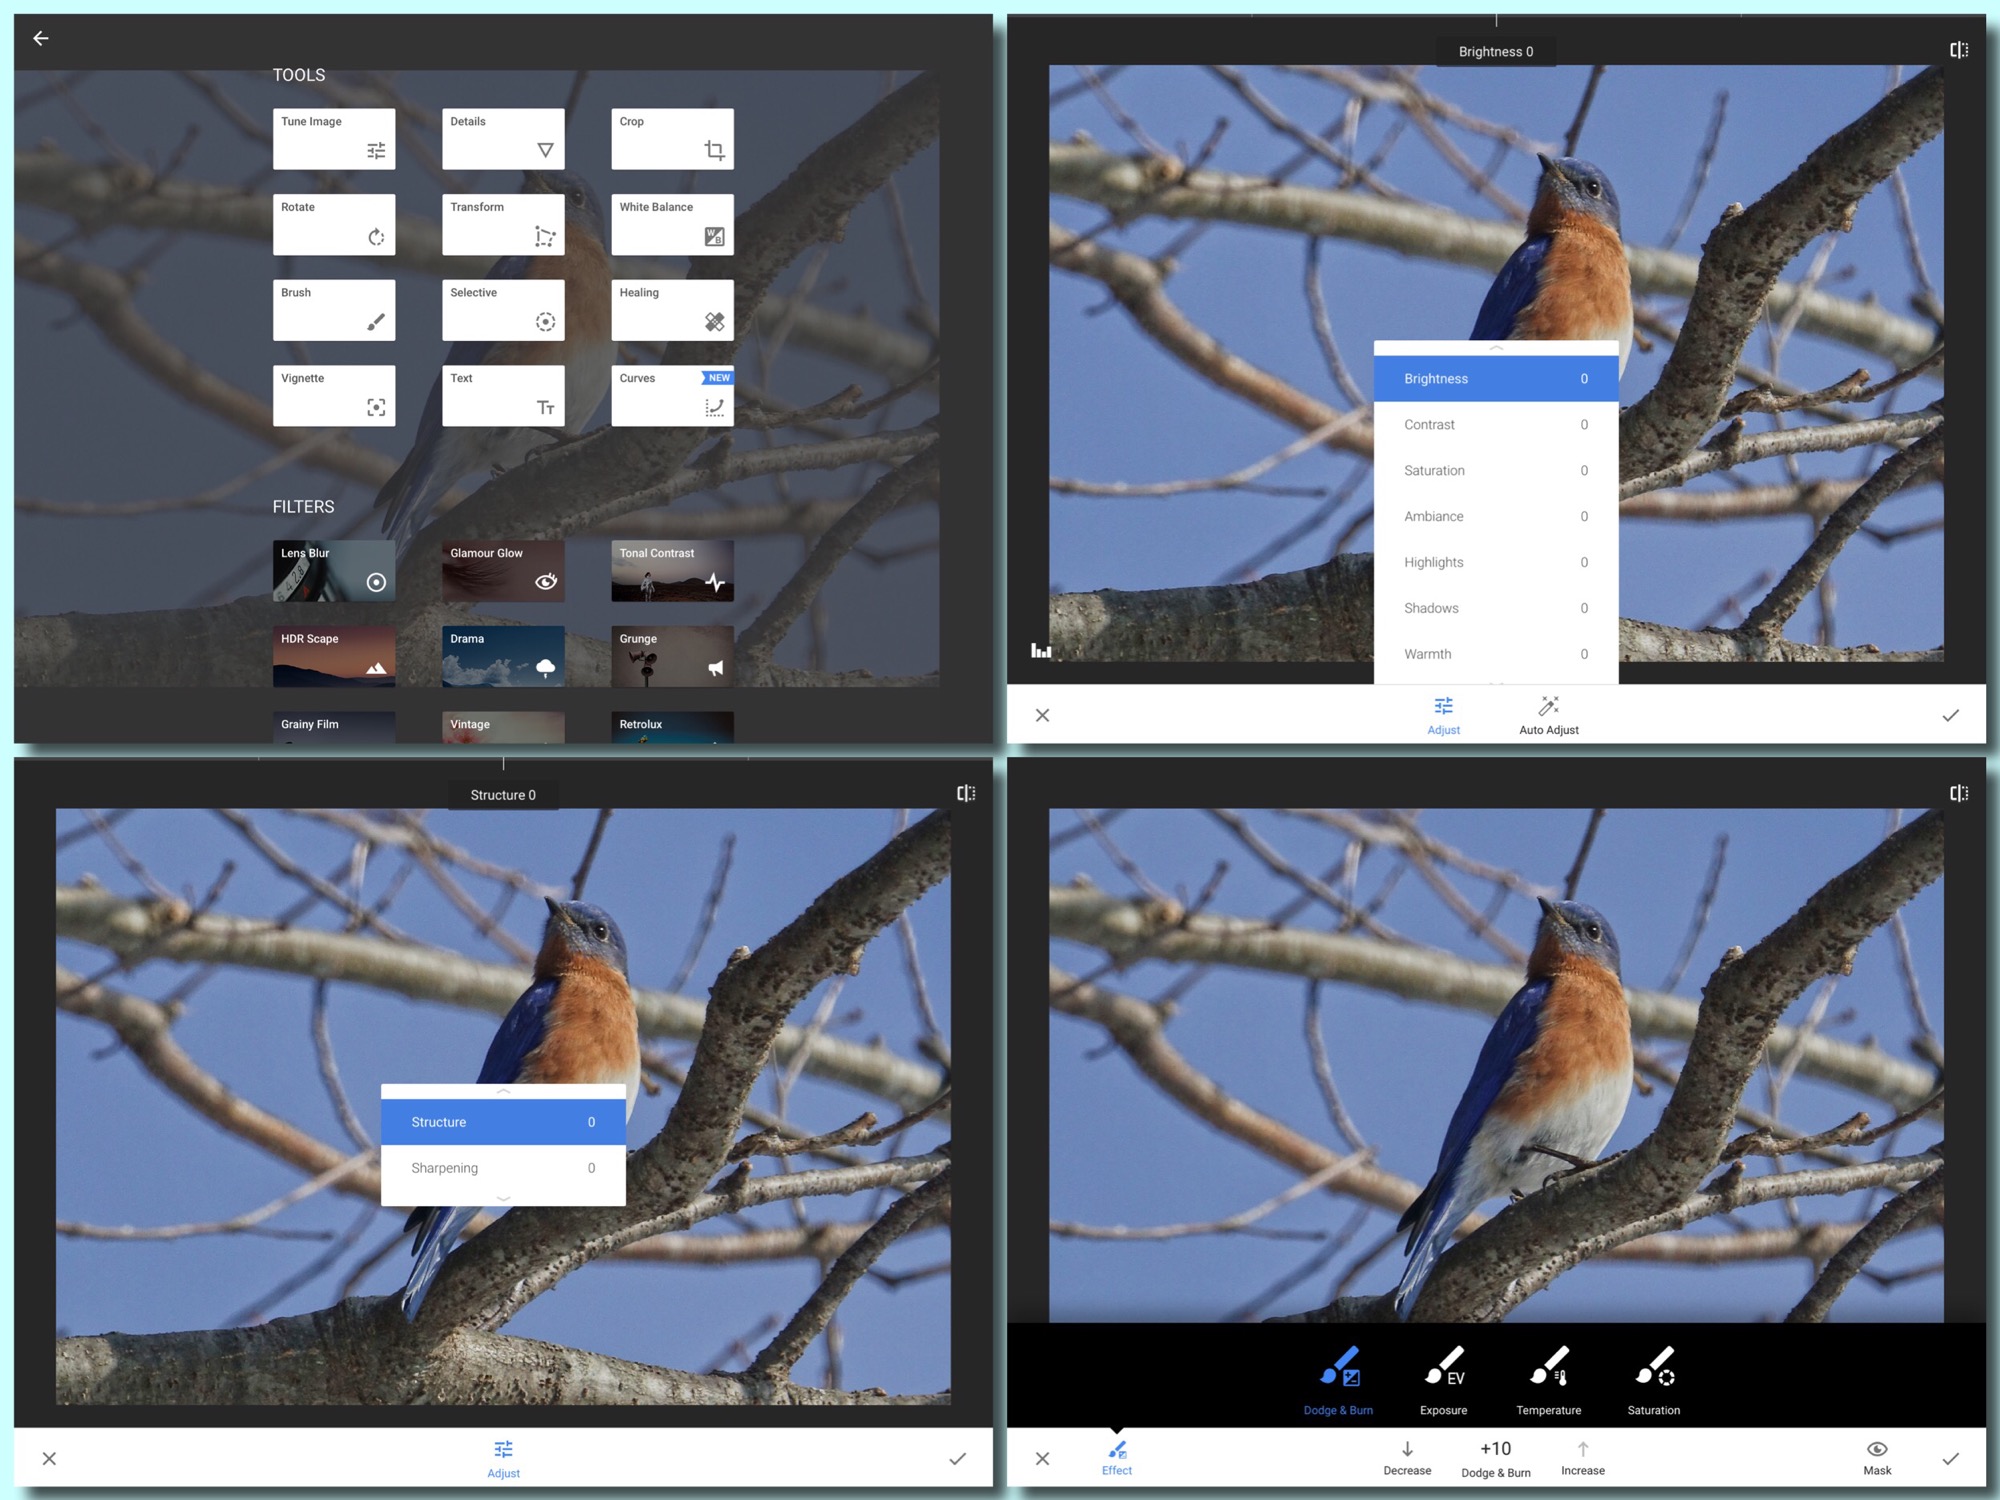
Lighting: Even a correctly exposed digital image, the shadows will often be too dark, and the highlights too bright, when compared to what the human eye sees in the same situation. The eye sees further into the shadows than the camera does, and we can see detail in bright areas that the camera will render as blocks of solid white or bright color. Cameras today have some kind of compensation for this built in, generally called Dynamic Range Control, or DR Enhansement, or iContrast, or Active D Lighting, etc. Even when taking advantage of these in-camera adjustments (and you should be taking advantage of them), there is no way the sensor can see or record the full range of light that the human eye does. By adjusting the shadows and highlights in post-processing we can produce an image that has the appearance of being closer to what our eye sees in any given situation. To improve the image we need to “open” the shadows (brighten them) and “pull back” the highlights. Not a lot, or the image will look flat and uninteresting, but some. That is the first change to make. In a traditional program like PhotoShop these changes are made with the “curves” tool. In the other apps and programs it is made with the Shadows and Highlights sliders. Slide shadows to the plus side until the shadows open to suit you. Pull the highlights slider to the negative side until you see the detail you want in the bright areas of the image. Do not expect miracles. The shadows slider will not reclaim shadows that are totally black, and the highlight slider will not restore detail in totally overexposed whites or brights…but generally these adjustments will produce a more pleasing, more life-like image. And don’t overdo either. You want the image to still have enough contrast between the darks and lights to be three-dimensional and interesting.
Detail: Because of the structure of digital image sensors, all digital images need some sharpening. Most cameras, when you shoot in jpeg, apply sharpening in camera. I set my cameras to apply the least possible sharpening in-camera, since it is better done in post-processing. In-camera sharpening can produce extra noise in the background of the image, and unnaturally sharp edges. The sharpening tool in most modern apps and programs applies a combination of traditional edge sharpening and unsharp masking to produce a natural looking result, with a simple slide of the sharpness slider until it looks right. PhotoShop is the exception again, where you still have separate sharpen and unsharp mask tools. Do not oversharpen! It will produce the same negative effects on image quality as in-camera sharpening often does. If an image, or parts of an image are out of focus or motion blurred, they will not be improved by oversharpening. Quite the opposite. Apply just enough sharpening to render the details in the image as they would look to the human eye, if you were at approximately the right distance to make the subject the same size as it is in the image.
The second aspect of sharpening is most often called clarity (it is called structure in Snapseed). Clarity increases the local-area-contrast of the image to bring out fine detail in hair, fur, feathers, or the fine textures of flower petals (or human skin). Think of it as controlling the “inner detail” of the image. In PhotoShop we produce this effect by using unconventional settings of the unsharp mask tool. Most modern apps and programs will have a clairity (or “structure“) slider. Again, just slide the clarity slider to the positive side until it produces the effect you want. (If you slide it to the negative side it will become really obvious what the tool is doing.) Hint: you do not want to overdo the clarity, especially in images with people’s faces in them. In fact one of the legitimate uses of negative clarity is in portraits, where you might not want to see the “inner detail” of every skin blemish 🙂 Hint 2: Increaseing the clarity will sometimes have the effect of making the whole image look a little darker. You can offset this with the Exposure or Brightness sliders.
Color: The auto color temperature controls in today’s cameras are very good. They can adjust the jpeg processing to produce natural looking colors in almost any light. They are almost as good at this as the human eye. Amost. What can be improved in most digital images is the “pop” or “impact” of the colors…especially if you have already adjusted the shadows and highlights. Modern apps and programs have a control called vibrance (sometimes grouped with clarity and sometimes grouped with color temperature and saturation…and, as always, called something else in Snapseed: “ambiance“). Vibrance looks at the image and determines which colors might be undersaturated (not rich or vivid enough). Generally these are the blues and greens, and sometimes reds. Sliding the vibrance slider will increase the saturation and brightness of only those colors that the program or app thinks need it. It will generally make the sky a darker blue, and the green trees brighter green. Or it might pick up the similar hues in a bird’s plumage or a flower’s petals. Slide the vibrance (or ambiance) slider to the positive side until you produce a pleasing effect. (And again, sliding it to the negative side will give you a better idea of what you are actually changing.) Once more, do no overdue it. If the control is adjusting reds, or purples, especially, it is easy to get the reds and purples so saturated that you no longer see fine detail in those areas of the image. And it is also easy to get the sky unnaturally blue. Exercise restraint. Again, PhotoShop (the last time I looked) did not have a vibrance slider or control. You would have to adjust the individual color channels using the curves control. Not easy to do. It is worth mentioning that Snapseed’s ambiance control has more effect on the brightness and color temperature of the image (by color temperature we mean the balance between warm tones and cold ones, red and yellow and orange being warm…just think the color of fire, and blues and blue-greens being cold), than the vibrance control in the other apps and programs. It produces almost a warm glow…which is pleasing in some images, but not in others.
Before and after. Original and basic edits applied. I also used the brush in Polarr to bring up detail in the chin patch 🙂
To summarize, these are the adjustments all most all digital images will need, or benefit from. The amounts will depend on your camera and your taste.
open the shadows
pull back the highlights
sharpen the image
increase the clarity of the image
increase the vibrance of the image
exercise restraint…work for the natural look not the spectacular. 🙂
Lightroom controls, lots of presets, but none of them user custom, local controls limited to gradient and radialSnapseed. Main controls. Tune Image where most of what we want is. Details. Local Controls: brush and radial.Polarr. General controls. Light opened and you can see the others, Local controls, Custom filters
Wildlife, birds, and macro images will benefit from more sharpening and clarity than landscapes, and will not need as much shadow, highlight, and vibrance control. Landscapes will generally need more shadow, highlight, and vibrance control, and less clarity and sharpness. People shots will not like much sharpening or clarity at all (at all), and can stand only a touch of vibrance. Shadow and highlights can be effective but you need to be careful not to produce a cartoony look.
In programs that allow me too, I will set up three presets, or saved looks, or custom filter (all names for the same thing…a set of edits that are saved and can be applied with a single touch or click to the nickname). I love the way Snapseed works, and it is the one app that will run on any mobile platform (not matter how underpowered), but it does not yet have the ability to save a set of edits and apply them to a different image. Lightroom on the desk and lap-top has this ability and is excellent…but Lightroom for mobile platforms does not. PhotoShop Elements and Polarr both save sets of edits (My Looks in PSE, and Custom Fliters in Polarr). For exactly that reason, my go-to post-processing program on the desk and lap-top is Lightroom, and my go-to apps on my tablet are PSE and Polarr. (PSE for landscapes, because the shadow tool is more effective, and Polarr for everything else, since it is faster, and has a deeper feature set than PSE.)
An in-camera HDR (high dynamic range, three shots blended for exposure) image processed in PhotoShop Express. More shadow and highlight control to really open shadows, retrieve detail in clouds, and bring up the green in the foliage.
Honestly, if you have your camera set up right for quality jpegs, you will rarely have to go beyond these basic edits…and most often will be able to apply one of your saved presets or custom filters. If you need to to more, they you really need to ask yourself if the image is worth saving. Most of the time, even with more powerful tools and more sophisticated techniques, you will not be able to produce the image you had in mind when you pressed the shutter. Sorry. That is just the way it is with digital.
One exception is the dehaze or defog control that is available in Lightroom (both mobile and -top) and in PhotoShop Elements and Polarr on mobile. The dehaze tool, like the others covered, takes care not to overdo it, but it can be effective in restoring contrast to an image that is washed out due to an over abundance of blue refracted light…as in fog or haze, or the effects of shooting into the sun. It selectively removes diffuse blue spectrum light from the image. It will also darken the image overall, so some compensation with the exposure or brightness control is generally needed, but it can improve some shots dramatically. It is never part of my basic presets, looks, or custom filters, as I only use it rarely, but it is really useful on occasion.
Another exception is what we call local adjustments. In PhotoShop to make local adjustments you have to use the selective brushes and masking. In Lightroom, Snapseed, and Polarr, you can apply them quickly and easily using specialized controls. Lightroom on the desktop has the best implementation. You can apply gradient or radial filters, or you can brush on adjustments to just a specific portion of the image. In Lightroom on the mobile platform you only have the gradient and radial options. Snapseed has radial filters and a brush, but the brush is not very fine. Polarr, on the mobile platform has the set that is closest to Lightroom desk and lap-top: gradient, radial, and and finely controllable brush. I have not found much use for a radial filter (basically round and graduated from the center) in any app or program, but I use the gradient filters on occasion to darken the sky and lighten the foreground in a particularly difficult landscape shot. You just drag a gradient over the image, top to bottom or bottom to top, and then adjust things like exposure, brightness, clarity, vibrance, etc. The effects are applied as a gradient…most intense at one edge of the image and then gradually fading to nothing at the other edge. You can actually apply two gradients (I call them dueling gradients), one from the top and one from the bottom to, as I mentioned, darken the sky at the same time you lighten the foreground.
The other local control that I do use is the brush, especially in Lightroom (-top) and Polarr (mobile). The brush allows me to decrease the brightness of, say the white patch on the chin of a otherwise correctly exposed Great Blue Heron, to retrieve detail in the feathers there. I simply select the brush control and paint over the area to be changed, then apply negative exposure. I can do the same thing with the clarity control to make the eye in an image pop. Just paint over the eye, and increase clarity. Again, I do this kind of extra editing to maybe one in 300 images.
Finally, there is one app available on iPads and Window’s tablets which does what no other will do…on those very rare occasions when the there is something in the image that just has to go…whether is an out of focus branch in an otherwise perfect composition of a bird, or beer can on an otherwise pristine beach. TouchRetouch does a better job of removing and filling than any other app I have used. You simply paint out, or lasso, the offending object, press go, and the app removes the object and seamlessly fills in the hole by very intelligently extrapolating from the surround. When it works it is magic. It does not always work. Sometimes the background is just to complex or the objectionable thing is too close to your subject, etc. But is is always worth a try when you have an image that requires, or could benefit from its magic TouchRetouch.
TouchRetouch used to remove distracting out of focus branch.
In my opinion, for general editing and post-processing there is no match for Lightroom on the desk or lap-top, though it does require you to import every image you want to process into its catalog. On the mobile platform there is no reason not to use PhotoShop Express (especially as it is free…though to unlock all its features you have to have a Adobe subscription). It works very much like Lightroom on the desk or lap-top, and allows you to save your editing settings as a custom My Look. Polarr is becoming my go-to image processor on my iPad Pro, because of its speed and deep feature set, and the ease with which you can save and apply our editing settings as custom filers. To unlock all features it cost $20, but that also gives you access to Polarr on any platform you might use…desk or -laptop, Andriod phone or tablet, iPad or iPhone, and even Chromebooks. It is available for them all.
So again, get your camera set up for consistently well exposed jpeg images, and apply a few basic edits in the program or app of your choice, and you will have consistently satisfying images.
I had the opportunity to visit Cuba for 14 days in October of 2016. What a trip! The birds were greatl, especially the endemics, of which we saw over 20 out a possible 26. Then too, the landscape was often unique and beautiful, the food was great, and the people were open and friendly. It is a great place to visit, and a great place for photography.
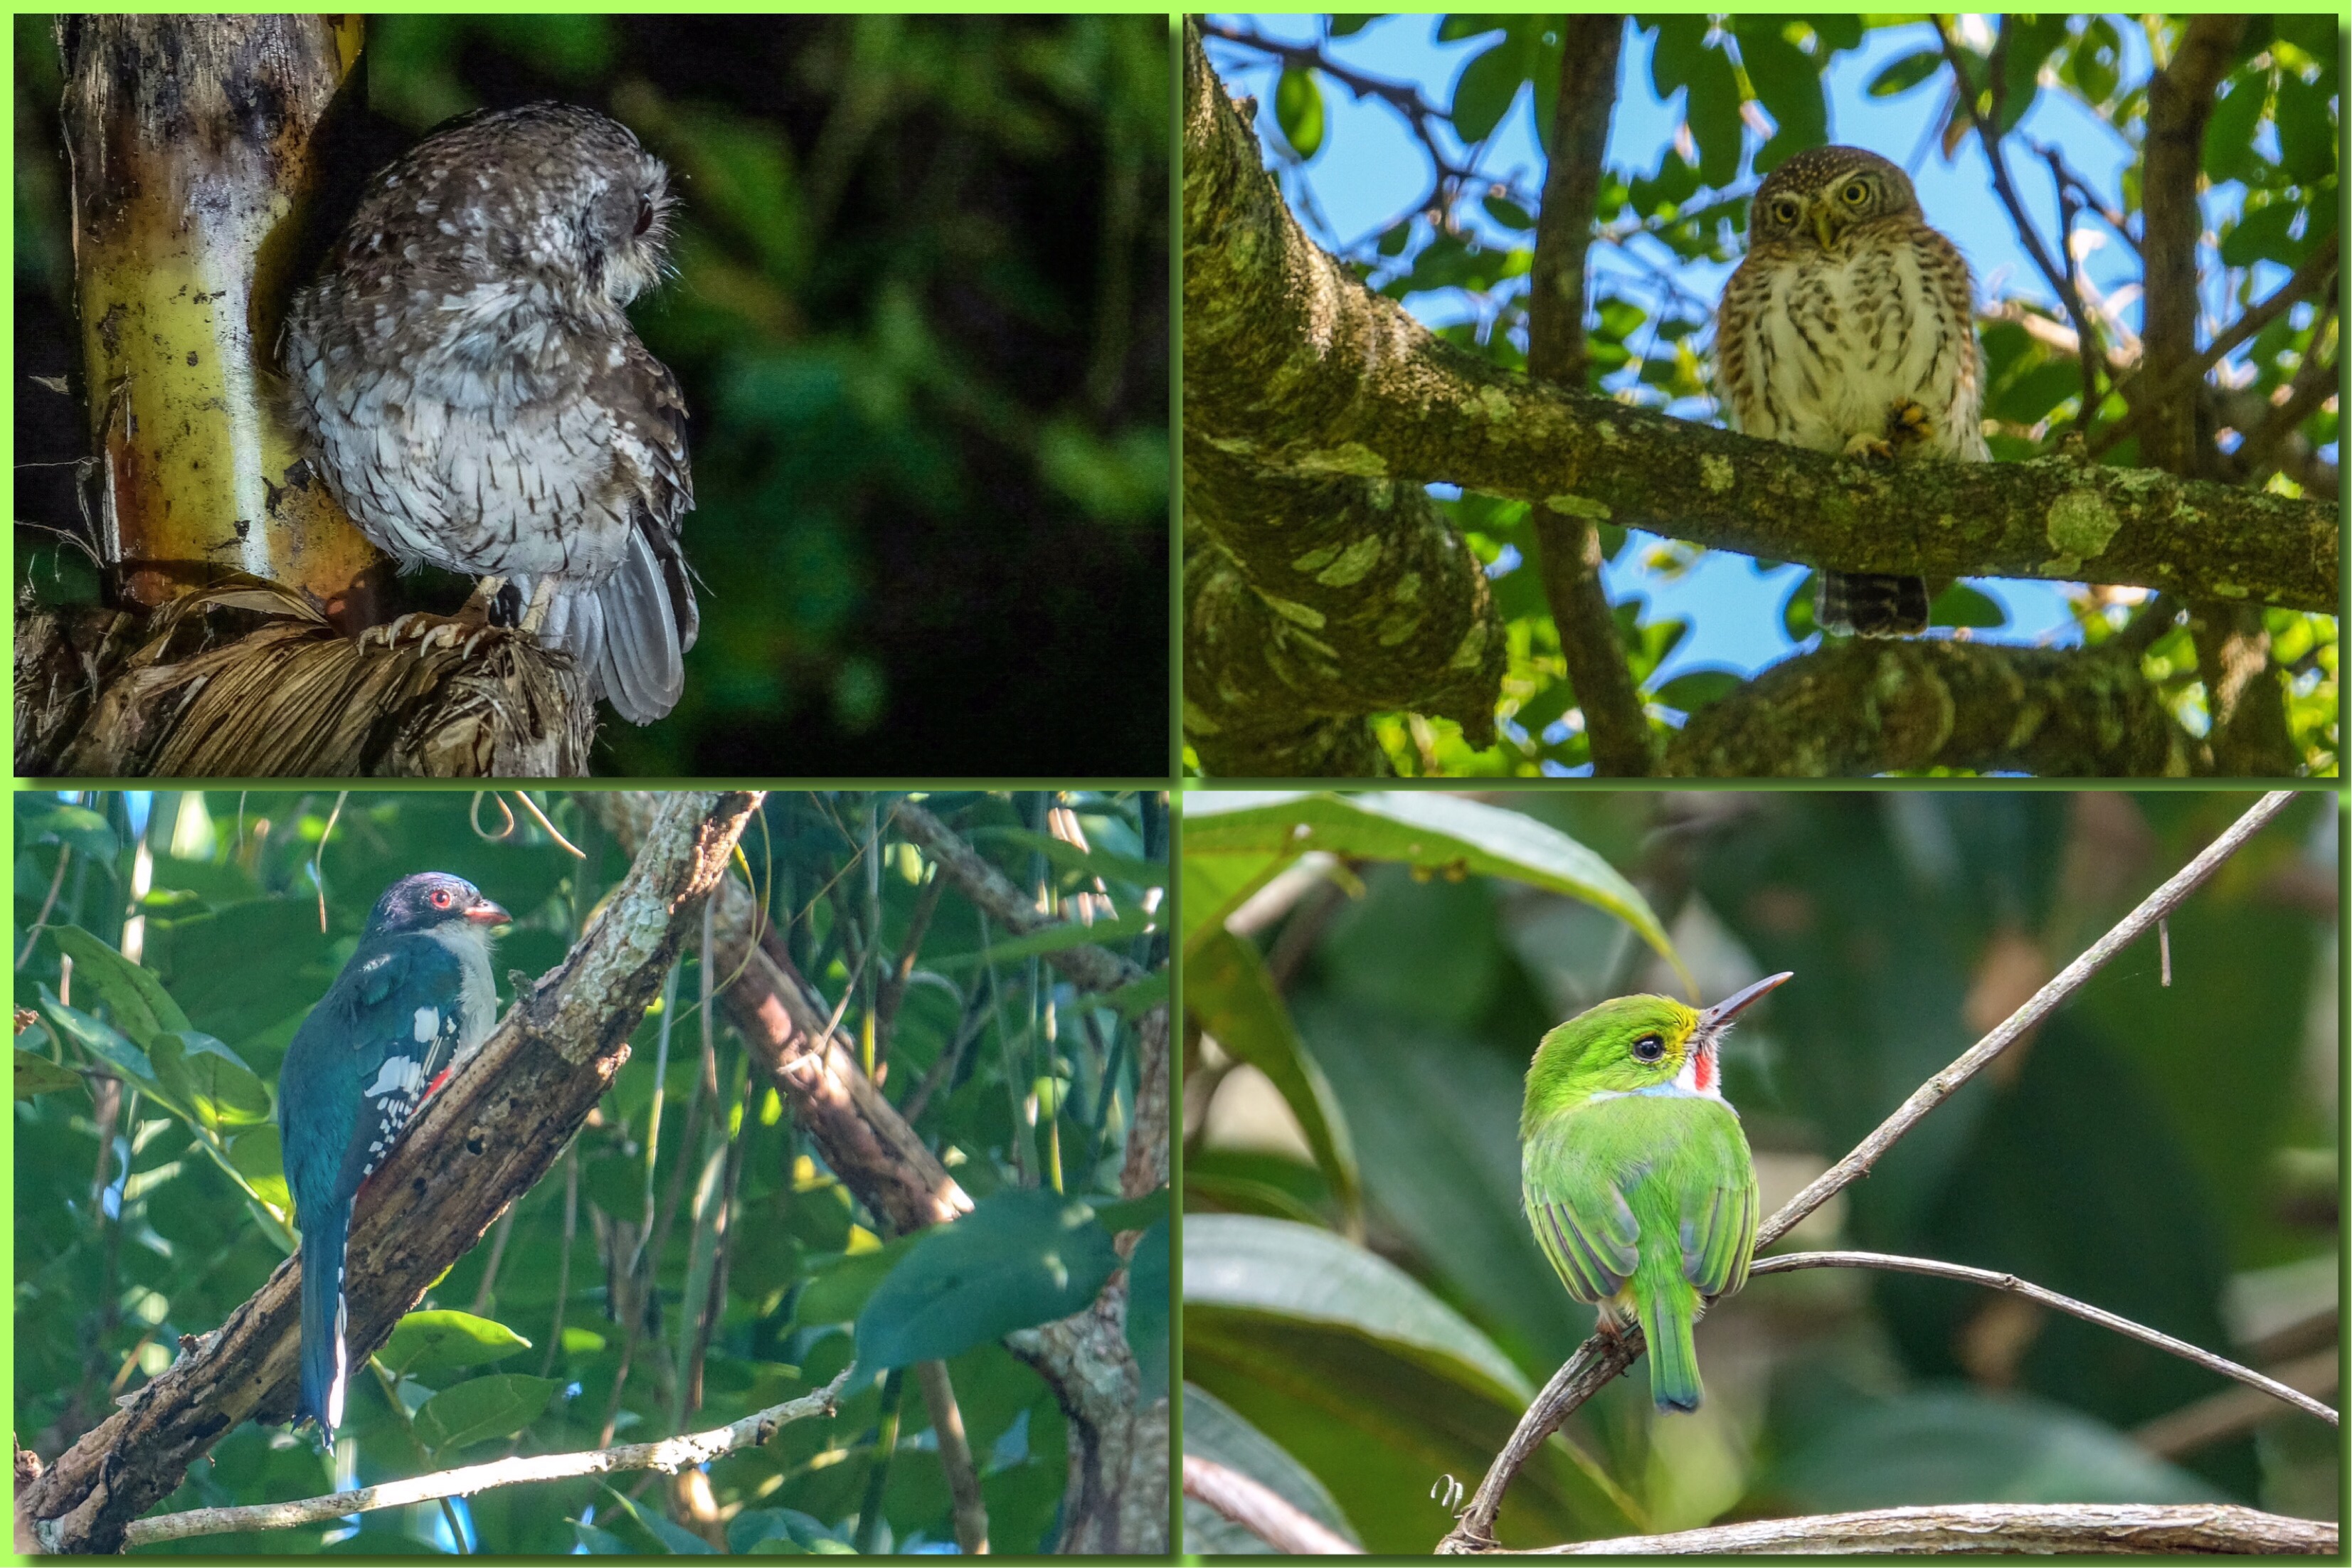
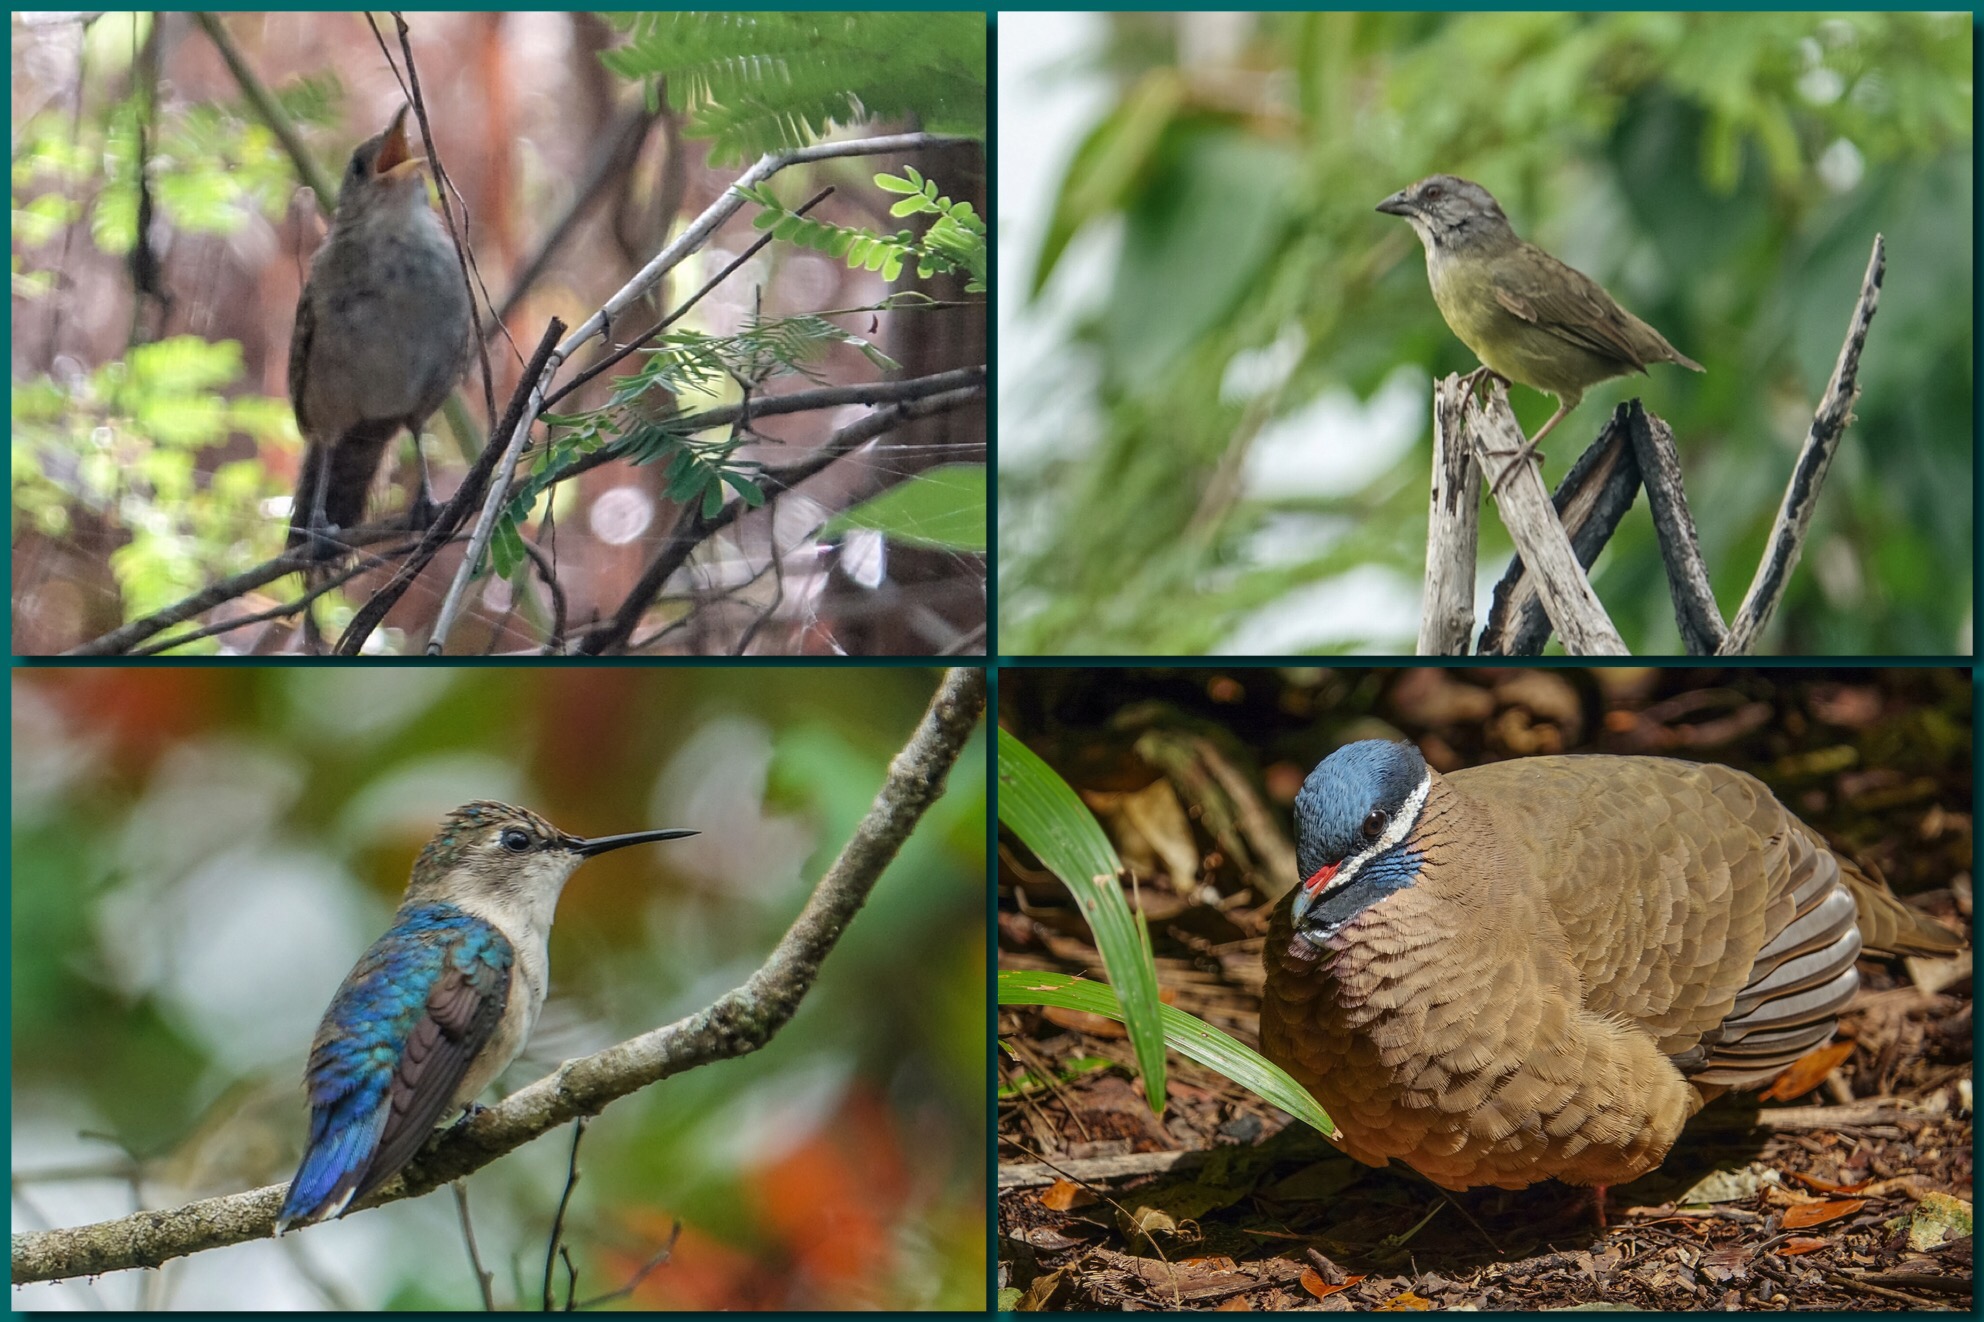
4 Cuban endemics: Bare-legged Owl, Cuban Pygmy Owl, Cuban Trogon, Cuban Tody
We visited the mountains west of Havana on our first night (I was there for 2 trips, so we stayed in two different hotels). I don’t recommend hotels in Cuba. You are much better off staying in Casa Paticulars, private homes licsenced by the government to host visitors. They are common in most of the touristy areas, and are less expensive, cleaner, and often more modern than the hotels. Private tiled baths with shower, air conditioners in each room, generally a refrigerator (sometimes shared between rooms), filtered water used for cooking, bottled water and beverages available, etc. are standard (and, it was my impression, required by law.) Plus you can arrange to have your meals at the Casa Paticular and if the ones we stayed at are a good sample, the food is abundant and excellent!
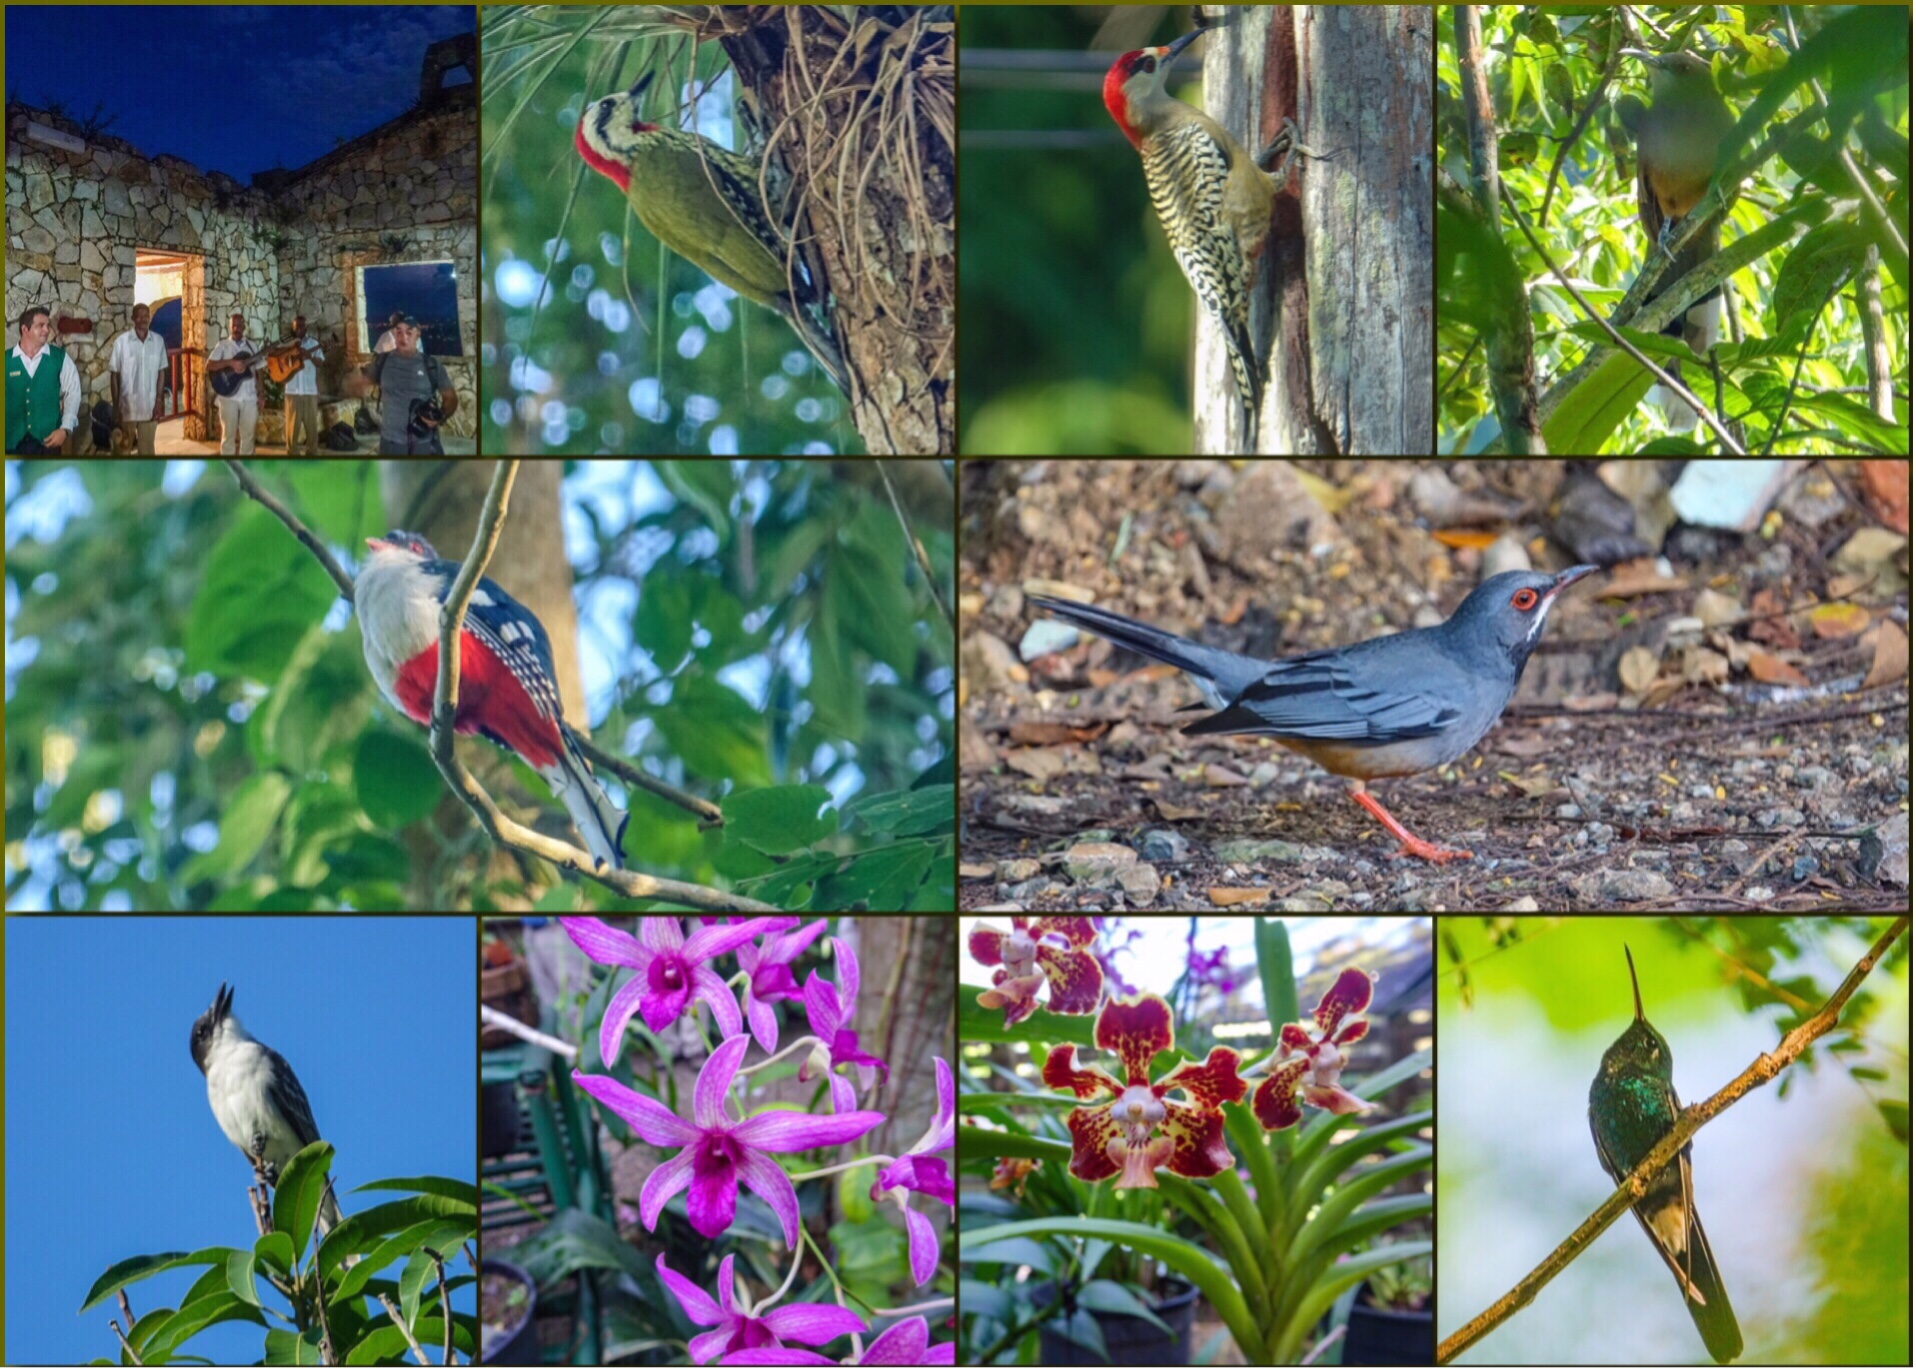
Dinner our first night on the mountain, Cuban Green Woodpecker, West Indian Woodpecker, Giant Lizard Cuckoo, Cuban Trogon, Red-legged Thrush, Giant Kingbird, Orchid, Orchid, Cuban Emerald
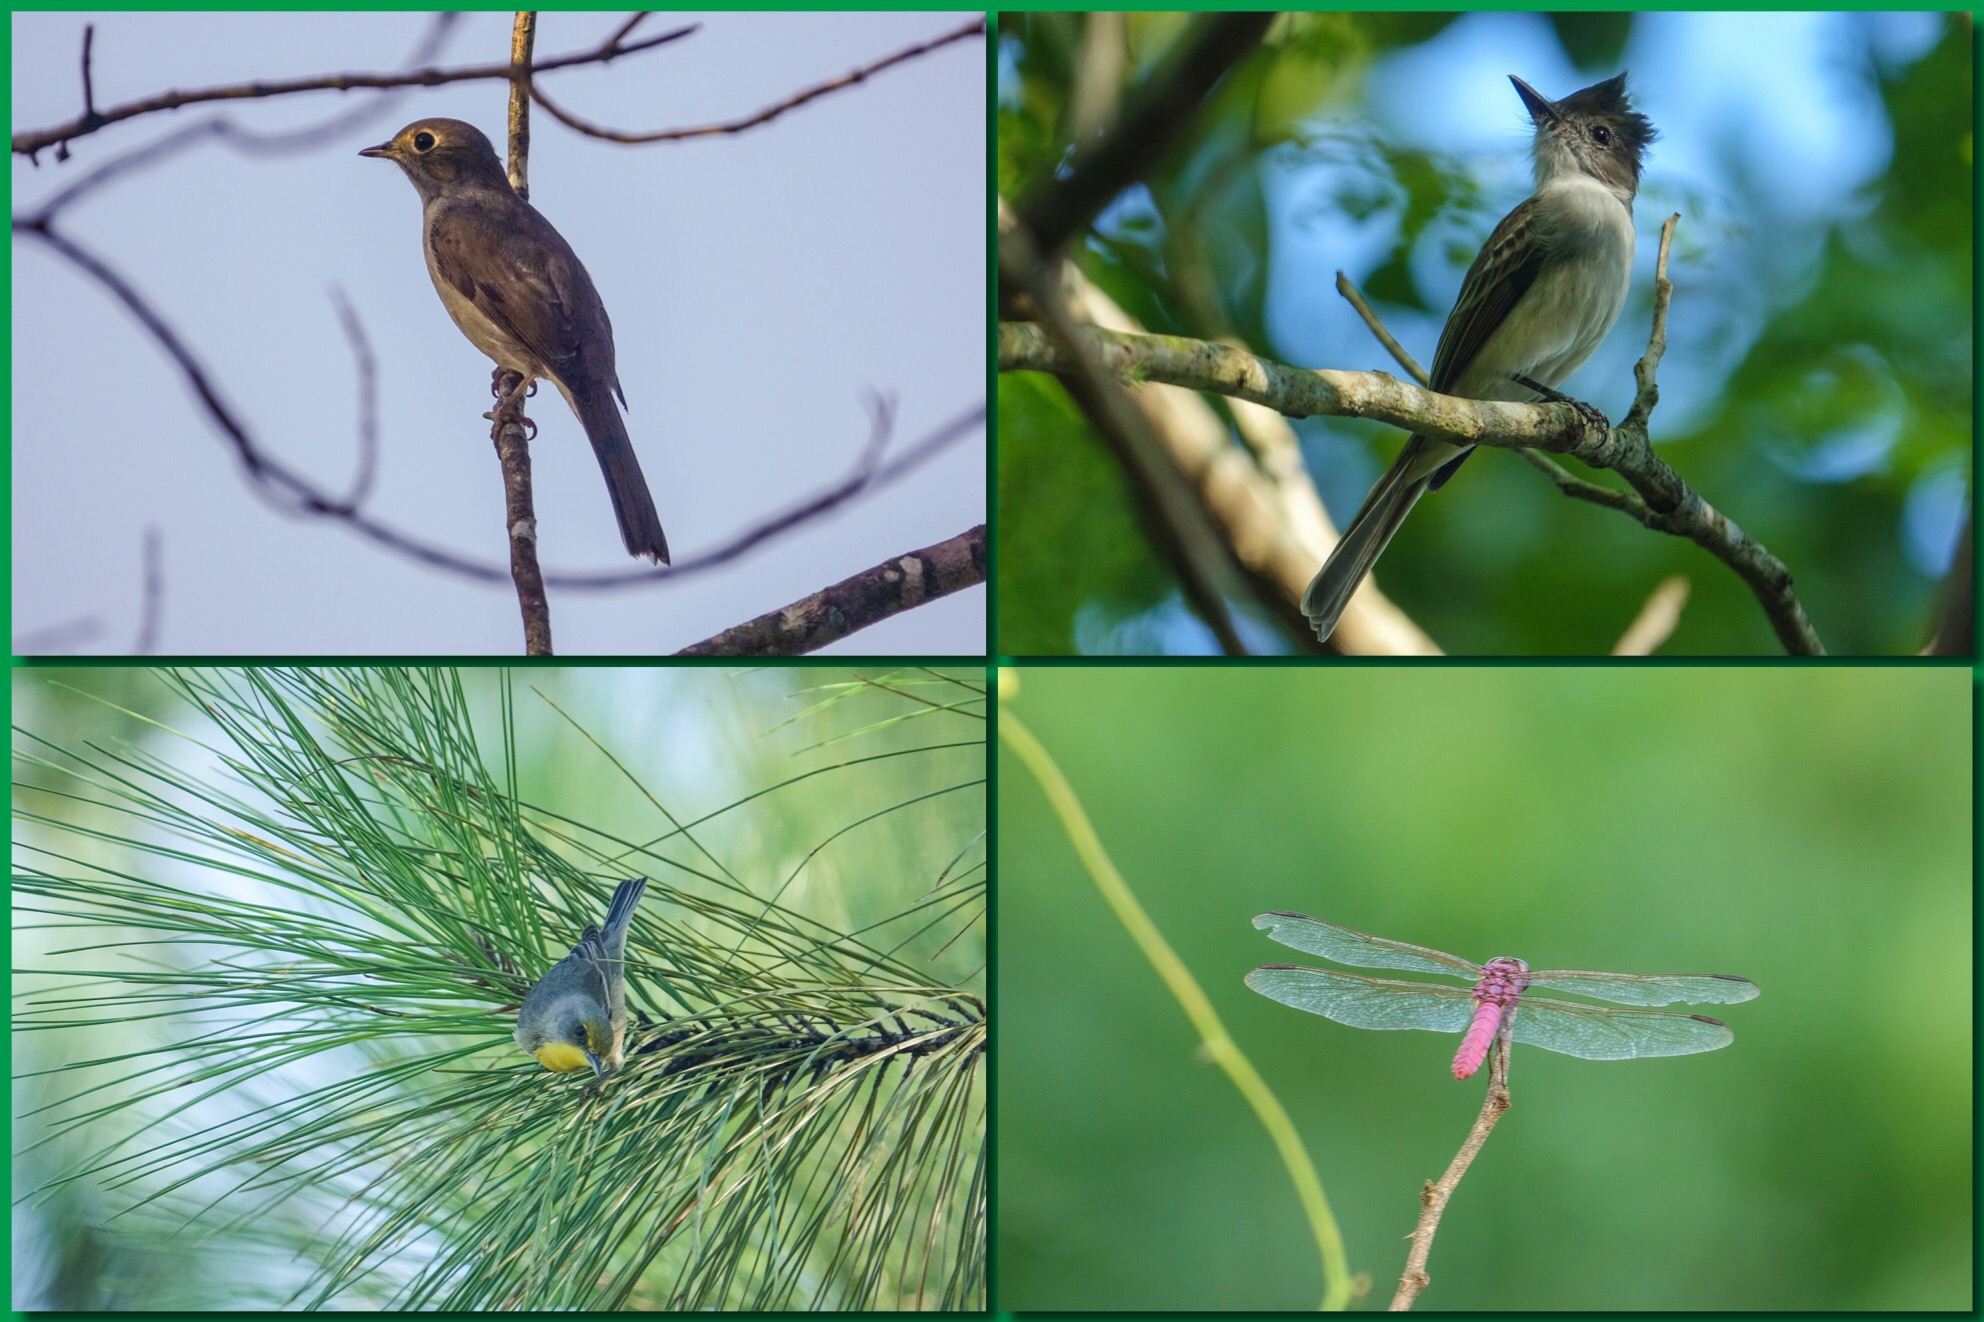
Near our first hotel there was a small botanical garden…or Orchid Garden. Besides beautiful plants and stunning landscaping…in a series of terraces up the side of a steep limestone hill…the birding was excellent. Here we saw our first endemic: the Cuban Trogon. We also had good views of one of the most common, and most spectacular birds of the Cuban forest, the Red-legged Thrush. The Great Lizard Cuckoo lived up to its name. Cuban Emeralds worked the flowers on the terraces. We also saw Cuban Green and West Indian Woodpeckers, and the rare and unexpected Giant Kingbird.
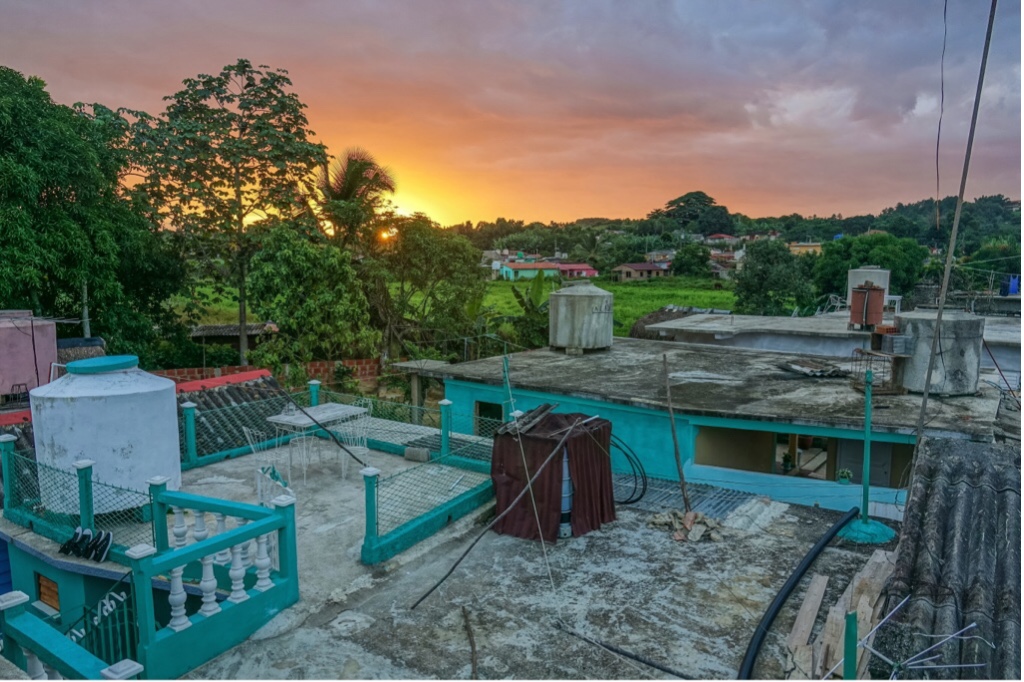
Dawn in Vinales from the roof of our Casa Paticular
In Vinales (a must-visit city in one of the most unique landscapes in the world, and the center of the cigar industry in Cuba) there are whole neighborhoods that are pretty much exclusively Casa Paticulars. They have catered for a decade to German and French tourists, and are eager to host Americans. The hosts have limited English. I don’t recommend going to Cuba without hiring a local guide to set up your trip for you, but once at your Casa Paticular, even the most basic Spanish (and I am limited to a very few words), combined with the host’s basic English, will generally get you what you need. In one case, where the host needed to communicate a maintenance issue, he was able to flag down a passing neighbor with more English and we got the job done. As I said before, the people I met in Cuba were among the most friendly and accomodating I have met anywhere in my travels.
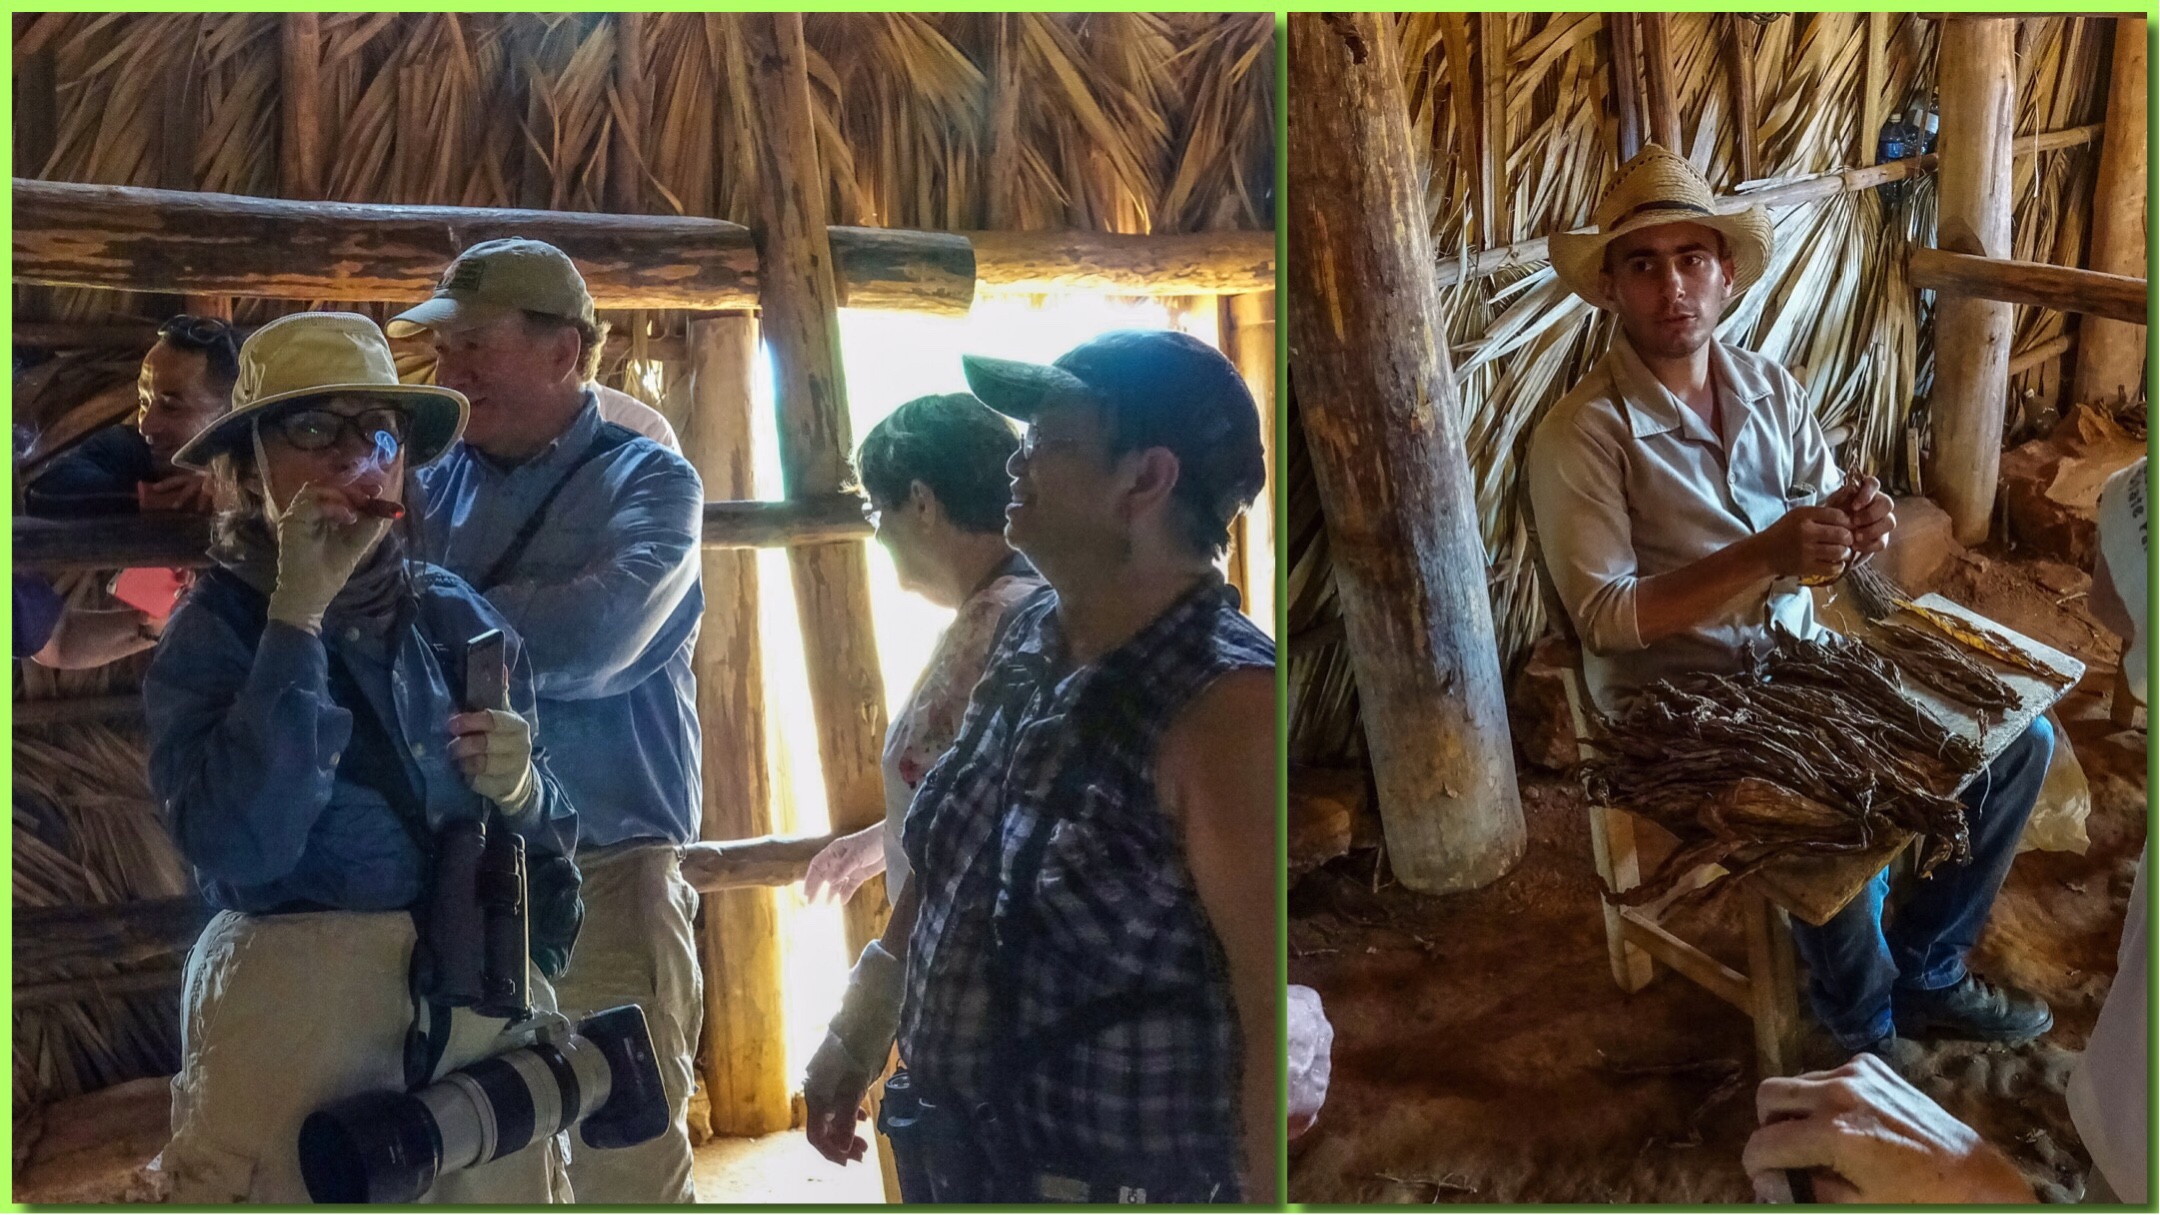
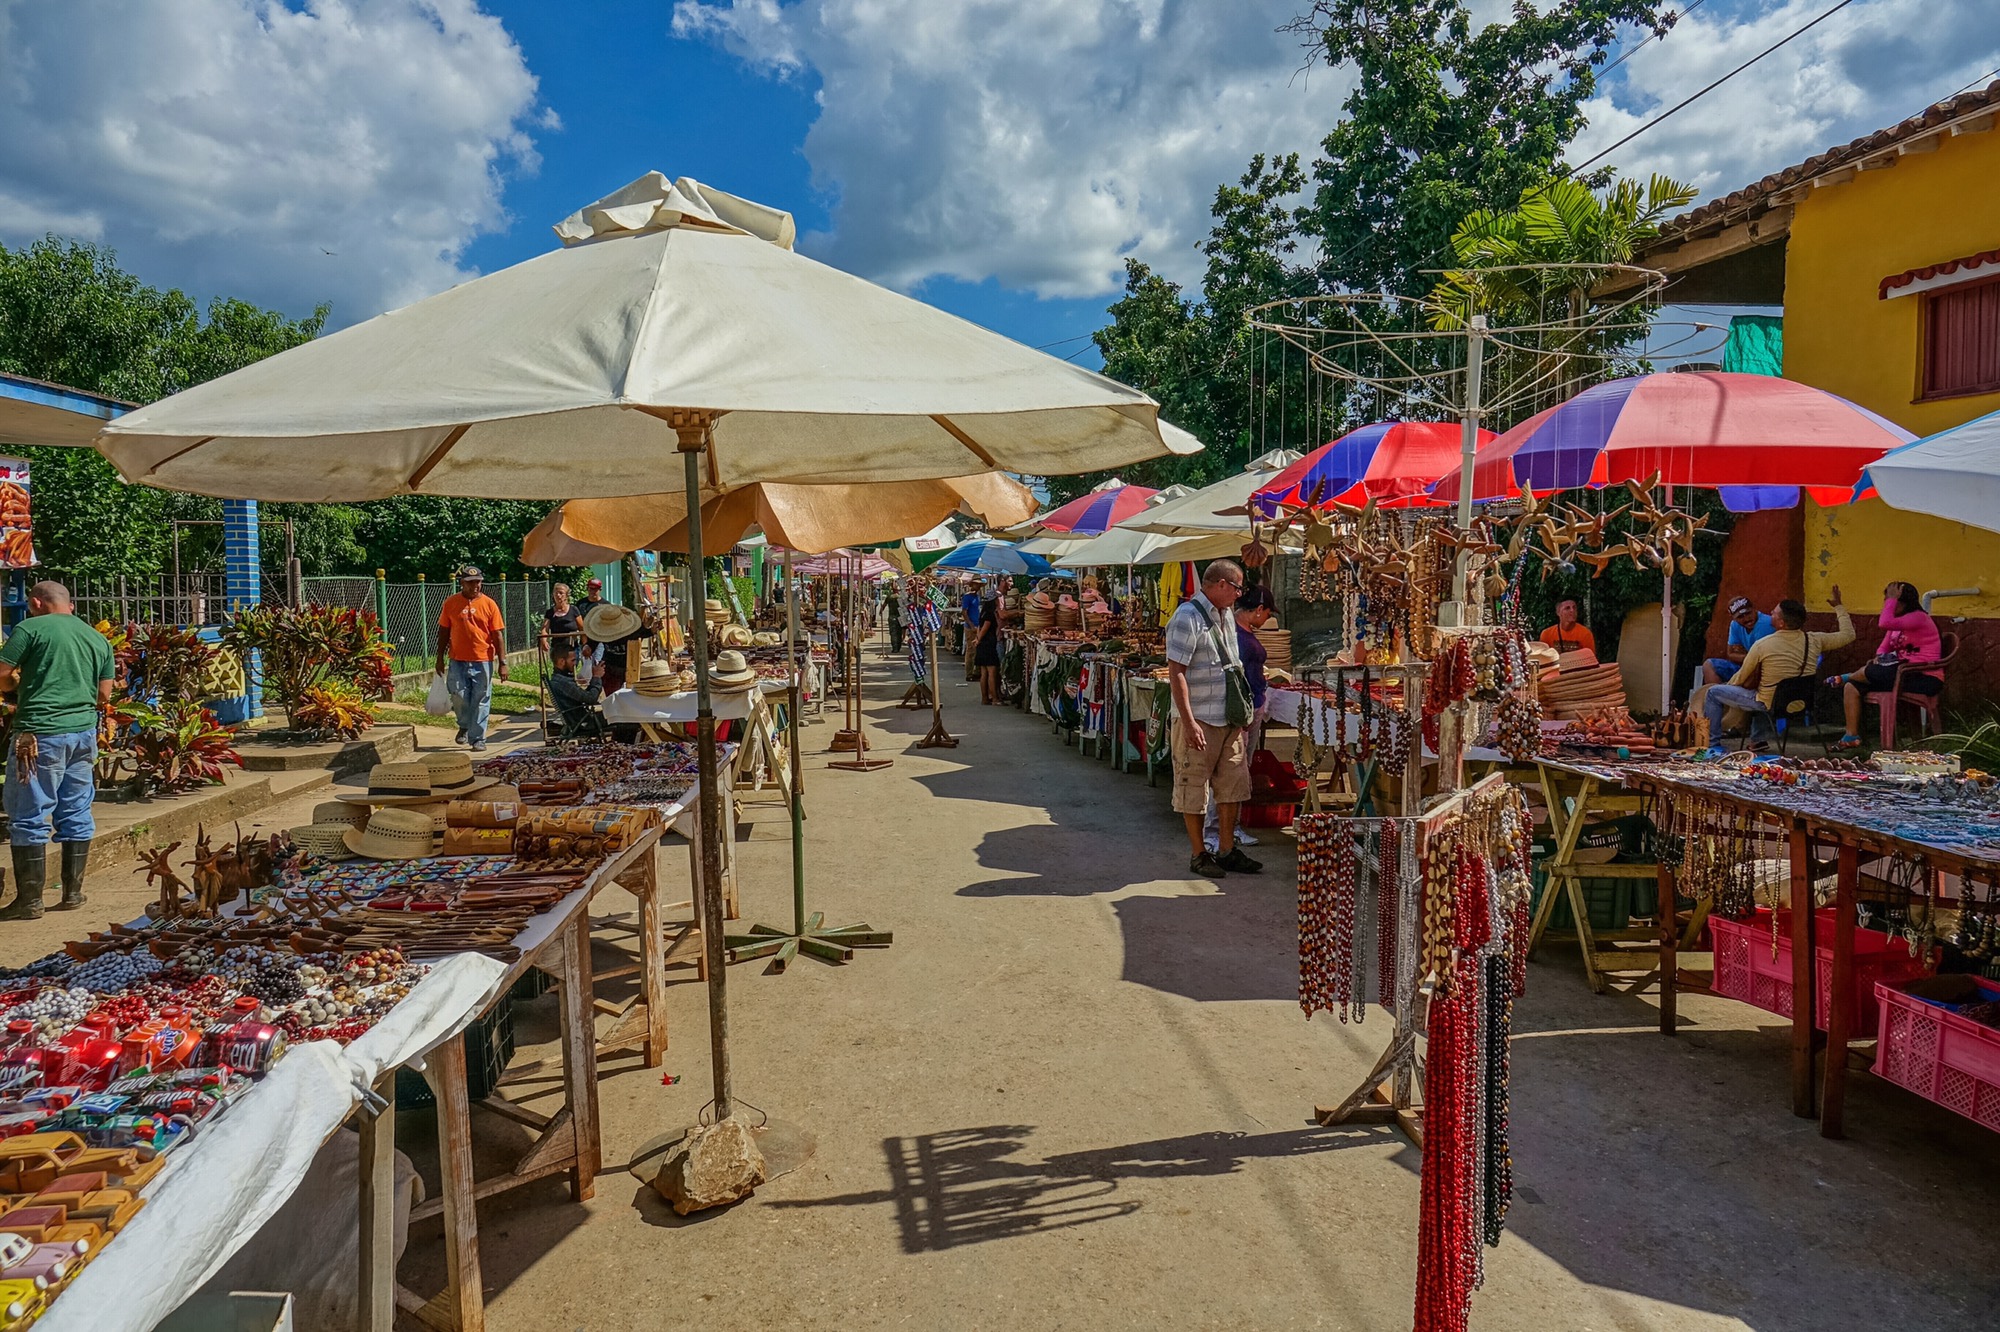
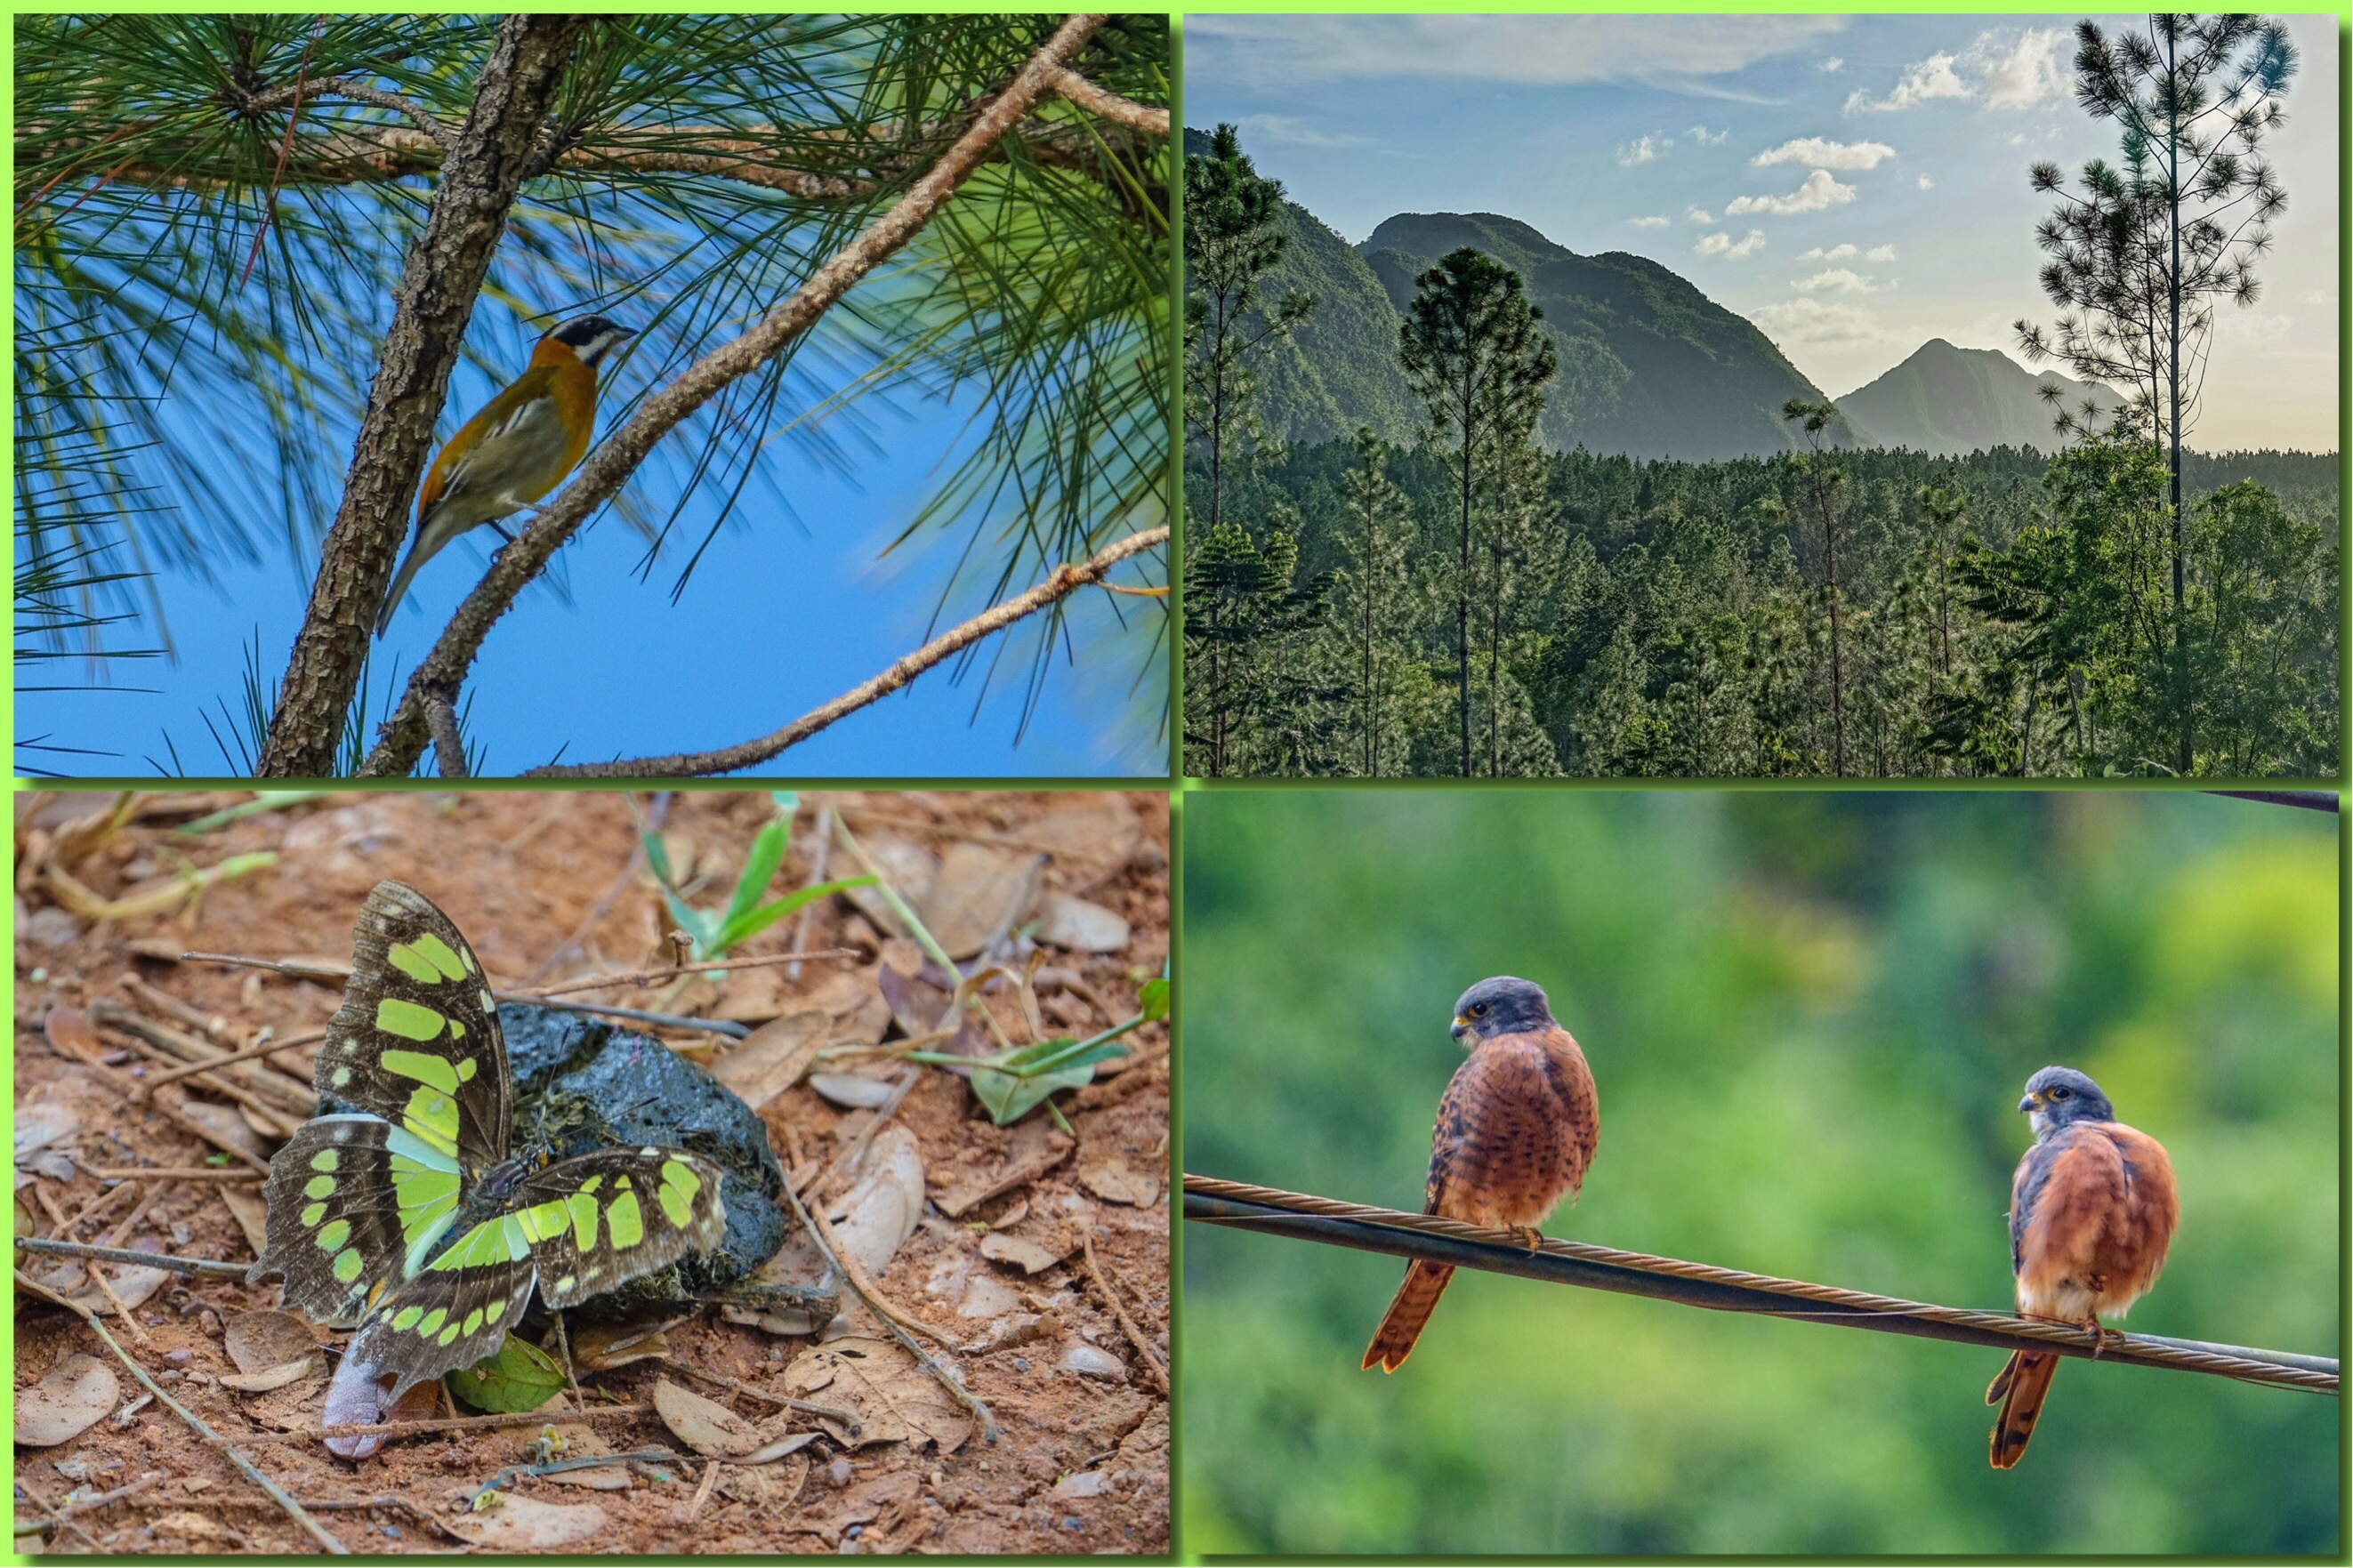
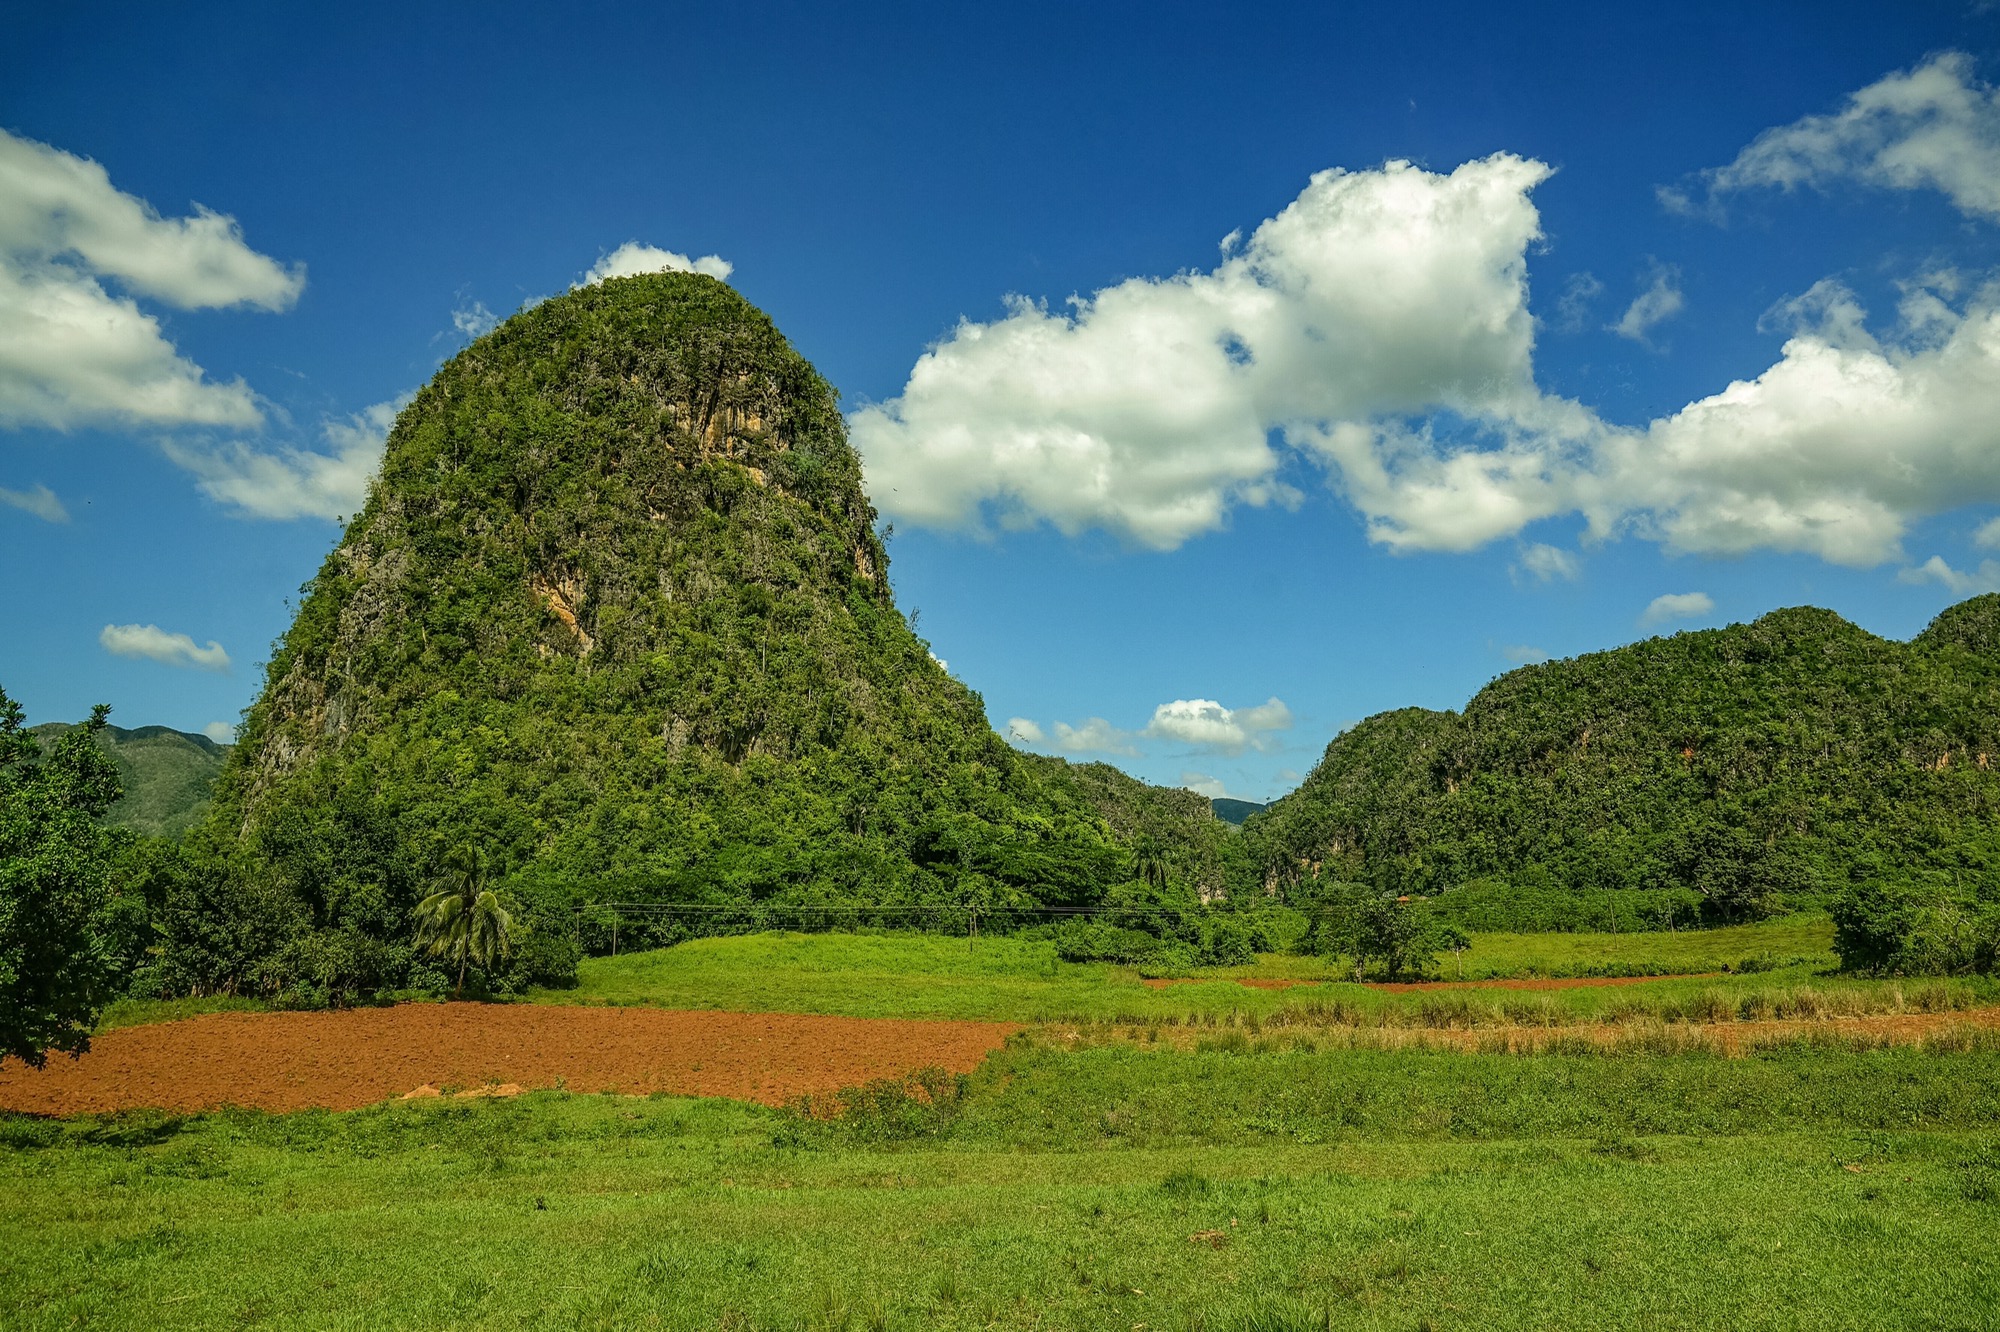
sampling the product: Vinales tobacco farm and cigar hand rolling facilityStreet market in VinalesWestern Spindales, in the mountains east of Vinales, Green Malicite Butterfly, Cuban Kestrels (dark variety)Out the bus window…the unique landscape around Vinales. Tobacco fields and Mogotes (the mountains)Cuban Solitaire, Cuban Pewee, Olive-capped Warbler, Roseate Skimmer dragonfly
From Vinales we traveled back toward Havana and then south to the Zapata Swamp area. Our accommodations were again in Casa Paticulars, this time in the resort town of Ponto Larga at the head of The Bay of Pigs. This is another unique landscape, somewhat reminiscent of the Everglades in south Florida. A porous limestone base mixes fresh and salt water well inland, creating extensive marshes and wet plains. There is a fault running up the middle of the Bay, so the east side is low, with sandy beaches, and the west side is some 20-30 feet higher, with a rim of low limestone cliffs, and many sinkholes back from the shore. This is the only place in Cuba for three of the most sought after endemics…the Zapata Sparrow, the Zapata Wren, and the Zapata Rail. The existence of the rail is currently in some doubt, as there have been no reliable records for several years now. This spring, when the marsh is dryer, local ornithologists and biologists are mounting a last-ditch effort to find the rail and document its status.
The Zapata area is also a good place to find a two of the other Cuban endemics: the Cuban Bee Hummingbird (the worlds smallest bird), and the Blue-headed Quail Dove.
Zapata Wren, Zapata Sparrow, Cuban Bee Hummingbird, Blue-headed Quail Dove
The Blue-headed Quail Dove used to be very hard to find. Recently a small flock has taken up residence around restaurant at a sink-hole park just across the road from the Bay. They come in to corn spread by the staff at the restaurant, and draw the tourists with them. 🙂 The Wren and the Sparrow, however, required a 5 mile round trip hike into the swamp on raised dike roads, in the heat of a hot October. Fortunately there were other birds along the way to keep our spirits up. On the first of the two trips I hosted, the Bee Hummingbird was easy as well. There is a backyard in a small village just north of the Bay where they are regular visitors, so much so that the owners have a small business showing them off. On the second trip the Cuban Emeralds (not endemic despite its name) were so numerous and so aggressive that the Bees were scarce. We did find them elsewhere, but did not get close views.
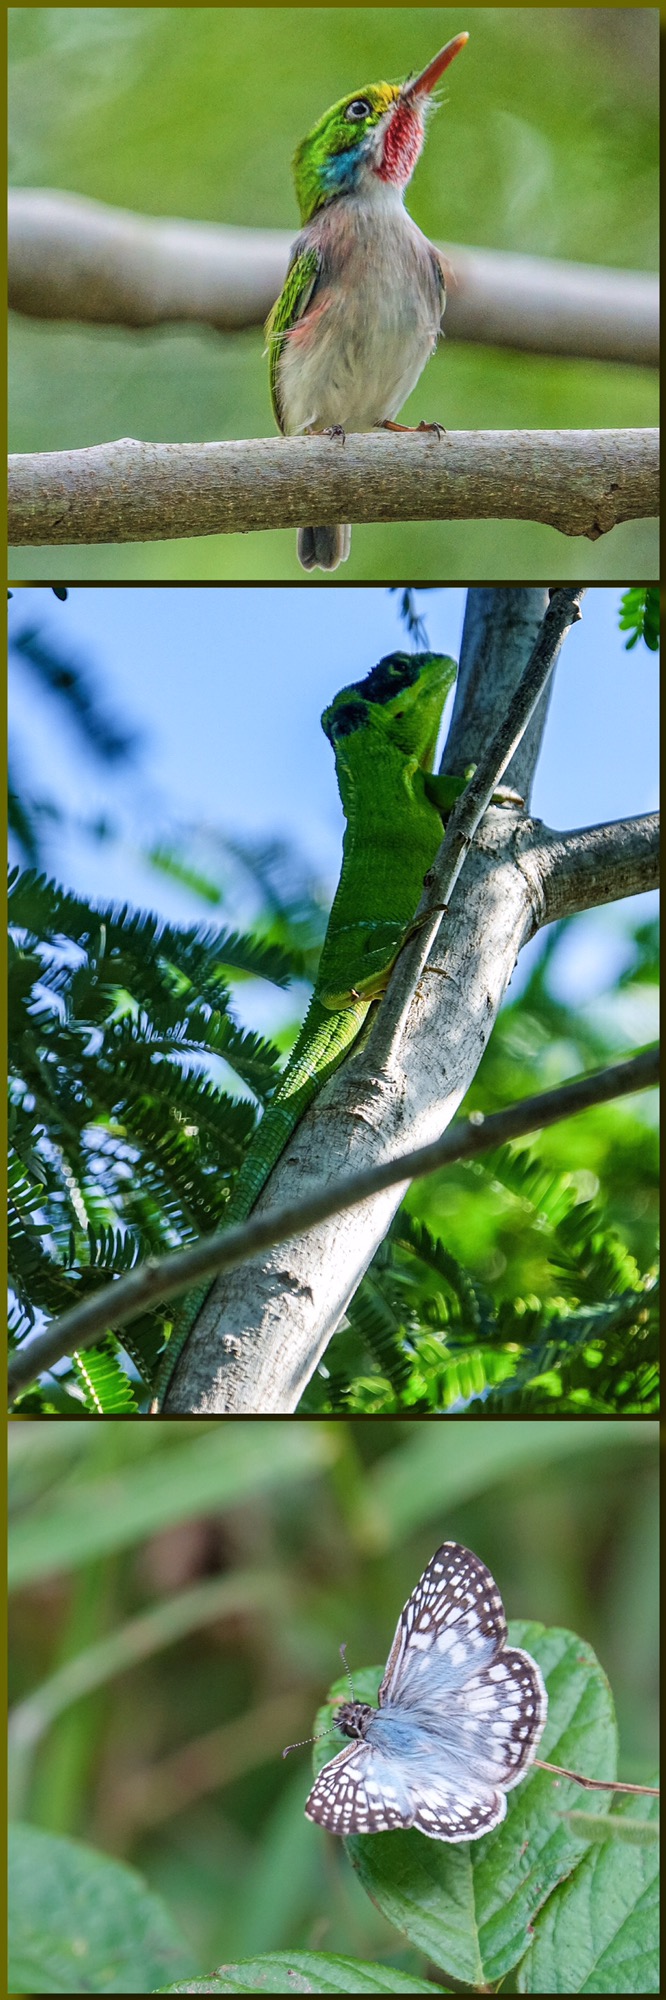
Cuban Tody (again), Giant Green Anole, Butterfly
The most elusive of the endemics of the Zapata region (not counting the rail), turned out to be the Fernandino’s Flicker, which should have been a lot easier in the wet plains back from the Bay. On our first trip we had only a questionable sighting. On the second trip we tried an unlikely spot in the mountains west of Havana where our guide had seen them once before, and had great views. Of course, on that trip, we also found them on the Zapata Plains.
Our Fernandino search did turn up other interesting birds. We had our first sighting of the Cuban Pygmy Owl here, and great looks at yet another Cuban Tody.
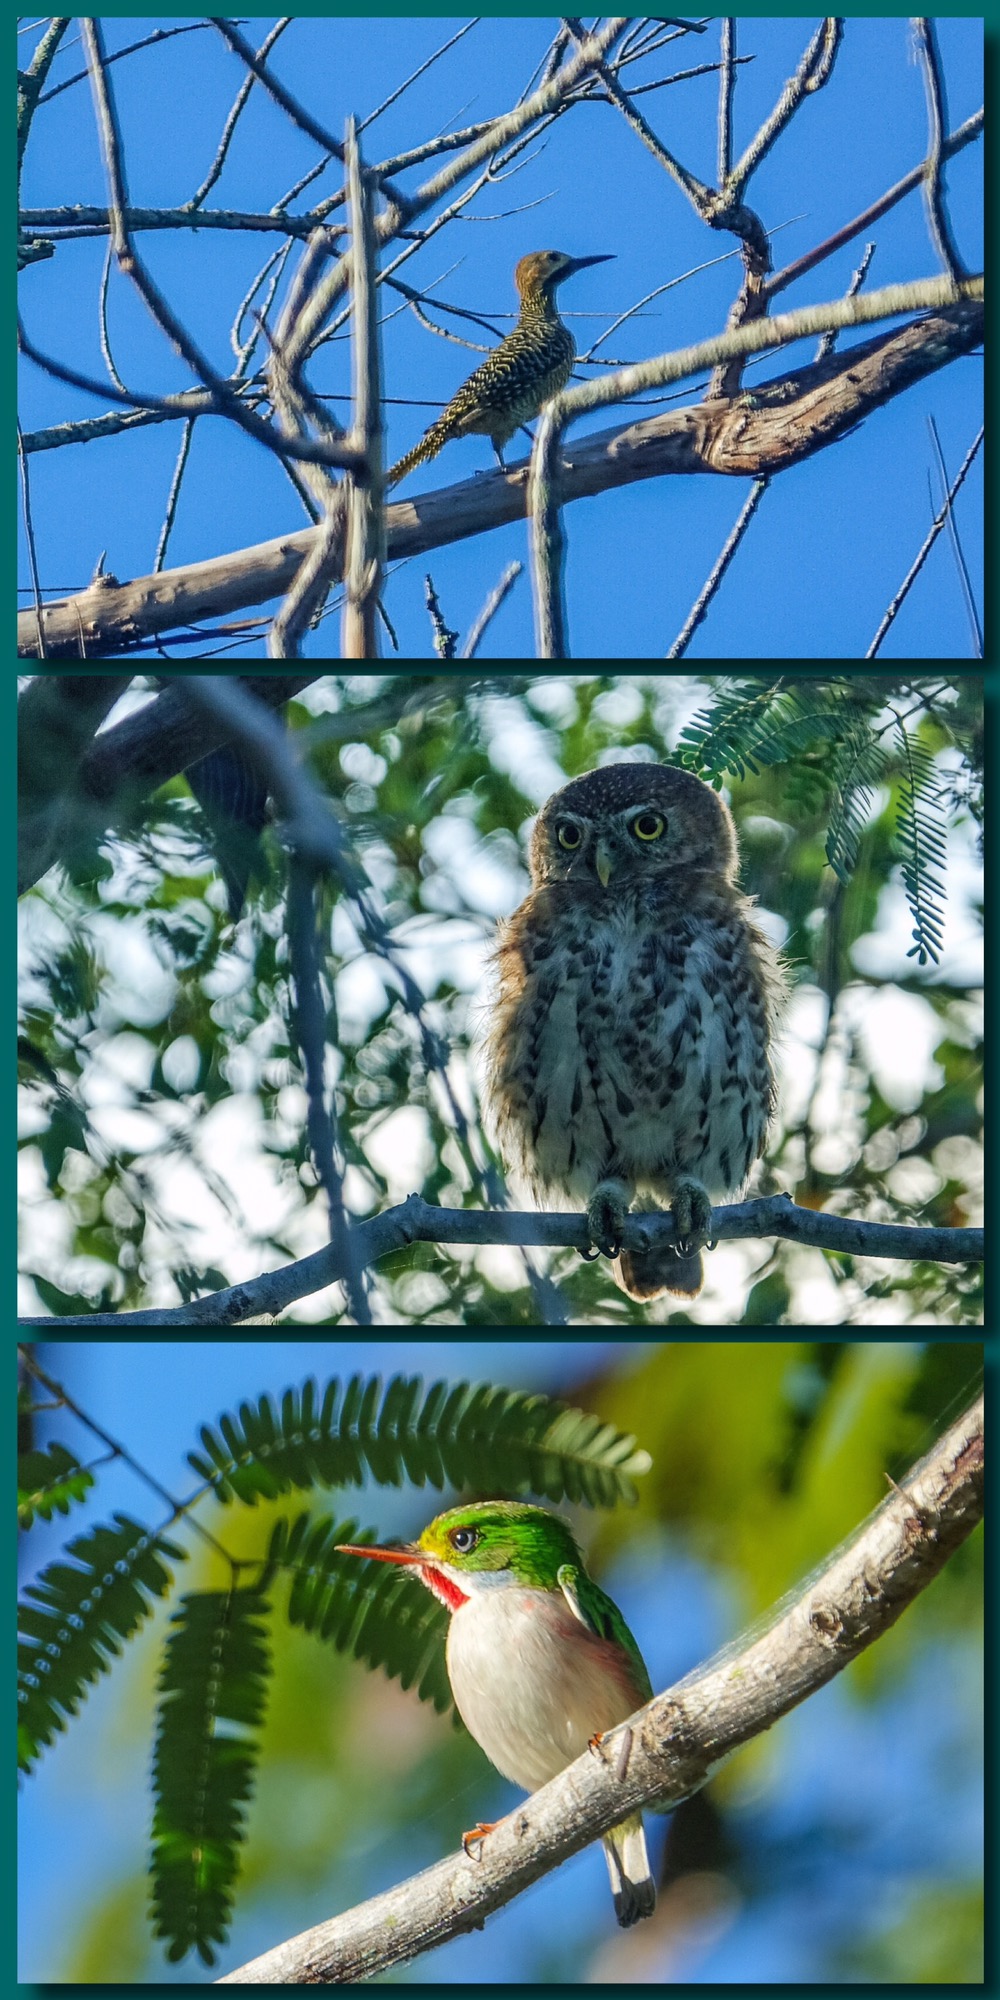
Fernandino’s Flicker, Cuban Pygmy Owl, Cuban Tody
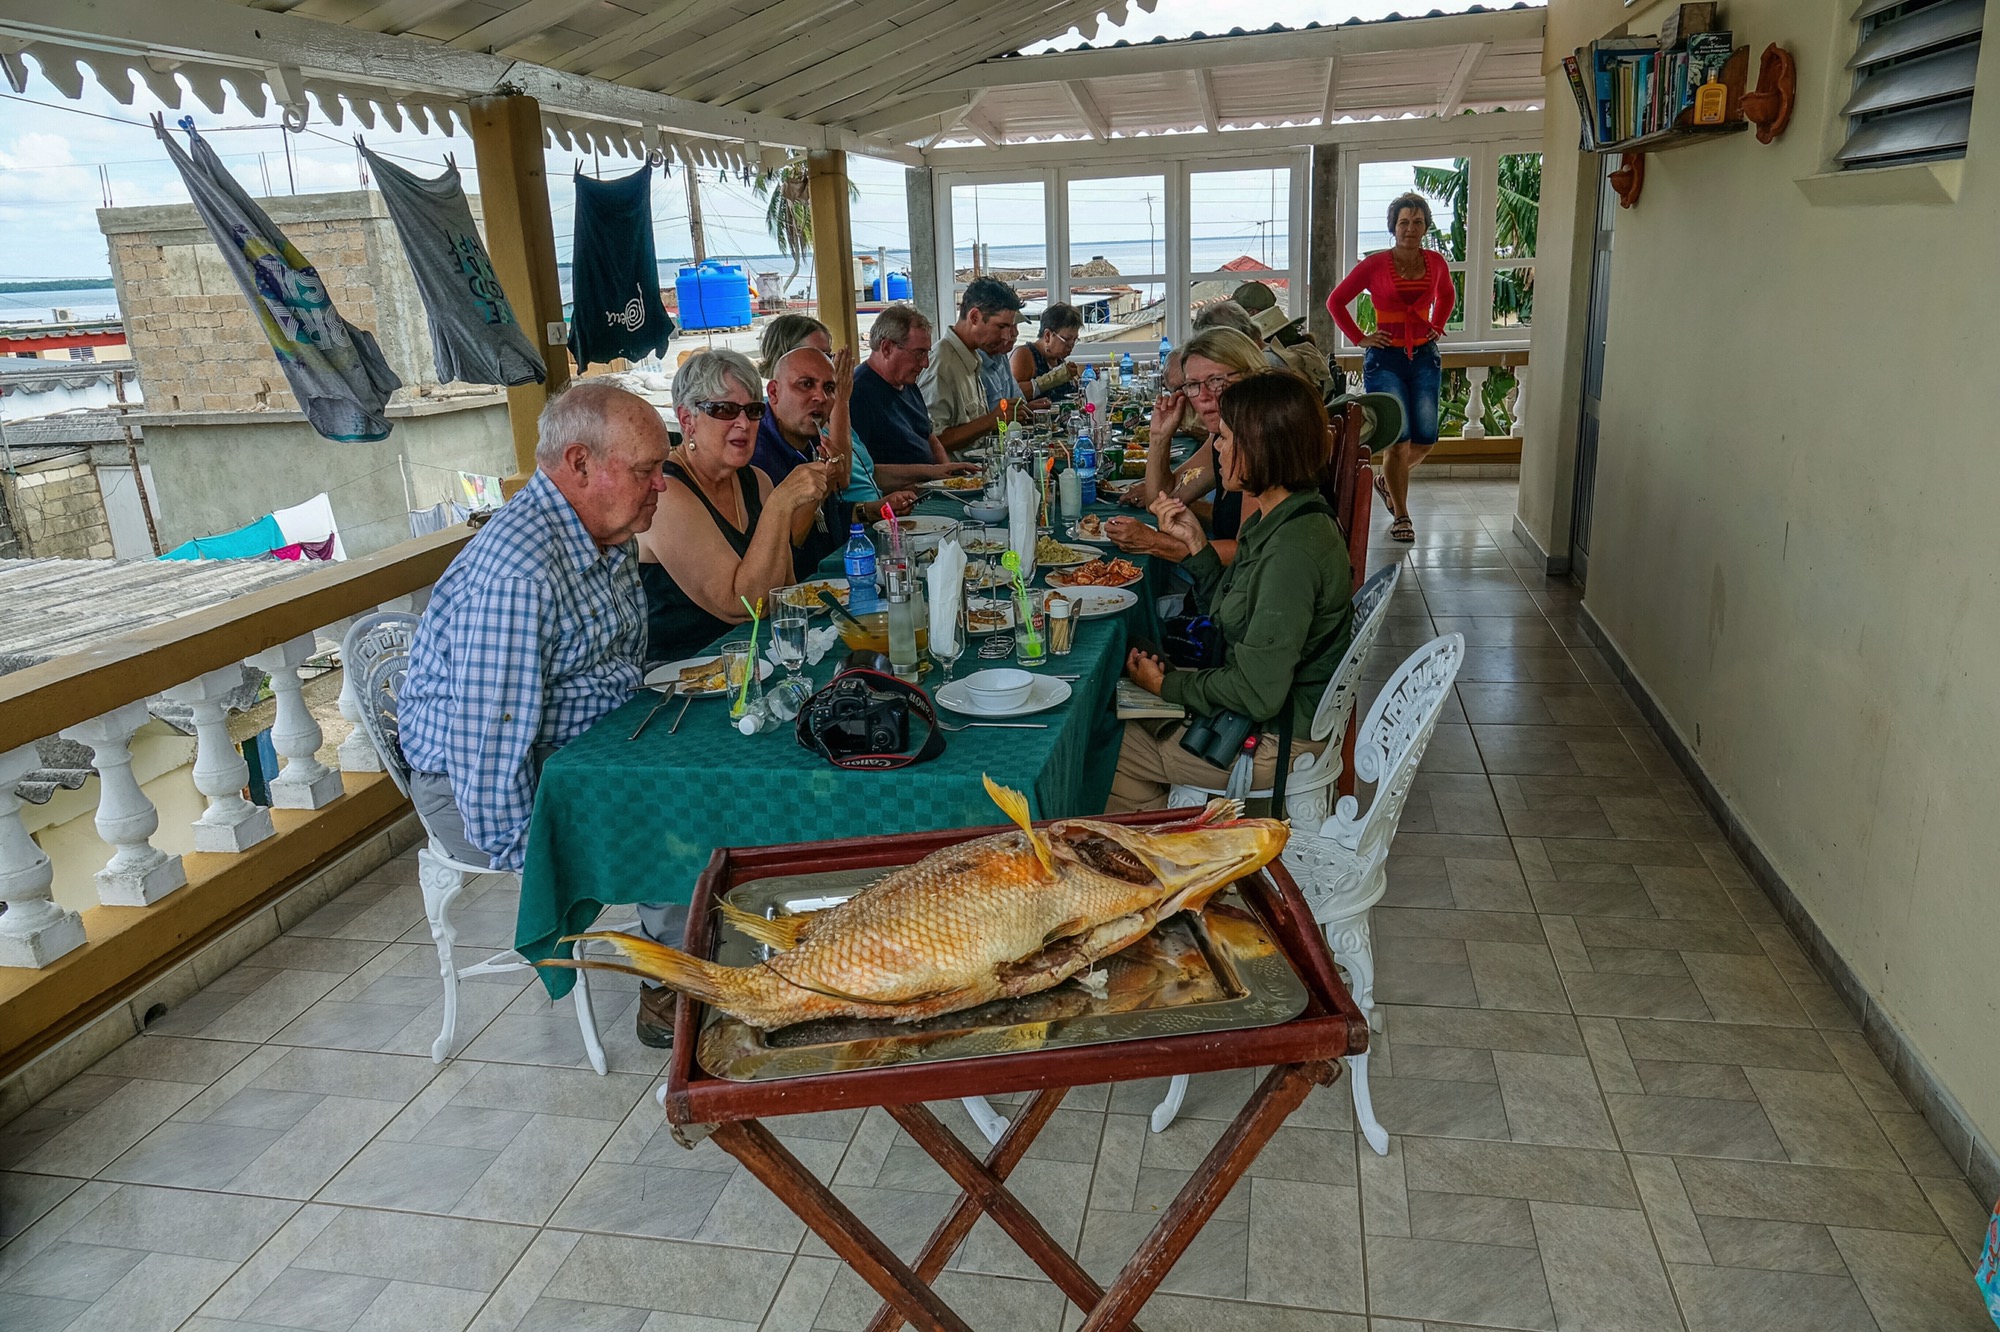
Meals in Playa Larga tended to center around seafood. Excellent shrimp, lobster fixed several different ways, and Deviled Crab with peppers and green olives. And of course fish, like this giant Dog-fish that capped a seafood meal at one of our Casa Paticulars.
The shrimp, lobster, crab, beans and rice, salad plates, fried plantains, and fruit were only the appetizers for the main course.
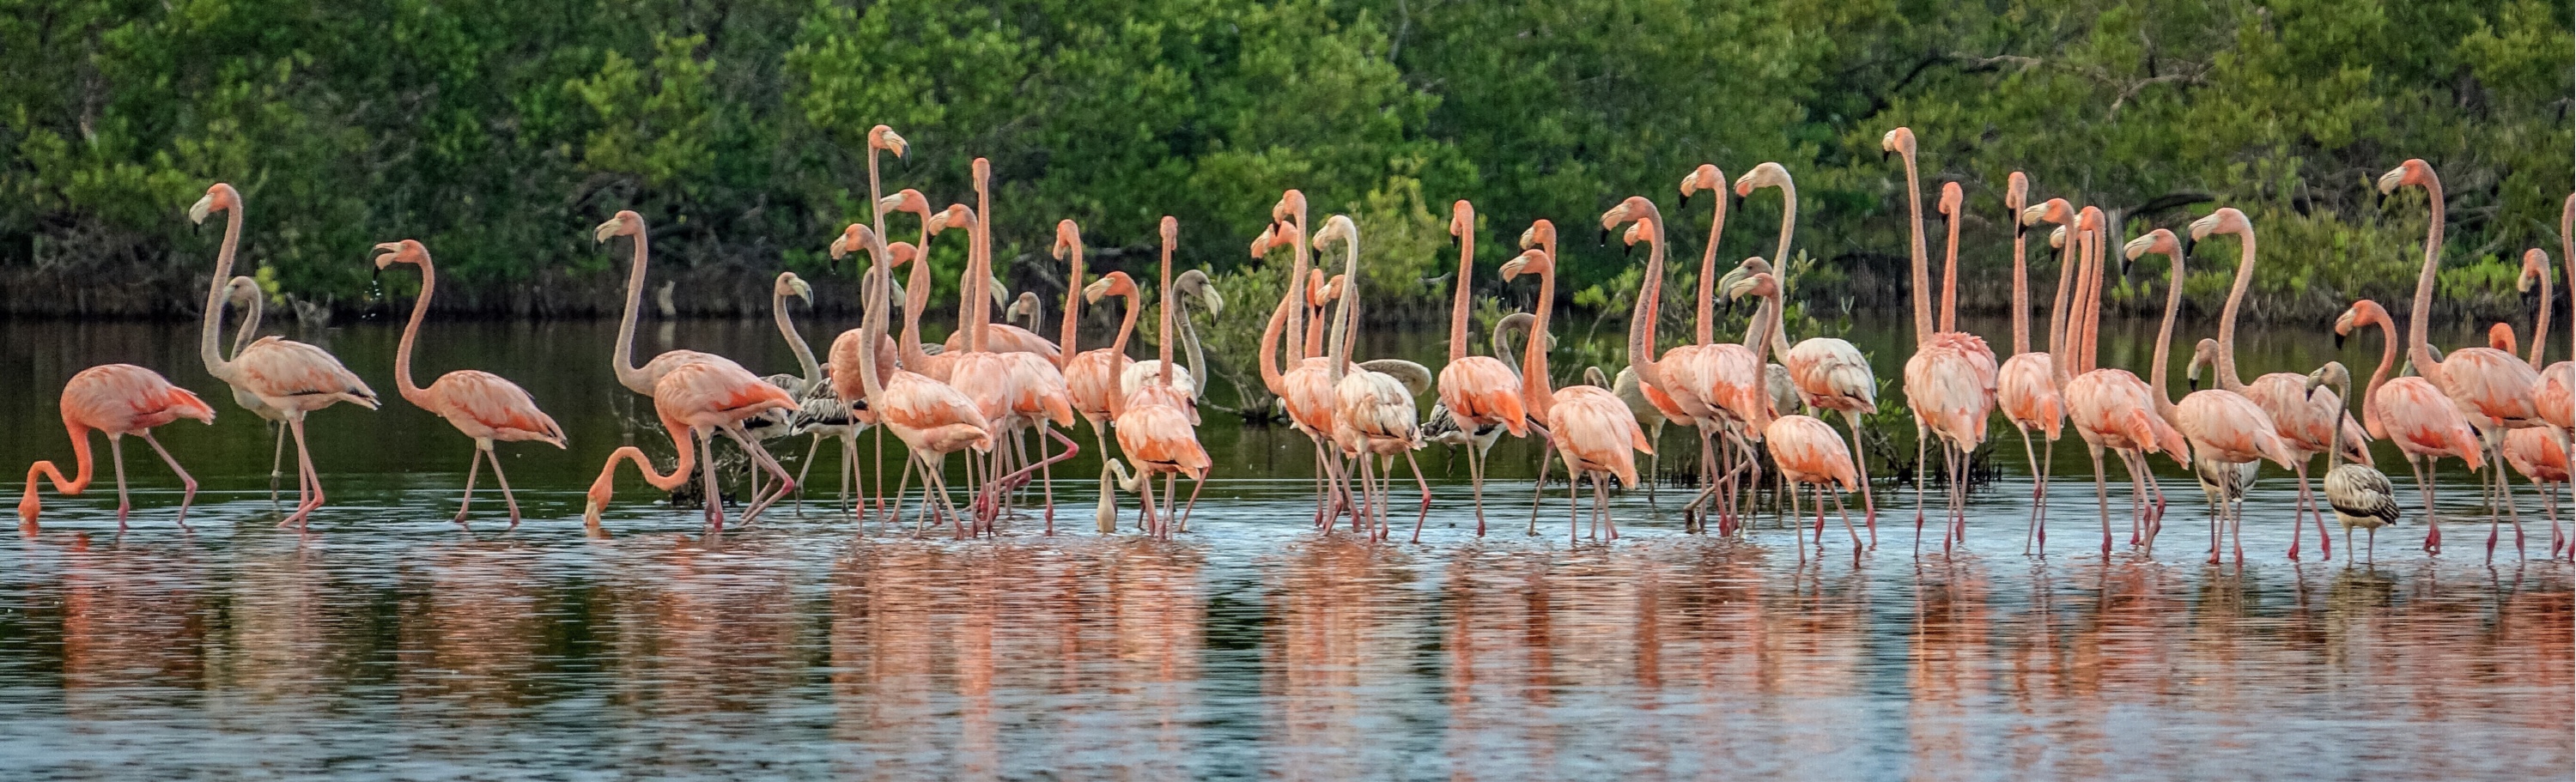
South of Playa Larga are the extensive salt-water marshes of the La Salina Refuge. This area is very like a cross between the Everglades and Merritt Island in Florida. The winter birds were just coming in, but La Salina is home to part of the Caribbean flock of American Flamingos, as well as the Cuban variety of the Osprey and many of the other wading birds you would expect to see in South Florida.
American Flamingos, La Salina, Cuba
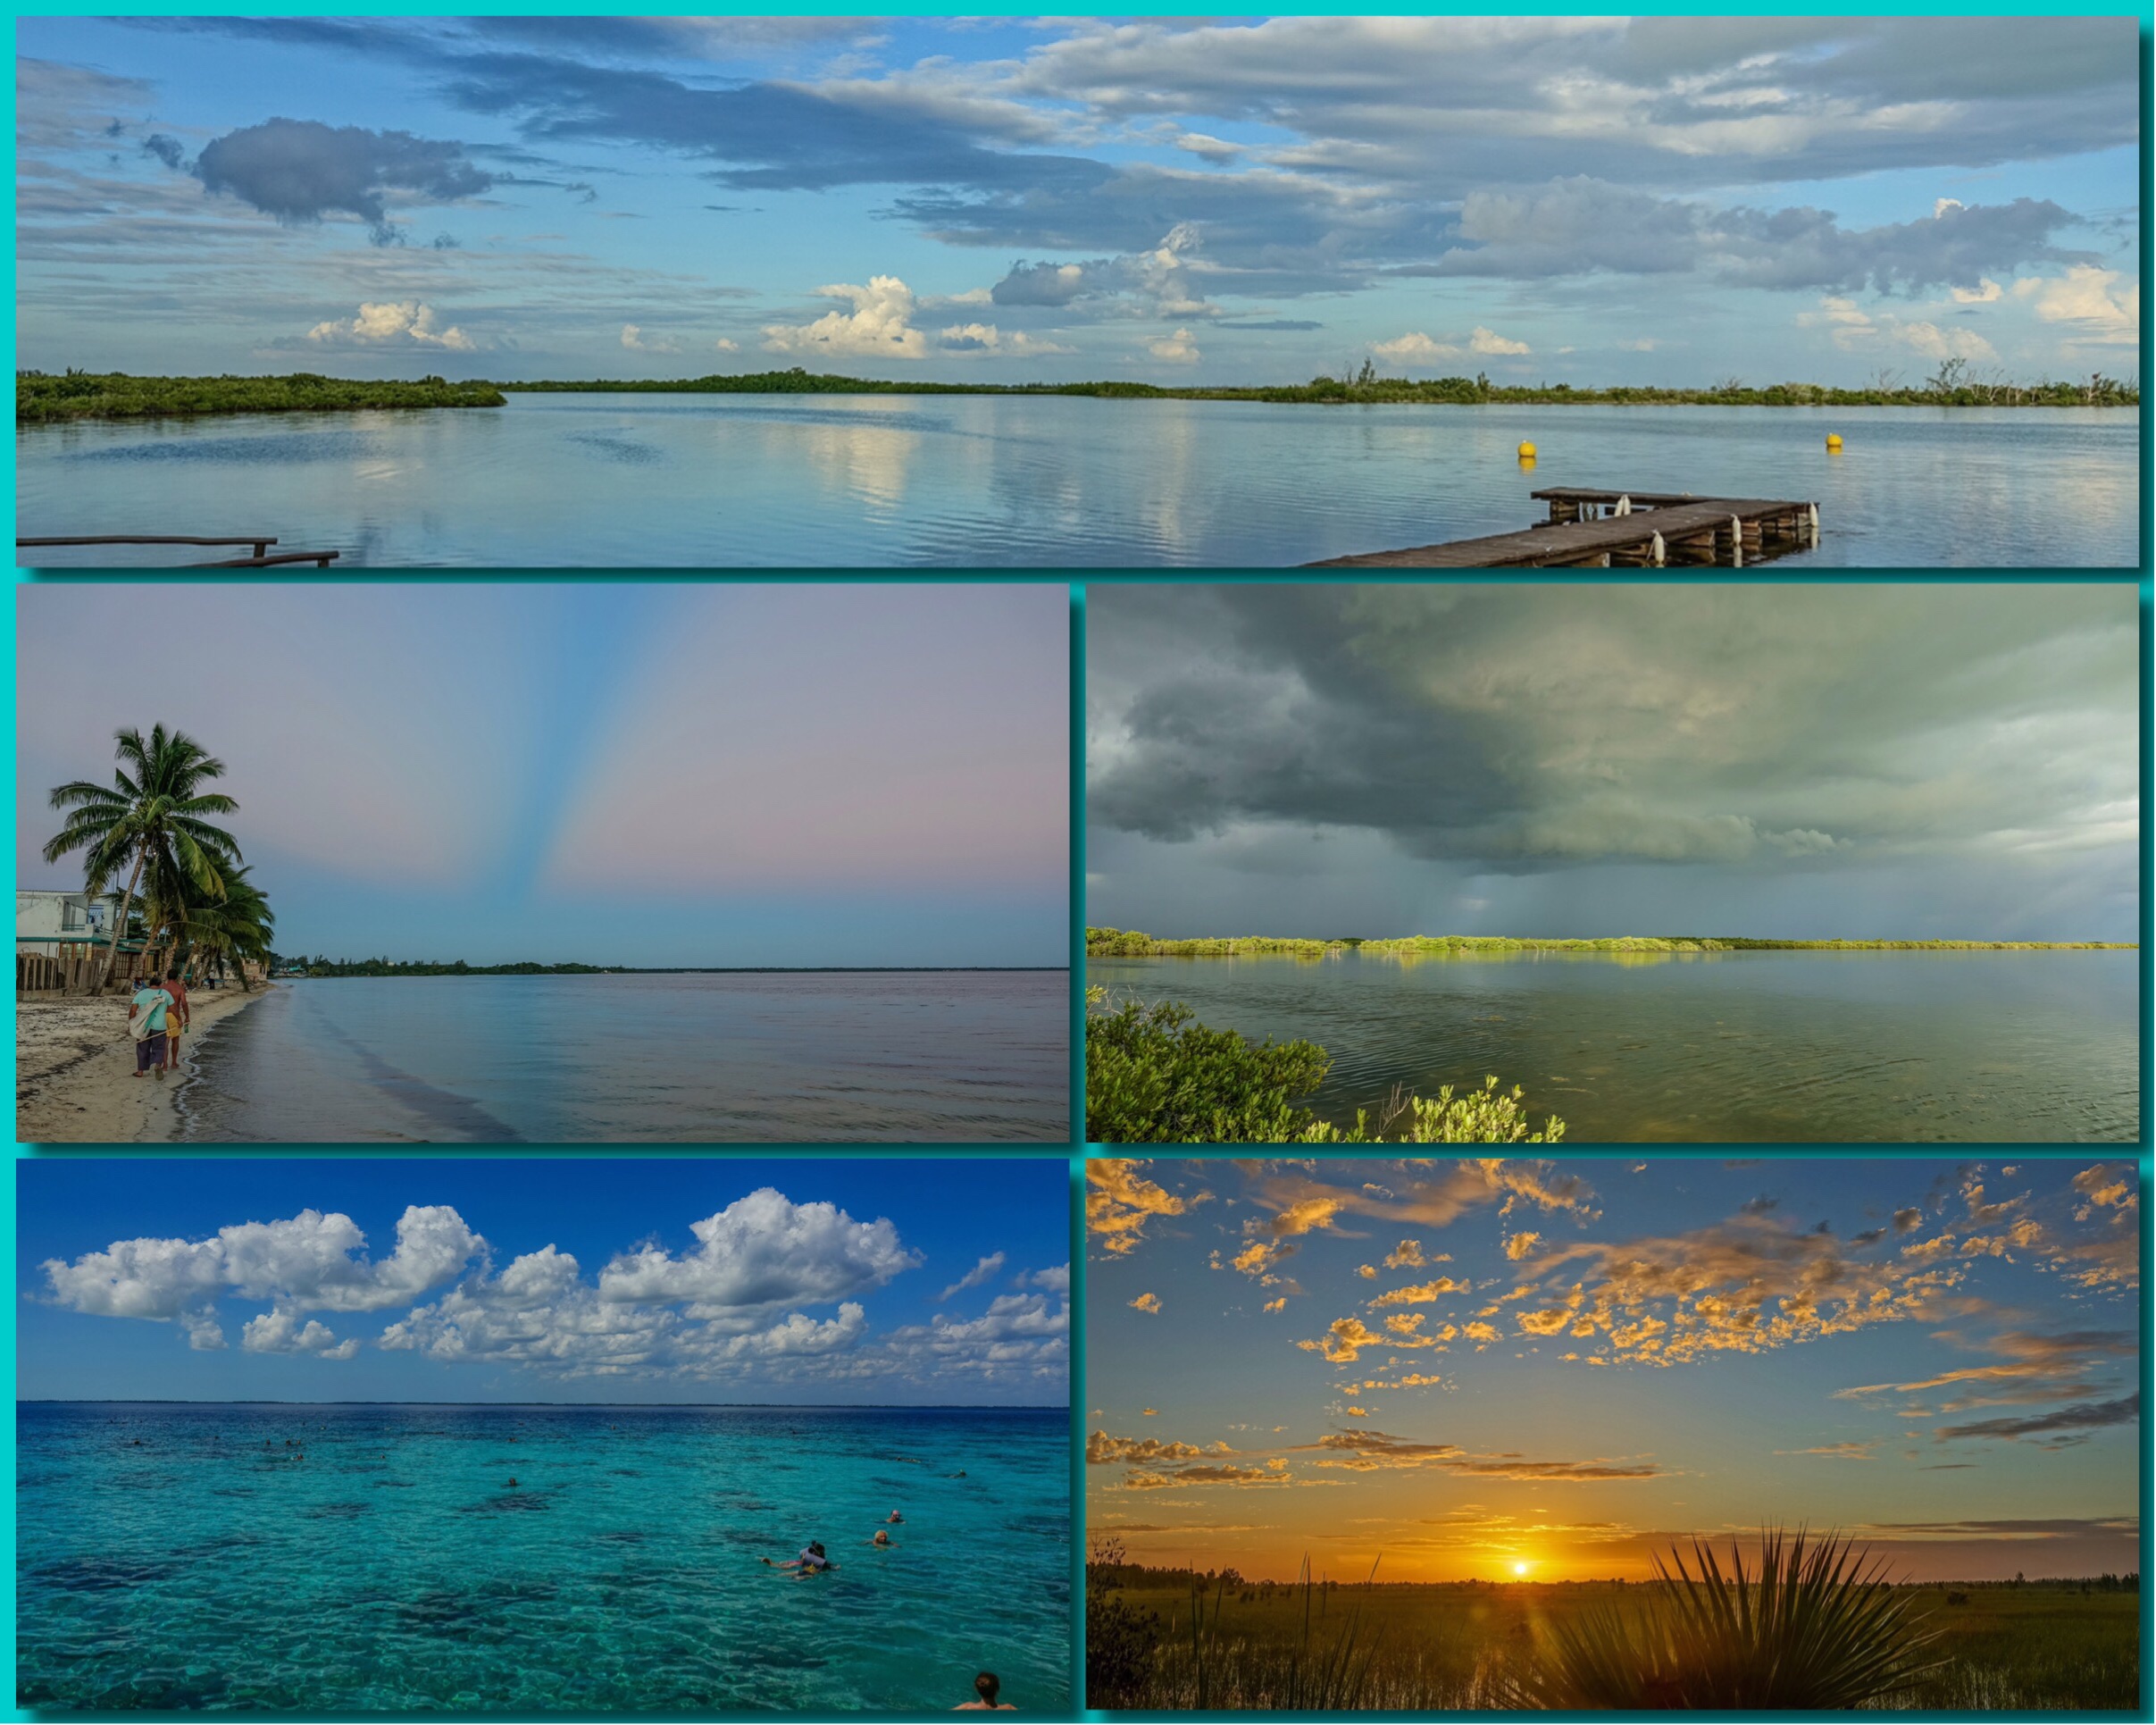
Though the Zapata area lacks the mountains, it has the marshes and the Bay of Pigs, both spectacular in their own way.
La Salina, dawn at Playa Larga, La Salina, Bay of Pigs, Zapata Marsh
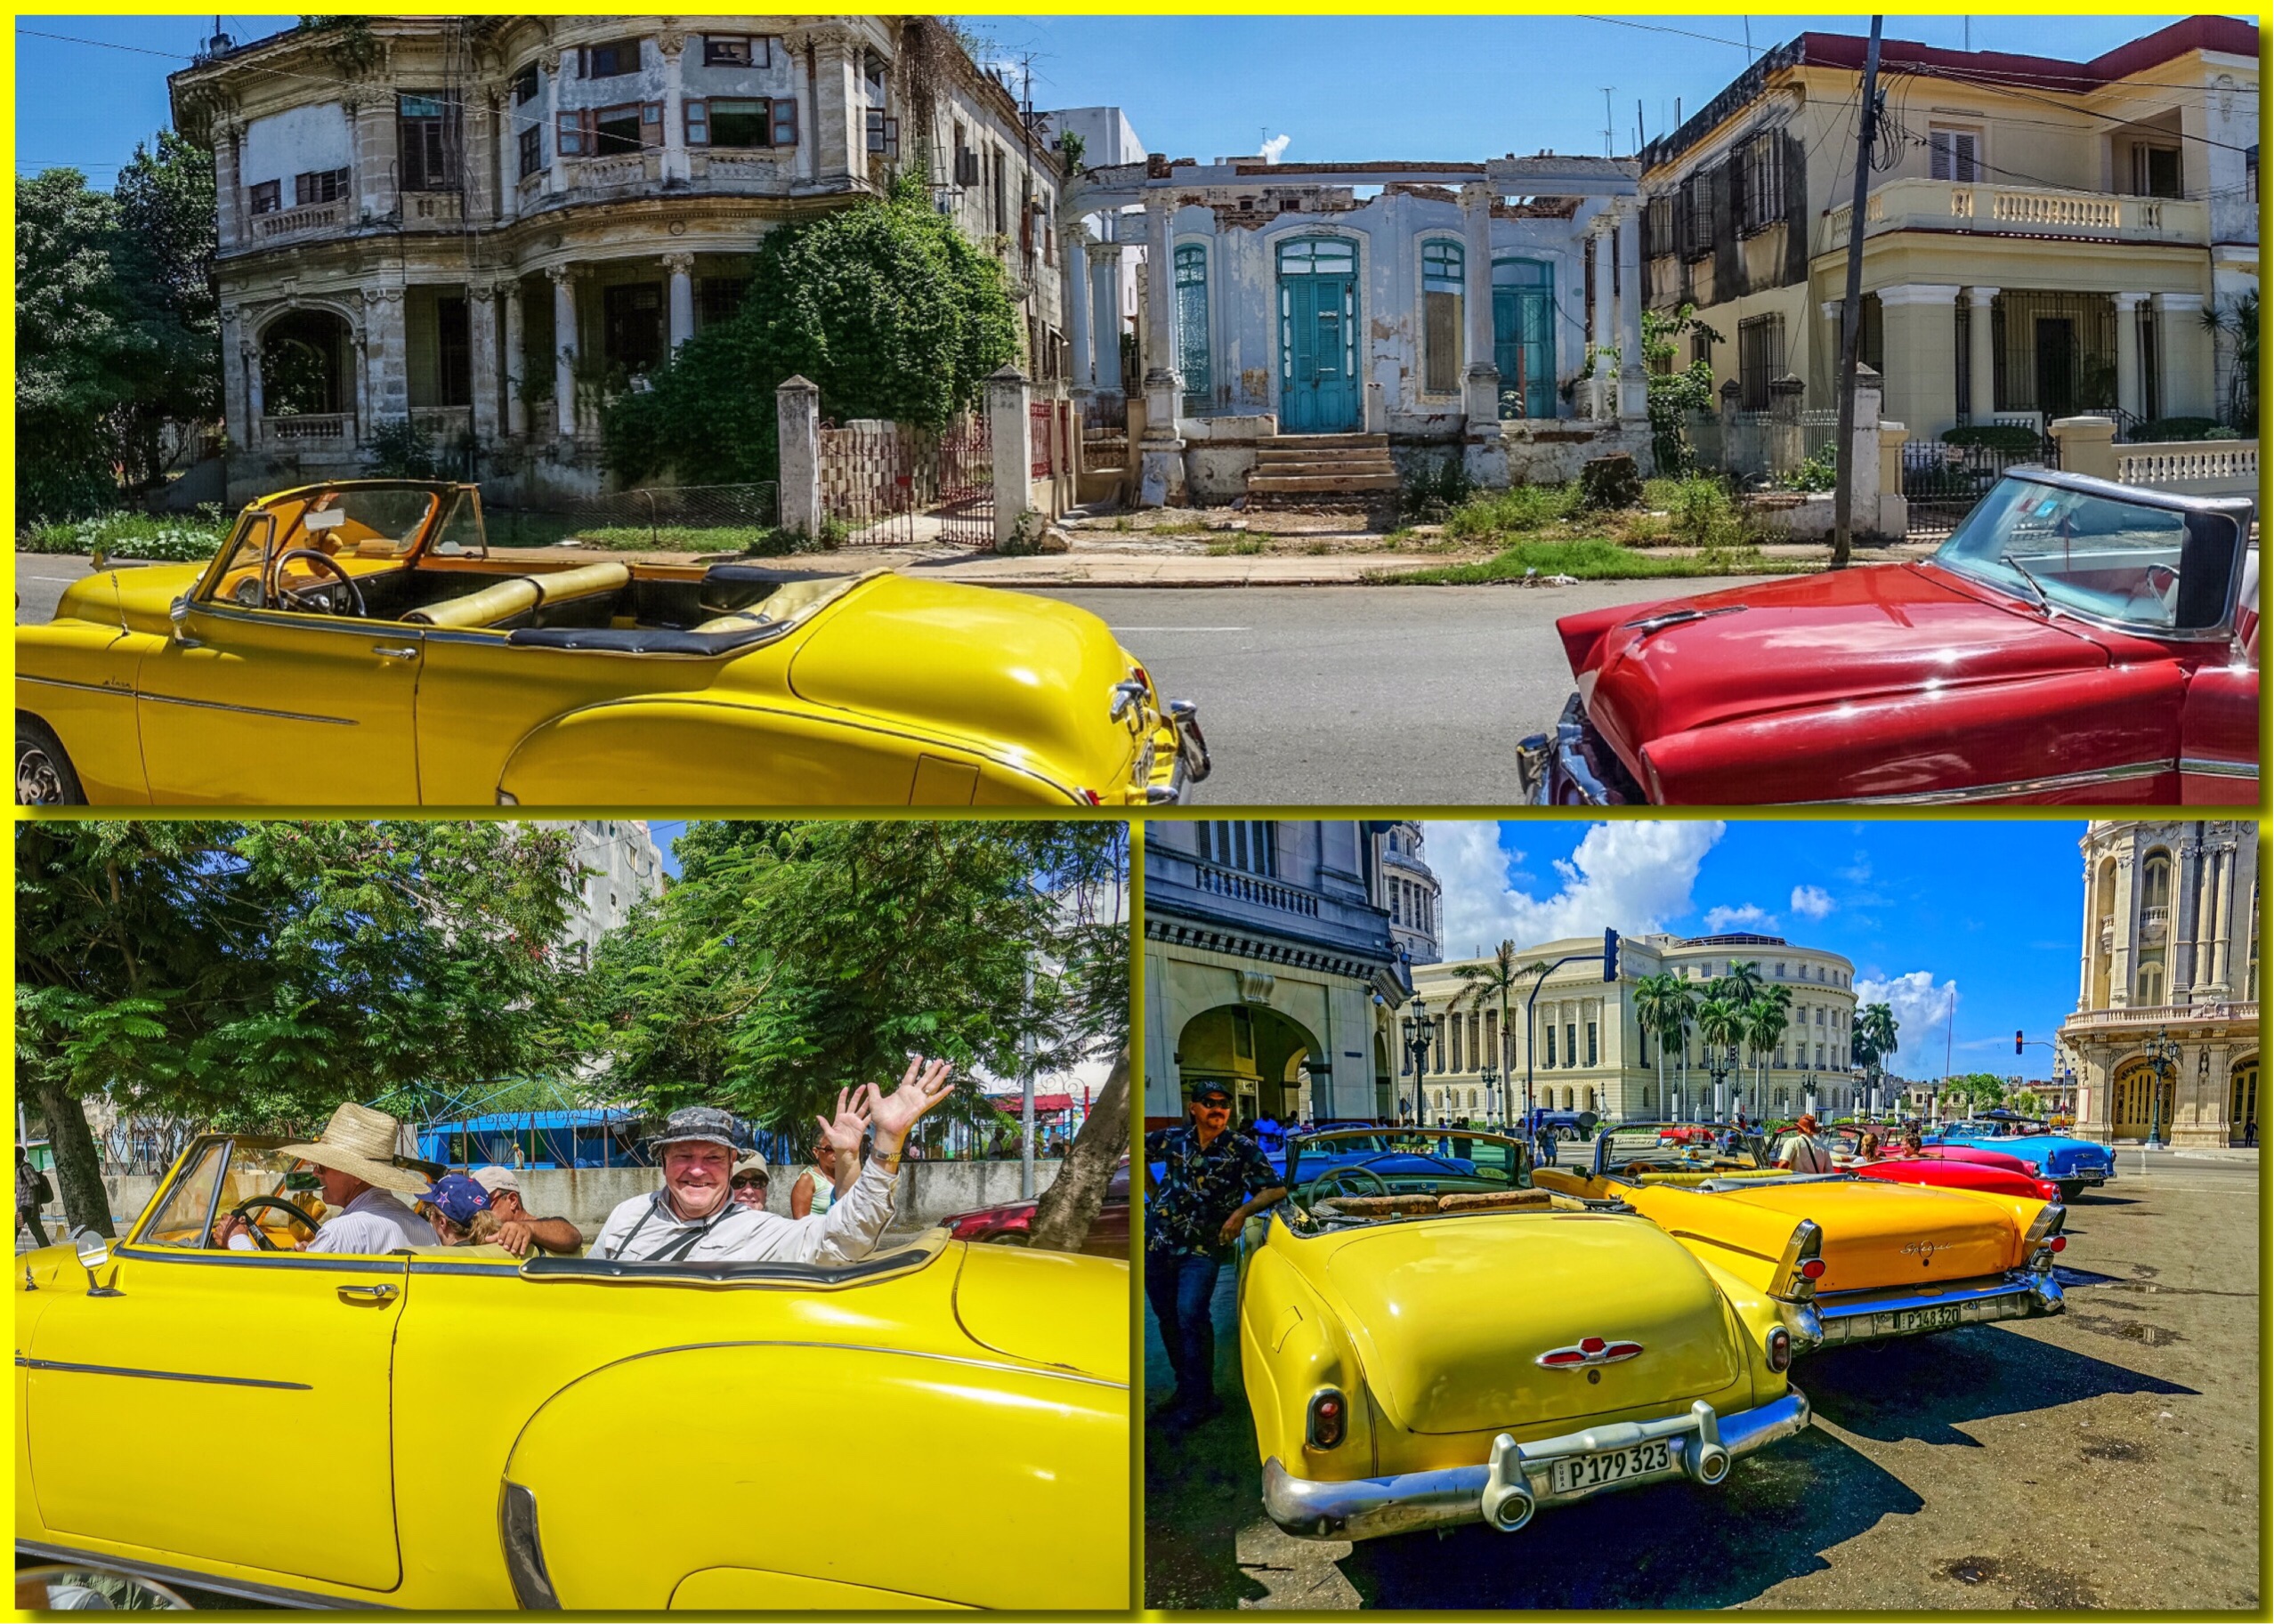
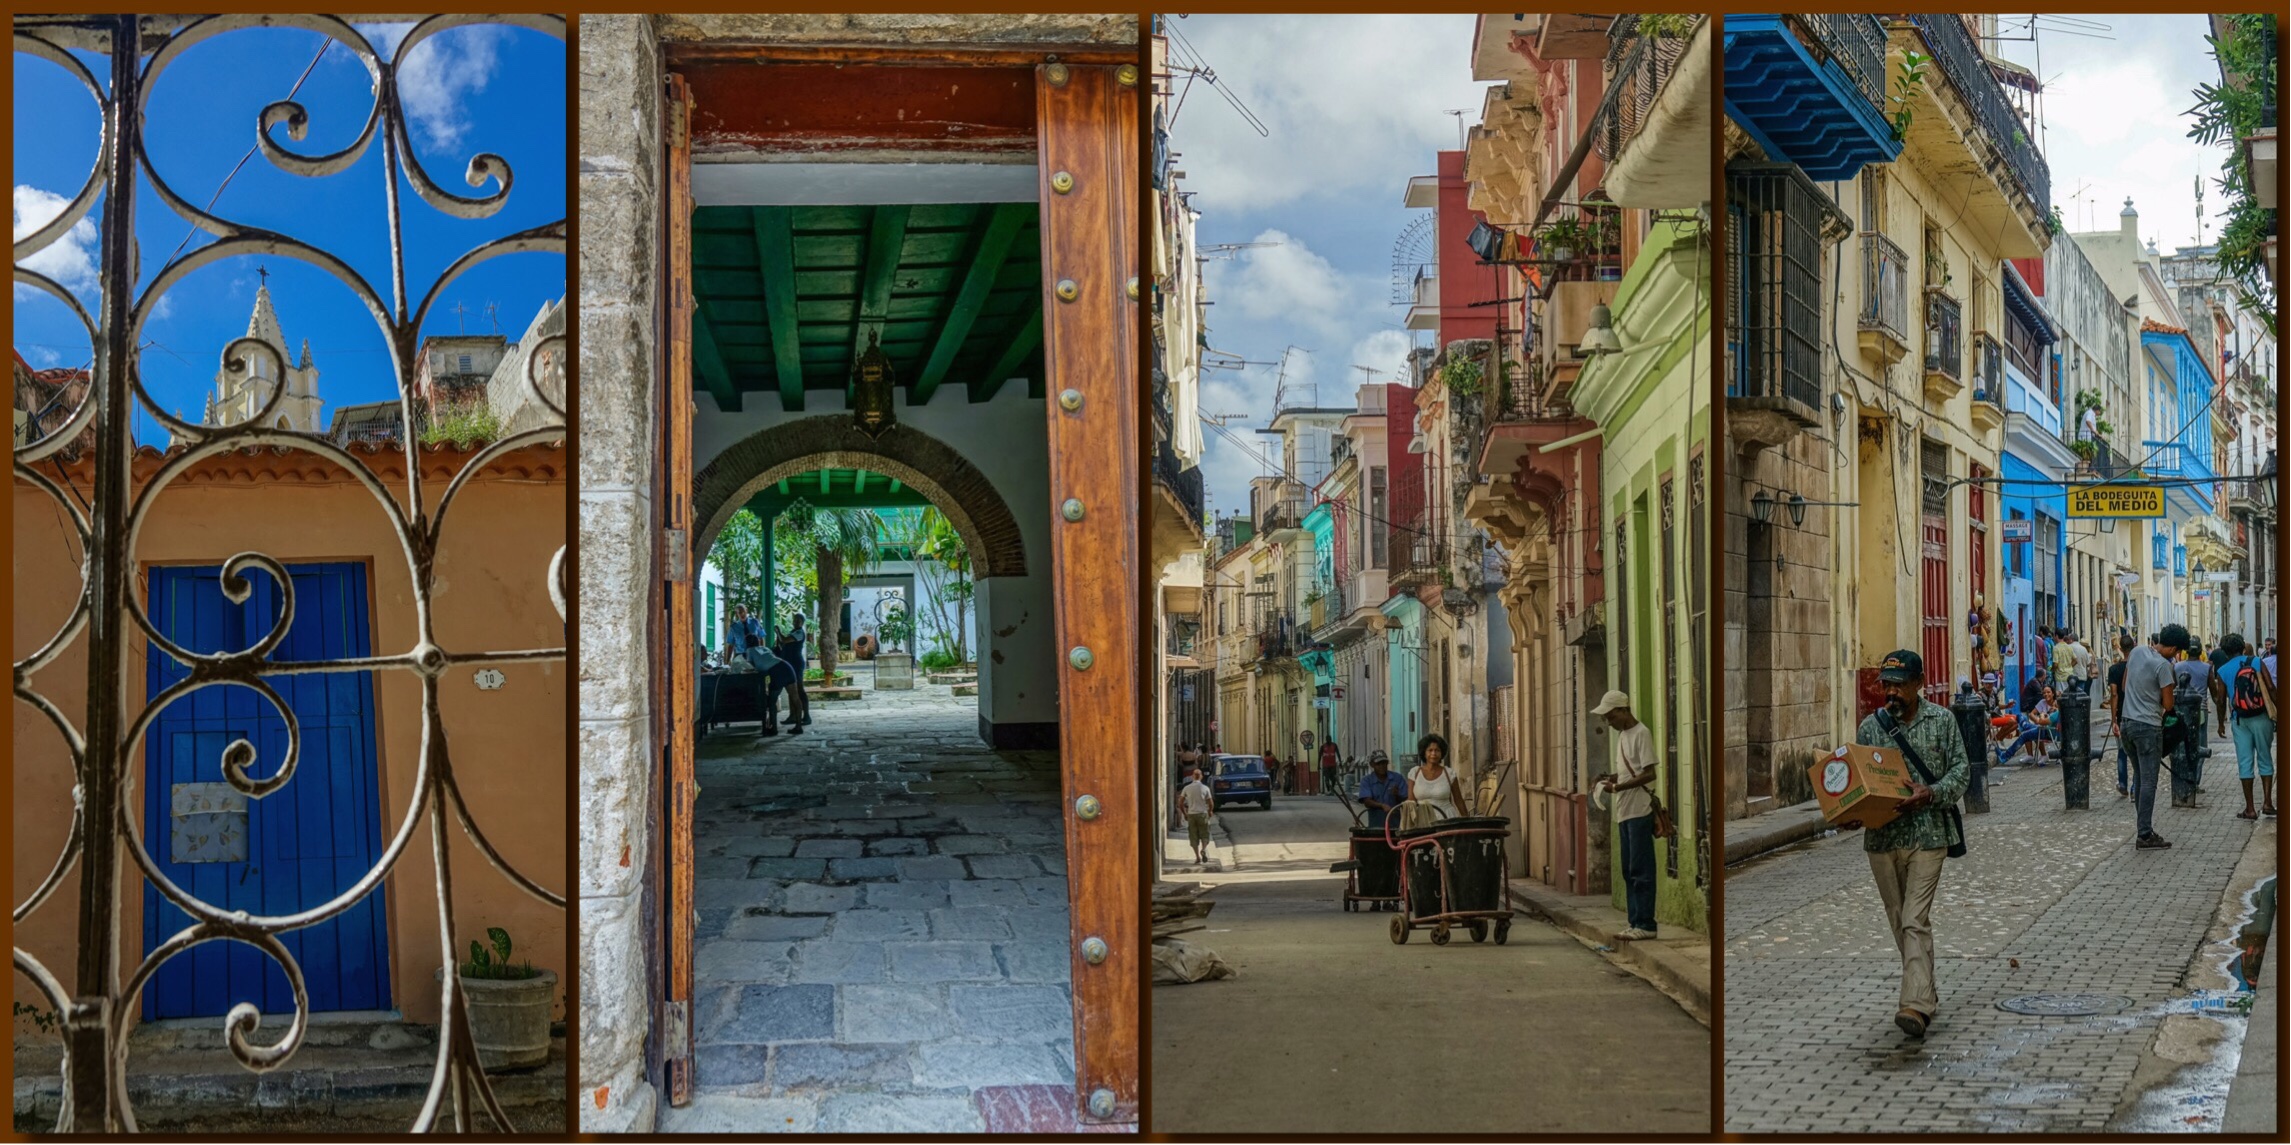
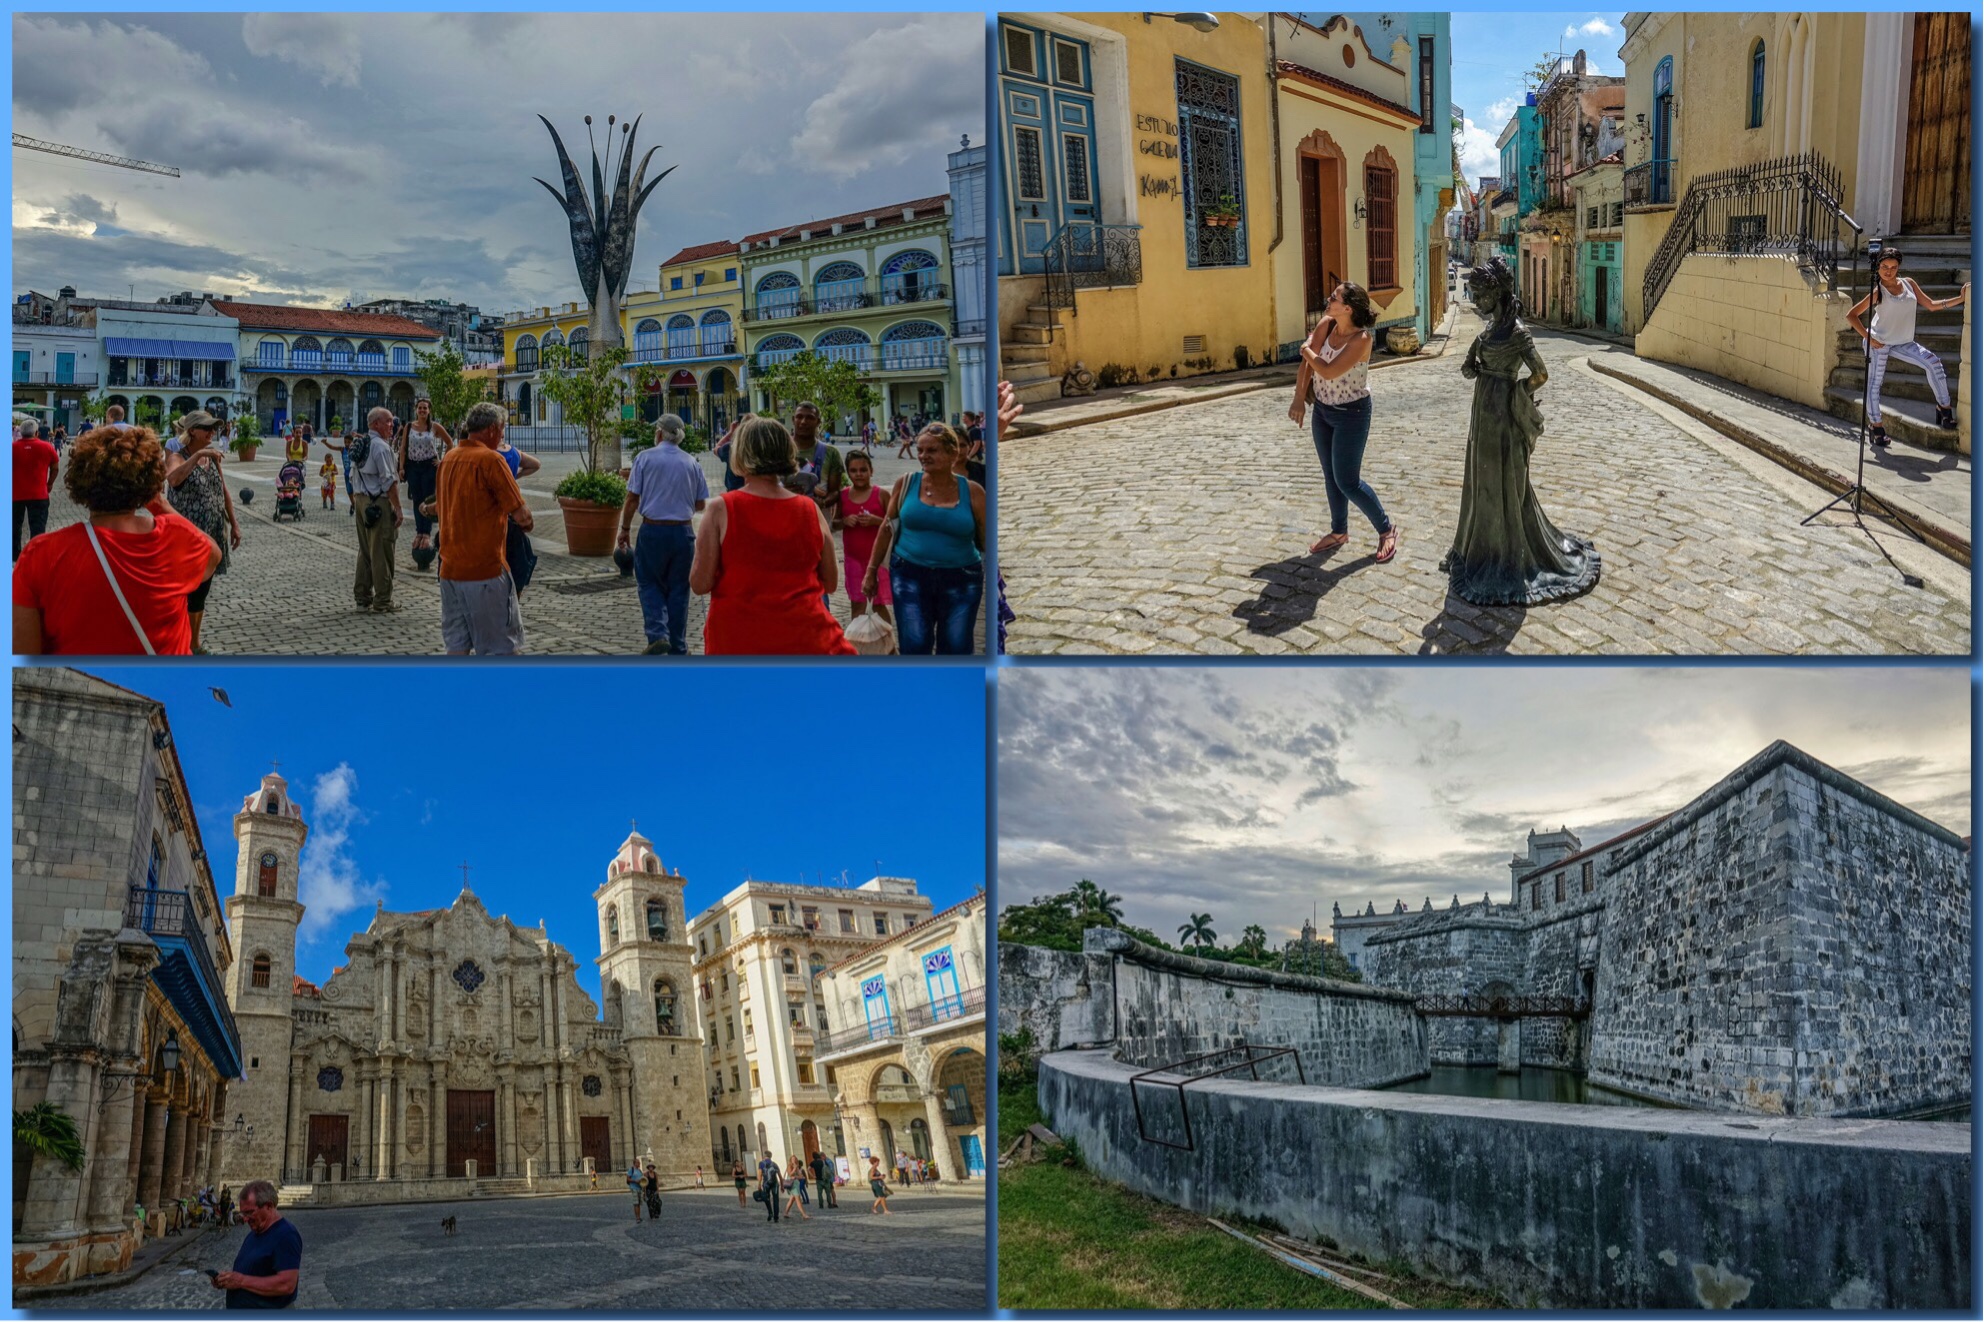
We finished our trip, both times, with an afternoon in Havana. We stayed in Old Havana, an area which is rapidly being gentrified…with lots of trendy restaurants, brick streets, art galleries, mucic venues…surrounding the museums, historical sites, and famous Squares already in the area. Casa Particulars in Old Havana can be a bit basic…but comfortable. And the sights of the Old City are not to be missed…from the monuments and squares and the classic architecture, to the abundance of well maintained 50’s convertible taxis (from Fords to Cadillacs), the host of pedicabs, and the occasional horse-drawn carriage or cart. Street life is vibrant.
Car culture HavanaOld Havana streetsOld Square (newest actually), our guide, Cathedral Square, Old Fort
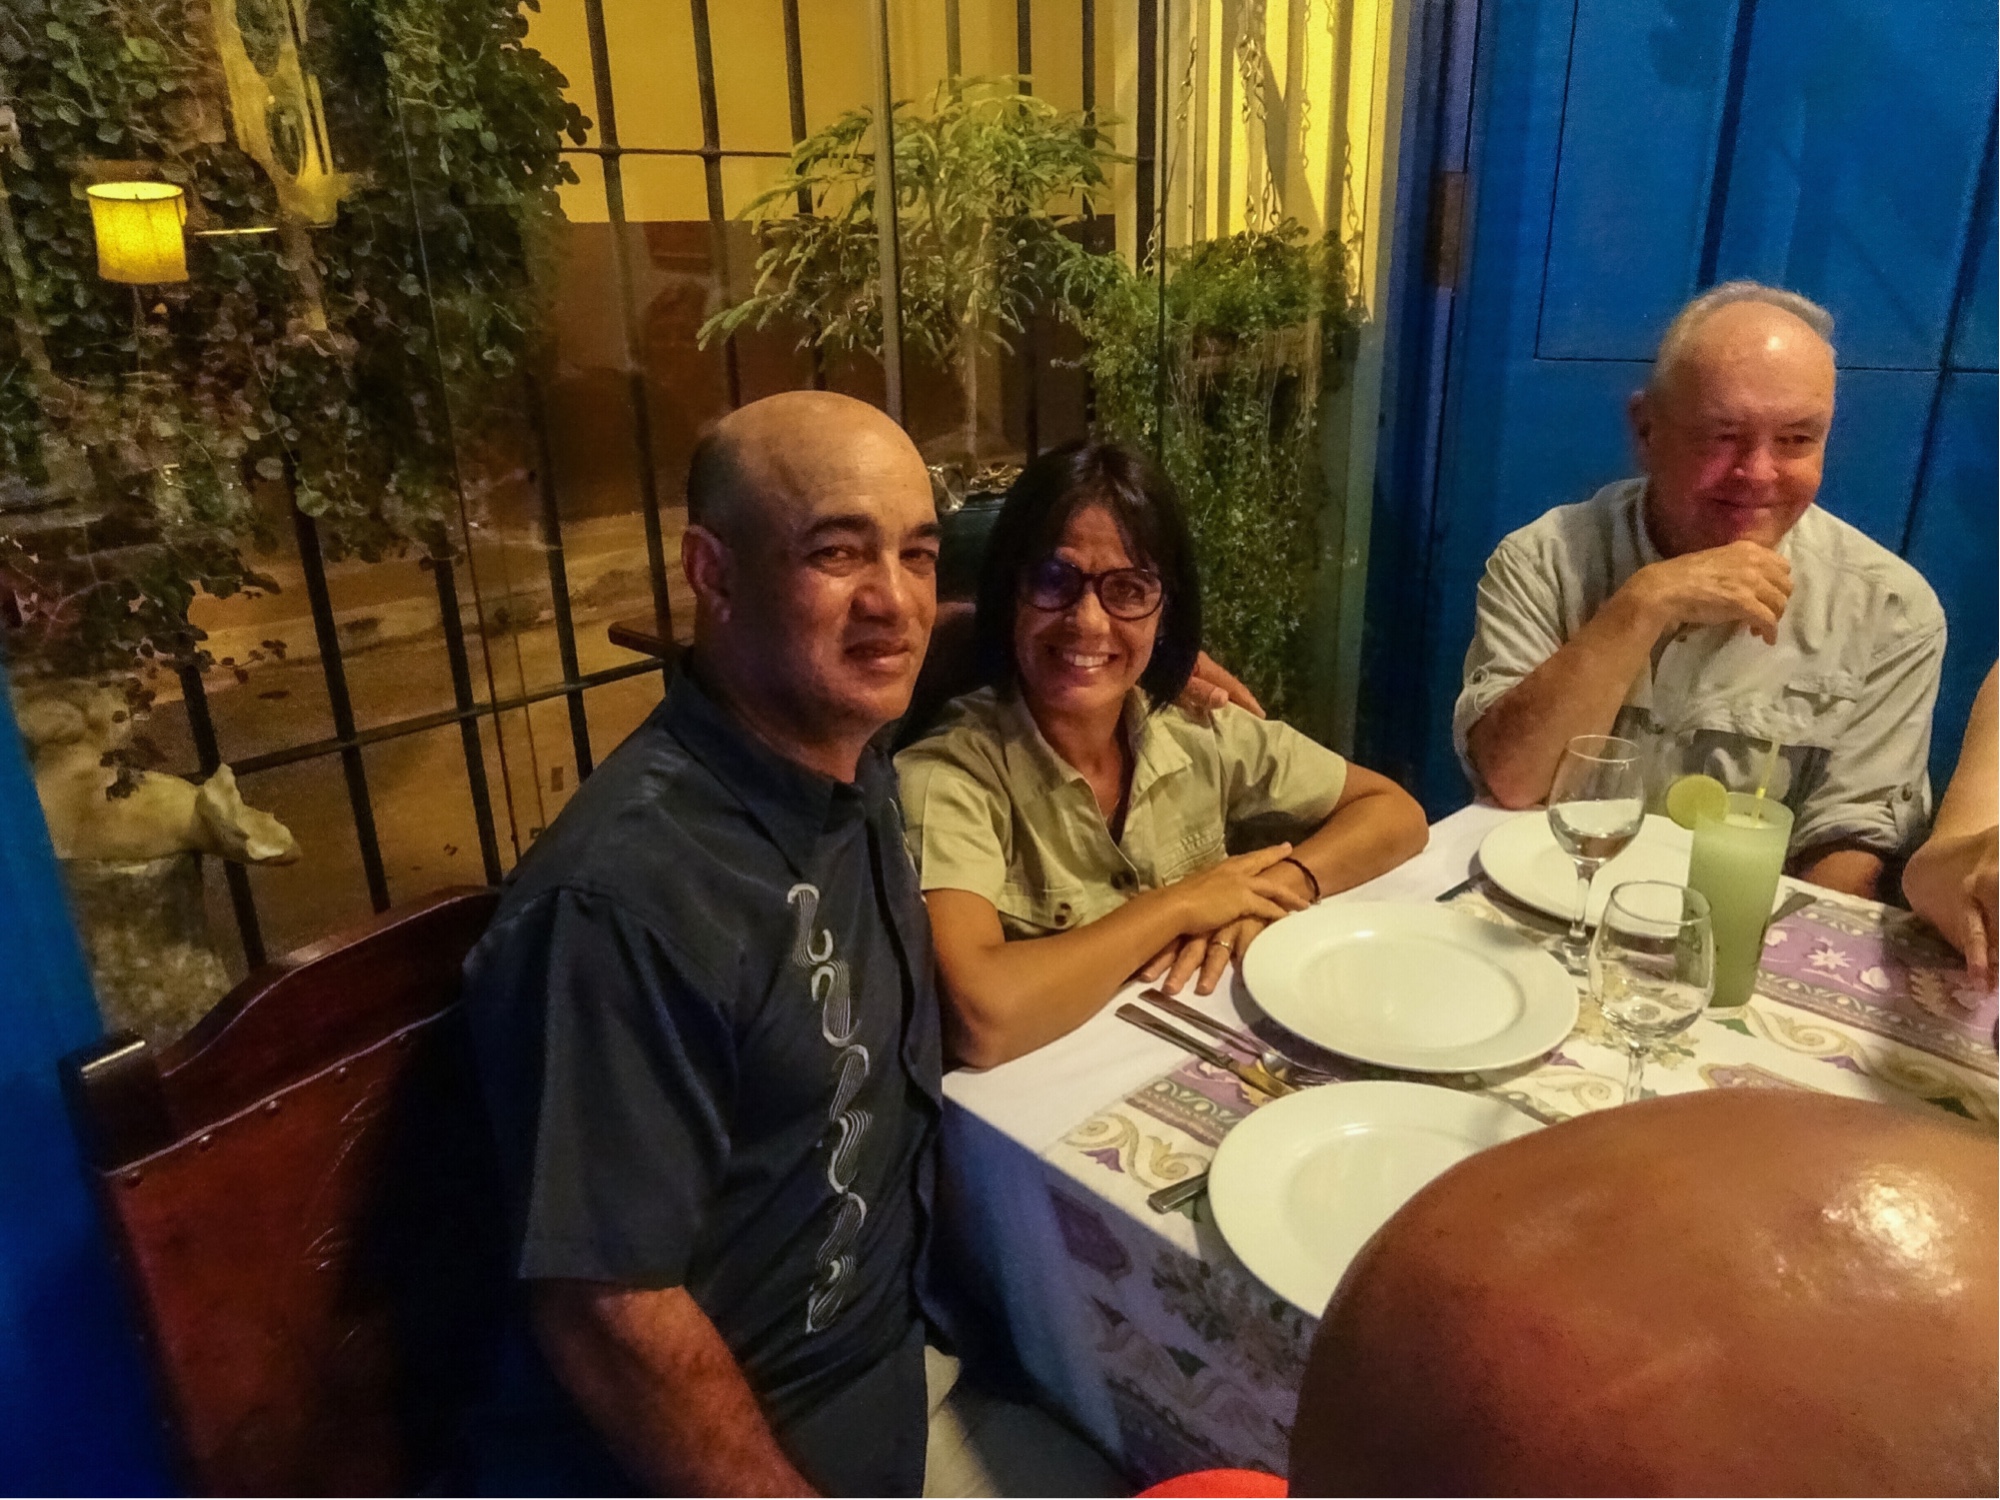
And I will finish with out hosts/guides on this amazing adventure. Ernesto and Tanya are two of the most wonderful people I have ever met…committed to the birds of Cuba and the future of Cuba. If you are interested in touring Cuba and birding with them, the easiest way is probably to contact Joni at Optics for the Tropics.
Cuba is an experience. It is getting easier. It is only an hour from Miami. You really have no excuse. Grab your camera and go!
How African classic is that? Giraffe in the sunrise. Balule Game Reserve
I think every nature/wildlife photographer dreams of a photo safari to Africa, and that certainly includes Point and Shoot Nature Photographers. Lions, elephants, giraffes, rhino, hippopotamus, cheetah…and a host of bright African birds: sunbirds, rollers, and bee-eaters…not to mention the big birds, Ostriches and Bustards, Vultures, and Eagles. And just being there, in the presence of so much great wildlife…the Africa of all our dreams.
However, if you have priced an African photo safari lately, you know that it can be a very expensive destination. The safaris themselves are pricey compared to other eco or adventure travel, or even photo tours, and the cost of getting there is high. Airfare is expensive, and it can take as much as 38 hours with layovers on the least expensive flights.
Bush Bomba, our first night in Africa
Of course that does not keep me from dreaming or taking a look on-line at the safari booking sites. Recently I found a company, Viva Safaris, in the Greater Kruger National Park area of South Africa (perhaps the most accessible of the African nations), offering what appeared to be real bargains in Kruger Wildlife Safaris. I also found a direct flight from JFK to Johannesburg (South African Air), that got me from Portland Maine to Africa in less than 24 hours for just over $1000. The trip total was around $2500 for 11 days (two back to back safari packages at different lodges owned by Viva). That included 2 bushwalks with an armed Ranger, one night Game Drive and several sunrise and sunset Game Drives on Private Reserves in the Greater Kruger Area, and 4 full day Game Drives in Kruger itself.
I did have some doubts. The Lodges and Camps I stayed at are not in Kruger. They are in Private Game Reserves adjacent to Kruger. Balule Game Reserve very large and is unfenced on the Kruger side, so it is, for all practical purposes, part of Kruger National Park. Motlala Game Reserve is smaller, but is also open to the surrounding reserves. However, Balule is about an hour from the nearest Kruger gate and Motlala is only a bit closer, so you do not get early mornings in Kruger itself. Early bushwalks and drives are on the Private Reserves.
Then too, the safari packages they offer are not Photo Safaris per say…they are general wildlife safaris. If you have ever been out with a group of non-photographers when you are trying to photograph, you know there can be some strain there…and the potential for cross purposes is high. Most dedicated Photo Safaris to Africa guarantee you a window or outside seat in the high Game Viewers used in the African Bush (converted transport buses or Land Cruiser type vehicles with high seats and large sliding windows, or no windows at all), which automatically means a small number of people per vehicle. No such guarantee here. Viva offers its low prices based on the simple premise of keeping their rooms and their Game Viewers (the Land Cruiser, open sided type) full at all times. Also the pace of a photo safari can be quite different than the pace of a general wildlife safari. On Wildlife Safari, the goal is to show the customer as many animals as possible. That can mean the quantity of views will generally trump the quality. On a Photo Safari, the goal is to get you good shots of as many animals as possible..but that may mean you see less animals total, and miss some altogether…and that is perfectly fine with most photographers. Quality over quantity.
Vervet Monkeys were everywhere around both lodges.
Finally the Lodges themselves were an unknown. They got generally excellent reviews on Tripadvisor, but, as there always are, there were a few outstanding negative reviews too.
I will reassure you on that point first. The Lodges were fine. Tremisana Lodge on the Balule Game Reserve is comfortable, with nice rooms and a family style atmosphere…including family style meals. Marc’s Treehouse Lodge is more rustic, with a more genuine “bush” feel and reed cabins perched in trees or on stilts high above a flowing river, and is much more like a “camp”…including camp style meals. Perhaps because of that, Marc’s attracts a lot more young people than Tremisana, and that just adds to the camp atmosphere. I enjoyed the experience of both, and the contrast between the two. I have no hesitation in recommending Tremisana to any potential traveler. I would recommend Marc’s Treehouse to those with a desire for a more authentic bush experience, and a good sense of adventure 🙂
Tremisana Lodge
Marc’s Treehouse Lodge
As far as my other doubts went, the quality of the night, early and late walks and drives in Balule Game Reserve and the neighboring Tshakudu Reserve, both in the numbers of animals seen, and in the skill of the driver/rangers Viva and Tshakudu employ, more than made up for any lack of mornings in Kruger. At Balule we were able to spotlight elephants, giraffe, and honeybadgers on the night drive, and at Tshakudu we were able to drive up, just after sunset, within 40 feet of a pride of lions at a kill. (Other groups at Balule also saw a lion kill, but I missed it.) The rangers at Tremisana went out of their way (literally) on several occasions to show me birds I might not otherwise have seen or been able to photograph.
And the Viva driver/rangers who take the Game Viewers into Kruger daily did a wonderful job of finding and getting us views of as many animals as possible each trip. Every ranger I road with, and I road with four different ones, was knowledgeable and keen eyed, and I was especially impressed that, even though they are in Kruger every day, driving the same roads, chasing the same animals, they all still obviously enjoyed showing the African Wildlife to their customers. That makes a huge difference in the quality of the experience.
So, no it was not a dedicated photo safari…but I am not sure it made a difference, especially for a first experience of Africa. Perhaps because I was one of the few people each day in the Game Viewer with serious looking camera gear, I generally was voted into an outside seat. On the occasions when I did have a middle seat, it turned out not to be much of a problem. The vehicles are very high, with seats raised considerably above even the normal bed of the Land Cruiser, and I could generally shoot over or around my fellow passengers…and again, since I was obviously serious about my photography, the others generally made a special effort to make sure I got my picture. Several asked if I would send them copies of things that were just beyond the cameras in the cell phones and tablets that most of them were carrying. (I was totally amazed at how many of my fellow safariers came out with only a cell phone for a camera.)
Lions, Kruger National Park. We swung around and went back for this view. Because I asked 🙂
Again, though it was not a photo safari, the driver/rangers are very experienced in positioning their vehicles so that everyone can see the animals…and on the few occasions where my view was blocked or where I saw the potential for a better shot, the driver made every effort to reposition the vehicle so I could get the shot I wanted. I would love to be able to afford a dedicated photo safari, but I am not convinced I would come back with any more keepers than I did from my Viva Wildlife Safari.
I took three cameras with me. The Sony RX10iii, with its 1 inch sensor and 24-600mm zoom, which I intended to use most of the time, the Nikon P900 for when I needed more reach (out to 2000mm equivalent, especially for birds), and the Sony HX90V (a tiny P&S with a 24-720mm equivalent zoom) as a fail-safe backup in case both other cameras broke 🙁 As it turned out, it was just too much trouble to handle more than one camera in the field in Africa, especially in the Game Viewers, so the Nikon and HX90V stayed in my pack most of the time. Except for distant birds, I did not miss the reach of the P900, and even for distant birds, with the shimmer in the heated African air, I am not sure I would have gotten better shots with the 2000mm zoom. I did use the Clear Image Zoom out to 2x on the Sony more than I thought I would. Distant prides of lions, or a Cheetah in the shade of a distant tree just demanded more reach than 600mm, though I could have cropped and gotten the same image scale. Overall I was pleased with the results even for those stretched shots. I also found the Sony’s Anti-motion Blur Mode useful on several occasions when the light levels were low. I got better shots of hyena and the pride of lions at the kill after sunset because that mode was available…and impossible shots of Honeybadger after full dark in the light of only the Game Viewer’s spotlight. Finally, for the landscapes I took, the in-camera HDR on the Sony is just the best!
Today’s modern Point and Shoot superzooms are ideal cameras for Africa, offering you the wide open vistas at 24mm, frame filling shots of larger wildlife at mid-telephoto range (250mm), and the reach to shoot a close-up of an elephants eye or a distant lion or small bird. And you well not find yourself overburdened with gear, or changing lenses in the field.
I took 5000 exposures over 11 days. I have 851 keepers. Lots of lions, more elephants that I really need, a hundred giraffes, most of the antelope species, zebra, wildebeest, rhino, hippo, leopard, cheetah, honeybadger, mongoose, etc.
White-fronted Bee-eater, Balule Game Reserve
And though it was not a birding trip, I got to photograph my “most wanted”: two sunbird species, both African rollers, and two bee-eaters…as well as many of the larger birds of the African bush…including a total surprise in a pair of Kori Bustards (the largest flighted bird) that we found walking one morning just after we got to Kruger.
Kori Bustard, Kruger National Park
This is a slideshow of 132 of the best or most interesting shots from my keeper set. You can also view the full take, organized by day, (and subject as time allows) on WideEyedInWonder.
I am considering, if there is enough interest, negotiating a bit more photo-centric trip with Viva or one of the other Kruger Safari companies next September. I think, if we could fill a Game Viewer (9 or 10 participants), we might get some special treatment (though not a cost savings as Viva is already about as inexpensive as anyone can be). Let me know via email, if you would be interested.
In August of 2016 I had the privilege of being the official ZEISS host for a ZEISS/Eagle Optics trip to Tranquilo Bay Lodge in Bocas del Toro, Panama. While it was a birding trip, not a photography trip (and there is a difference), I took along my Sony RX10iii (and two back-up cameras) for those inevitable (at least for me) photo opportunities.
Headed out from the dock at Bocas Town on our way to Tranquilo Bay Lodge
I have said here before that in my opinion, Tranquilo Bay Lodge and the surrounding area in the islands of Bocas del Toro, and the lowlands, foothills, and mountains of the ajoining mainland, are one of the best spots in Central American for bird and wildlife photography, especially during migration season. Our August trip proved that it is also excellent even at slower times of the year.
I am posting several slide shows of images. All were taken with the Sony RX10iii in Program Mode, In-camera HDR, or my customized Birds-in-flight mode (based on the built in Sports Mode, see here) and processed in Lightroom.
This firsts set is from Day One. You have to overnight in Panama City to get to Bocas del Toro at any reasonable time on your first day. The Lodge books the dawn flight from the domestic airport in Panama City, so you are in Bocas early enough for a full day of exploring or birding. The Lodge picks you up at the airport and transports you to their boats at a dock in Bocas Town, and you motor out to Bastimento Island were Tranquilo Bay Lodge is located. We were met, half way up the boardwalk between the dock and the foot of the stairs leading up to the Lodge by what appeared to be the official Tranquilo Bay greeter for the day…a Three-toed Sloth in the canopy above us. That set the tone for the whole trip. After check in and island breakfast with your hosts at the Lodge, you head out to explore the trails around the island before lunch. After a siesta, which gives you a chance to unpack and even shower, you are off again on new trails, ending your exploration on the Canopy Tower on the hill above the cabins, watching flights of parrots returning to their roosts for the night.
On day two, we were up early to travel to the mainland for a day in the lowlands, foothills, and mountains. You can drive from the dock, right up to and over the continental divide, on good paved roads. The first section is lowland grass and swamp, then the foothills with rainforest, and eventually the mountains right up to the edge of cloudforest. Spectacular birding and photography all the way. We got rained out on our first approach to the divide, and went back down to the Ranger Station where we had lunch under their thatched shelter. By the end of lunch it has stopped raining and we went back to the divide to bird, then retuned to the foothills to end the day. There were many interesting dragonflies along the road were we birded on the way back.
Day three took us the Green Acres Chocolate Farm for morning birding, adn then back to Tranquilo Bay for the afternoon. The Chocolate Farm is near the mainland and has different species than Bastimento…including a totally different species of Poison Dart Frog.
On day four we traveled to the mainland again to explore the lowlands and ridges of the Changuinola region on the north edge of Bocas del Toro. Besides interesting birds, we encountered a number of butterflies, most of which I can not identify yet.
Day five was our day to visit Isle de Popo, a close neighbor of Bastimento and Tranquilo Bay. There are two major attractions at Popo. One is a population of Snowy Contingas, and the other is the unique phenomenon of a mix of color variations of Poison Dart Frog in a single location. Generally Poison Dart Frog variations are restricted to small ranges on individual islands or individual drainages. On Popo, in an area the size of a heavily forested football field you can find at least 5 different color variations of Poison Dart Frogs, plus two separate species. Though I was with some hard-core birders, I persuaded them to visit the frog spot, and most seemed to really enjoy chasing the elusive critters around the forest floor, trying to find new color variations. We had just about given up on finding the rarer second species and were actually headed back before Ramone, our guide, found one. One of the birders jokingly asked for a Tourquoise frog. We found her one of those too. We did not, however, find the Snowy Cotinga, though we came back to Popo after our afternoon rest period, and again on our last morning at Tranquilo Bay. Not for want of trying.
Between trips to Popo on Day five, we had some free time. Some went on another hike around the lodge in search of the Three-wattled Bell Bird. I elected to hike back to the Golden-collared Manakin lecks to see if I could photograph these elusive but brilliant birds. Tranquilo Bay Lodge has to be one of the best places for Golden-collared Manakin. After a long hot wait in the humidity and mosquitoes, I was rewarded with two male Manakins coming into the lecks. August is late for any lecking activity so I felt particularly privileged. They did not actually get down and display, probably because there were no females in the area, but I got some keepers of the males.
Day 6 was our day for the Snyder Canal and Swan Island. The Snyder Canal was built at the turn of the century by the United Fruit Company to transport bananas from the plantations to the ships in a deep channel in northern Bocas del Toro, near the mouth of the Changuinola River. It was only in active service for about five years before the railway put it out of business, but it is still there, winding its way parallel to the coast through some prime swamp and lowlands. It provides easy access to some of the best birding in Bocas del Toro.
Swan Island is a volcanic plug about 40 minutes off-shore out in the Caribbean. It is home to a nesting colonies of Red-billed Tropicbirds, Brown Boobies, and Frigatebirds…and is one of unique attractions of Tranquilo Bay and Bocas del Toro.
After finishing in the Snyder Canal and Chinguinola River, we headed to Swan Island. All images here are taken in my custom birds-in-flight mode.
On our last day, the day we traveled back to Panama City to spend another night before our flights home, we made, as I mentioned, one last try for the Snowy Cotinga, without success. Just before we left for Panama City, I took some time to shoot fish off the dock, and then we were back in the boats and on our way to Bocas Town and the airport.
So, my conclusion. Tranquilo Bay is still one of the best places in Central America for bird and wildlife photography…no matter the season. I can’t wait to go back again. (And maybe you will join me. Keep an eye on the Workshops and Tours page.)