Sony RX10iv: the world’s best Point & Shoot bridge camera!

Rainbow over Alvares, Portugal. Sony RX10iv in-camera HDR. Processed in Polarr.

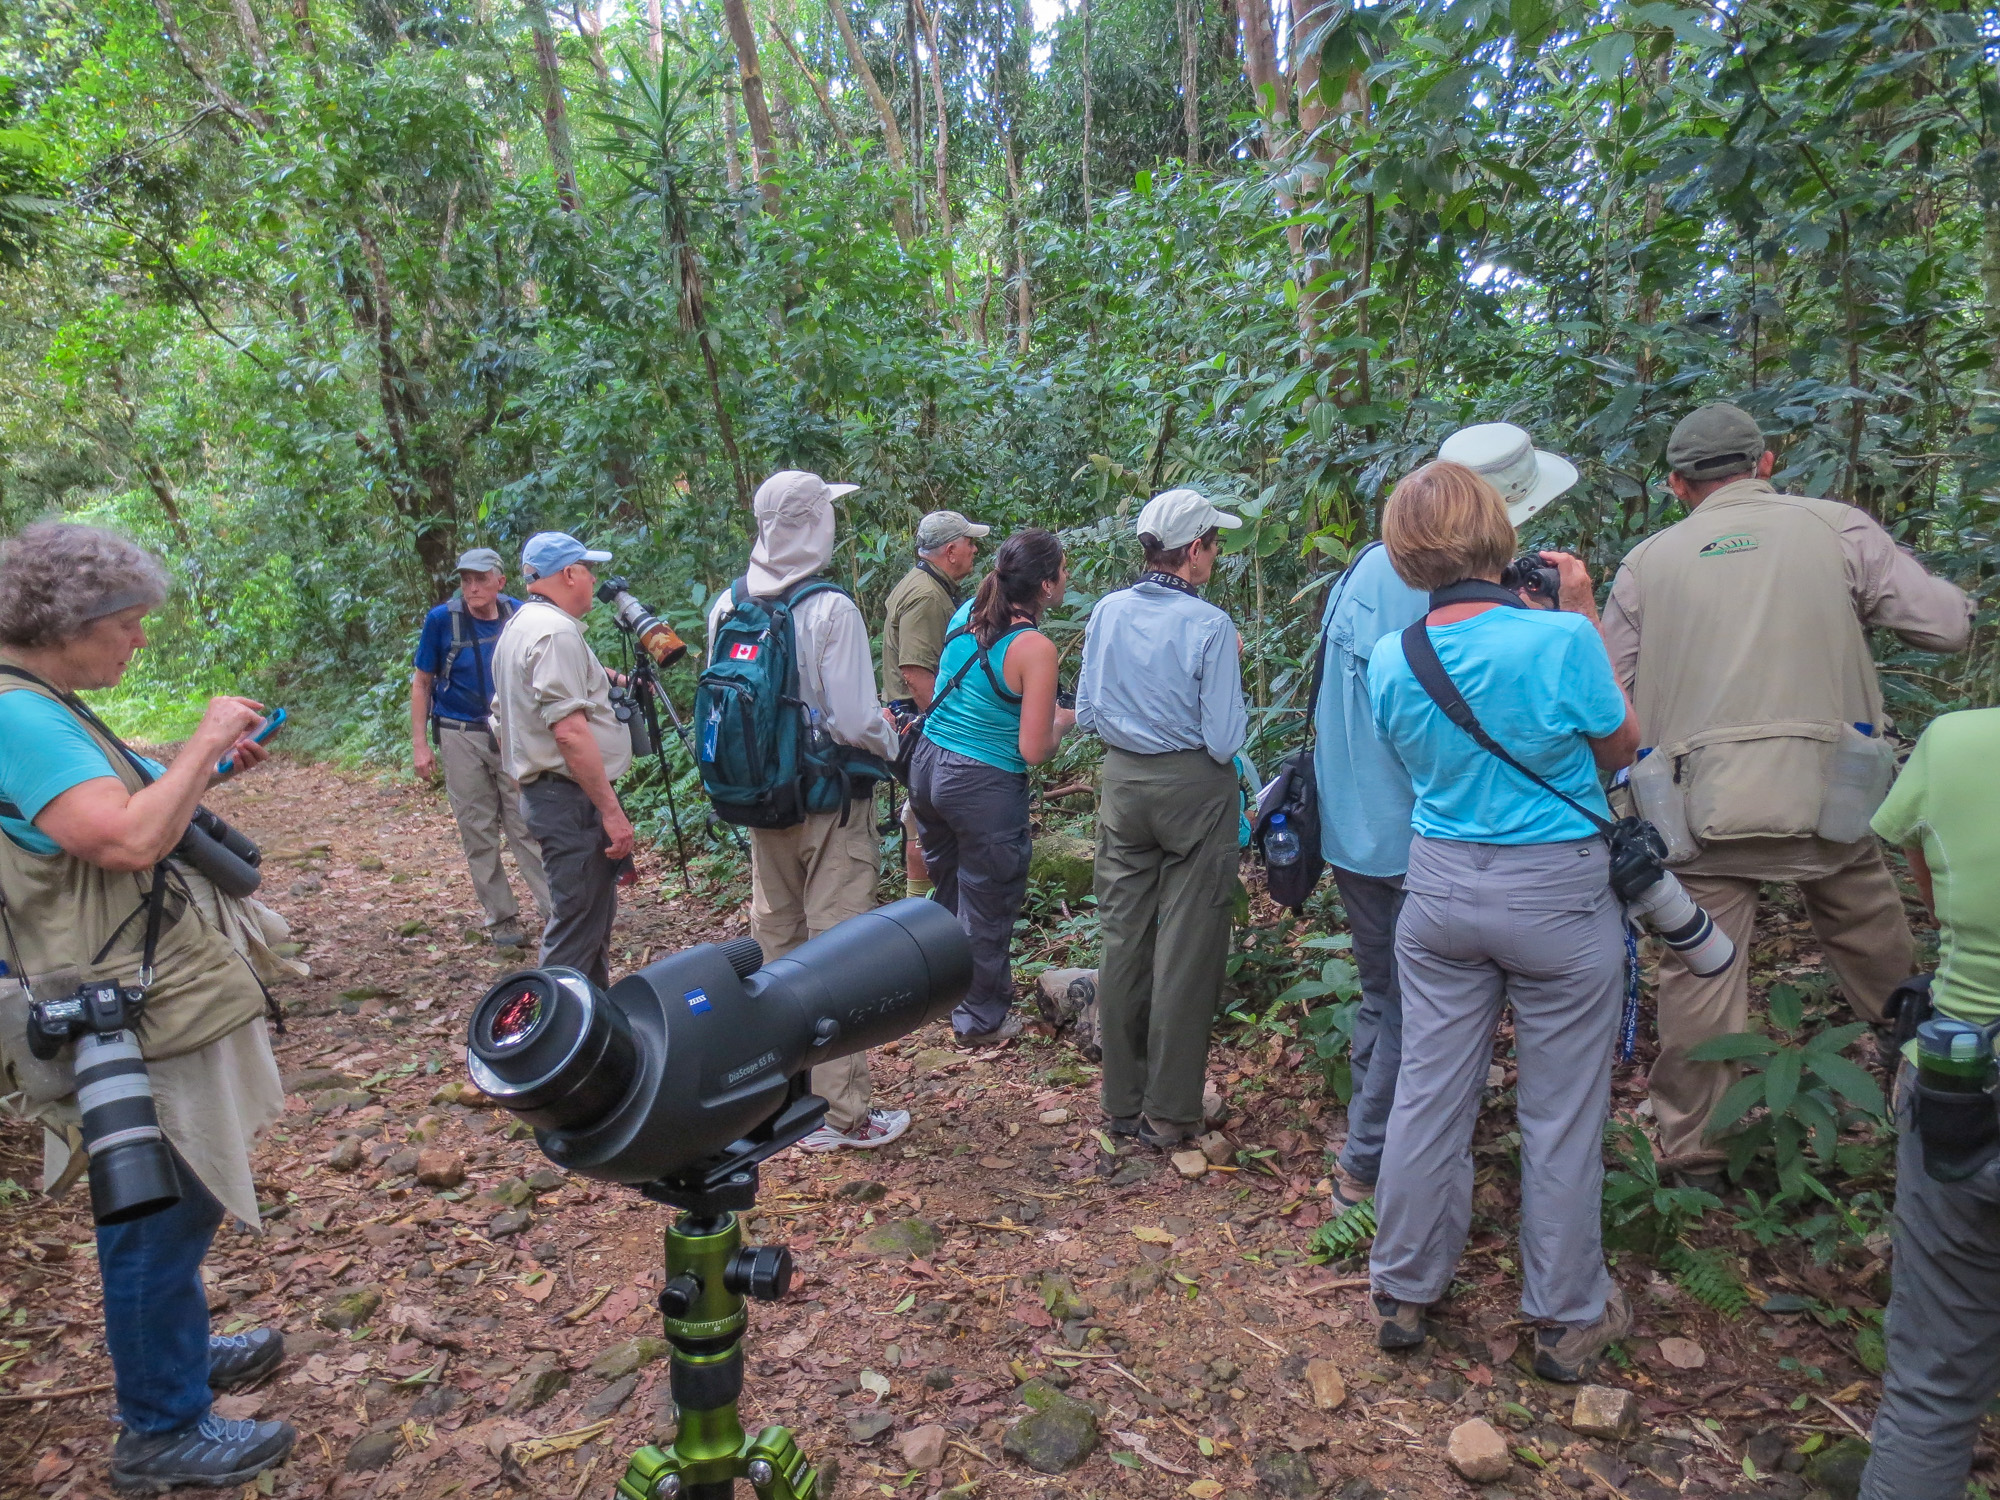
If you read my review of the Sony RX10iii, published about 20 months ago, you know that I really liked the camera, despite its hefty price and relatively short zoom. Since that review the RX10iii as been to Panama, Honduras twice, South Africa, Cuba, Peru (the Amazon River), Ecuador (the Galapagos), England, and Costa Rica…as well as Florida, New Mexico, California, Ohio, Pennsylvania, Massachusetts, and Maine. I have carried it so far and so much that the LCD is beginning to show signs of wear and the markings on a few buttons is beginning to wear off. It has been my constant photographic companion and more than gotten the job done wherever I have traveled. It has been a joy to use…a camera I am always happy to pick up…and one that I could be supremely confident of in the field in any situation. Even around home, its Anti-motion Blur mode made photographing family gatherings a joy. What a camera!

So when I say that the Sony RX10iv is everything that the iii was, and considerably more, you will get the idea. The engineers at Sony listened to the feedback over the 18 months of the iii’s run, and attacked every possible weakness, to produce what may well be the greatest compact fixed-zoom camera ever made. I can not imagine a better camera for travel, wildlife, general nature photography, and day to day family photography. It is nothing short of brilliant in any situation you might find yourself in. I thought the RX10iii had been designed specifically for me…and I never complained about any shortcomings, but it is really like the engineers at Sony read my mind, and offered a solution for almost all my niggling doubts about the iii. I am amazed!

Little Owl, Portugal. Sony RX10iv at 600mm and f4. Razor sharp.

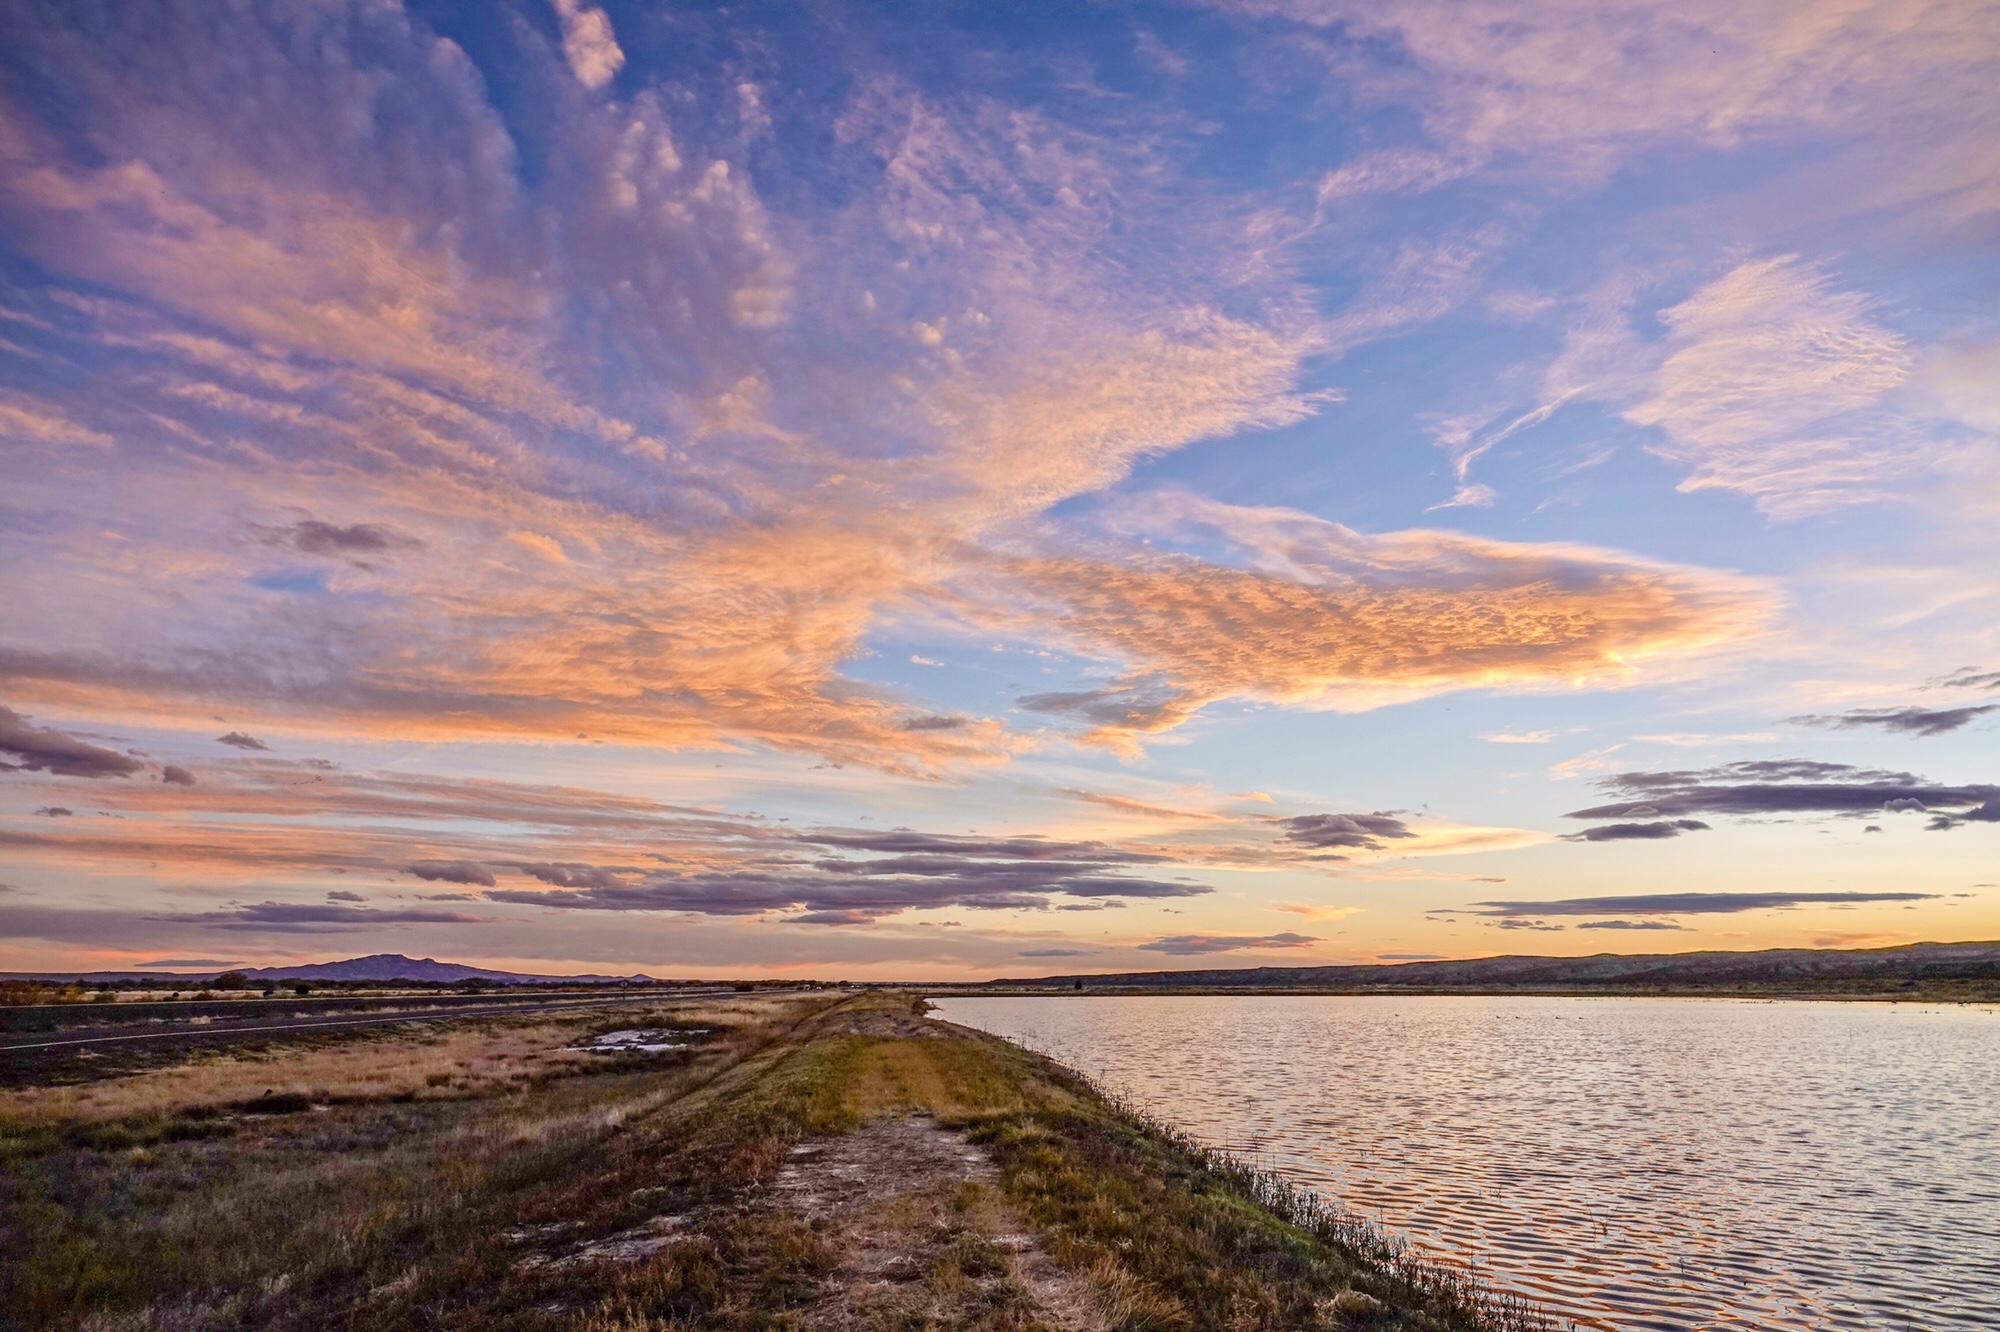
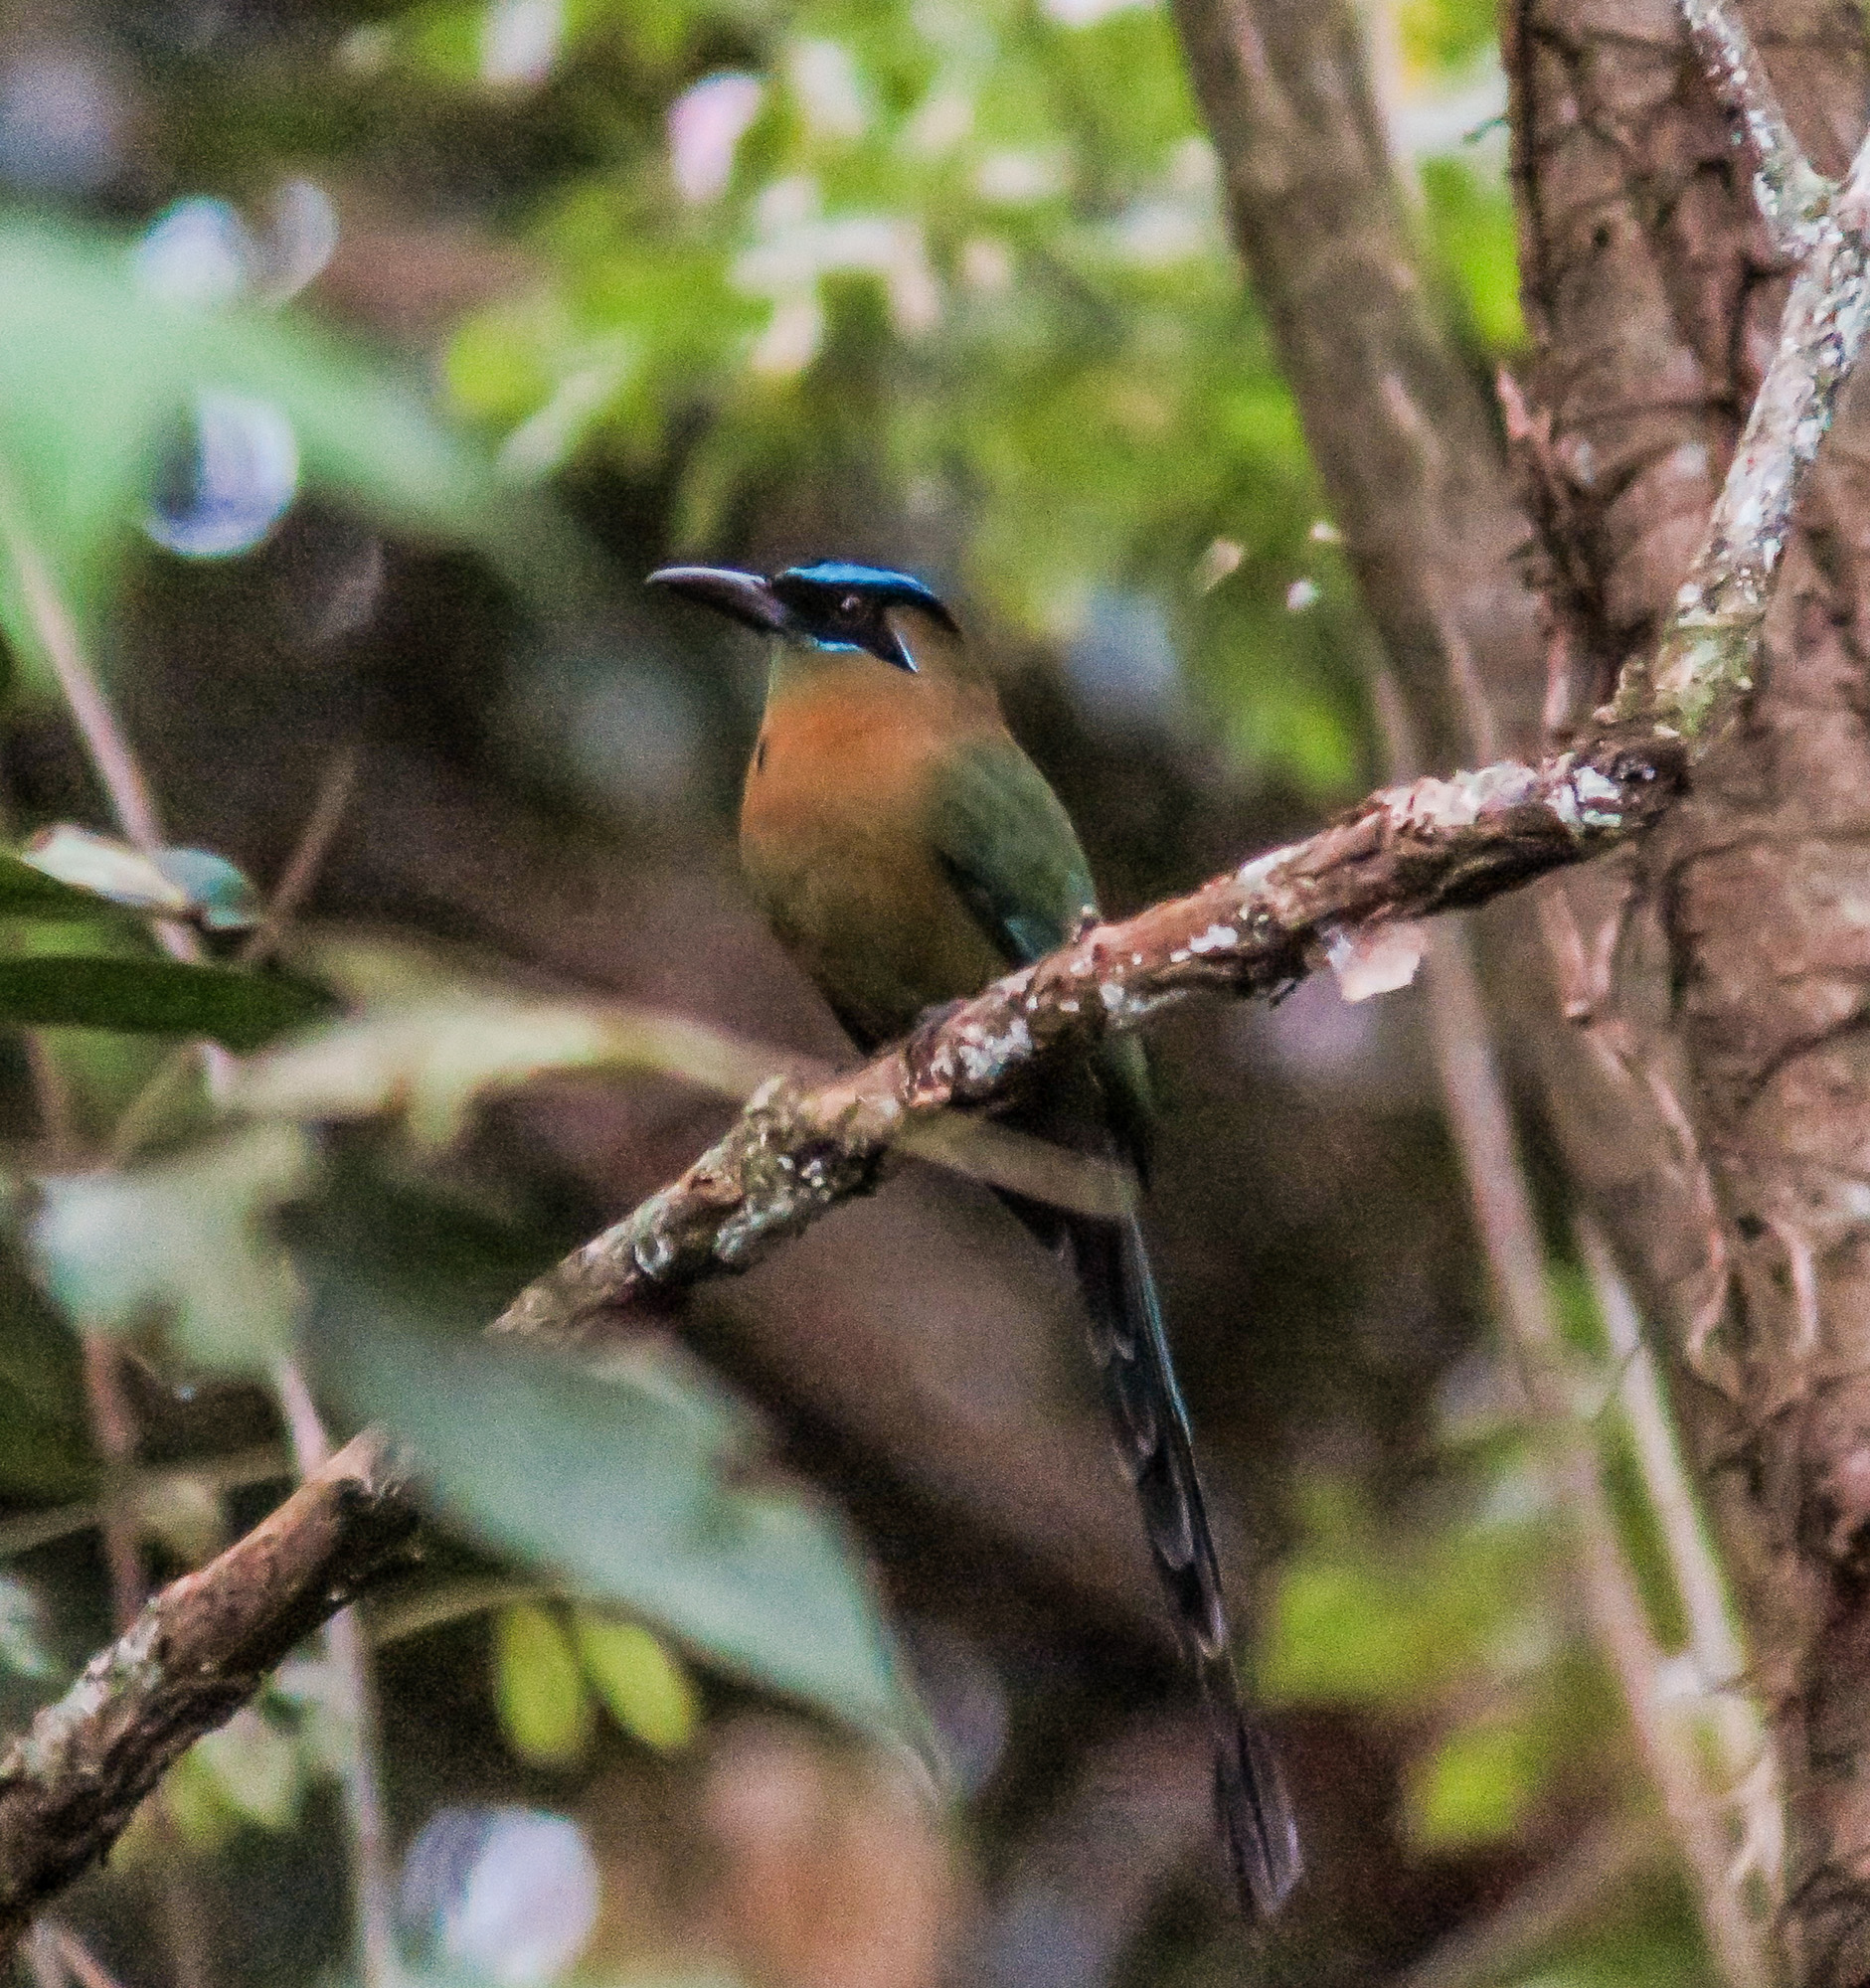
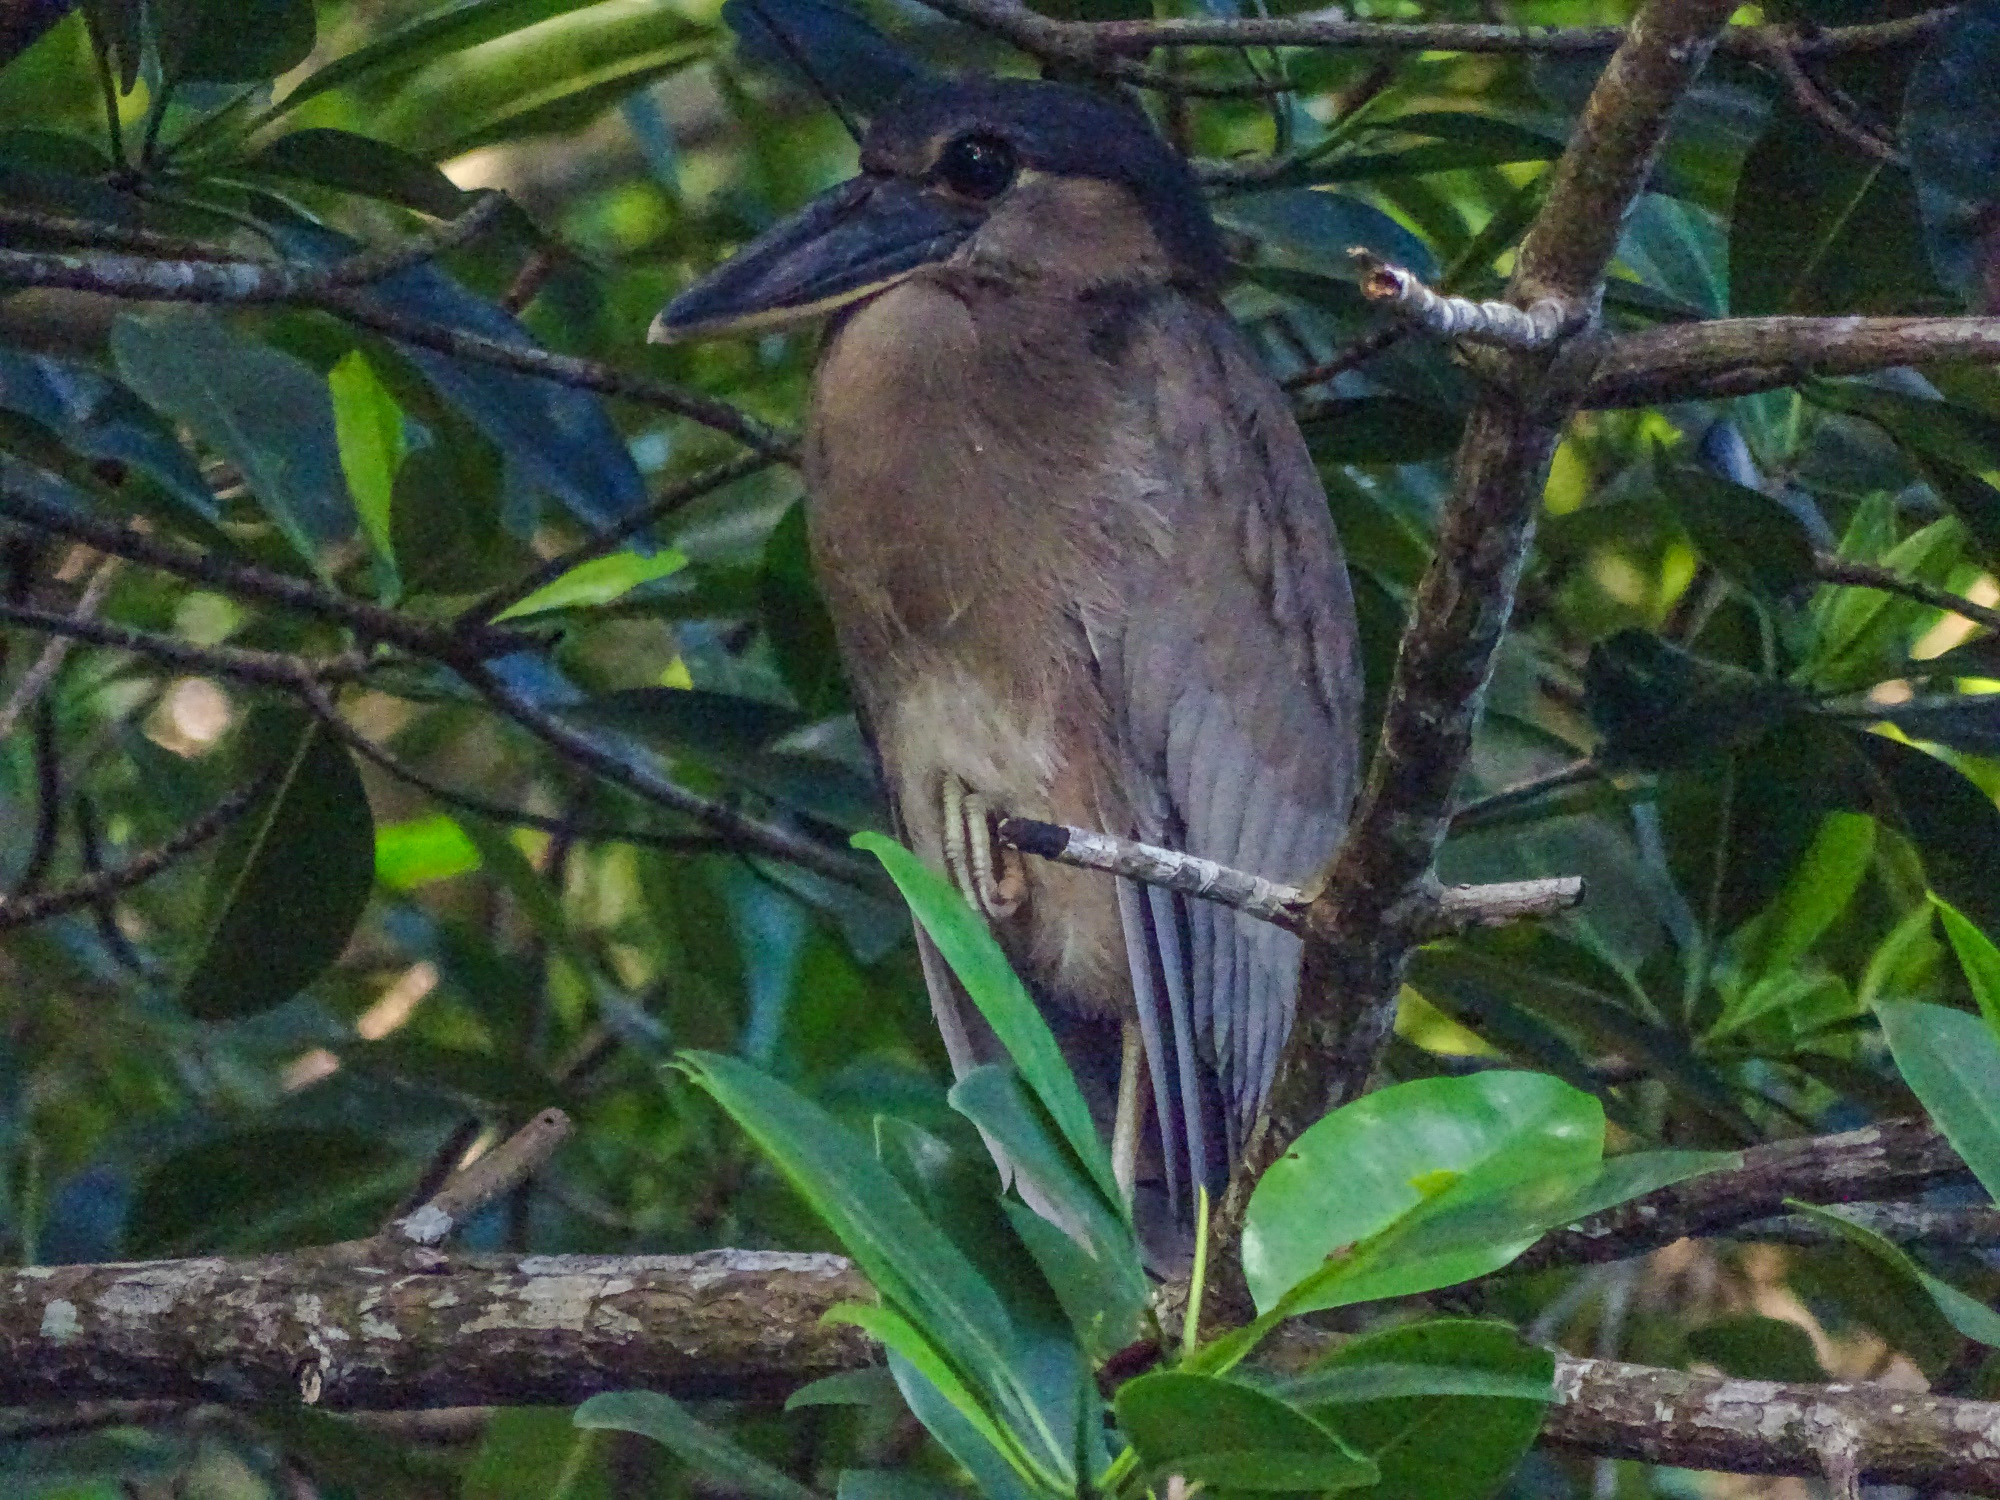
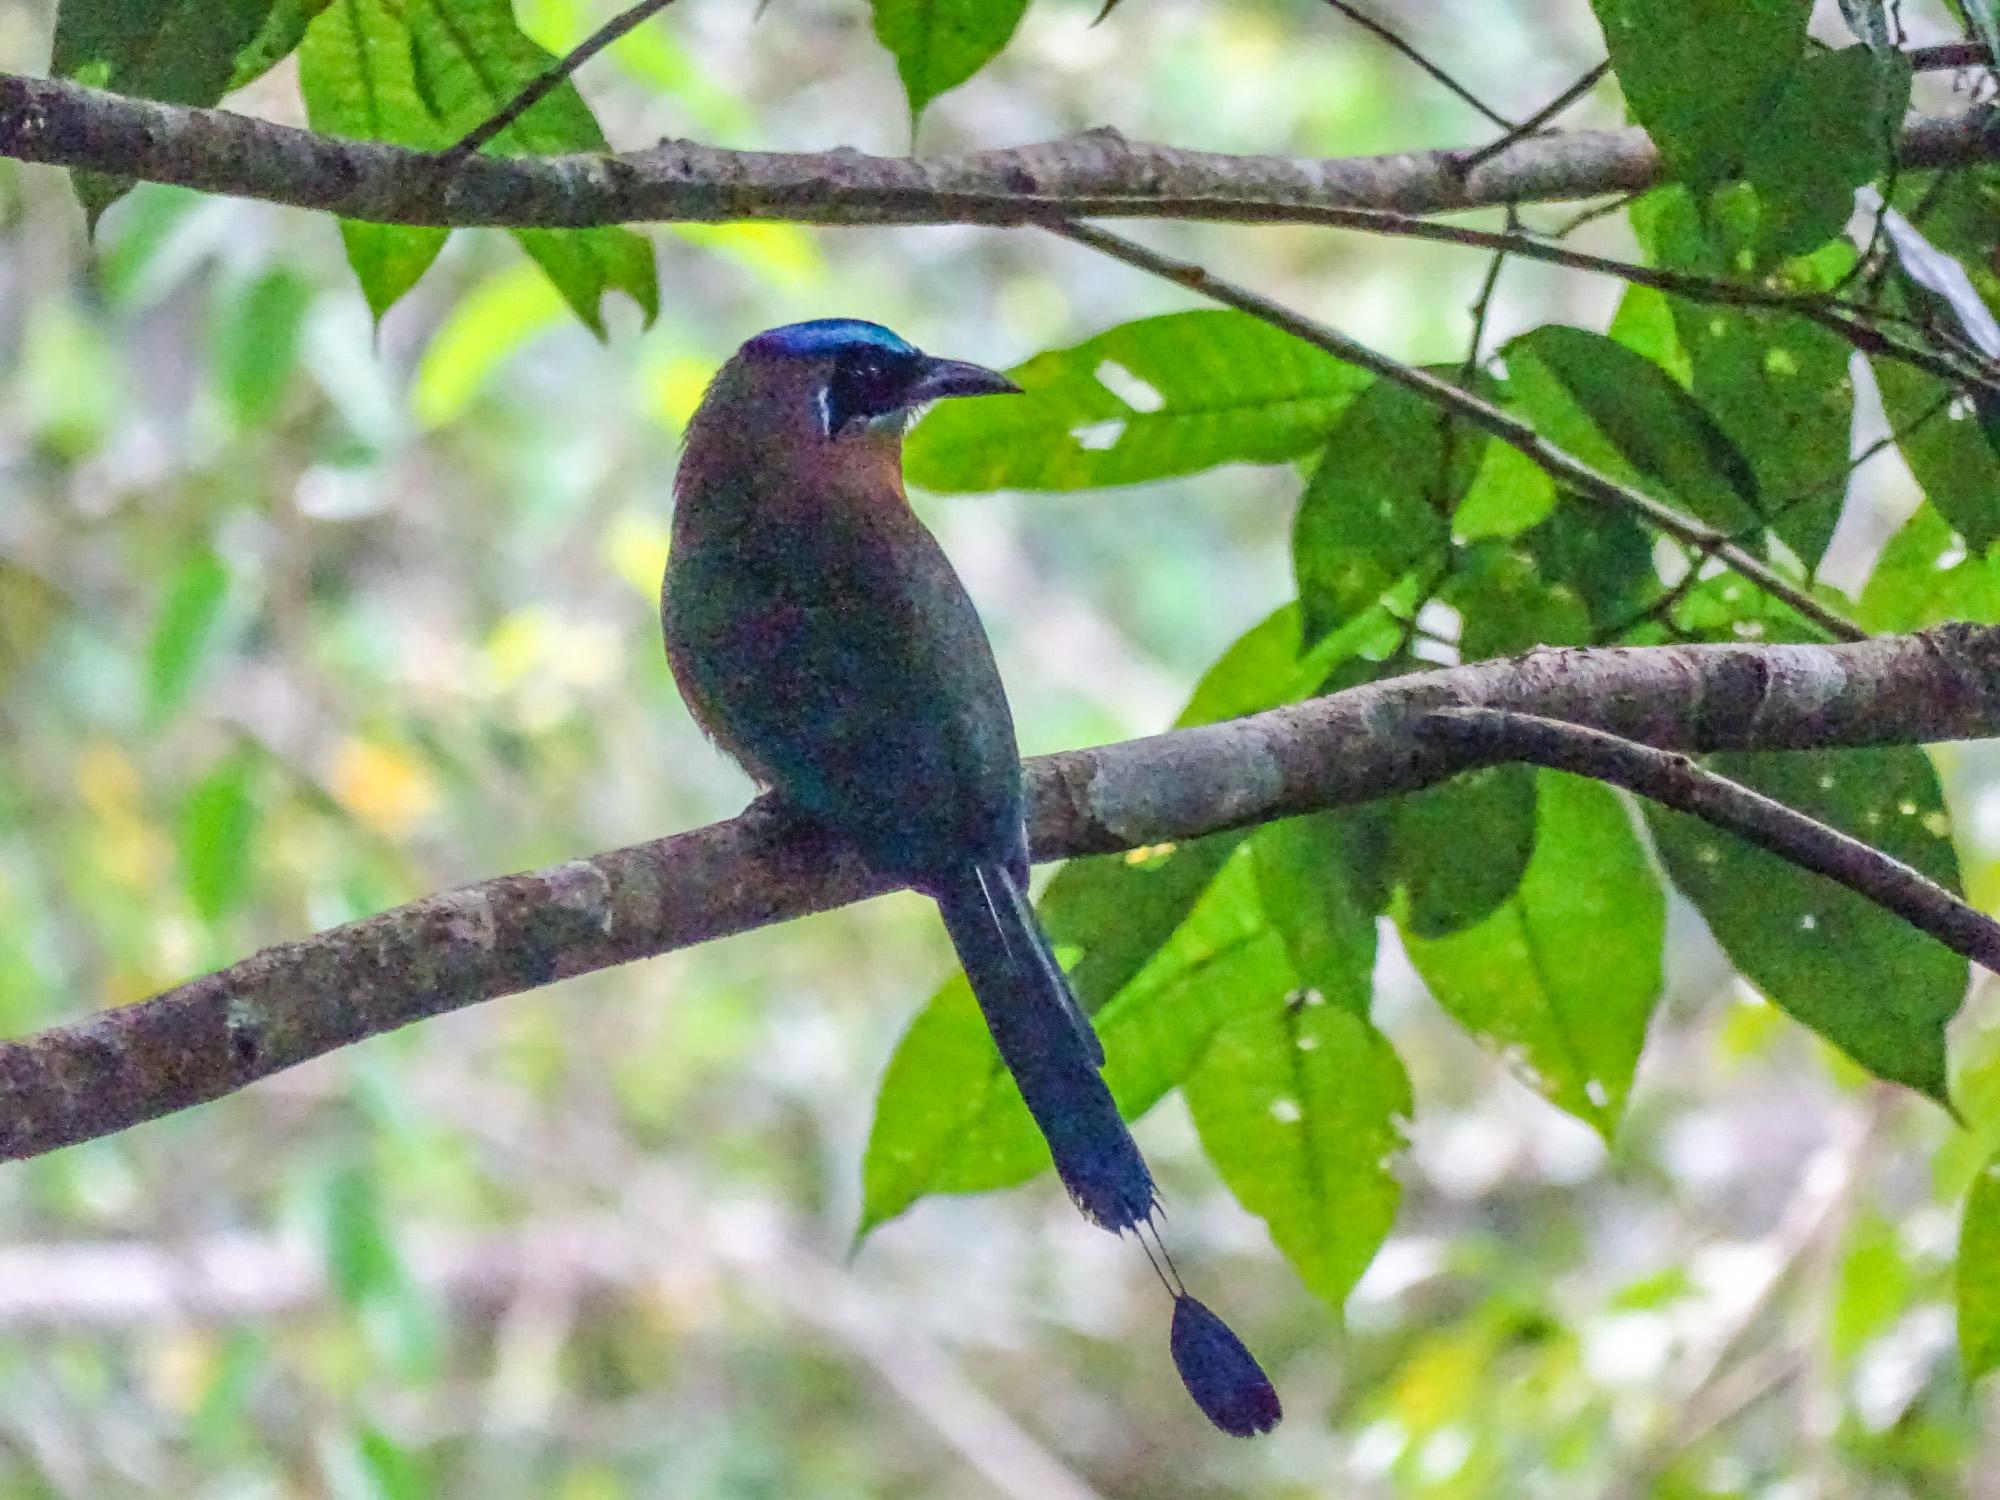
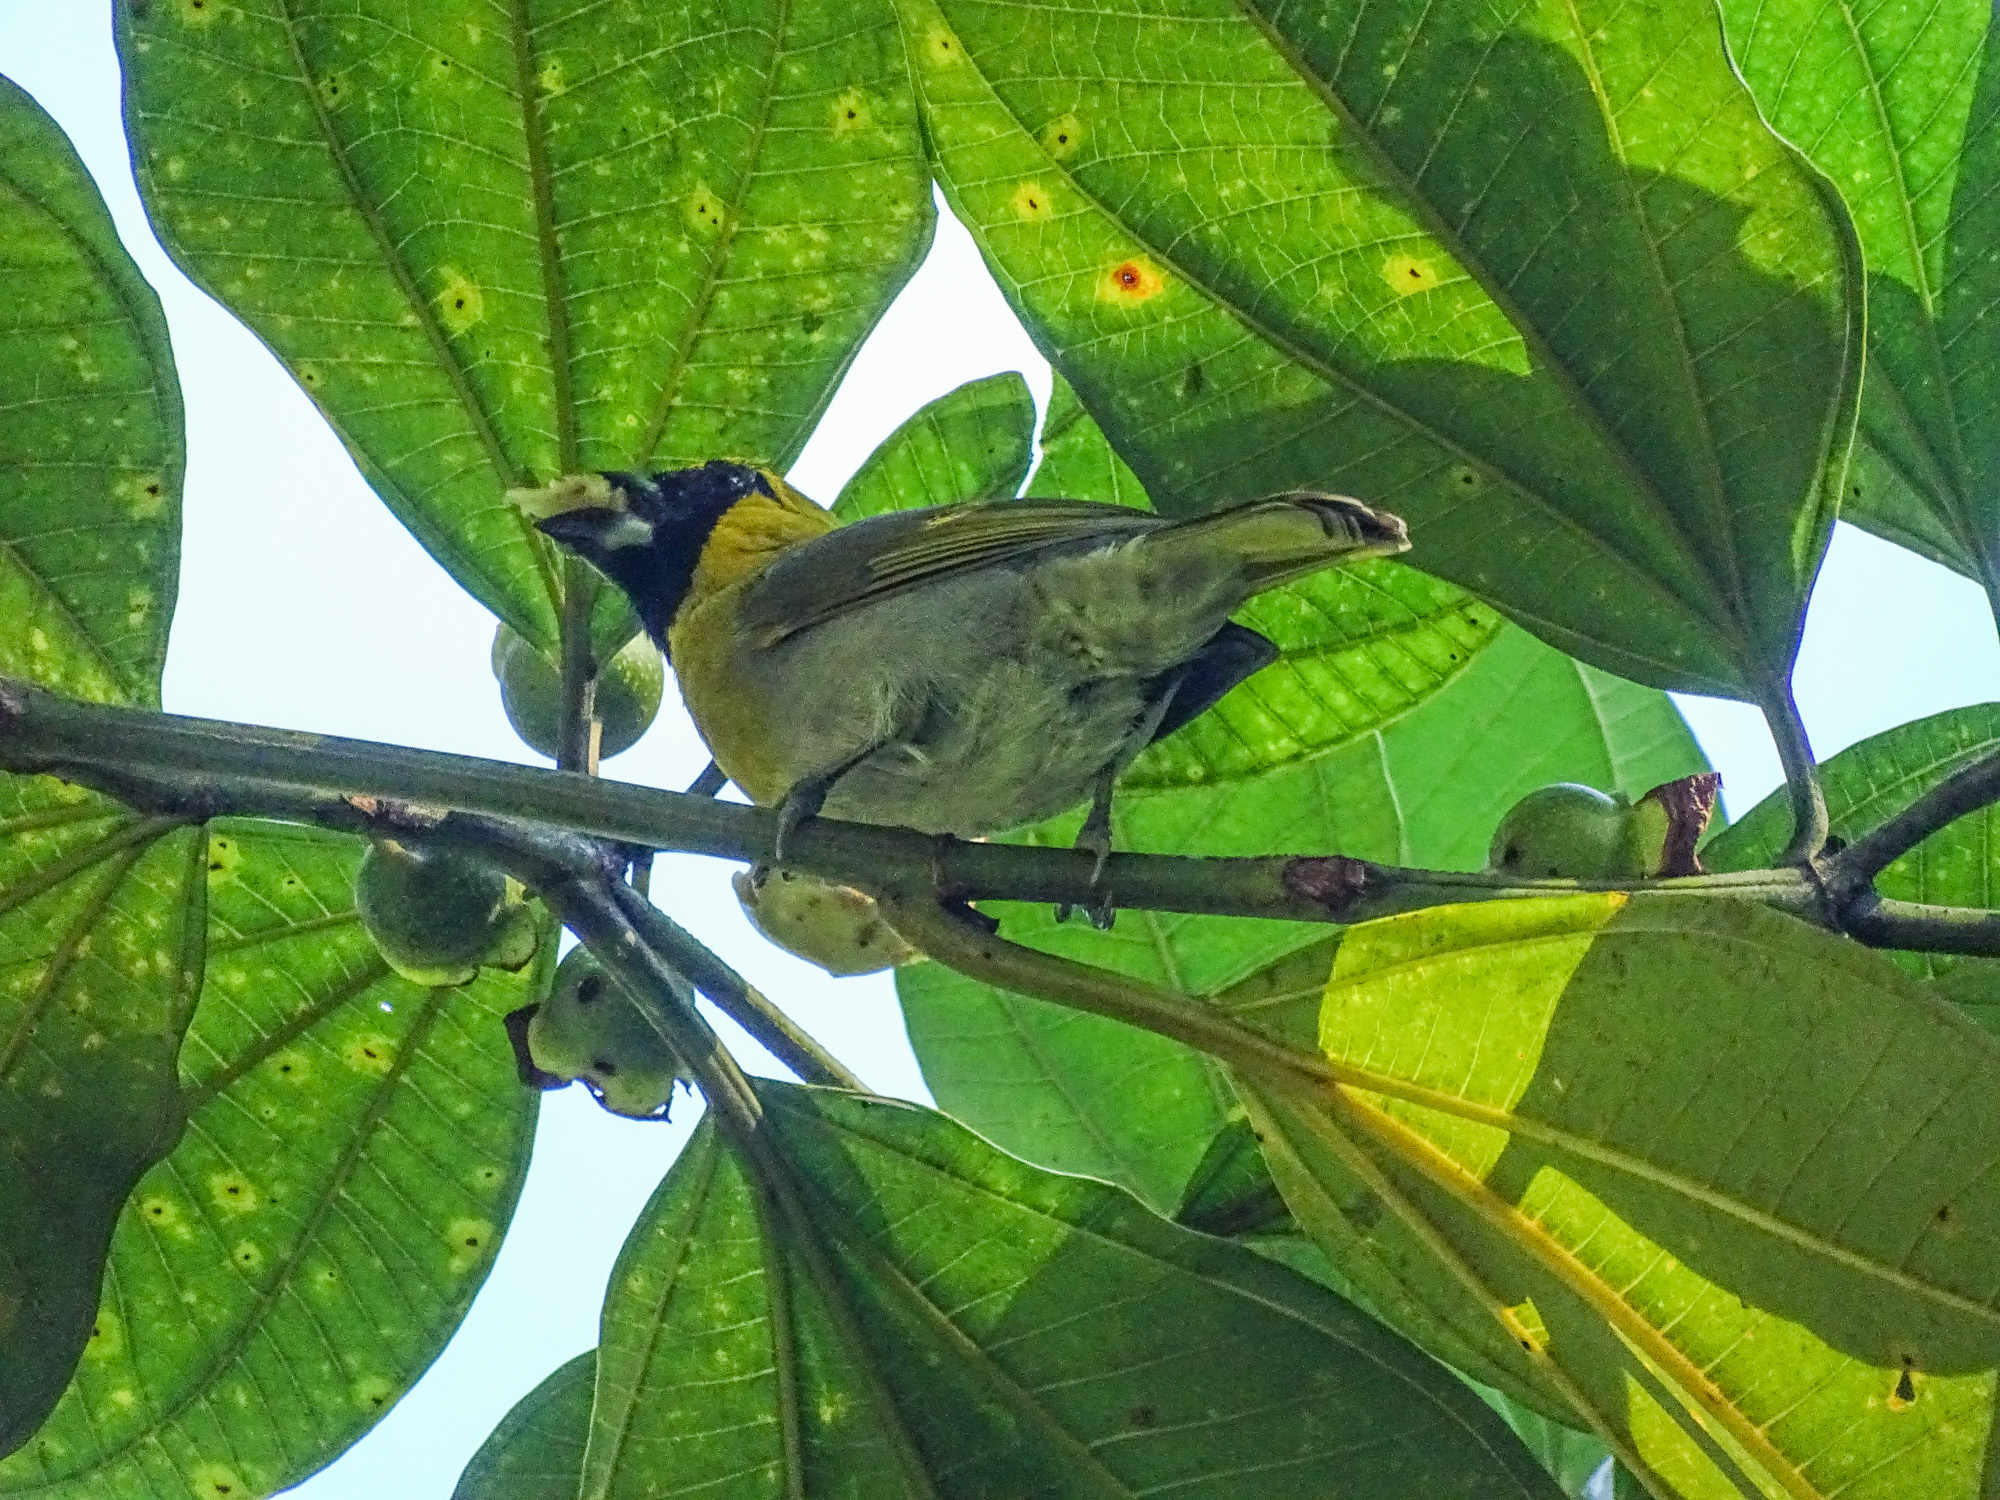
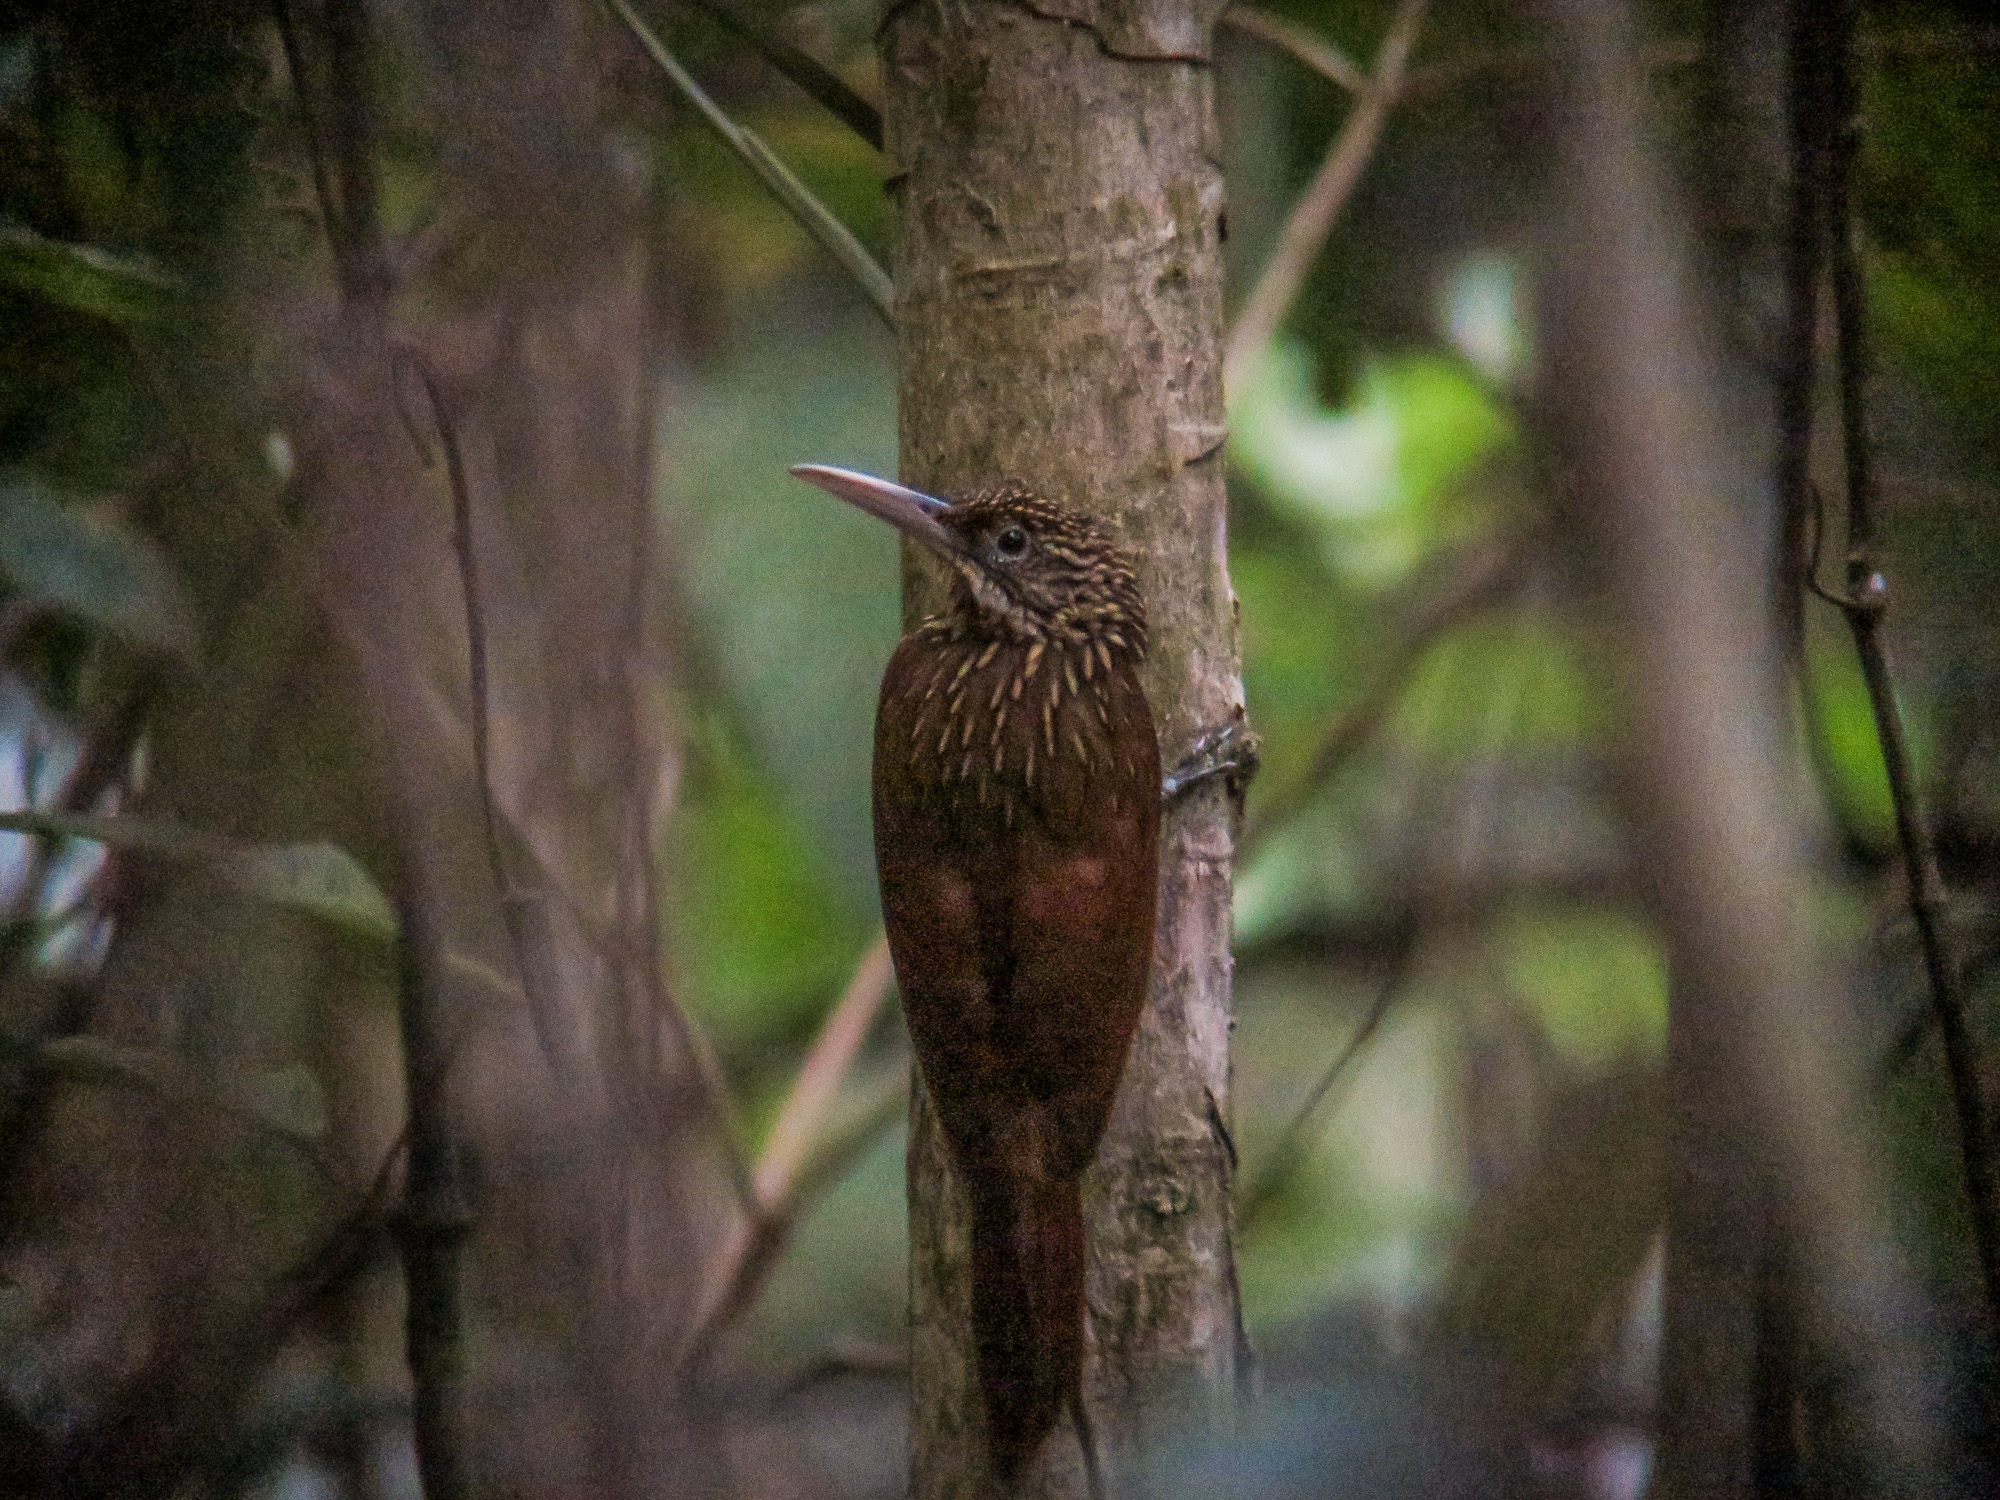
First, the body on the iv is identical to the iii, with all the same customizable buttons and the same amazingly sharp 24-600mm equivalent ZEISS Vario Sonnor zoom lens. The lens alone is worth the price of the camera. It is bright, f2.4-f4, and at its sharpest wide open at any zoom length. It really comes into its own in the rainforest or other lowlight situations where a lessor lens would simply not get the shot. Yes, I often wish for more than 600mm, but I am almost always able to crop to a satisfying frame and image, even when the birds and wildlife are distant. At 24mm it produces stunning landscapes and effective indoor shots. Really I would not trade it’s quality for more reach (unless somehow I could get the same quality at a longer focal length…something that just might defy the laws of physics, or push the camera to a size that would not be comfortable to carry in the field).

Eastern Bluebird at our back deck feeder. About 12 feet. 600mm. F4 @ ISO 320. Amazing feather detail.

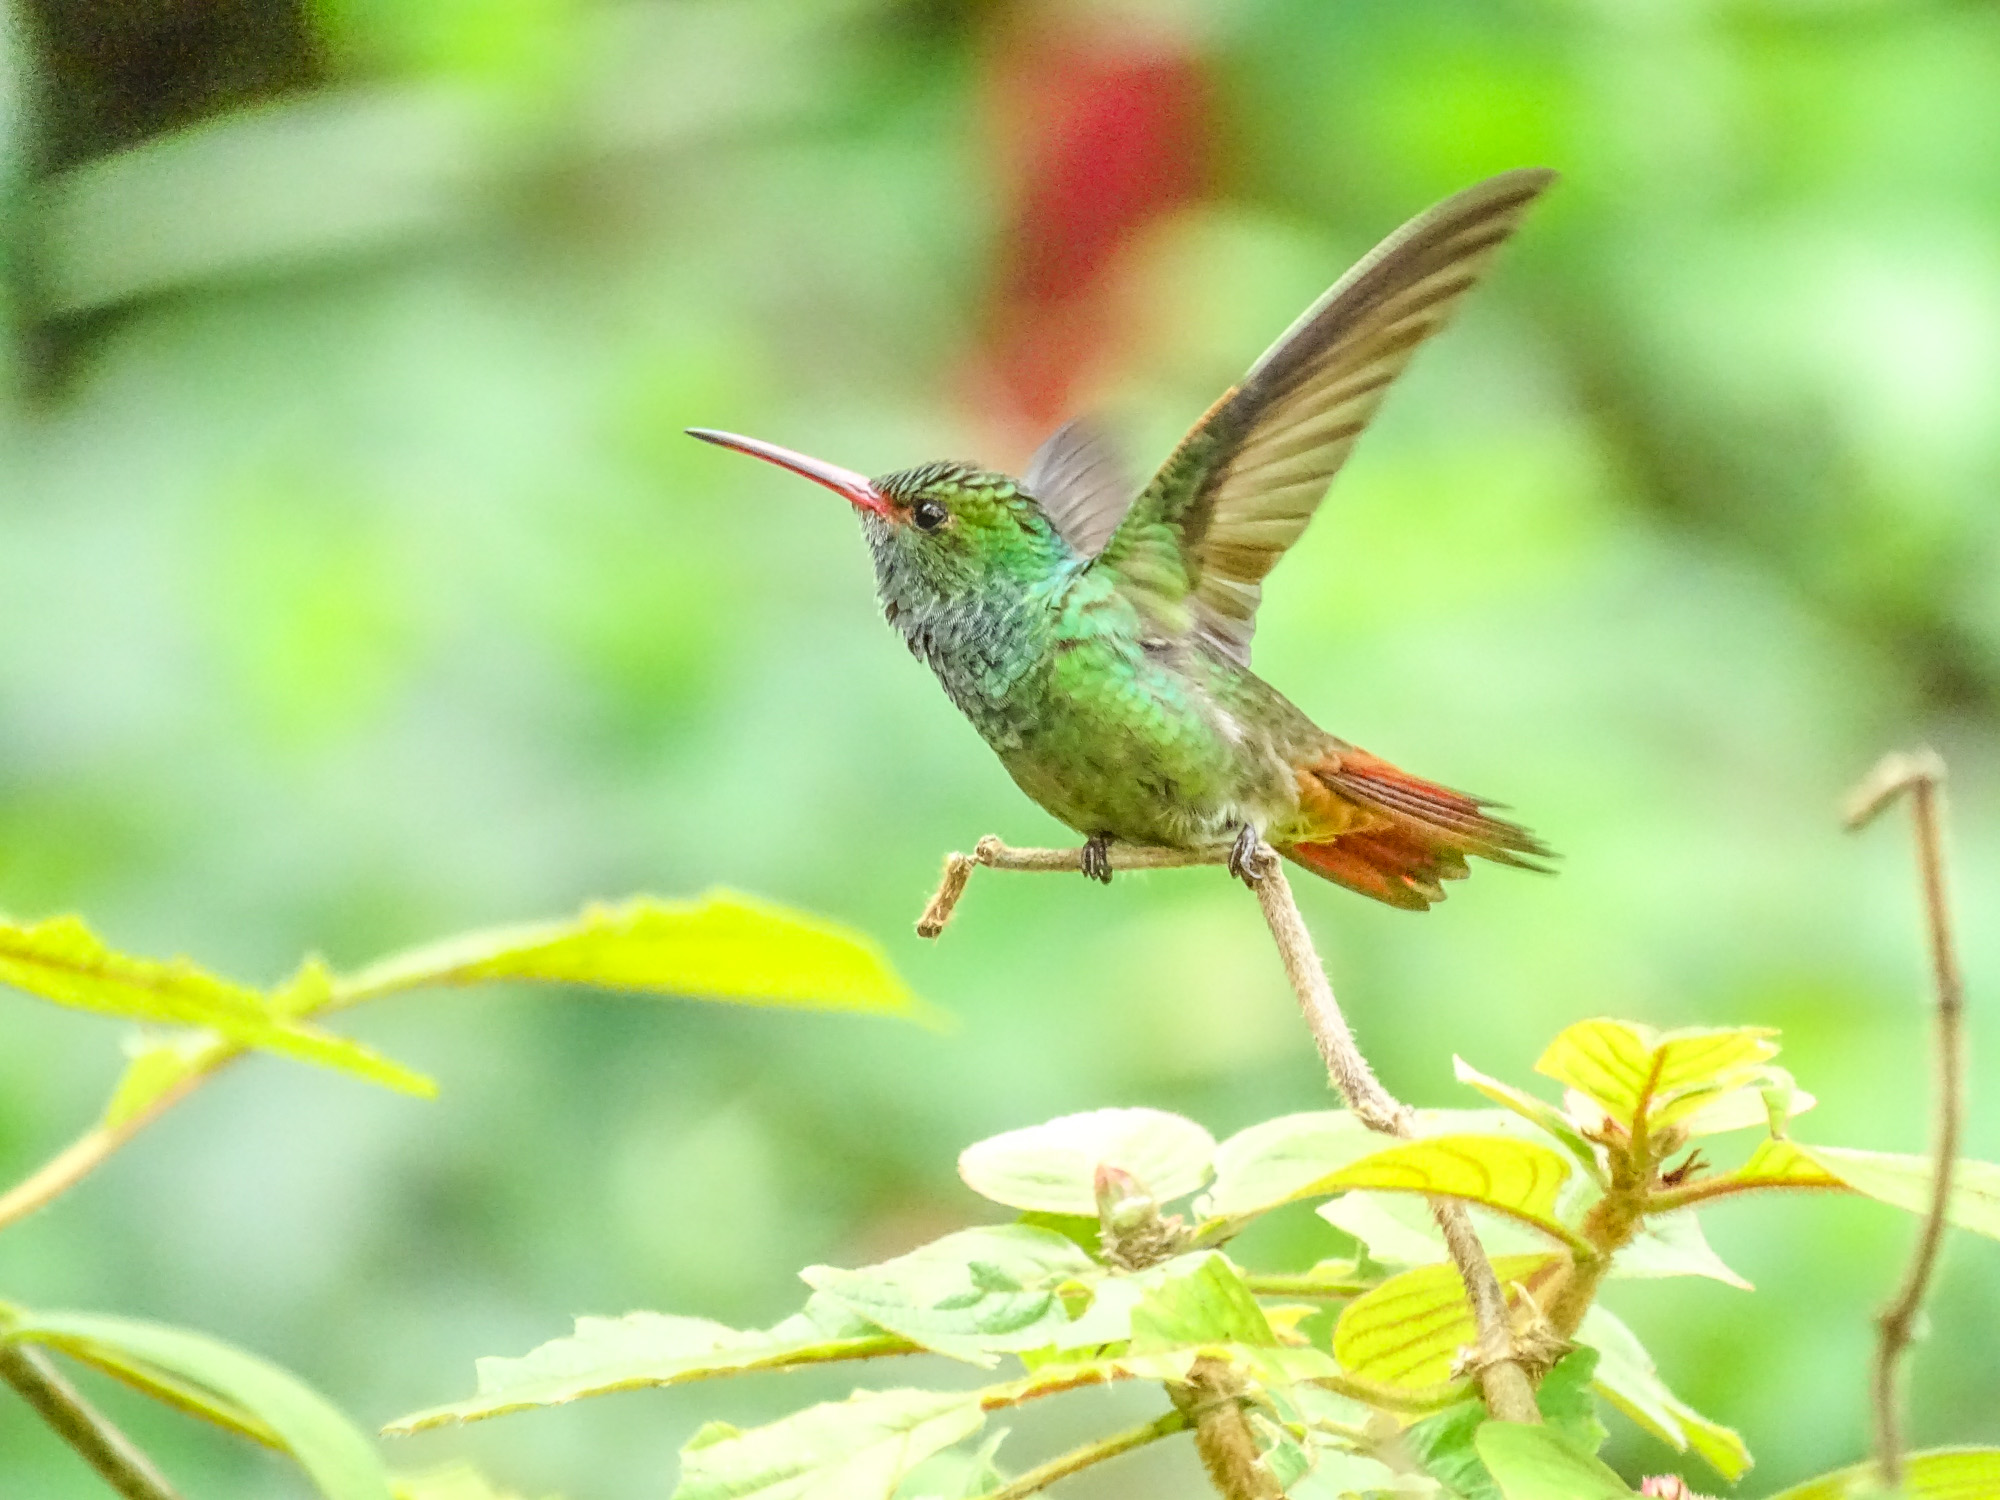
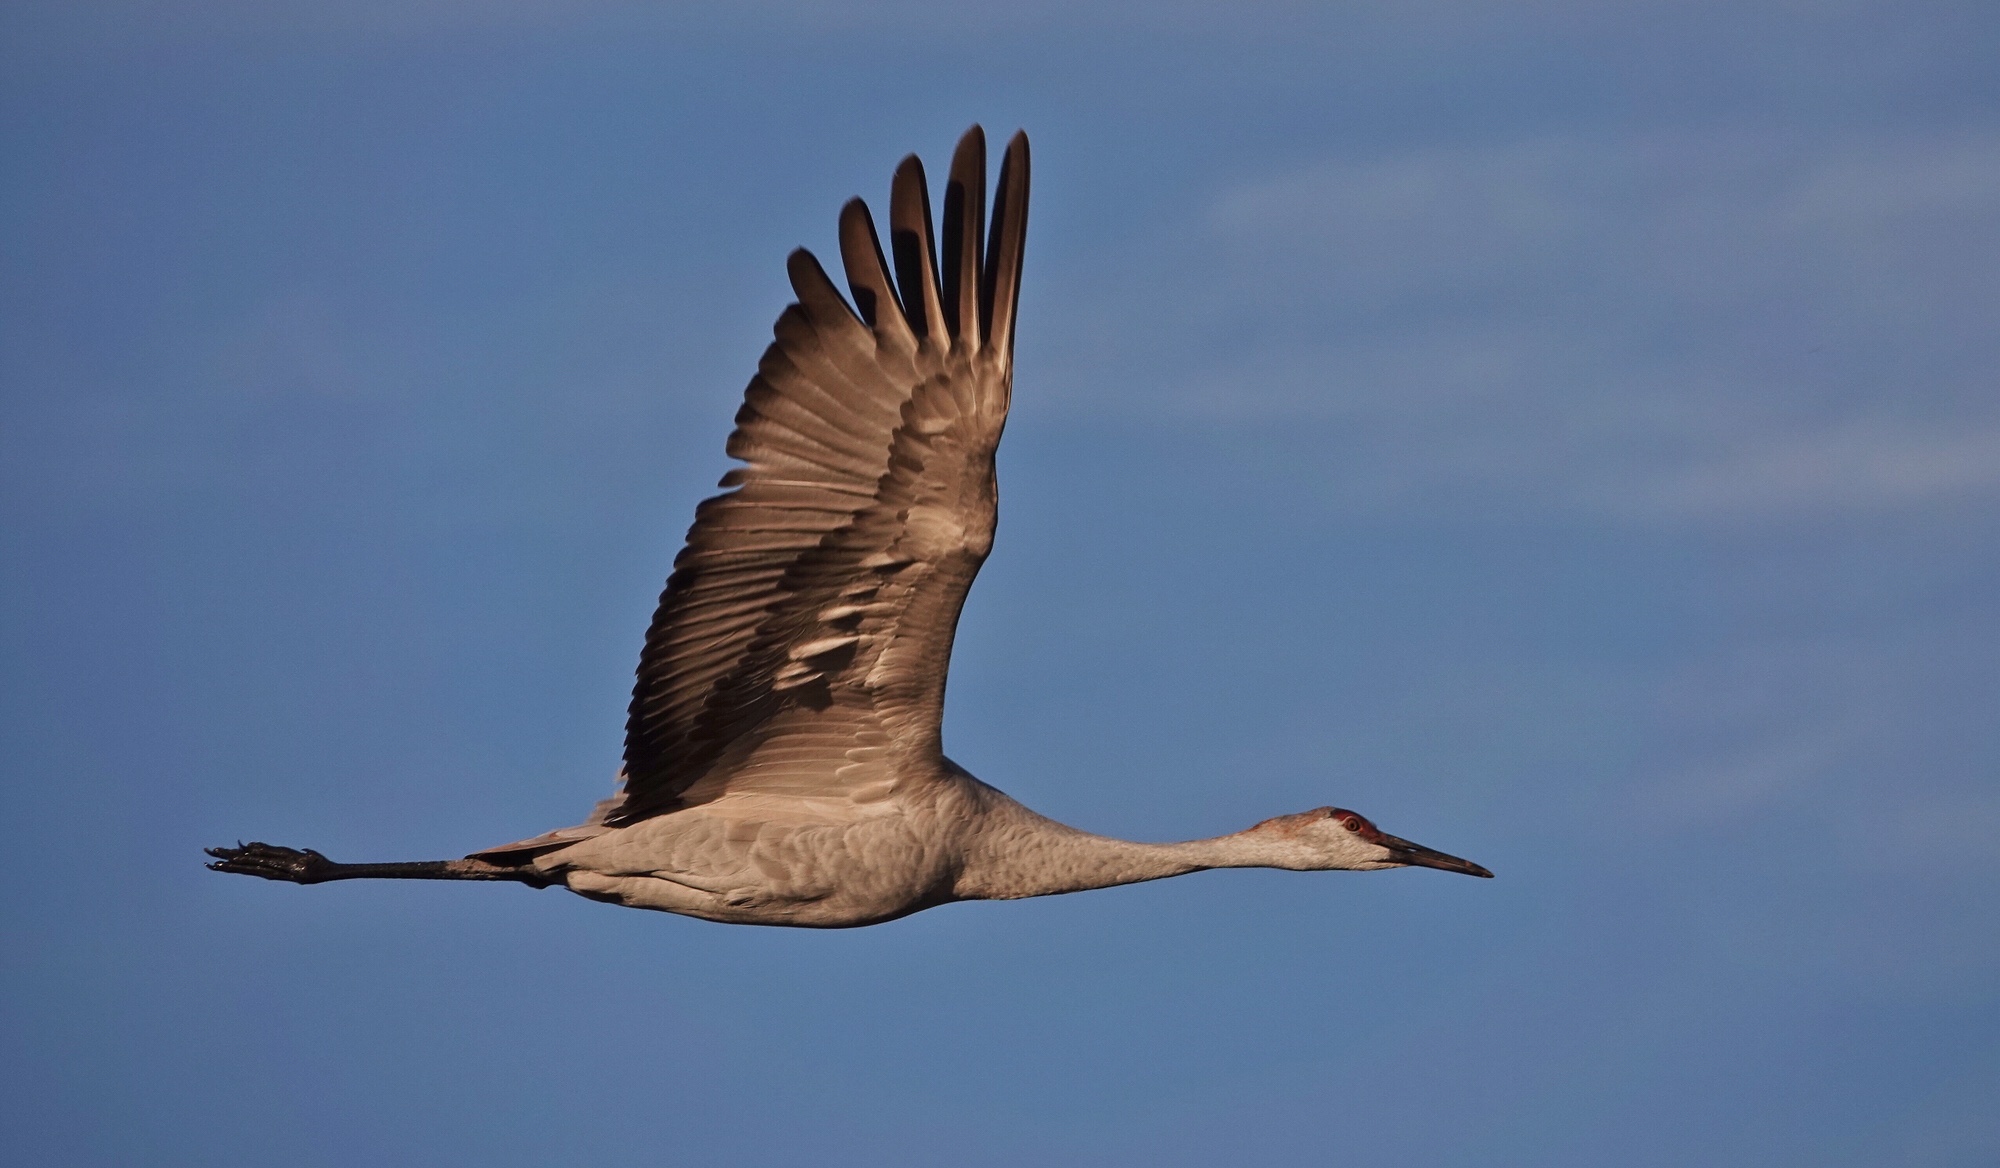
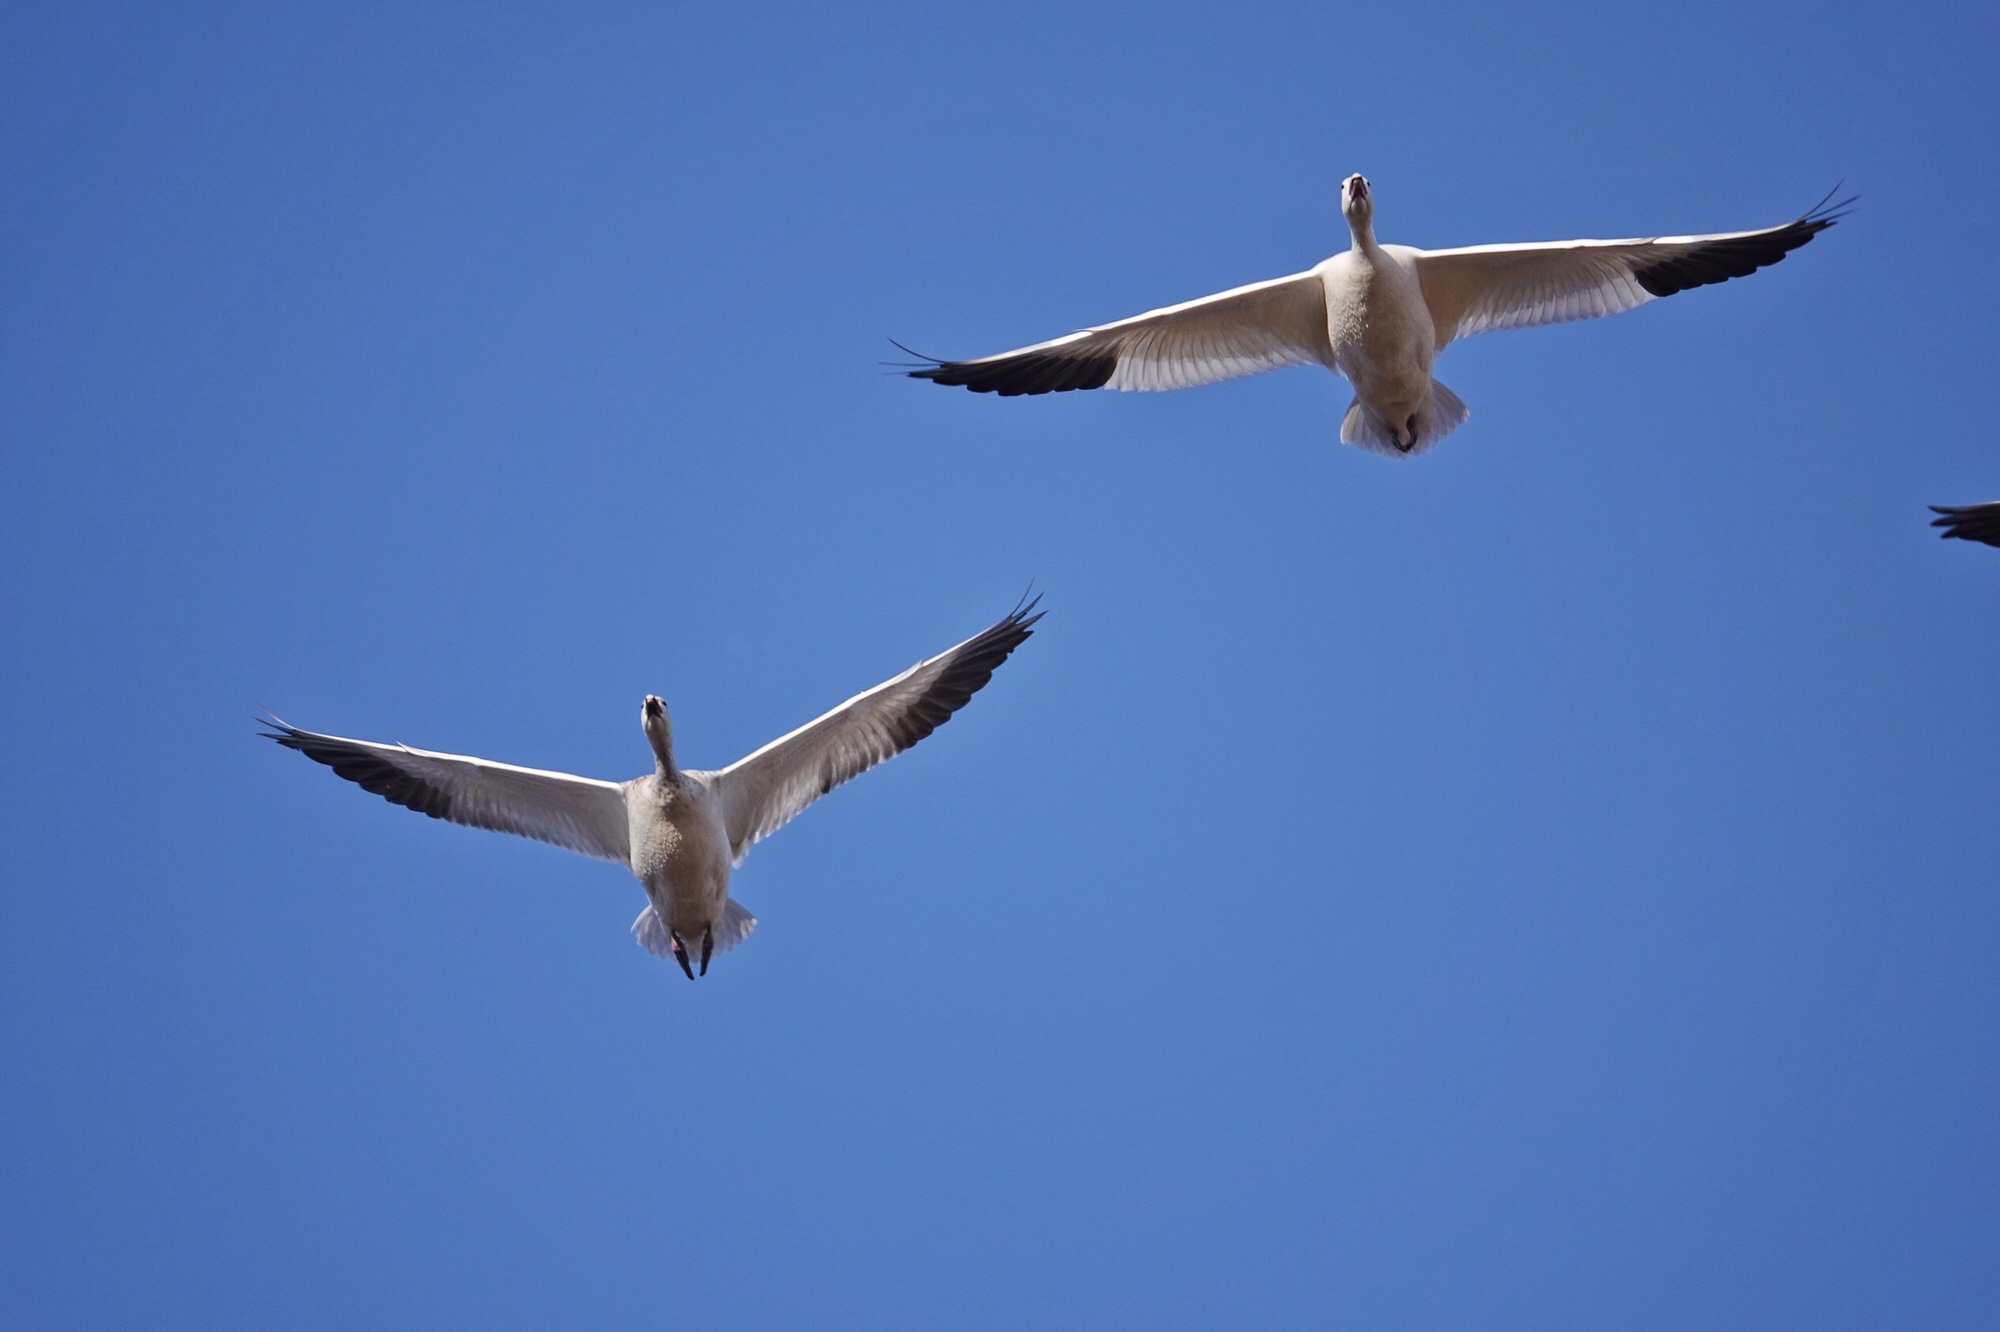
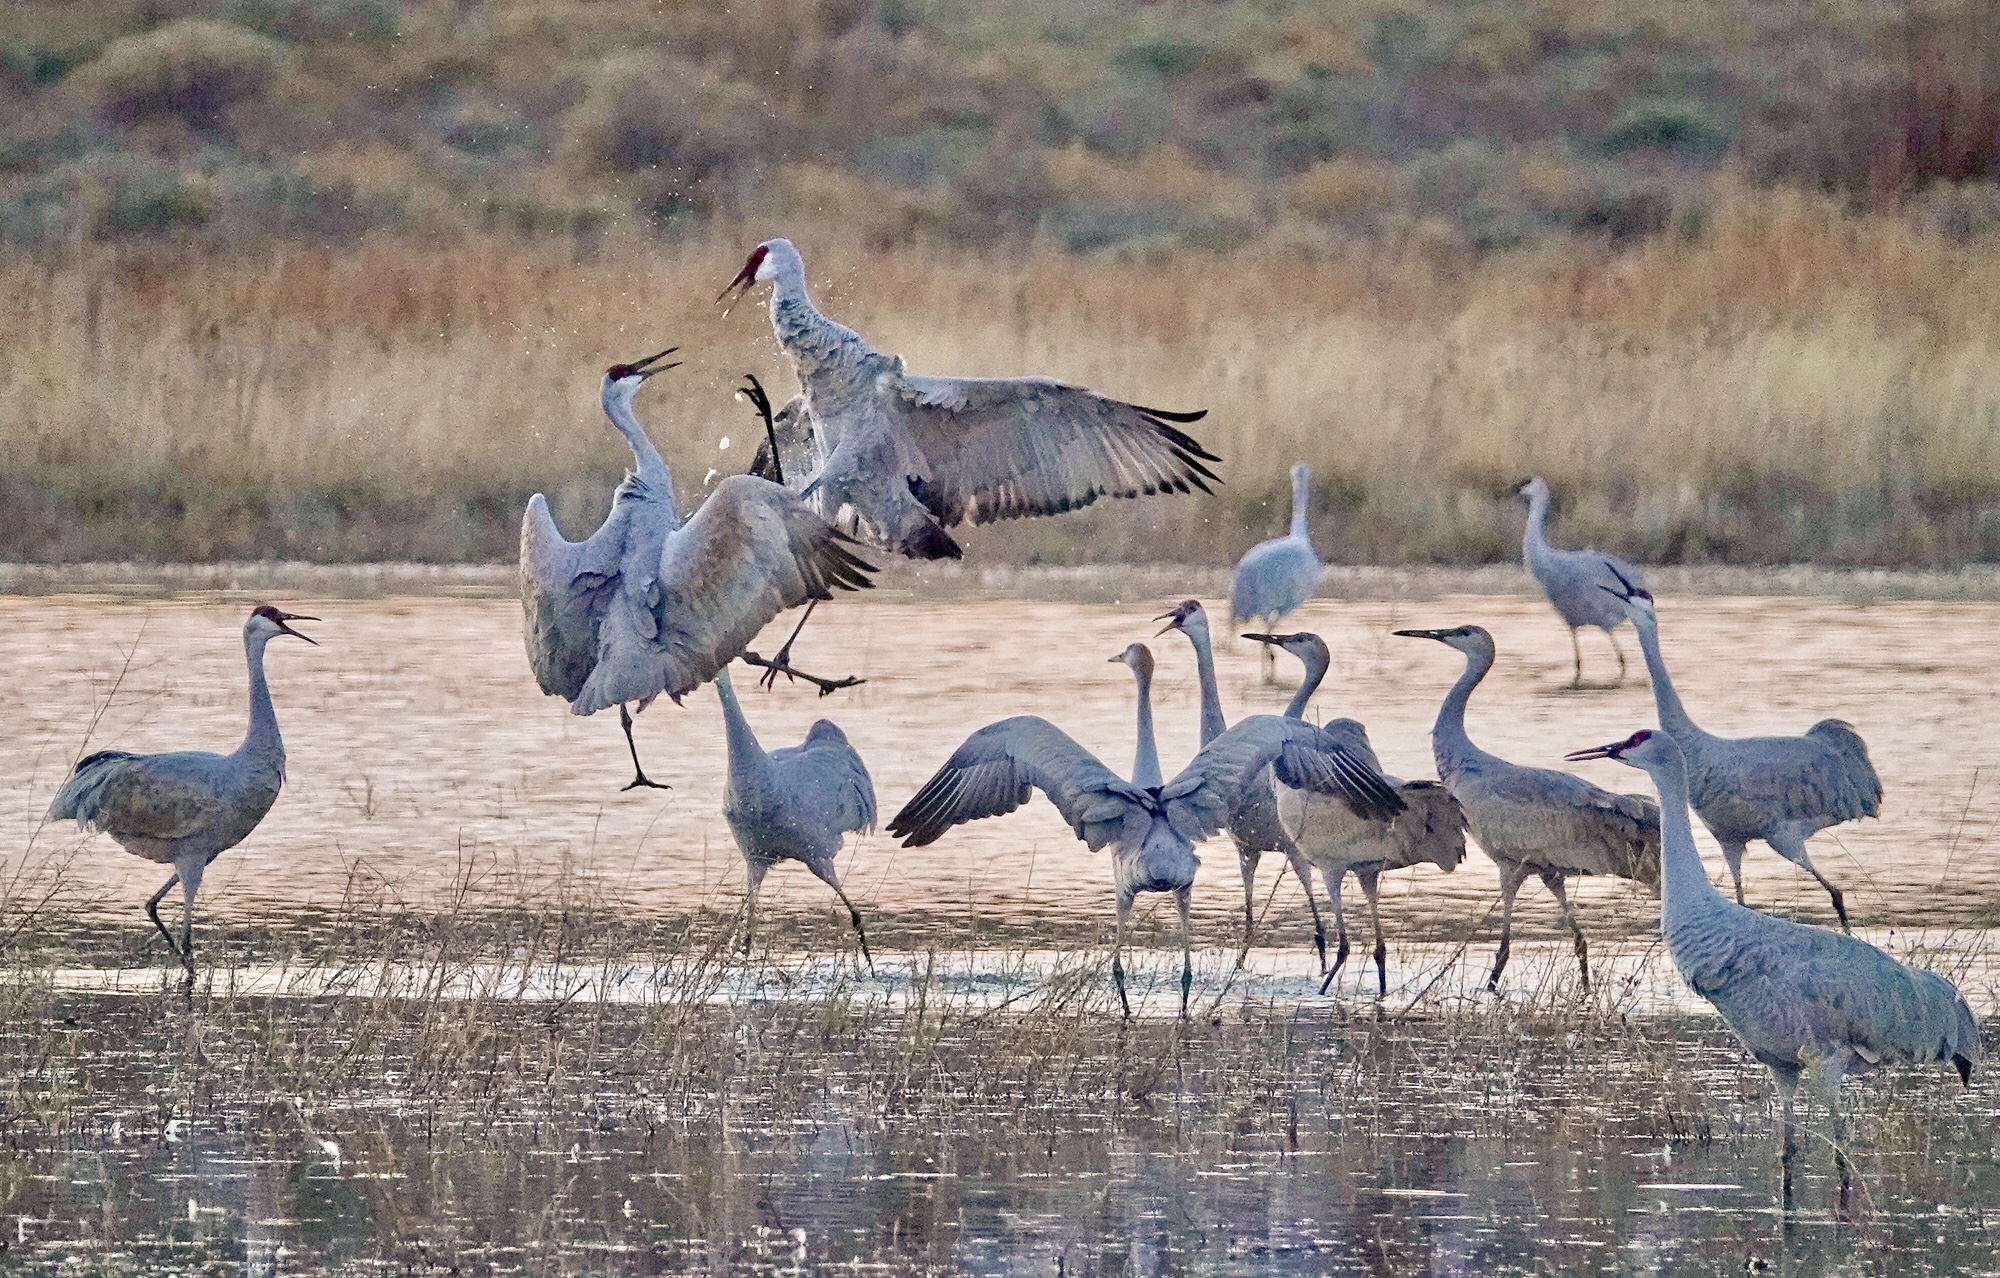
The real change is in the sensor and processing engine. This might be the same sensor, with hybrid focus and 325 phase detection focus points, as Sony used in the RX100V, but it is processing engine from the top of the line A9 full frame camera. Combine that processing engine with that sensor and you get totally amazing focus capability. Birds in flight are embarrassingly easy. Yes. Embarrassingly easy. It used to be a real challenge with a Point and Shoot superzoom, even the RX10iii, to get even the occasional bird in flight. With the iv, you literally just point and shoot. You can use a specific focus area in the center of the frame, which picks up birds in flight easily against most backgrounds, and the camera will focus between frames even at 24 frames per second (though I never use more than 10 frames per second). The iii locked focus on the first frame, which made following birds in flight much more difficult, often impossible. In fact, I use this center frame focus setting for general wildlife photography, so the camera is ready and able to pick up the unexpected flyover. For more dedicated birds in flight work, there is lock on tracking auto focus, which will pick up a bird anywhere near the center of the frame and lock on to follow the bird as you pan. Both work really well, depending on how large the bird is in the frame. Tracking works best with bigger birds and birds bigger in the frame. And, as far as wildlife action on the ground (or sports for that matter). the focus lock is amazingly fast and positive. I came back from Bosque del Apache this year with more satisfying Birds in Flight images, from just this year, than I have managed to get in all the years I have been going there with other cameras.

Sandhill Crane in flight. Bosque del Apache National Wildlife Refuge, Socorro, NM. 600mm. 1/1000th.
Snow Geese coming head on and passing close overhead. The RX10iv tracked these geese in as they came and held focus through over 50 frames at 24 fps. Totally amazing.
Sandhill Cranes in confrontation after sunset. 600mm, 1/1000th @ ISO 1600. An amazing shot with any camera.

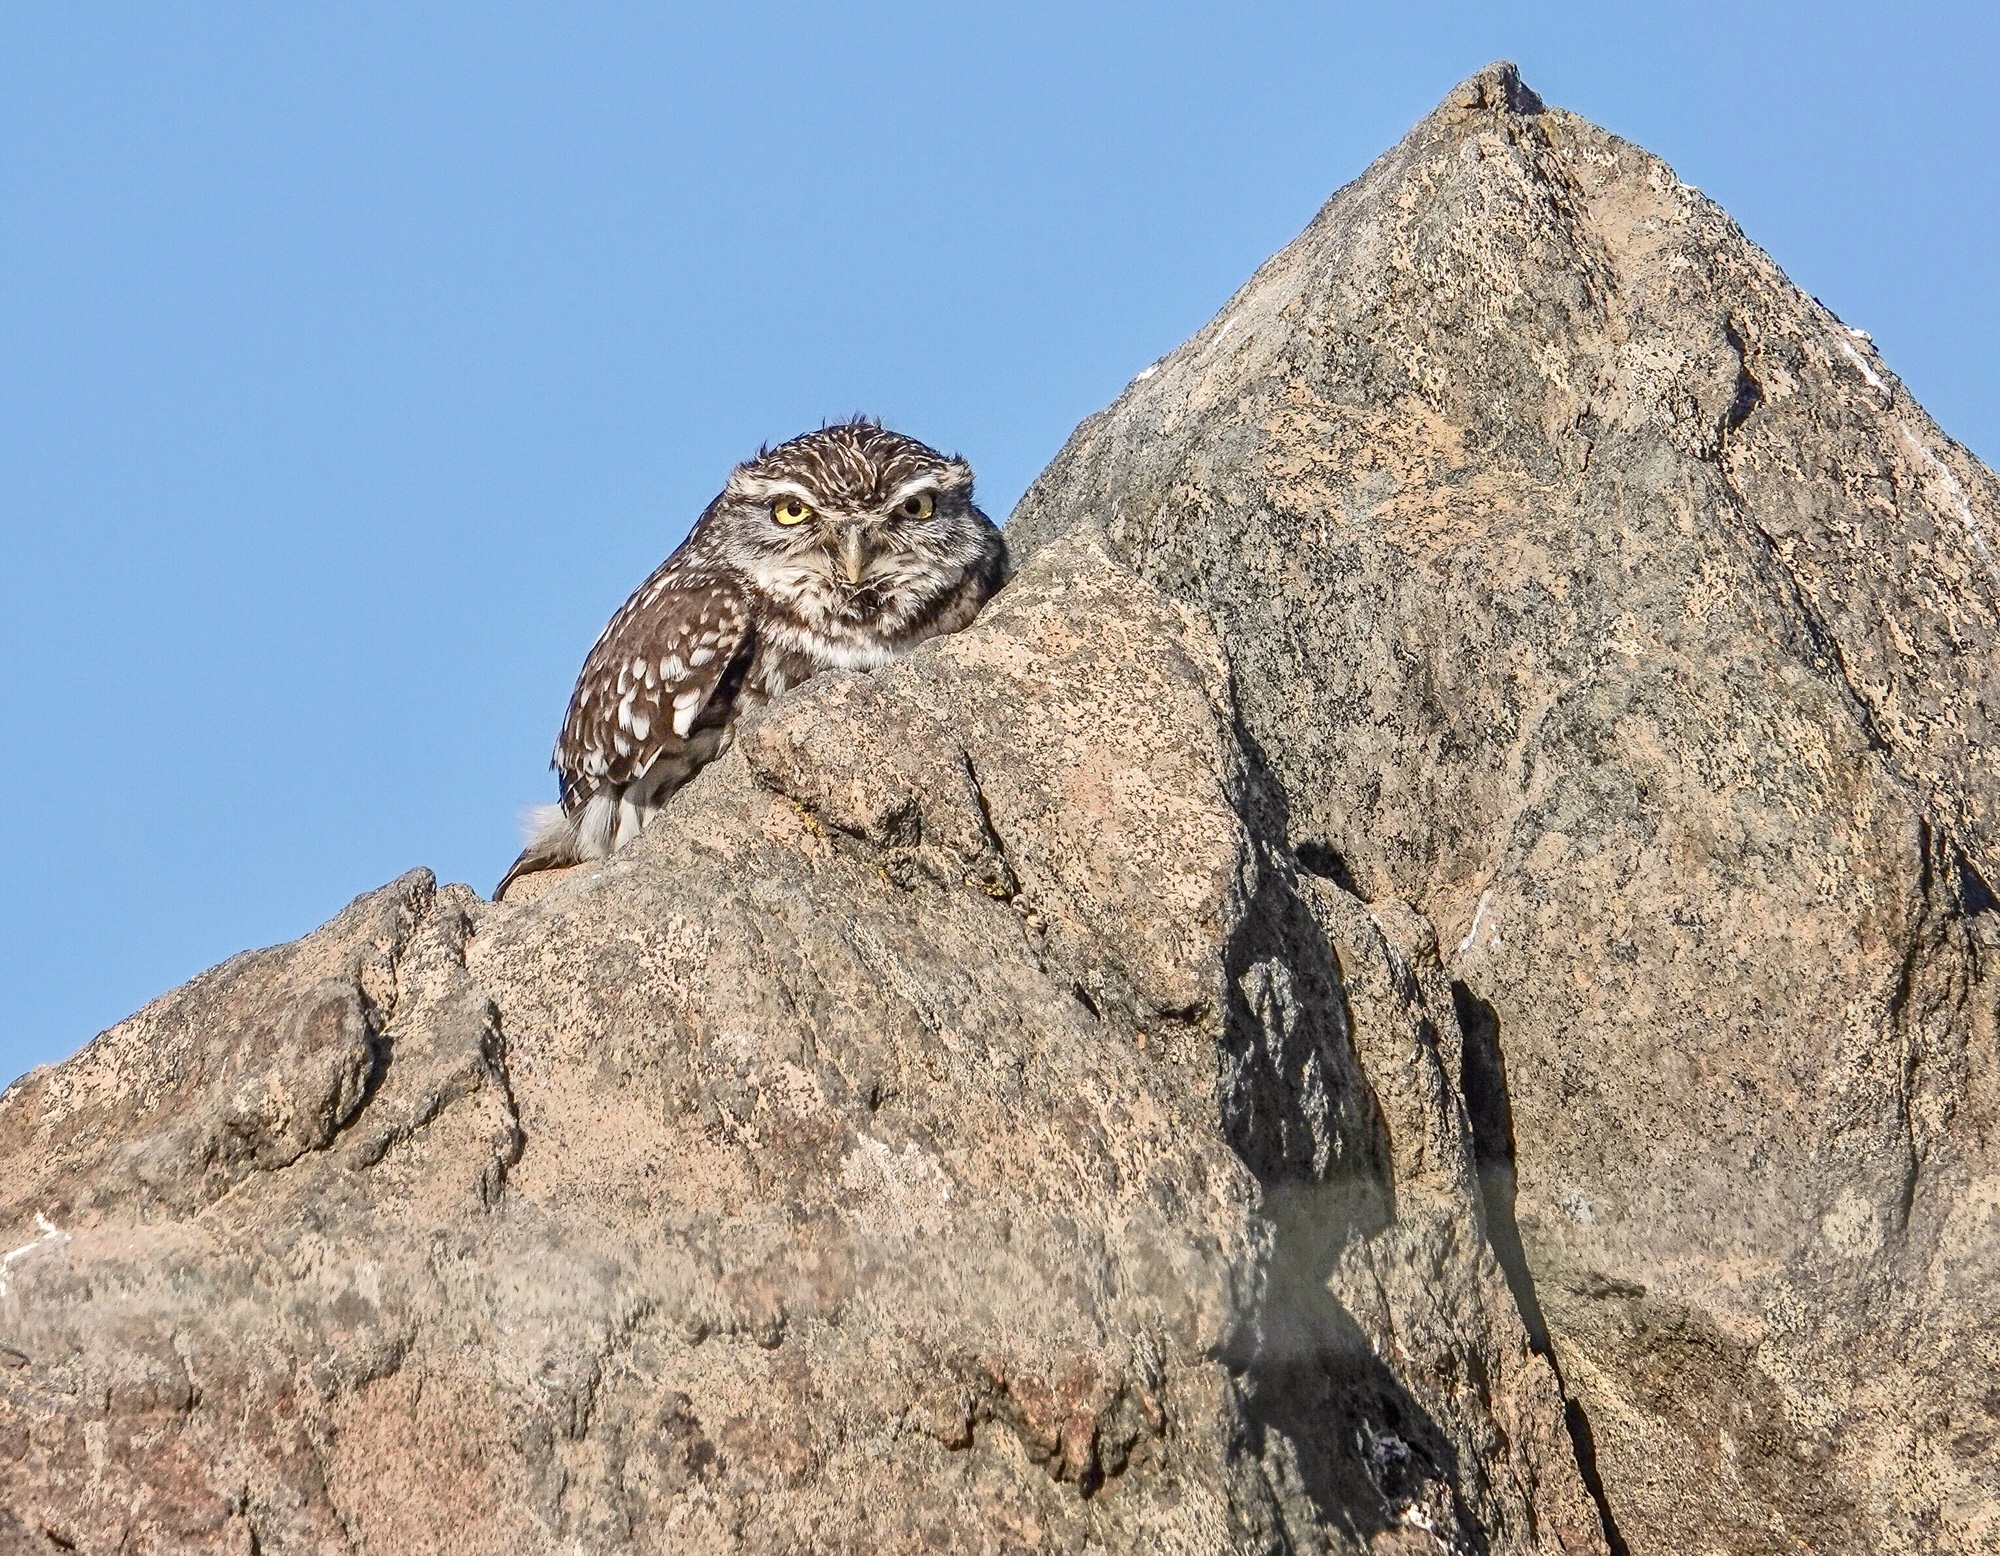
In general wildlife shooting, occasionally the iii would hunt when trying to get a bird or beast in lower light, especially with a confusing background. Not the iv. I recommend keeping the camera set to “continuous focus”, which seems to turn on the Phase Detection Focus points for faster focus. The focus is so fast that you quickly forget to even think about it. Point and shoot!

European Kingfisher, Tagus Estuary, Portugal. Early morning in low light.

The new processing engine has also enabled some refinements which I am only beginning to appreciate as I use the iv more. Auto HDR has been improved to the extent that I rarely use any of the other HDR settings (you can still set 1EV to 6EV differences) and, if you are careful, you can shoot an HDR right out to 600mm on the zoom. The iii could not assemble an HDR much beyond 100mm. Highlights in Auto HDR are now very well controlled. They were not in the iii. That does not sound like much, but since I use In-camera HDR a lot, it means that I do not have to think about adjusting my HDR settings as often. As a Point and Shoot photographer I am all for that!

600mm in-camera HDR. Not possible with most cameras.

Another more subtitle improvement is the menu system. There are still a bewildering number of options and menu screens, but menu items are now grouped in more logical manner on each menu screen, with each screen clearly labeled so you know where you are. I use the excellent function button and function menu almost exclusively when in the field, so I never minded the Sony menu system, but I know that some did. 🙂 The changes should make it easier for folks to find what they are looking for, but I still recommend using the function menu whenever possible.

Some folks are excited about the 24 frames per second (with focus between frames!) capability of the RX10iv. That is essentially movie frame rate, and you can capture action sequences in the equivalent of a 20 mega pixel per frame video. I have not yet found a use for it. Somehow even the 10 fps “medium” speed seems faster and smoother than the 10 fps top speed on the RX10iii did…and focus between frames is just a wonderful improvement. They have also added a 2 fps slow speed continuous. And the size of the image buffer is amazing. I think I read that you can take over 300 frames before the camera freezes up to clear the buffer. (While I have tested the limits, one thing I discovered is that, though you can continue shooting, the buffer is clearing in the background, and you can not make changes in the settings of the camera until the buffer completely clears.) I can tell you one thing…you can burn through an SD card really fast at 24 fps.

I used touch to focus to place the focus exactly over the Bison’s eye without reframing.

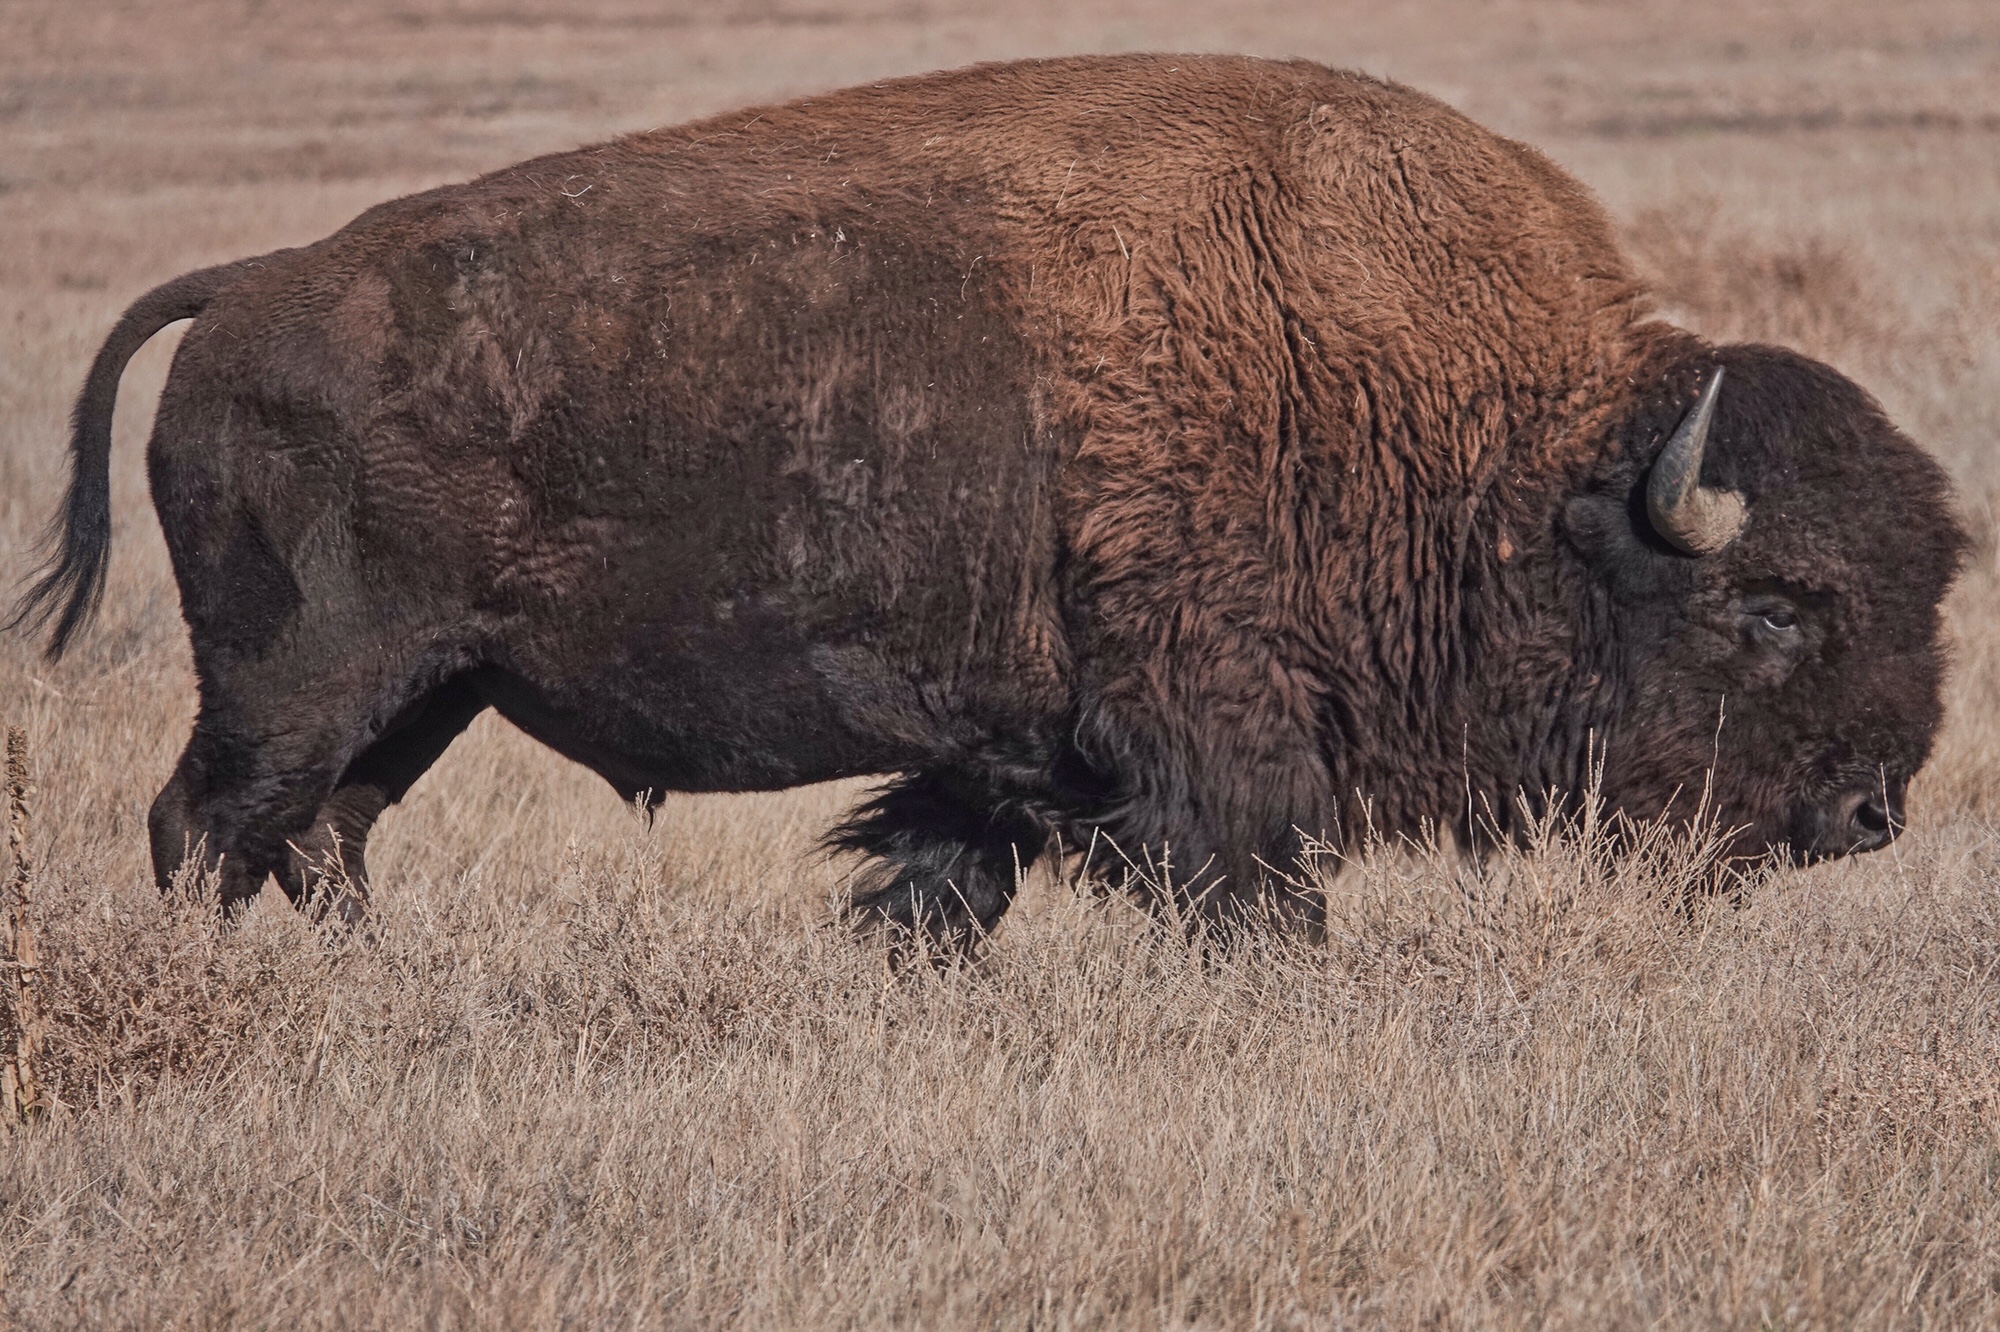
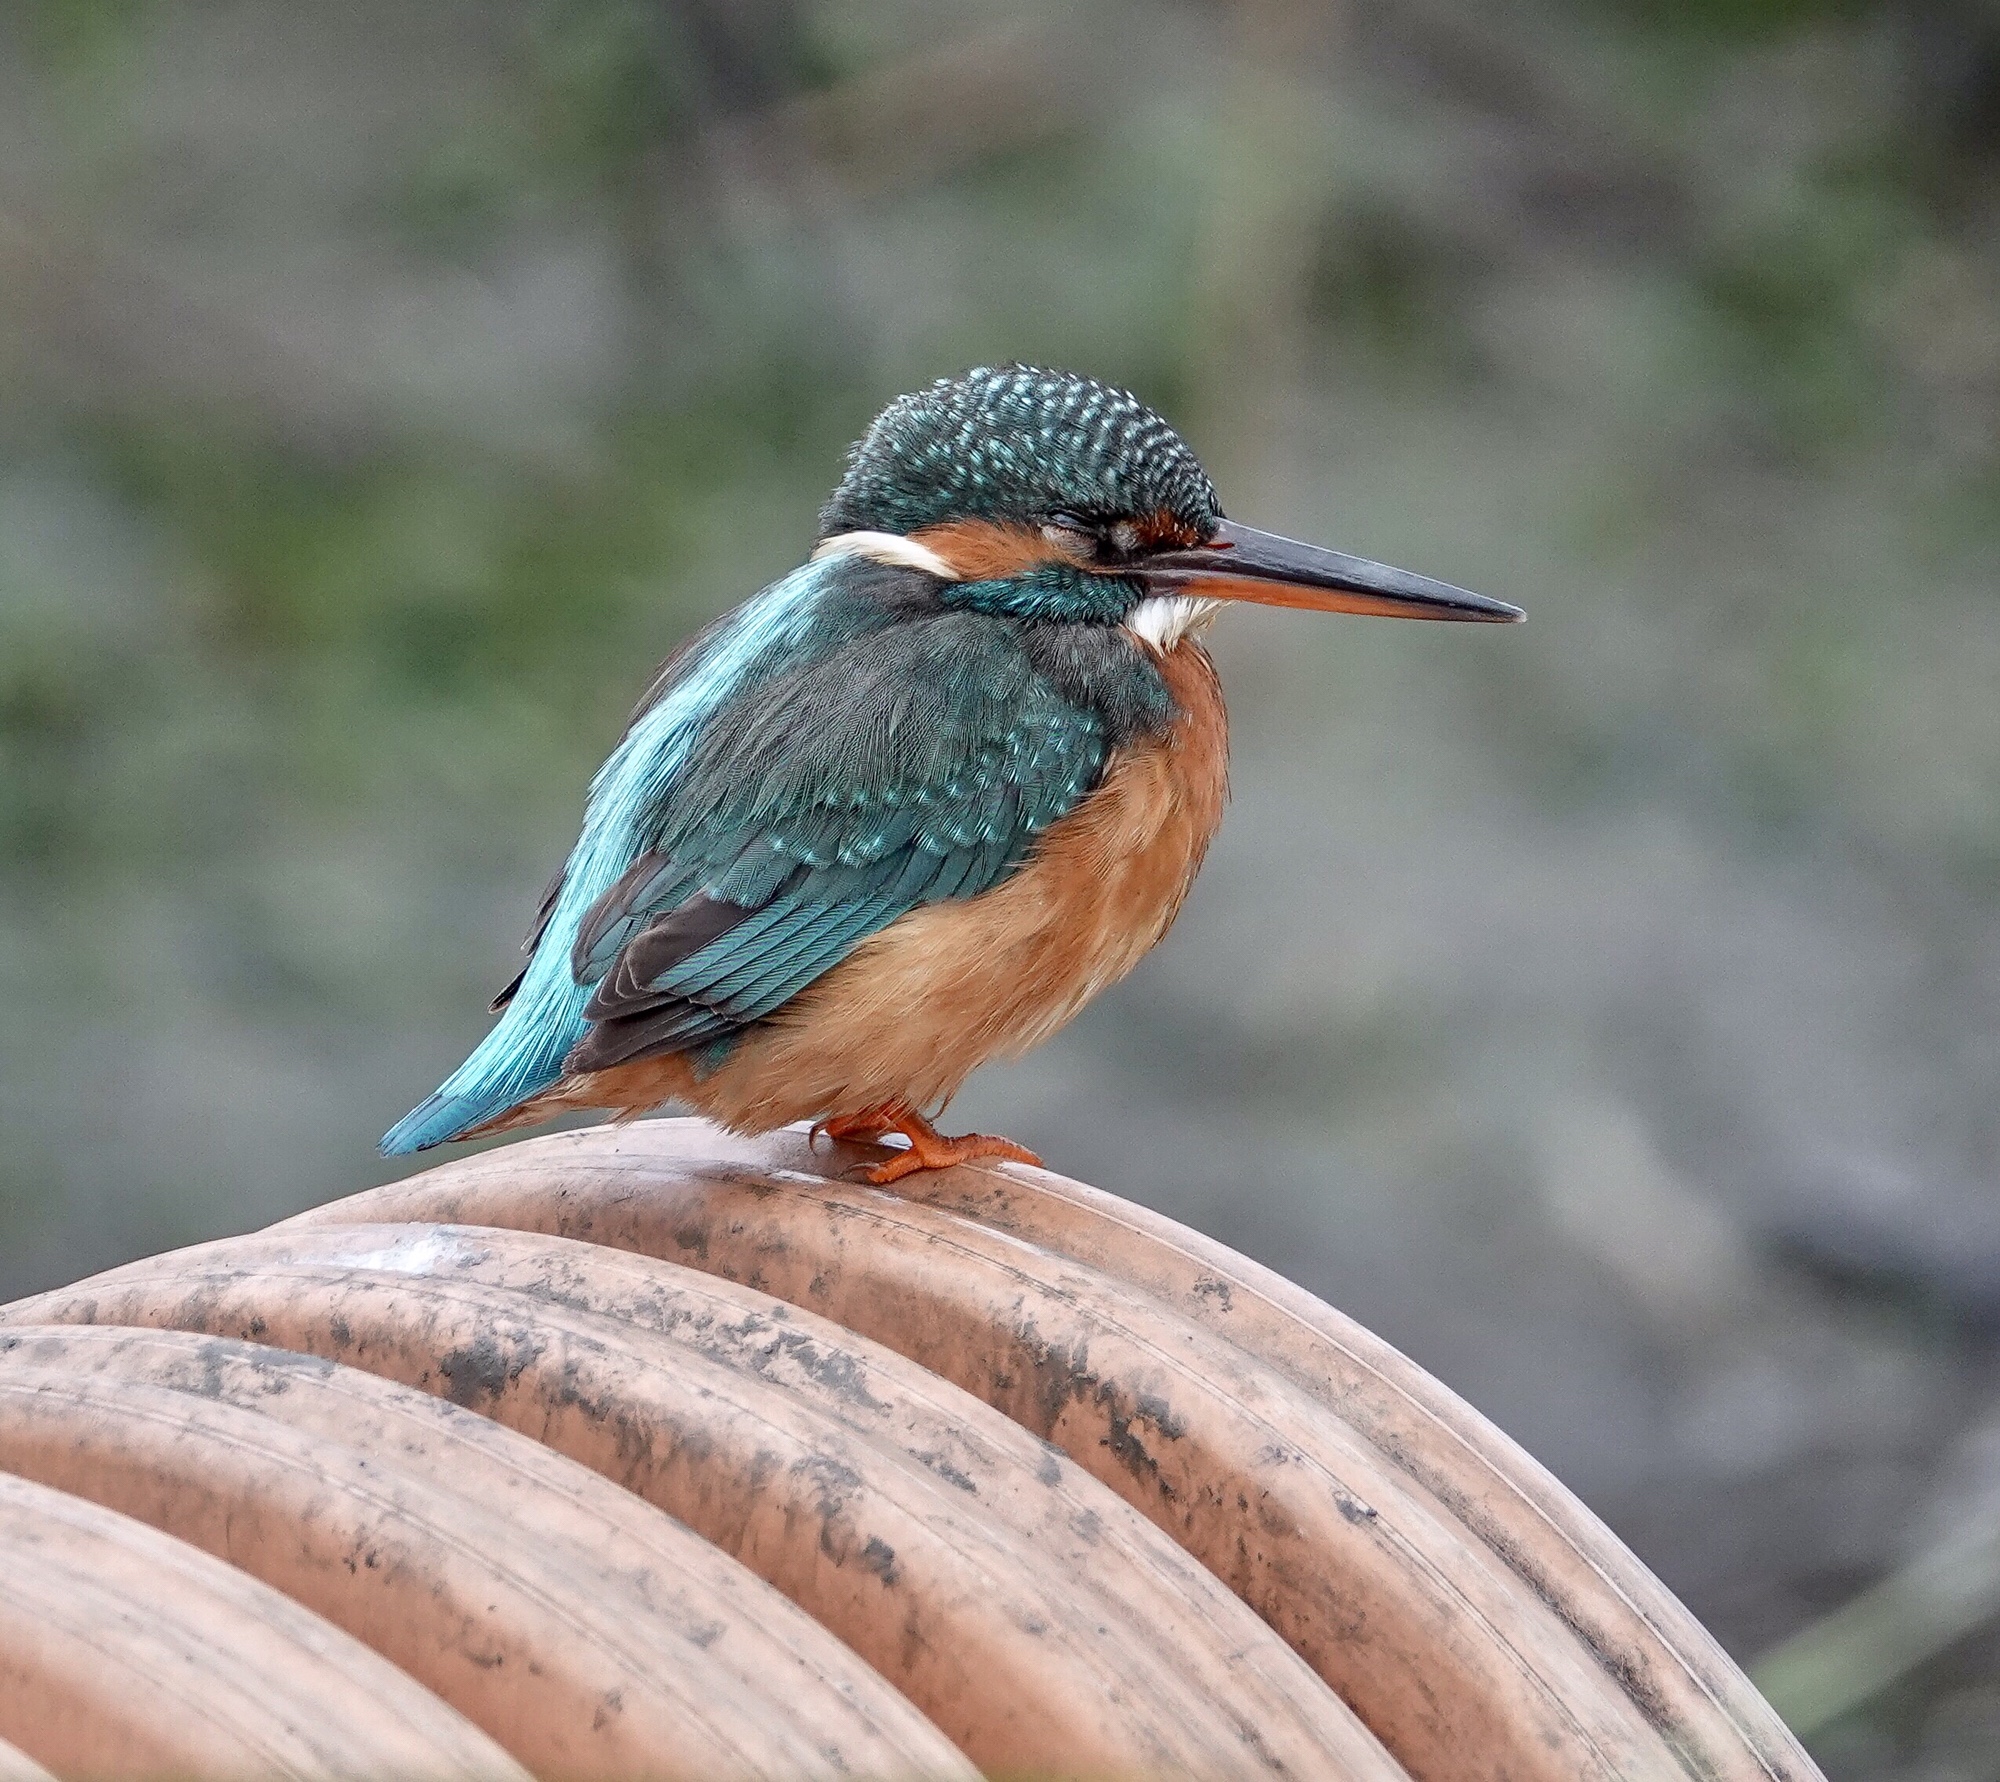
Another change is the addition of touch-to-focus on the new touch screen. It is actually more like touch-to-move-the-focus-area unless you have the camera in continuous focus mode…and it does not, like some implementations, actually take the image. You still have to use the shutter button for that. Many folks on the dpreview Sony Cybershot forum recommend turning touch to focus off, as you do sometimes accidentally move the focus point when handling the camera…however I find touch focus to be really useful. For instance, when shooting a American Bison at close range, I was able to touch the screen to instantly move the focus to the eye of the beast, where I wanted it. On close-ups of birds, I often just tap the screen, again to move the focus to the head or eye. When using Anti-motion-blur mode inside at parties, one of the things I disliked about the mode in the iii was that you lost control of the focus point. On the iv in the same mode, you just tap over the face you want in focus, and, presto, good to go.

My daughter Anna at graduation. Anti-motion blur mode for the low light, and touch to focus to make sure the camera focused on her face.

Actually touch to focus is one of the few things the new touch screen actually does. You can’t use it to set menu items or to navigate the menu system. You can, however, double tap an image in review mode to zoom it, and move the image around to view other parts with your finger. Strange choices on the part of the Sony engineers…but they tried. And, despite the occasional fumble when I get the camera up to my eye and find that the focus square is way off in the upper left hand corner, I do find touch to focus worth getting used to.

It is hard to say for sure, but my impression is that the new sensor and processing engine have also improved higher ISO performance slightly. It was already pretty good on the iii, but in similar situations the iv just seems to do a bit better. And if you are not familiar with the image quality of the Sony 1 inch sensors in the RX series, all I can say is, be prepared to be impressed. Between the exceptional ZEISS glass and the Sony sensors and processing engines, the RX series in general, and RX10iv in particular, produce images that hold up very well, at normal viewing sizes and distances, to anything on the market, including full frame cameras and lenses many sizes larger than the relatively compact RXs. Certainly if you are using the Sony RX10iv as your all around travel, wildlife, landscape, and party camera, you will have nothing to apologize for when displaying your images (and much to be proud of).

Crane against the sunset, Bosque del Apache, New Mexico. 600mm.

I already loved the RX10iii. It was the best camera I have ever had the pleasure of traveling with, and I owned it during 18 months when I visited so many wonderful places. I have only had the iv for a few months now (since a few days after it was released), but already I love it even more. It has not been as many places yet, but it will get there…and I know that when it does, it will bring back the images I want, day after day, time after time, amazing place after amazing place. I have no qualms about calling it the best fixed-zoom, superzoom, compact camera ever made. I plan on wearing it out before they come out with the RX10V (which will go to 800mm at f5.6 of course 🙂 This is my camera and I love it!

P&S in the Tropics!

Rufous-tailed Hummingbird, Rio Santiago, Lodge at Pico Bonito, Honduras
Rufous-tailed Hummingbird, Rio Santiago. Sony HX400V

The tropics provide one of the richest and most varied arrays of photographic opportunities of anyplace on earth…but they also provide definite challenges for any photographer…including, of course, Point and Shoot Nature Photographers. From the dense, dark, dim (and often damp) canopy of the rain and cloud forests to the harsh light of the dry forest and uplands in the rain-shadow of the mountains, exposure is always a difficult issue. Then too, focus in the rain forest, with all the vegetation, and the dim light, can be a real problem.  It is not much easier in the glare of the dry forest.

I recently enjoyed a week at the Rain-forest Lodge at Pico Bonito in Honduras, spending each day in different location in the area…from deep rain-forest on the shoulders of the mountains, to coastal mangrove lined rivers, to the Honduran Emerald Reserve in the dryer country inland.

It was not a photo expedition…we were primarily birding…but it gave me a chance to experience the joys and challenges of the tropics first hand, and to put my super-zoom point and shoot to the test. For stationary and particularly cooperative birds (and since it was a ZEISS sponsored trip and I was one of the leaders), I also carried a light-weight digiscoping rig…the compact ZEISS DiaScope 65FL spotting scope, a 30x wide-field eyepiece, a Canon S120 on the Digidapter for ZEISS, and the wonderful Roadtrip carbon fiber travel tripod from MeFoto…the whole thing weighing in at something under 6 pounds.

Most of my digiscoping rig. The camera and adapter are in a pouch on my waist. Great tripod!
Most of my digiscoping rig. The camera and adapter are in a pouch on my waist. Great tripod! You can see the two 7Ds and long lenses in the group.

In my group there were, of course, people carrying Canon 7Ds and either the 400mm prime or the 100-400 zoom, so I had a chance to observe and compare how the full DSLR/Long Lens rig handled the same tropical situations. I have to say, my complete outfit, super-zoom P&S, and the digiscope rig, weighed less than their body and lens…even if they were shooting off-hand. One gentleman carried a full sized tripod and a gimbal head on every outing. That is real dedication. 🙂

Blue-crowned Motmot, Lodge at Pico Bonito, Honduras
Blue-crowned Motmot, Lodge at Pico Bonito. Digiscoped with the ZEISS DiaScope 65FL

The first challenge in the tropics is always going to be light. My DSLR toting friends were shooting at ISO 6400 most of the time in the rain-forest, and I was pushing ISO 3200 for most shots. Even-so I had to dial the shutter speed down from my usual 1/640th of a second to 1/250th or even 1/160th to get enough light for a decent exposure. The Image Stabilization on the Sony HX400V handled the slower shutter speeds well, but detail at ISO 3200 suffered. I got the shots, but not always totally what I might have wanted. The tropics push any camera to its absolute limits.

To complicate matters, most P&S super-zooms have a maximum aperture of between f6.3 and f6.7 at the telephoto end…a far cry from a Canon 400mm f2.8 or even the 400mm f4. However, that is f6.x at 1200mm or greater equivalent. If you zoom back to 400mm the aperture will be not much different than the fixed Canon lens. It is always a trade off when it comes to cameras.

Boat-billed Heron, Cuero y Salado Wildlife Refuge, Sony HX400V at ISO 2500 at 1/160th second.

For the Point and Shoot photographer I recommend my standard wildlife settings: shutter preferred, Auto ISO (with the upper limit set as high as possible). Even so, at least in rain and cloud-forest, you will find yourself using slower shutter speeds than you are comfortable with…but the Image Stabilization on most Point and Shoot super-zooms is up to the challenge. On the Sony, changing shutter speed in shutter preferred on the fly is super-easy…you simply spin the wheel under your thumb…your mileage with other brands may differ. 🙂

I regret that I did not try the High Sensitivity modes on the Sony, which would have given me ISO 6400-12800 in a pinch. It might have made a difference. I will certainly give it a try on future trips to the tropics.

Blue-crowned Motmot. Sony HX400V. ISO 3200 @ 1/250th @ f6.3. Pushed to the limits
Blue-crowned Motmot. Sony HX400V. ISO 3200 @ 1/250th @ f6.3. Pushed to the limits.

Focus is a whole other issue. Point and Shoot cameras use Contrast Detection Auto Focus, which is slower and less precise than the Phase Detection Auto Focus on full sized DSLRs. It also requires more light to work effectively. You will certainly want your focus area set to the smallest possible square in the center of the field, so that you have a chance to focus on the bird through the dense foliage.

Even then, I found myself resorting to Dynamic Focus Assist on the Sony HX400V much more often than ever before. The Sony focus system allows you to maintain auto focus, and fine-tune it using the focus ring around the lens barrel, just as you would focus a manual focus lens. It is, without a doubt, the easiest manual override auto focus of any P&S camera on the market, and I certainly appreciated it by the end of my time in Honduras. The only thing that would have made it better would have been a higher resolution Electronic View Finder so I could have seen when the bird was in focus more easily.

Almost all P&S super-zooms today have some kind of manual override on the auto focus…or straight up manual focus…but none are as quick, easy, and intuitive as the Sony system. Still, if you are headed for the tropics, dust off your manual and find out how to manually focus your camera. 🙂

Black-faced Grosbeak, Sony HX400V. Tricky focus requires manual override.

For all the difficulty in focusing, however, I am pretty sure I got as many sharply focused images as my DSLR friends. Birds under the canopy will generally sit still long enough to find focus.

Of course, there are areas in the tropics that have lots of light! We visited the Cuero y Salada Wildlife Refuge at the junction of two mangrove lined rivers near the Caribbean coast. To get there we rode a “banana train”…a narrow guage, open car, toy train that was used in the early 1900s to transport bananas from the plantation near the coast, 9 km inland to the railhead. Despite the fact that there were local paying passengers on the train, we stopped often for birds along the way.

Even along the river we found some birds in good light. And, with enough light, the super-zoom P&S always performs well. These shots are satisfying, especially since they were taken hand-held from a boat.

In the dry forest, and in the inland valleys, the super-zoom gave me the reach to capture birds from the bus on the road, and from respectable distances in the forest…as well of macros of some interesting butterflies.

And of course, at the wide end the P&S super-zoom captures the grand tropical landscape.

Sports Mode, or tracking auto focus, even makes hummingbirds at feeders and perched possible.

Just for sake of interest I will share one more digiscoped image, again taken with the Canon S120 P&S through the 30x eyepiece on the ZEISS DiaScope 65FL spotting scope, using the Digidapter for ZEISS and the MeFoto Carbon Fiber Roadtrip tripod. This is a particularly difficult shot due to the low light and the foliage between me and bird.

Ivory-billed Woodcreeper, digiscoped at ISO 3200.

So, how does the P&S super-zoom fair when compared to a full scale DSLR/Long lens rig in the tropics. My good friend Diane Porter was shooting beside me most of the trip, with her Canon 7D Mk2 and the 100-400mm Canon IS Zoom. She has kindly allowed me to borrow a few of her shots for comparison. Of course, her shots had to be heavily cropped to equal the scale of the 1200mm equivalent zoom on the Sony. It is a testimony to the quality of the Canon 7D Mk2 that the images hold up so well to heavy cropping.

You will notice that the better the light, the closer the Sony P&S comes to the full sized rig. The first comparison is not totally fair to the Sony, as I used the full 2x Clear Image zoom for the equivalent of 2400mms of reach. Digital zoom (while the Sony system is among the best), will never equal the quality of optical zoom.

I will give you one more comparison. This time it is a digiscoped Trogon, digiscoped at the short end of the digiscoping range…and again at 3200 ISO to cope with the low light levels under the rain-forest canopy.

(Just for fun, here is Diane and her rig, playing host some kind of whiptail lizard.)

Diane Porter and a visitor. This is a trick you can not do with a P&S.

Photography is about choices as much as anything. When we choose the compact ease and flexibility of a Point and Shoot super-zoom over the more conventional DSLR/long lens rig, we know that we will sacrifice some image quality. Conditions in the tropics test the limits of any camera and lens, but all in all I will still be packing my P&S super-zoom on my next tropical adventure!


Point and Shoot: reality “reproduced” or reality “rendered”?

Anhinga wing. Florida. Sony HX400V

Photo geek discussions of image quality often revolve around the presence or absence of artifacts in the image when viewed at high resolution and large sizes. The theory among serious photographers seems to be that a good digital image should have very few visible artifacts, no matter how big you blow it up.

Digital artifacts come in several flavors. One of the more obvious ones is color, tone, and detail smearing, often referred to as the water-color-effect. In areas of the image with very fine visible detail the colors tend to run together in a muddy mix, and fine detail looks smeared as though a wet brush had been dragged across it. This is especially evident in grass at distance and at the edges of the frame and foliage. Then there is postering. Areas of smooth tone, like the human face, clothing, or the sky take on a poster like look, with visible edges between two areas of tone that should blend into each other. Another is blocking, where jpeg compression creates a pattern of tiny blocks instead of smooth color gradations. This is generally accompanied by the jaggies…another jpeg compression artifact, that produces a step like line where a smooth curve should be. Finally there is an artifact called over sharpening, which produces hard edges and even halos (bright lines) along the edges of objects in the image, as well as contributing to the postering effect.

In addition, small sensor cameras can suffer from mottling and color noise in smooth tone areas…especially in the sky. This produces a blotchy, freckled look where there should be a smooth expanse of blue. Color noise is especially easy to see in dark areas of the image. There might be little rods of red, green, and blue scattered in the shadows.

Generally speaking, none of these artifacts can been seen at normal viewing size or in prints under 8×10, though in an image where they are very present, the effect can be general loss of subtlety. People might say the photographic image looks more like a painting than a photograph. Generally though, you have to view the image blown up to nearly full resolution on a good high resolution monitor or LDC panel to see the artifacts. They can also show up clearly in large prints made from infected files.

This image from an older Point and Shoot superzoom shows most of the painterly artifacts discussed above.

It is a pretty standard criticism of Point and Shoot cameras and sensors that the images have too many artifacts. Some photographers will argue that the built in processing engine in any camera that saves the images only as jpeg files will produce an unacceptable level of artifacts…since many of them come from jpeg compression, and less than subtle in-camera processing. This is why P&Ss that record images in the RAW format (unprocessed) are generally considered higher quality than cameras that do not.

There is a name for those photo geeks who are really hung up on the artifacts issue. They are called pixel peepers (since they blow images up until they can see the individual pixels) by those with a more relaxed attitude. Of course I am pretty sure the pixel peepers consider the rest of us to be something less than serious about our image quality.

I will admit to having gone through my pixel peeping phase. Only a few years ago, some P&S cameras had such complex and such obvious artifacts that it was very easy to be disappointed with the results for anything but casual use. The images really did look like bad paintings at anything bigger than your standard laptop screen size.

Recently though I have come to suspect that there is more to this artifacting issue than might be immediately apparent.  I began to wonder if the artifacts in the best of today’s Point and Shoot cameras might be intentional…the result of the aesthetic engineers attempts to get the best performance out of the tiny sensors in Point and Shoot cameras.

Part of my suspicion is fueled by the undeniable fact that the image quality of Point and Shoot cameras, at least when images are viewed at reasonable sizes, has improved steadily over the past few years…yet the pixel level artifacts remain.

And part of my suspicion is fueled by the realization that all digital images are in fact closer to paintings than to conventional photographs. All digital images are renderings of reality, not reproductions.

I believe what we are observing in recent Point and Shoot camera generations is that the computing power and the sophistication of the processing engines (software) built into today’s cameras has gotten to the point where the jpeg renderings of the files for display are simply very, very good…so good they consistently fool the human eye into seeing more detail and more subtle color that is actually in the file.

For years, the stated purpose, or at least the underlying assumption, behind digital photography as been to improve the technology so that the camera can accurately capture, or record, the full range of light and dark, every subtle shade of color, and finest detail of every texture that our eye can see in the world around us. And we have made great progress toward that goal.

However, the truth is that no matter how accurate our recording, to be of use, the data that we capture has to be displayed using a pattern of tiny glowing bits on a monitor or LCD panel, or transformed into a pattern of ink dots on paper that can be viewed by reflected light. The resolution and color depth of displays continues to improve, and printers to evolve, but we have to remember that, no matter what the camera records, we do not have an image until it is rendered for display.

And, of course, someone has to decide how the raw data is going to be translated into a file that will drive a display or printer. Most professional and many advanced amateur photographers want to be the one to make the decisions…admittedly subjective, aesthetic decisions…on how that translation is going to happen. They work with RAW files and process them at the full resolution and color depth the sensor provides, and only translate them for display or printing at the last possible moment.

But the fact is, of course, that no sensor made today can capture what the eye sees, and no display technology can display it. Therefore part of the process of translation is always to adjust the data captured to compensate for the limits of the sensor and then tailor that data to the limits of the display technology available. All with the goal, of course, of displaying what the eye saw, or at least what the mind (heart) intended.

That is what I have come to call rendering the image. All digital images today are rendered for display, in much the same way we understand that a painter renders the scene before his/her eyes or in his/her mind. We might use digital technology, but our photographs are as much paintings as the work of any impressionist, and actually use a very similar theory of imaging…breaking the image down into bits of color and pattern, and reassembling bits and patterns of color to represent what we saw. That is the essence, as I understand it, of impressionistic painting.

When the aesthetic engineers at the today’s camera companies are faced with getting the most pleasing results out of a tiny sensor, they have to make decisions based on how the image will be displayed. Knowing the likely limits of resolution and size of the display, and the likelihood that the display will be digital itself, they have opted to program the camera to render the image for apparent detail and smooth tones at those sizes.

This requires a different approach to rendering than you might use in an idealized large sensor camera.

A really good painting produces the illusion of much more detail than is actually there. Walk up close to any painting and see how quickly the image dissolves into artifacts…how close do you have to be, in fact, to see the individual brush strokes and blobs of paint? Or to see that what looked like grass in all its glory was actually a swath of green paint with some clever strokes of yellow and black that tricked the eye into seeing the detail that is not there? How close do you have to be to see that the fully formed human face that you appreciated from 6 feet is actually a single brush stroke with a suggestion of eyes and mouth dabbed in?

Okay, so that is an extreme example…but I believe it captures the essence of the quality we are seeing in today’s best Point and Shoot cameras…especially in the jpeg files the cameras are designed to produce.

Perhaps the aesthetic engineers at Sony, to pick a company often criticized for their artifacty images, are not attempting to produce a smooth toned, finely detailed reproduction of the world through the lens, so much as they are attempting to render an image that, when viewed or printed at reasonable sizes, produces a satisfying impression of fine detail and smooth tone.

Admittedly, if you pixel peep, the artifacts are still visible, just as you can see the brush strokes and blobs of paint in a painting if you get too close, but with each generation of Sony Point and Shoot cameras, with increasing pixel count and processing power…as well as increased software sophistication…the rendering of reality has gotten finer, more detailed, more subtle…more satisfying.

I do not believe there is any other way to get satisfying performance out of a small sensor. We know, in selecting a Point and Shoot superzoom that we are making a compromise based on flexibility and compactness. No other camera can offer us an equivalent range in such a tiny package. That is the attraction. To get that means a small sensor…and satisfying image quality at reasonable viewing sizes from a small sensor requires an impressionistic rendering of the image. That is just a fact of life.

In fact, it is pretty miraculous, and evidence of great skill and dedication on the part of the artist-engineers, that a tiny 20mp sensor and a tiny computer in the camera can render such a high quality image, in a compressed format like jpeg, that allows easy, fast file movement.

At the other extreme, at the true professional end of the photographic spectrum, we are seeing more and more high pixel count full frame sensor cameras…and more and more high resolution displays and printers. And ever increasing power in the desktop and laptop computers we use (even in tablets these days) to process the high resolution RAW files. That is the other way to produce satisfying renderings of reality…the only way if you are going to display images on 4D and higher resolution displays and at print sizes, say over 24 inches. But even with the rich clean data of a big sensor, some kind of intelligent, intentional rendering of the image for display will always be required, whether it is done in-camera or after the fact.

Need visuals?

Green Heron at screen resolution. Sony HX400V


Detail at approximately 1 to 1.


Detail at approximately 4 to 1.

In the images above we have an example of pixel peeping. The top image is presented at screen resolution. By clicking on it you can view it at its full uploaded resolution of 2000×1500 pixels. You will see at anything up to that size (and considerably larger actually) the image looks great…excellent rendition of detail and color…certainly very satisfying. Until recently an HD computer monitor or LCD screen was 1900 pixels across, so this image would fill the screen. It would make a 10×8 inch print at 200 dpi…excellent quality.

The next image shows a small segment of the first blown up so that you can see each pixel. That would be the equivalent of full screen view on a monitor with a resolution of 5184×3888 (twice the resolution of highest resolution LCDs currently in production), or a print 25 inches wide. At that size the artifacts are just beginning to show. Still, from anything more than a foot away, the image on an HD screen or the 25 inch print would look amazingly detailed, smooth, and satisfying.

The final image is an even smaller segment of the first, now blown up to 4 to 1…four times full resolution. At this scale the artifacts are obvious…but it is the equivalent of a print 100 inches wide! Even at that scale, from more than 4 or 5 feet viewing distance, the image would still look almost as good as it does on at screen resolution. Don’t believe me. Next time you are in an airport, take a really close look at one of those wall sized images. 🙂

So, bottom line. The artifacts you see in Point and Shoot images when you pixel peep are necessary to the pleasing effect of the images viewed at normal viewing sizes. If you have opted for the convenience, the flexibility, the compactness of a Point and Shoot superzoom…just enjoy the results it is designed to produce. Do not pixel peep. The artifacts you do not see can not hurt you…and you will get full enjoyment out of the images you bring back…images that you would be unlikely to get with any other camera!