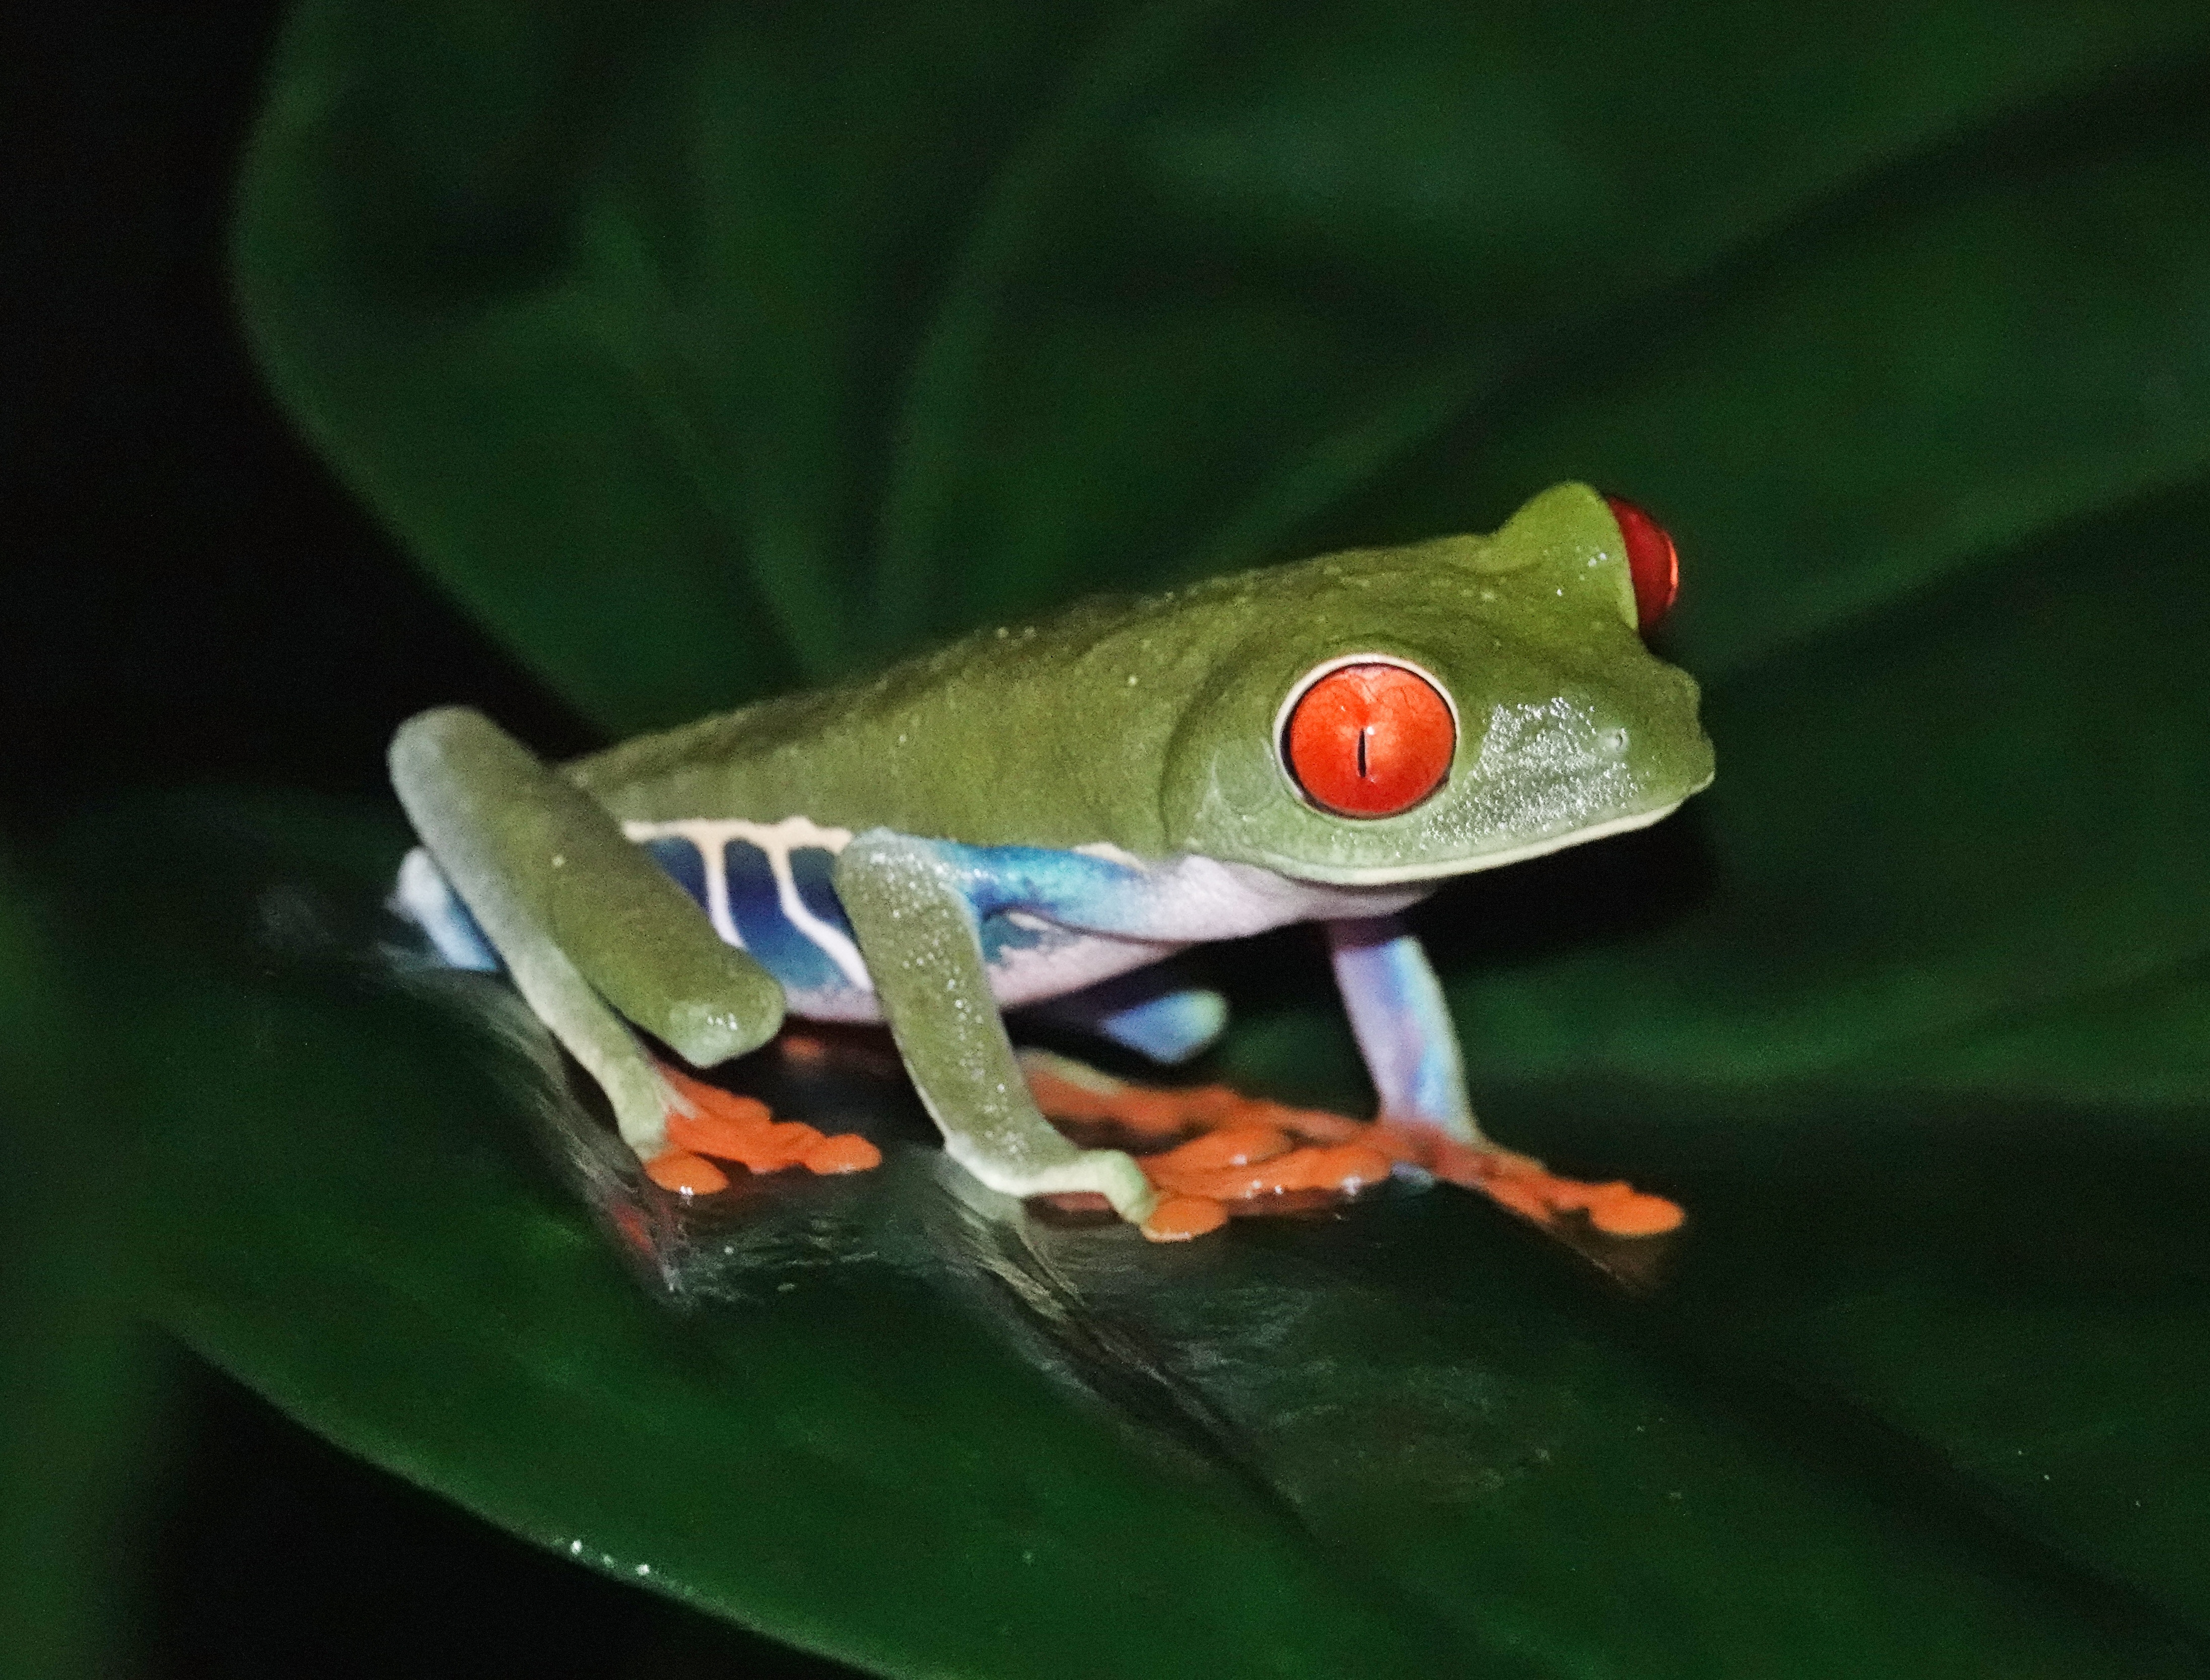
In Costa Rica, you are not allowed to use flash at night when photographing frogs (to avoid damaging their eyes and disrupting their night time routine…in fact flash is discouraged in wildlife photography of any kind in Costa Rica…where it is not actually illegal). In the past I have used a good led flashlight, most recently a Everready daylight balanced flashlight, held beside my camera, with the camera set in “Anti Motion Blur” mode. I have gotten some good shots, but in Anti-motion Blur mode it is not possible to adjust Exposure Compensation and keeping the whites on the Red-eyed Leaf Frogs in check has been difficult. At close distances I often had to turn the flashlight down or shine it slightly off to the side, which pushed my ISO’s higher than they needed to be.
On this year’s Point and Shoot Nature Photography Adventure in Costa Rica, I made two changes to my technique.
1) Inspired by ads for a similar, but much more expensive, device on Facebook, I searched Amazon and bought a little light cube, normally used for shooting video. It mounts in the flash shoe of the Rx10iv and has three levels of adjustable illumination. It was under $30 and came with the flash shoe mount and a set of color filters to change the color temperature. It is roughly daylight balanced as it is.
light cube from Amazon
2) I experimented with “multi-frame-noise-reduction” instead of anti-motion-blur. It does not have the motion processing of AMB but it still takes 3-4 images at a lower ISO and stacks them. Since high ISO noise in an image is random, stacking 3 images tends to ”average out” the noise. I was concerned that if the frog moved…or, more likely, if I moved the camera, the multiple frames would not stack correctly…but in practice it worked better than I expected. MFNR allowed me to dial in the EV for best results and, if I was very careful with motion, to even use Clear Image Zoom. In fact, MFNR did a better job of stacking exposures and I did not have to use much EV compensation at all.
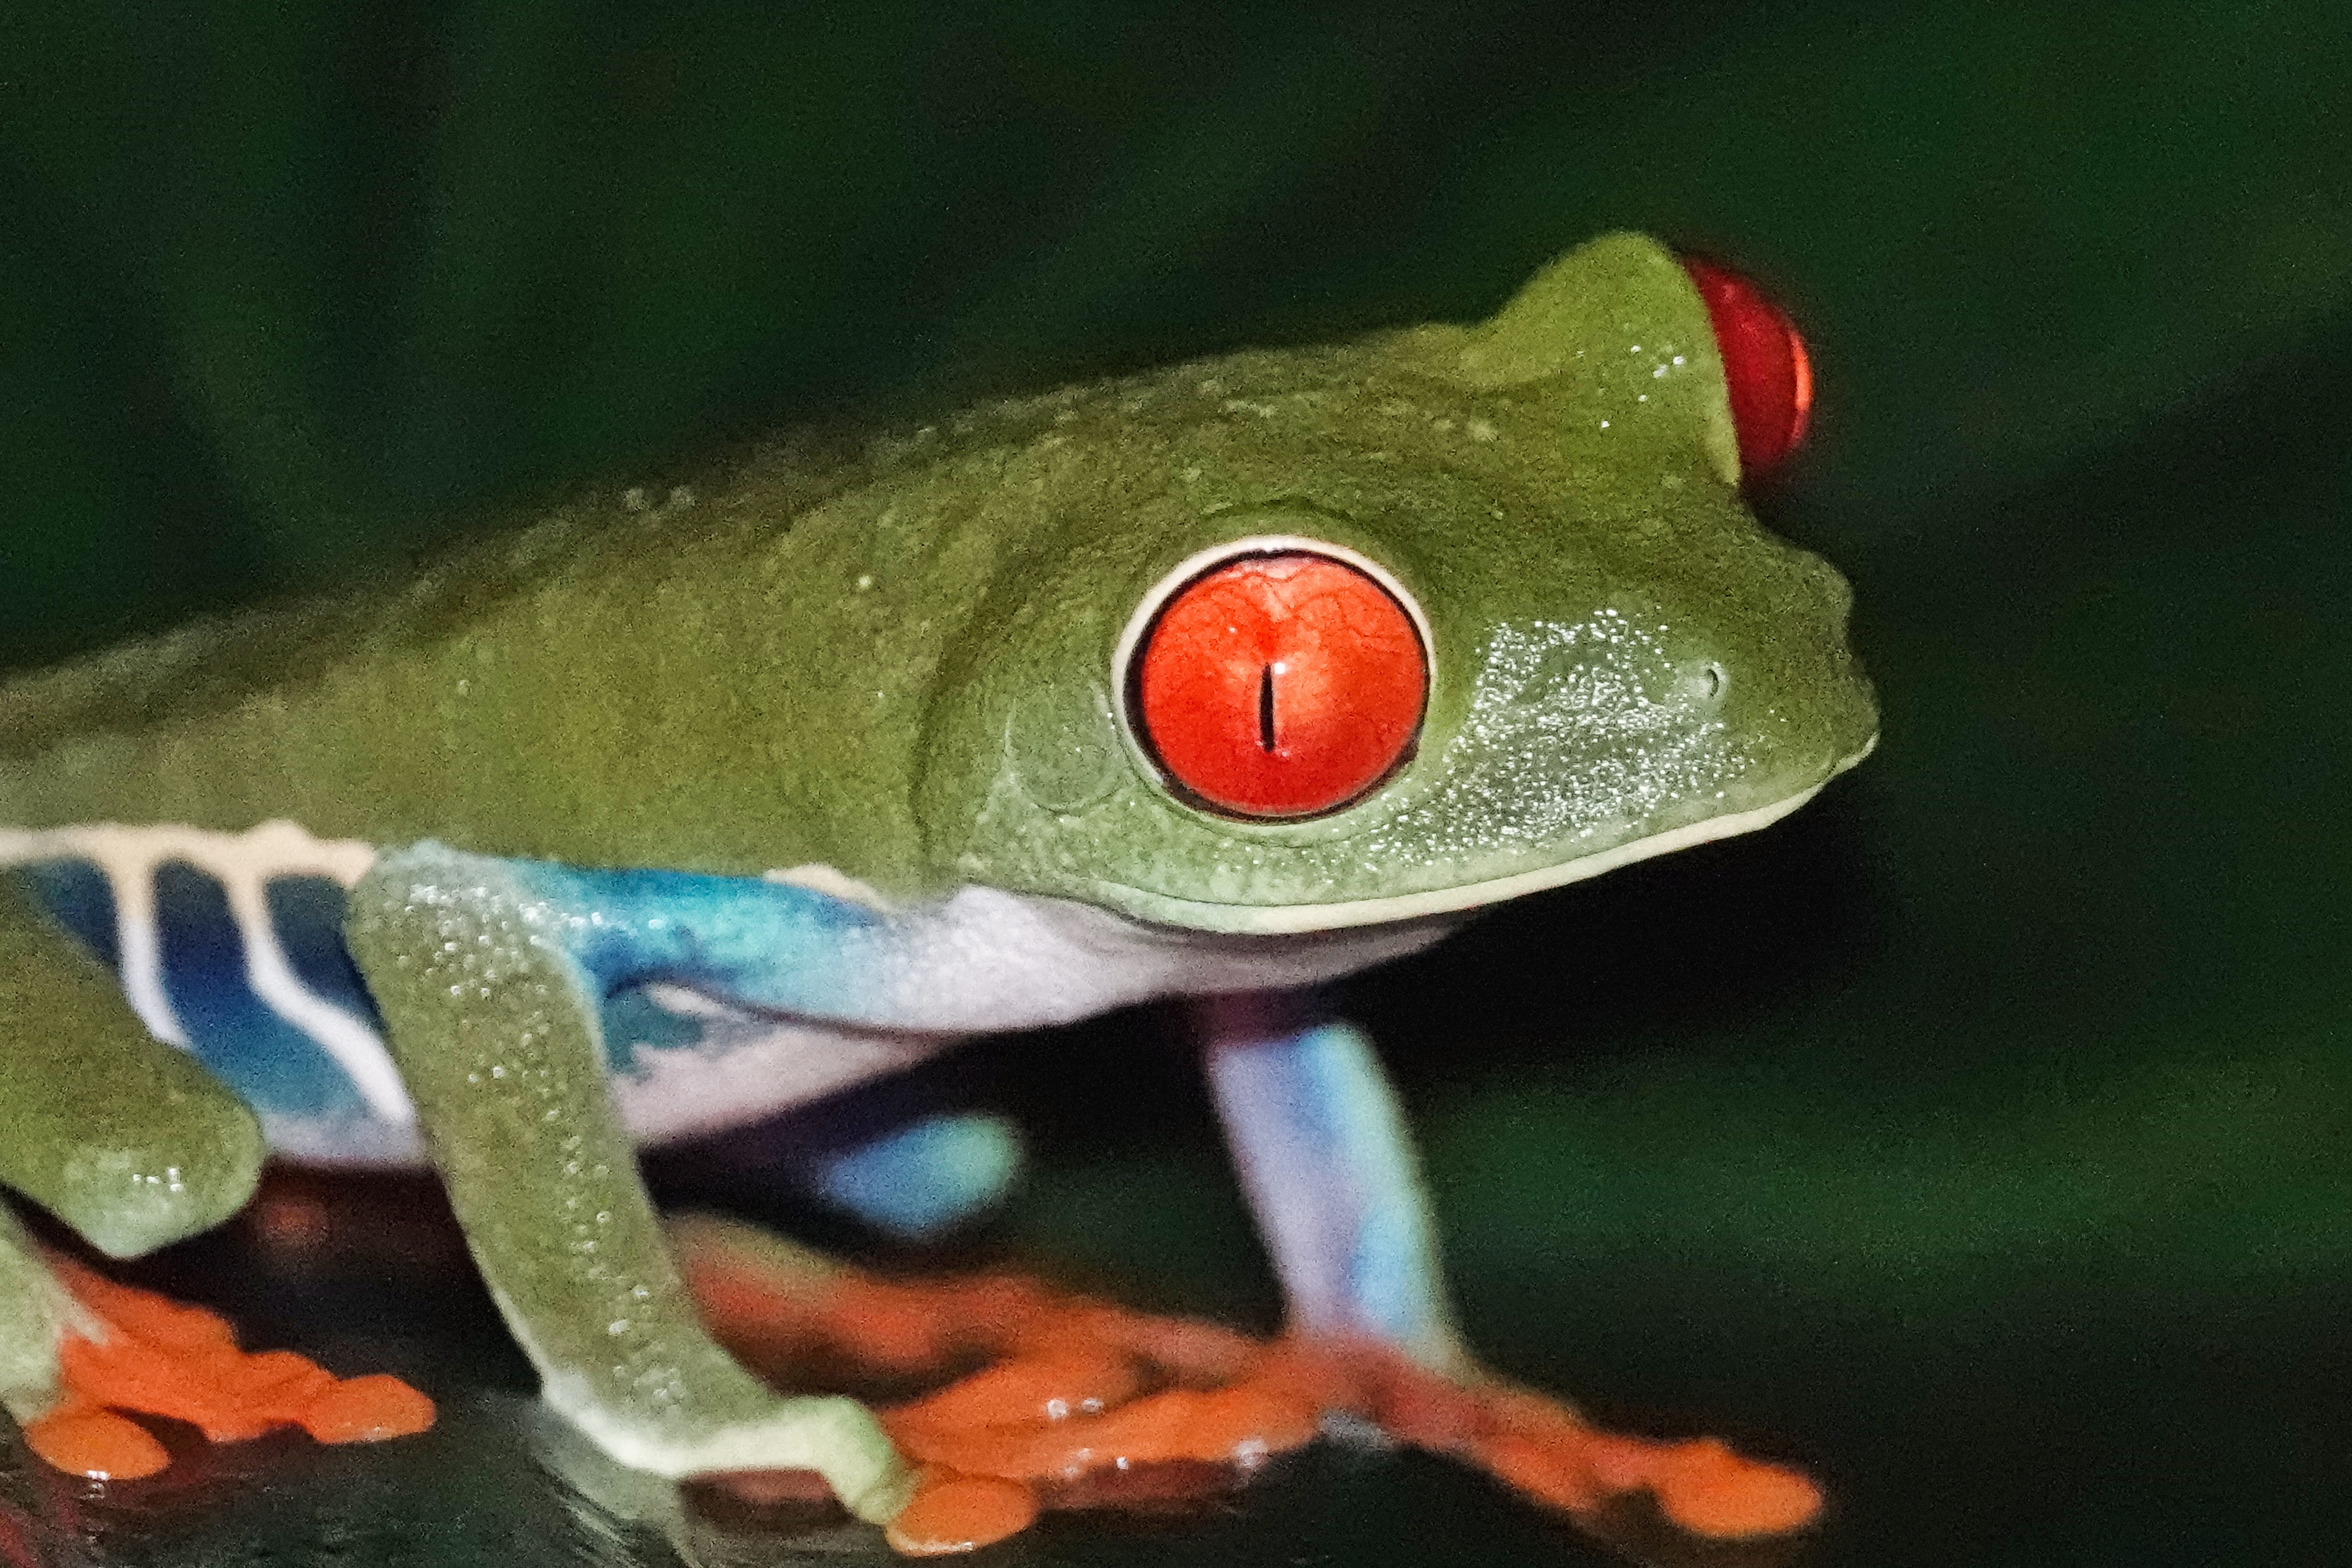
With some Clear Image Zoom, for an extreme close up from about 5 feet.
What I also found was that the daylight balanced light cube did not disturb the frogs at all. With flashlights, the frogs first shut their eyes and then hunker down to make themselves as small as possible. You have to be quick to get a shot before they respond. With the light cube I could work a frog for many moments and it did not even close its eyes, much less hunker down.
If you do any night photography, I highly recommend you check out a light cube. They are available from a number of vendors on Amazon, and are inexpensive. They are also way easier to work with an a separate hand held flashlight, and seem to disturb the subject less. What is not to like?
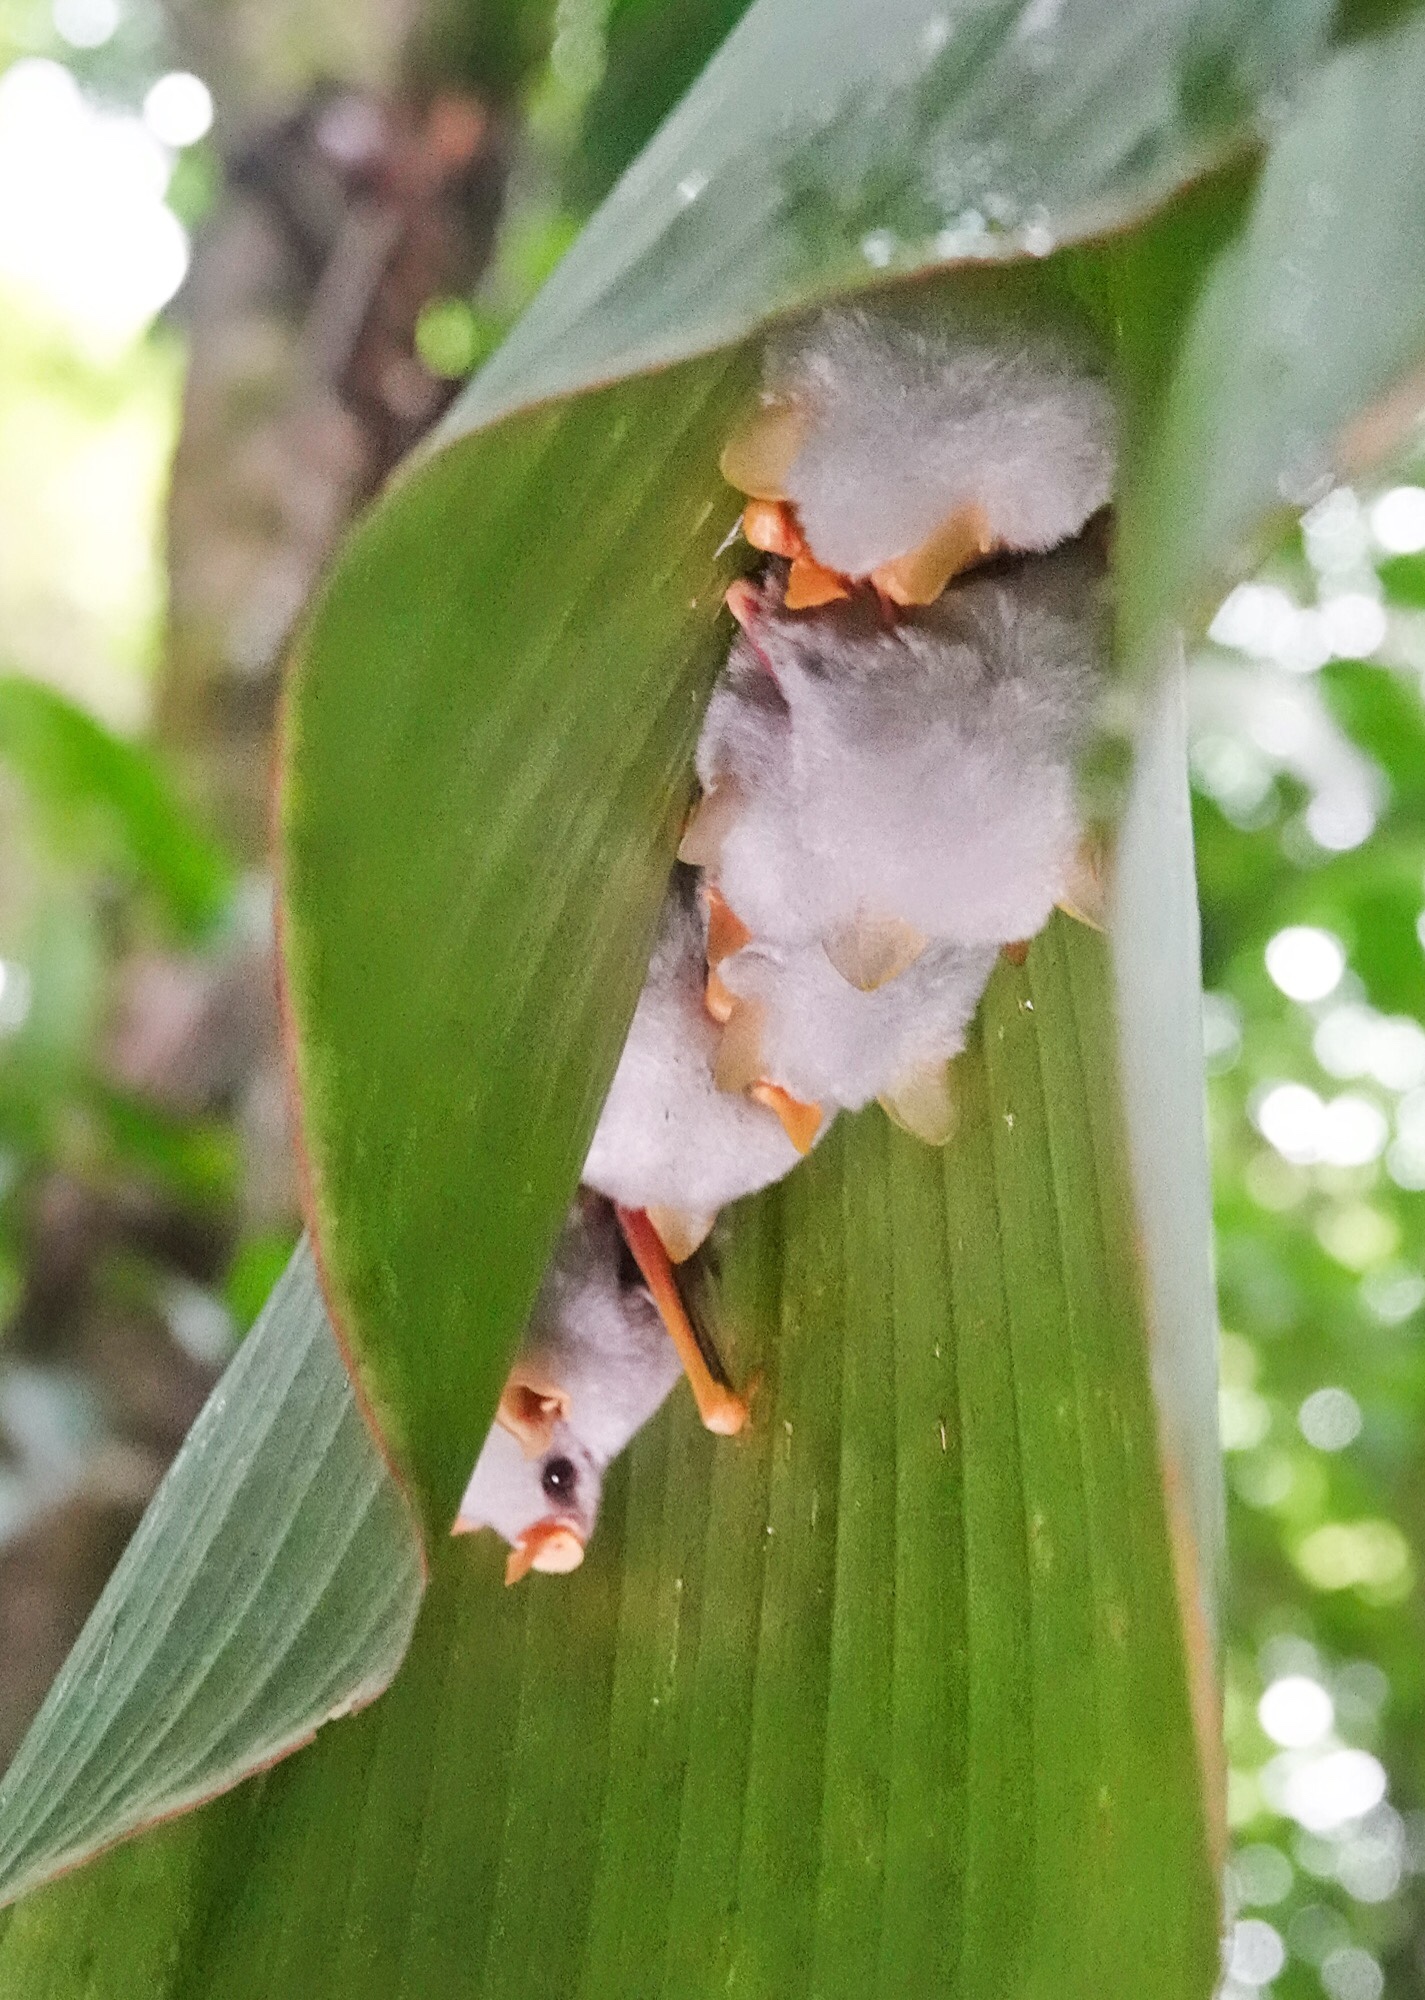
As a final note, while in Costa Rica I worked with Cope, an artist and naturalist who lives in La Union (Donde Cope). He was using an LED array…also sold for video work…with over 150 leds. It seemed to provide a very non-directional light source, much like natural daylight, and would, I think, be very useful for hummingbirds and other birds in low light. That will be my next experiment. This shot of Honduran White Tent-making Bats up under a leaf under heavy canopy was taken using his hand held Led Array, but they do mount in your flashshoe as well. Note how natural the shadows look.
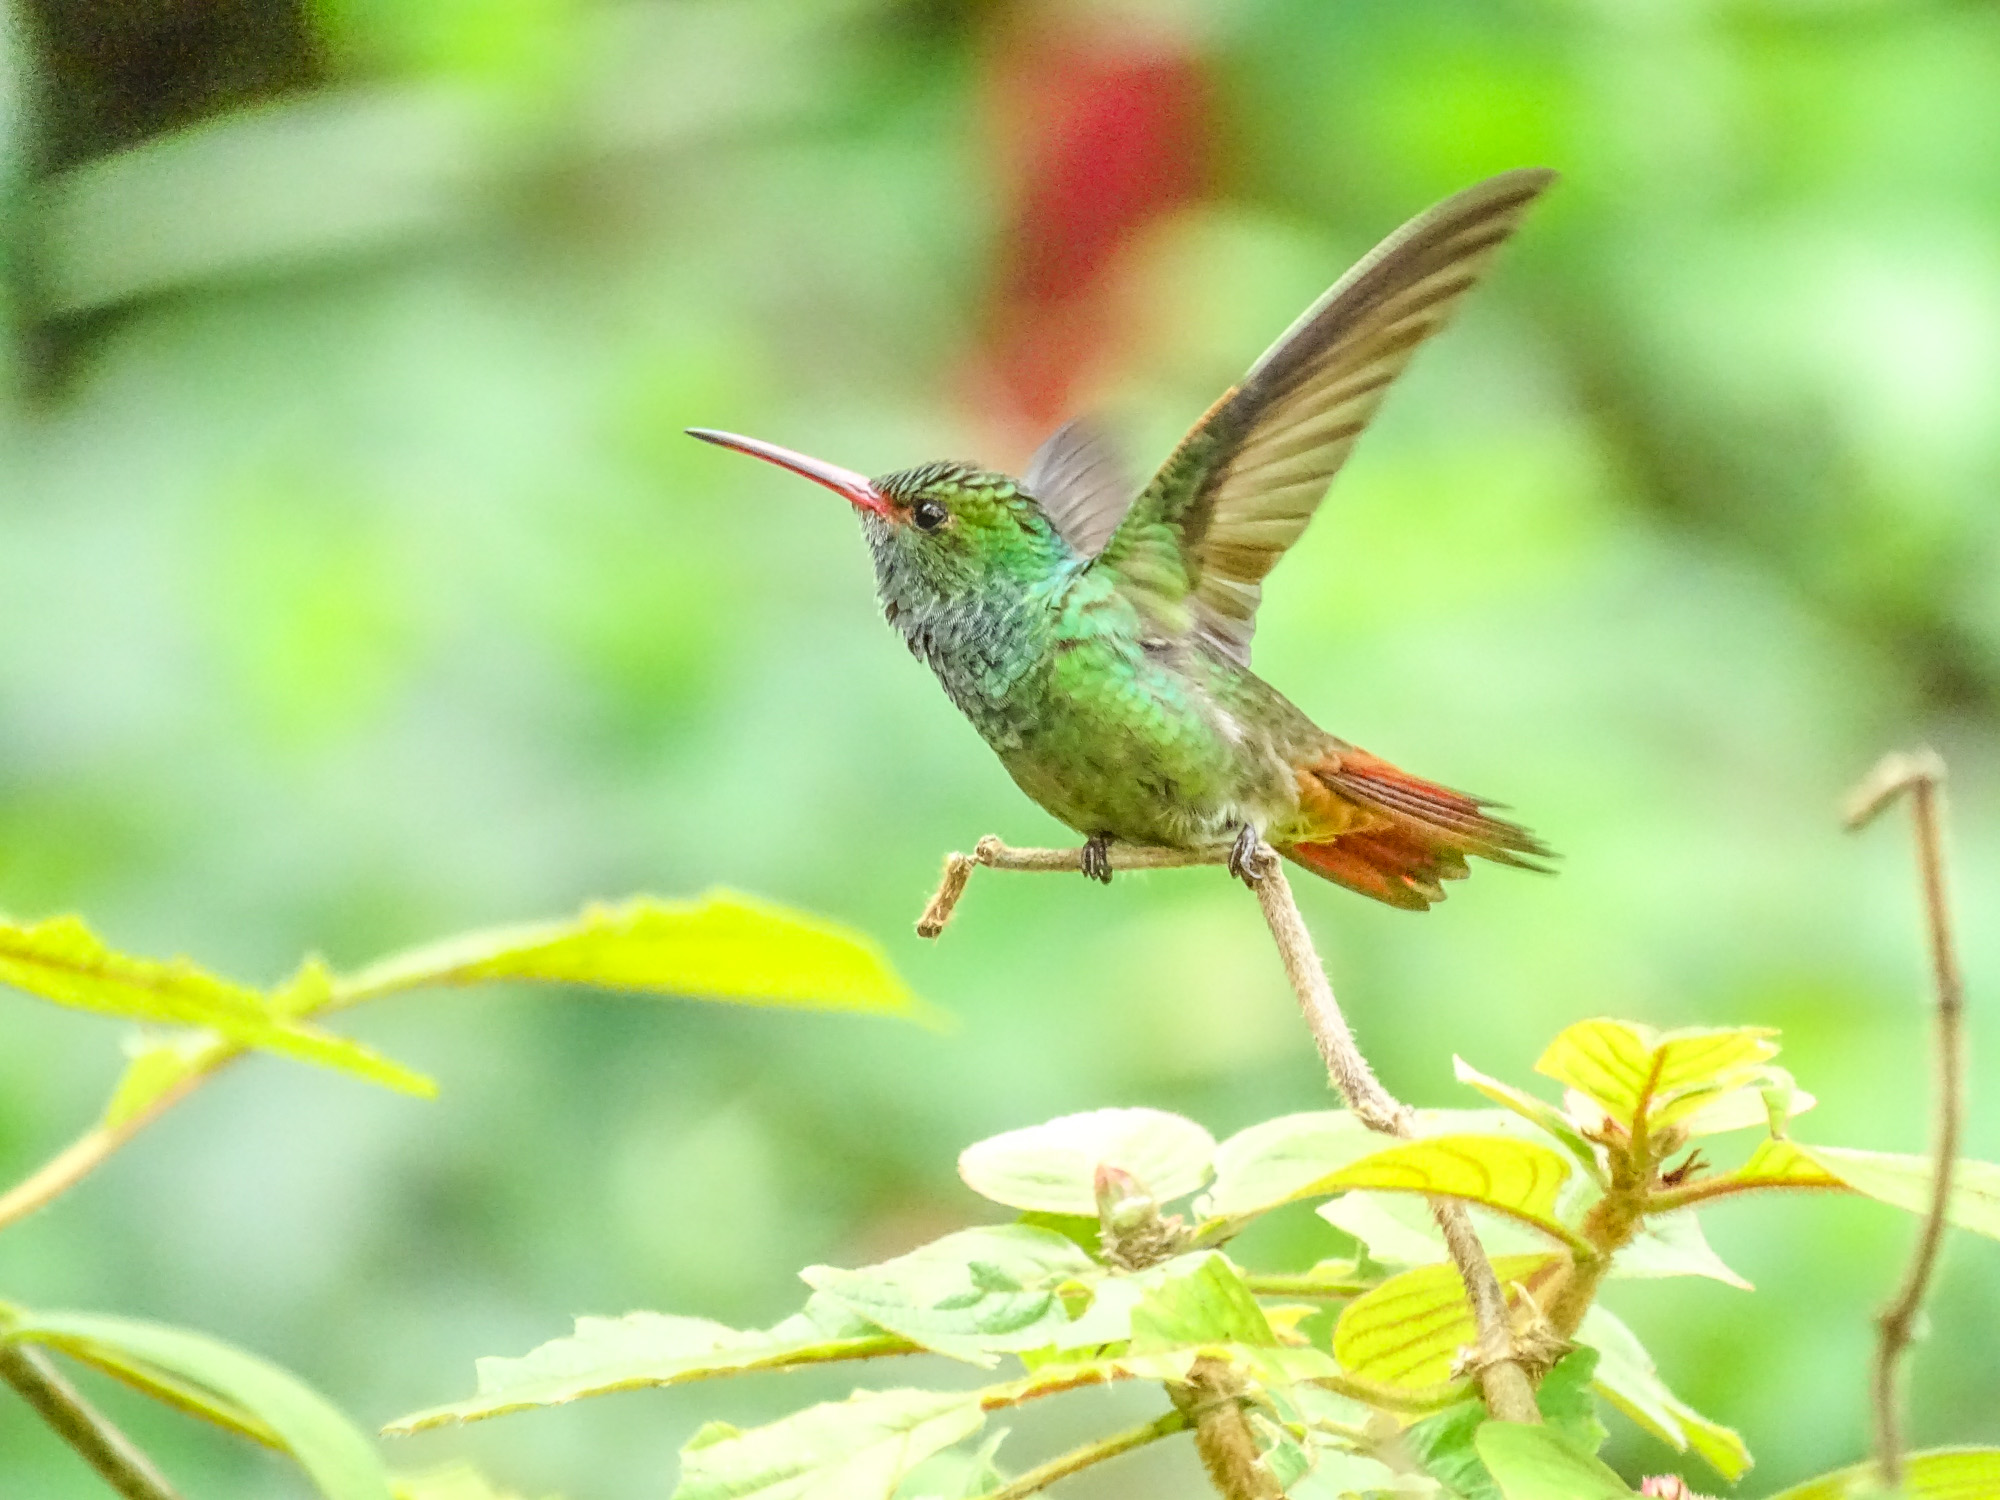
Rufous-tailed Hummingbird, Rio Santiago. Sony HX400V
The tropics provide one of the richest and most varied arrays of photographic opportunities of anyplace on earth…but they also provide definite challenges for any photographer…including, of course, Point and Shoot Nature Photographers. From the dense, dark, dim (and often damp) canopy of the rain and cloud forests to the harsh light of the dry forest and uplands in the rain-shadow of the mountains, exposure is always a difficult issue. Then too, focus in the rain forest, with all the vegetation, and the dim light, can be a real problem. It is not much easier in the glare of the dry forest.
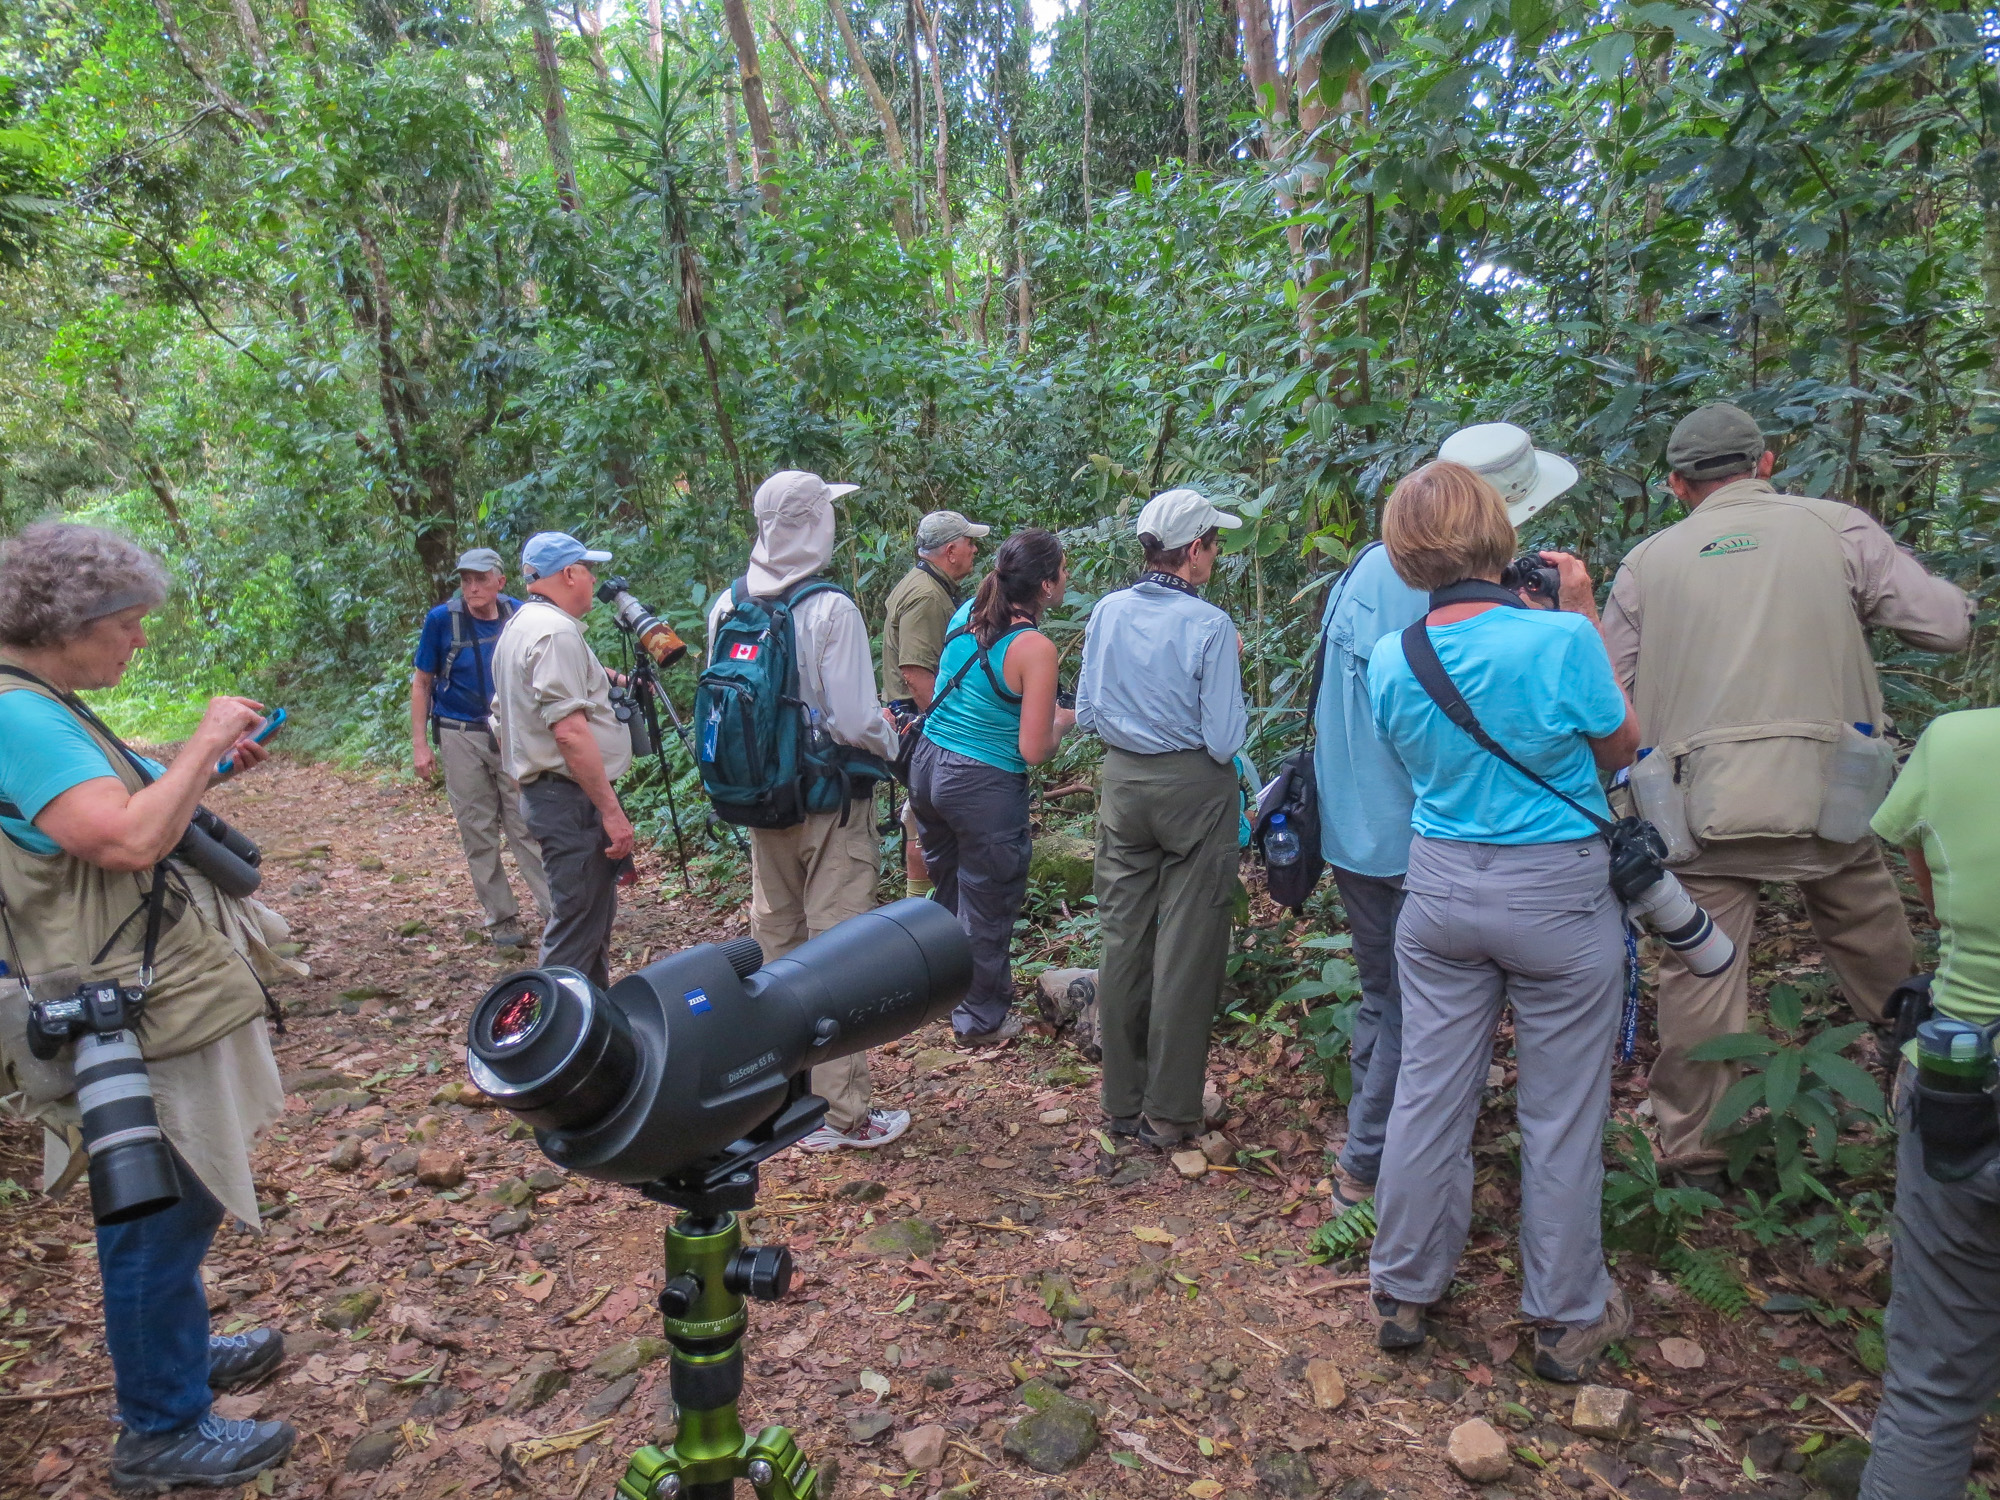
I recently enjoyed a week at the Rain-forest Lodge at Pico Bonito in Honduras, spending each day in different location in the area…from deep rain-forest on the shoulders of the mountains, to coastal mangrove lined rivers, to the Honduran Emerald Reserve in the dryer country inland.
It was not a photo expedition…we were primarily birding…but it gave me a chance to experience the joys and challenges of the tropics first hand, and to put my super-zoom point and shoot to the test. For stationary and particularly cooperative birds (and since it was a ZEISS sponsored trip and I was one of the leaders), I also carried a light-weight digiscoping rig…the compact ZEISS DiaScope 65FL spotting scope, a 30x wide-field eyepiece, a Canon S120 on the Digidapter for ZEISS, and the wonderful Roadtrip carbon fiber travel tripod from MeFoto…the whole thing weighing in at something under 6 pounds.
Most of my digiscoping rig. The camera and adapter are in a pouch on my waist. Great tripod! You can see the two 7Ds and long lenses in the group.
In my group there were, of course, people carrying Canon 7Ds and either the 400mm prime or the 100-400 zoom, so I had a chance to observe and compare how the full DSLR/Long Lens rig handled the same tropical situations. I have to say, my complete outfit, super-zoom P&S, and the digiscope rig, weighed less than their body and lens…even if they were shooting off-hand. One gentleman carried a full sized tripod and a gimbal head on every outing. That is real dedication. 🙂
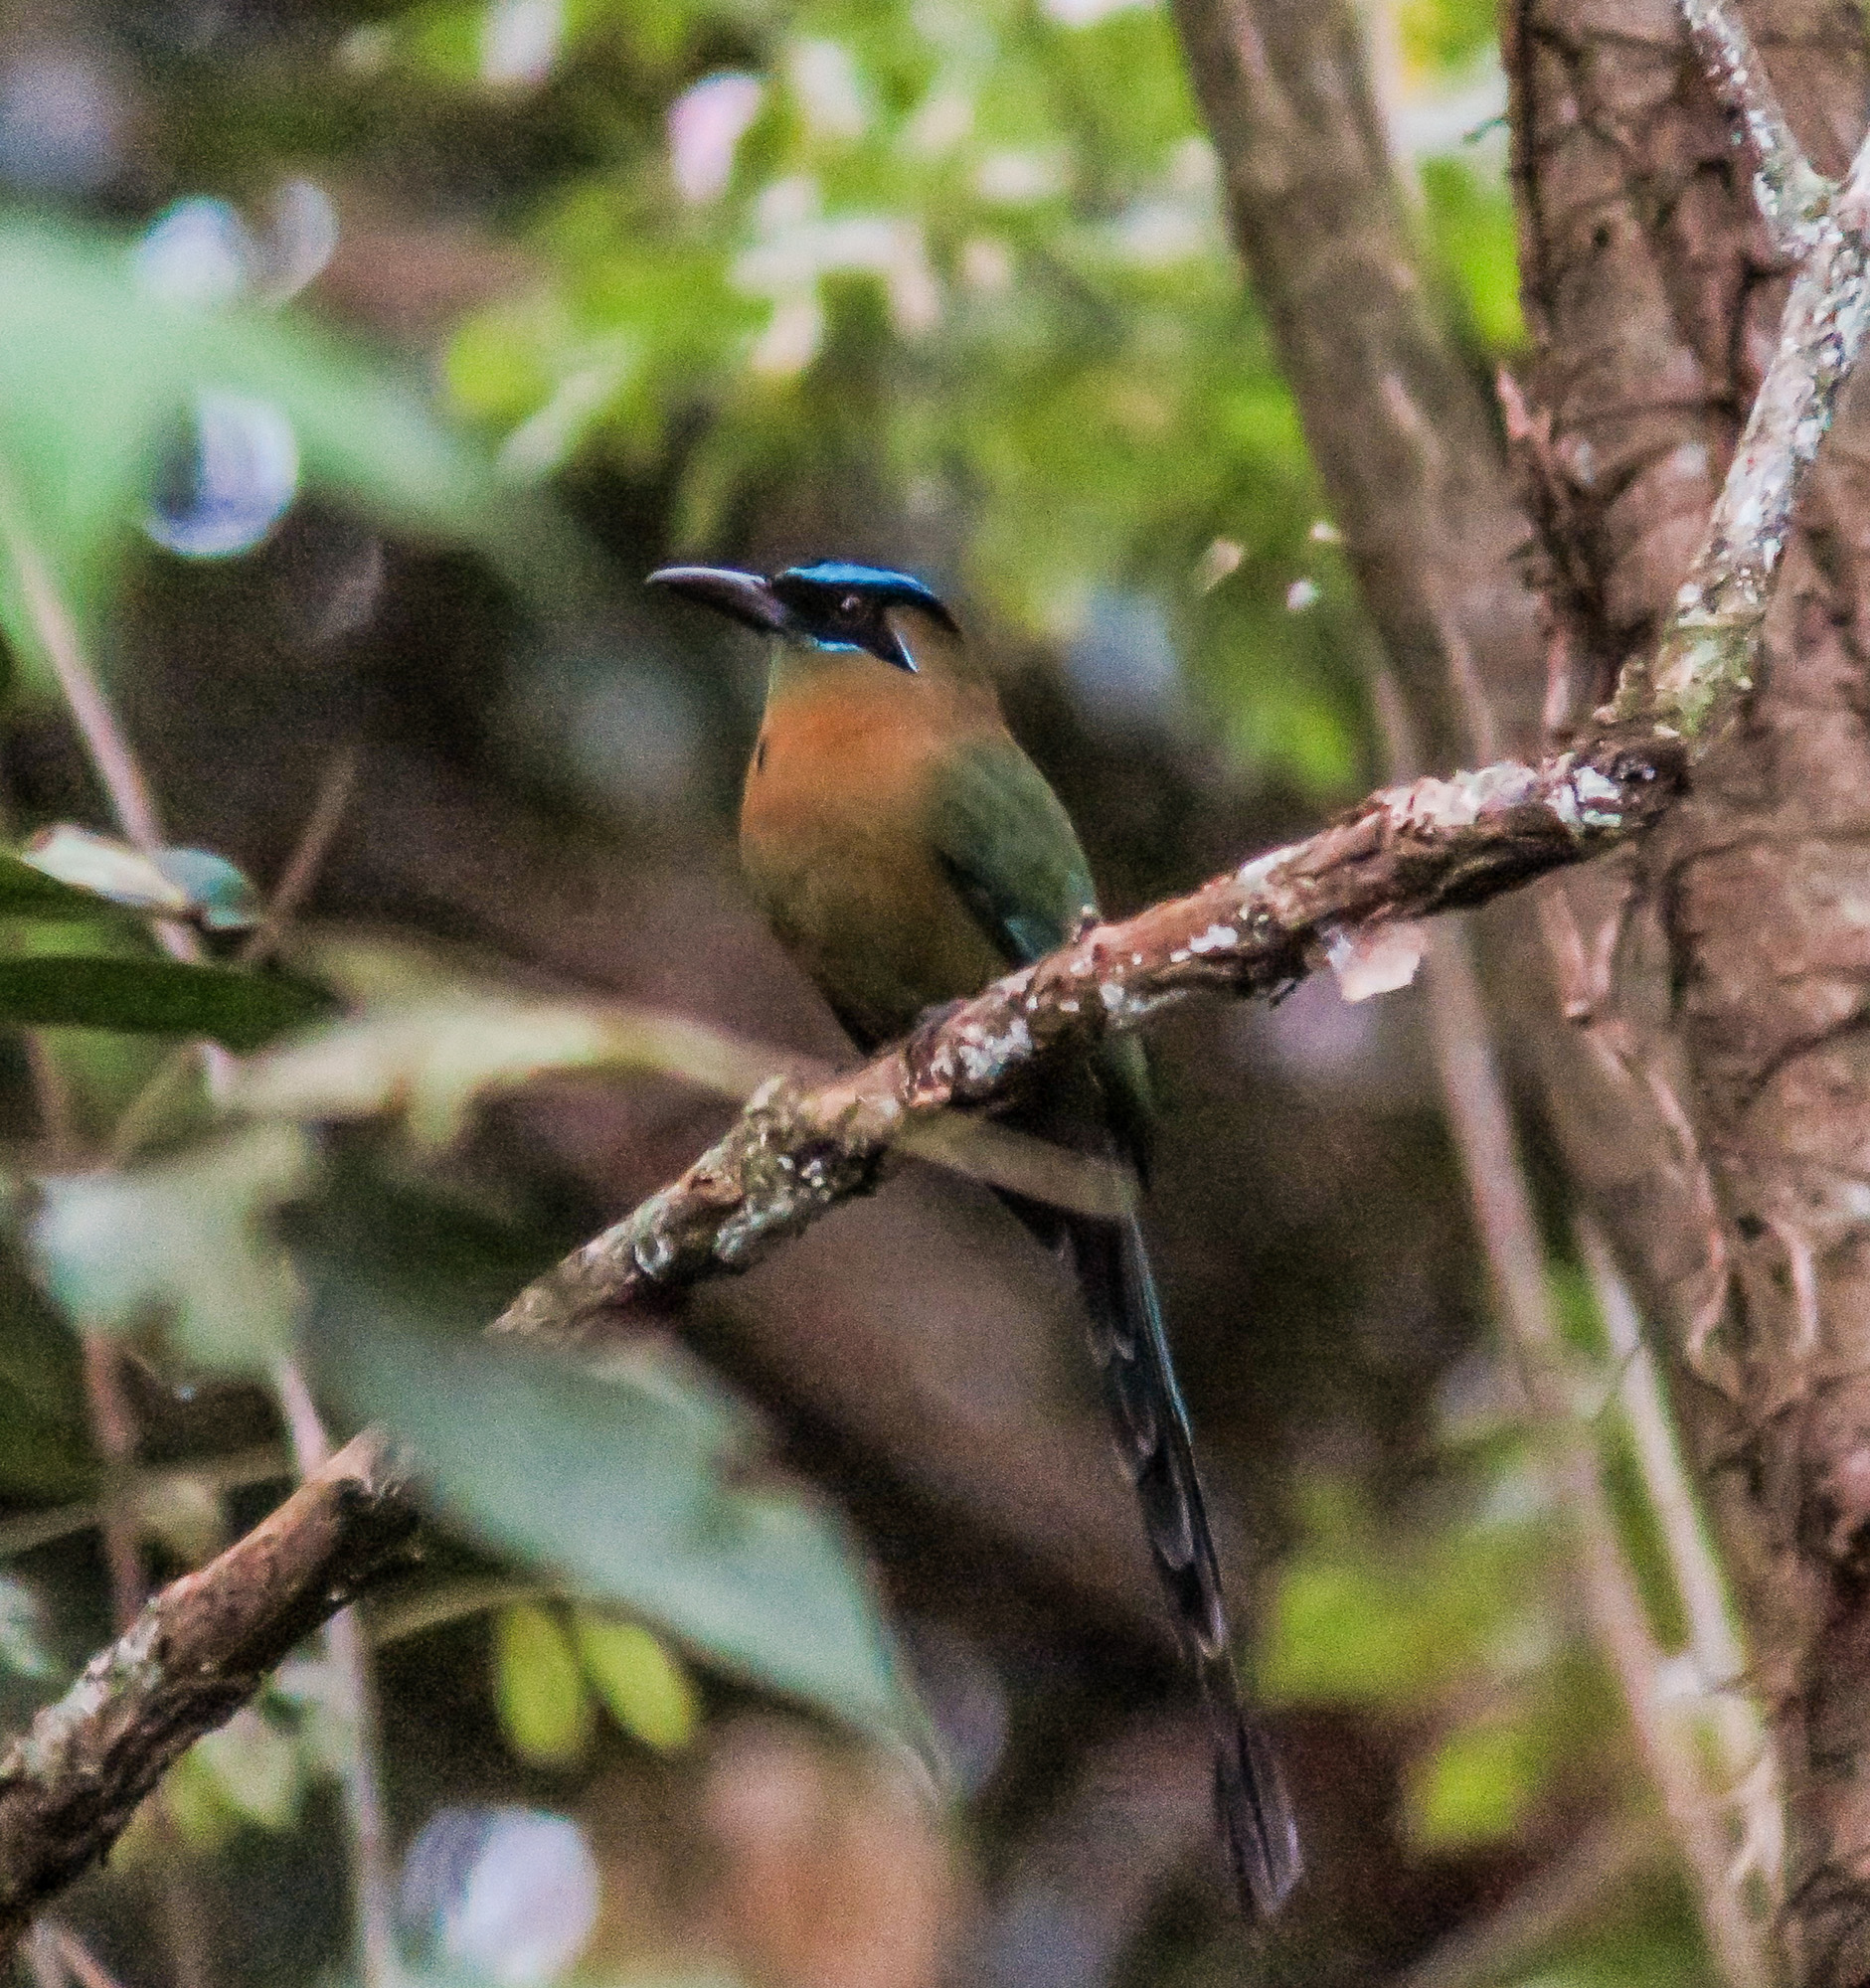
Blue-crowned Motmot, Lodge at Pico Bonito. Digiscoped with the ZEISS DiaScope 65FL
The first challenge in the tropics is always going to be light. My DSLR toting friends were shooting at ISO 6400 most of the time in the rain-forest, and I was pushing ISO 3200 for most shots. Even-so I had to dial the shutter speed down from my usual 1/640th of a second to 1/250th or even 1/160th to get enough light for a decent exposure. The Image Stabilization on the Sony HX400V handled the slower shutter speeds well, but detail at ISO 3200 suffered. I got the shots, but not always totally what I might have wanted. The tropics push any camera to its absolute limits.
To complicate matters, most P&S super-zooms have a maximum aperture of between f6.3 and f6.7 at the telephoto end…a far cry from a Canon 400mm f2.8 or even the 400mm f4. However, that is f6.x at 1200mm or greater equivalent. If you zoom back to 400mm the aperture will be not much different than the fixed Canon lens. It is always a trade off when it comes to cameras.
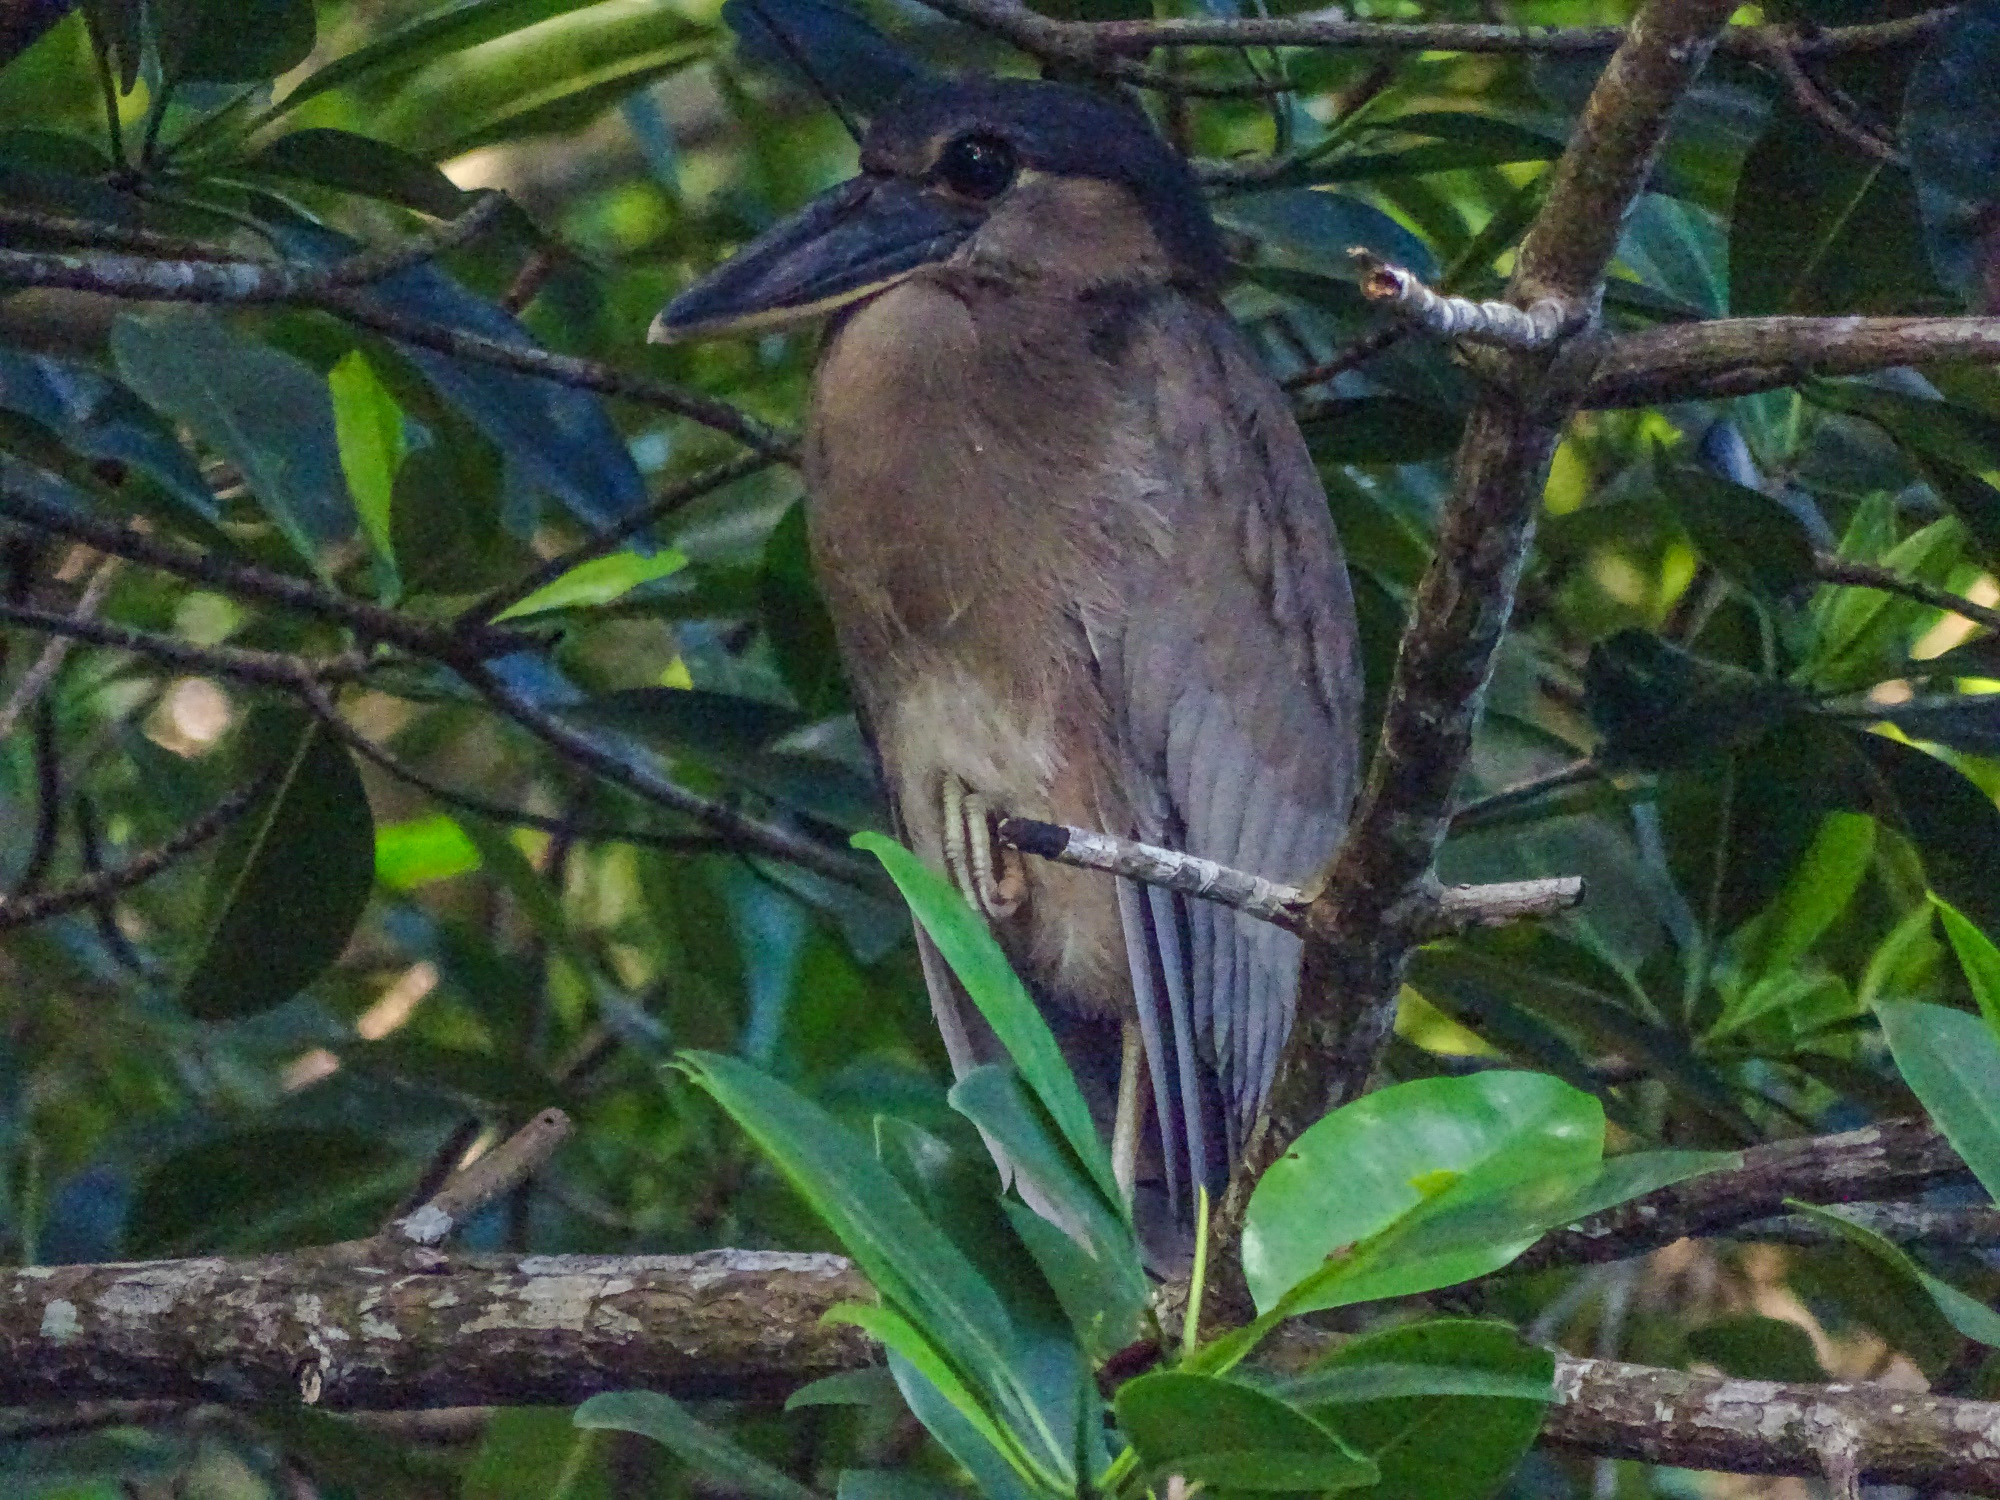
Boat-billed Heron, Cuero y Salado Wildlife Refuge, Sony HX400V at ISO 2500 at 1/160th second.
For the Point and Shoot photographer I recommend my standard wildlife settings: shutter preferred, Auto ISO (with the upper limit set as high as possible). Even so, at least in rain and cloud-forest, you will find yourself using slower shutter speeds than you are comfortable with…but the Image Stabilization on most Point and Shoot super-zooms is up to the challenge. On the Sony, changing shutter speed in shutter preferred on the fly is super-easy…you simply spin the wheel under your thumb…your mileage with other brands may differ. 🙂
I regret that I did not try the High Sensitivity modes on the Sony, which would have given me ISO 6400-12800 in a pinch. It might have made a difference. I will certainly give it a try on future trips to the tropics.
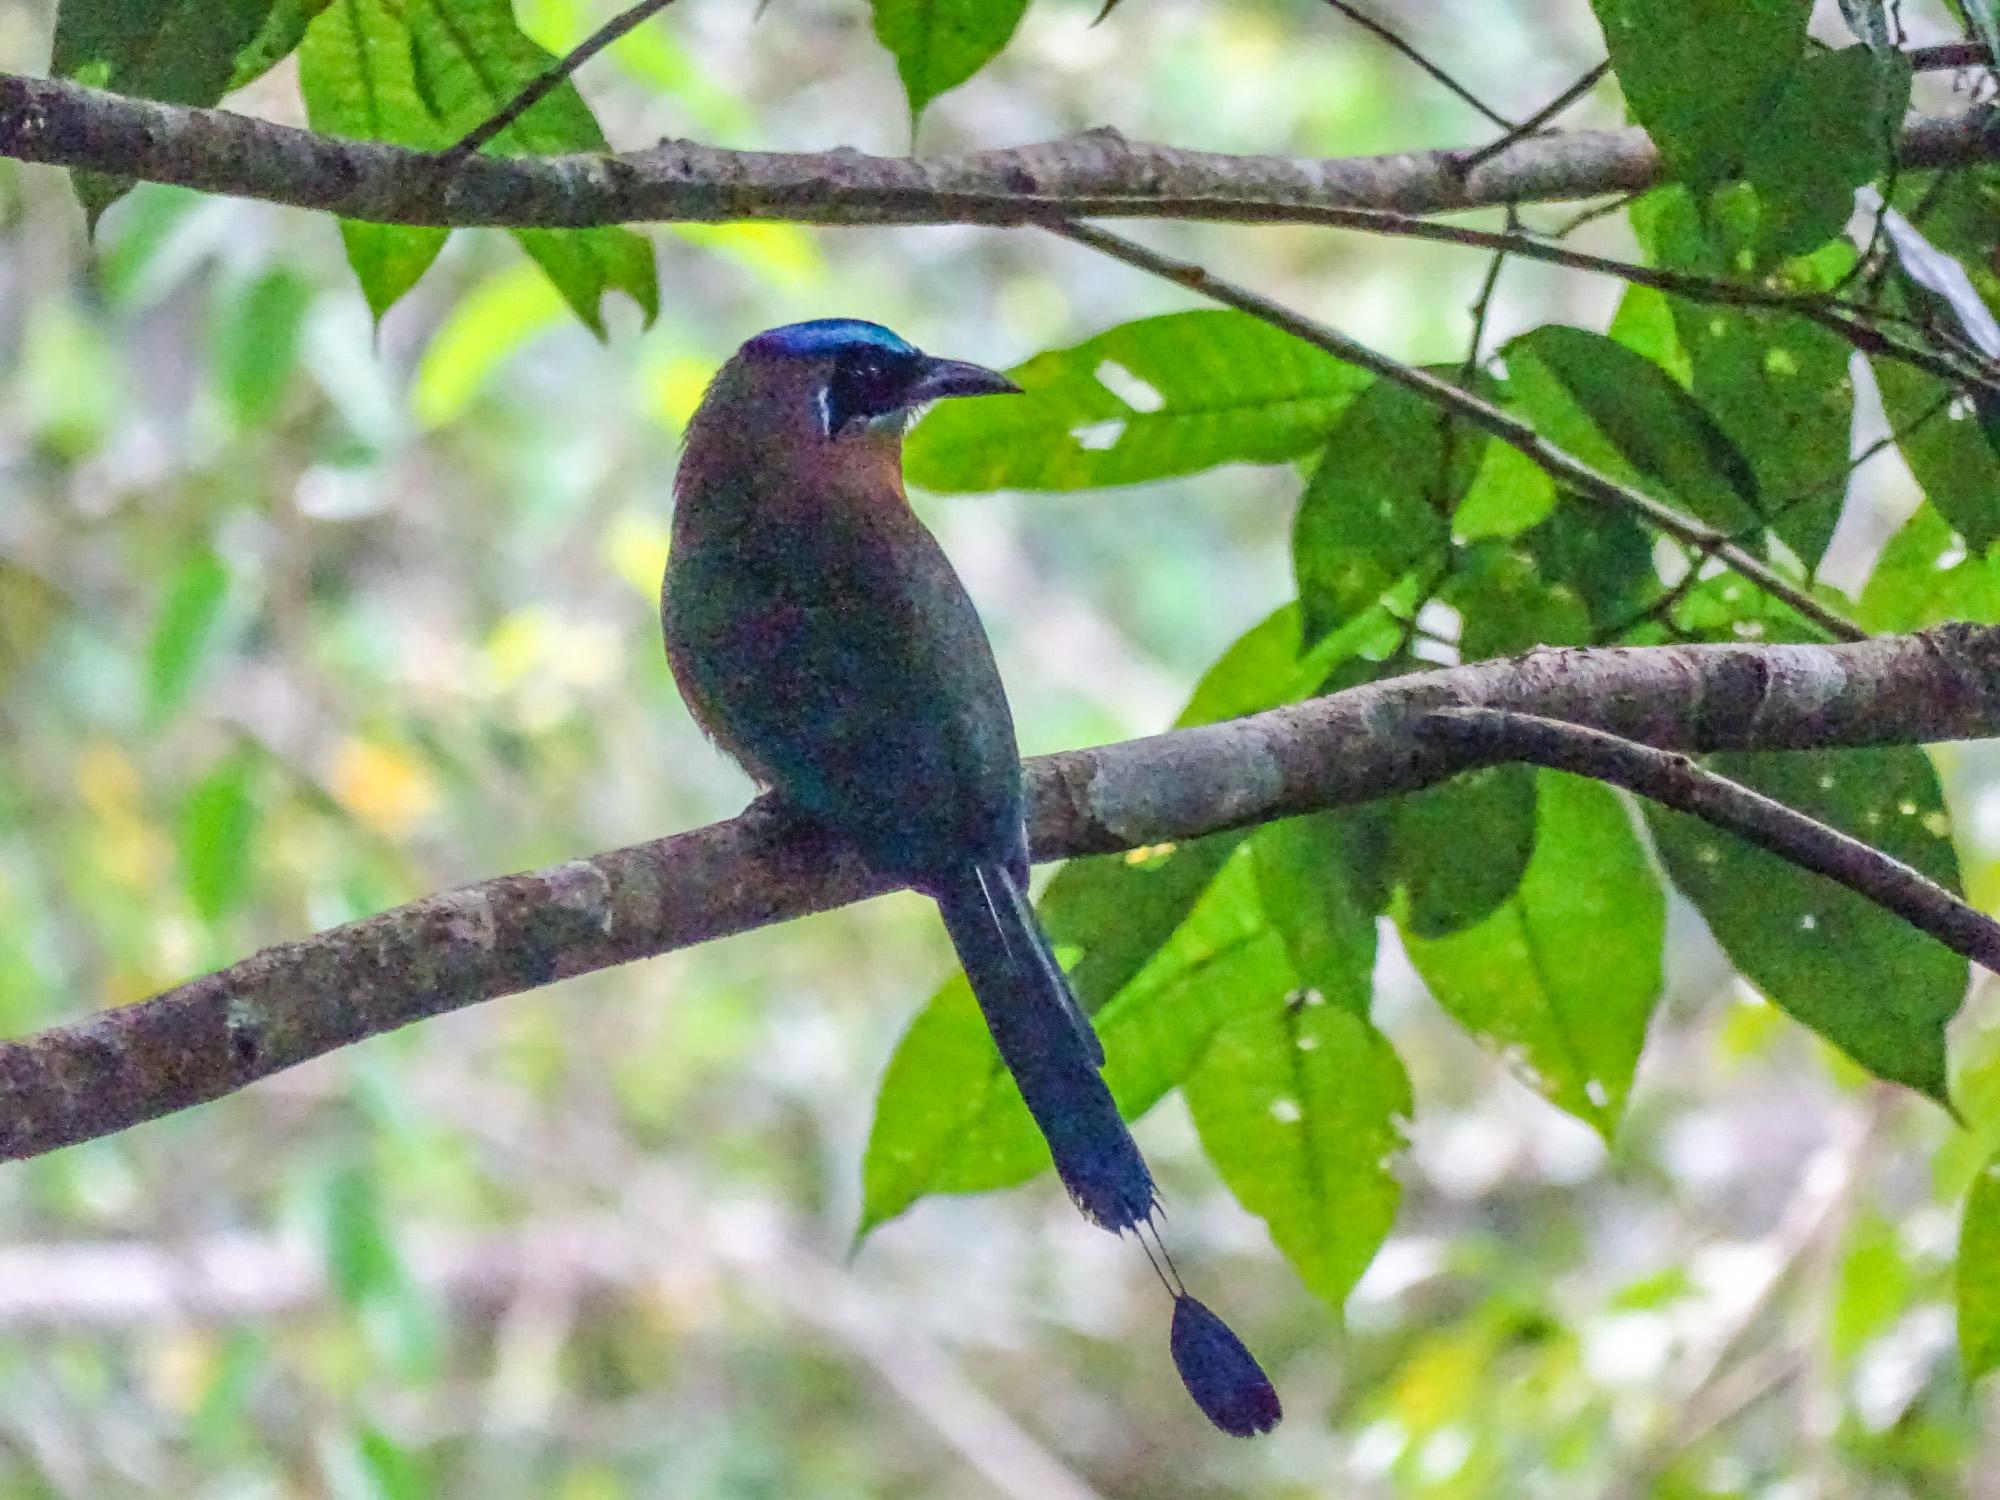
Blue-crowned Motmot. Sony HX400V. ISO 3200 @ 1/250th @ f6.3. Pushed to the limits.
Focus is a whole other issue. Point and Shoot cameras use Contrast Detection Auto Focus, which is slower and less precise than the Phase Detection Auto Focus on full sized DSLRs. It also requires more light to work effectively. You will certainly want your focus area set to the smallest possible square in the center of the field, so that you have a chance to focus on the bird through the dense foliage.
Even then, I found myself resorting to Dynamic Focus Assist on the Sony HX400V much more often than ever before. The Sony focus system allows you to maintain auto focus, and fine-tune it using the focus ring around the lens barrel, just as you would focus a manual focus lens. It is, without a doubt, the easiest manual override auto focus of any P&S camera on the market, and I certainly appreciated it by the end of my time in Honduras. The only thing that would have made it better would have been a higher resolution Electronic View Finder so I could have seen when the bird was in focus more easily.
Almost all P&S super-zooms today have some kind of manual override on the auto focus…or straight up manual focus…but none are as quick, easy, and intuitive as the Sony system. Still, if you are headed for the tropics, dust off your manual and find out how to manually focus your camera. 🙂
Black-faced Grosbeak, Sony HX400V. Tricky focus requires manual override.
For all the difficulty in focusing, however, I am pretty sure I got as many sharply focused images as my DSLR friends. Birds under the canopy will generally sit still long enough to find focus.
Of course, there are areas in the tropics that have lots of light! We visited the Cuero y Salada Wildlife Refuge at the junction of two mangrove lined rivers near the Caribbean coast. To get there we rode a “banana train”…a narrow guage, open car, toy train that was used in the early 1900s to transport bananas from the plantation near the coast, 9 km inland to the railhead. Despite the fact that there were local paying passengers on the train, we stopped often for birds along the way.
Northern Jacana, Cuero y Salado Wildlife Refuge
Bare-throated Tiger Heron
Roadside Hawk, Cuero y Salado Wildlife Refuge
Bat Falcon, Cuero y Salado Wildlife Refuge
Even along the river we found some birds in good light. And, with enough light, the super-zoom P&S always performs well. These shots are satisfying, especially since they were taken hand-held from a boat.
Mangrove Common Blackhawk, Cuero y Salado Wildlife Refuge
Magnificent Frigatebird, Sports Mode.
Ringed Kingfisher, Cuero y Salado Wildlife Refuge
White-collared Puffbird, Cuero y Salado Wildlife Refuge
In the dry forest, and in the inland valleys, the super-zoom gave me the reach to capture birds from the bus on the road, and from respectable distances in the forest…as well of macros of some interesting butterflies.
Lesser Roadrunner
Clouded Sulphur
Crimson Patch
Green Kingfisher
Lineated Woodpecker
Grove-billed Ani
Wood Storks and Egrets
And of course, at the wide end the P&S super-zoom captures the grand tropical landscape.
Rio Santiago
Along the way to see the Honduran Emerald
Sports Mode, or tracking auto focus, even makes hummingbirds at feeders and perched possible.
Violet Saberwing
Crowned Woodnympth
Long-tailed Hermit
Crowned Woodnympth
Long-tailed Hermit.
White-necked Jocabin
Stripe-throated Hummingbird
Rofous-tailed Hummingbird
Crowned Woodnymph
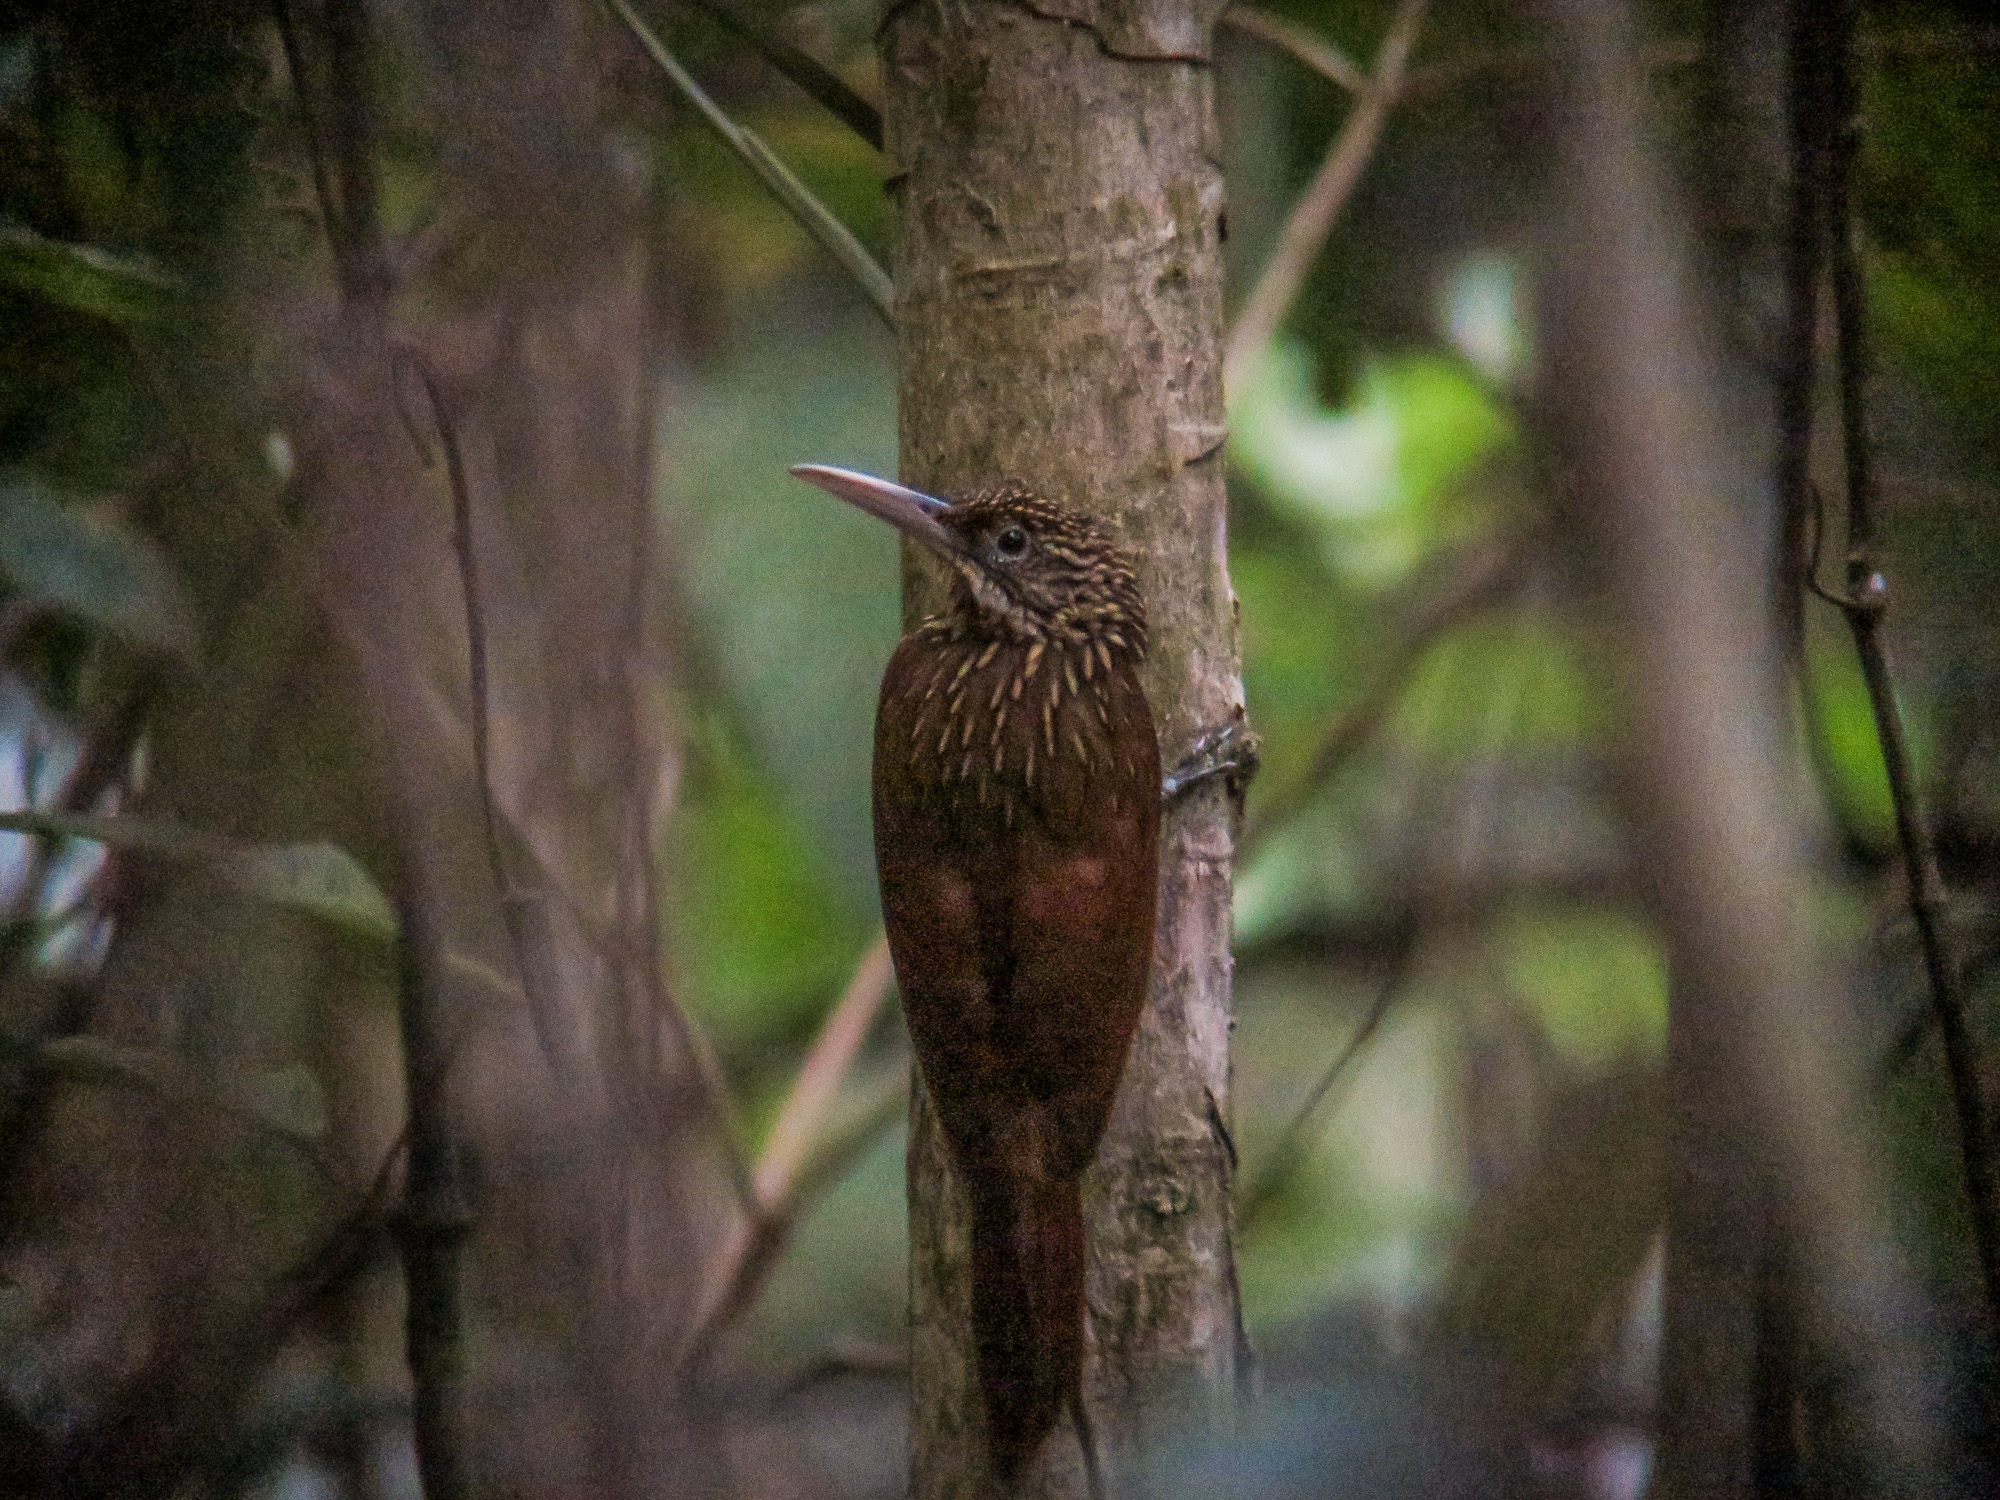
Just for sake of interest I will share one more digiscoped image, again taken with the Canon S120 P&S through the 30x eyepiece on the ZEISS DiaScope 65FL spotting scope, using the Digidapter for ZEISS and the MeFoto Carbon Fiber Roadtrip tripod. This is a particularly difficult shot due to the low light and the foliage between me and bird.
Ivory-billed Woodcreeper, digiscoped at ISO 3200.
So, how does the P&S super-zoom fair when compared to a full scale DSLR/Long lens rig in the tropics. My good friend Diane Porter was shooting beside me most of the trip, with her Canon 7D Mk2 and the 100-400mm Canon IS Zoom. She has kindly allowed me to borrow a few of her shots for comparison. Of course, her shots had to be heavily cropped to equal the scale of the 1200mm equivalent zoom on the Sony. It is a testimony to the quality of the Canon 7D Mk2 that the images hold up so well to heavy cropping.
Diane Porter. Canon 7D Mk 2, 100-400mm zoom. ISO 6400. 1/500 @ f7.1 Cropped for scale.
Sony HX400V @ 2400mm equiv. Ferruginous Pygmy Owl, Lancetilla Botanical Gardens. @ ISO 2500 @ 1/250 @ f6.3
You will notice that the better the light, the closer the Sony P&S comes to the full sized rig. The first comparison is not totally fair to the Sony, as I used the full 2x Clear Image zoom for the equivalent of 2400mms of reach. Digital zoom (while the Sony system is among the best), will never equal the quality of optical zoom.
I will give you one more comparison. This time it is a digiscoped Trogon, digiscoped at the short end of the digiscoping range…and again at 3200 ISO to cope with the low light levels under the rain-forest canopy.
ZEISS DiaScope 65FL. 30x eyepiece. Canon S120 on the Digidapter for ZEISS. MeFoto travel tripod. ISO 3200.
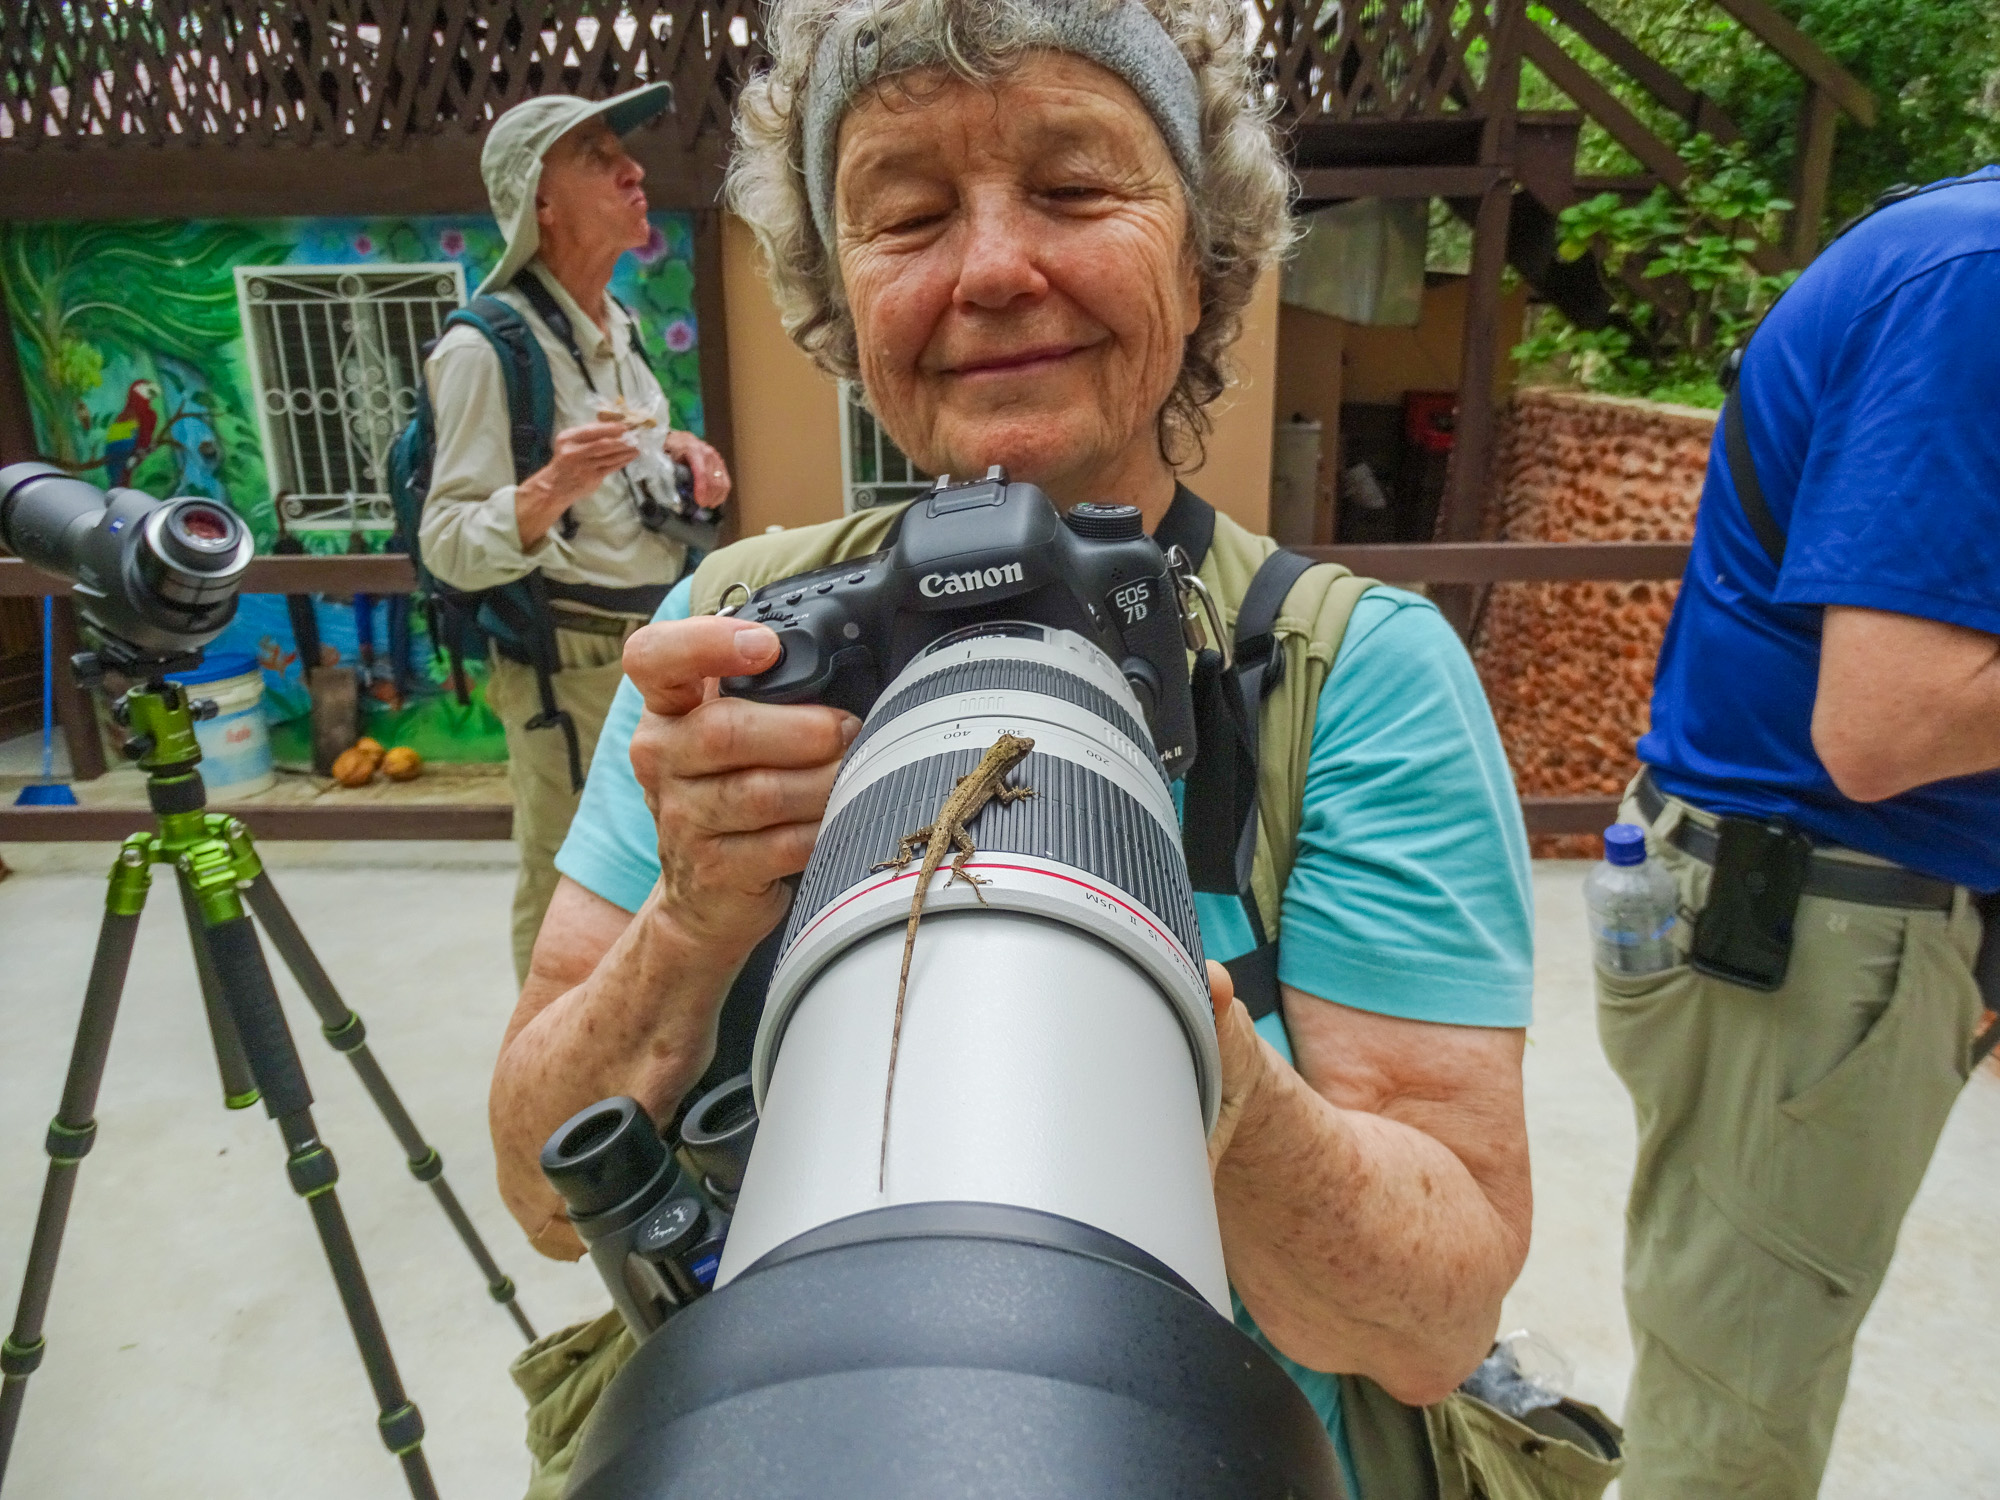
(Just for fun, here is Diane and her rig, playing host some kind of whiptail lizard.)
Diane Porter and a visitor. This is a trick you can not do with a P&S.
Photography is about choices as much as anything. When we choose the compact ease and flexibility of a Point and Shoot super-zoom over the more conventional DSLR/long lens rig, we know that we will sacrifice some image quality. Conditions in the tropics test the limits of any camera and lens, but all in all I will still be packing my P&S super-zoom on my next tropical adventure!
When you read the reviews of Point and Shoot cameras, especially the superzooms we favor for bird, wildlife, and nature photography, you are sure to come across comments about their less than stellar low light performance. No digital sensor camera does as well at high ISOs as it does at low ISOs. Digital sensors love light, and the more light, within reason, the better the image quality and the image detail you can expect. And the smaller the sensor, the common wisdom goes, the worse the high ISO, low light, performance you can expect. The tiny senors in the P&S Superzooms can not be expected to equal the performance of APS-C or full frame sensors.
Full overcast vs full sun: ISO 1600 ves 160
On the other hand, you will notice that with each new generation of digital sensors, the maximum ISO ratings increase. Full frame cameras will let you set ISO to 5 digits these days…totally unheard of, undrempt of even, ratings back in the days of film. Remember, ISO 800 color slide film (ASA 800 in those days) was revolutionary, and only to be used in emergencies, since its performance…with highly visible grain, limited contrast range, and muted colors…left a lot to be desired. Those were the days when Kodachrome 25 was still the standard for published photos.
Even today’s P&S cameras will reach 3200-6400 ISO, though to listen to the reviewers, anything over ISO 400 on some, and certainly ISO 800 on most, is simply unusable. Same issue: visible noise (the digital equivalent of grain), limited contrast range, and desaturated colors. However, each new generation of P&S cameras also has improved noise reduction built into the jpeg processing engines. Yet the common advice is still to turn it off if you can…or to shoot in RAW (again if you can)…and do any noise reduction in software after the fact. The Image Quality issues (watercolor effects and detail smearing) that are often claimed for P&S superzooms are often attributed to “overly aggressive noise reduction.”
Still, if you shoot wildlife…especially active birds…in anything but full sunlight, you sometimes find yourself making the hard choice between higher ISOs and slower shutter speeds. Nothing will destroy image detail quicker than camera or subject motion, so you pretty much have to keep the shutter speed up, and let the ISO got where it needs to. I do not like to shoot birds and wildlife at anything under 1/500th of a second, even with today’s excellent optical image stabilization. Even if the camera does not move, the critter is likely too. 🙁
On my latest photo trip to Cape May, New Jersey, for the Autumn Bird Festival, the days ranged from rain and overcast to full sun. If I wanted to shoot birds it was necessary to let the camera do its ISO thing, using the full range available to me. The first two days I still had not figured out how to set the camera so that it was not limited to ISO 1600 in Auto ISO, so that limited me even more. I did eventually figure out how to let the IsO ride all the way up to 3200.
Reflecting on the results, and my efforts around home over the past weeks and since returning from Cape May, I have come to a pretty startling conclusion. At least with the superzoom I am using (Sony HX400V), the high ISO results were not all that bad…in fact…they were very good…especially when you consider that I could not have gotten the images any other way. When choosing between some kind of pretty good okay image and no image at all…well, that is an easy choice for me. 🙂
The first thing I learned is that there is a lot of detail in underexposed images. While the camera was limiting me to ISO 1600, many of my bird and wildlife shots were seriously underexposed…by several stops. Yet, when taken into Lighroom, I was able to bring them up to quite acceptable levels and produce images that were satisfying, if not spectacular…and you might even consider them spectacular if you take into account the conditions they were taken under.
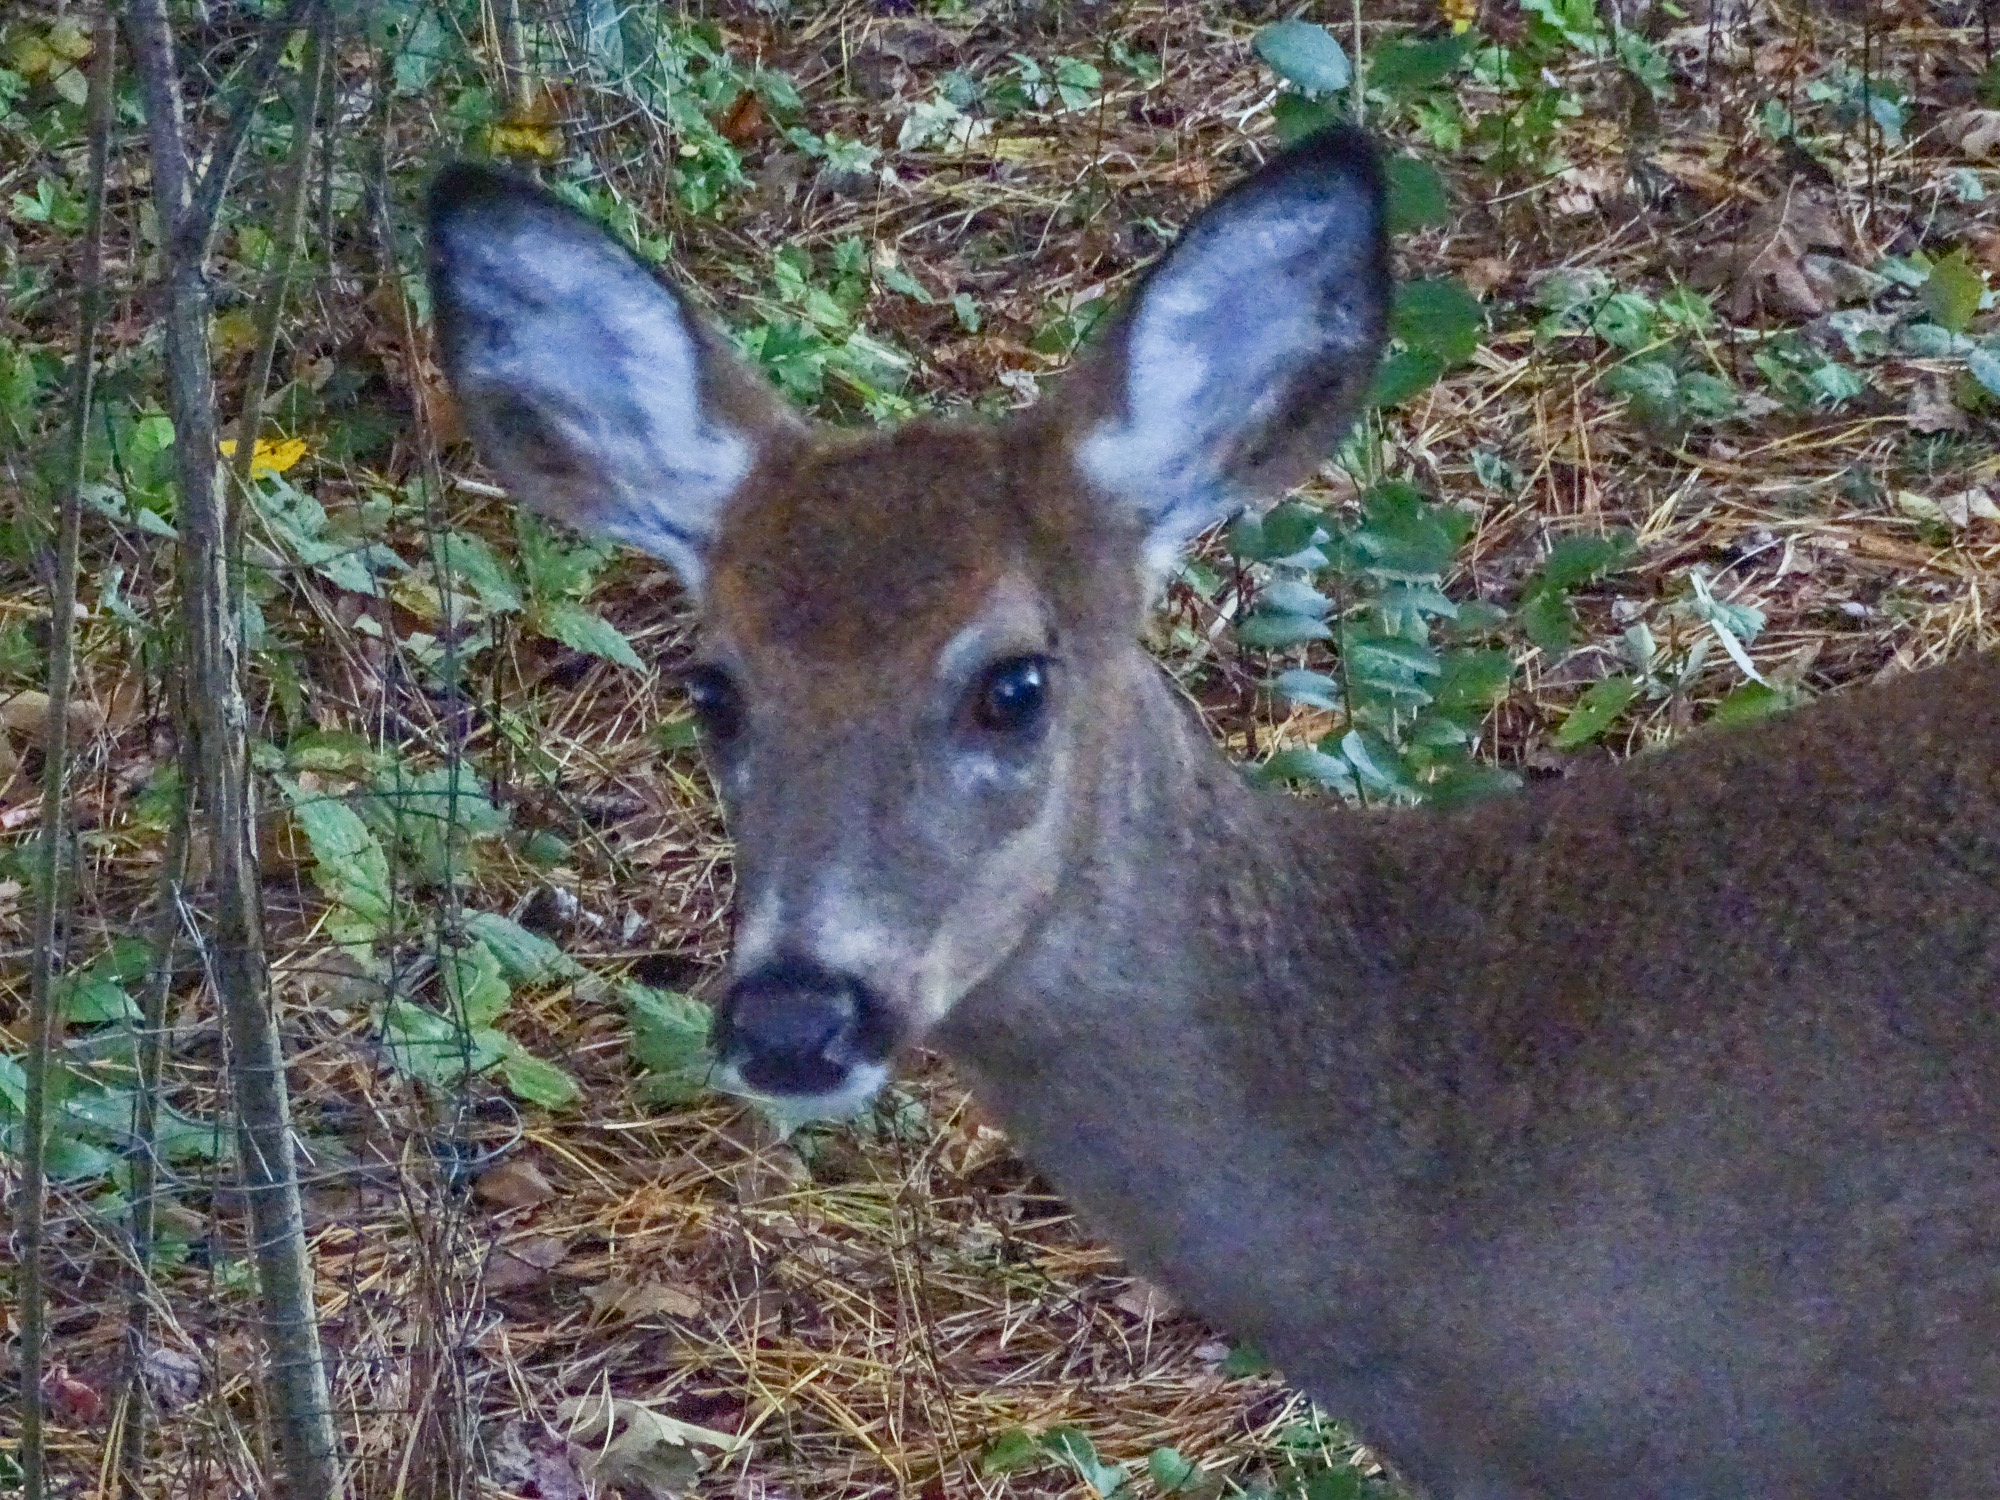
Consider this Red Squirrel from Laudholm Farm…taken before I left for Cape May. It was so dark in the under the apple trees and in the brush that I pushed the shutter speed all the way down to 1/160th at ISO 1600, stretching both the Image Stabilization of the camera, and the good will of the squirrel to the max…and the image was still several stops underexposed.
underexposed at 1/160th @ ISO 1600, processed in Lightroom
As you see, while not a great image, it is hard to tell the processed result was ever that underexposed. Color is pretty good. Detail is satisfying. Both noise and digital artifacts are visible in the finished result, but only if you view the image at full resolution. At normal screen sizes it looks pretty good okay! And…of course…I could not have done any better with any camera I could have been carrying…a full frame DSLR would have wanted even more light…pushing the ISO higher and the shutter speed lower…and no lens I could have hand-held…no…no lens I could have used even on a tripod…would have equaled the 1200mm reach of the Sony HX400V. I would have had to crop heavily to achieve this image scale. Given that, I am convinced that this image is better than I would have gotten with any other camera. You want more proof…
Deer at 1600 ISO. Well underexposed and brought up in Lightroom.
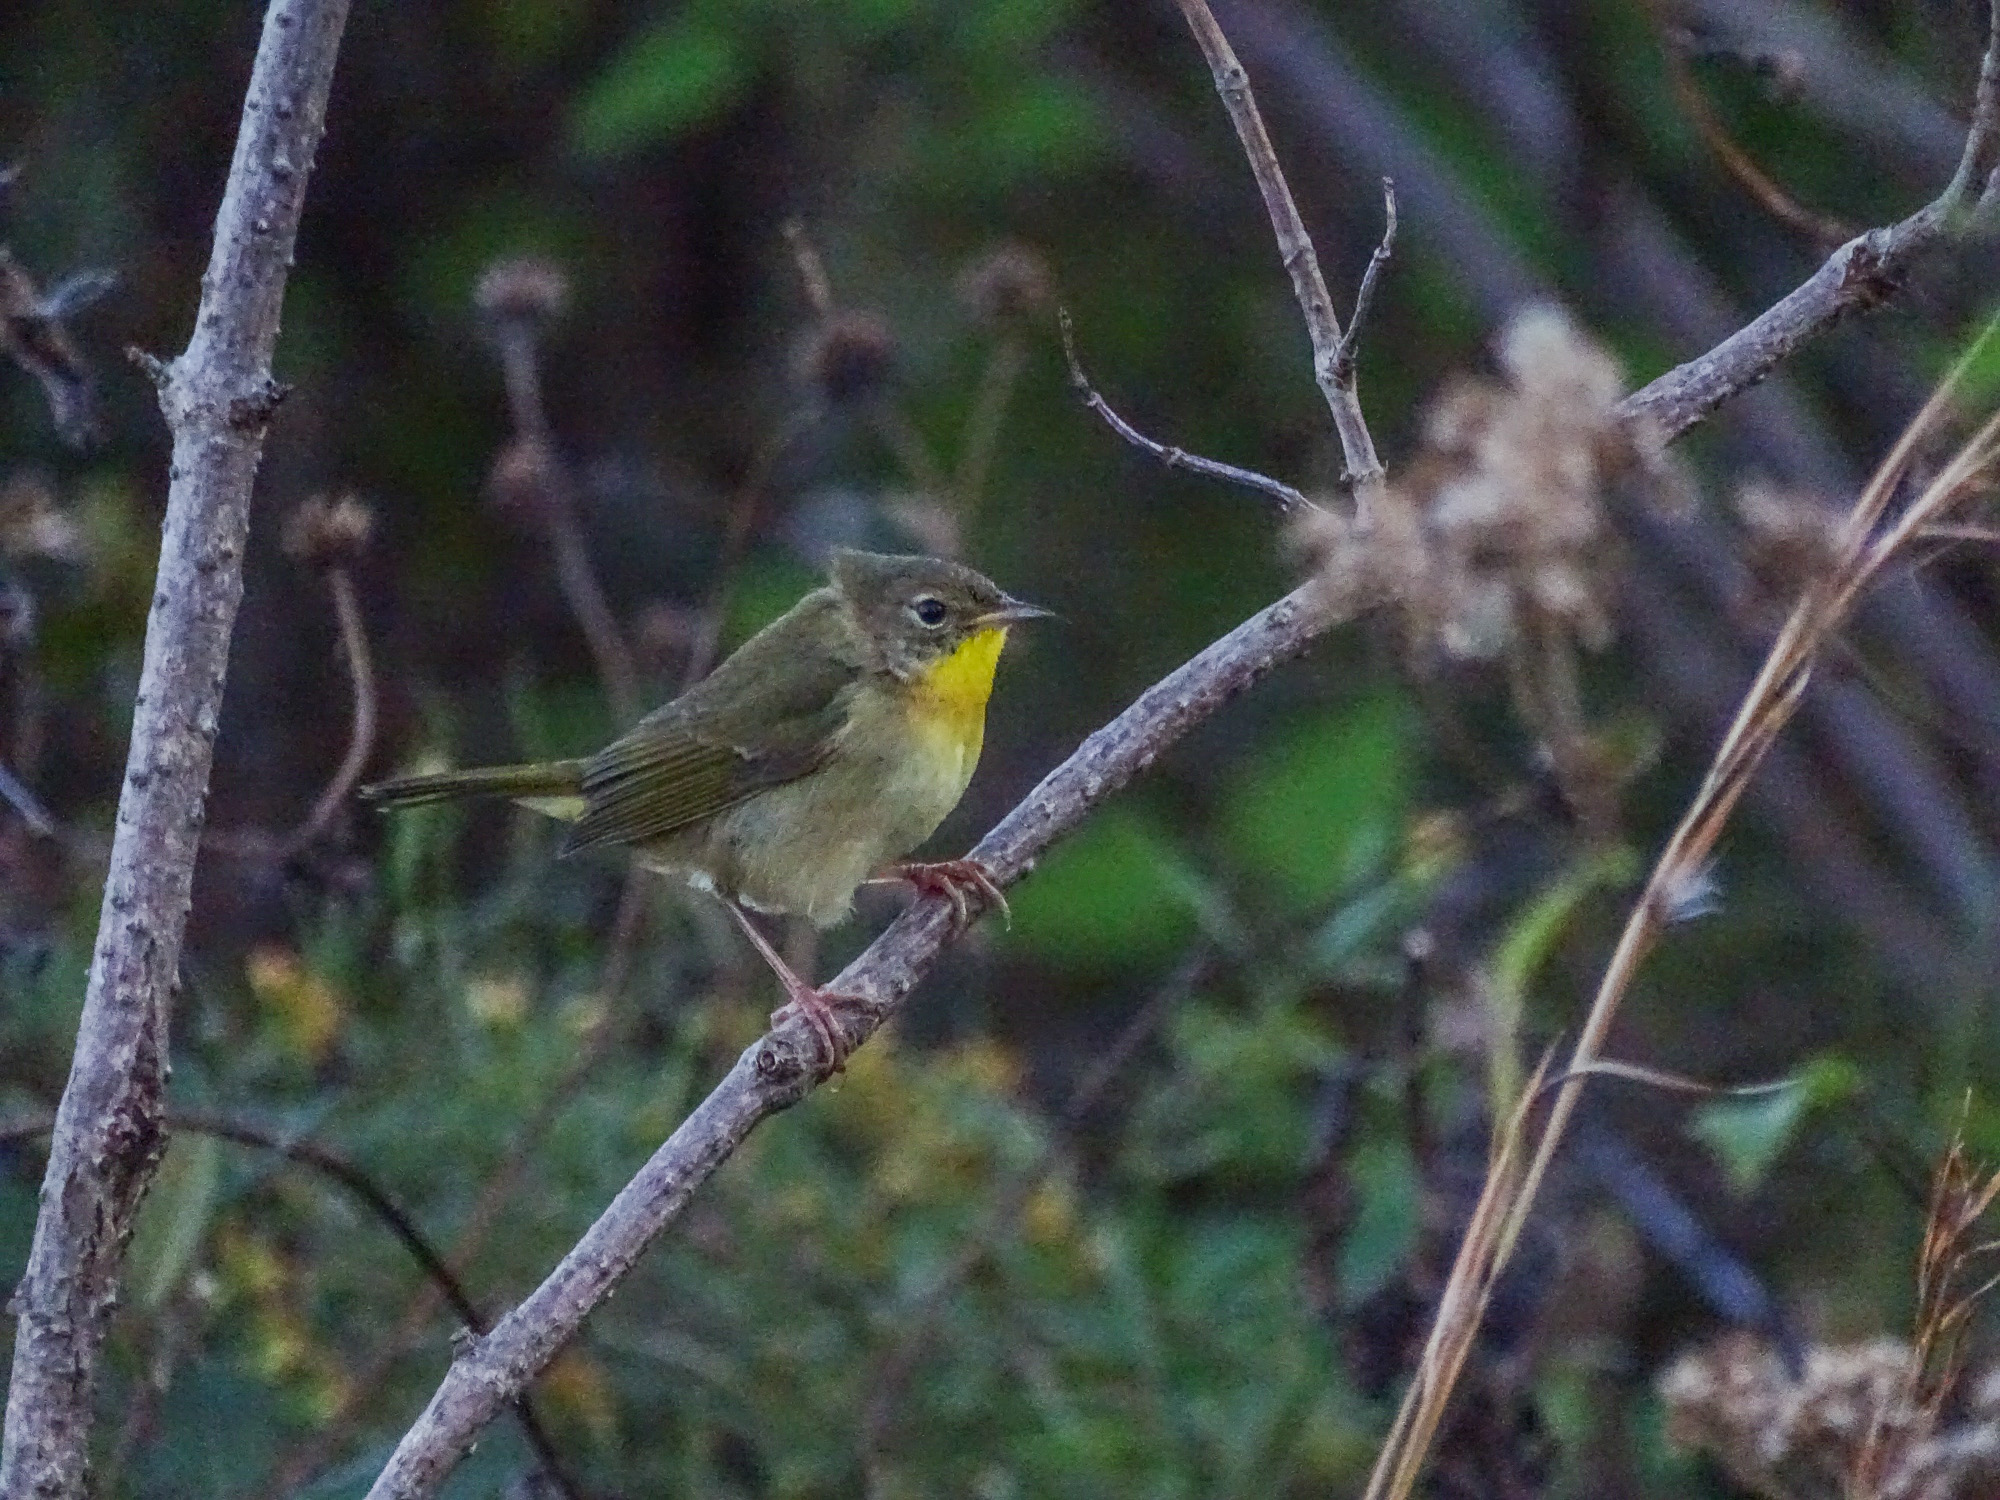
Common Yellow-throat, again underexposed at ISO 1600.
Again, not great shots, but satisfying, considering any reasonable alternative. 🙂
When I did figure out how to set Auto ISO for the full 3200 range on the HX400V, I was even more surprised by the results! The images, of course, required much less lightening in post-process, and maintained good color saturation, satisfying detail, and very few visible artifacts in the backgrounds (a problem area for any high ISO shot). And this is straight from the camera, with only my standard one click preset Lightroom processing. I did not, at first, even apply any extra noise reduction in Lightroom…though I did find that some slight Luminance NR, with detail emphasis, did produce an even more satisfying result.
Squirrel ISO 3200
White-throated Sparrow 3200
Squirrel ISO 3200
Golden-crowned Kinglet 2000
Ruby-crowned Kinglet 2000
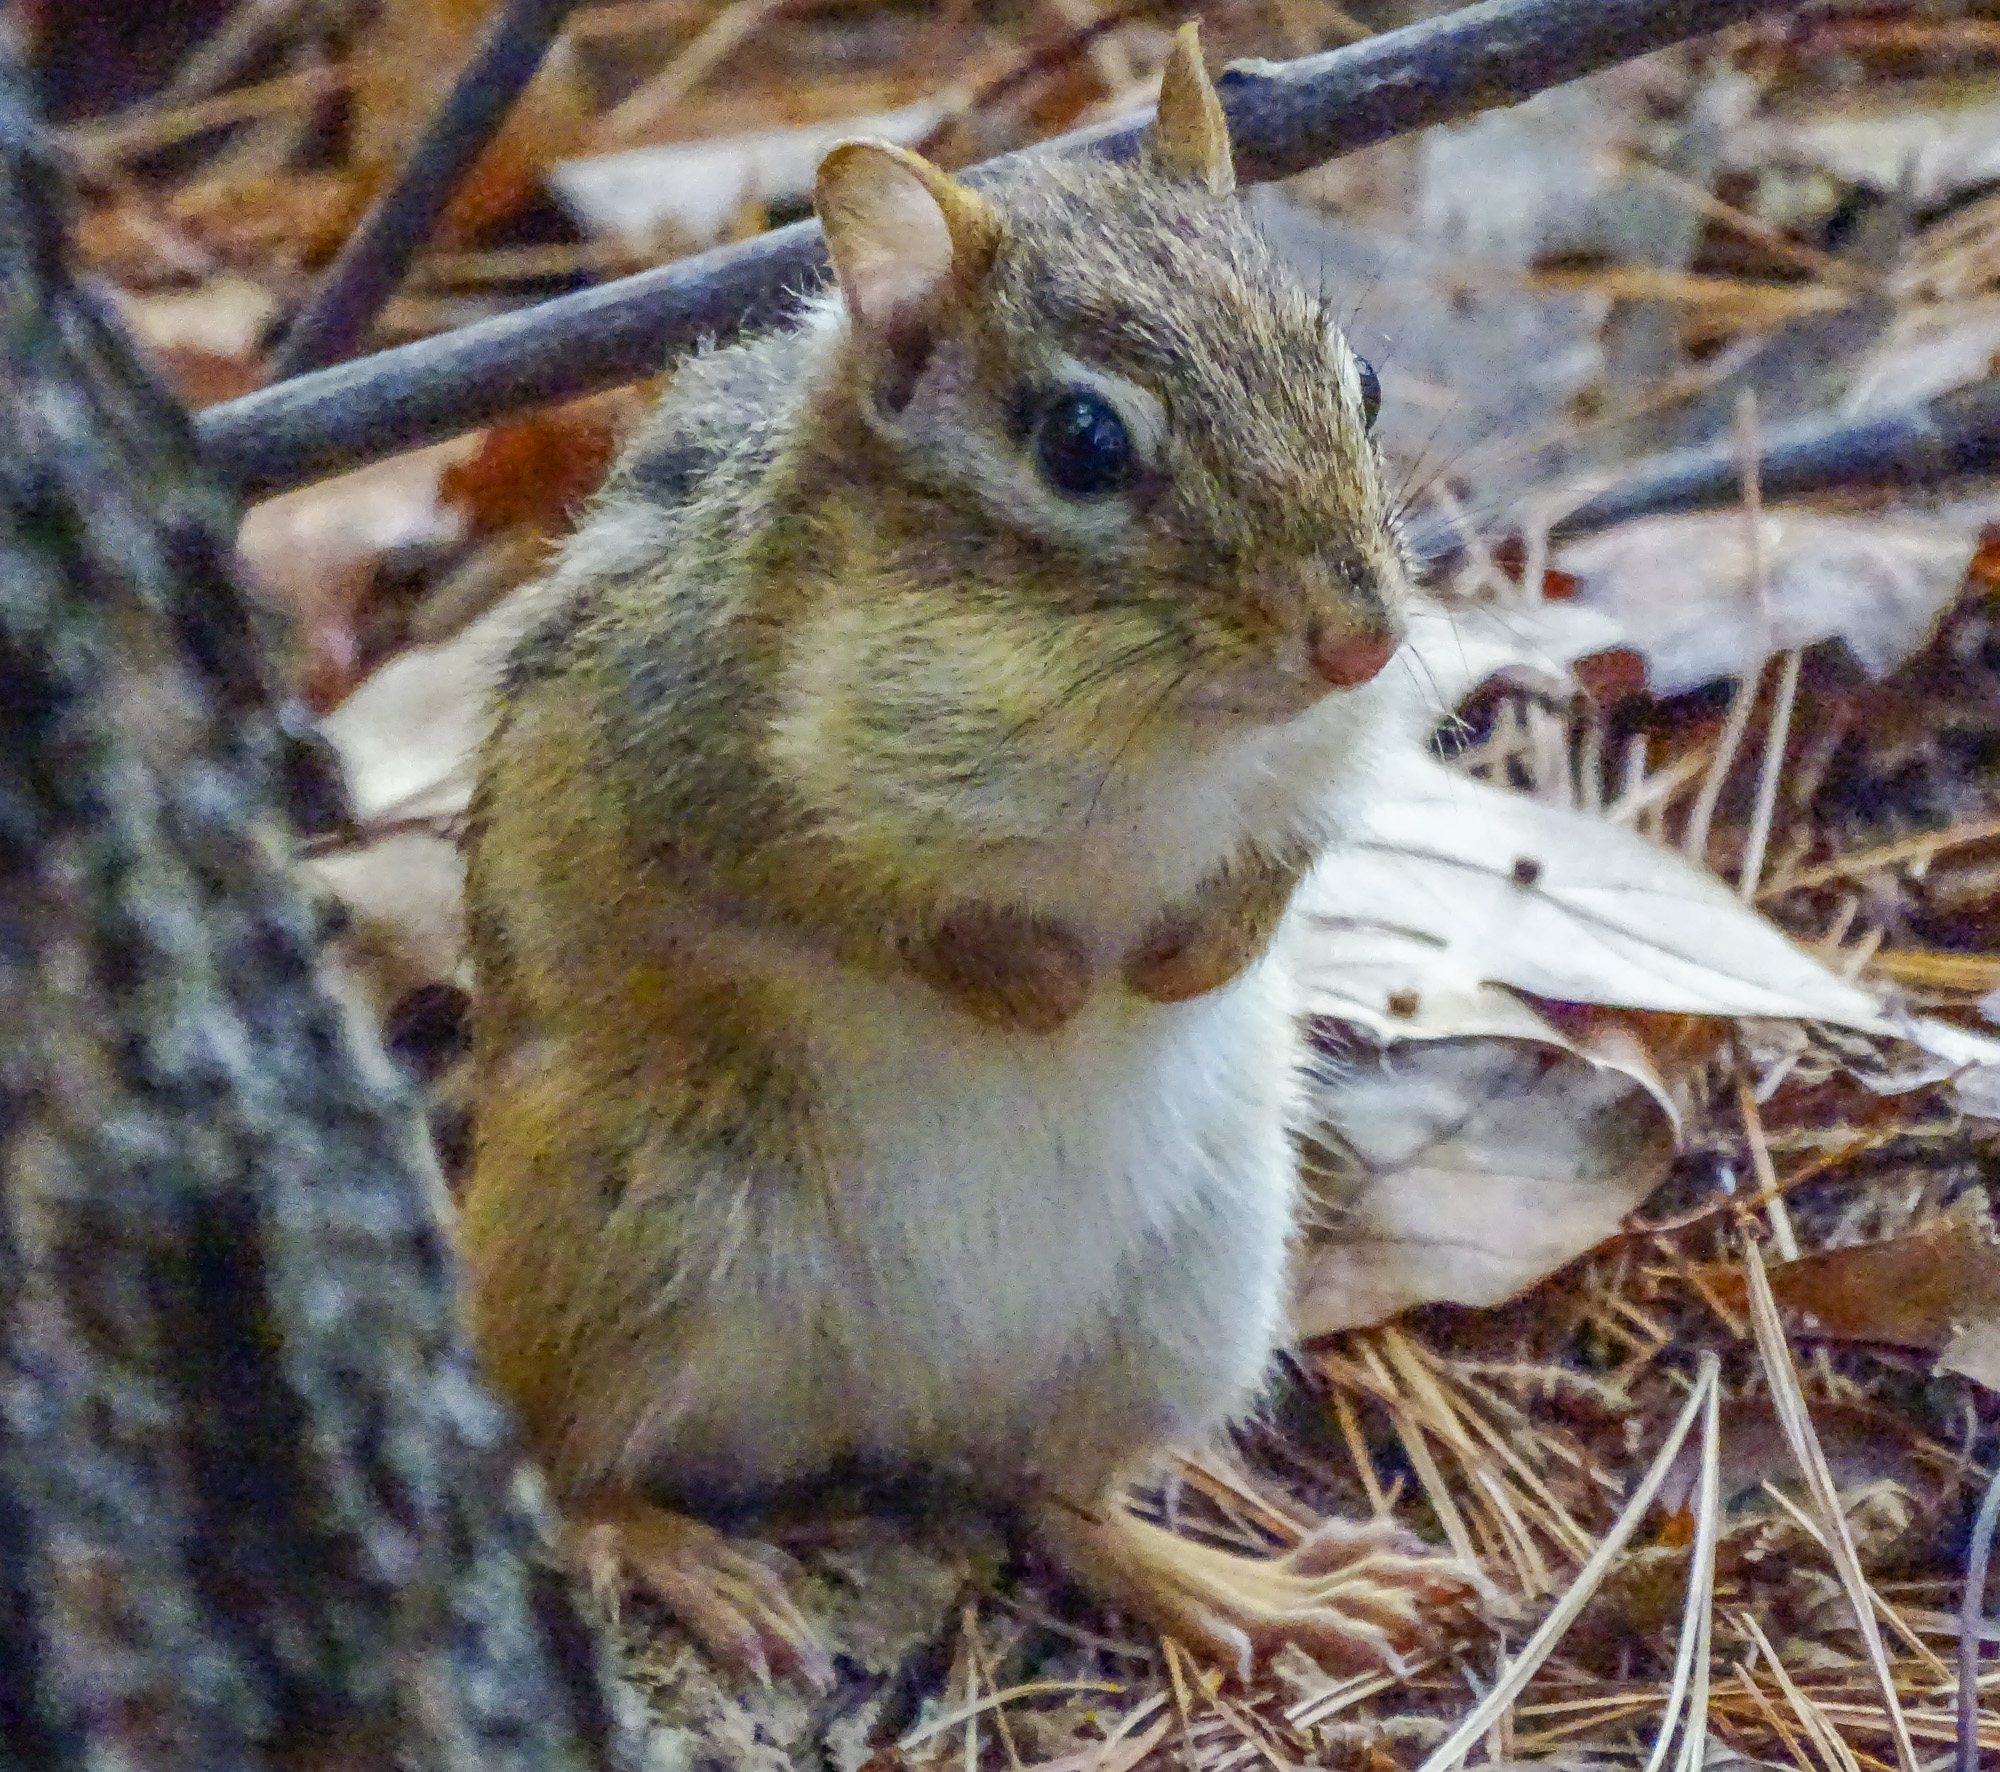
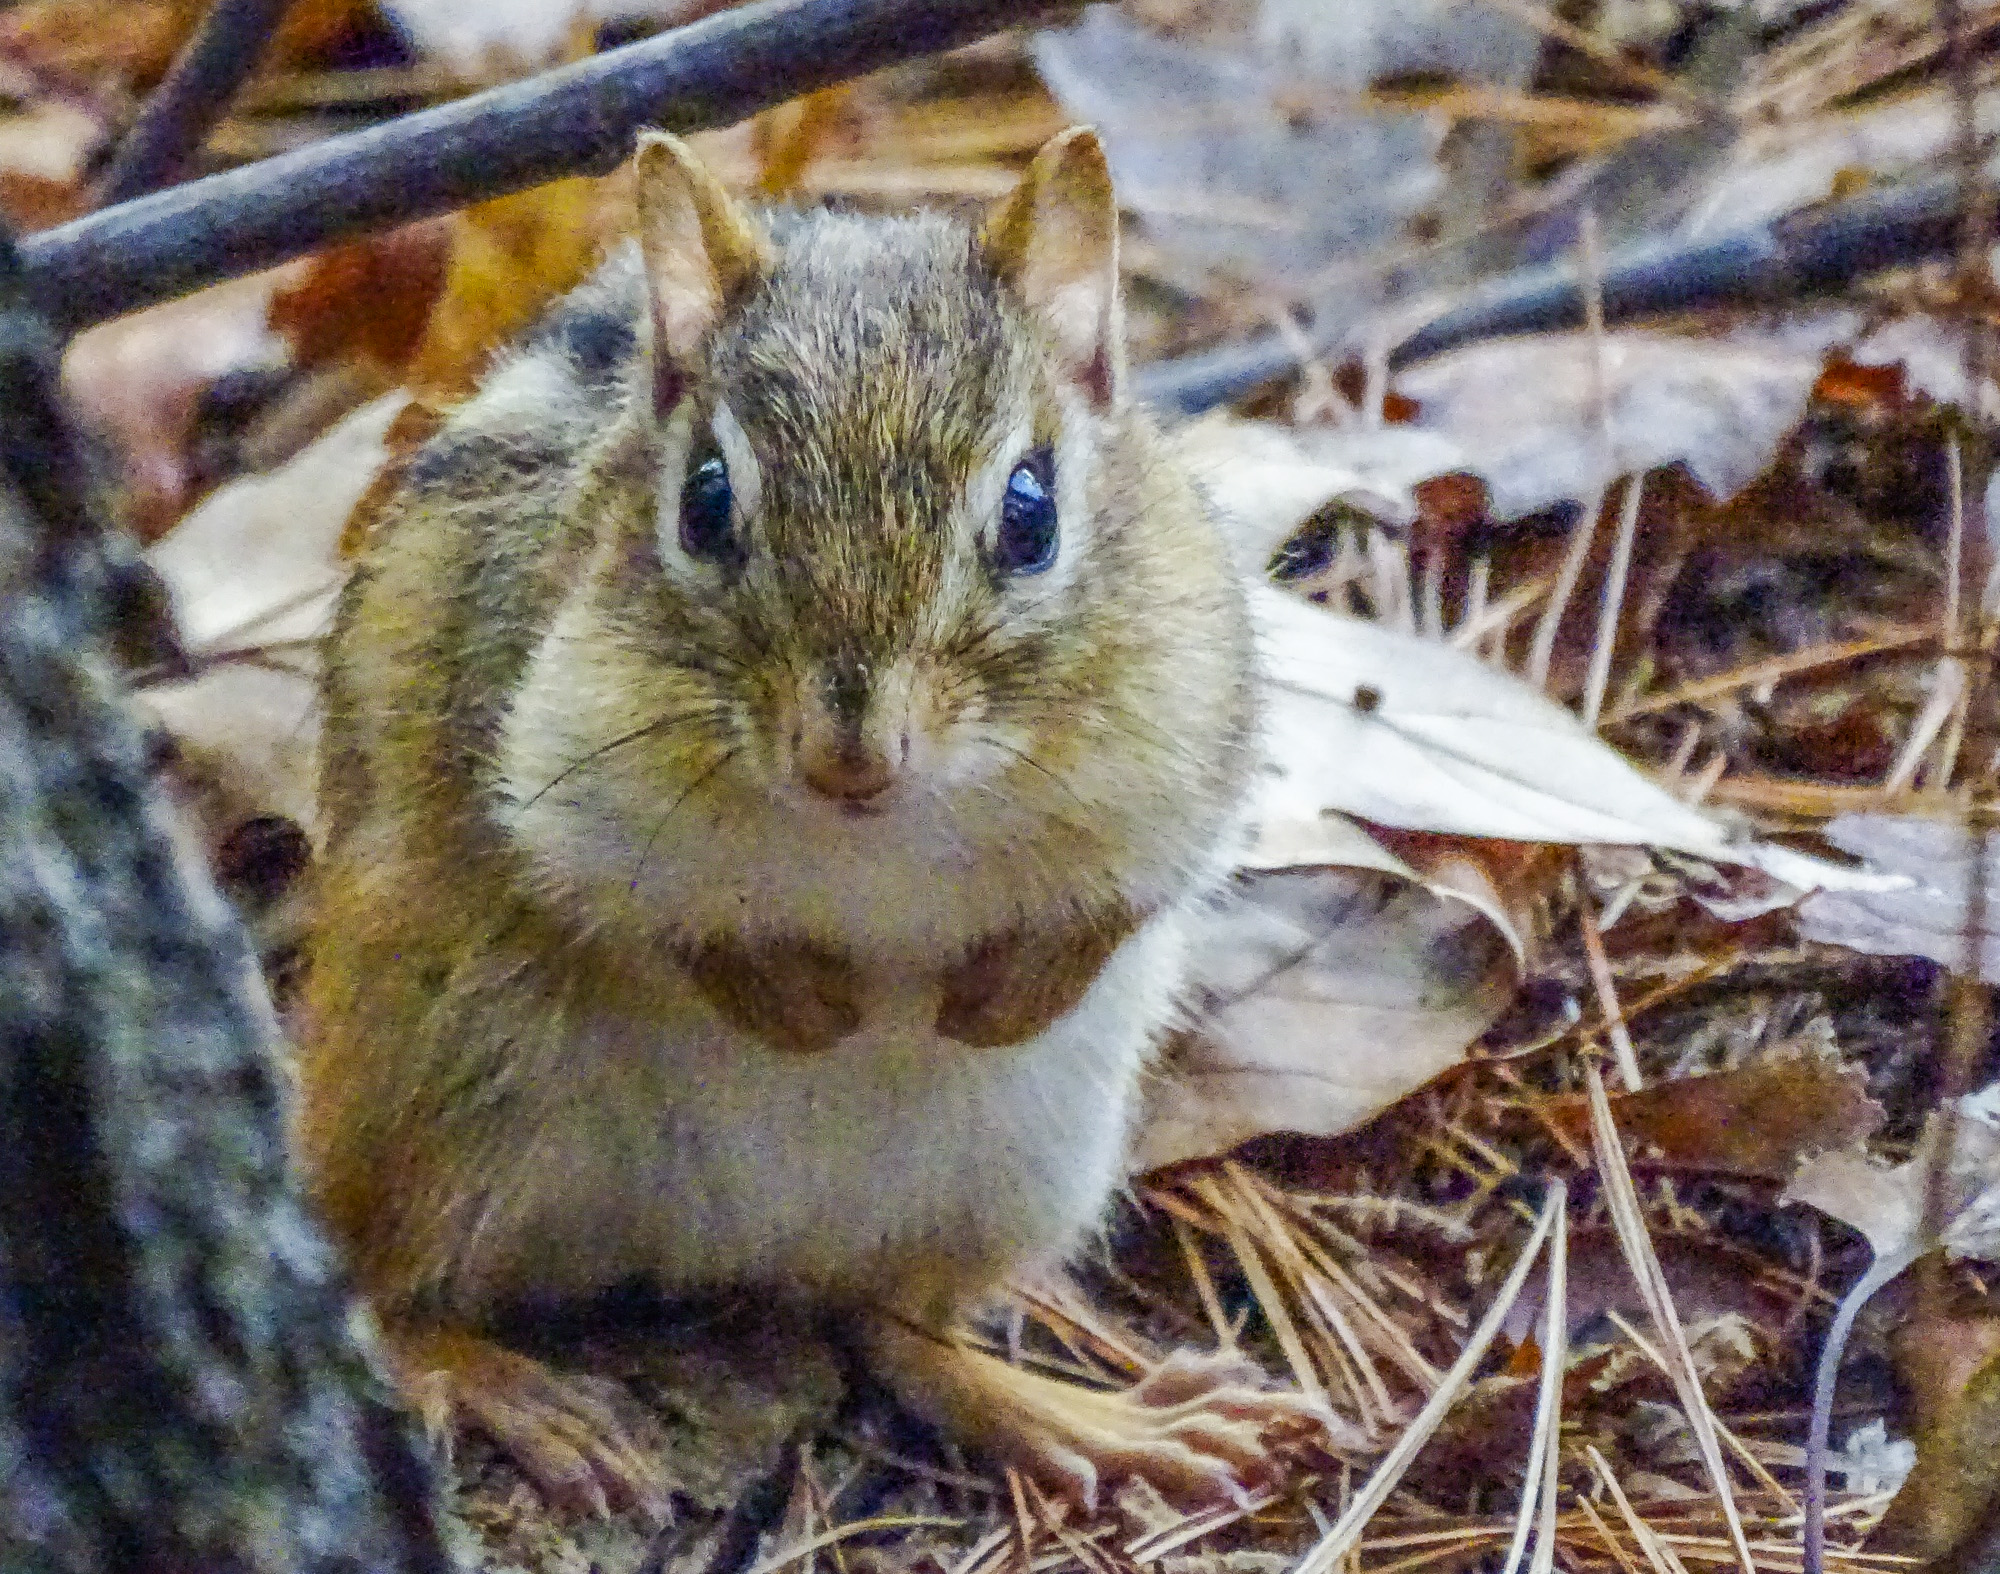
It is even possible to crop an ISO 3200 image from the Sony HX400V and get acceptable results…pretty good okay results! This chipper is proof enough for me. In-camera Noise Reduction set to standard. Sharpening to -1. Saturation to +1. My standard one click processing in Lightroom with some added NR.
ISO 3200. Cropped.
ISO 3200. Cropped.
So folks, here is my conclusion. Unless you are looking for magazine quality publication images…if, in other words, your main interest is sharing on the web and the occasional print for the wall or for a gift…you have no reason, with the latest crop of P&S superzooms, to fear the dark. Go boldly. Set your ISO high and bring back satisfying images of the birds and wildlife you encounter in less than ideal light…images you would be very unlikely to get with any other camera.