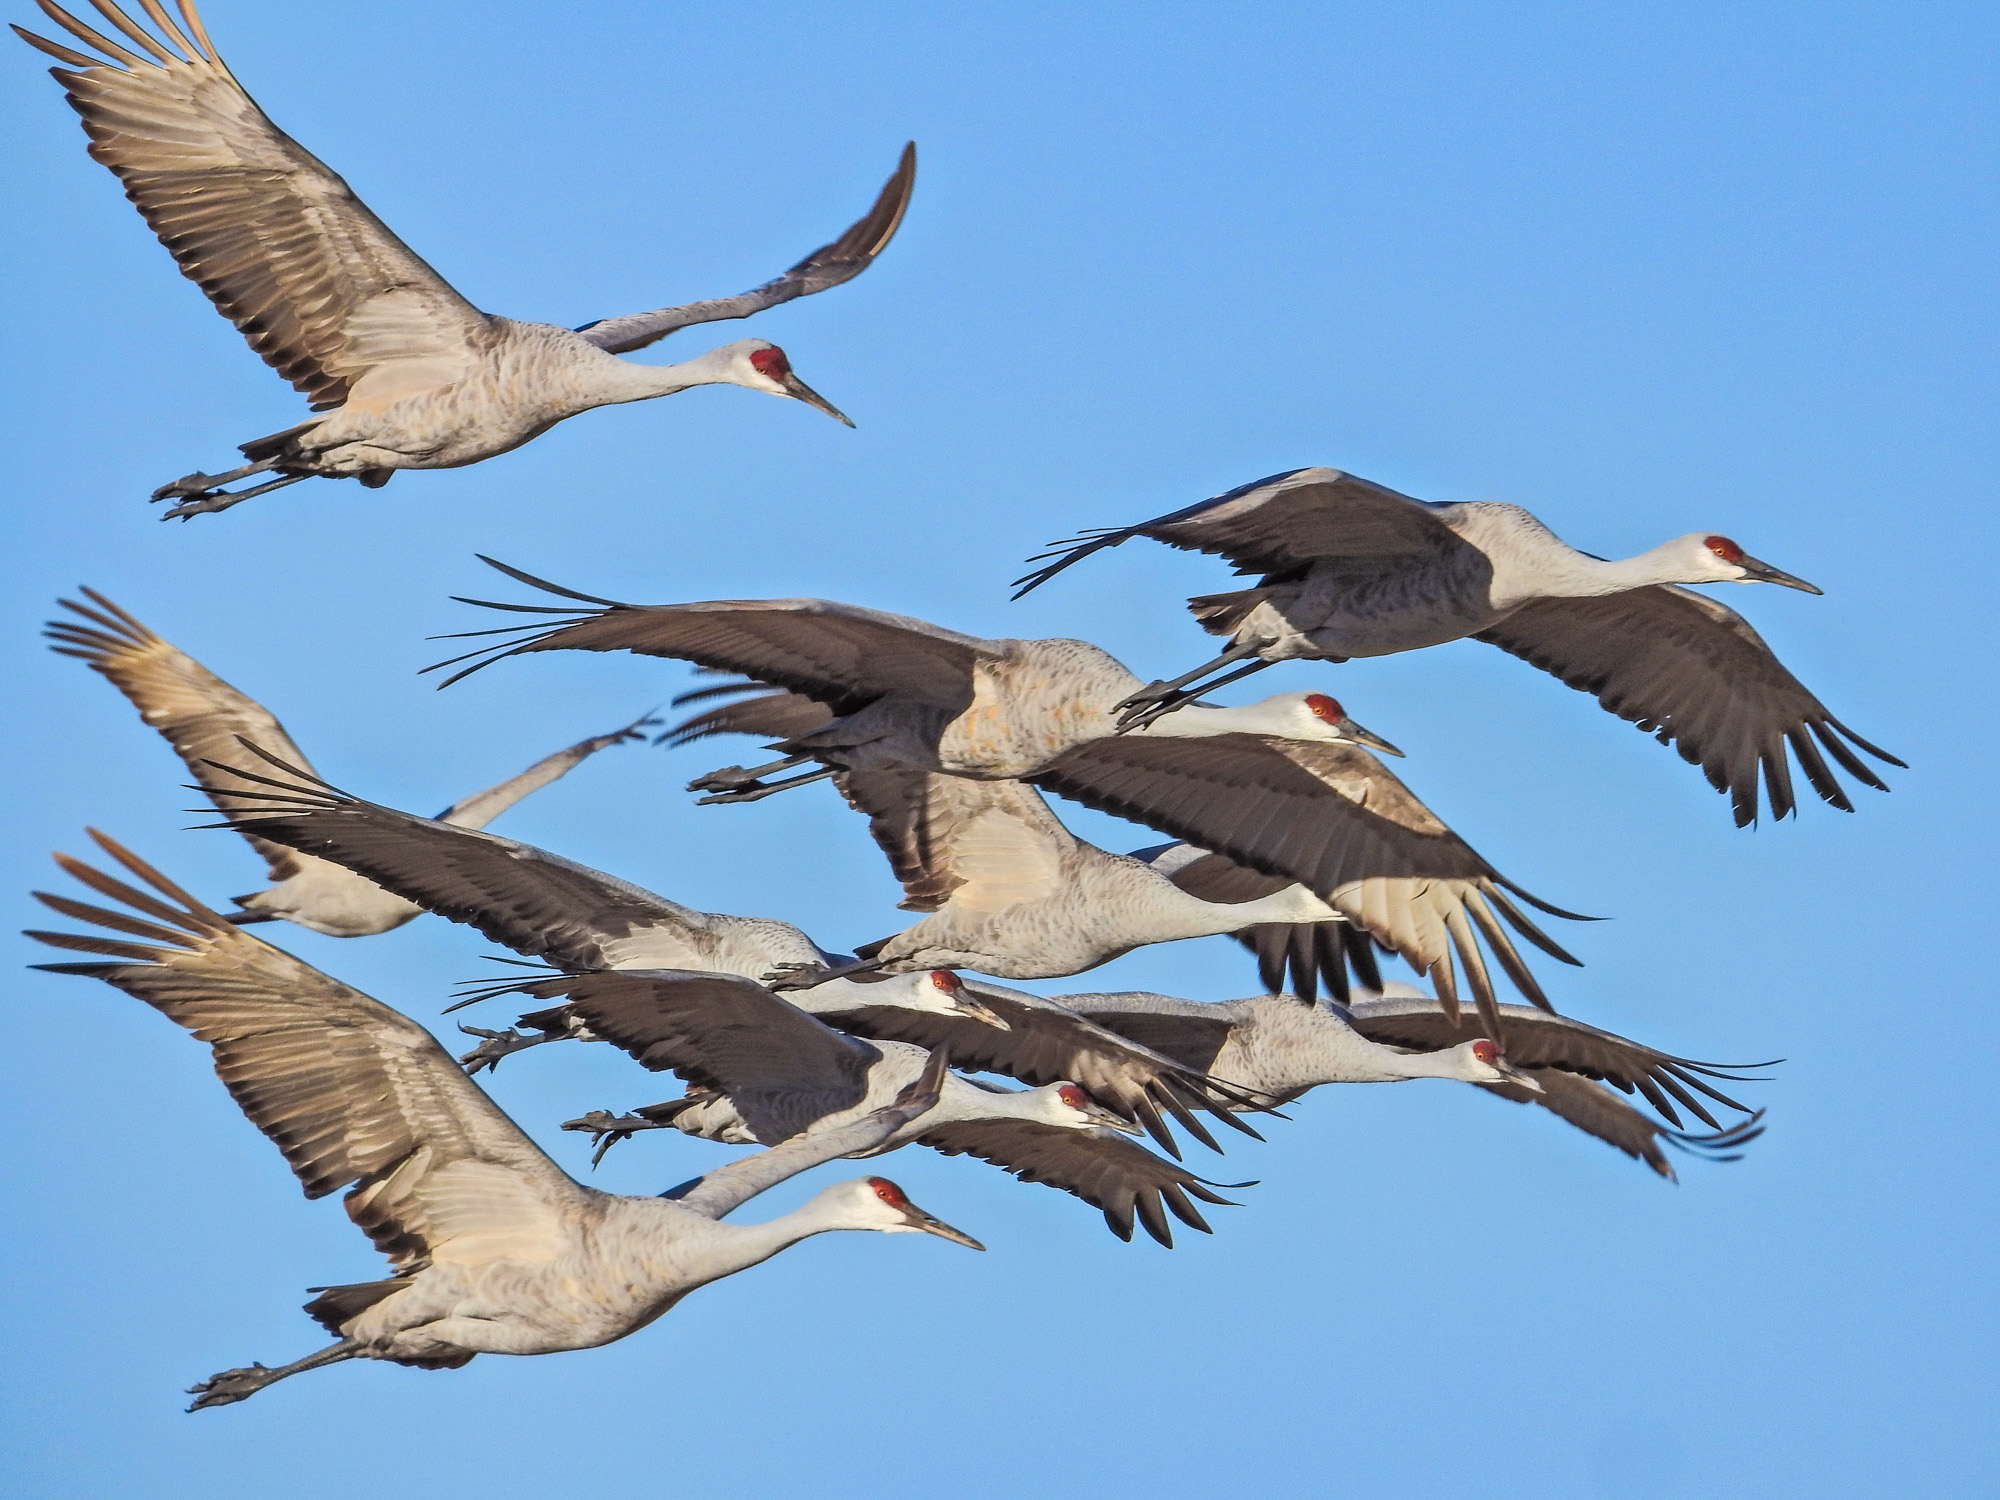
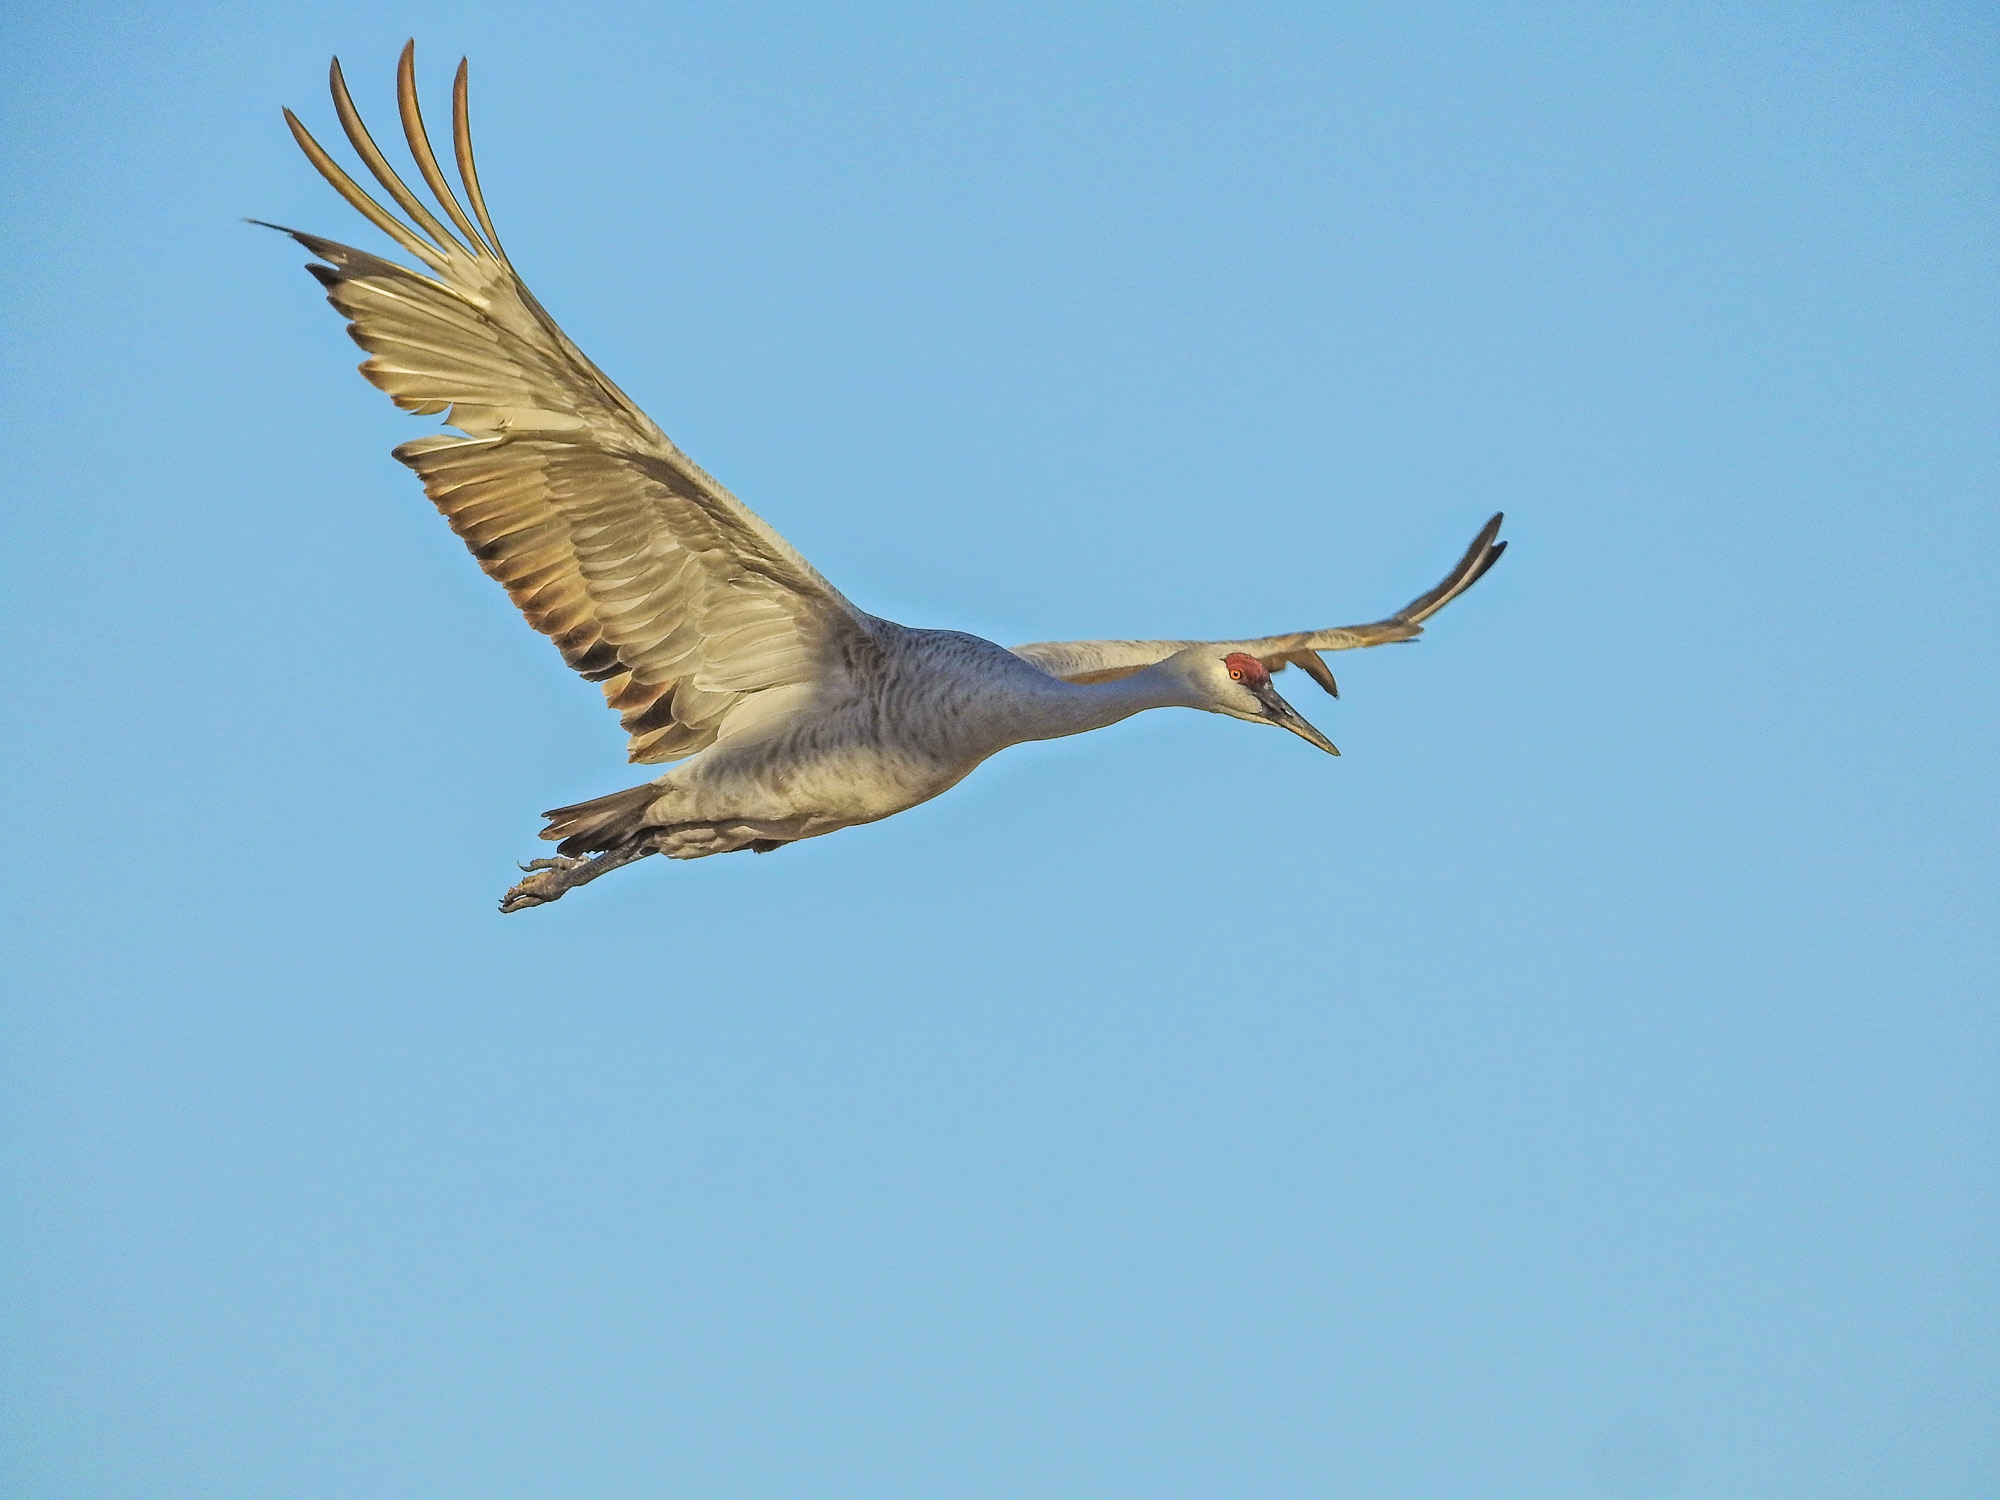
Sandhill Cranes at Bosque del Apache NWR. Nikon P900. Shutter preferred. 1/640 @ 1200mm @ ISO 100 @ f7.1
A while back I posted my original BIF (Birds in Flight) article, which pretty much covered BIF with the Canon SX50/60 (and hopefully 70) models and the Sony HX400V. (See here.)
This post expands BIF coverage to embrace the Nikon P series…the P610 and P900 in particular.
Focus against a blue sky is one thing. Focus against a landscape background is much more difficult.
With the Canons and the Sony, the built in Sports Mode did and excellent job with BIF. On the Nikons…not so much. The default (and unchangeable) focus mode for Sports is the medium spot focus square…which makes getting on a BIF very difficult. And should you get the bird in focus when you press the shutter release, the camera does NOT follow focus. Focus is established by the first lock, and does not change as the bird moves…so, even if you pan with the bird as the camera takes its burst of 10 high speed continuous shots (also default and unchangeable) chances are pretty good that only the first shot will be in focus (if any are). Worse yet, even though this is Sports Mode and supposedly designed for action, Nikon did not bias the exposure system for high shutter speeds, so most often you will have motion blur as well as focus issues. Nikon does not seem to understand what a Sports Mode is supposed to do…but then Nikon’s control software has a lot of short-comings. Sports Mode is a particularly bad example.
I have gotten some great BIF with the Nikon Sports Mode, and it is worth a try in really good light, with cooperative birds.
Nikon Sports Mode BIF. 1/500th @ ISO 100 @ f5.6.
I recently spent a week at Bosque del Apache National Wildlife Refuge in Socorro New Mexico. As noted in the previous BIF post, the Bosque is certainly one of the best places in North America to practice BIF. In my week there I took hundreds of BIF exposures and developed a technique that works pretty well…almost as well as Sony’s Sports Mode.
What you need for BIF is an auto focus mode that will quickly and reliably lock on to birds in motion against a blue sky…or against a landscape background. And, you need high enough shutter speeds to freeze motion.
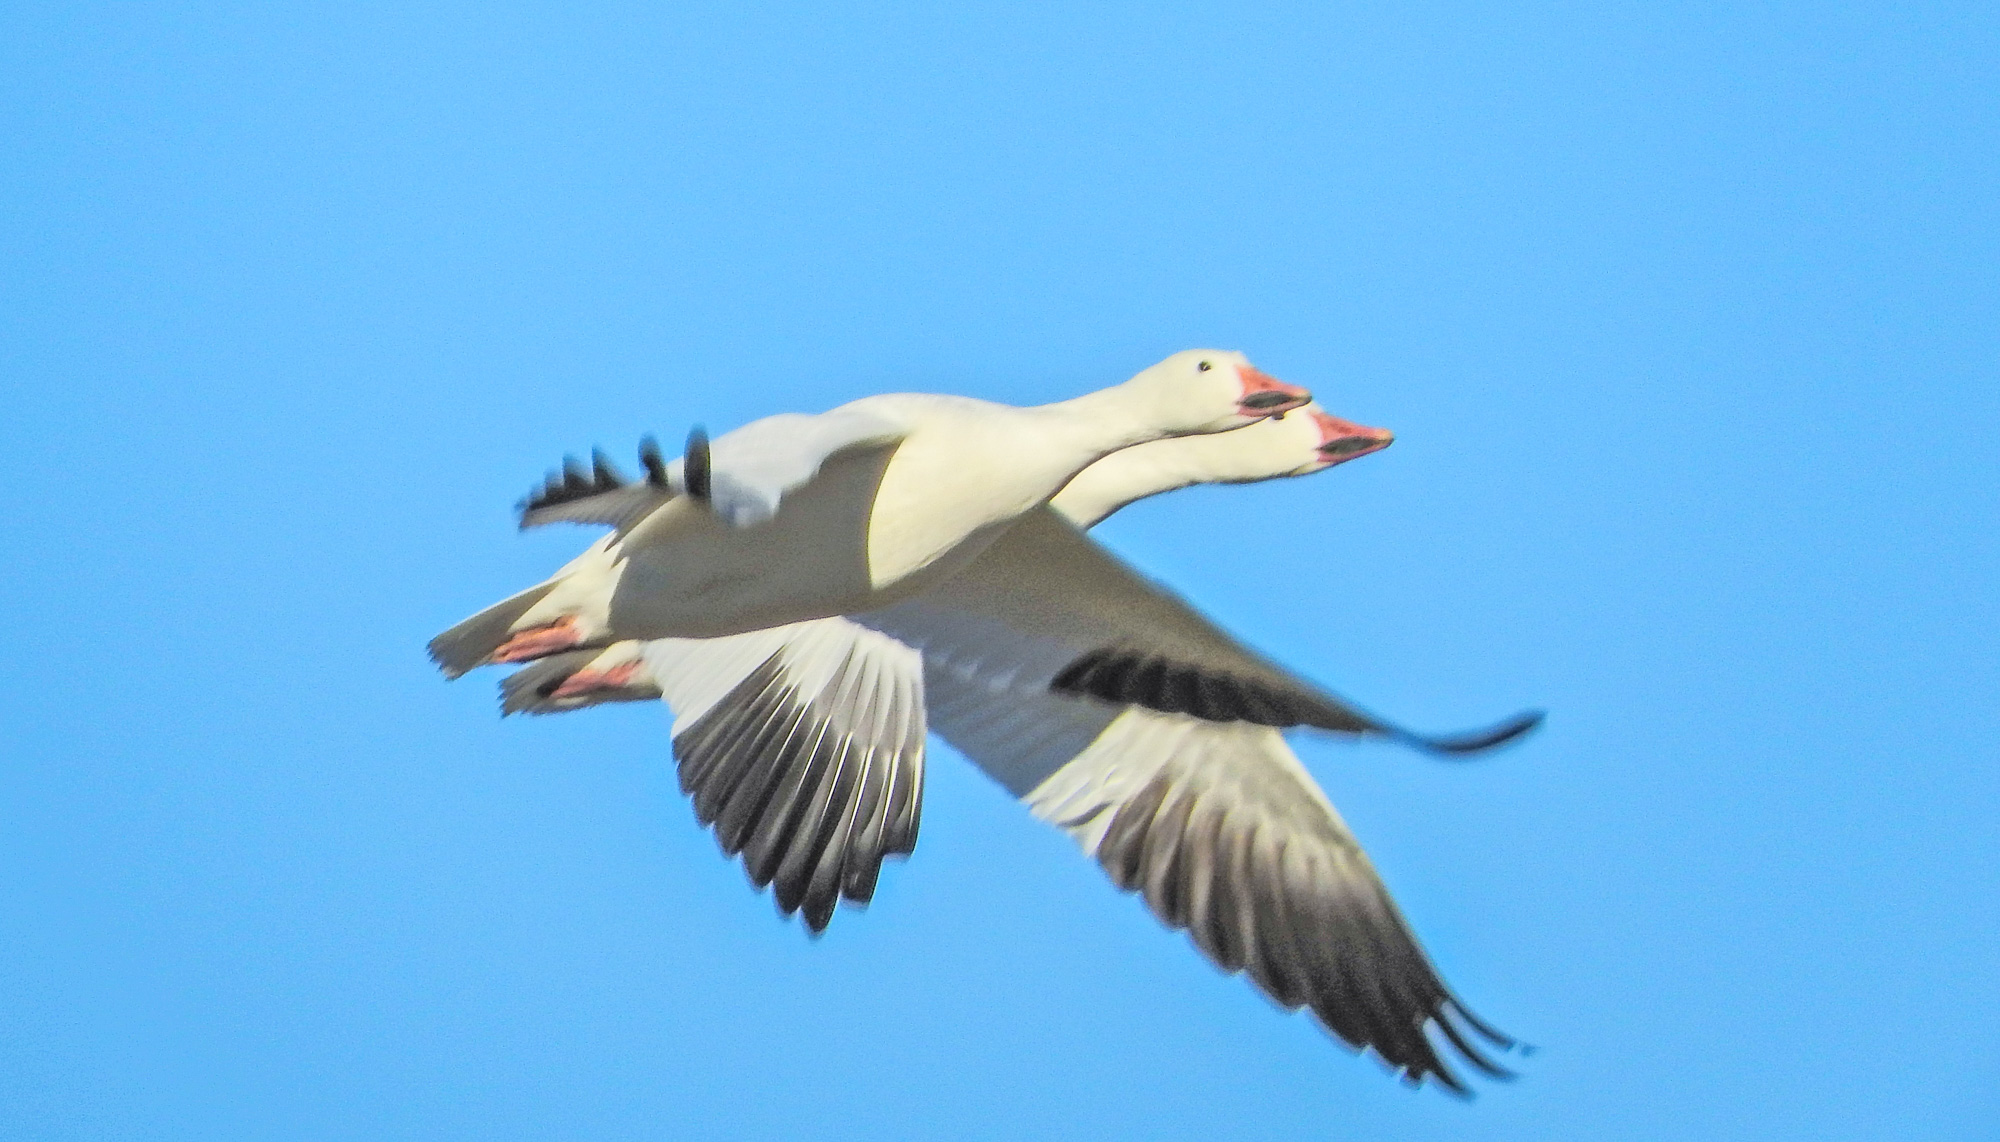
Snow Geese. Custom BIF mode. Nikon P900
On the Nikons, setting the control dial to “S” for shutter preferred allows you to control the shutter speed. Leave everything else on Auto (ISO, etc.). I find that in good light, 1/640th is enough to freeze the wing motion of most BIF, while still giving you a reasonably low ISO for fine detail. In low light…dawn or dusk…1/250th does a good job with all but the wing-tips. Your ISO will be 400-800 (or even higher) but you will get some decent shots.
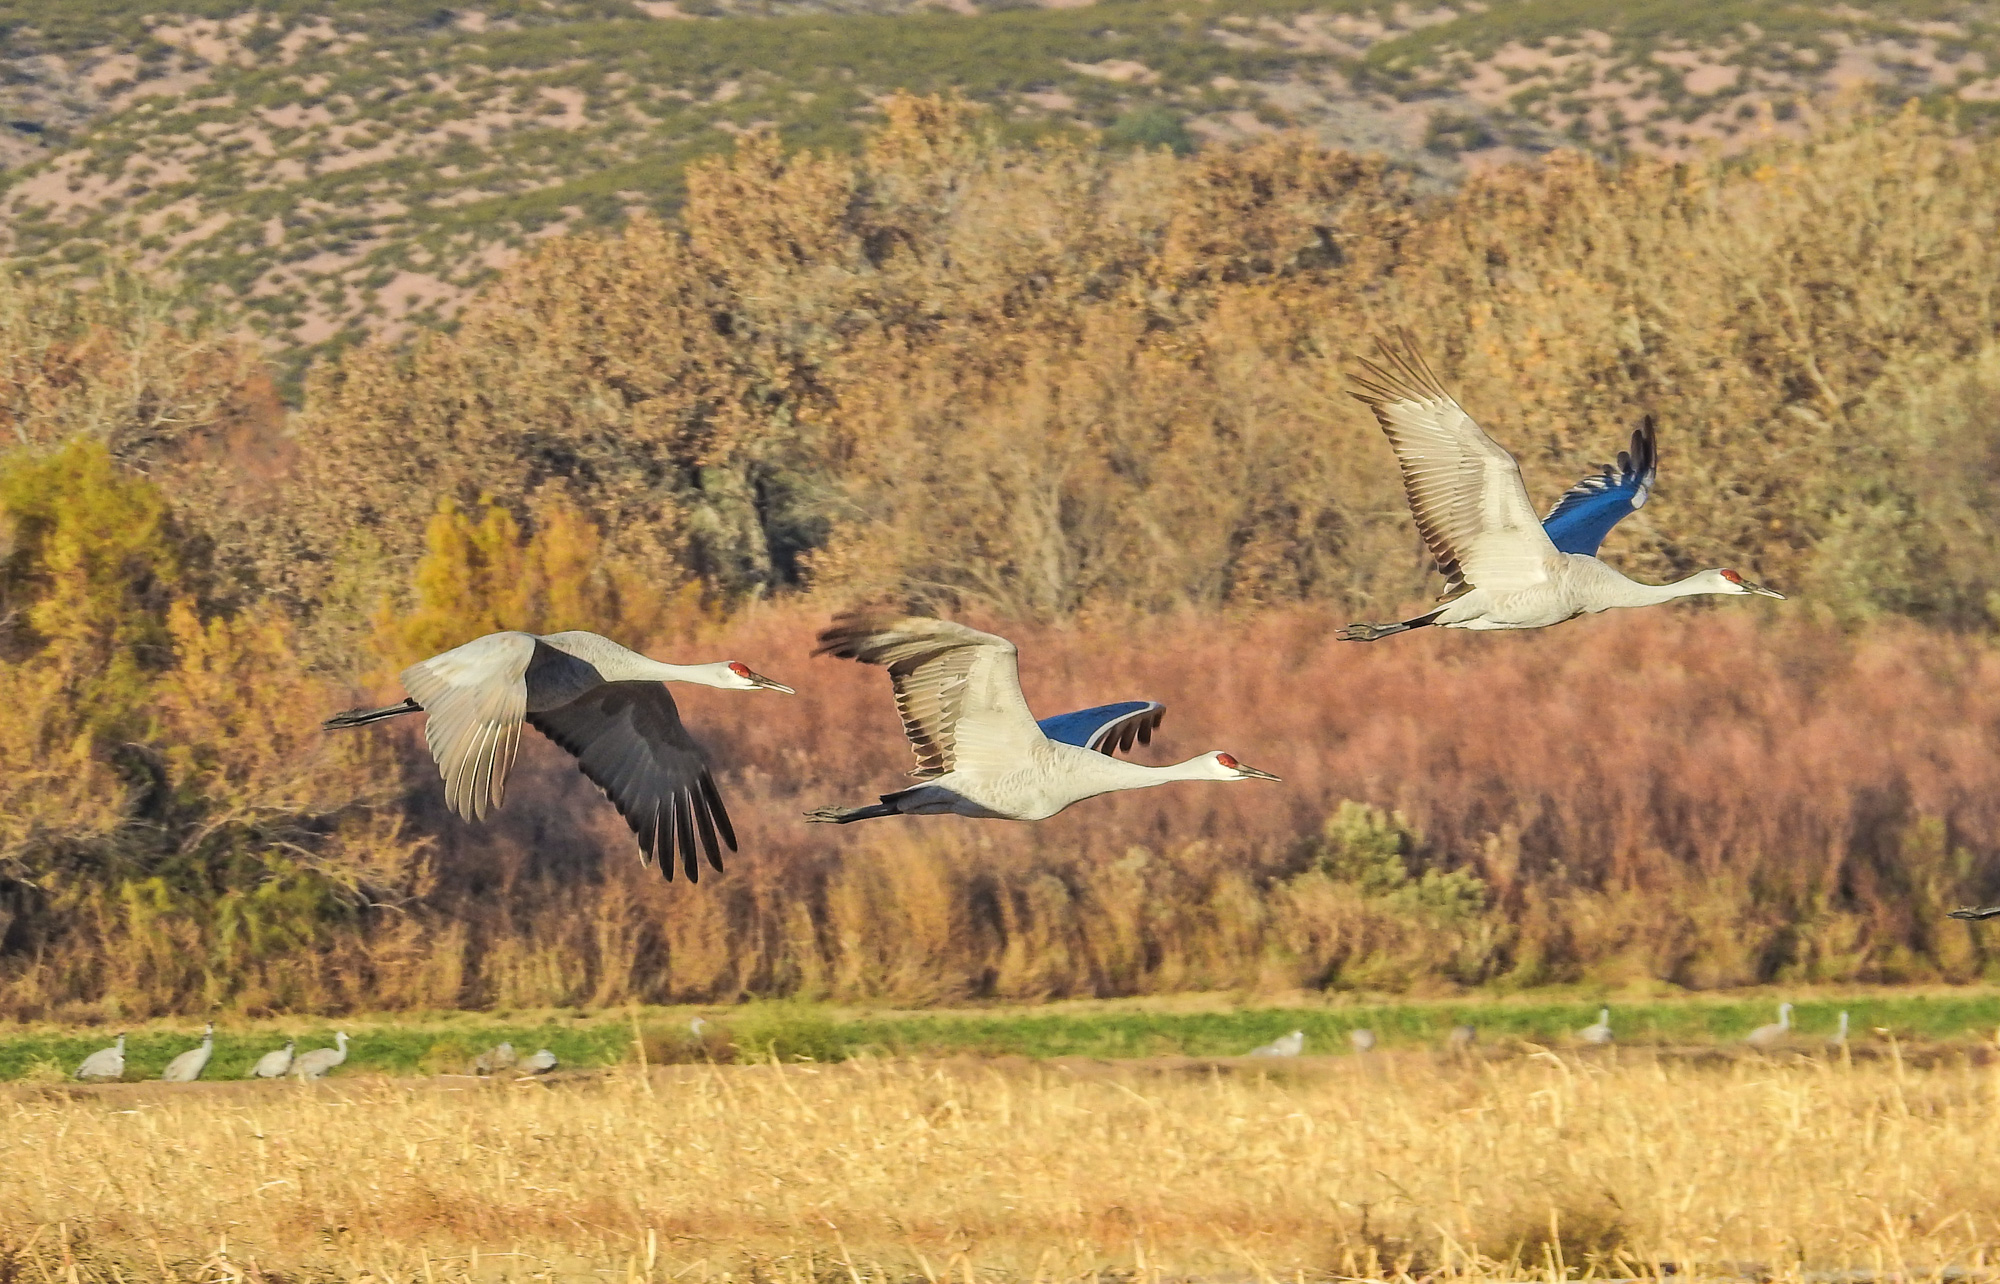
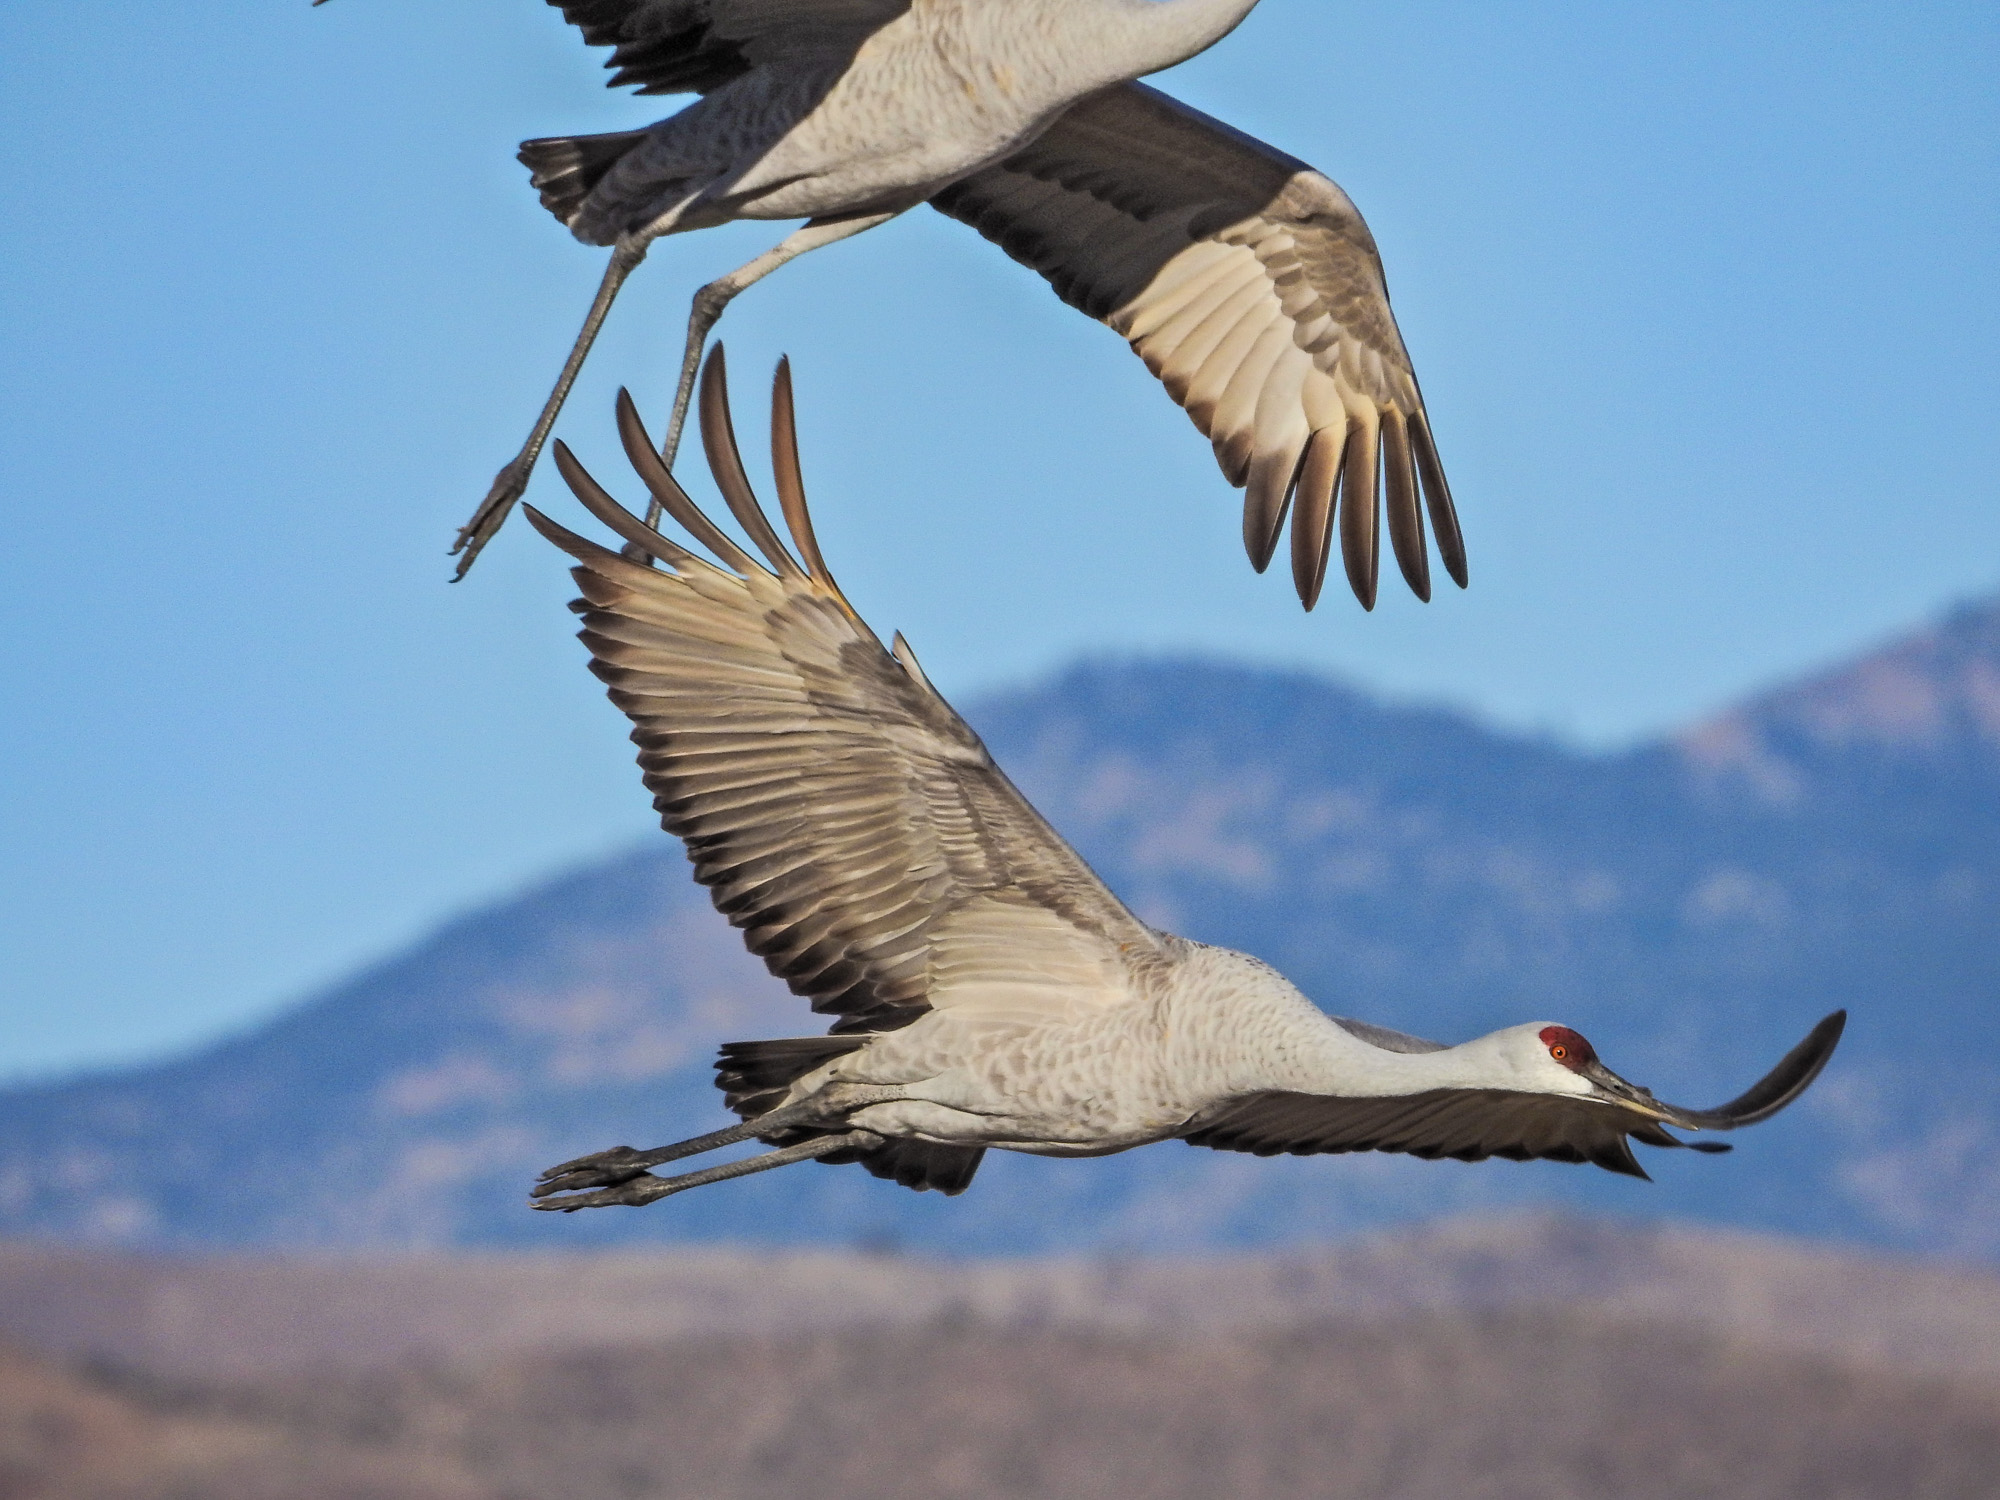
Sandhill Crane, Bosque del Apache NWR. Custom BIF mode. 1/640th @ ISO 100 @ f7.1. 1200mm equivalent.
For the most efficient focus, set the camera to Target finding auto focus. Target finding auto focus is the default in Auto and Program modes, and is your traditional wide angle focus where the camera decides what your might be trying to focus on. I do not generally recommend letting the camera make that decision, but for BIF on the Nikons, Target finding auto focus proved to be fast and accurate more often than any other mode. I was getting 70% or better quick accurate focus on BIF against a blue or clouded sky, and better than 50% against a landscape background. That is actually very good performance.
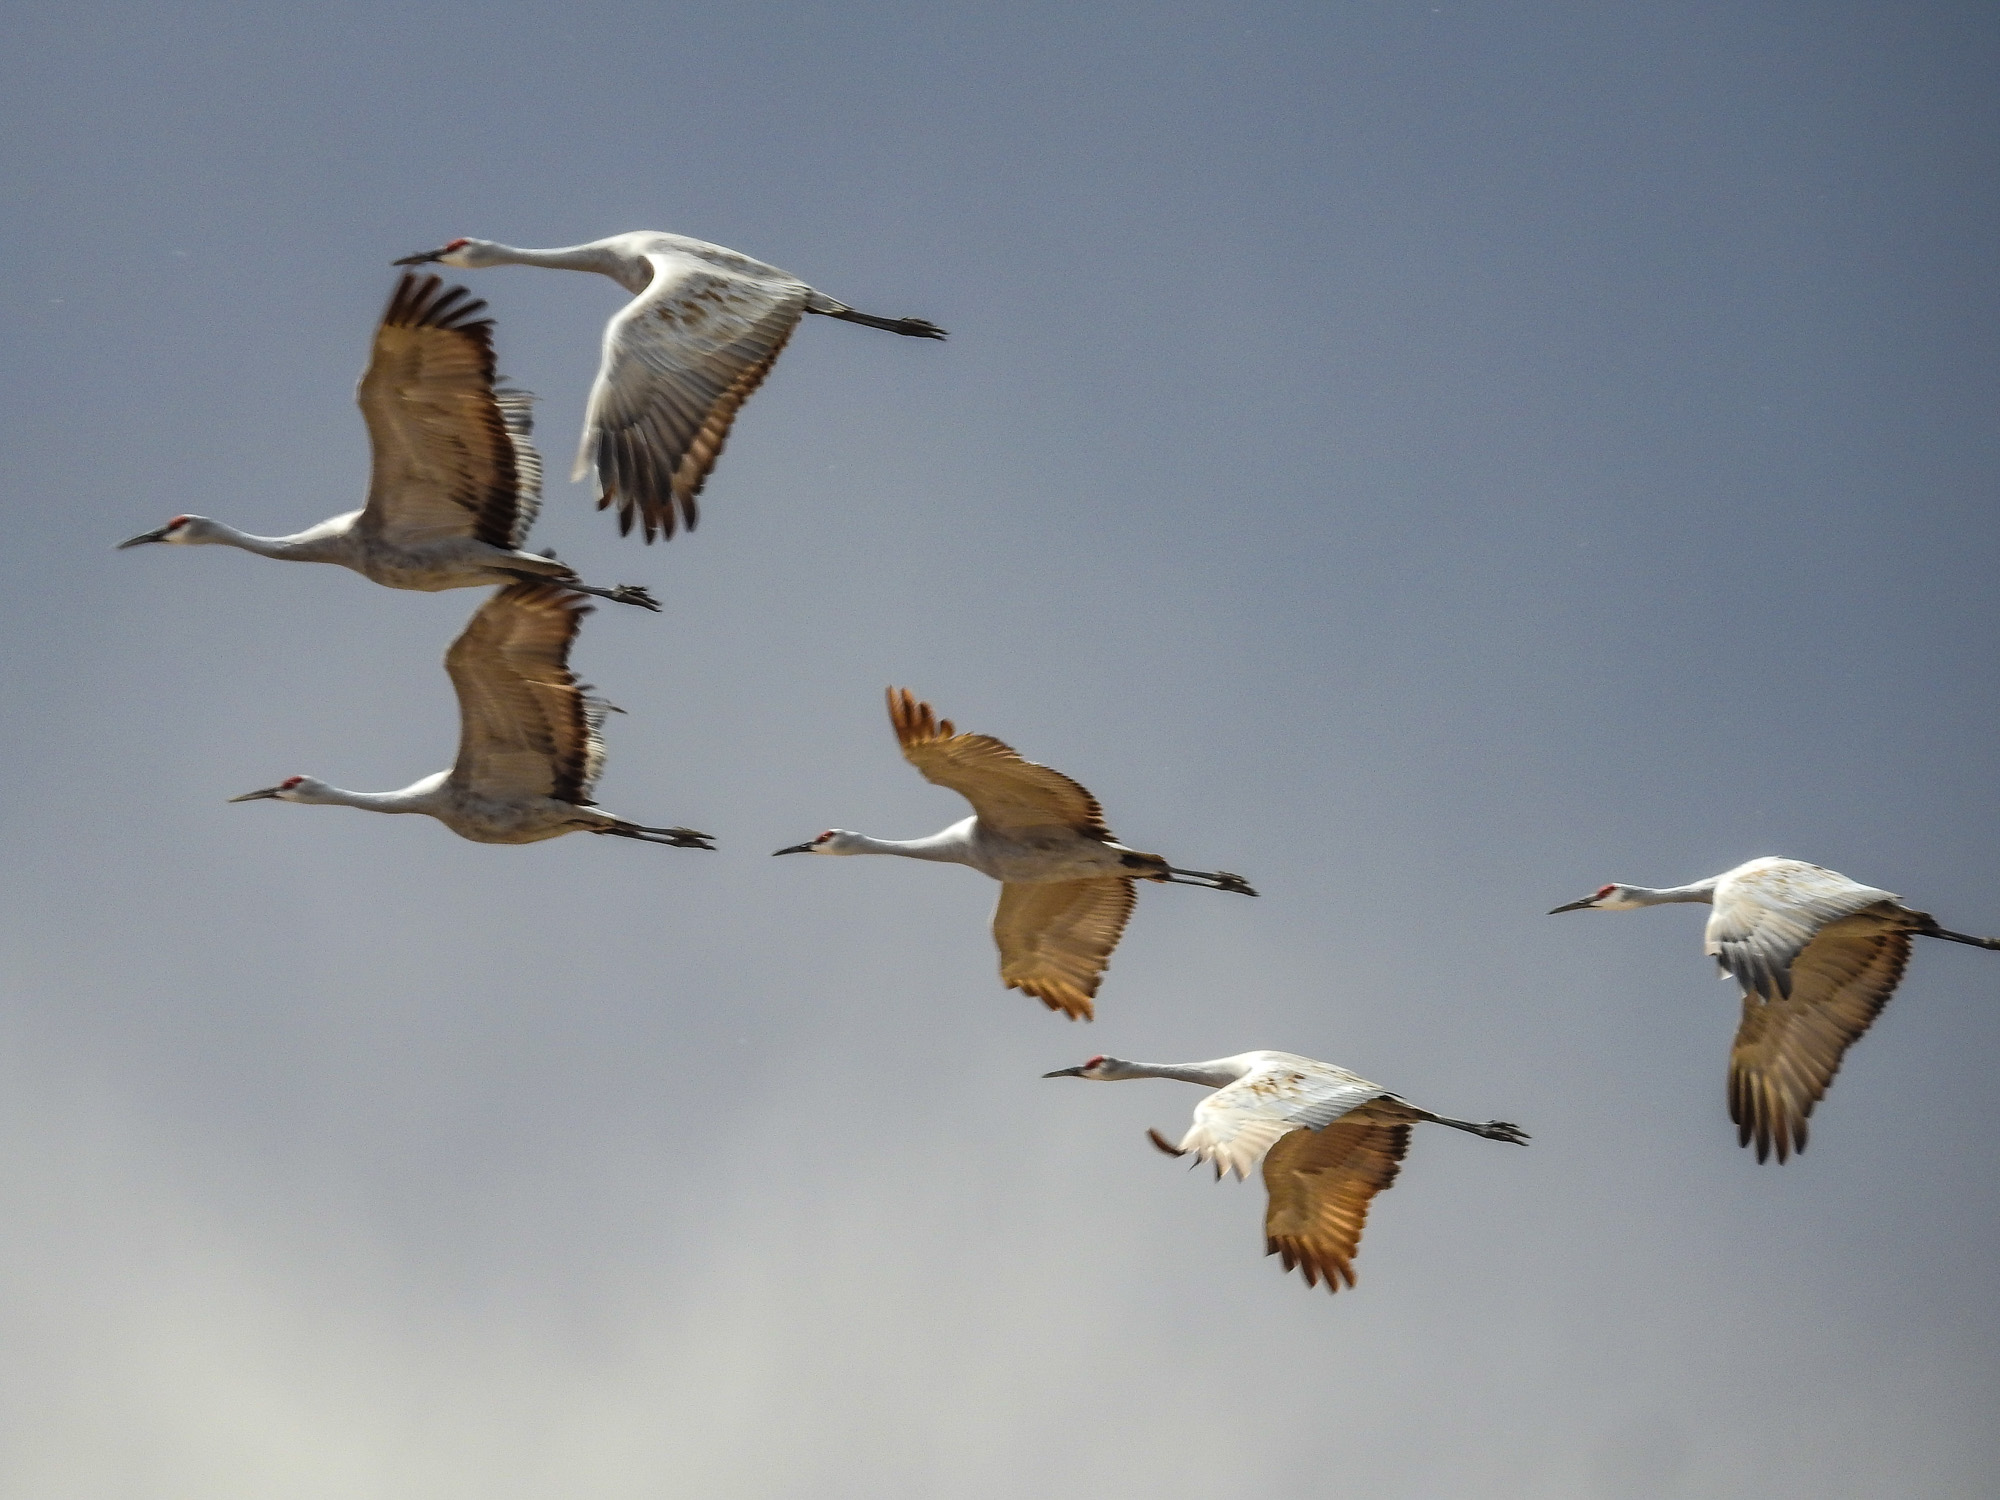
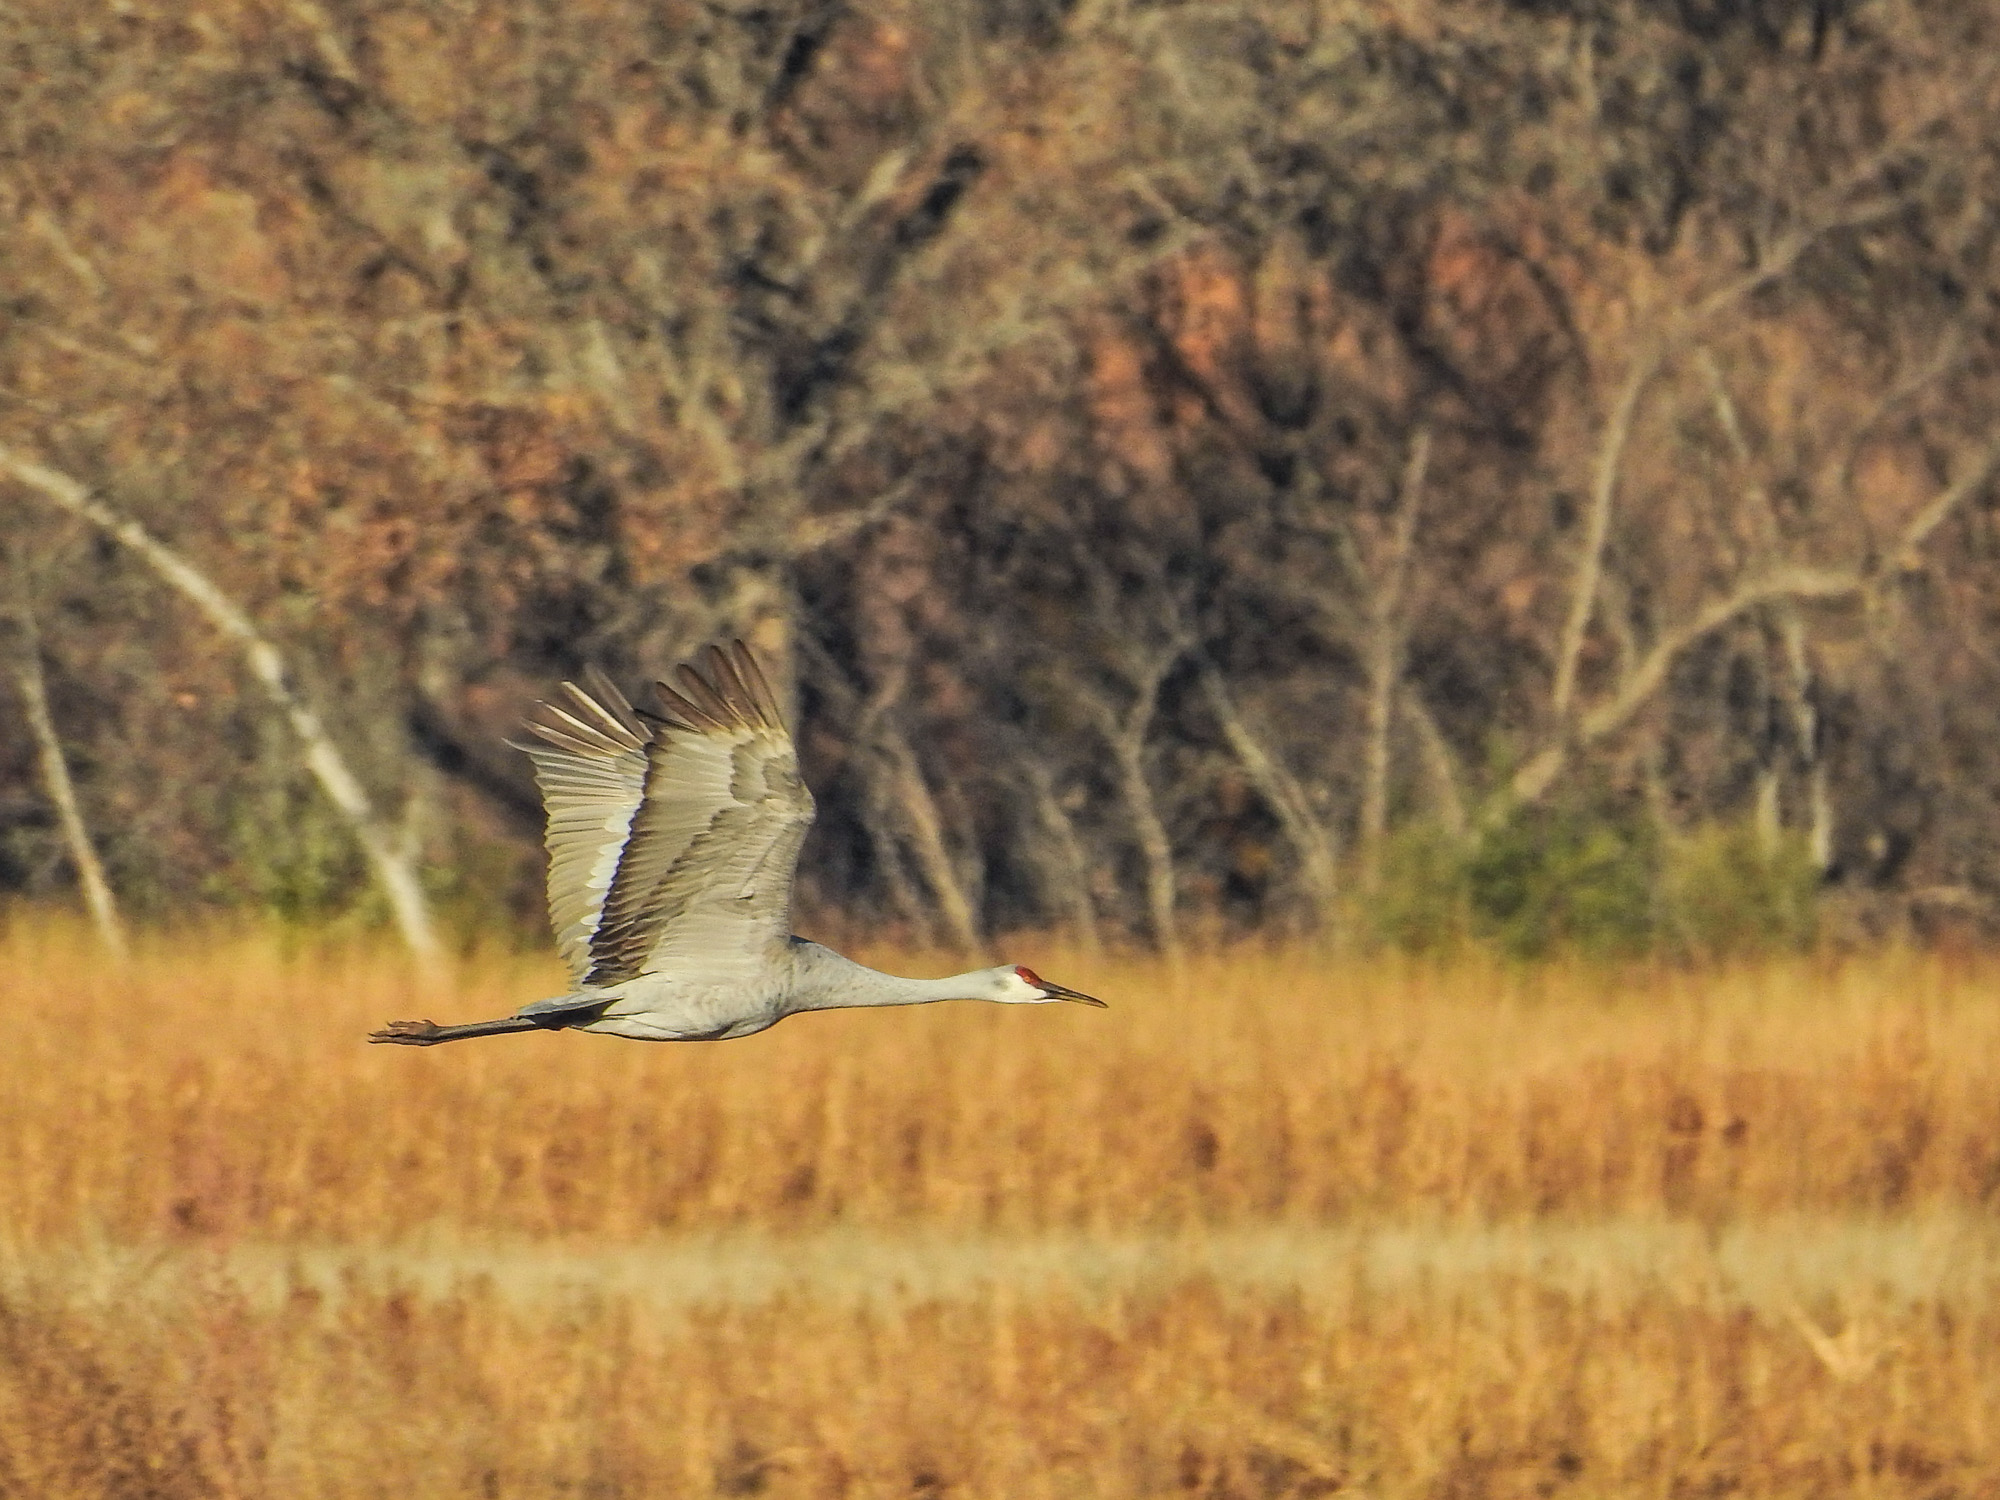
Focus against a background. Custom BIF mode. Nikon P610. 1440mm equivalent. 1/640th @ ISO 100 @ f7.1
I found that in following fast moving birds, high speed continuous was easier than low speed…since the black out between images is long enough on low speed so that I would loose my pan and the bird would go out of frame.
Another focus against a background example. Snow Geese.
General BIF advice: 1) don’t try to shoot at the long end of the zoom, especially as you are developing your technique. Finding focus and keeping the bird in frame are both easier at 600-1000mm equivalent fields of view, than they are at 1200-2000mm. Remember, the DSLR/long lens crowd are shooting at 400-600mm and cropping. 2) Pan with the birds before pressing the shutter for focus. Pick the birds up as soon as possible, and pan with them until they are close enough for a satisfying image. Then half press the shutter for focus. If you get focus lock, then shoot off a burst.
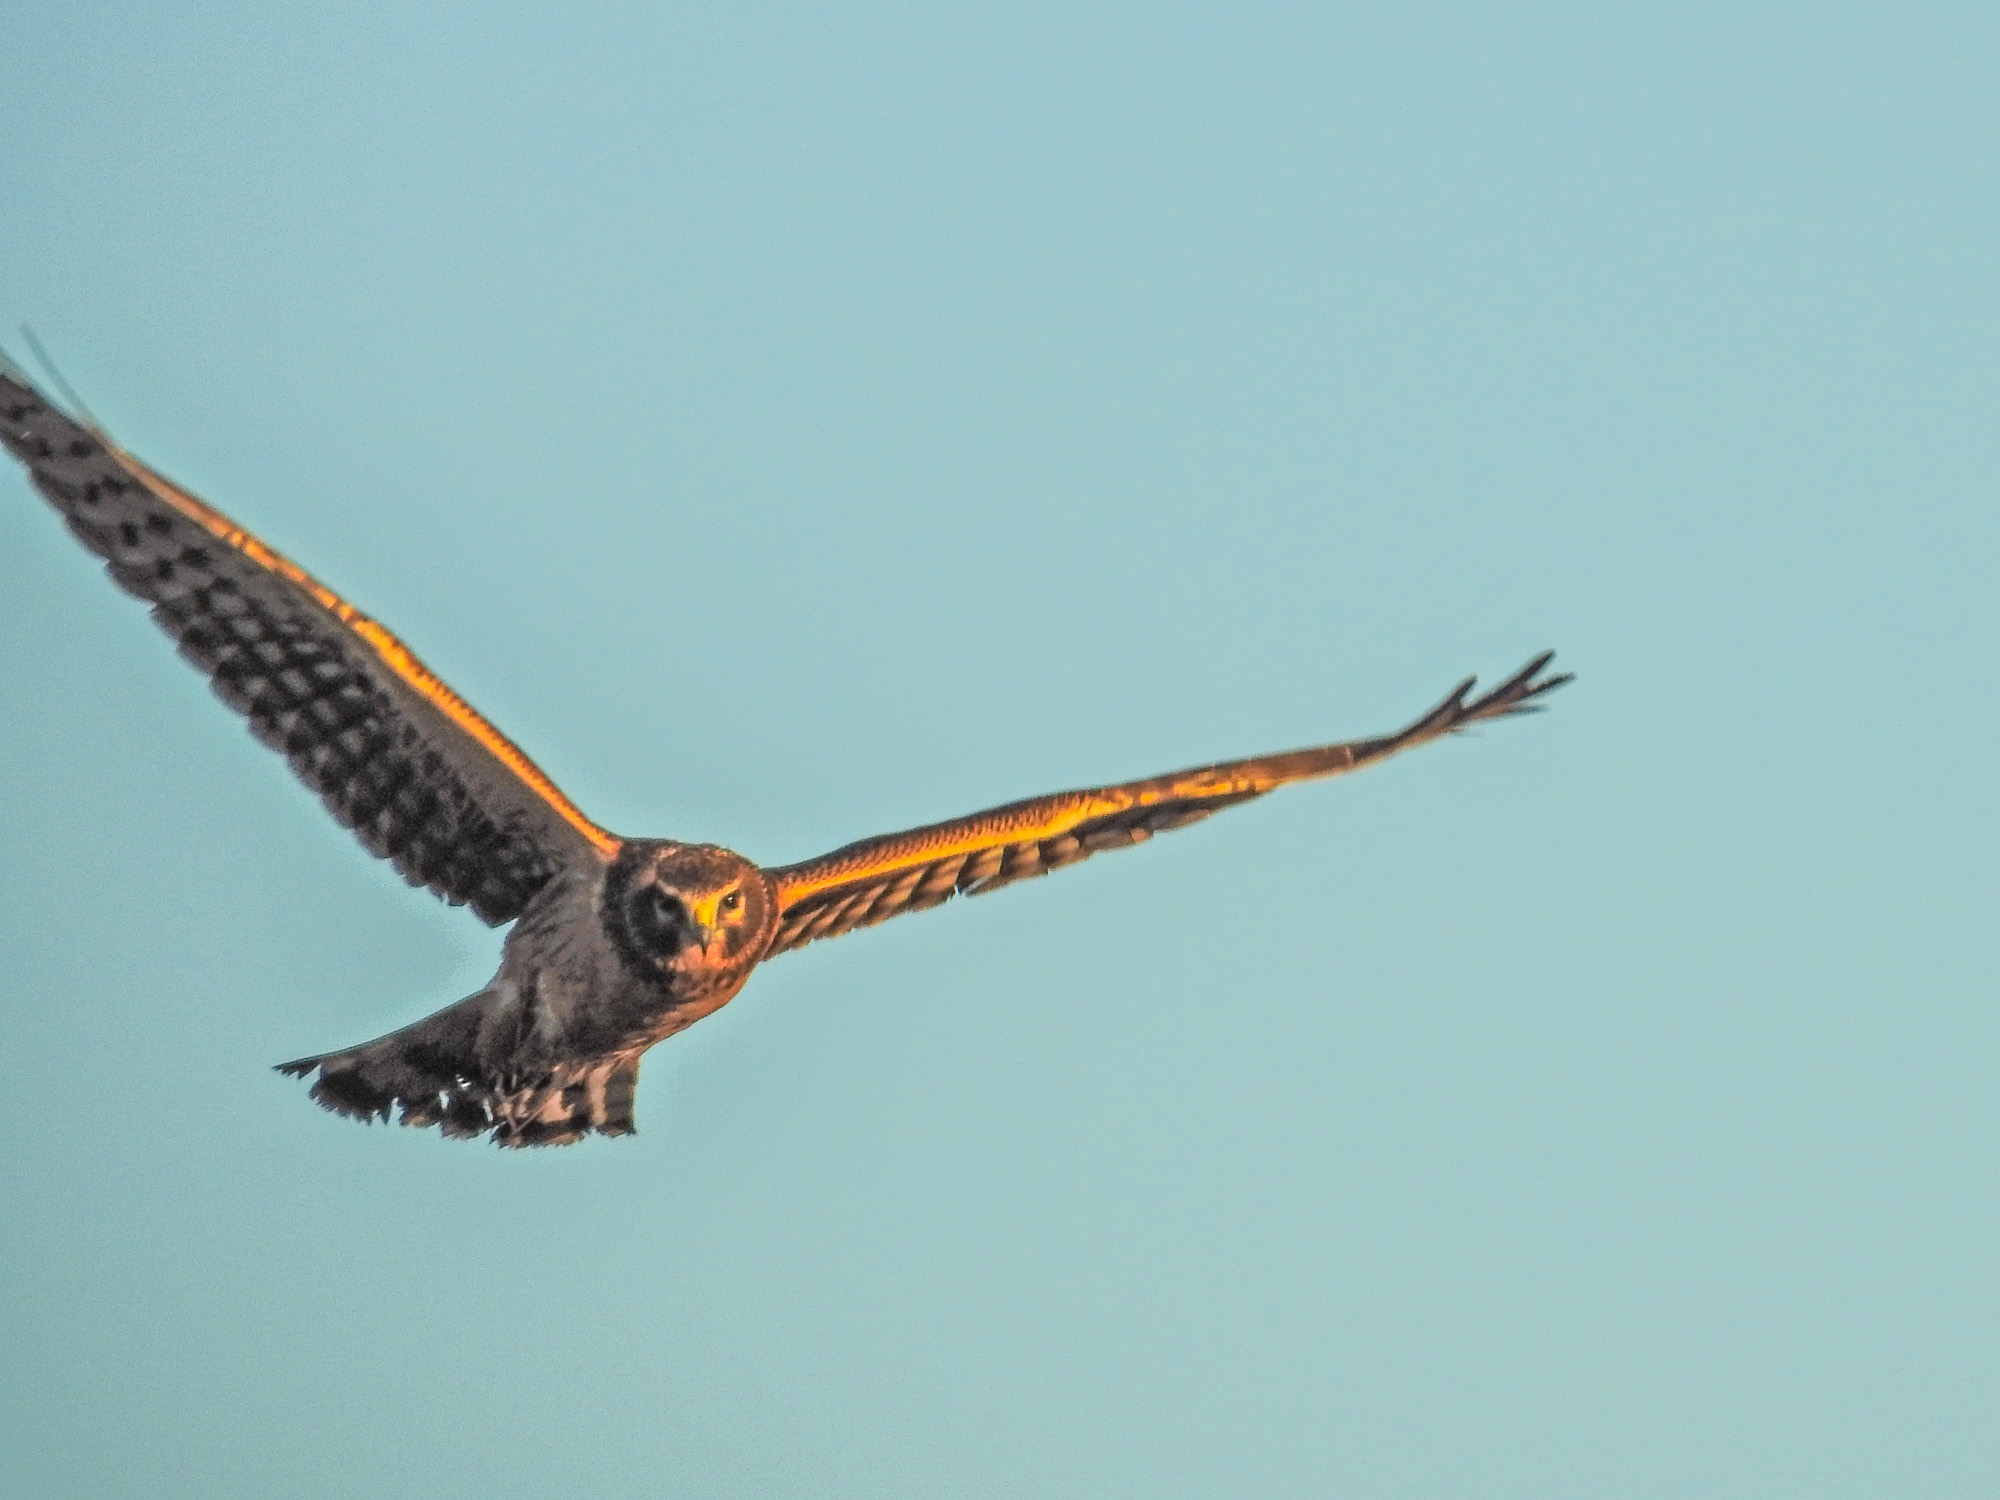
Northern Harrier. Focus on birds coming head on is the most difficult of all.
As always, take a lot of exposures! Try, try, and try again. And don’t worry about the misses. Celebrate the hits!
Classic flight shot. Sandhill Crane. Bosque del Apache NWR.
Sony HX90V. Notice finger grip, and control ring around lens next to the body.
I really like the Nikon P900, which I am using for the majority of my bird and wildlife photography these days, and which does a good job on nature photography of all kinds (it is hard to argue with the excellent 83x zoom and amazing image stabilization), but since I switched to it from the Sony HX400V, there are several things the Sony did well that I find myself missing. The main ones are: fully adjustable in-camera HDR and more robust Dynamic Range Optimization options, reliable macro, and Anti-motion Blur mode for inside shots. The Nikon does all these things, after a fashion, but it does not do them as well as the Sony HX or RX series.
Then too, I have now passed both the Sony HX400V and the Canon SX50HS, my previous “back up cameras”, on to others. That left me with just one camera for trips, and it is never safe to travel for more than a few days with only one camera. What if something bad happens? Imagine it: stuck in Panama for a week without a working camera. Never!
Which is why the Sony HX90V, when it was first announced, appealed to me. It has the pop-up electronic view finder from the RX 100 iii and iv; the control ring around the lens from the whole RX series (see above); the finger grip from the RX 100 iv (also in the pic above); a flip up 180 degree, selfie ready, LCD like the Alpha 5000 and 6000; and the world’s smallest 30x zoom …24 to 720mm equivalent field of view (and a ZEISS Sonnar at that). Given past experience with Sony’s souped up digital Clear Image Zoom, that means possible pics out to 1440mm in a pinch.
And it is small enough to carry along with the Nikon P900 without even thinking about it.
Sony HX90V at 720mm and Nikon P900 at 2000mm.Viewing options. Pop-up, pull out EVF, flip up LCD.
It also has the truly inspired Function button and menu I had loved on the HX400V…which gives you easy access to anything you are likely to want to set…and three fully programmable memory locations for settings you use often. And, of course, the traditional Sony Creative Styles options, which allow you to fine tune how the jpeg images are processed and encoded in the camera before they are written to the card. (Sony’s answer to RAW.) All in all, the level of control possible with the Sony simply puts the Nikon in the shade…it is a good thing the Nikon lens and IS are so good!
Of course, no amount of control matters if the images are unsatisfying. Like all Sony cameras, especially the P&Ss, the images from the HX90V will not stand a lot of pixel peeping…they are not as clean at the pixel level as Nikon or Canon images. However, at normal viewing and printing sizes, they are simply excellent…sharp, vibrant, and lively.
Since it is a primary interest of mine, we will begin with a few in-camera HDRs: you can set in-camera HDR for anything from 1 EV differences in exposure, for a very subtle effect, to 6 EV differences, to capture deepest shade and boldest highlights. There is also an Auto setting which does an excellent job in all but the most extreme conditions.
Then you have macro effects down to 5 cm (2 inches). I find that about 35-40mm equivalent works really well, along with DRO level 5 or Auto. You actually get an excellent macro effect.
The long end of the zoom is useful, with or without some Clear Image zoom, for close-ups of bugs, and the occasional grab shot of a cooperative bird. This (along with super-bright sunny days) is where the pop-up EVF comes into play! It is much easier to hold the camera still when it is up to your eye.
The flip up selfie mode on the LCD panel does a good job.
Me at Nubble Light, in Maine
Panorama shots are as easy as they are with any Sony. You have your choice of “standard”, “wide”, or “360 degree.”
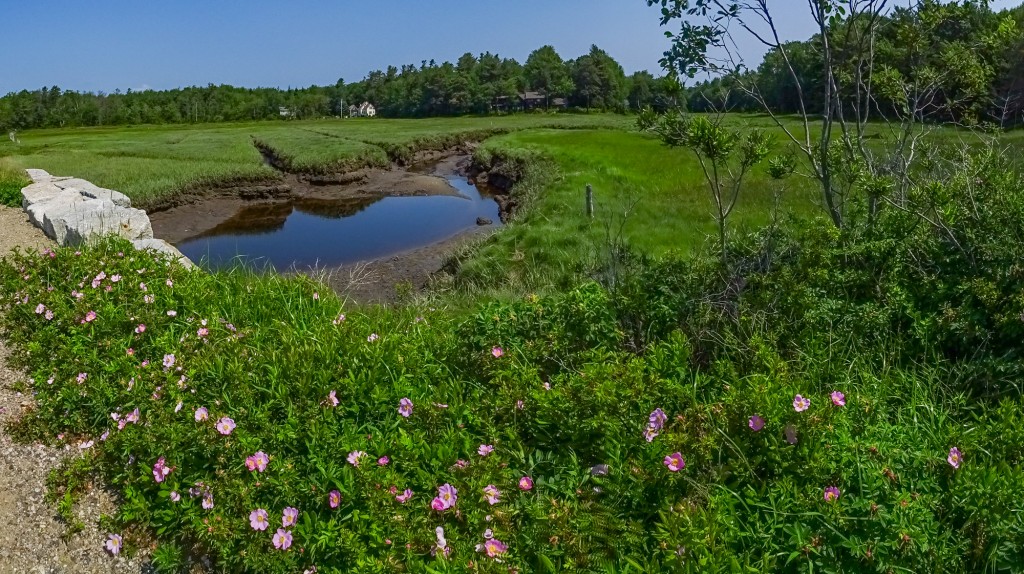
Wild Roses along the Bridle Path
Big Beach, Kennebunk ME. Wide format pano.
Some of the Picture Effects are also interesting. I have enjoyed playing with HDR Painting, which can be adusted to one of three levels, and produces a nice “slightly over the top”, tone-mapped HDR look.
In-camera, HDR Painting Picture Effect. This is on the “low” setting.[/caption
Sunsets are always a good test of a Point and Shoot. I tried both the Multiple Frame Noise Reduction Mode and in-camera HDR. I like the results from HDR better. Pleasing rendition of colors, and very little noise in the image.
Sunset over Back Creek, with fisherman 🙂
I went to Strawberry Banke, a local historical district in Portsmouth NH, today, and had a chance to try out several modes for indoor use. I tried straight in-camera HDR, Anti-Motion-Blur Mode, and Multi Frame Noise Reduction (with is actually an auto ISO setting). All three worked well, and provided higher ISO equivalent images in low light that showed much less noise than you would expect. Anti-Motion Blur tended to have the most noise, as it consistently selected higher ISOs suitable for moving subjects. In-camera HDR was relatively clean, and, as expected had the most extended range…usable highlights and open shadows. Multi Frame Noise Reduction ISO mode produced the cleanest looking images, amazing clean for hand-held indoor shots in very dim natural lighting, but would not be suitable for indoor action. This is a hand-held Multi Frame NR shot in a historical kitchen with only window and fire light. I think it is pretty amazing.
Strawberry Banke hearth cooking demo. Portsmouth NH. Multi Frame NR
So…all in all the Sony HX90V is a great second camera. It does everything I had hoped, and almost everything the Nikon P900 does not do well. It is even a great first camera. The degree of control offered, the viewing options, the excellent long zoom, the advanced multi-frame features, etc. put it right there in the top choices for a P&S superzoom for nature and creative photography…as long as you don’t need more than 720mm of reach (1440mm with Clear Image zoom).
And finally, of course, the Sony HX90V was conceived as a travel zoom…and as that I can not imagine a better choice! It does it all and it does it all well…fits in a large pocket…and is the ideal camera to carry absolutely everywhere you travel. Good job Sony!
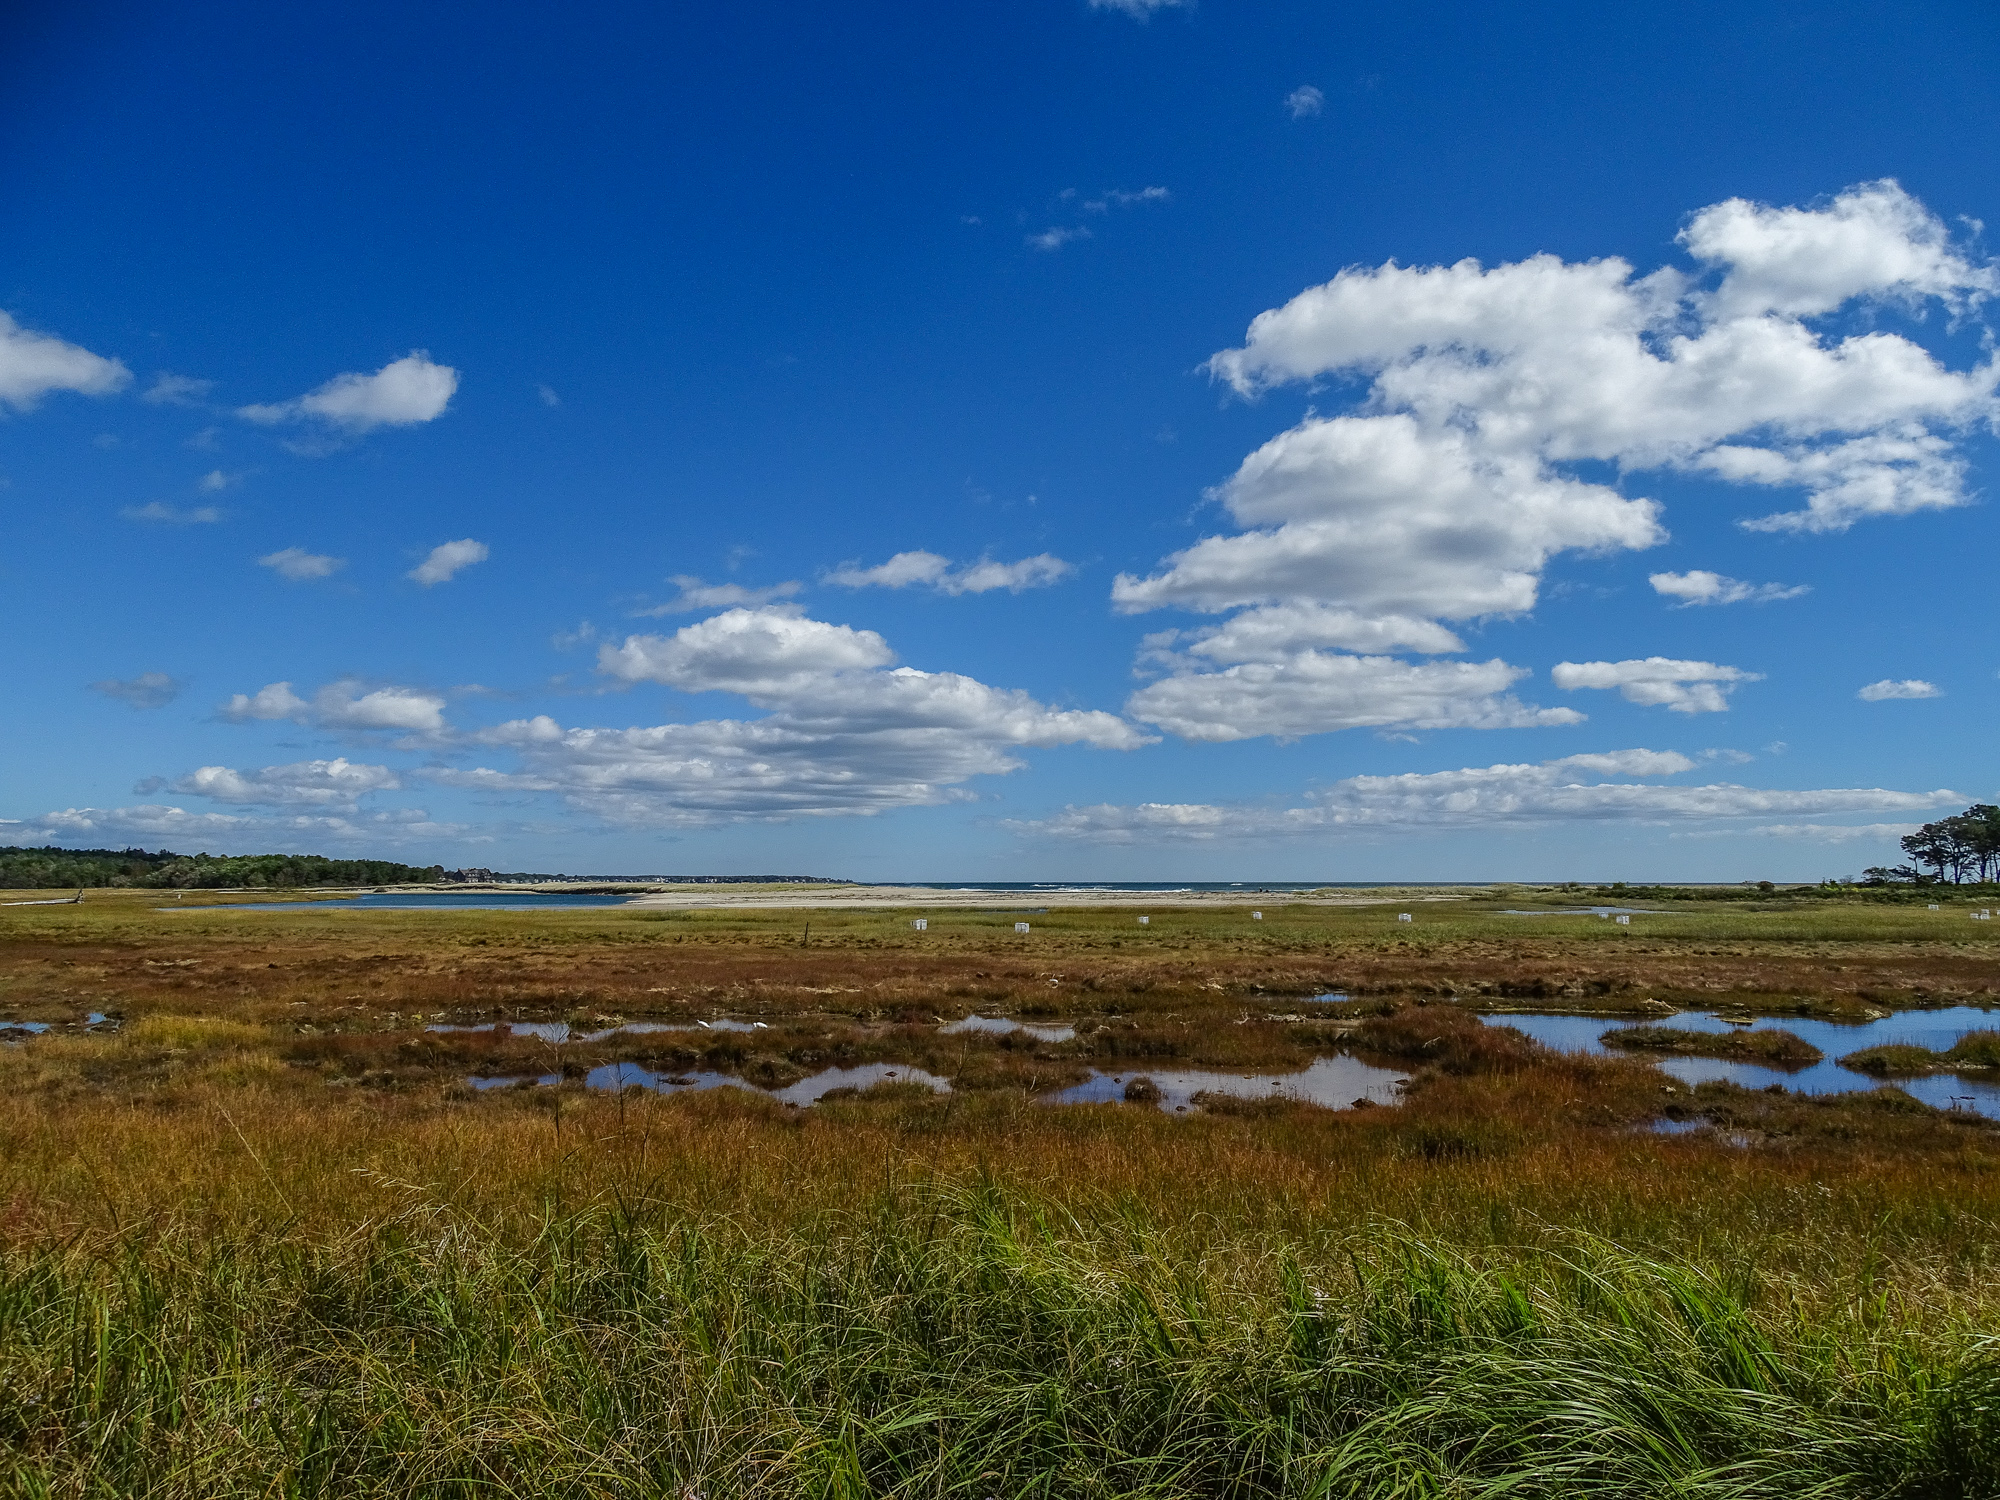
A walk at the Wells National Estuarine Research Center at Laudholm Farms in Wells ME. Nikon P900, showing the full zoom range and flexibility of the superzoom camera.
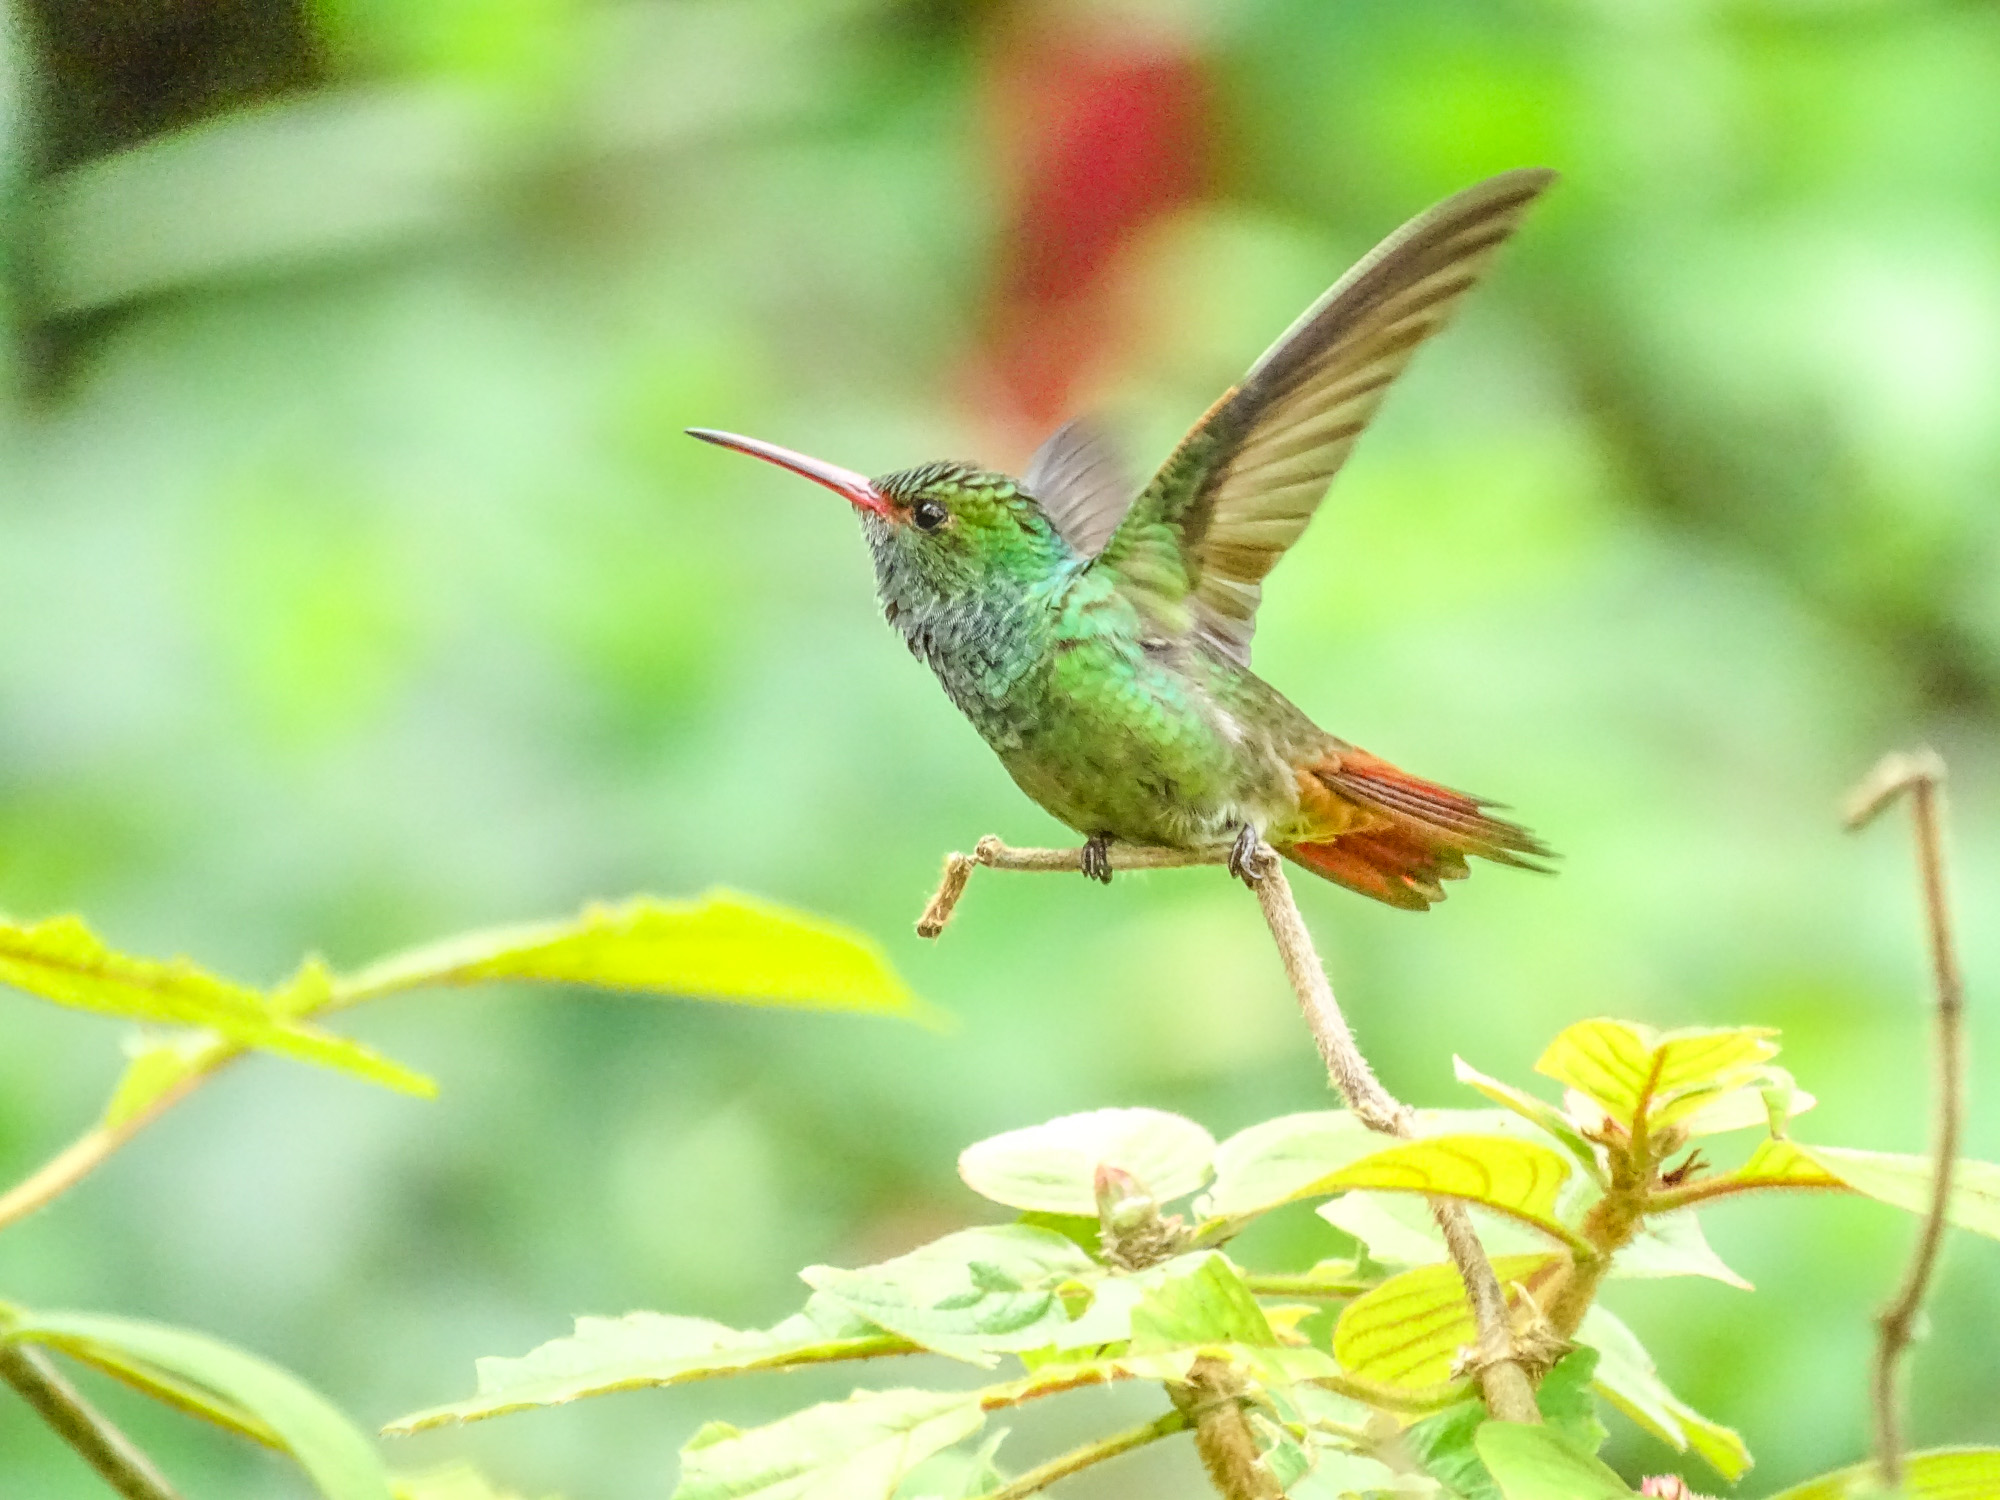
Rufous-tailed Hummingbird, Rio Santiago. Sony HX400V
The tropics provide one of the richest and most varied arrays of photographic opportunities of anyplace on earth…but they also provide definite challenges for any photographer…including, of course, Point and Shoot Nature Photographers. From the dense, dark, dim (and often damp) canopy of the rain and cloud forests to the harsh light of the dry forest and uplands in the rain-shadow of the mountains, exposure is always a difficult issue. Then too, focus in the rain forest, with all the vegetation, and the dim light, can be a real problem. It is not much easier in the glare of the dry forest.
I recently enjoyed a week at the Rain-forest Lodge at Pico Bonito in Honduras, spending each day in different location in the area…from deep rain-forest on the shoulders of the mountains, to coastal mangrove lined rivers, to the Honduran Emerald Reserve in the dryer country inland.
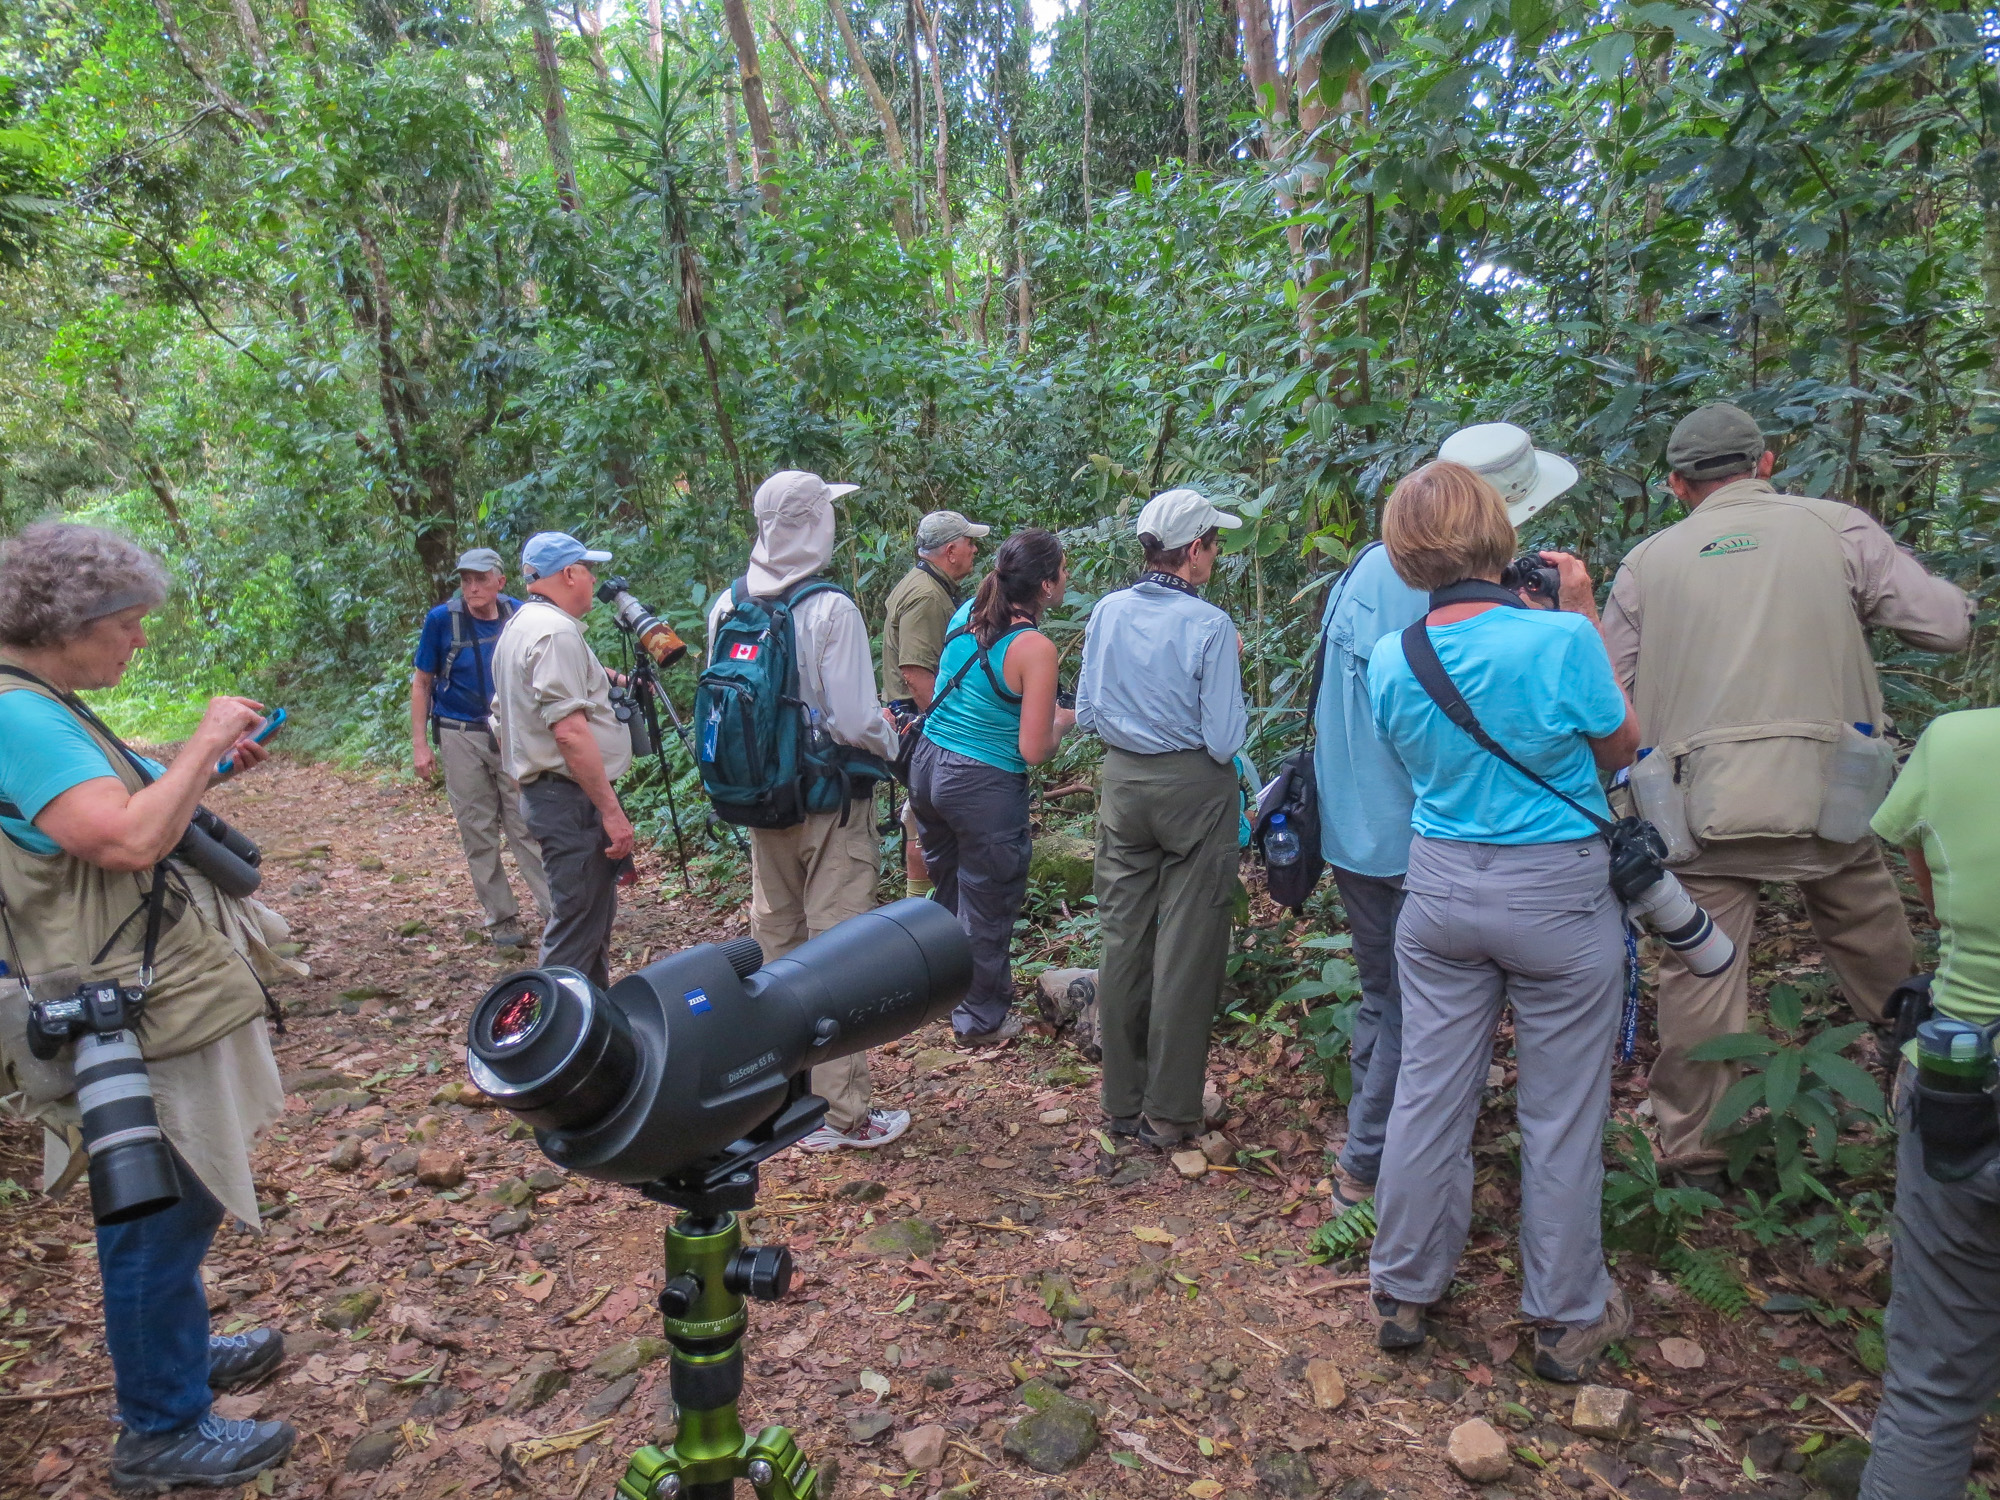
It was not a photo expedition…we were primarily birding…but it gave me a chance to experience the joys and challenges of the tropics first hand, and to put my super-zoom point and shoot to the test. For stationary and particularly cooperative birds (and since it was a ZEISS sponsored trip and I was one of the leaders), I also carried a light-weight digiscoping rig…the compact ZEISS DiaScope 65FL spotting scope, a 30x wide-field eyepiece, a Canon S120 on the Digidapter for ZEISS, and the wonderful Roadtrip carbon fiber travel tripod from MeFoto…the whole thing weighing in at something under 6 pounds.
Most of my digiscoping rig. The camera and adapter are in a pouch on my waist. Great tripod! You can see the two 7Ds and long lenses in the group.
In my group there were, of course, people carrying Canon 7Ds and either the 400mm prime or the 100-400 zoom, so I had a chance to observe and compare how the full DSLR/Long Lens rig handled the same tropical situations. I have to say, my complete outfit, super-zoom P&S, and the digiscope rig, weighed less than their body and lens…even if they were shooting off-hand. One gentleman carried a full sized tripod and a gimbal head on every outing. That is real dedication. 🙂
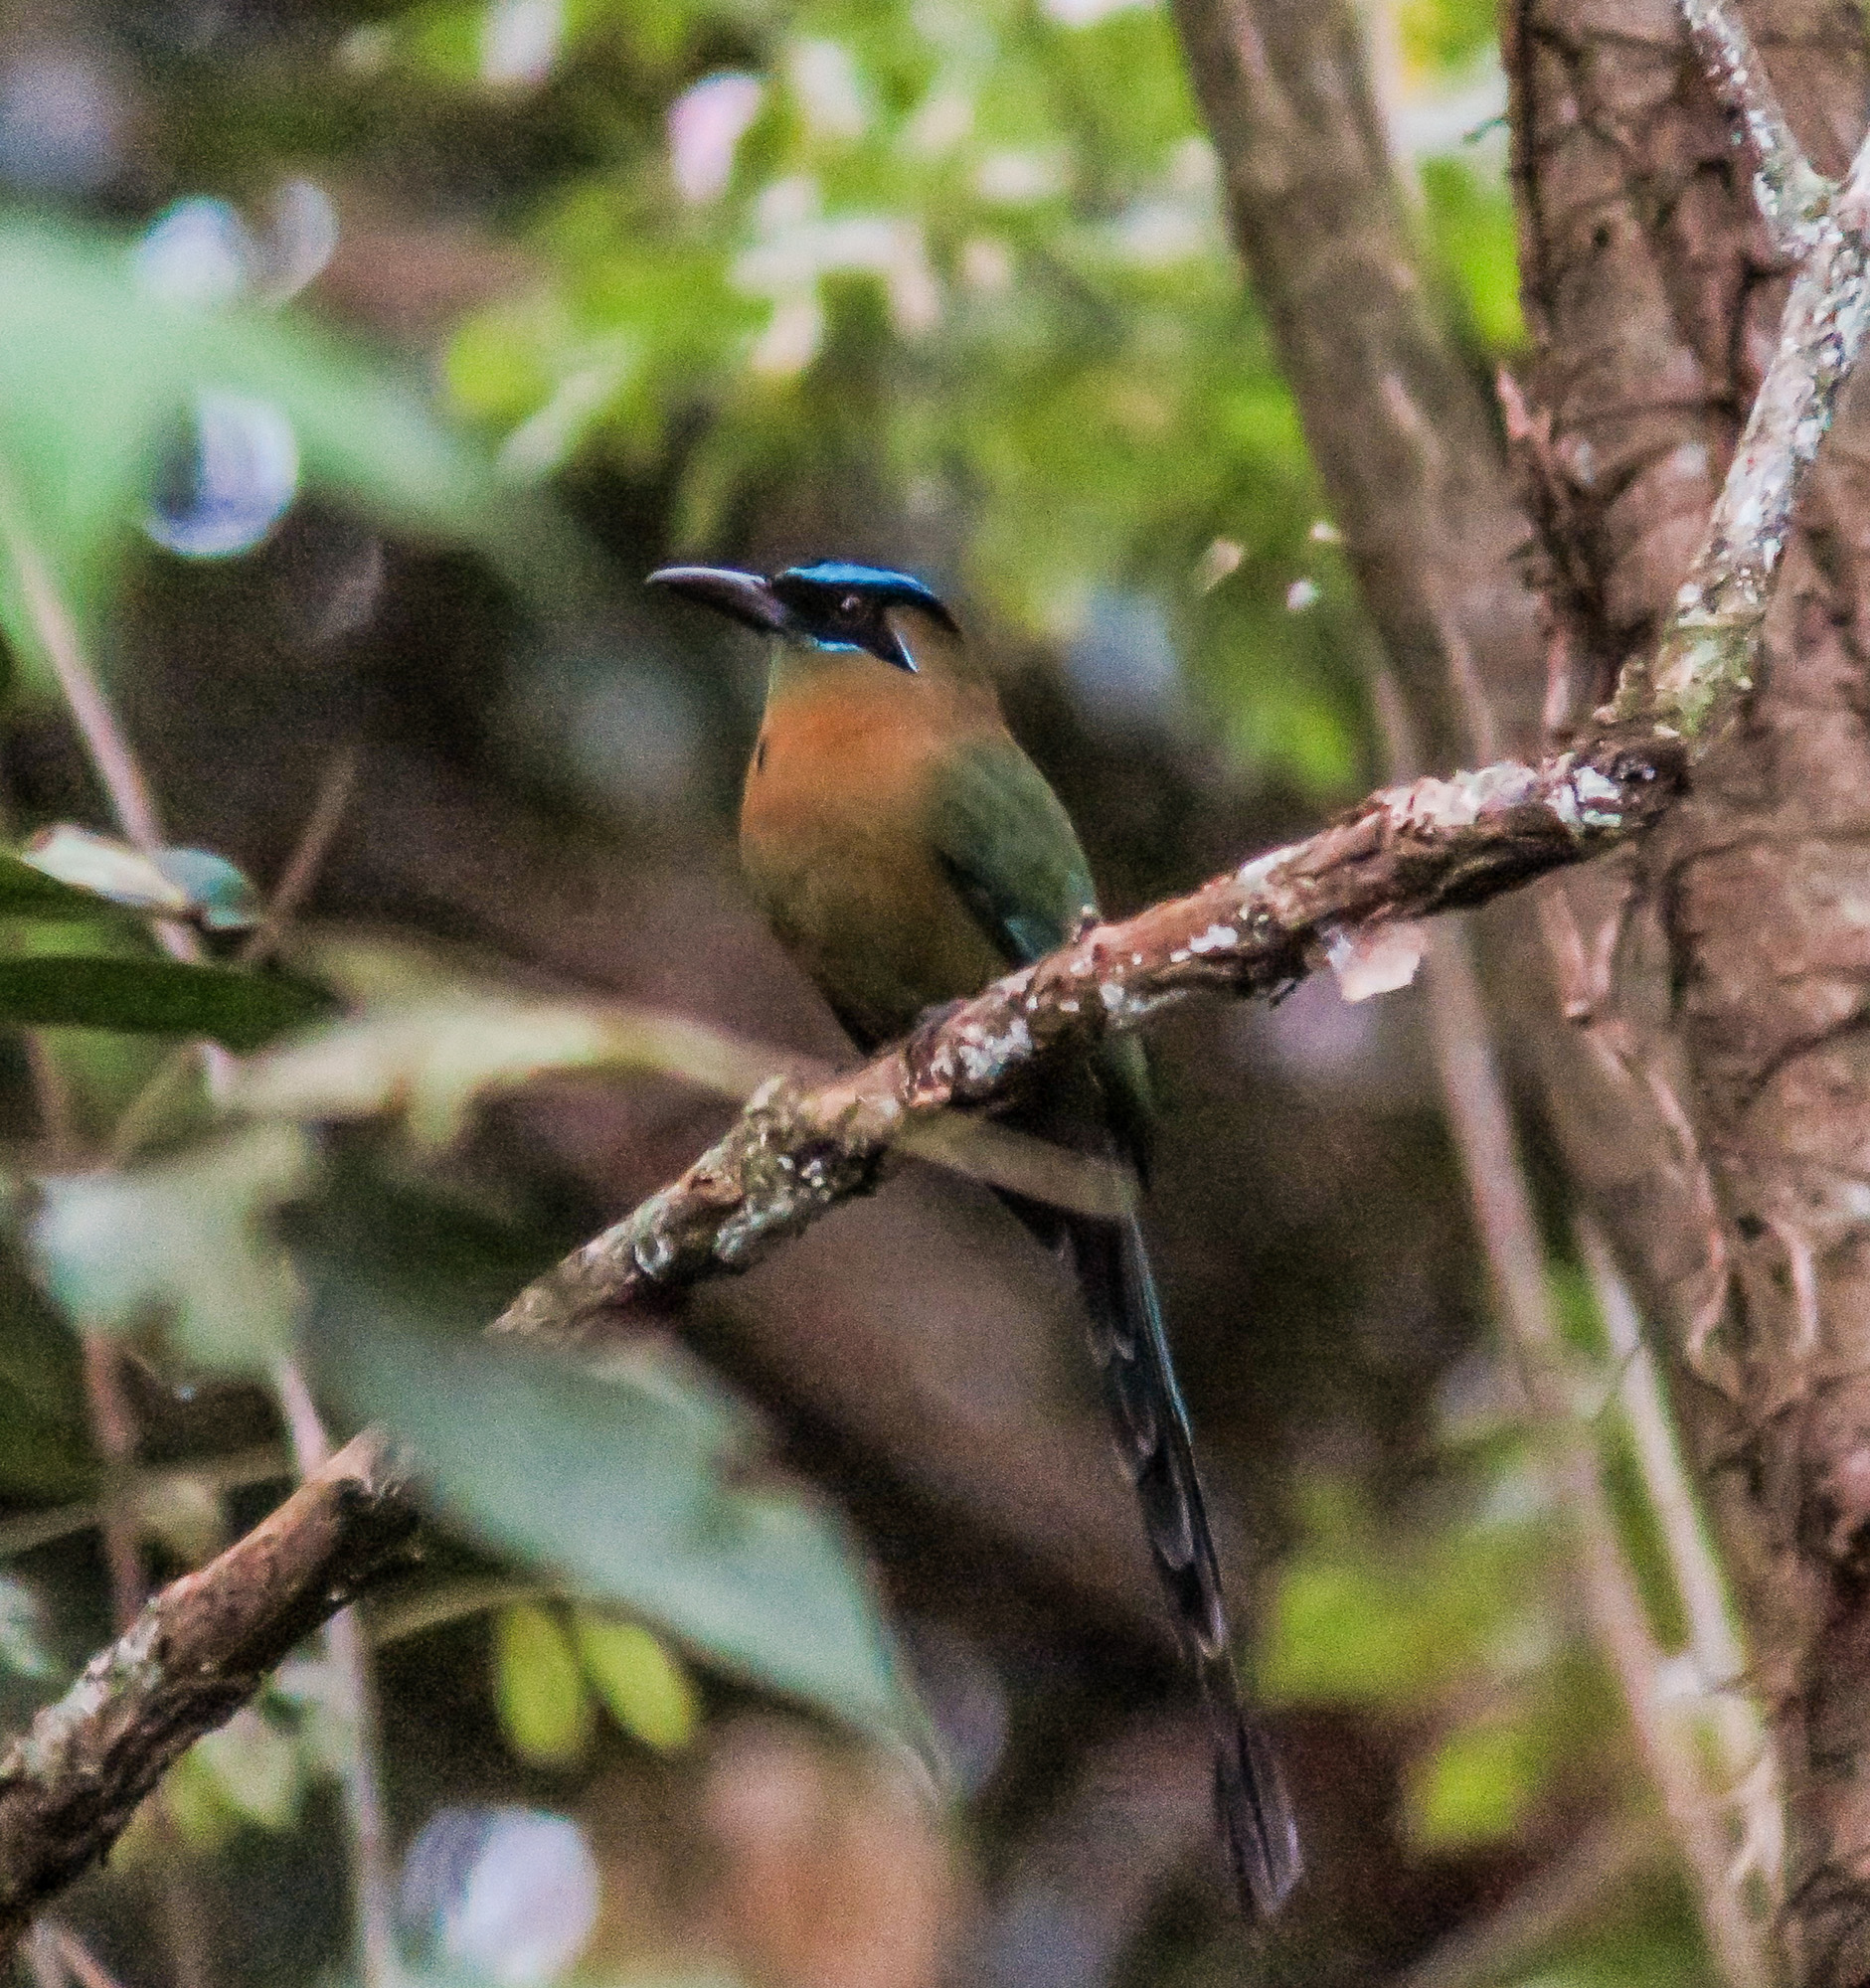
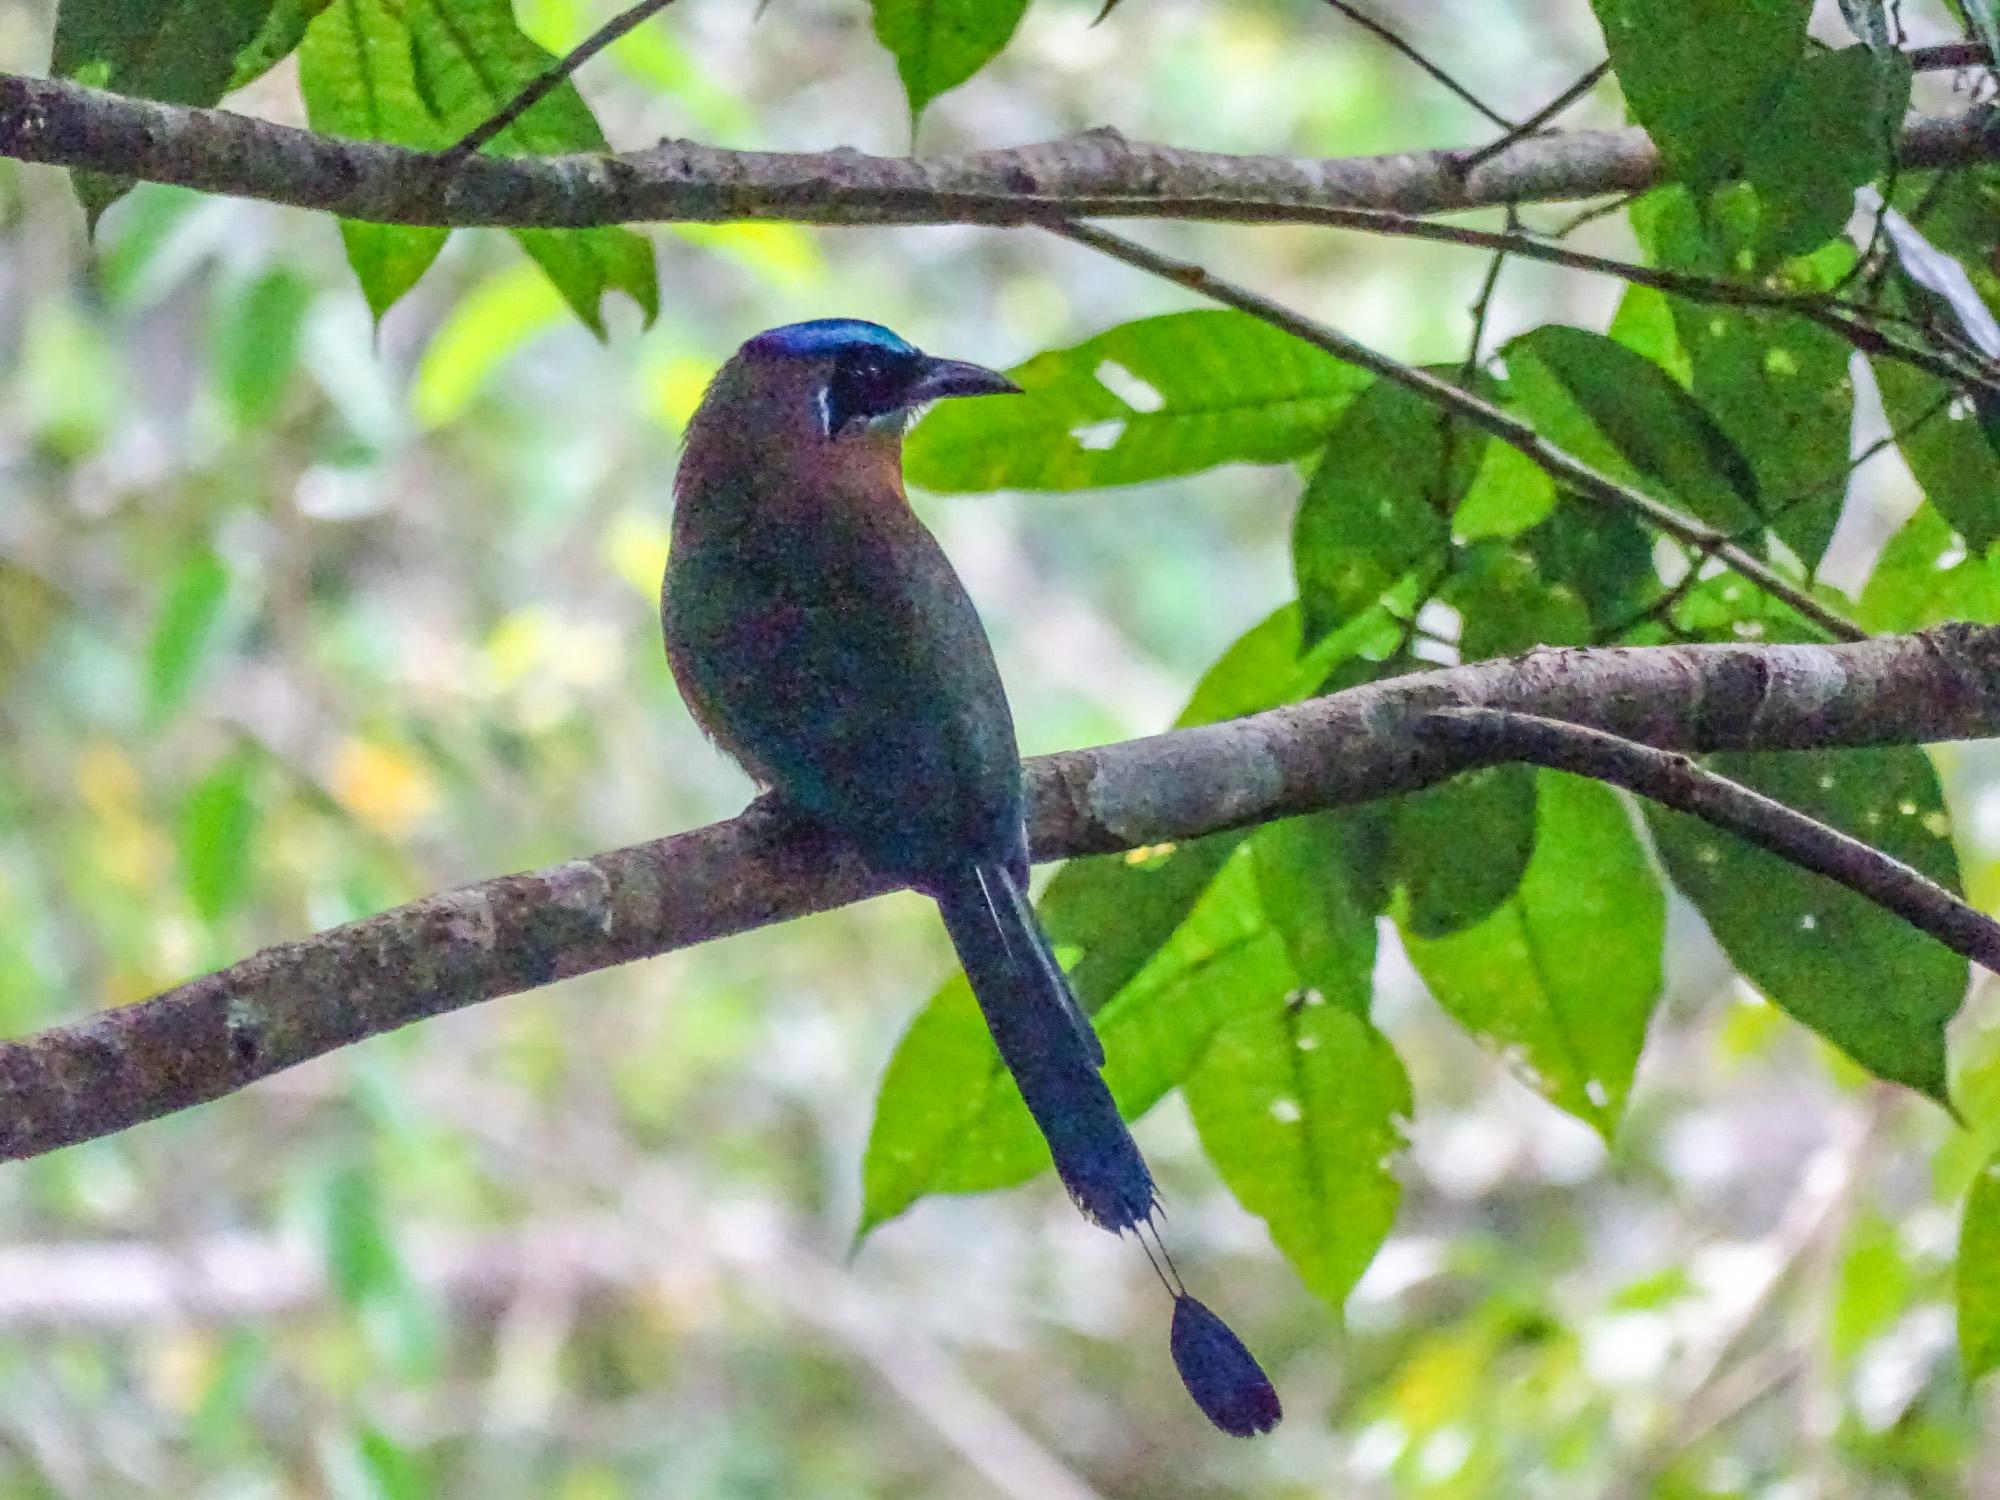
Blue-crowned Motmot, Lodge at Pico Bonito. Digiscoped with the ZEISS DiaScope 65FL
The first challenge in the tropics is always going to be light. My DSLR toting friends were shooting at ISO 6400 most of the time in the rain-forest, and I was pushing ISO 3200 for most shots. Even-so I had to dial the shutter speed down from my usual 1/640th of a second to 1/250th or even 1/160th to get enough light for a decent exposure. The Image Stabilization on the Sony HX400V handled the slower shutter speeds well, but detail at ISO 3200 suffered. I got the shots, but not always totally what I might have wanted. The tropics push any camera to its absolute limits.
To complicate matters, most P&S super-zooms have a maximum aperture of between f6.3 and f6.7 at the telephoto end…a far cry from a Canon 400mm f2.8 or even the 400mm f4. However, that is f6.x at 1200mm or greater equivalent. If you zoom back to 400mm the aperture will be not much different than the fixed Canon lens. It is always a trade off when it comes to cameras.
Boat-billed Heron, Cuero y Salado Wildlife Refuge, Sony HX400V at ISO 2500 at 1/160th second.
For the Point and Shoot photographer I recommend my standard wildlife settings: shutter preferred, Auto ISO (with the upper limit set as high as possible). Even so, at least in rain and cloud-forest, you will find yourself using slower shutter speeds than you are comfortable with…but the Image Stabilization on most Point and Shoot super-zooms is up to the challenge. On the Sony, changing shutter speed in shutter preferred on the fly is super-easy…you simply spin the wheel under your thumb…your mileage with other brands may differ. 🙂
I regret that I did not try the High Sensitivity modes on the Sony, which would have given me ISO 6400-12800 in a pinch. It might have made a difference. I will certainly give it a try on future trips to the tropics.
Blue-crowned Motmot. Sony HX400V. ISO 3200 @ 1/250th @ f6.3. Pushed to the limits.
Focus is a whole other issue. Point and Shoot cameras use Contrast Detection Auto Focus, which is slower and less precise than the Phase Detection Auto Focus on full sized DSLRs. It also requires more light to work effectively. You will certainly want your focus area set to the smallest possible square in the center of the field, so that you have a chance to focus on the bird through the dense foliage.
Even then, I found myself resorting to Dynamic Focus Assist on the Sony HX400V much more often than ever before. The Sony focus system allows you to maintain auto focus, and fine-tune it using the focus ring around the lens barrel, just as you would focus a manual focus lens. It is, without a doubt, the easiest manual override auto focus of any P&S camera on the market, and I certainly appreciated it by the end of my time in Honduras. The only thing that would have made it better would have been a higher resolution Electronic View Finder so I could have seen when the bird was in focus more easily.
Almost all P&S super-zooms today have some kind of manual override on the auto focus…or straight up manual focus…but none are as quick, easy, and intuitive as the Sony system. Still, if you are headed for the tropics, dust off your manual and find out how to manually focus your camera. 🙂
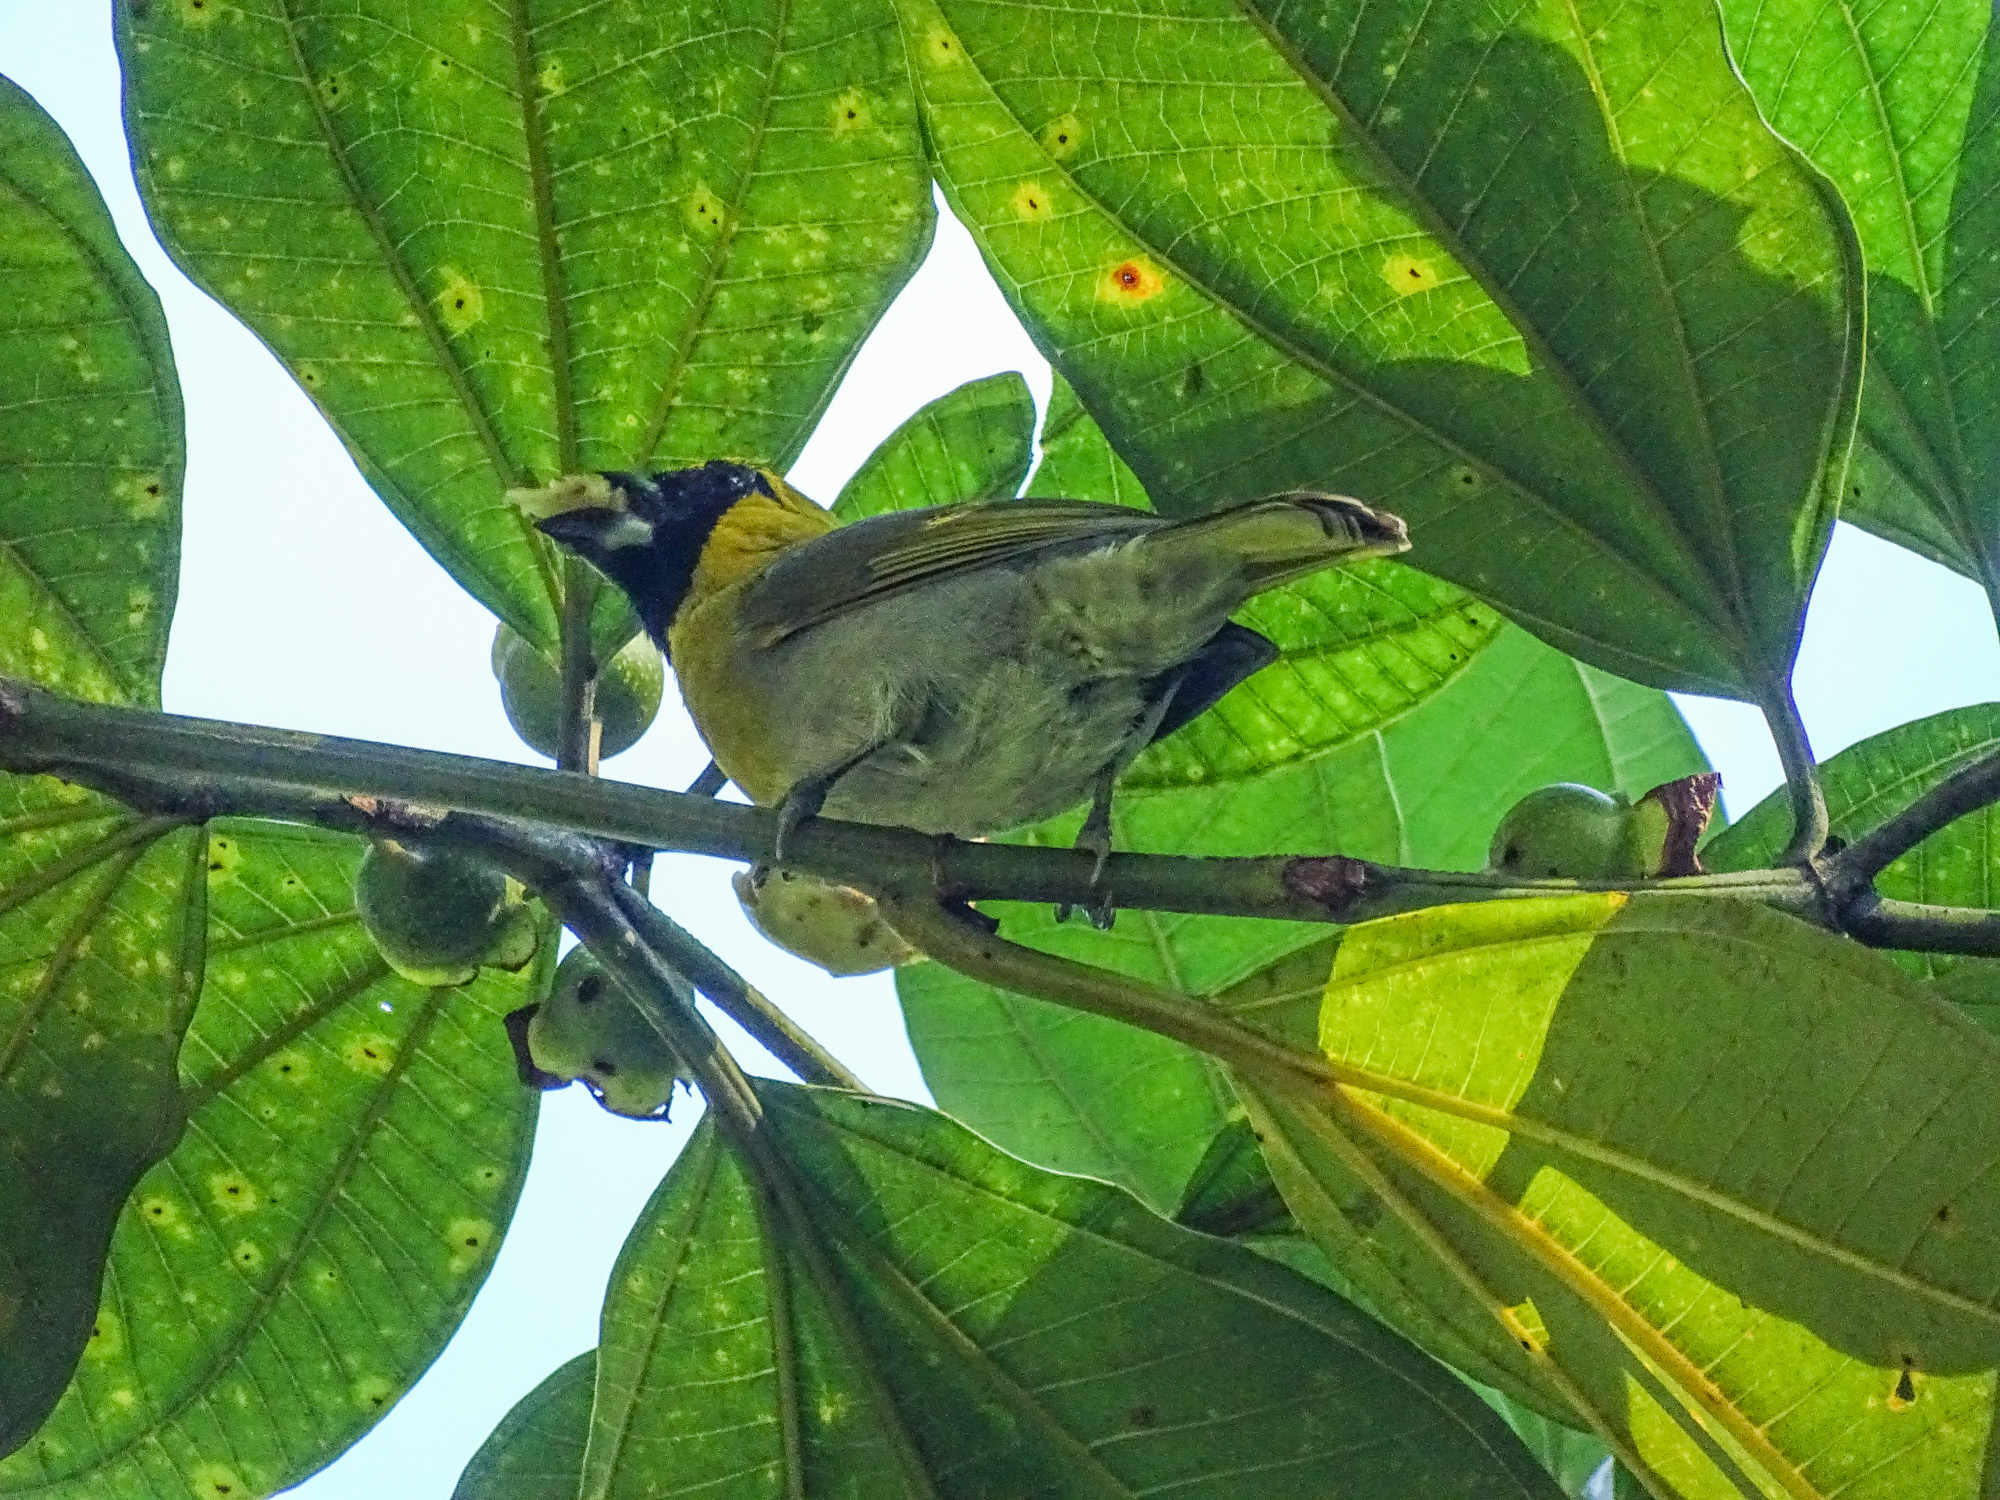
Black-faced Grosbeak, Sony HX400V. Tricky focus requires manual override.
For all the difficulty in focusing, however, I am pretty sure I got as many sharply focused images as my DSLR friends. Birds under the canopy will generally sit still long enough to find focus.
Of course, there are areas in the tropics that have lots of light! We visited the Cuero y Salada Wildlife Refuge at the junction of two mangrove lined rivers near the Caribbean coast. To get there we rode a “banana train”…a narrow guage, open car, toy train that was used in the early 1900s to transport bananas from the plantation near the coast, 9 km inland to the railhead. Despite the fact that there were local paying passengers on the train, we stopped often for birds along the way.
Northern Jacana, Cuero y Salado Wildlife Refuge
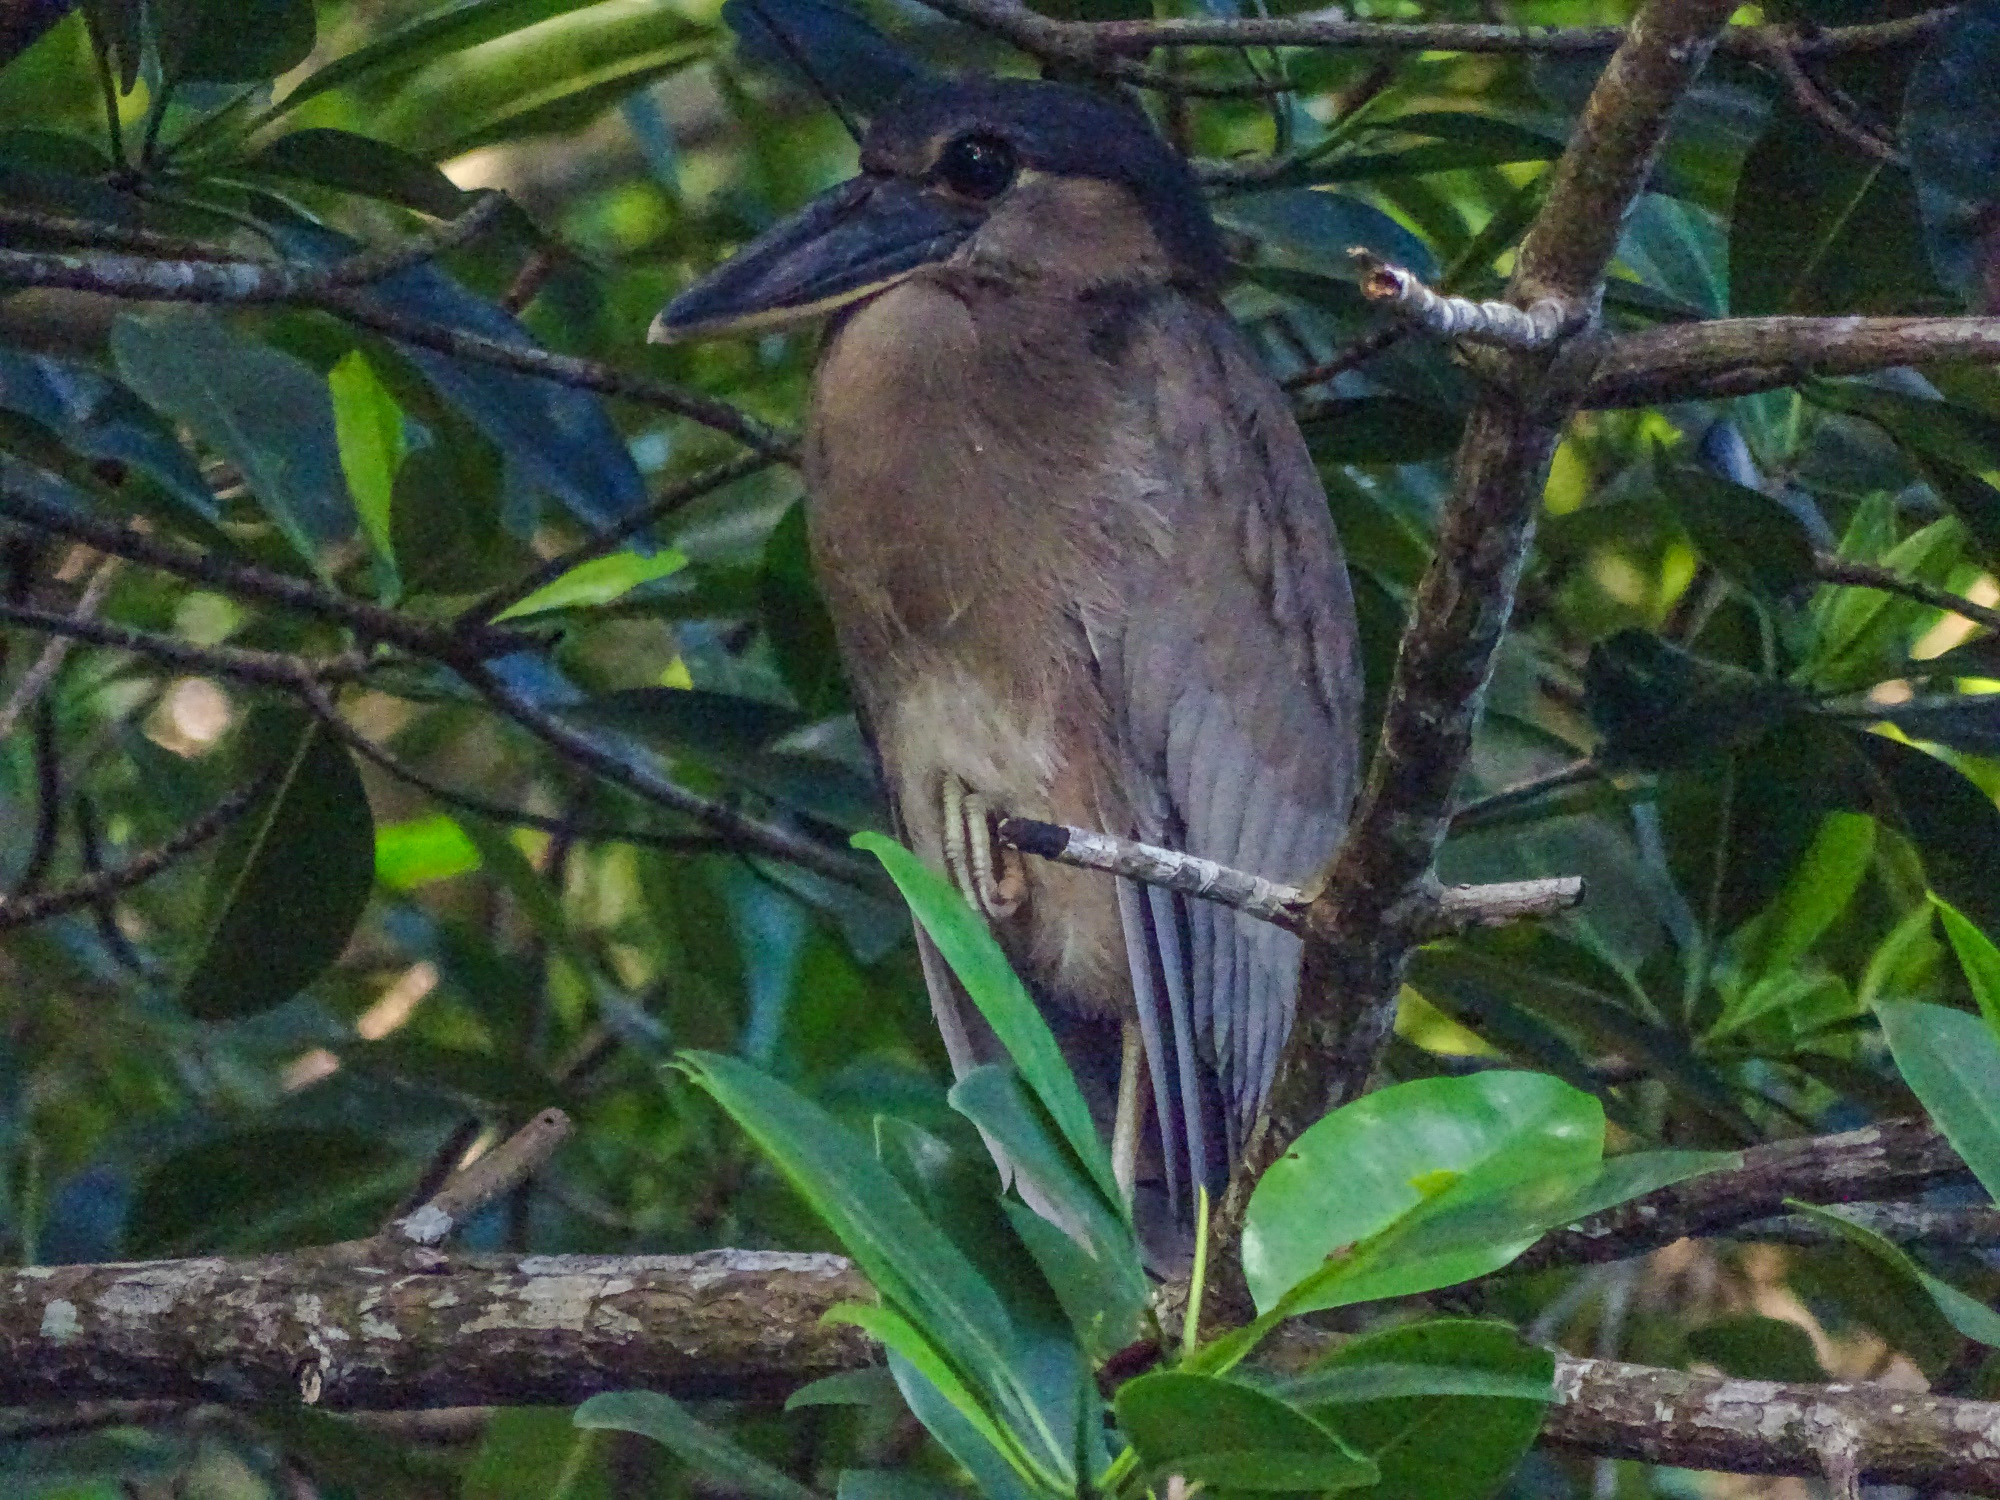
Bare-throated Tiger Heron
Roadside Hawk, Cuero y Salado Wildlife Refuge
Bat Falcon, Cuero y Salado Wildlife Refuge
Even along the river we found some birds in good light. And, with enough light, the super-zoom P&S always performs well. These shots are satisfying, especially since they were taken hand-held from a boat.
Mangrove Common Blackhawk, Cuero y Salado Wildlife Refuge
Magnificent Frigatebird, Sports Mode.
Ringed Kingfisher, Cuero y Salado Wildlife Refuge
White-collared Puffbird, Cuero y Salado Wildlife Refuge
In the dry forest, and in the inland valleys, the super-zoom gave me the reach to capture birds from the bus on the road, and from respectable distances in the forest…as well of macros of some interesting butterflies.
Lesser Roadrunner
Clouded Sulphur
Crimson Patch
Green Kingfisher
Lineated Woodpecker
Grove-billed Ani
Wood Storks and Egrets
And of course, at the wide end the P&S super-zoom captures the grand tropical landscape.
Rio Santiago
Along the way to see the Honduran Emerald
Sports Mode, or tracking auto focus, even makes hummingbirds at feeders and perched possible.
Violet Saberwing
Crowned Woodnympth
Long-tailed Hermit
Crowned Woodnympth
Long-tailed Hermit.
White-necked Jocabin
Stripe-throated Hummingbird
Rofous-tailed Hummingbird
Crowned Woodnymph
Just for sake of interest I will share one more digiscoped image, again taken with the Canon S120 P&S through the 30x eyepiece on the ZEISS DiaScope 65FL spotting scope, using the Digidapter for ZEISS and the MeFoto Carbon Fiber Roadtrip tripod. This is a particularly difficult shot due to the low light and the foliage between me and bird.
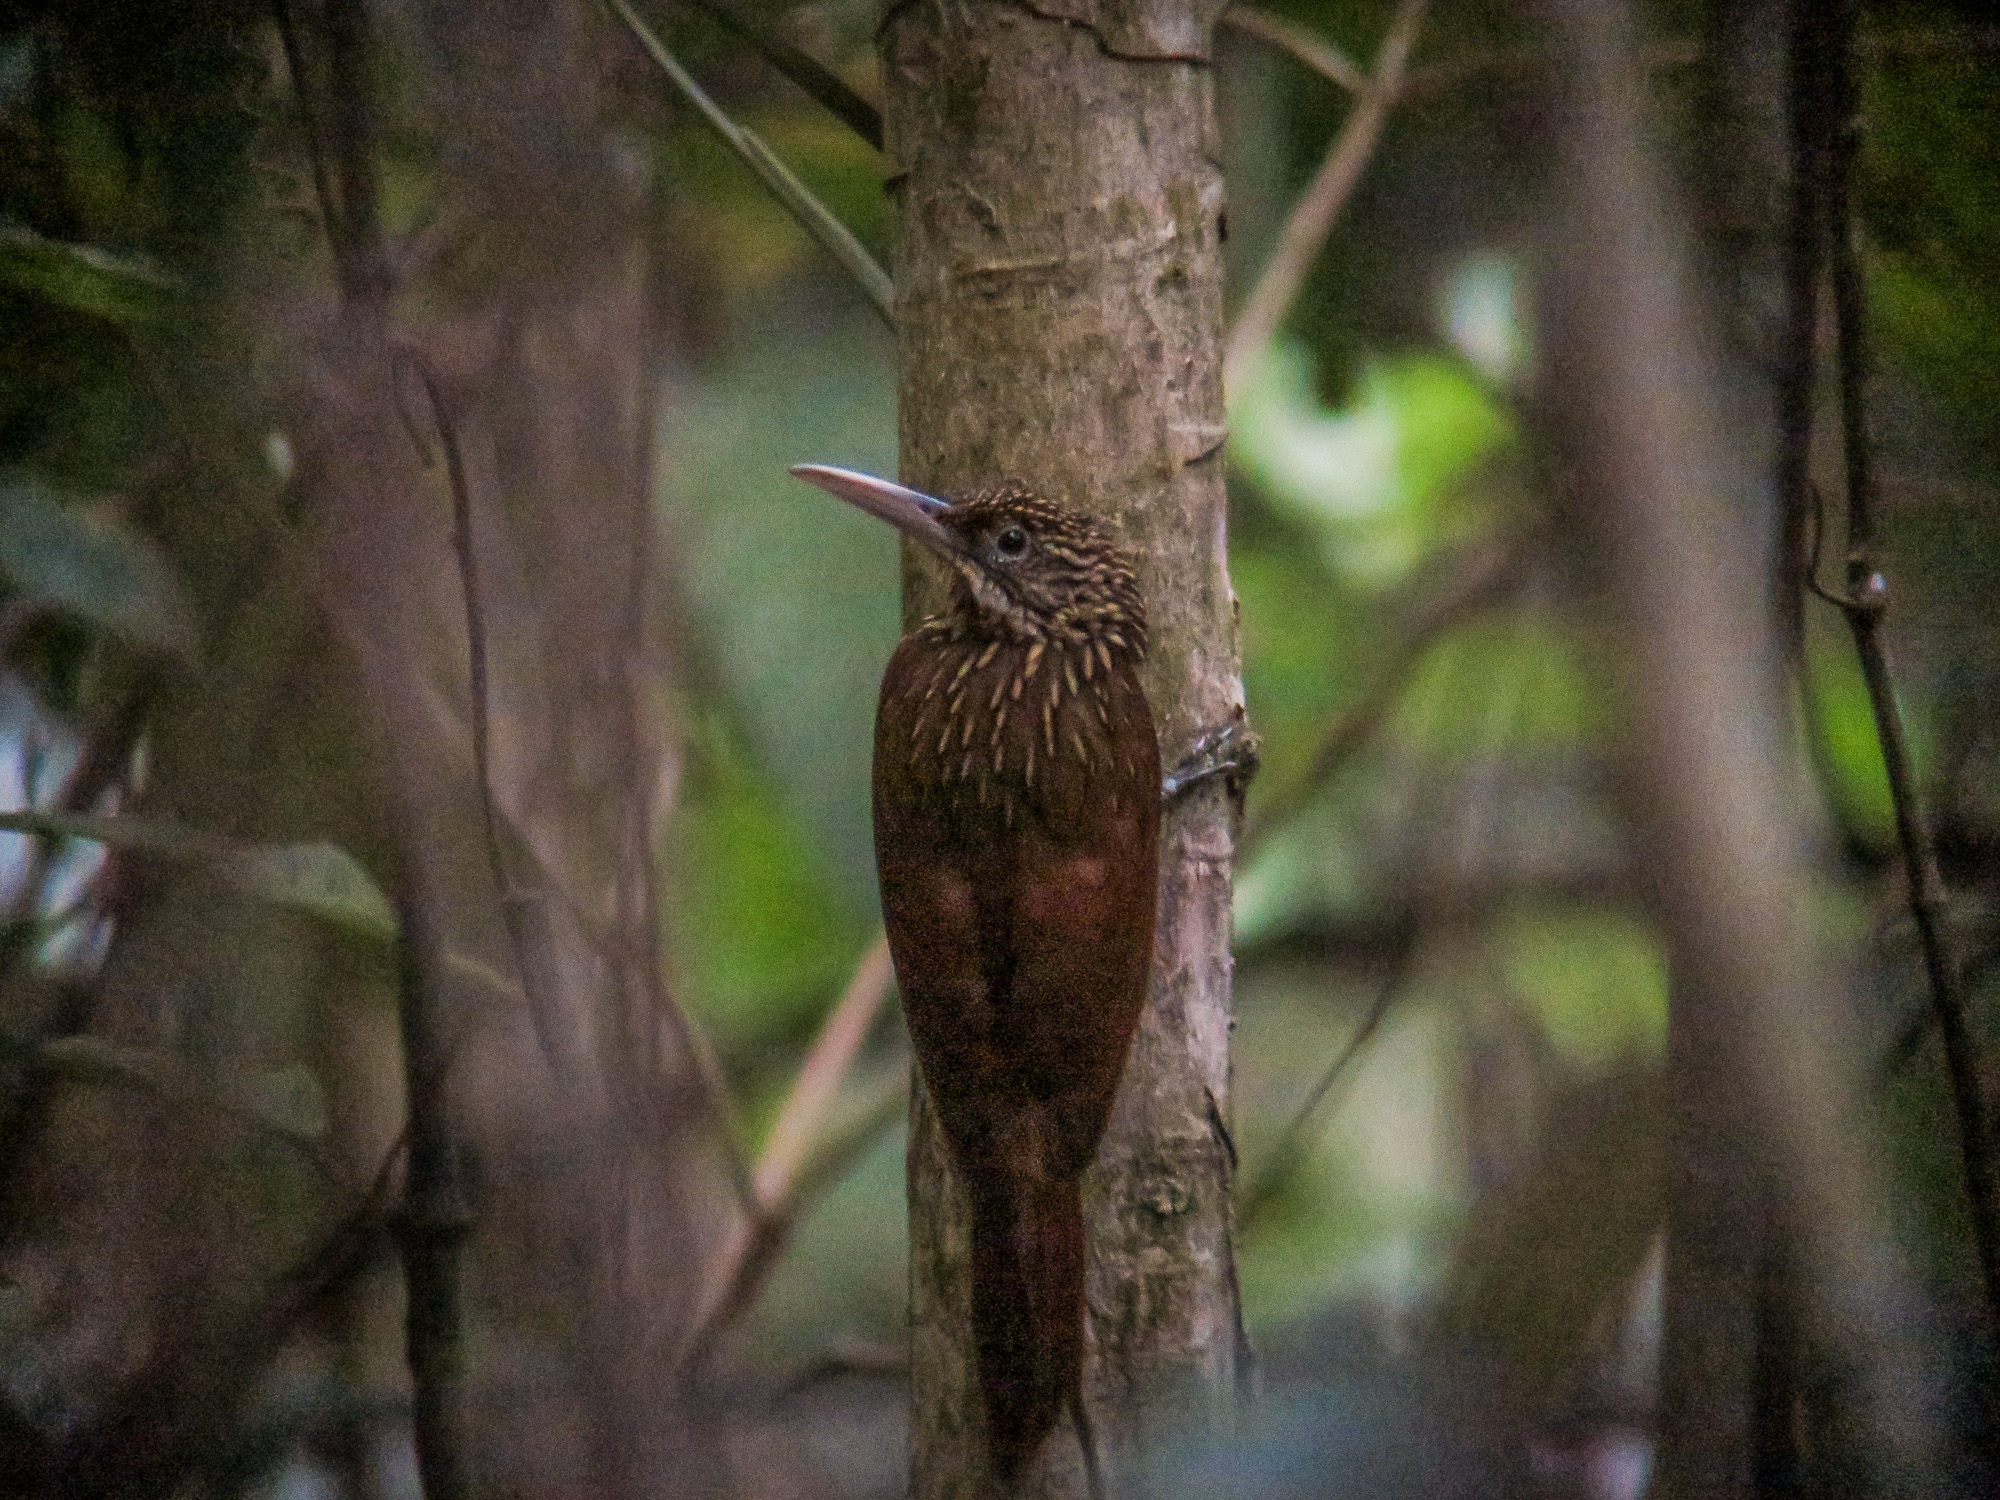
Ivory-billed Woodcreeper, digiscoped at ISO 3200.
So, how does the P&S super-zoom fair when compared to a full scale DSLR/Long lens rig in the tropics. My good friend Diane Porter was shooting beside me most of the trip, with her Canon 7D Mk2 and the 100-400mm Canon IS Zoom. She has kindly allowed me to borrow a few of her shots for comparison. Of course, her shots had to be heavily cropped to equal the scale of the 1200mm equivalent zoom on the Sony. It is a testimony to the quality of the Canon 7D Mk2 that the images hold up so well to heavy cropping.
Diane Porter. Canon 7D Mk 2, 100-400mm zoom. ISO 6400. 1/500 @ f7.1 Cropped for scale.
Sony HX400V @ 2400mm equiv. Ferruginous Pygmy Owl, Lancetilla Botanical Gardens. @ ISO 2500 @ 1/250 @ f6.3
You will notice that the better the light, the closer the Sony P&S comes to the full sized rig. The first comparison is not totally fair to the Sony, as I used the full 2x Clear Image zoom for the equivalent of 2400mms of reach. Digital zoom (while the Sony system is among the best), will never equal the quality of optical zoom.
I will give you one more comparison. This time it is a digiscoped Trogon, digiscoped at the short end of the digiscoping range…and again at 3200 ISO to cope with the low light levels under the rain-forest canopy.
ZEISS DiaScope 65FL. 30x eyepiece. Canon S120 on the Digidapter for ZEISS. MeFoto travel tripod. ISO 3200.
(Just for fun, here is Diane and her rig, playing host some kind of whiptail lizard.)
Diane Porter and a visitor. This is a trick you can not do with a P&S.
Photography is about choices as much as anything. When we choose the compact ease and flexibility of a Point and Shoot super-zoom over the more conventional DSLR/long lens rig, we know that we will sacrifice some image quality. Conditions in the tropics test the limits of any camera and lens, but all in all I will still be packing my P&S super-zoom on my next tropical adventure!
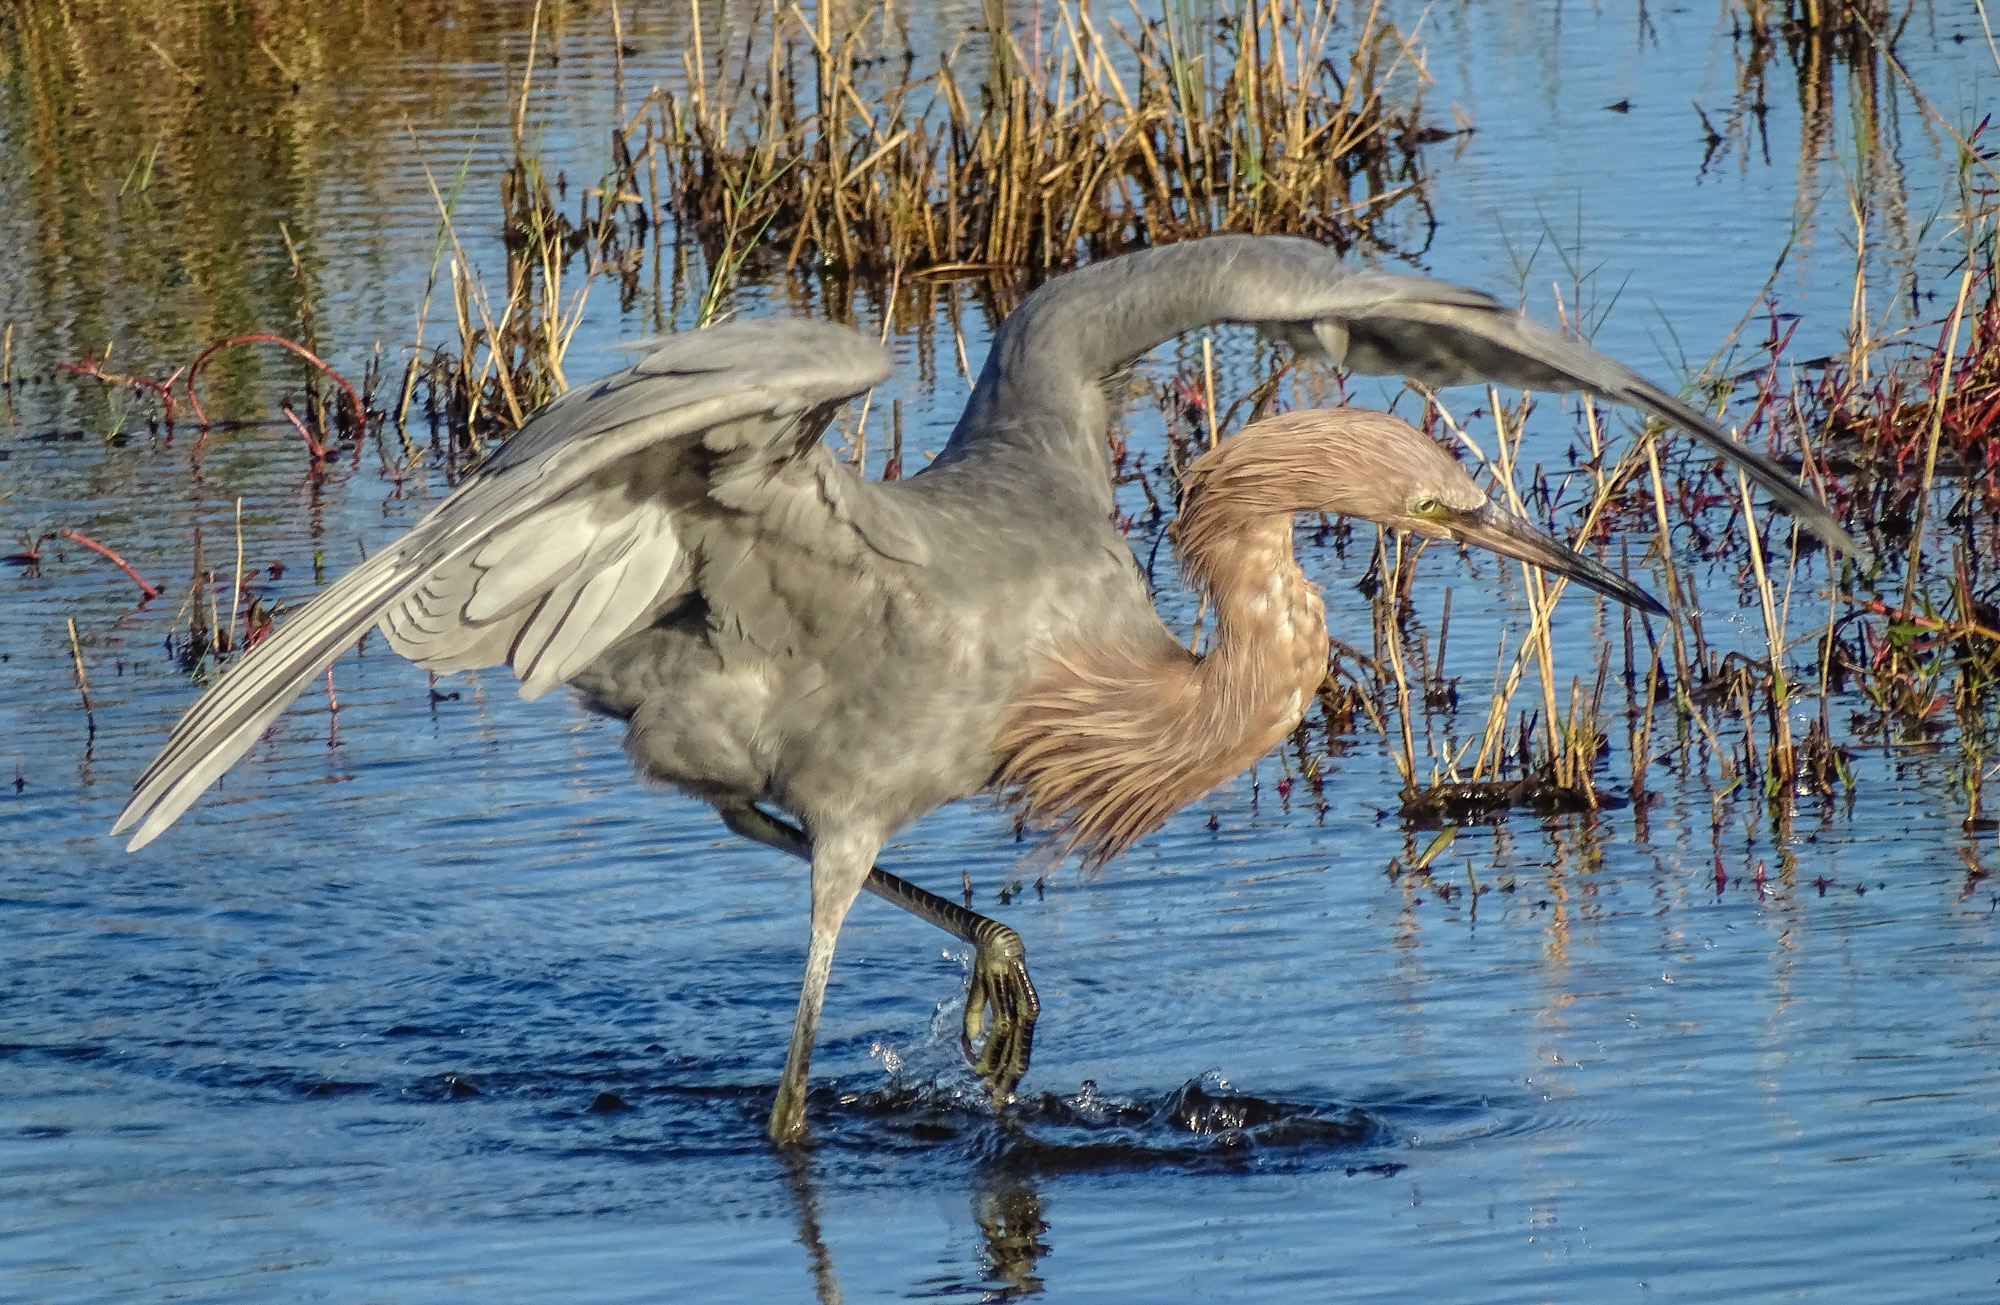
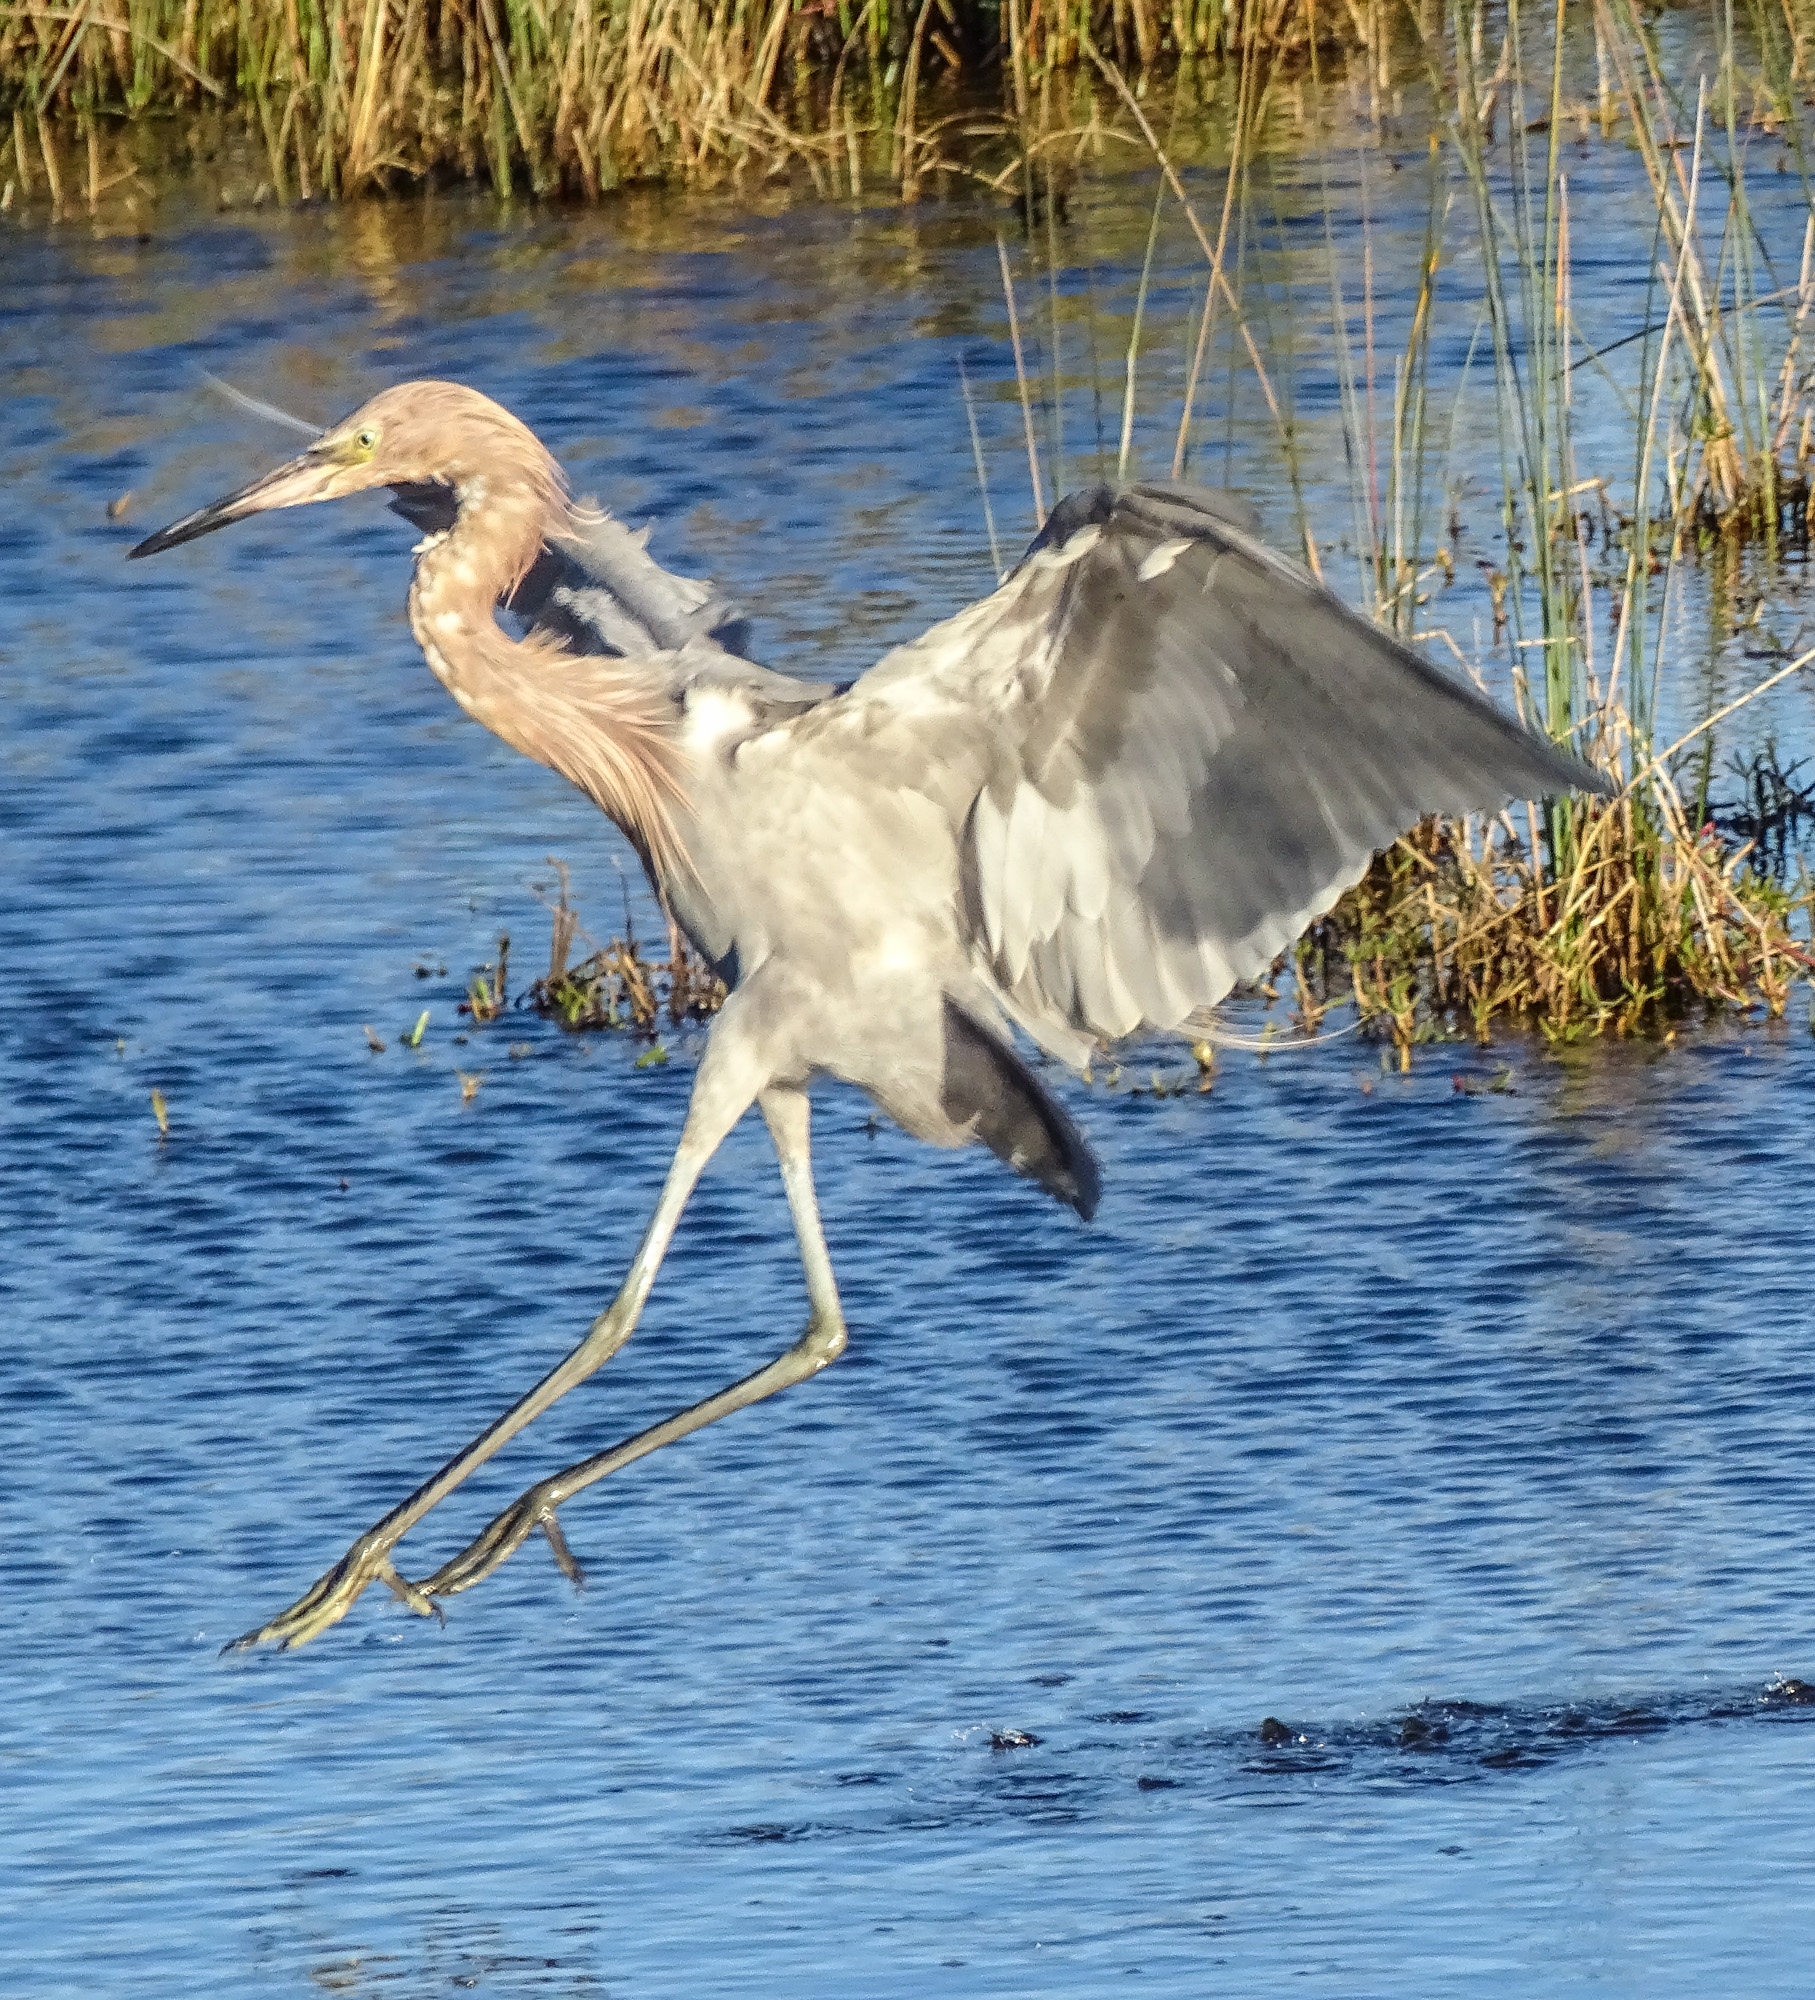
Reddish Egret, Blackpoint Wildlife Drive, Merritt Island NWR, FL
One of the limitations of Point and Shoot cameras, even advanced Point and Shoot cameras like the super-zooms, is that they use a simpler, and less effective, auto focus sensor system than full fledged DSLRs. This matters not at all when you are shooting landscapes…and seldom when you are shooting people, even active people at parties, etc…but it can matter a lot when shooting wildlife…especially active wildlife.
Nothing is more active than a feeding Reddish Egret. I have tried to catch the wing-thing the Reddish Egret does periodically as it dances and prances about feeding…but this is one time when my choice of camera makes photographic life more difficult. The bird is literally all over the place…near and far…running to the left…hopping back to the right…and it seems impossible to predict when it will raise its wings to shadow the water so it can see its target fish. And the whole wing thing takes only a second. Done and gone.
Recent generations of super-zooms, however, have borrowed the “follow focus” mode from their larger cousins. Follow focus, or focus tracking, allows you to lock focus on a moving subject in the frame, and then the camera will track that subject and keep it in focus. On some superzooms, putting the camera in Sports Mode automatically activates tracking auto focus, and sets the focus programming to favor moving subjects.
You might remember that I recommend Sports Mode for birds in flight, but I had the opportunity to put Sports Mode and tracking auto focus to the test with a few cooperative Reddish Egrets along Blackpoint Wildlife Drive at Merritt Island National Wildlife Refuge. It is worth noting that if tracking auto focus is going to work anywhere…it will work best in the brilliant winter sun of Florida.
And work it did. Unlike some P&S superzooms, with the Sony HX400V it is not even necessary to half press the shutter release. The camera automatically locks focus on any moving subject when it is centered in the finder, and then all you have to do is keep the subject roughly centered. The camera does the rest, and you are focused and ready when the action you want to capture happens. Combined with the Sony’s fast 10 frames per second continuous mode, I was able to capture many wing-things, and several dramatic sequences of the Egret striking at fish. I was even able to catch the Egret in mid-hop. 🙂
This slideshow requires JavaScript.
Mid-hop. Reddish Egret. Blackpoint Wildlife Drive, Merritt Island NWR, FL
Some superzooms do not have a Sports Mode, or on some Sports Mode might work differently. If so, look for the Tracking Auto Focus, or Follow Focus under the auto-focus settings in your menu.
Find some active wildlife and give it a try. I think you will like it. 🙂
I will admit to not being nearly as sensitive to background in my wildlife and nature shots as I should be. On the other hand, there are always two ways to become known for your photography. 1) you can work very carefully, and develop great skill in waiting for exactly the right light and working the angles for the perfect background on every shot you take…or 2) you can shoot a lot…all the time…every time you get any kind of chance at all…and then be very selective in what you show to other people 🙂 Either method works…and most honest photographers will tell you that their success rests on a combination of the two. It is important to be able to take an exceptional photograph when the opportunity comes your way…and to be able, within the limits of what nature offers, to create that opportunity when ever you can…but it is just as important to shoot all the time, to shoot a lot, a lot…and to learn to recognize the exceptional shot when you come to process it.
Either way, background has to figure into your calculations. By background I mean whatever is behind your subject…or whatever fills the space in the frame not occupied by the focus of your attention. It if it a picture of a bird, it is everything that is not the bird. If it is a picture of person or an elk, it is everything that is not person or elk. Etc.
Take the two images that lead the post here. It is the same Green Heron, taken from the same boardwalk…Anhinga Trail at the Royal Palm Visitor Center at Everglades National Park…moments apart. The difference is that I re-positioned myself and my camera a few feet down the boardwalk for the second shot in order to get a less cluttered background. I wish I could say it was a conscious choice…but honestly, I was just experimenting with different angles, and noticed the different effect of the background only while processing the images.
And the difference here is not as dramatic as it might have been. There are things I like about both images.
But take this comparison.
Zebra Longwing, Everglades NP
Zebra Longwing, Everglades NP
Here I am much less ambivalent about which is the better photo. I far prefer the contrasting, uncluttered background of the second shot. The second shot also displays an effect referred to, in photographic circles, as bokeh. Bokeh is the Japanese term that is used to describe the visual structure of the out of focus portions of an image. We say an image has nice bokeh when the out of focus background is pleasing to the eye. Pleasing to the eye, of course, is a judgement call, but there seems to be quite a bit of consistency in the way the term bokeh is used…which leads me to believe that we humans tend to agree, for the most part, on what kind of background is pleasing. An out of focus background that shows some abstract pattern, but not so much as to be distracting, seems to get the most consistent praise.
Tricolored Heron, Shark Valley, Everglades NP
Tricolored Heron, Anhinga Trail, Everglades NP
These are two very similar images taken of the same species of bird miles apart. One is from the Anhinga Trail at Royal Palms, the other is from Shark Valley, both in Everglades National Park. The difference between them is subtle…but it definitely hands on the background.
One more really obvious example, though in this case I could have done nothing about the background in either image. I was shooting from the car for the first image, across the passenger, and the bird was on the ground, so my options were limited. The second bird was simply perfectly posed on a post beside West Road in Shark Valley and sat there while I stopped my bike and got off a short burst of images, before flying away. There was no chance to reframe in either case.
Red-shouldered Hawk. Shark Valley
Red-shouldered Hawk, Flamingo
Obviously, if you have a choice, maneuvering for a less cluttered background should be part of your photographic habit. A few steps right or left, or a shift in angle up or down…or both…is often all it takes. This is the same spider at Shark Valley, from just a slightly different angle.
Spider, Shark Valley
Spider, Shark Valley
Snowy Egret, Shark Valley, Everglades NP
Sometimes it is totally the background that makes the shot, as in this image of a Snowy Egret at Shark Valley. Until I pressed the shutter and reviewed the image, I could not see the pattern that the light on the moving water made in the background, and it did not really come up until processing in Lightroom. But I have to tell you I was really happy to see it there!
The background effect is just one more thing to think about while shooting and while processing…but giving it the attention it deserves will improve your images and repay the effort. Eventually someone is going to say “nice bokeh” when you show them a shot (if you have any photo-geeks among your friends at all), and you will be able to say, “Yes…I worked hard to get that!” or, at the very least, “Thank you!”
Three Sanhill Cranes in flight. Bosque del Apache NWR
Birds in flight are such a challenging photographic subject that the category of images has its own internet acronym: BIF. Go to any of the camera forums (like those on dpreview.com) and you will see periodic discussion of the challenges and techniques of BIF photography. Mostly the challenges.
Standard BIF rig. Photo from Borrowlenses.com
Until very recently BIF was the sole domain of the long lens, DSLR photographer, generally shooting off a heavy duty tripod with a gimbal head (one of those heads that suspends the lens from above and allows free motion up and down and side to side for panning and following BIFs). Only a pro level DSLR had the focus speed to catch BIFs and most BIF photographers shot with 400-600mm lenses to fill the frame.
And they practiced, almost to the point of specialization, to develop the panning and following skills needed. I see photos of BIFs that just leave me speechless…they are that good, and that amazing.
Of course, that has never stopped me from attempting BIFs with my chosen Point and Shoot super-zoom cameras. Until a generation ago (camera generation…about 2 years) the results were spotty at best. I got an occasional keeper on a day and in a place where there were lots of birds in the air and I had lots of time to practice. Rookeries. National Wildlife Refuges that draw geese, ducks, and cranes. Etc. But it was more by chance and persistence than it was by skill when I came home with anything I wanted to share.
Canon SX50HS in Sports Mode
However, with the advent of the Canon SX50HS and its effective Sports Mode, suddenly BIFs with a Point & Shoot became a lot more possible and a lot more fun. Sports Mode on the SX50HS was programmed to lock focus on a moving subject and then to follow focus on that subject while it was still near the center of the frame. Combined with a 3.4 frames per second continuous shooting mode, Sports Mode made it really possible for the first time to get consistent BIF shots without investing in the full DSLR rig above.
In a place like Bosque del Apache National Wildlife Refuge or along the cliffs of Point Cabrillo in San Diego, where there are Snow Geese and Cranes or Pelicans in the air almost continuously, with practice you could pick up a bird and center it far enough out so you could pan smoothly and follow…half press the shutter release to lock focus…and then fire off a burst when the bird was near filling the frame…continuing to pan with the bird for best effect. You were half-blind once your pressed the shutter, since the viewfinder did not refresh fast enough to really follow the bird…but it could, with practice, be done. 🙂
Pelican off the Tide Pools at Point Cabrillo in San Diego. SX50HS in Sports Mode.
There was a good deal of debate on the forums (not helped by inconsistencies in the Canon documentation) about whether Sports Mode did in fact follow focus once you pressed the shutter release to start your burst. I was, and remain, in the “yes it does” camp, and have results to prove it, at least to me. The doubters have their demonstration sequences as well.
However it works, the Sports mode on the SX50HS (and I assume on the SX60HS as well), makes BIF fairly easy, given the right birds and a bit of patience and persistence.
I have been waiting for my yearly visit to Bosque del Apache NWR to really give the Sony HX400V Sports Mode a fair trial.
The Sony works very much like the Canon. There is a large rectangular focus frame in the center of the view. The Sony auto-focuses on whatever is nearest the center of that frame using continuous auto focus. When you half press the shutter release it locks on the subject, and then follows focus on that subject as it moves within the frame or as you pan with the motion.
The HX400V has two continuous shooting modes, and you can use either in Sports Mode. I have been using high speed burst which is 10 frames per second for 10 frames. It is possible to shoot a shorter burst than 10 frames, but you have to be really light on the shutter release. The finder flashes while shooting the 10 frames, but you get a pretty much continuous look at your subject to aid in panning.
Tandem Snow Geese. Sony HX400V in Sports Mode
In practice, I generally had to zoom the Canon SX50HS out to 600mm equivalent field of view to get consistent BIFs. On the Sony HX400V I can use the full 1200mm reach. It is that much easier to use. 🙂 (But then it is really two generations newer than the SX50HS.)
Three at a time. Sony HX400V
These shots are not perfect. If you blow them up to full resolution on the computer (pixel peeping) you see some artifacts, but at reasonable viewing and printing sizes they are simply very satisfying. And so easy!
Sports Mode on the Sony HX400V completely takes over control of the camera, so if you are not the trusting type, in might not suit you. The only thing you can change is the speed of continuous shooting. However, even in difficult light, Sports Mode on the Sony does the job.
Sandhill Cranes and Snow Geese against the sunset.Landing in the dawn lightCranes on a burning sky.
Of course, the better the light, the better the results.
Snow Geese against the Mountains to the West of the refuge.Solo Snow GooseCranes at 1200mm equivalent field of view.
Remember: patience and persistence. Take a lot of images. Try, try, and try again. And don’t grieve the close shots…the near misses…the not quite, but close stuff you have to delete from the card. Just keep shooting. Eventually you will get the shots you want.
And don’t try BIFs, at least at first, unless you have a lot of birds to practice on…even if it is only gulls at the local landfill. Even with the aid of the excellent Sports Modes on today’s Point and Shoot super-zooms, it takes practice!
My last image here was submitted to the Canon Print Challenge on Saturday at Bosque del Apache, along with many images from conventional long-lens, DSLR, tripod wielding photographers…and it won! At the end of the competition the Canon folks made me a 13×17 inch exhibition print on art paper…and it looks great! So don’t let anyone tell you you can’t, or should not even try to, shoot BIFs with a Point and Shoot. It can be done. Easier with each generation. 🙂
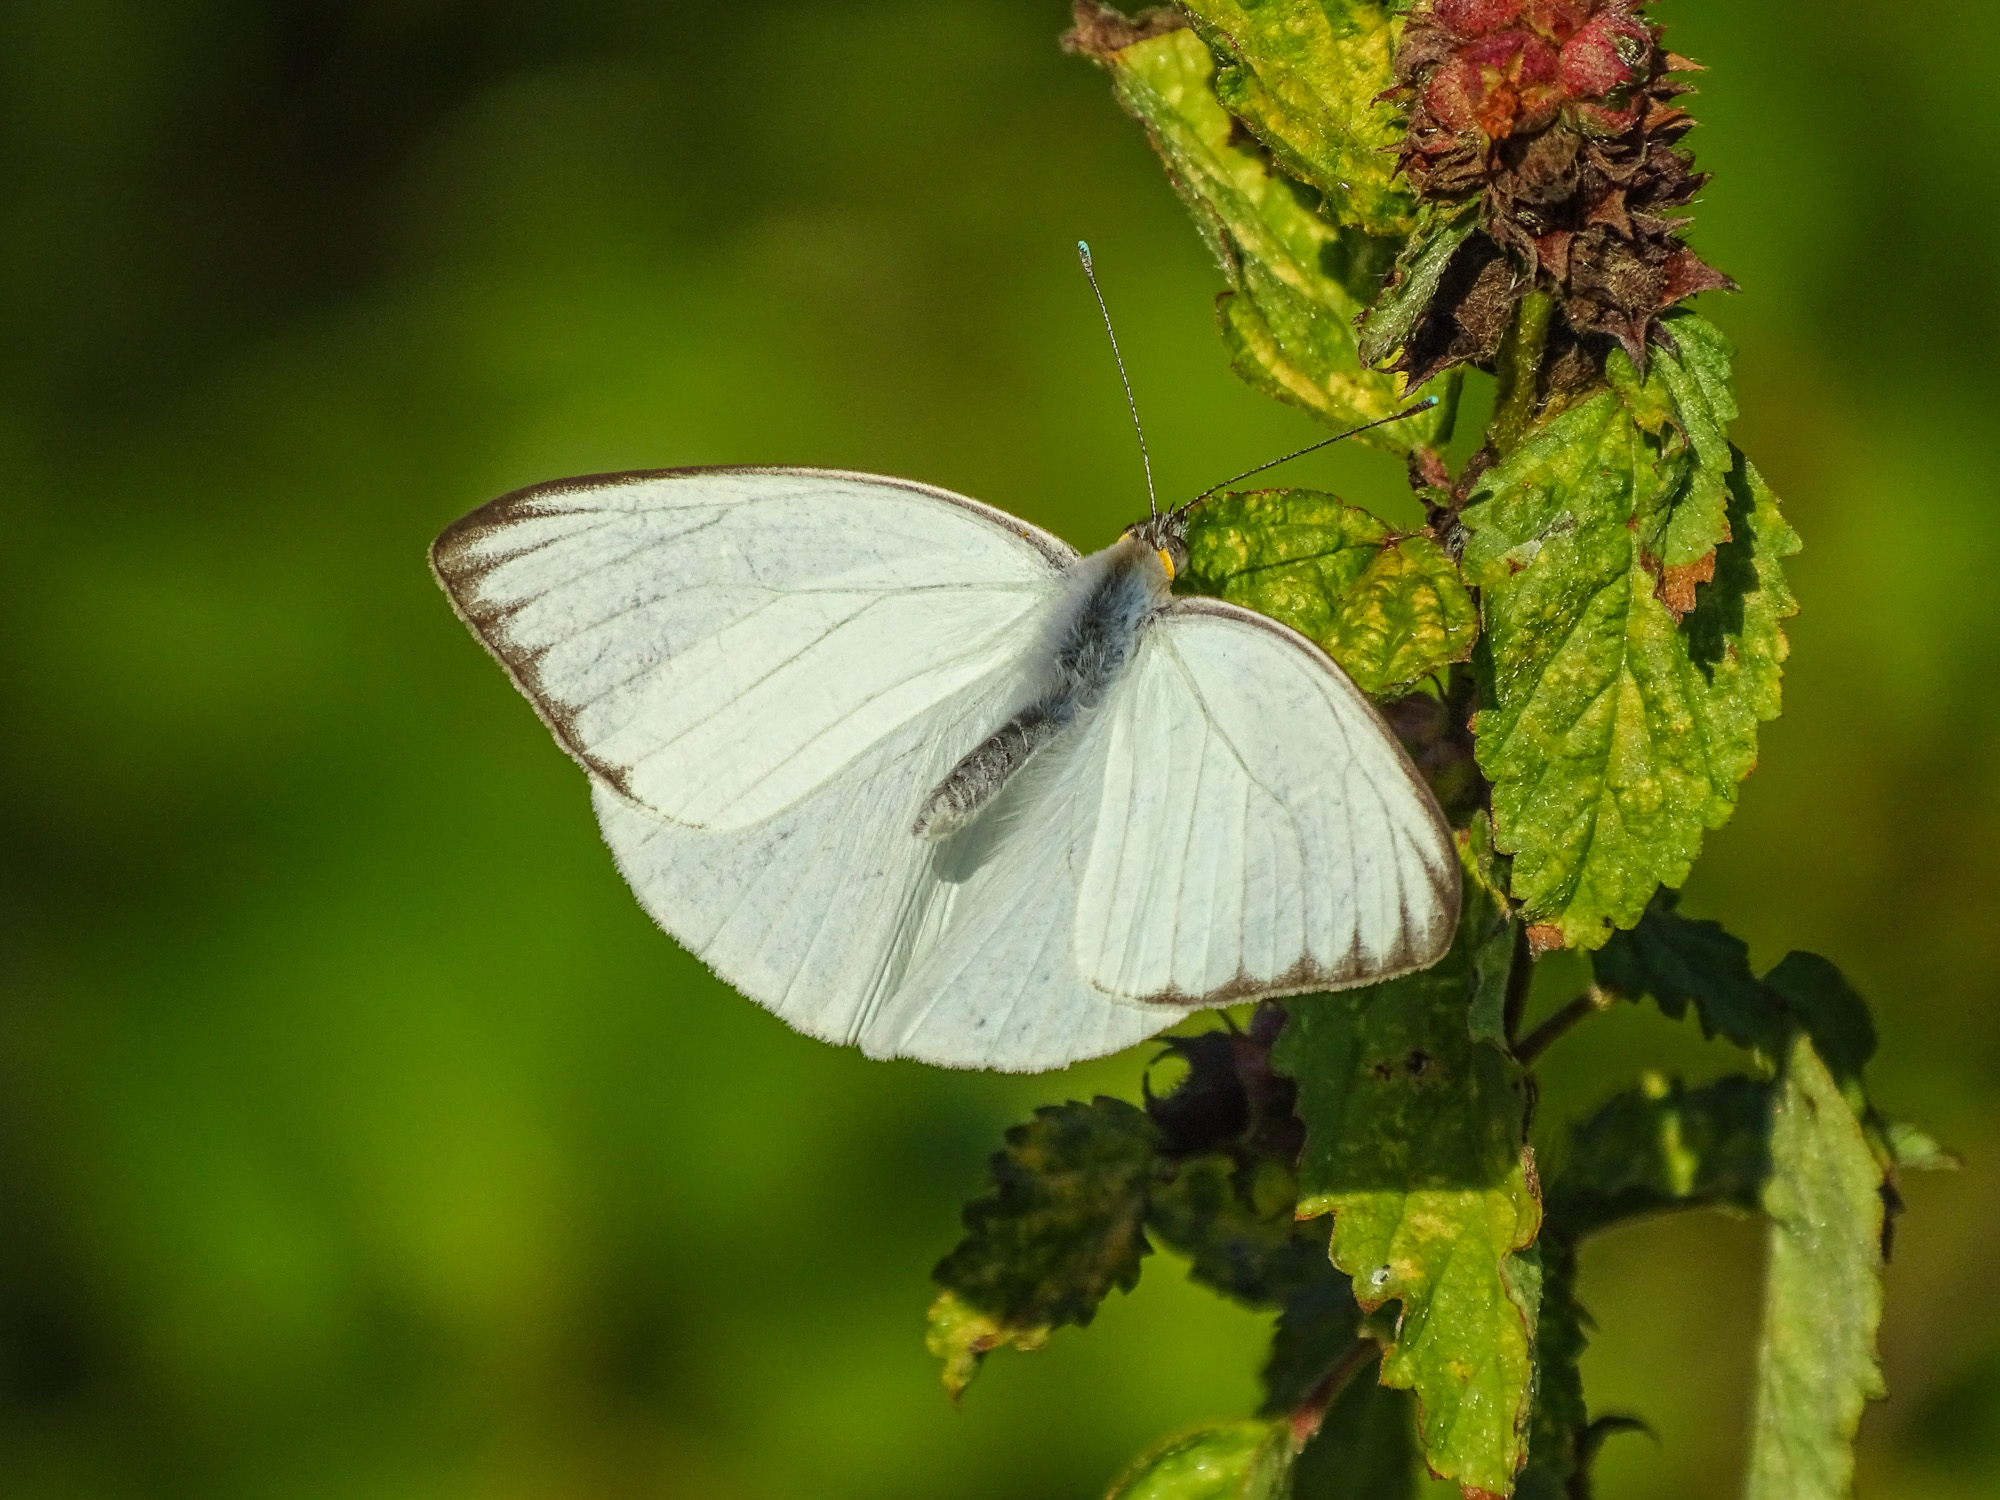
I recently spent several hours at the National Butterfly Center south of Mission Texas (and at Bentson State Park World Birding Center next door.) The NBC is one of my favorite places to photograph…the density and variety of butterflies and dragonflies found in the gardens right on the Rio Grande river can not be matched anywhere, at least in a natural setting (as in…not in a butterfly house). You an see the results in my WideEyedInWonder gallery. National Butterfly Center. If you pursue the exif data (available with the “i” information icon) you will see that most of these shots were taken with -.3 to -.7 EV exposure compensation. The ultra bright, high saturation, high contrast colors on butterfly wings tend to burn out…turn light or white…with normal exposures. Underexposing slightly keeps the colors as vivid as they are in life.
When shots like this present themselves, you need to be ready, and so does your camera. Wouldn’t it be nice if there was a Bird and Wildlife Mode that would take care of all the settings for you…leaving you free to frame the shot and shoot?
The Nikon P600 actually has a Birding Mode as one of its scene settings, and other cameras may have a Pet mode that is similar, but reviewers have pointed out that these generally are not actually the ideal combination of settings for birds and wildlife. On all other Point & Shoot superzooms, you can fairly easily create a Bird and Wildlife Mode and save it to one of you Custom or Memory settings. This is not for the faint hearted. It will require some digging around in menus and even your manual if you are going to succeed…but the rewards are worth the effort.
Canon SX50HS and Sony HX400V in Bird and Wildlife Mode
This I show I set up my cameras for birds and wildlife.
The base mode for birds and wildlife, since you will be using the top half of the zoom, and the full zoom most of the time, will be Shutter Preferred (labeled “T” on many control dials, “S” on others). Begin by setting your camera to T or S.
Canon SX60HS at 1365mm at 1/100th sec.
Both subject and camera motion contribute to the blur.
Either using the control wheel or the left/right rocker switches on the 5 way control on the back of the camera (rarely the up/down rocker switches) set your shutter speed to the lowest speed experience has shown your image stabilization will handle at full zoom. More telephoto shots are lost due to subject and camera motion blur than to any other cause. Even with the best IS, a high shutter speed will increase your chances of success. I use 1/640th and that is more risky than some would prefer. 1/1000th is probably safe. That means that when you switch to your saved Bird and Wildlife Mode, the shutter speed will be automatically set to no lower than your number…1/640th in my case. Once in Bird and Wildlife Mode in the field, if the light is good, and ISO at a reasonable value, you can easily bump the shutter speed up using the same control you used to set it.
Leave ISO on Auto (or set it to Auto if it is not there). You will need free ranging ISO to compensate for the higher shutter speeds, especially because the the typical superzoom only goes to f6.3-6.5 at the long end. You are going to be shooting wide open, at the lowest possible f-number, 99% of the time.
Set shooting to continuous. I prefer normal continuous to any high speed burst mode that might be available. I find that high speed burst too often gives me 10 identical images. 2-5 frames per second is fast enough, in my opinion, for most bird and wildlife action. If you have a choice, choose the continuous mode that uses auto-focus between frames. Both birds and wildlife are active, and you need all the help you can get keeping them in focus.
If you have control of the size of the focus square (check your menus and manual), set it to spot focus and the smallest area possible. Matrix or wide area focus, where the camera picks the focus point, will not work well, especially shooting birds or wildlife in deep cover. Also set Auto Focus to continuous to eliminate any lag while the camera finds focus.
Likewise, if you have control over the size and positioning of the exposure metering, set it to spot and the center of the field. You are more interested in getting the bird or animal correctly exposed than you are in the foreground or background.
Set image stabilization to full time, and the most intelligent mode your camera provides. This might be called active IS, or adaptive IS, or just super IS. Again, check the menus and manual.
A very difficult shot without manual over-ride.
If your camera has a manual focus over-ride on Auto Focus, and if it is easy to use, set it to active. Many superzooms provide the feature, but then make it so hard to use, involving rockers on the back of the camera, etc. that it is really useless. One of the best things about the Sony HX400V is the focus collar around the lens that can be used to fine-tune auto focus…or, more often, to quickly get the focus system in the right range so auto focus can lock without a lot of seeking.
If there is some kind of intelligent digital telephoto extender built in to your camera…most have some kind or other…make sure it is set so you have quick access to it. I am not talking about digital zoom. Most superzooms today have a mode that applies extra processing up to 2X beyond the optical zoom setting to produce very satisfying images at great magnifications. If yours works well, you will find yourself using it on occasion, even if you have over 1200mm optical equivalent to work with…especially on birds, butterflies, and dragonflies.
Sony HX400V at 2400mm equivalent
The final setting is zoom position. I keep mine set to full zoom.
Last, and most important, navigate to the menu area that allows you to memorize the the whole set of settings you just made. It might be called save settings, or custom mode, or something similar. Some cameras will allow you to save one set of settings, some will allow for two or more. Save your settings.
Now, rotate the control dial to P or A. Zoom all the way back in to wide angle. When you move the control dial to M1, or C2 or whatever the memory setting is called on your camera, just like magic, all of the Bird and Wildlife Mode settings will be restored…you will be in shutter preferred, continuous shooting, spot focus and metering, etc…and the zoom will automatically extend to full zoom. Within a second or less, you will be ready for birds and wildlife. 🙂
Depending on the features and capabilities of you particular P&S superzoom, you will want to fine tune my formula as you gain experience…or add features that I have not mentioned. For instance, Sony provides adjustable Creative Styles to control the way the image is processed from RAW to Jpeg in the camera. I have a custom designed Creative Style for birds and wildlife that is also programmed into my Birds and Wildlife mode. (It is Memory 1 on my dial, of course! 🙂
By the way, using a similar technique, I set my Memory 2 to the HDR settings I prefer, and I have my P set up (it automatically remembers the last set of settings you used, with the possible exception of zoom length) for normal and macro shooting. With Sports set as my Scene Mode, I than spend 90% of my time at one of 4 settings on the control dial. And that is worth the effort with menus and manuals.
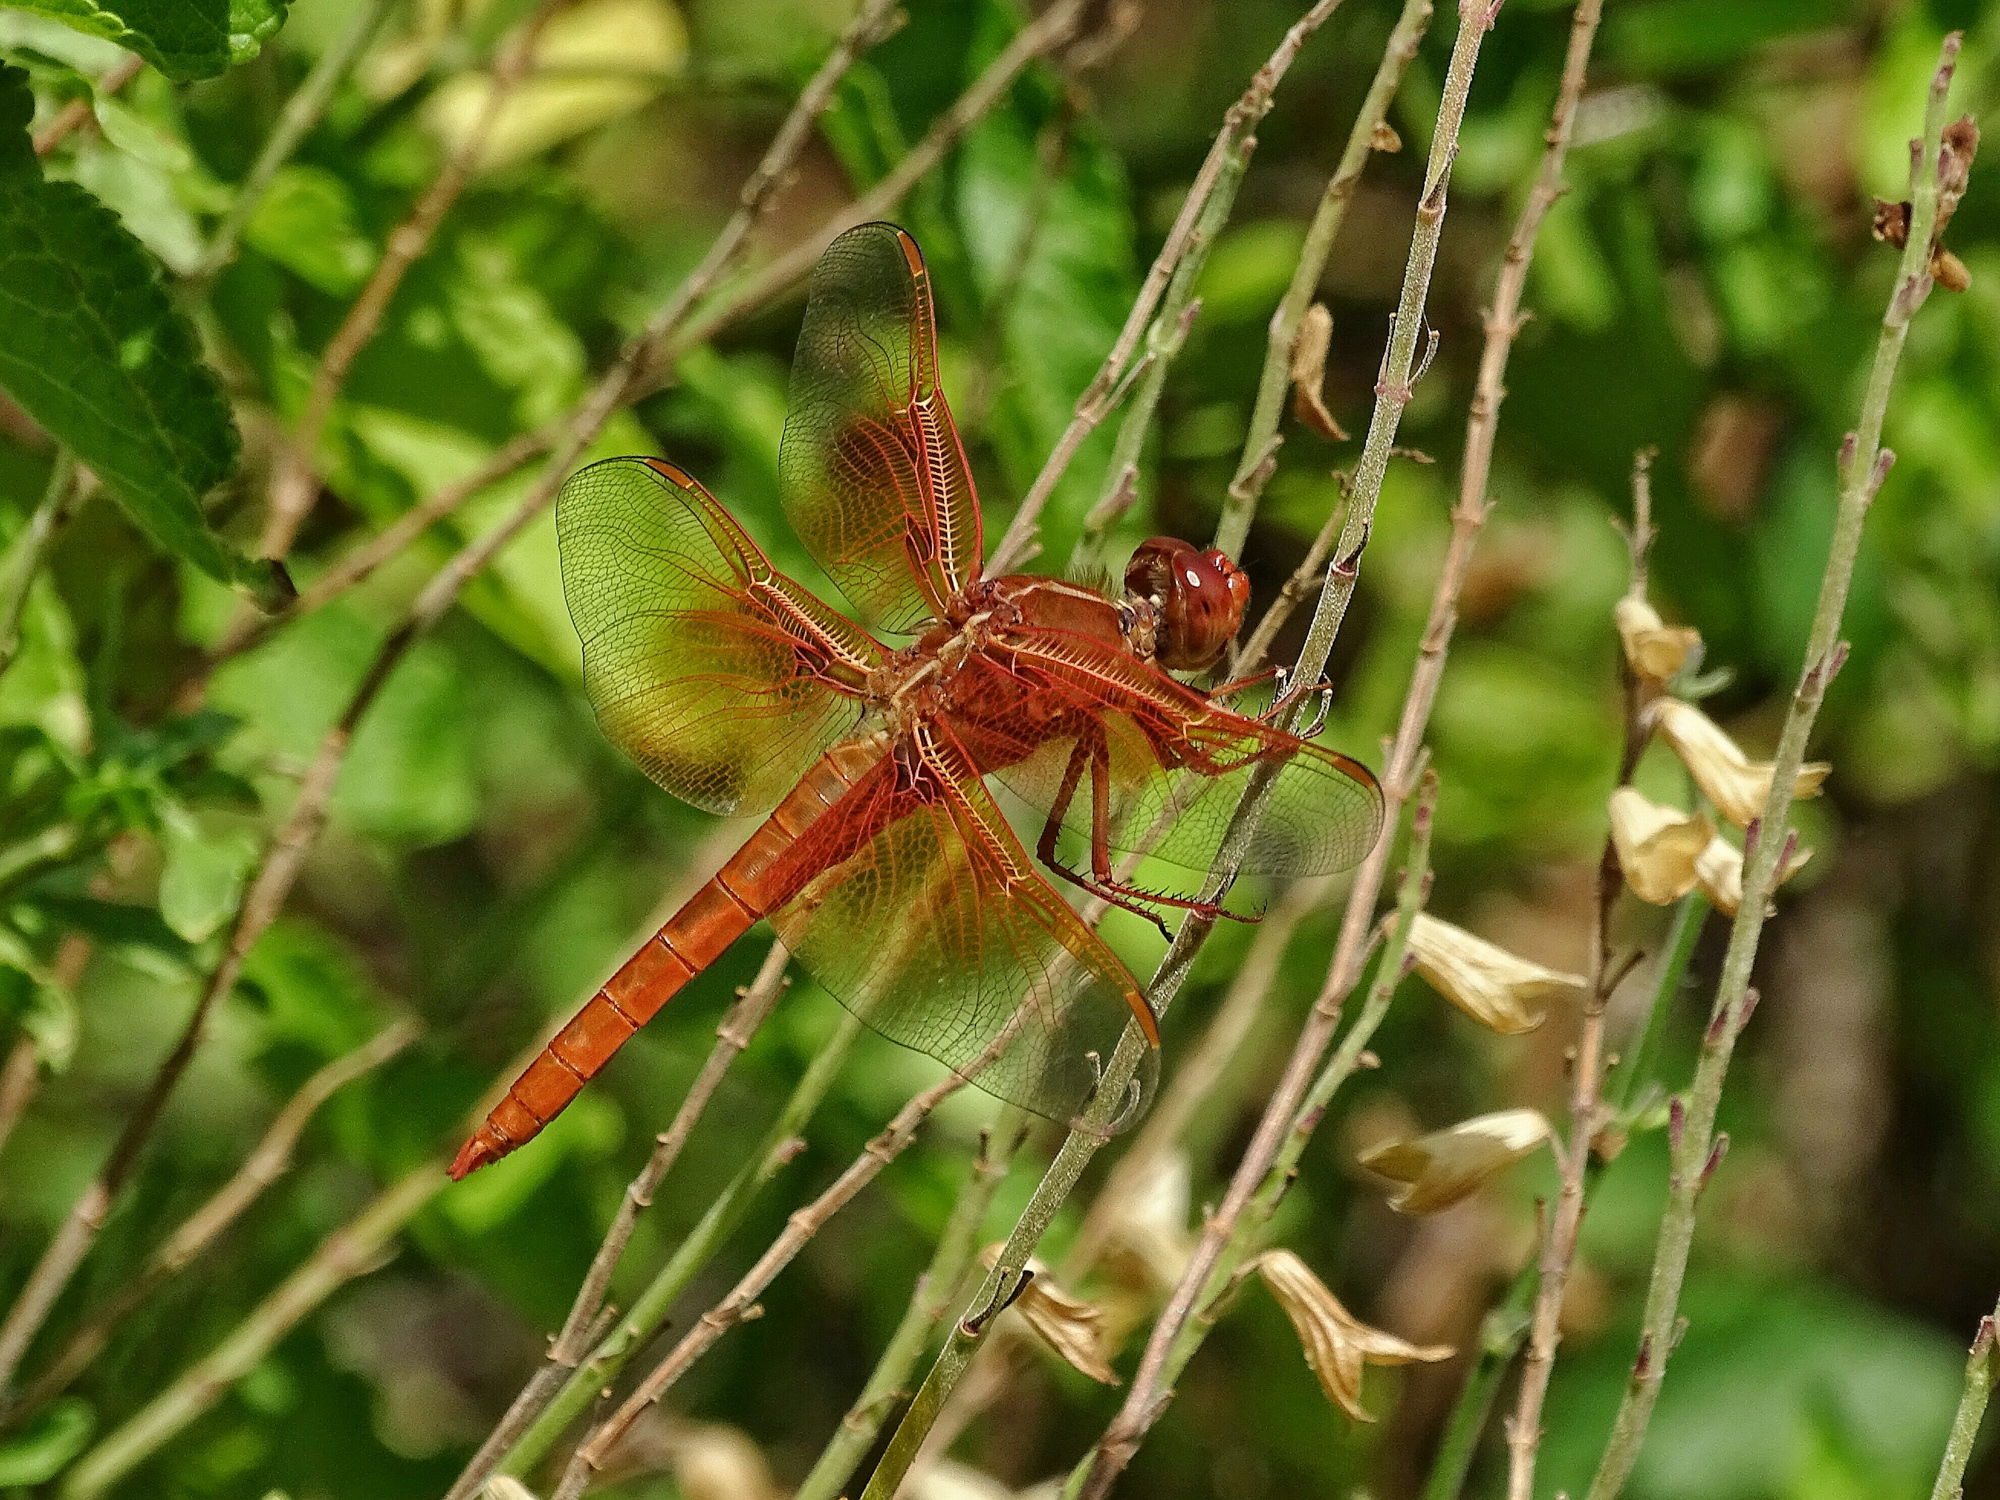
Flame Skimmer: wildlife certainly includes dragonflies!
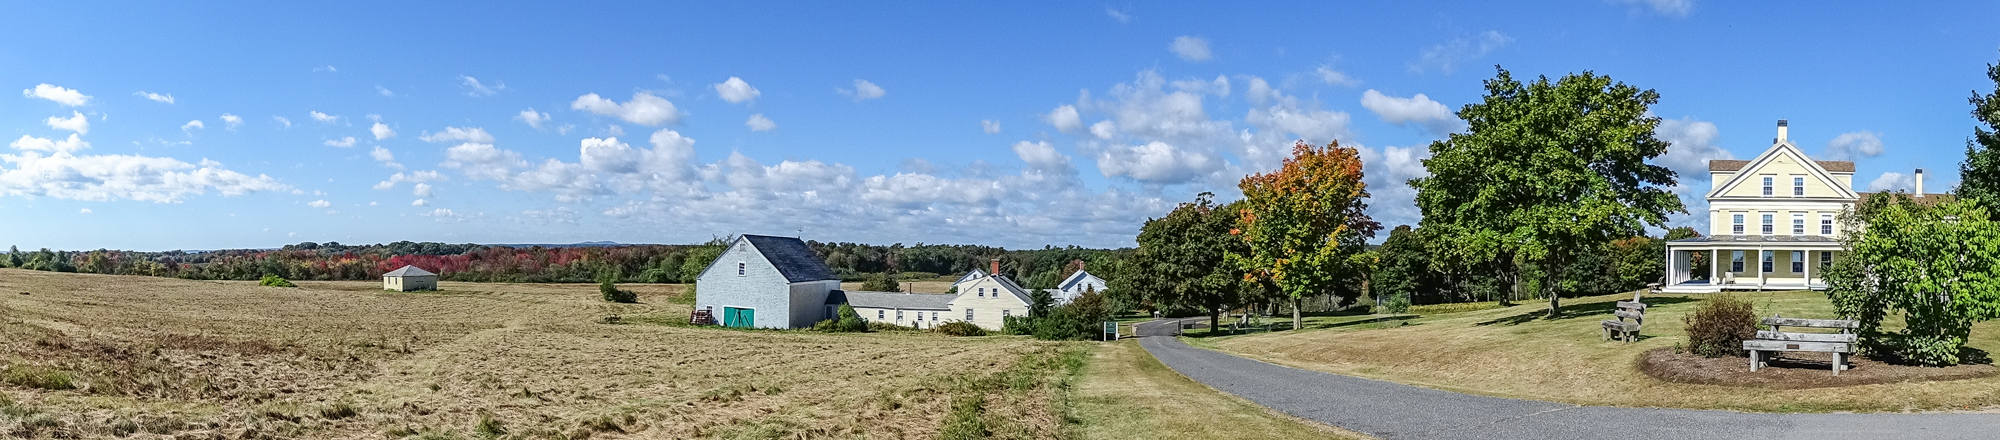
Approaching an 180 degree sweep. Wells National Estuarine Research Center at Laudholm Farm. Sony HX400V.
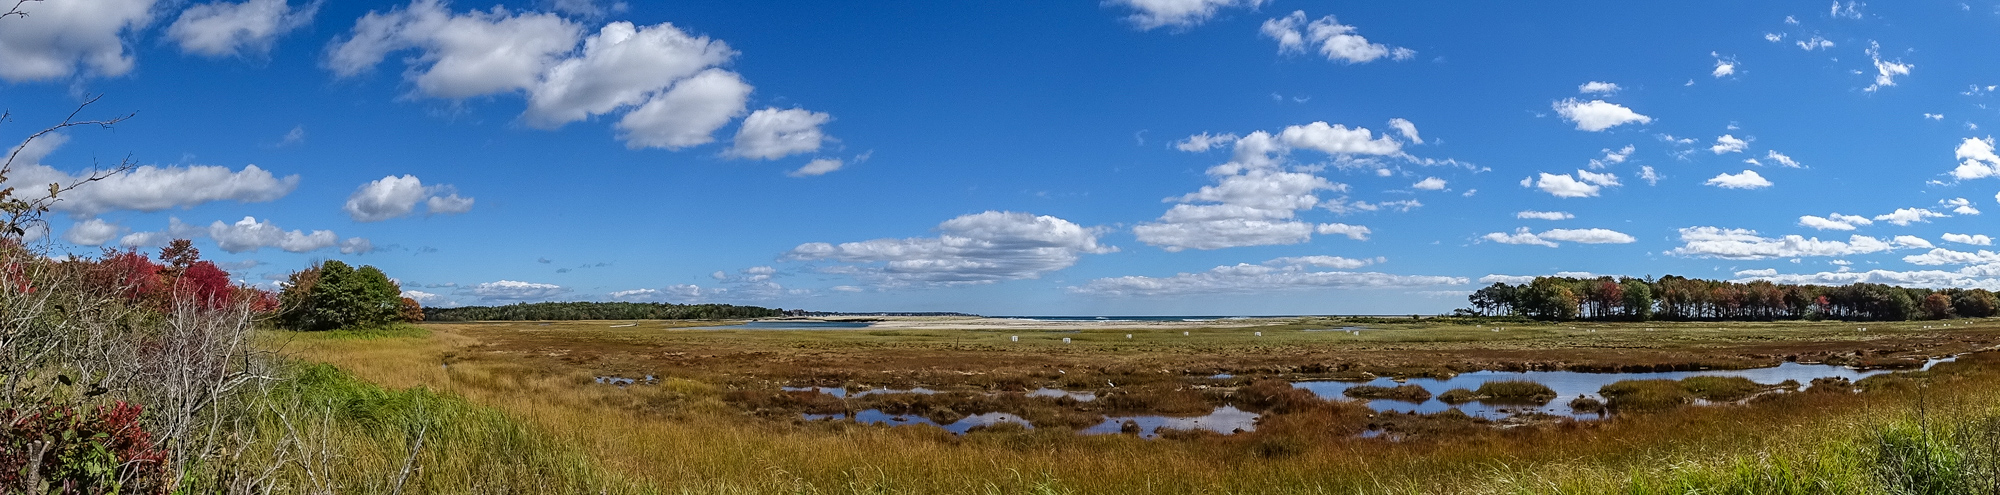
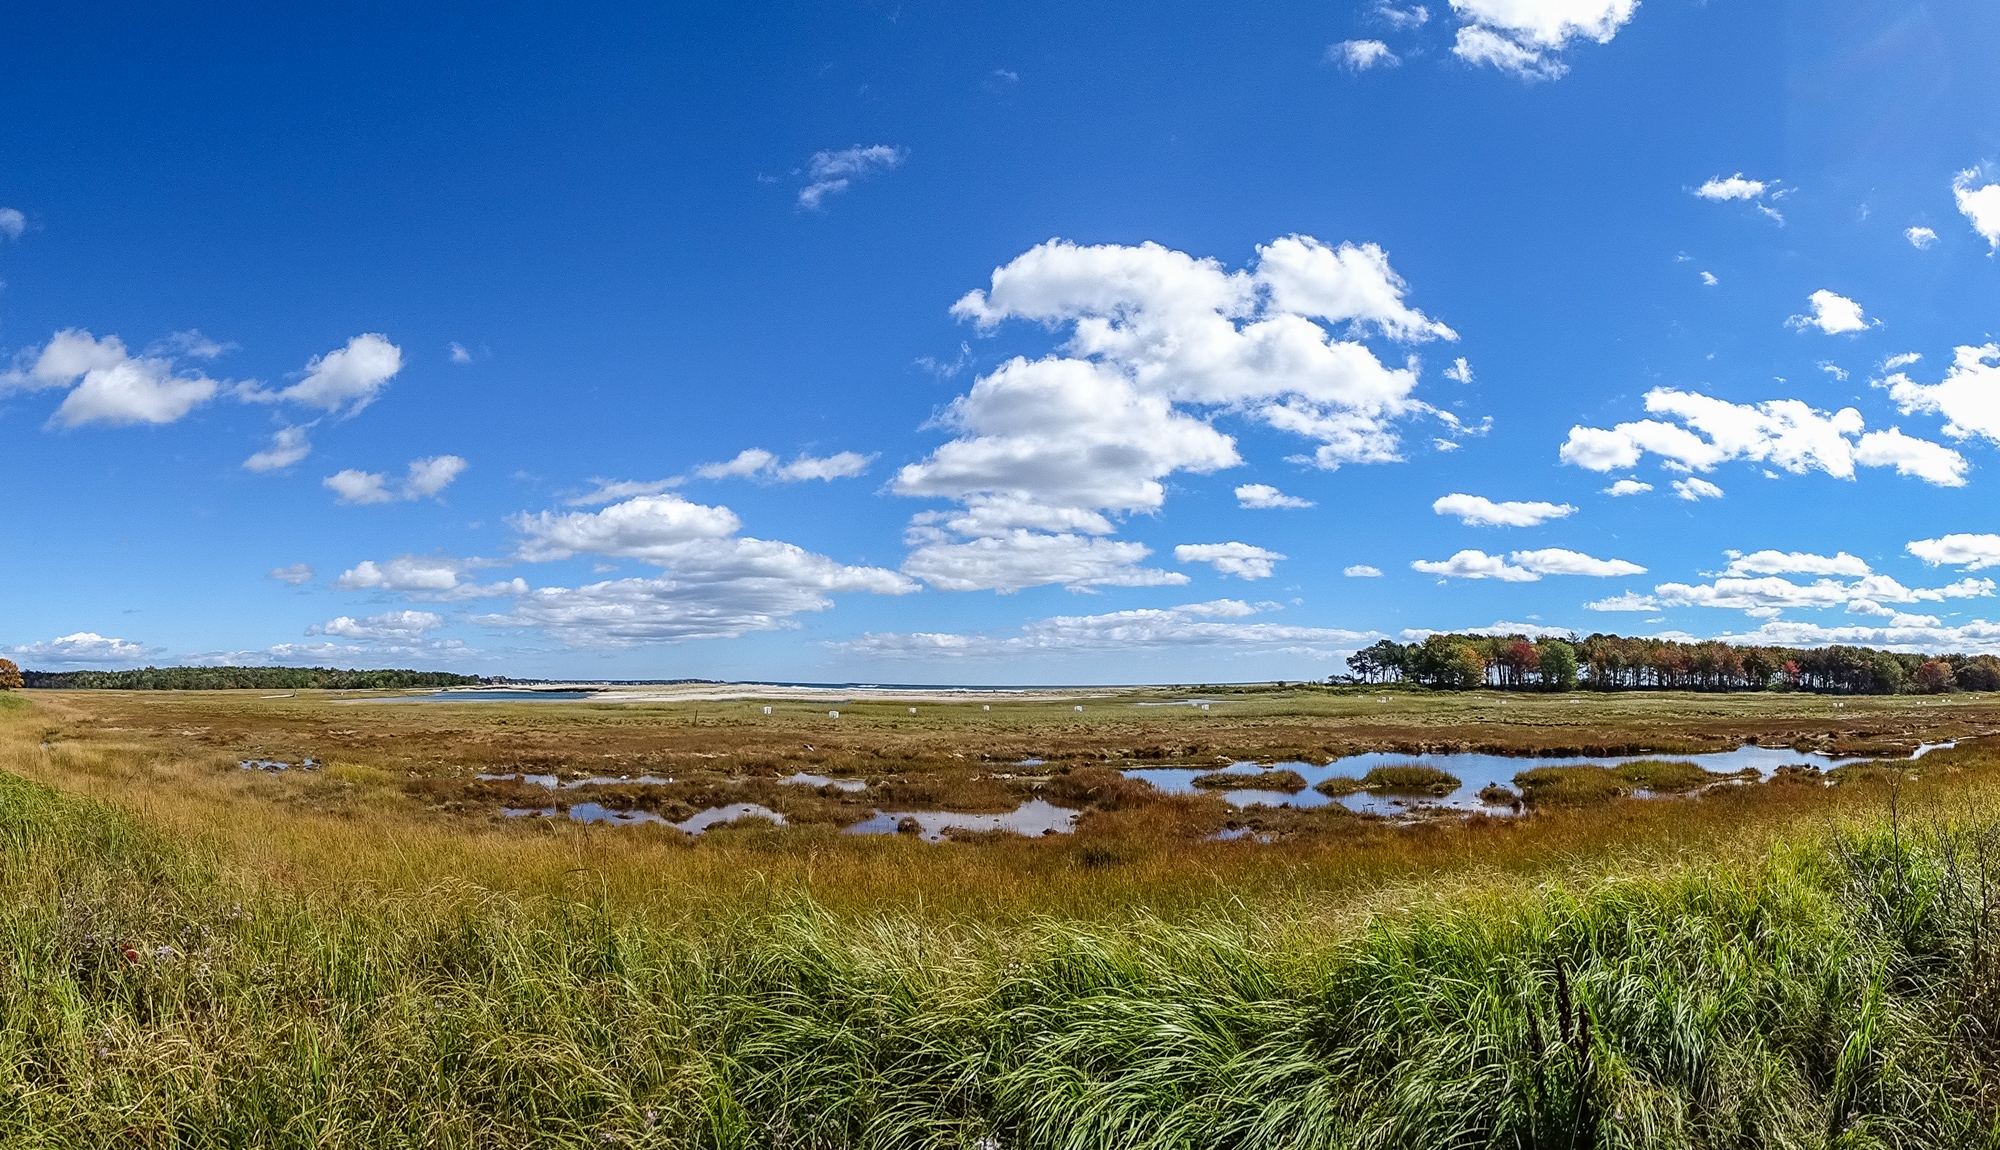
Sometimes, when faced with a grand landscape, wide-angle, no matter how wide the wide end of your zoom is, is simply not wide enough. Most of the recent P&S superzooms reach 24mm equivalent field of view…and a few reach 21mm. Both will embrace a generous expanse of land and sky, as you see in this conventional wide angle shot.
24mm equivalent field of view of the same scene.
But is that enough? When faced with a landscape and sky like this one, I am always tempted to try a panorama shot.
There were, back in film days, specialized panorama cameras that featured rotating lenses that painted a panorama on a long strip of film on a curved film-plain. In the digital era, panoramas were created by taking several overlapping frames and stitching them together in software after the fact. The software started out as single purpose, stand-alone programs that you used before or after whatever photo editing program you used. The challenge was to match the edges of the frames perfectly and then blend the exposures at the edges to create a seamless image. Not easy, even with the help of a computer. Eventually the math behind the problem became well enough established so that main-steam photo editing software, even inexpensive software like Photoshop Elements, had a panorama function built in. They did a decent job, as long as your exposures were relatively consistent, and you did not use a lens with too much distortion at the edge of the field where the images had to blend. And, if the perspective of the three shots worked. Shooting from a tripod might keep the images aligned, but, ideally, rather than rotating about a fixed point, the camera should sweep through an arch so that the lens, essentially, rotates as it did in a dedicated panorama camera to embrace the scene. Specialized tripod heads were developed to accomplish that, but panoramas were still not easy to do. Which is why we saw so few.
A sweep-panorama with buildings. Note that the perspective remains relatively accurate.
I seem to remember that Sweep-panorama was first introduced in phone cameras. The tiny fast CMOS sensors in phones were able to essentially paint the image to a file one narrow band at a time as the phone was swept across the extent of the landscape, almost as though you were panning a video camera. Nice trick. And, since you were framing the image on the LCD of the phone, it was natural to hold the camera out from your face and sweep it in an arch by rotating your whole body. Ideal! Suddenly panoramas were a lot more common.
I believe it was Sony who first introduced sweep-panorama to the P&S world, along about the time the first fast back-illuminated CMOS sensors found their way into P&Ss. The other makers lagged somewhat…building in conventional multiple scene stitch together assist panorama assist…but with this last generation of P&S superzooms, I am pretty sure they all feature sweep-panorama.
Keys to success:
1) Meter off the area of the scene you want to be best exposed. Do no simply point at one edge and press the shutter. Pick the area of the scene with the average brightness, or the area, as above, that is most important to you, point at it, half press the shutter to lock exposure (that works on most cameras, some may have a separate exposure lock button), rotate back to one edge of the scene and fully press the shutter button to start exposure.
2) as above, hold the camera out in front of you several inches to a foot and sweep it across the scene in an arch, rotating your body if necessary. There should be a straight line from the horizon through the camera lens to the center of your body at all times. It is easier to do than it is to describe. 🙂
3) if your camera has guide-lines that can be turned on for framing the scene on the LCD, turn them on and use them to keep the horizon level and placed correctly as you sweep.
4) keep the speed of the sweep uniform. Your camera will generally alert you and the panorama will fail if you go too fast or too slow. A little practice makes perfect.
Tips:
Don’t limit yourself to long narrow horizontal panoramas. Most cameras will allow you to set the direction of the sweep. Try some horizontal sweep-panoramas with the camera held in portrait orientation (vertically). This will produce a pano that is wide, but also taller than normal, for some very interesting (and more natural looking) effects. Compare this to the long panorama of the same scene at the head of the post.
Tall/wide panorama with the camera held vertically and swept horizontally.
And don’t limit yourself to horizontal panoramas at all. A vertical sweep pano can capture the sky effects better than almost any other technique.
Finally, try shooting panos, especially vertical panos of things that are not, on first glance, pano subjects. Vertical panoramas of trees, for instance, can show the tree in a way you rarely see it presented…whether you are after the massive scale of forest giants, or the intimate detail of an interesting trunk.
So sweep away…but don’t get swept away. Panoramas are fun, but as you might have observed here, they are hard to display on any kind of screen or monitor. Still there are times when the landscape or the subject simply demands that you break the bounds of the conventional wide angle frame. And sweep-panorama in today’s P&S superzooms will do the trick. Give it a try.


