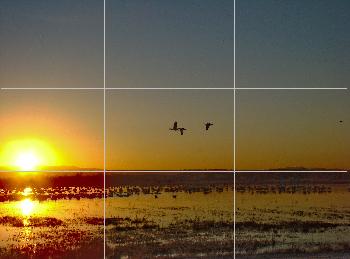
I was thinking about this while out catching images this afternoon. I have a little grid in my camera viewfinder that separates the view into thirds both ways: two horizontal lines and two vertical lines which intesect each other at the 1/3 points, and kind of float there in the view.
The rule of 3rds grid in my viewfinder.
I use them all the time. I use them to decide where to place the horizon (and to keep the horizon straight). I use them to decide where to put the strong verticals in the image. I use them to decide where to put the primary subject…where to put what I want to viewer to notice first and to keep coming back to in the image. I never turn the grid off, though I could. It is there all the time, dividing the view into thirds.
You are going to hear about the rule of thirds sooner or later, so, if you haven’t heard about it already, you might as well hear it from me. (And I will try to make this article worth your while even if you have heard all you think you want to know about the rule of thirds.)
First, let’s get the rule part out of the way. Photography is an art, right, and some people strongly object to the notion that there are, or even can be, any kind of rules that govern an art. Art is about creativity, and creativity, in the minds of some, is most often about breaking the rules.
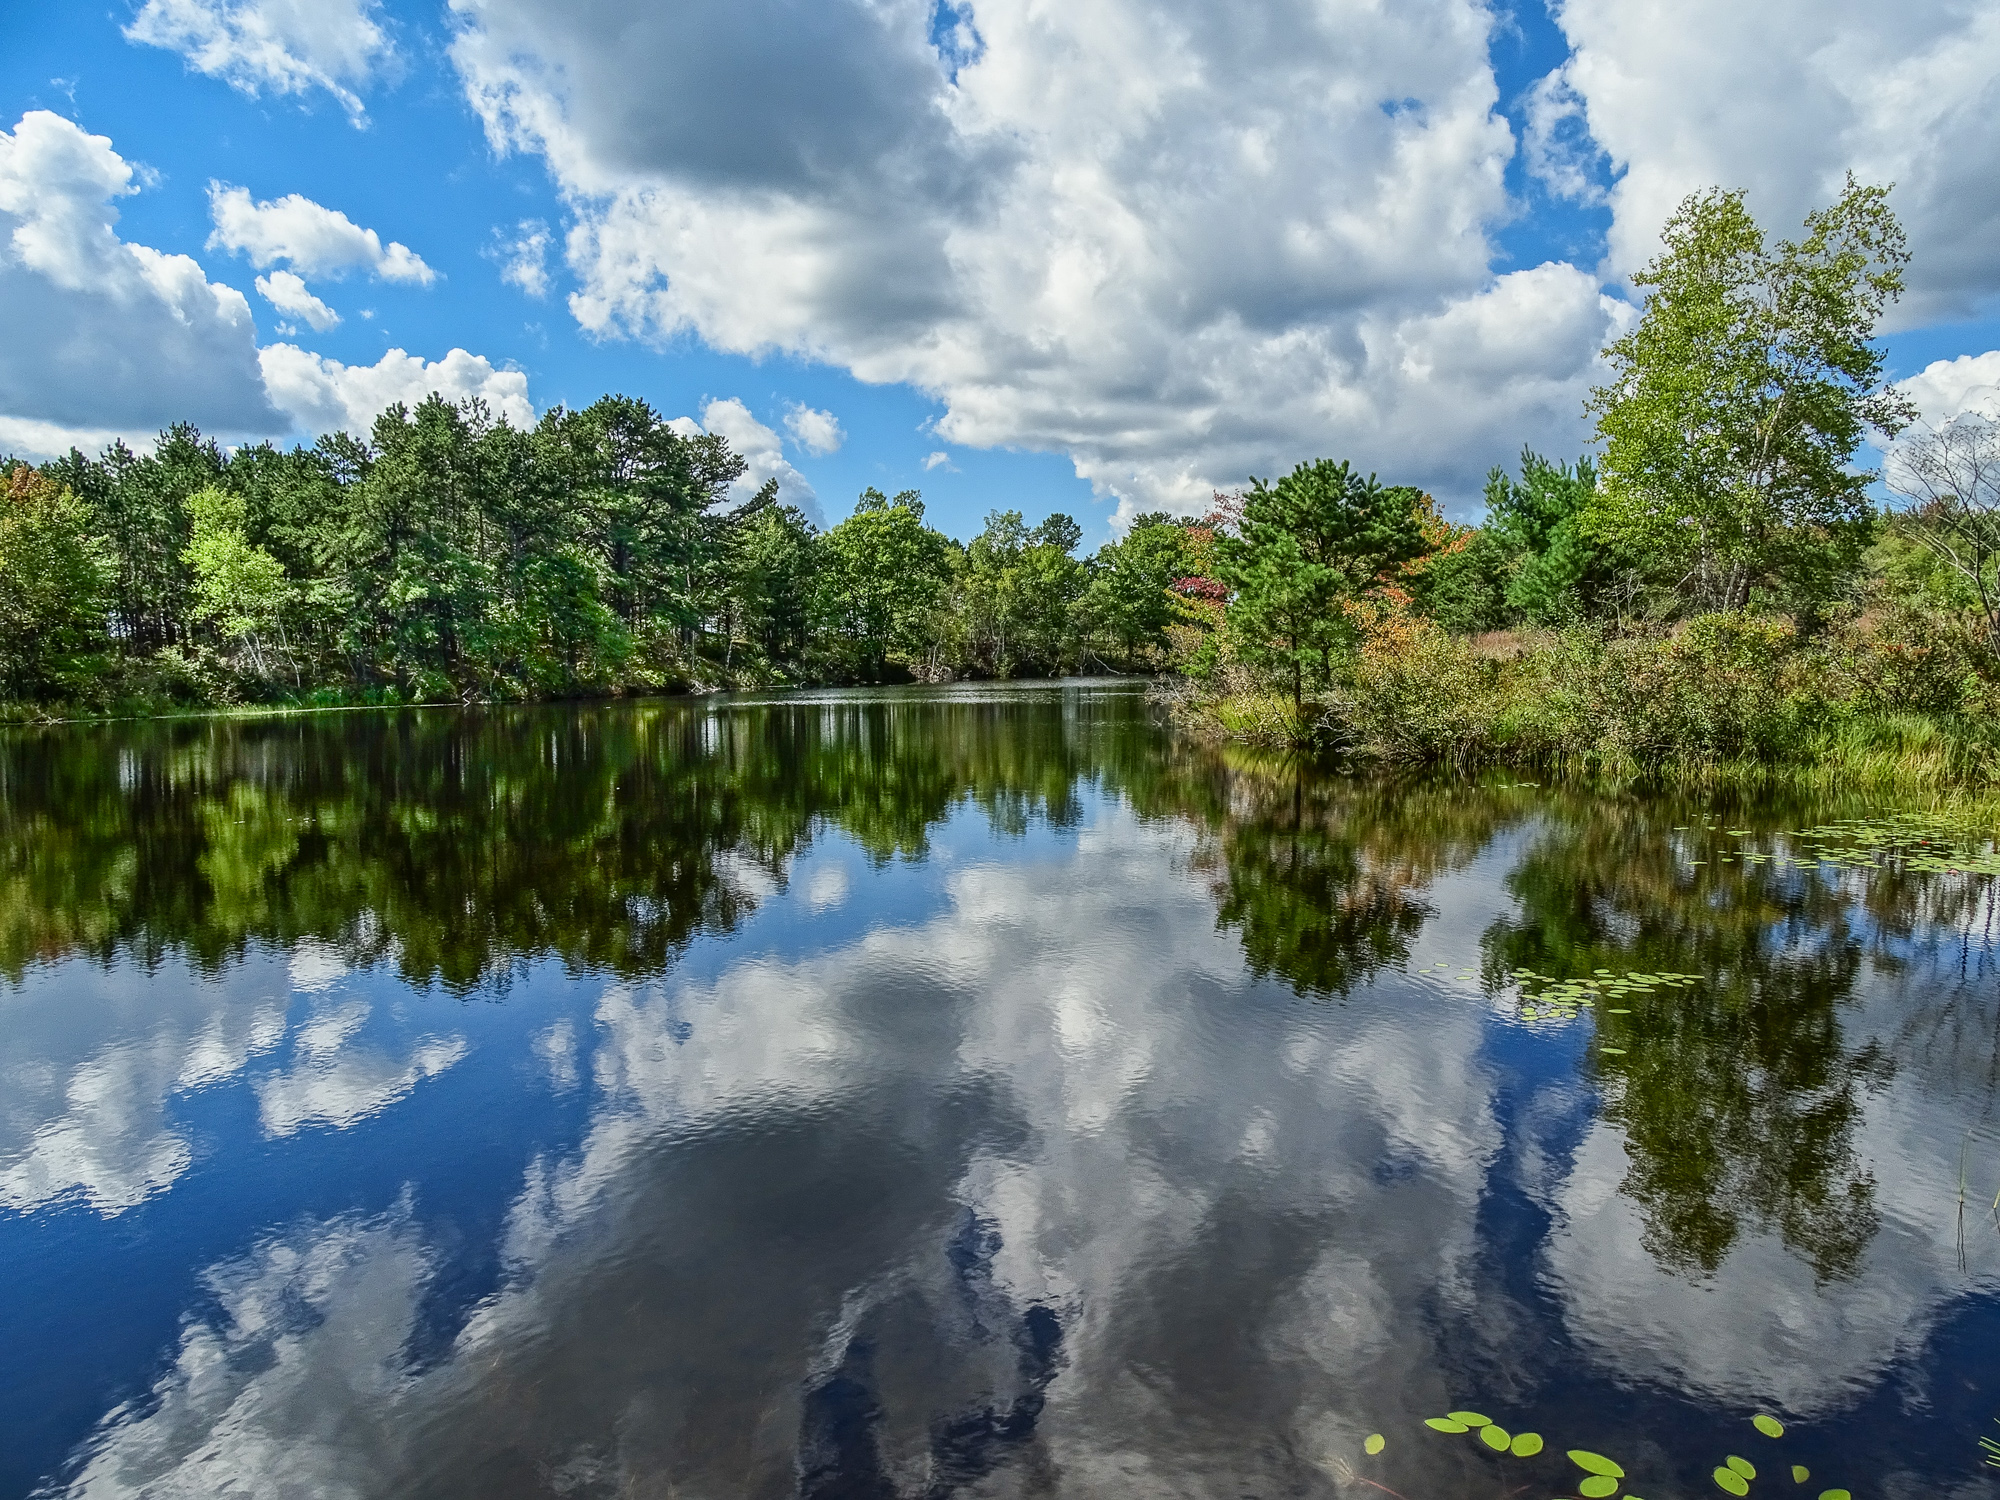
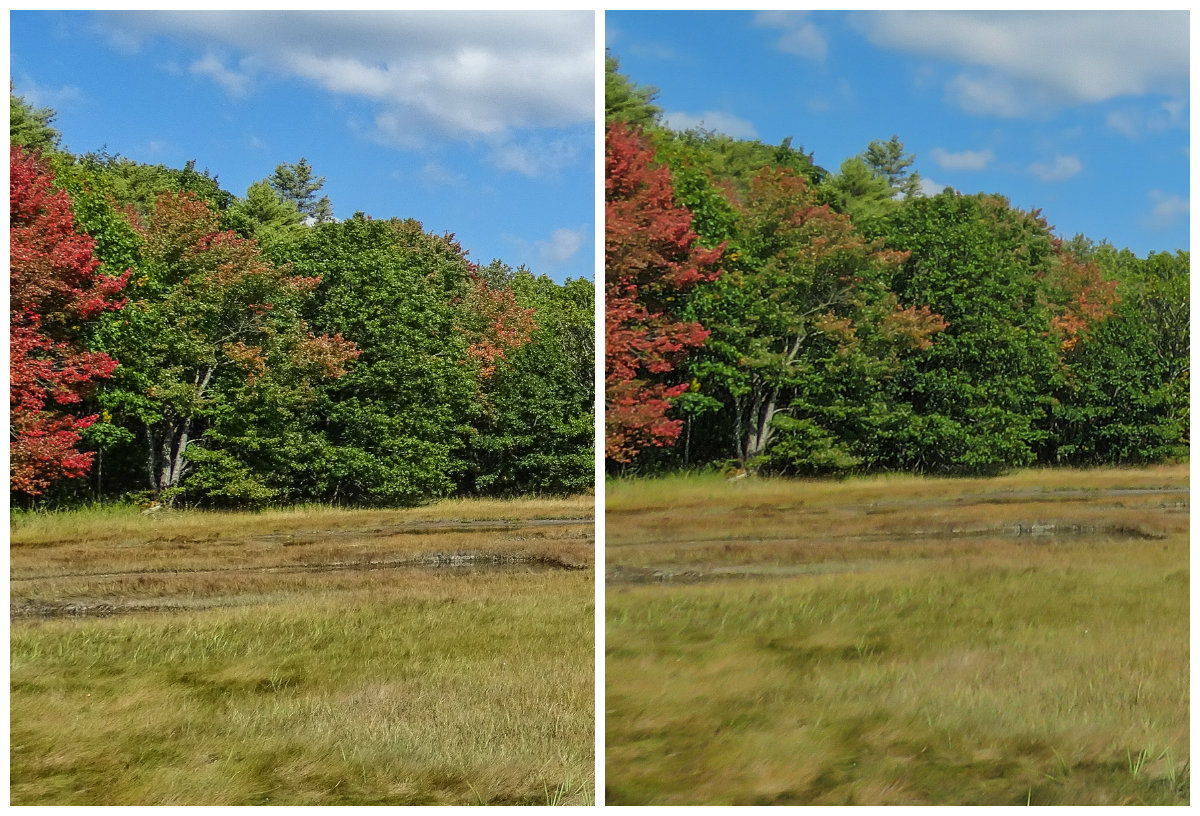
Horizon and strong vertical element: 3rds!
In the minds of some. Others see creativity as an act that is self-defining…it may obey all the rules you can imagine for its form, but it manages to be something more than the rules could have predicted. In a real sense, truly creative acts define the rules without being defined by them…they give, by their creative example, whatever rules might exist their true meaning and only reality.
But, just to be on the safe side, let’s say there is no rule of thirds. There still might, however, be a really strong suggestion of thirds.
That little grid in my viewfinder divides the view by the rule of thirds…er…the suggestion of thirds.
What that gives me is 9 quadrants of interest, 4 power points, two horizons, and two strong verticals. Some one must have described all this before, and you can probably find similar stuff in a hundred books on composition, but what I am telling you now I am making up as I go along. All that about quadrants of interest, power points, etc. is just the way I think about the suggestion of thirds, and it provides a frame of reference that, I hope, might help you to think about composition in your images.
The theory behind the suggestion of thirds, as I understand it, is that the eye is naturally drawn to the horizontals and verticals that divide the frame into thirds, and that our minds (spirits?) are comfortable with images that fall into 1/3 and 2/3 spaces. It has to do, some say, with a kind of tension that is introduced by that division, and the fact that the eye can roam over the frame and come back to rest at those dividing lines in a way that satisfies some inner sense of harmony.
That is why you see so many landscapes with the horizon at either the bottom or the top horizontal third line. That is why you see the strongest verticals in the images…whether they are trees, people, flag-poles, cliffs, or building edges…hugging the two vertical third lines.
At the same time, our eyes are drawn first to objects that sit at the power points…the places where the horizontal and vertical lines cross. And our eyes return repeatedly to any object (or subject) that is placed there.
Placing an object or subject at a power point produces a very different effect than placing the same object at the center of the frame. Center placement says “this is an image about this object or subject”…or perhaps even “this is a portrait of this object or subject.” That’s fine.
Placing an object or subject at a power point says “this is an image about the relationship of this object or subject to the rest of the image (and, by extension, the world as a whole). It is not a straight up portrait, but a portrayal of the object or subject in context, in relationship, in tension with its surroundings.
A seemingly insignificant or relatively small object or subject at a power point can dominate the image, drawing the eye back and back, until the mind has to grapple with the “what’s this all about?” question.
Another way of thinking of it is this: placing an object or subject at the power point is like flagging it…it says “look at this”…”notice this”…”whatever else you see here, don’t miss this.”
This image is not about the shells in the foreground, though they add visual interest and depth…it is about the two tiny girls standing at the power point and their relationship to the rest of the scene.
Each of the nine quadrants of interest, to me, has a different feel to it. Placing an important image element in any of the four outer corner quadrants (1,3,7,9) produces a real tension…gives the image a tilt to that quadrant. It can work for images where you want to challenge the viewer’s perceptions of the relationship of that element to the rest of the image and to the world around it.
Placing an important image element within the the outer center quadrants (4,6) feels to me like an entrance or an exit. If the object or subject is facing into the frame, then it is an entering element and there is a feeling of expectation, and eager feeling, a feeling of things about to happen.
If the object or subject is facing out of the frame, then it is an exiting element. “Just caught on the way out.” There is a feeling rush, a feeling of impatience, a tension that can be uncomfortable or simply challenging.
This entering and exiting elements concept is useful in the four corner quadrants too, of course, as elements placed there can be entering or exiting, and that will effect the way the viewer interprets the challenge of placing the object or subject there.
The center quadrant (5), as above, is, to my eye, for portraits. Everything else in the image falls away behind, is automatically rendered secondary, placed in a supporting role. The center quadrant has “star of the show” status.
And it is exactly because of that dominant feeling that placing the real “star” of the image at a power point is often more effective. No easy assumptions about the relationship of the subject or object to the rest of the frame are possible…you have to figure it out in the moment…and that creates a visual interest that we find appealing.
Star of the show…vs…an element in tension
Placing matched, or symmetrical image elements in the outer quadrants, one on each side of center, is the classic framing technique. It can give a feeling of intimacy to what might otherwise impress as a distant landscape, or it can focus the eye powerfully on the subject of the portrait.
Classic framing technique
Of course, I don’t think about all of this while I am catching images…or I wouldn’t if I didn’t have my little grid on. Seeing that grid there reminds me that I have options…I have decisions to make…and that my decisions will effect how the viewer sees the image I catch. I can, most of the time, move around and reframe to place different image elements in different quadrants of interest. I can easily make sure there is something of interest occupying at least one of the power points…and that it is the right object or subject…the one I want there. I can easily check to see where my horizon is (and if it is straight). I may not put it right on either horizontal line, but when I don’t, that is a decision I am making about the impact of the image. If there is a tree in the foreground of the view, I can decide whether I want it at the strong vertical line so people notice it (and generally accept it) or if it is entering or exiting from an outer quadrant, or if I need to balance it with something in on the other side of the image to create a frame. That decision will, again, effect how viewers see the image I catch, the impact it has on them.
There are those, of course, who see all these decisions as too studied an approach. They suggest forgetting about formal composition and just shooting from the gut. My little suggestion of thirds grid in the viewfinder would drive them crazy and they would immediately shut it off…and they would see my having it on as somehow diminishing the immediacy and power of my gut reactions to the scene before me. To them that would be a bad thing.
Of course, I beg to differ. I see the suggestion of thirds and the composition grid as a way of more effectively capturing the gut feeling that drew me to the scene…to the photo op…in the first place. Not only that, but the suggestion of thirds continuously challenges me to attempt new visions of the scene…to catch different versions of the same scene…to try out the effects of altering the composition to see which works best. To me this is a good thing.
As an exercise, go through a photo magazine or a book of prints of the great masters (photographers or painters) and see how their images define the suggestion of thirds.
Now, you might not have a built in suggestion of thirds grid in your camera…most don’t…but that does not mean that you can’t project such a mental grid on your viewfinder while you are catching images. It is a bit more effort, and you have to remember to do it (rather than being reminded by the installed grid), but it can be done.
(Of course, to a certain extent, you can exercise the suggestion of thirds after the fact, while post-processing, through creative cropping too.)
Play with the concepts of the suggestion of thirds as I have outlined them here. I’d love to hear what you think. I’d love to see examples of the work you produce.
It’s not a rule, but that doesn’t mean it isn’t still a really good idea.
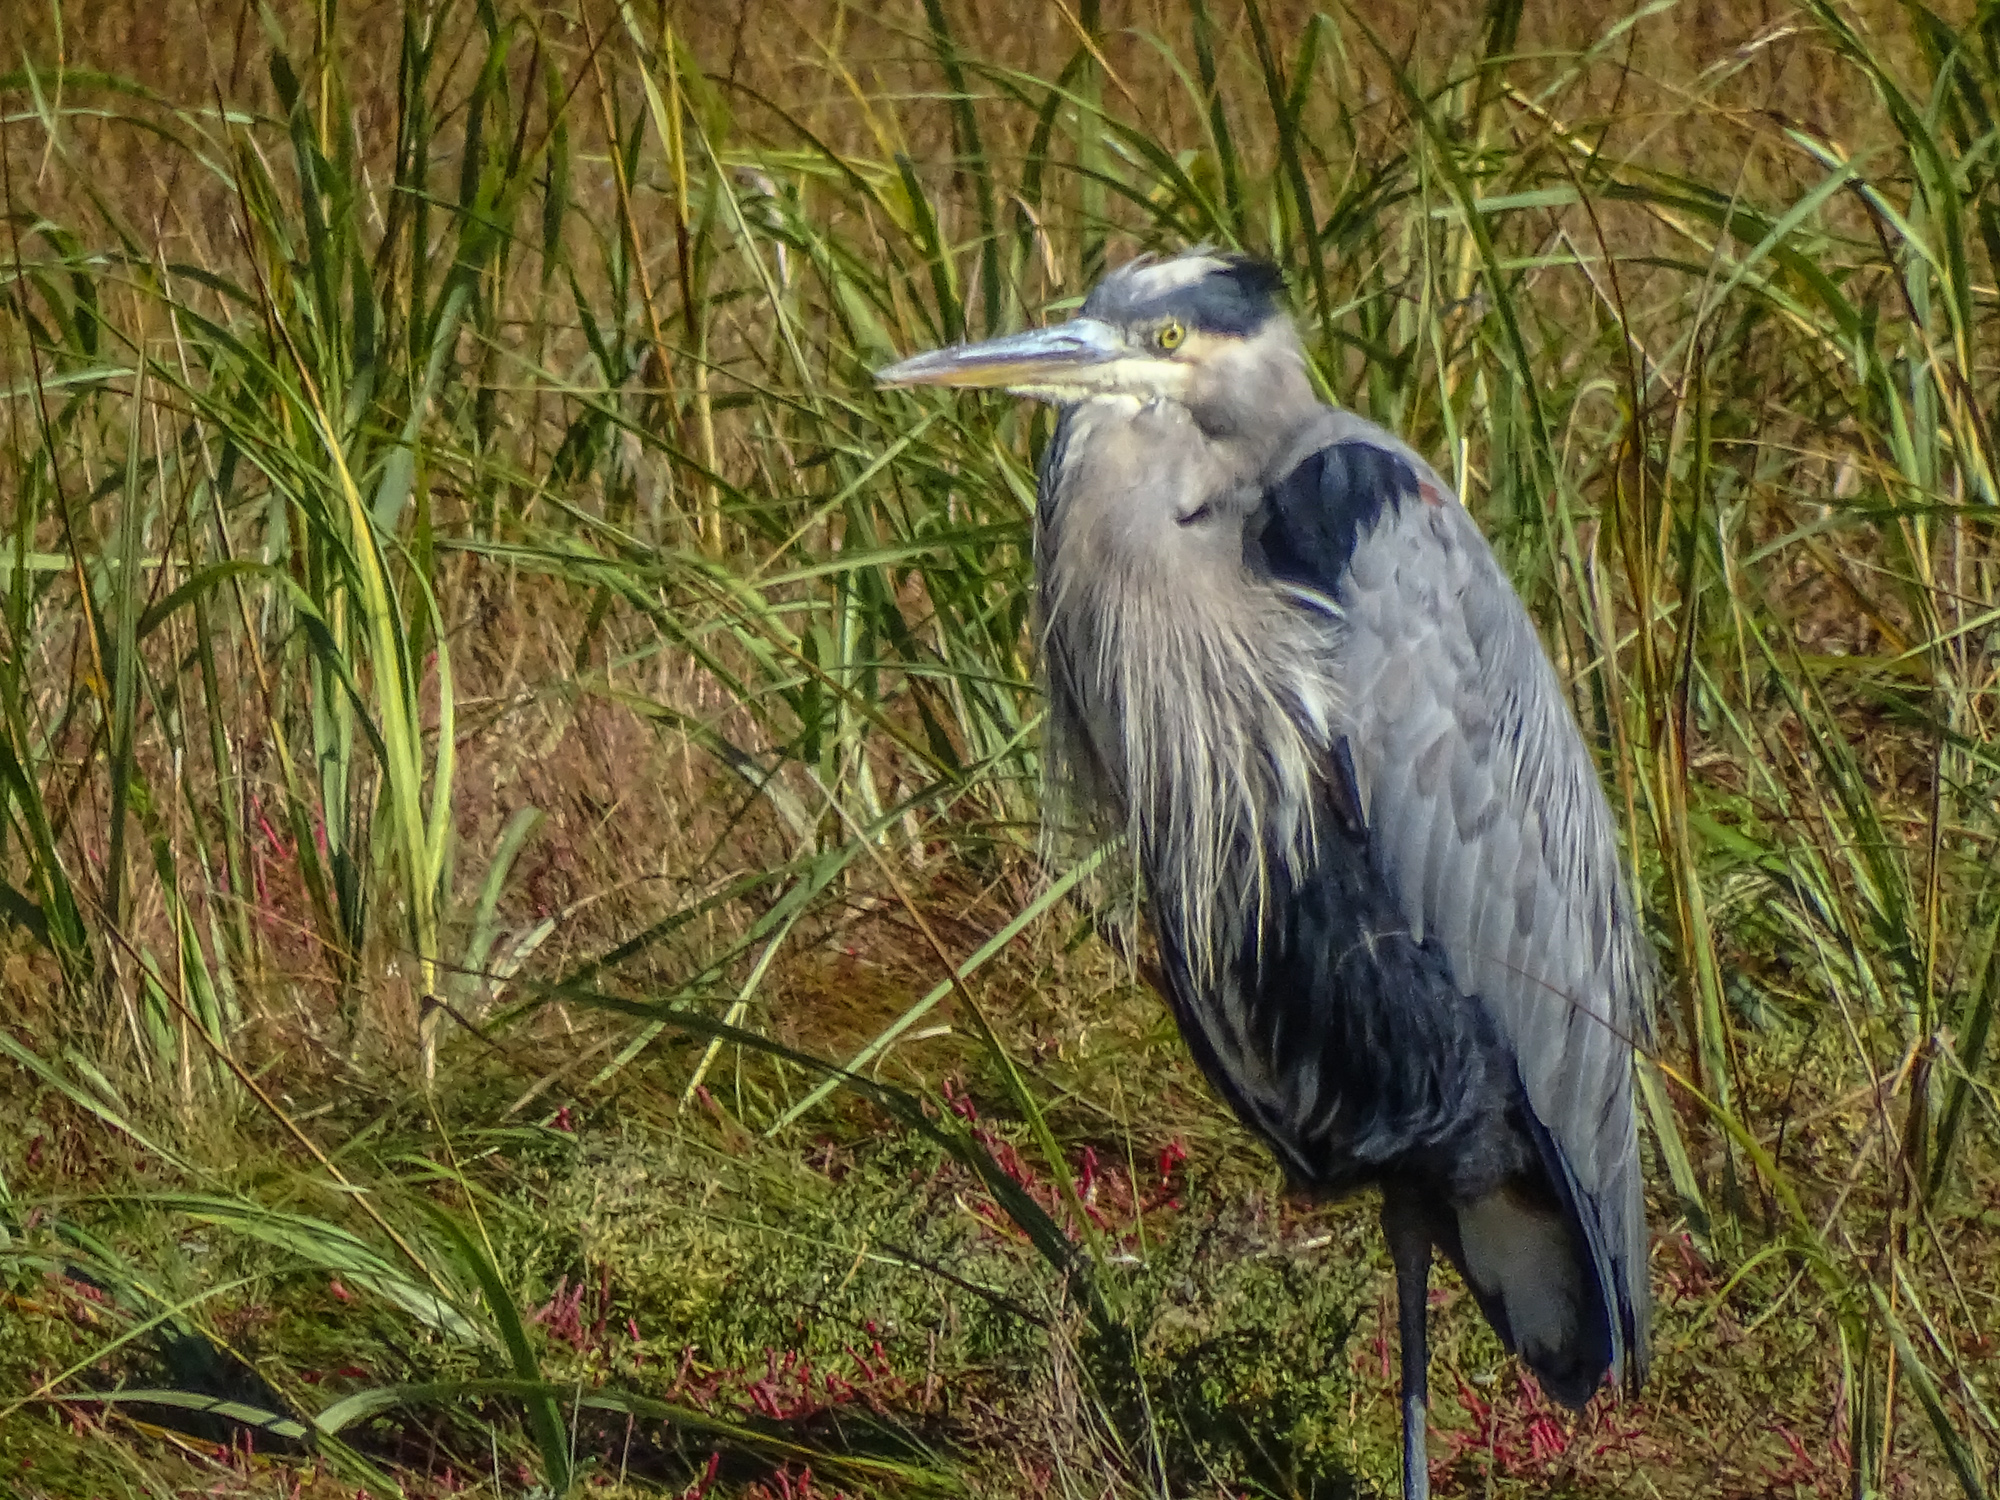
When shots like this present themselves, you need to be ready, and so does your camera. Wouldn’t it be nice if there was a Bird and Wildlife Mode that would take care of all the settings for you…leaving you free to frame the shot and shoot?
The Nikon P600 actually has a Birding Mode as one of its scene settings, and other cameras may have a Pet mode that is similar, but reviewers have pointed out that these generally are not actually the ideal combination of settings for birds and wildlife. On all other Point & Shoot superzooms, you can fairly easily create a Bird and Wildlife Mode and save it to one of you Custom or Memory settings. This is not for the faint hearted. It will require some digging around in menus and even your manual if you are going to succeed…but the rewards are worth the effort.
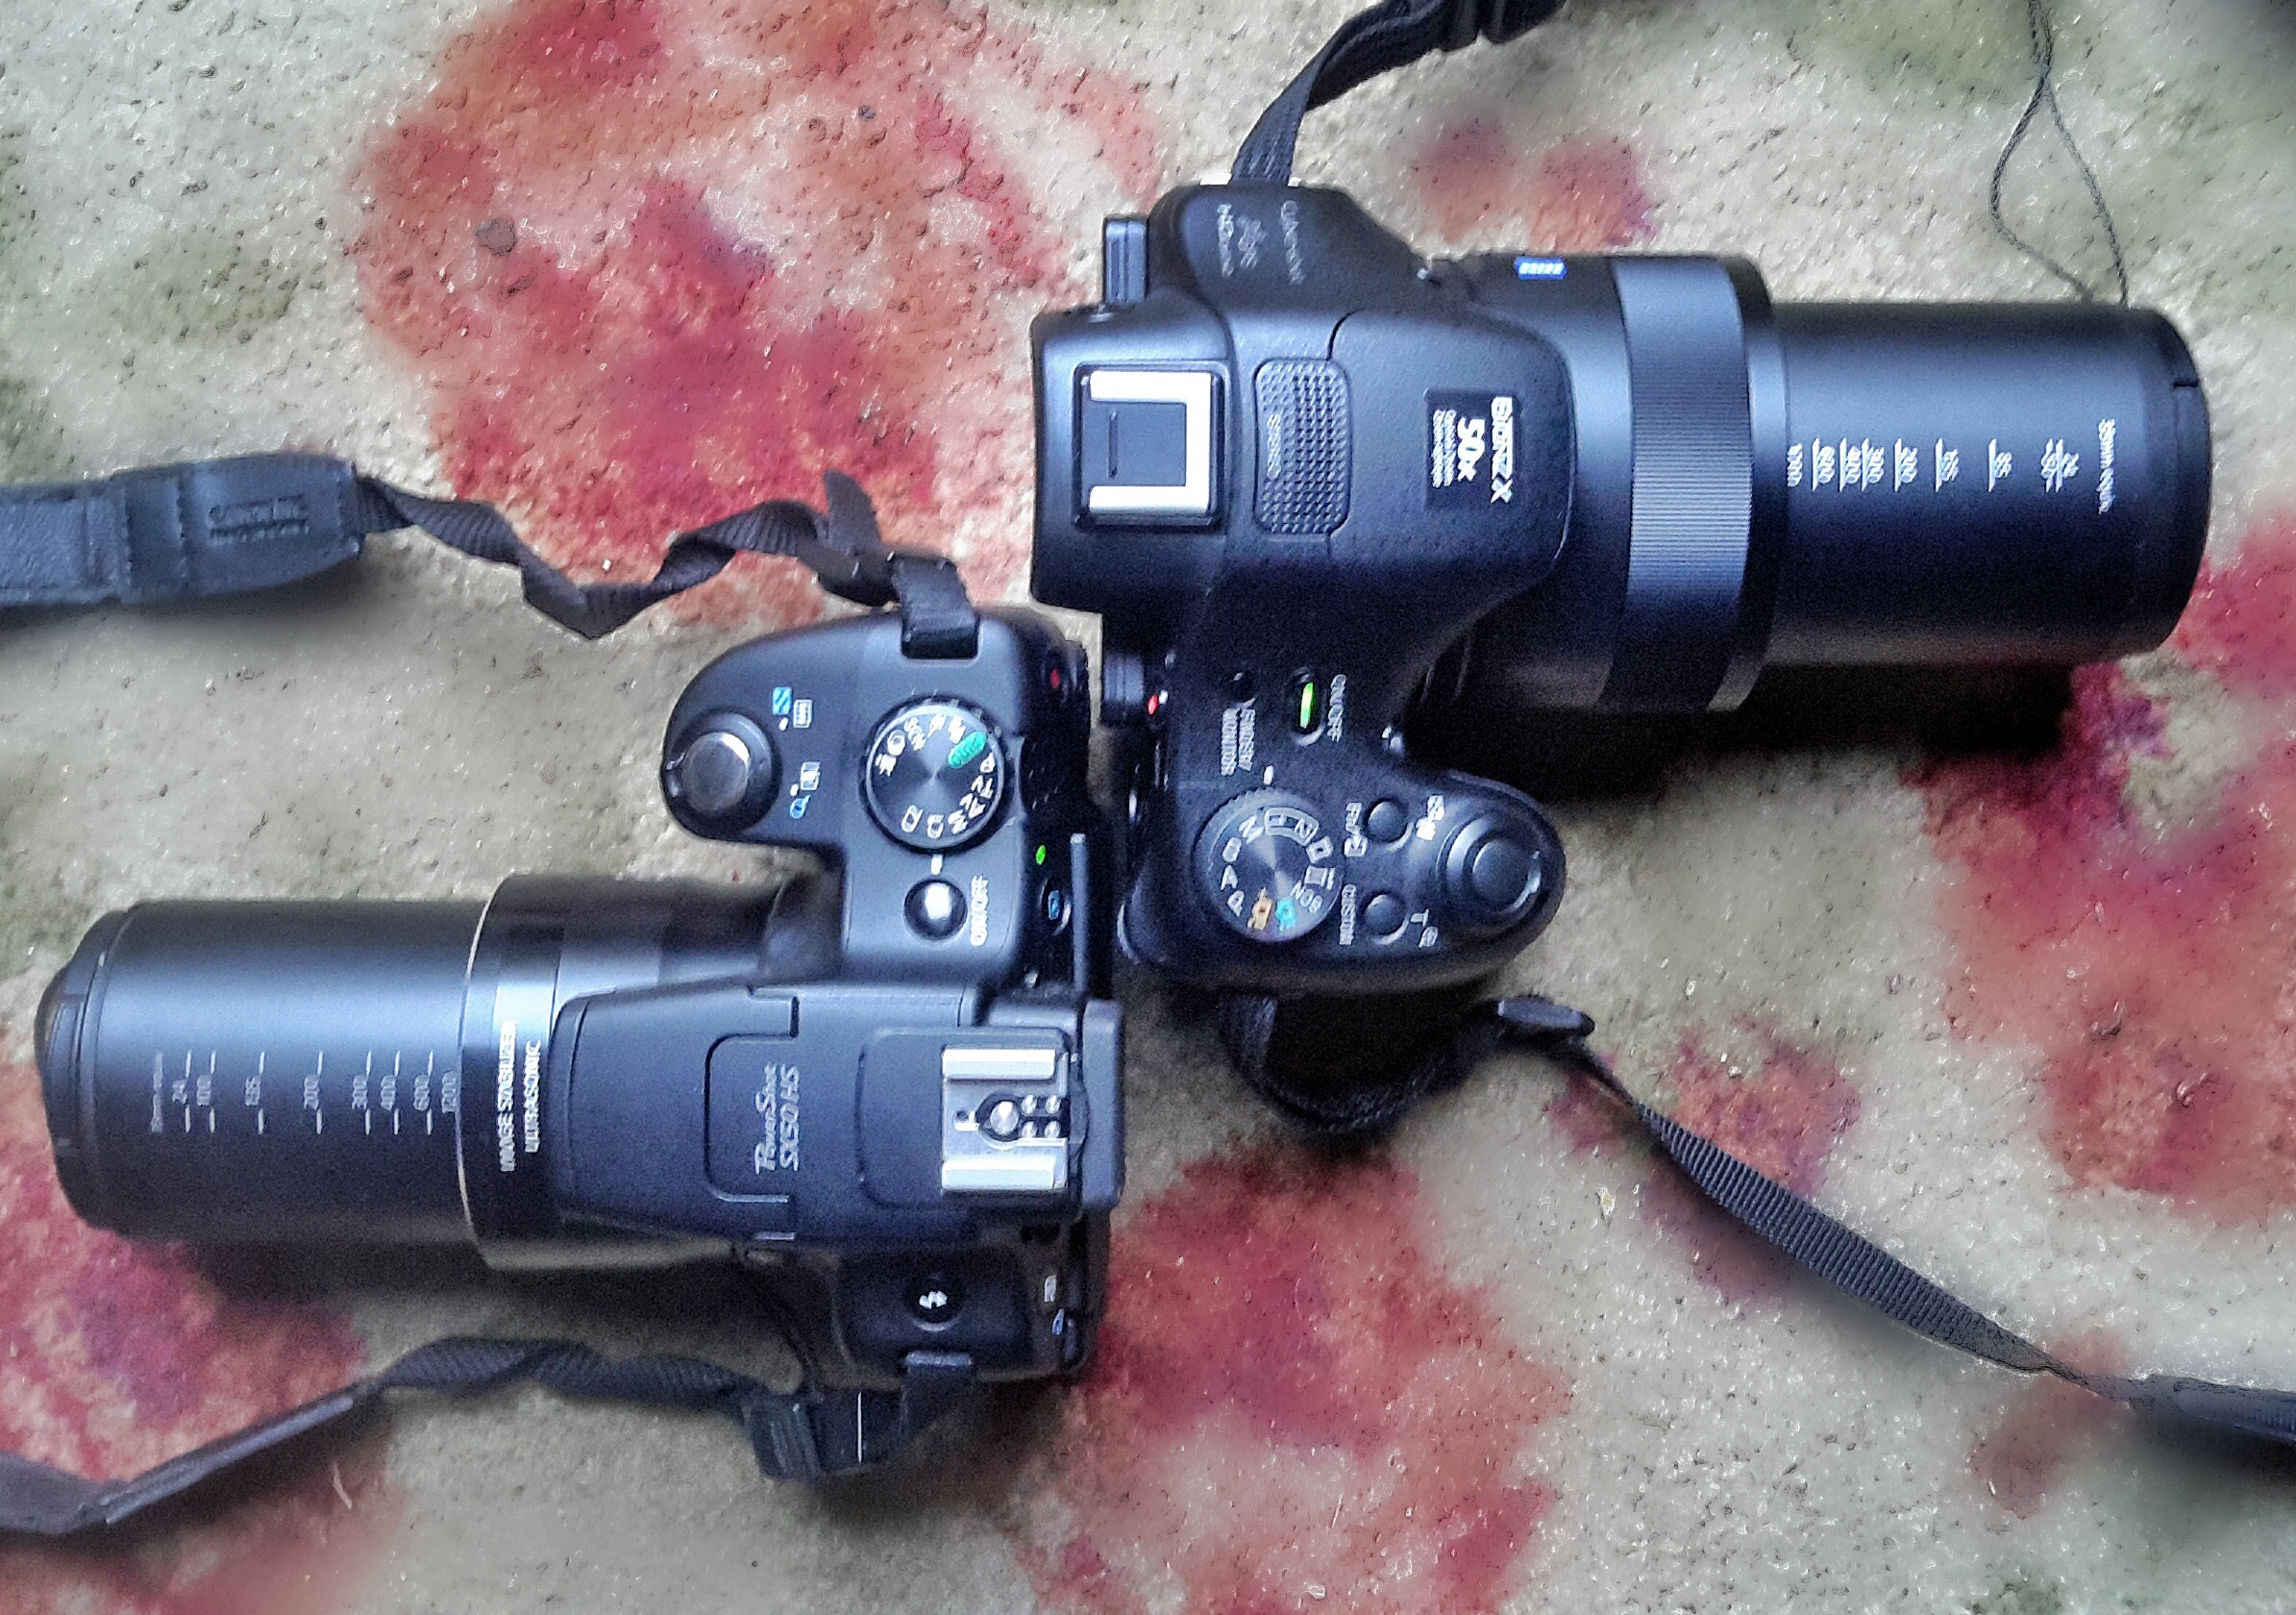
Canon SX50HS and Sony HX400V in Bird and Wildlife Mode
This I show I set up my cameras for birds and wildlife.
The base mode for birds and wildlife, since you will be using the top half of the zoom, and the full zoom most of the time, will be Shutter Preferred (labeled “T” on many control dials, “S” on others). Begin by setting your camera to T or S.
Canon SX60HS at 1365mm at 1/100th sec.
Both subject and camera motion contribute to the blur.
Either using the control wheel or the left/right rocker switches on the 5 way control on the back of the camera (rarely the up/down rocker switches) set your shutter speed to the lowest speed experience has shown your image stabilization will handle at full zoom. More telephoto shots are lost due to subject and camera motion blur than to any other cause. Even with the best IS, a high shutter speed will increase your chances of success. I use 1/640th and that is more risky than some would prefer. 1/1000th is probably safe. That means that when you switch to your saved Bird and Wildlife Mode, the shutter speed will be automatically set to no lower than your number…1/640th in my case. Once in Bird and Wildlife Mode in the field, if the light is good, and ISO at a reasonable value, you can easily bump the shutter speed up using the same control you used to set it.
Leave ISO on Auto (or set it to Auto if it is not there). You will need free ranging ISO to compensate for the higher shutter speeds, especially because the the typical superzoom only goes to f6.3-6.5 at the long end. You are going to be shooting wide open, at the lowest possible f-number, 99% of the time.
Set shooting to continuous. I prefer normal continuous to any high speed burst mode that might be available. I find that high speed burst too often gives me 10 identical images. 2-5 frames per second is fast enough, in my opinion, for most bird and wildlife action. If you have a choice, choose the continuous mode that uses auto-focus between frames. Both birds and wildlife are active, and you need all the help you can get keeping them in focus.
If you have control of the size of the focus square (check your menus and manual), set it to spot focus and the smallest area possible. Matrix or wide area focus, where the camera picks the focus point, will not work well, especially shooting birds or wildlife in deep cover. Also set Auto Focus to continuous to eliminate any lag while the camera finds focus.
Likewise, if you have control over the size and positioning of the exposure metering, set it to spot and the center of the field. You are more interested in getting the bird or animal correctly exposed than you are in the foreground or background.
Set image stabilization to full time, and the most intelligent mode your camera provides. This might be called active IS, or adaptive IS, or just super IS. Again, check the menus and manual.
A very difficult shot without manual over-ride.
If your camera has a manual focus over-ride on Auto Focus, and if it is easy to use, set it to active. Many superzooms provide the feature, but then make it so hard to use, involving rockers on the back of the camera, etc. that it is really useless. One of the best things about the Sony HX400V is the focus collar around the lens that can be used to fine-tune auto focus…or, more often, to quickly get the focus system in the right range so auto focus can lock without a lot of seeking.
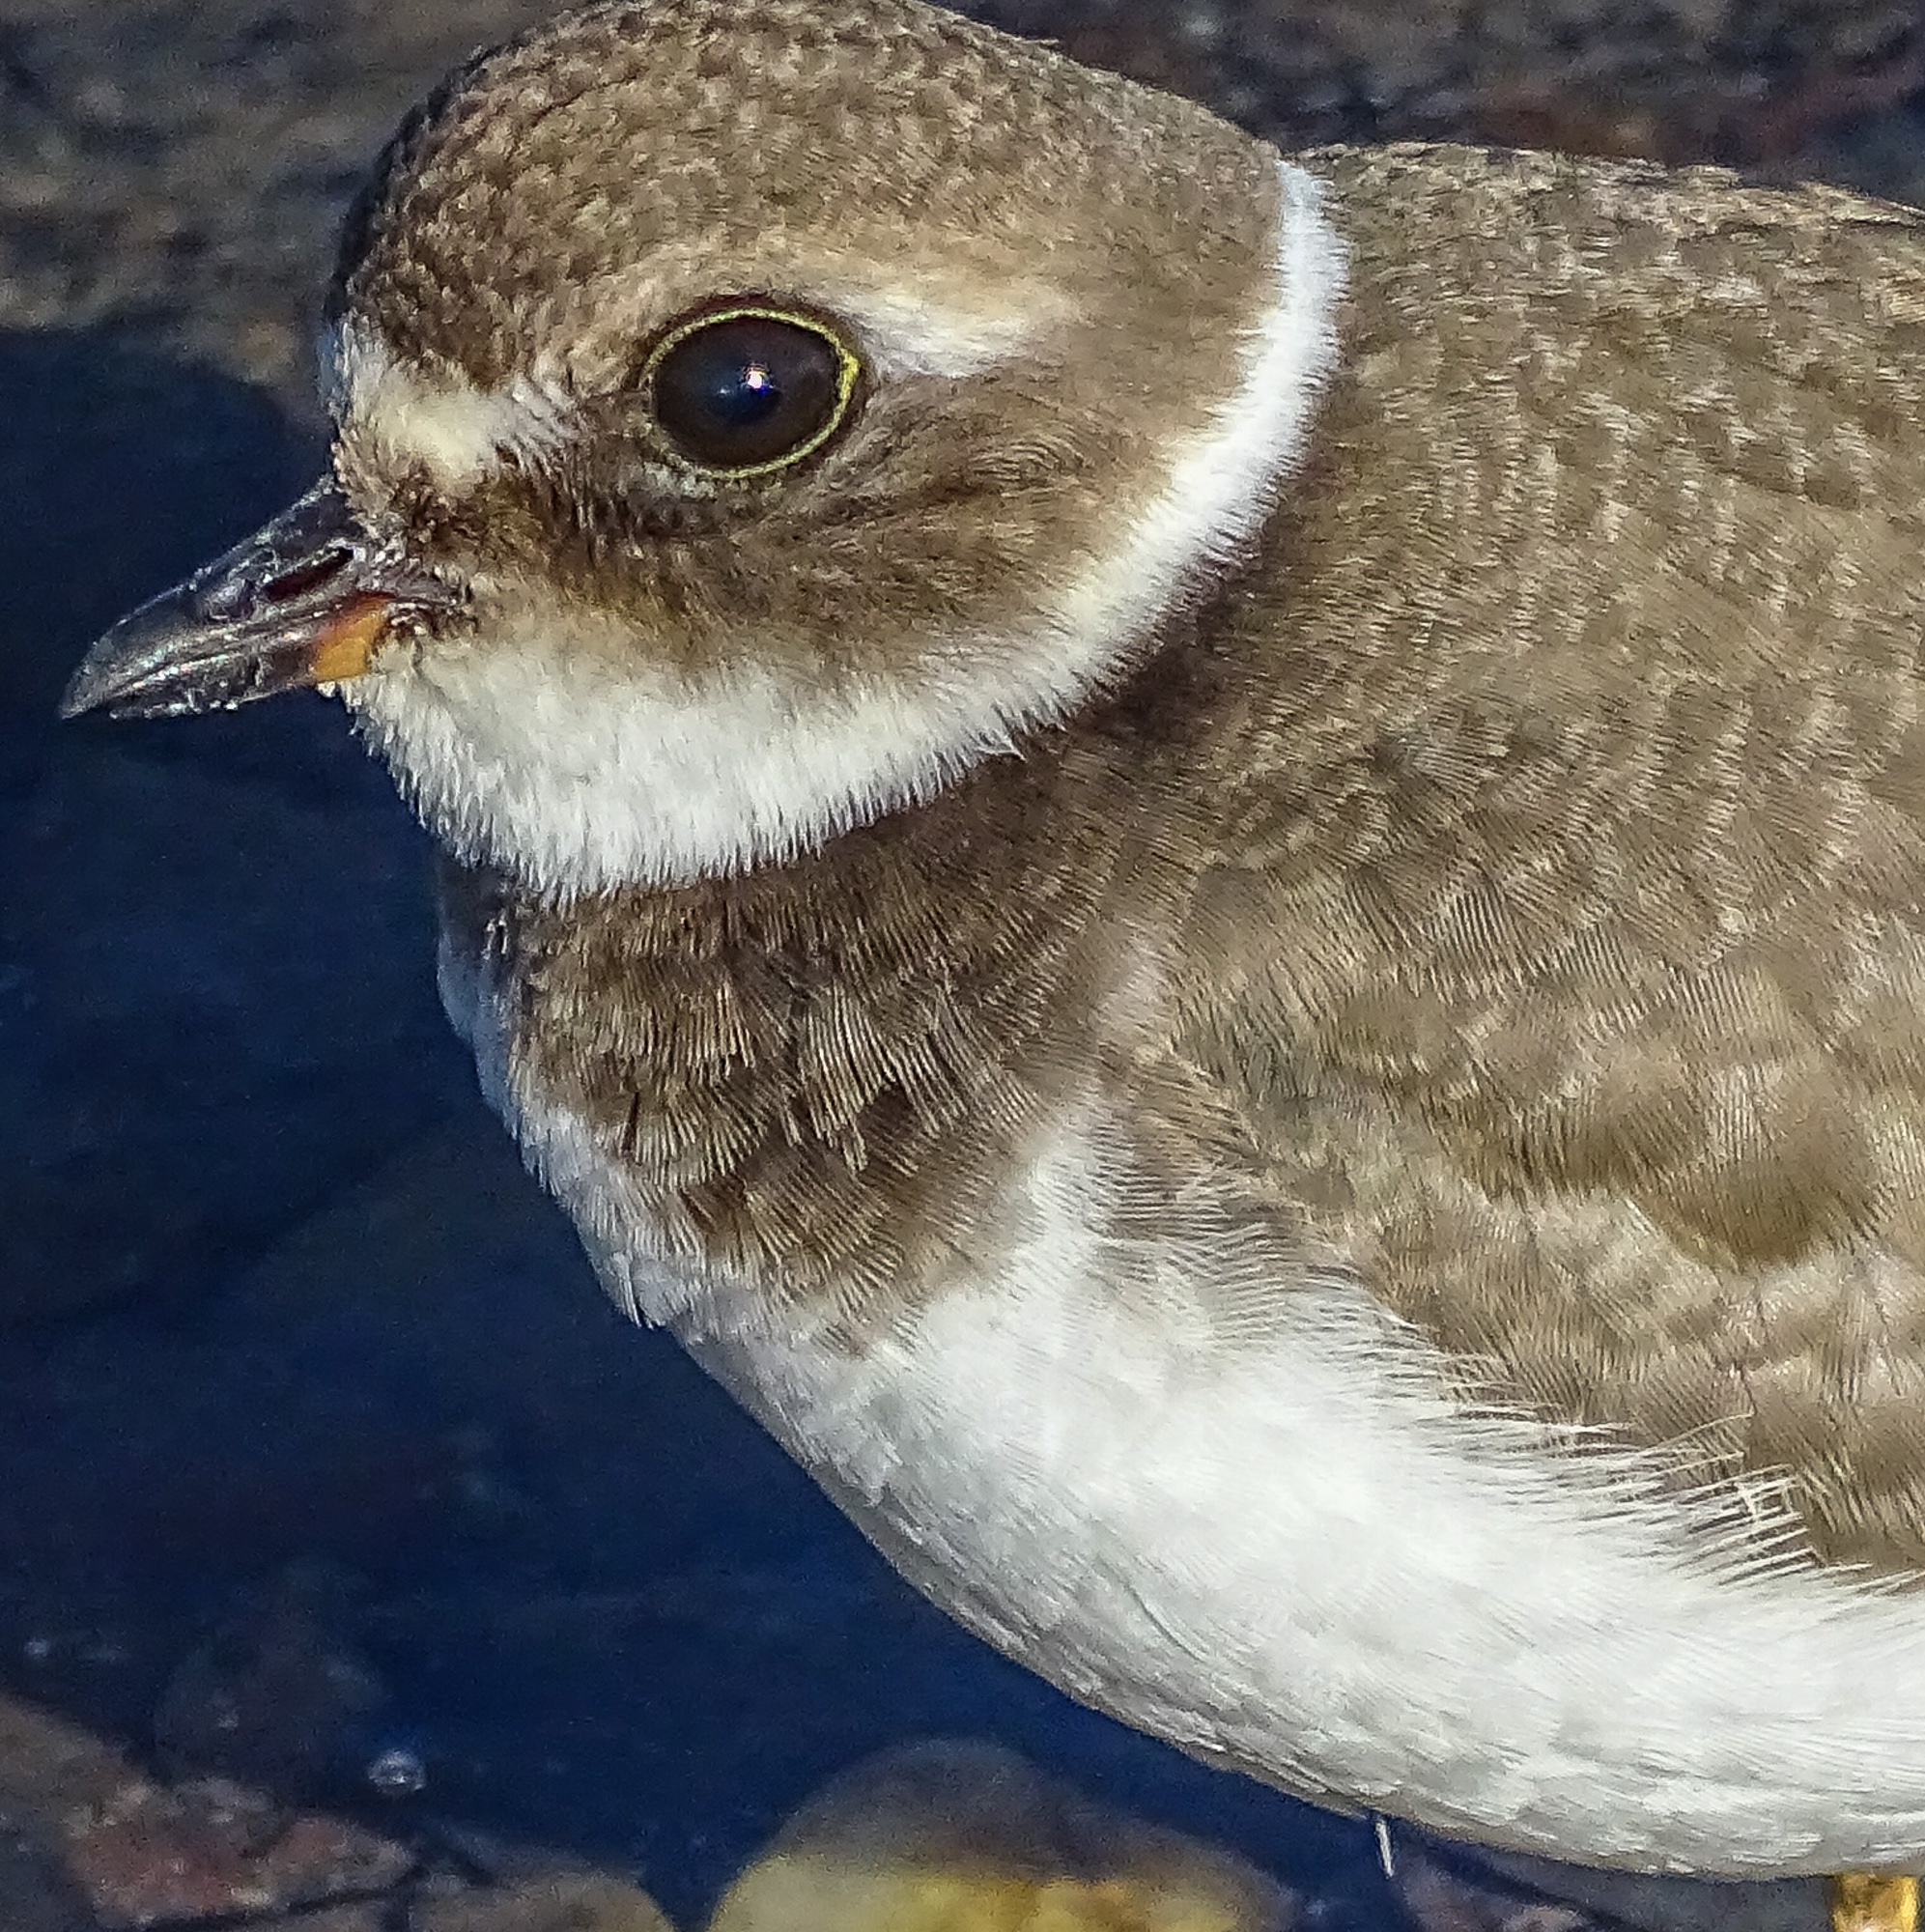
If there is some kind of intelligent digital telephoto extender built in to your camera…most have some kind or other…make sure it is set so you have quick access to it. I am not talking about digital zoom. Most superzooms today have a mode that applies extra processing up to 2X beyond the optical zoom setting to produce very satisfying images at great magnifications. If yours works well, you will find yourself using it on occasion, even if you have over 1200mm optical equivalent to work with…especially on birds, butterflies, and dragonflies.
Sony HX400V at 2400mm equivalent
The final setting is zoom position. I keep mine set to full zoom.
Last, and most important, navigate to the menu area that allows you to memorize the the whole set of settings you just made. It might be called save settings, or custom mode, or something similar. Some cameras will allow you to save one set of settings, some will allow for two or more. Save your settings.
Now, rotate the control dial to P or A. Zoom all the way back in to wide angle. When you move the control dial to M1, or C2 or whatever the memory setting is called on your camera, just like magic, all of the Bird and Wildlife Mode settings will be restored…you will be in shutter preferred, continuous shooting, spot focus and metering, etc…and the zoom will automatically extend to full zoom. Within a second or less, you will be ready for birds and wildlife. 🙂
Depending on the features and capabilities of you particular P&S superzoom, you will want to fine tune my formula as you gain experience…or add features that I have not mentioned. For instance, Sony provides adjustable Creative Styles to control the way the image is processed from RAW to Jpeg in the camera. I have a custom designed Creative Style for birds and wildlife that is also programmed into my Birds and Wildlife mode. (It is Memory 1 on my dial, of course! 🙂
By the way, using a similar technique, I set my Memory 2 to the HDR settings I prefer, and I have my P set up (it automatically remembers the last set of settings you used, with the possible exception of zoom length) for normal and macro shooting. With Sports set as my Scene Mode, I than spend 90% of my time at one of 4 settings on the control dial. And that is worth the effort with menus and manuals.
Flame Skimmer: wildlife certainly includes dragonflies!
When the Canon SX50HS came out, two years ago next month, it was a significant upgrade from the SX40HS, which was already a great Point and Shoot superzoom for wildlife, macro, and landscape photography. The SX40HS had impressive image quality, a long zoom with enough reach for even small birds and bugs, great optical image stabilization, and a wonderful macro ability both at wide angle and at full telephoto.
The SX50HS added a 50x zoom reaching 1200mm equivalent (2400mm with a very usable 2x digital tel-converter), fast precise focus, faster continuous shooting, a great Sports Mode for birds in flight, and, for those who wanted it, RAW. It quickly became, if you measure such things by the number of users and the chatter on the forums, the de facto standard for P&Ss for nature photography.
However, in the two years since its introduction a whole new group of features began to appear in competing models and in P&Ss in general. Wifi connectivity, GPS tagging, sweep panorama (see the post), in-camera HDR that does not require a tripod (post)…not to mention ever increasing pixel counts. Unfortunately none of the newer models seemed able to match the image quality of the SX50HS, and, honestly, for the P&S nature photographer, it is all about image quality…or at least it is about image quality first.
When last October rolled around, a lot of P&S nature photographers were disappointed that Canon did not update the SX50HS. Rumors came and went, and the fate of the SX60HS became a hot topic on the forums. It came up every time there was any kind of opportunity for an introduction from Canon all through 2014.
A few months ago I decided not to wait any longer, and purchased the Sony HX400V. It has all the modern features, a 20mp sensor, and, to my eye, image quality as good as the SX50HS…better in some situations…different certainly, but still very satisfying.
This month, of course, Canon finally introduced the SX60HS. It is not supposed to ship until October 20th, but I was able to get one direct from Canon this past week.
In many ways, it is everything a P&S nature photographer could have hoped for in an upgrade.
The Eye-level Electronic View Finder has been improved dramatically! It is bright, and detailed…the best I have seen in a P&S camera. The LCD panel is also high resolution and very easy to use.
The zoom is slightly longer (65x or 21mm – 1365mm, and still with usable 1.6x and 2x digital tel-converters to get you out to 2730mm when needed).
The pixel count has been increased to 16mp, considerably less than the Sony’s 20, but considerably more than the SX50HS’ 12mp.
Continuous shooting mode has been revised to 6.4 frames per second with viewfinder refresh between frames (the blacked-out view during high speed shooting was a major criticism of the SX50HS), 4.5 frames per second with auto-focus between frames. Contrast this with the Sony HX400V which only manages 2 frames per second with focus (or without focus…though it does have a 10 fps fast mode, see below), buffers all the images, and takes a much longer time to process and write the images to the card.
Macro mode has been extended so that you can still focus to 0 inches (touching the front lens element) at wide angle, but now focus to 1.1 inches all the way out to 200mm equivalent! Wonderful!
There is built in, no tripod needed, HDR.
Wi-fi connectivity is built in and apps are available for Apple and Windows laptops, tablets, and phones.
They also claim faster focus, but, personally, I don’t see a lot of difference between this and the SX50HS.
Sony HX400V 20mp
Canon SX60HS 16mp
Canon SX50HS 12mp
All thumbnails here are linked to much larger files for close viewing. Click and the original will load. You will need to use the back button on your browser to return here. (if you close the window with the large scale image, you will have to navigate back to this page manually 🙂
Center crop: HX400V
Center crop. SX60HS
Center crop. SX50HS
Unfortunately, at least in my early sample, Canon has not managed to maintain quite the same level of image quality from this 16mp sensor as they got from the 12mp sensor in the SX50HS. In fact, in every test I have tried, straight out of the camera, the SX50HS shows more detail and slightly better color than the SX60HS, and when looking for fine detail, the SX60HS comes no where near the Sony HX400V. The Canon images from the SX series have always been very clean at the pixel level…showing very few digital artifacts (pixelization and blocking), noticeably fewer than the the Sony, but at sizes up to 2:1 magnification, both the SX50HS and the HX400V clearly show finer detail and less digital “smudging” than the SX60HS. Digital smudging used to be a huge issue in Sony P&S superzooms. The fine details in browns, tans, flesh color, and all shades of green would just turn to mush, as though someone had dragged a wet brush across a water color painting. In fact, it was often called the water color effect. The Sony HX400V shows very little smudging and the SX50HS shows practically none. The SX60HS, again, straight out of the camera, shows a lot…as much as or more than earlier Sony H series cameras. Even without the smudging, the detail is just somewhat soft overall in the SX60HS when compared to the SX50HS or HX400V.
SX60HS at full zoom. Center crop.
HX400V at full zoom. Center crop.
To compound the matter the SX60HS images at full wide angle and full telephoto zoom appear the most soft…and this time I think it is a lens or focus issue. Interestingly the images at full zoom look fine in the wonderful high resolution EVF, but as soon as you press the shutter release all the way down, you can see the image go soft even in the EVF. ??? And once up on the computer at home, the softness is evident, especially when compared directly to SX50HS and HX400V images taken in the same spot of the same subjects.
It is, of course possible to process the SX60HS images after the fact to improve apparent sharpness and detail at screen resolution. One of the differences between Canon and Sony is that Sony always applies more aggressive in-camera processing to their jpegs. Some people feel this gives Sony images a painterly look, lacking subtly, but there is no doubt in my mind that the images have eye-appeal at normal viewing sizes. I have experimented with more aggressive processing for the SX60HS images in Lightroom, but honestly, there is only so much you can do without introducing so much noise that it becomes noticeable even at screen resolution. And I have also been experimenting with turning down the in-camera sharpening on the Sony.
SX60HS, Unprocessed left, processed in Lightroom on right.
Even with much lighter processing in Lightroom, the Sony has better apparent detail, and this is with the in-camera sharpening turned down one notch. 🙁
HX400V. Sharpening turned down one. Processed in Lightroom.
Post-processing to the rescue is not a motto I believe in. I want a camera that has excellent, or at lease acceptable, Image Quality straight out of the camera, so that I can make it even better in post-processing. The SX50HS and the Sony HX400V give me that. The SX60HS, at least in my early sample, does not! It is not a camera I could trust in the field on a day to day basis.
HX400V left, SX60HS right. In-camera HDR processed in Lightroom.
One mode where the HX400V clearly outperforms the SX60HS is in-camera HDR (High Dynamic Range. The camera combines three exposures taken automatically at different exposures to produce a single image with better highlights and shadows than any normal exposure). The Sony allows much more control over the process, and produces consistently better results, especially when shooting without a tripod. I find the SX60HS HDR images to be mushy and messy compared to the highly detailed HX400V images. If HDR is important to you, you might not be happy with the SX60HS.
And then too, for whatever mysterious reason, the SX60HS totally lacks a Panorama mode???? What’s up with that?
tall/wide sweep panorama HX400V
And I am sorry, the Wi-fi connectivity to a computer in the SX60HS is simply too difficult to set up. It to me three days to work it out, and I am considerably computer handy. Good luck to anyone who is not. The process is unnecessarily complex, involving several trips to the Control Panel, adding devices, installing drivers, etc. Once connected the Canon Camera Window software works well. Connection to an Android tablet is somewhat easier and again, the Camera Window software works. Still, the Sony was much easier to set up.
And, for another omission that is hard to understand…the SX60HS has no GPS for tagging images.
So, you would probably not upgrade to the Canon SX60HS because of the modern features, or for image quality, as such. Though the modern features are all there (except sweep panorama and GPS), they simply are not particularly well implemented. And the SX50HS still has marginally better image quality…though the SX60HS might show slightly finer detail (as others have reported from their own samples). You still might what to upgrade to the SX60HS for the very fine EVF and LCD, longer zoom, the amazing macro mode, and the continuous shooting ability, if those are more important to you than image quality.
If you are choosing your first P&S superzoom for nature photography, the SX50HS is still available and is an excellent P&S for nature photography…especially if you do not need or want the modern features. The Nikon P600 gets very good reviews and I have seen some excellent images from it. I would love to be able to test the Fuji S1, which looks like it might be worthy camera. If post-processing is already part of your work-flow and style, you are not adverse to a little extra work, you shoot much macro or active wildlife, and want the best EVF in a P&S, then the SX60HS has a lot to recommend it…but only if you can live with its lower image quality. The Sony HX400V, of the three cameras compared here, gives you the highest level of control over how your image is processed in the camera, delivers great images straight out of the camera, and has all the modern features (and well implemented at that). Despite its somewhat awkward continuous mode, I can highly recommend it.
As I have said, my SX60HS is an early production sample. Things may change for the better when they get production ramped up. Mine is going back to Canon, and I will be shooting with the HX400V, with some additional tweaks I have developed during this test. I may reorder the SX60HS after a few months and give it another try. If I do, and it performs better, I will certainly let you know.
What follows is a somewhat detailed comparison of the features and characteristics of the three cameras…at least the features and characteristics that I think are important for Point and Shoot nature photography. That I think! For instance, you will not find mention of RAW capability, since I don’t use it. You will not find mention of “face mode” or “creative filters”, since again, I have not found a use for them in nature photography.
Image Quality:
SX50HS: excellent, very clean overall, with good detail and color.
SX60HS: perhaps acceptable, but requires considerable post-processing. Perhaps more subtle than the Sony.
HX400V: excellent. More digital artifacts than the SX50HS or SX60HS, but very little to no detail smudging, great fine detail rendition, and vibrant colors. Not as subtle as the Canons.
At the pixel level, the SX50HS looks best…for general viewing sizes I would give a slight edge to the HX400V. Some find the SX50HS images more natural looking. I tend to prefer the look of the more vibrant and apparently more detailed Sony images. At this point, unless Canon has a major firmware update that addresses the IQ issues, it is simply not in the IQ race at all.
Zoom range:
SX50HS: 50x, 24mm-1200mm equivalent field of view. The built in Digital Tel-converters at 1.5 and 2x provide acceptable results (especially for tel-macro where detail floods the sensor) out to 1800 and 2400mm equivalent. DTC can be applied anywhere in the zoom range, and is actually useful in macros to give large scale at reasonable working distances.
SX60HS: 65x, 21-1365mm equivalent. The Digital Tel-Converters here are 1.6x and 2x, but, since base IQ is less, they do not produce as satisfying results.
HX400V: 50x, 24mm-1200mm equivalent. Clear Image Zoom extends the range at the long end of the zoom out to 2400mm and provides very good results.
Though the Sony is the fastest (brightest) lens, it is not by much. None of these cameras are low-light specialists. Still they are adequate for most outdoor work, and all have special digital trickery built in to handle low light and indoor settings. And honestly, where are you going to find a faster 1200-1365mm lens for any camera? f6.3-f6.5 at those focal lengths is actually pretty fast, especially considering the light efficiency of the small P&S sensors.
Focus Speed and accuracy:
SX50HS: quite fast, and quite positive. Seeks in low light and sometimes does not find focus. Seeks in macro, and sometimes focuses on background.
SX60HS: as fast as the SX50HS, but not, perhaps, as accurate. Lots of shots are just a little off. More testing is needed.
HX400V: fast and accurate. Some seeking in low light and macro, but the hybrid focus (auto with manual assist using the excellent fly by wire collar on the lens) makes it easy to acquire correct focus in even the most difficult situations.
Both Canons also have a manual focus mode, but it is so difficult to use that it is pretty much useless.
Image Stabilization:
SX50HS: great! Allows for sharp shots, handheld, at full telephoto and even using the digital tel-converter…as well as in low light.
SX60HS: much the same.
HX400V: excellent, even better than the SX50HS, especially while framing the shot at full telephoto.
I have total confidence in the IS on the Sony HX400V. There is no situation where I feel a tripod is needed.
Macro:
Both the Canon’s have a dedicated Macro Mode. The Sony has macro focusing as part of its normal focus range. (In Auto and Program, the Canons will behave just as the Sony does and focus at macro distances without turning on Macro Mode. Macro mode is intentionally biased for close subjects…so focus may be quicker.)
SX50HS: focus to 0 in. at 24mm equivalent. Goes immediately to 1.1 in. as soon as you touch the zoom lever, and stays there until about 35mm equivalent. Goes to 1.9 in. until you reach 100mm, then jumps to 11.8 inches. You can only focus to 19.6 inches below 200mm where it jumps to 27 inches to Infinity. It quickly goes to 3.2 ft., 4.5 ft., 6.5ft. It drops back to 4.9 ft. at about 1000mm, and reaches 4.2 ft. again at 1200mm.
SX60HS: focus to 0 in. at 21mm equivalent. Jump immediately to 1.1 to 19.6 in. but stays there until you reach 200mm equivalent, where it goes to 3.9 in. At just beyond 300mm equivalent it jumps to 27 in. to infinity. From there it increases steadily to 6.2 feet just short of 1200mm and then drops back to 5.9 ft. at full zoom.
HX400V: focus to .4 in at 24mm equivalent. 1.2 in. at 50mm, 2 in. at 85mm, 6 in. at 135mm, 11.4 in. at 200mm, 27.6 in. at 400mm, 5.2 ft. at 600mm and 7.9 ft. at full zoom.
As you can clearly see, if you are into macro, the SX60HS is a great camera. Macros flood the sensor with detail, and you will get amazing results from 1.1 inches at 200mm equivalent field of view. The tel-macros on the SX50HS from 4.2 feet at 1200mm (or even 1800mm using the DTC) are totally amazing. The Sony makes up somewhat for lacking a true tel-macro with its higher pixel count and good IQ, both of which allow for pretty heavy cropping when you need it. On the other hand, the macros from 2 inches at 85mm are simply stunning!
High Speed Continuous Shooting:
SX50HS: 13 fps in dedicated High Speed mode for 10 shots. 3+ frames per second in regular continuous mode, with focus locked on the first frame, up to 24 shots. Less than 1 fps with focus between frames. Sports mode seems to break the rules and gives something over 3 fps with focus between frames, bot only in Standard resolution (not Fine).
SX60HS: as above, 6.4 fps continuous until the buffer fills, then progressively slower. Focus locked on first shot. Slower in low light. Moving the camera (as in panning to follow a moving subject) seems to fill the buffer faster. The finders is refreshed after each shot, beginning with about the 3rd shot, so you can see what you are following. 3.4 fps is set to focus between frames. There is evidently a third mode at 4.3 fps (LV: but I have not found what LV means in the manual yet).
HX400V: High speed: 10 fps for 10 frames. One press of the shutter shoots all 10 frames. Low: 2 fps. It is difficult to shoot less than 3 frames. The camera focuses between frames and the viewfinder is refreshed. However all shots are held in a buffer, then displayed to the LCD or finder as a group, then written to the card. It takes a few seconds between bursts for the buffer to clear. Sports mode on the Sony does not break any rules, and you are limited to the Low setting for continuous shooting.
In practice, I find that 13 fps, or 10, is simply too fast. You end up with 10 essentially identical images, and since focus locks on the first frame, if the first one is out of focus, they all are. 🙁 2-3 fps is fine for most bird and wildlife action, and focus between frames is essential. Of course. your needs may differ. All in all, the SX60HS is pretty clearly the winner here.
Electronic View Finder:
SX50HS: adequate (but just)
SX60HS: quite good. Higher resolution and contrast than either of the others. Colors a bit off, well on the warm side, but a real pleasure to use.
HX400V: adequate (but just). I have slightly more difficulty with this EVF in critical situations (like finding a bird in a bush or tree) than I do with the SX50HS.
For wildlife photography, a good EVF is essential. None of these match the EVF on the Olympus Mirrorless Compact DSLRs, but they get the job done. And the EVF on the SX60HS comes very close to the Mirrorless standard.
LCD:
All three are sharp and bright enough for daylight use. The SX60HS is the brightest and sharpest.
SX50 and 60HS: fully articulated, swings out and around to the side and rotates 180 degrees.
HX400V: semi-articulated. Pulls out and rotates about 90 degrees, 45 up and 45 down.
For me an articulated LCD is essential for macro and low angle landscape work. Both designs work here, but the Canon design is superior.
Controls and layout:
SX50HS: I have used this camera for two years so I am well used to where things are. There is a button for almost everything you might want quick access to, and one programmable custom button that you can reach with your left thumb. The controls are large enough for average hands. The thumb wheel surrounding the 5 way rocker control on the back of the camera can be awkward but is usable.
SX60HS: The 5 way rocker control on the back is very difficult to use without looking and the rockers are very small and too flush with the surface for my fingers. I may get used to it, but it is awkward. There is no ISO control button and the exposure compensation button has been moved off the rockers to a separate button above and to the left. The programmable shortcut button has been moved to the top where it is reached by your shutter finger. The thumb wheel has been moved from surrounding the 5 way rocker to an actual wheel immediately behind the shutter release. This means that you can NOT operate it with your finger on the shutter release as it requires that finger to turn it. Awkward! On the other hand, it is very handy for changing the primary settings in each Mode. For instance in Shutter Preferred Mode it controls shutter speed. Canon missed, in my opinion two good options for this wheel in standard Program mode. It ought to either control manual focus (ideally a manual focus assist for Auto), or Program Shift.
HX400V: Controls are well placed and large enough for most fingers. The rocker buttons on the 5 way control have a raised edge and are very easy to use. There is one programmable custom button immediately behind the shutter release and a function button to the left of it. The function button pulls up a programmable on-screen menu of the most used settings for the mode you are in. Selections are made using the center button on the 5 way rocker and adjustments are made using the excellent thumb wheel, which is ideally placed under your right thumb. (It is possible to turn this wheel unintentionally while handling the camera, but a little care solves the problem). All in all, excellent controls and layout.
The one thing all these cameras lack is touch screen control. This is surprising in cameras at this price level. An intelligent touch screen would improve usability.
In-camera HDR:
SX50HS: three exposures, adjustable for exposure spread and center, with “creative filters” (oops, I made a lair of myself…but I don’t use them). The three exposures take significant time, so a tripod is absolutely necessary. Results are good if you set it up right. Any movement at all results in ghosting or misaligned images.
SX60HS: three exposures, not adjustable, with creative filters. Results: not so great. The range is extended, but all fine detail is lost, and detail over all is smudged. Useless.
HX400V: excellent three exposures, adjustable for spread and center. Creative filters (Picture effects) available, as well as the full range of Sony Creative Styles (Vivid, Portrait, Landscape, Sunset, etc. (By the way, each of these Creative Styles has separate settings to adjust the Contrast, Saturation, and Sharpness of the image, giving you a lot of control over how the jpeg is rendered in the camera, not only in HDR mode, but in standard Program as well 🙂 I plan to “tune” my settings on the HX400V to see if I can achieve a more subtle rendering of color tones. )
I find in-camera HDR to be a big help with dramatic landscapes…big skies, etc. Of these three, only the Sony has a really effective in-camera HDR mode, and it produces files that can be easily tweaked in Lightroom for natural look I prefer. Post.
Panorama
SX50HS: Stitch assist panorama in any direction. Display allows you to overlap three or more separate exposures or stitching later in software.
SX60HS: NONE!
HX400V: two different (wide and standard) sweep panorama modes. Images are created seamlessly as you sweep the camera across the scene in any direction, in either portrait or landscape orientation. Such fun! And don’t forget to try vertical panoramas with the camera sweeping down. Post.
Considering that Sweep Panorama is built into $200 Point & Shoots these days (phones even), it is, in my opinion, inexcusable that Canon did not implement it in the SX60HS. Sony was the first to implement sweep panorama in a P&S, and their mode is still the best!
Sports Mode:
If you shoot birds or bugs in flight, you are going to be interested in the Sports Mode on these cameras. Sports Mode is optimized for rapidly moving subjects.
SX50HS: excellent. Locks on to moving subjects and tracks them, even after the shutter is pressed. Follow focus as long as the subject is near the center of the finder. Only focuses to 49 feet at the long end of the zoom, closer in at below 600mm. About 4 fps.
SX60HS: the same.
HX400V: large center focus rectangle picks up whatever is moving closest to center and tracks focus. 2 fps or 10 fps.
I have shot dragonflies in the air with the Sports Mode on the Sony, and many many birds in flight with the SX50HS. It is amazing that you can do either with a P&S! I plan a post of birds in flight in November when I next visit Bosque Del Apache National Wildlife Refuge and have lots of cooperative subjects. 🙂
Processing Customization:
Both the SX50HS and SX60HS shoot in both RAW and jpeg, or RAW and jpeg. That gives you a lot of control over how the image is processed after the fact. The Sony only shoots in jpeg, but gives you a lot of control over how the image is processed in camera. The Sony Creative Styles, as noted above under HDR, provide 7 different processing programs, each of which can be individually adjusted for Contrast, Saturation, and Sharpness. Your adjustment are remembered so in Program, you can have 7 individually tailored processing options. Changing Creative Style on the fly is easy, using the function button for quick access. You can also set a customized Creative Style in both of the Memory Modes. I am just beginning to play with customizing my Creative Styles, but I believe that this kind of control in-camera makes not having RAW much less of an issue.
To finish, I will give you my likes and dislikes for the Canon SX60HS and the Sony HX400V.
Canon SX60HS:
Like
excellent EVF
great macro
usable continuous shot
sports mode for birds in flight
Dislike
Image Quality overall
Poor HDR
No panorama
Difficult wifi setup
Sony HX400V
Like:
good to excellent image quality
great HDR mode
great sweep panorama
auto focus with manual assist using focusing collar on lens!


![compgrid[1]](http://psnp.info/psnp_/wp-content/uploads/2008/01/compgrid1.jpg)
![2156162498_64d6f9e913_m[1]](https://i0.wp.com/psnp.info/psnp_/wp-content/uploads/2008/01/2156162498_64d6f9e913_m1.jpg?ssl=1 "2156162498_64d6f9e913_m[1]")
![2053278956_62b7886338_m[1]](https://i0.wp.com/psnp.info/psnp_/wp-content/uploads/2008/01/2053278956_62b7886338_m1.jpg?ssl=1 "2053278956_62b7886338_m[1]")

![557235674_f1f770e6ce_m[1]](https://i0.wp.com/psnp.info/psnp_/wp-content/uploads/2008/01/557235674_f1f770e6ce_m1.jpg?ssl=1 "557235674_f1f770e6ce_m[1]")
![557376619_644891c1ab_m[1]](https://i0.wp.com/psnp.info/psnp_/wp-content/uploads/2008/01/557376619_644891c1ab_m1.jpg?ssl=1 "557376619_644891c1ab_m[1]")