I have been a faithful (mostly) Lightroom user since the program was in public beta. It was the first image processing, or post-processing, software that I really liked…not the first I used…but definitely the first I can honestly say I enjoyed. I had used PhotoShop (since it was a Mac only program), GIMP, PhotoShop Elements, Corel, PaintShop, Freestone…to mention a few, but once I discovered Lightroom, I never really looked back. (There was one year in there when I only carried a high end Android tablet and did all my processing in Snapseed and Photo Editor, but eventually the allure of Lightroom was just too powerful and I had to return to the fold and buy a Windows Surface Pro tablet so I could have the best of both worlds.)
To me, Lightroom is simply intuitive…it works in a way that matches the way I think about images…so post processing is about as natural as it can get. I like the cataloging features, which help me keep track of where my images are, and easily keep my home files in sync with my social media and cloud-based archival sites. And I especially like the ability to develop and easily apply presets…saved processing settings across the whole spectrum of possible edits…to a single image, or to a whole set. Then too, Lightroom has at least semi-embraced the world of tablet computing. The Edit module has a tablet interface that makes excellent use of the Surface Pro touch-screen to further ease the processing chores. Finally, the edits in Lightroom are the smoothest and least destructive of any program I have used…and that is saying a lot, since I shoot only jpeg, and do all my processing on jpegs.
All in all I can’t see myself giving up Lightroom any time soon. I even bought into the Adobe subscription model, much as it pained me, so that I can continue to use the latest features of the program.
In this piece, I am going to walk you through the creation of a preset. The first thing I do when I get a new camera is create a small set of presets for different processing needs. Generally I do one for 1) “standard images”…images that just require a bit of sharpening and enhancement to realize the full potential of the file. 2) HDR images…images which are produced by the camera’s built in HDR mode, or in some cases by the camera’s Landscape mode. I use the camera’s HDR or Landscape modes for…well, as you might expect…landscapes…especially dramatic landscapes with lots of light and shadow and interesting cloud effects. These images generally require a bit more lift to reach full potential. And then maybe 3) an HDR preset with a bit of added umph, and some extra brightness, for those cases were the scene was really beyond the ability of the camera to catch it. I might also develop a preset specifically for macro shots for some cameras, if one of the others does not already cover those images.
So, lets look at a “standard image” and its preset.
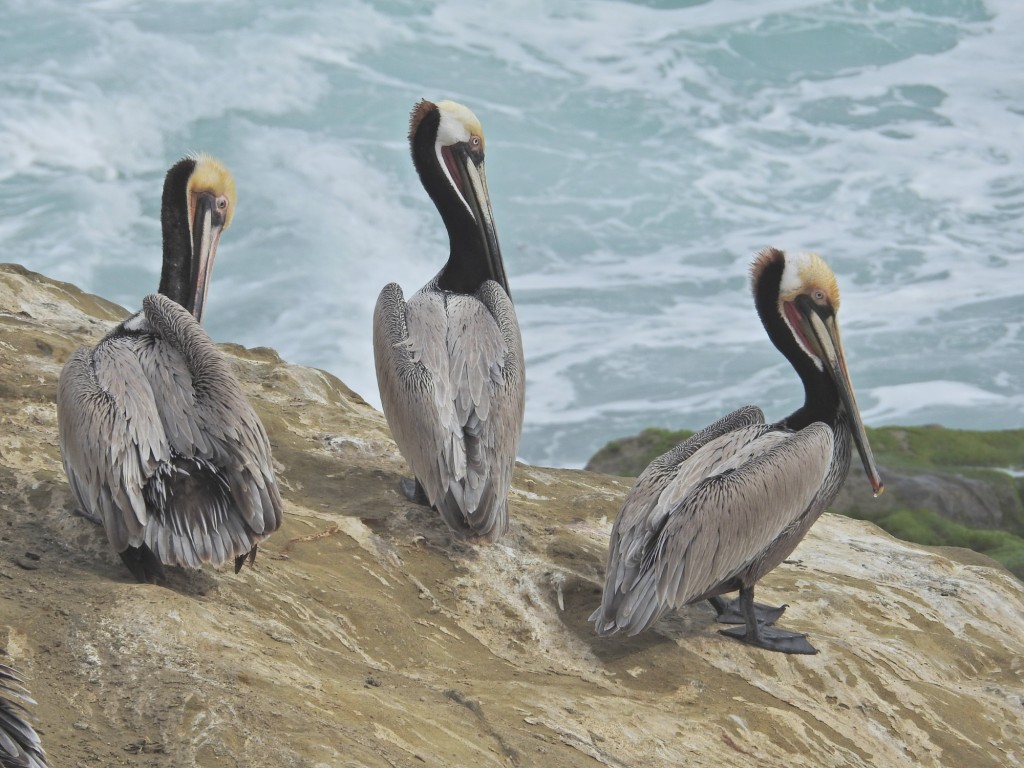
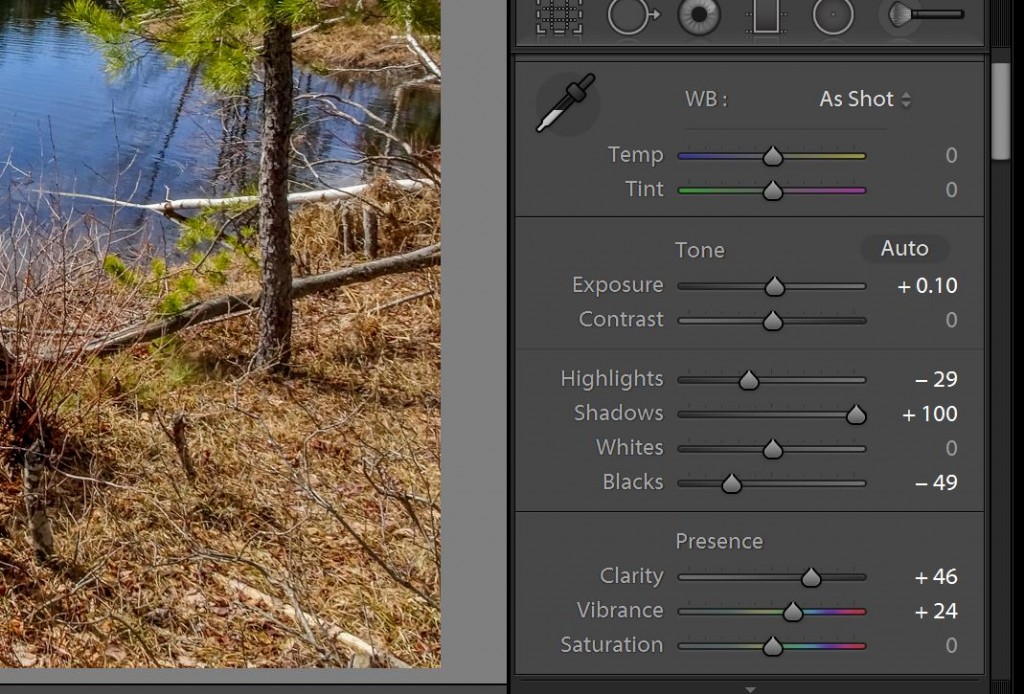
This image, like most well exposed digital images, only requires some added pop and sharpening to go from a good image to a really satisfying one. I begin my opening the image in the Develop module in Lightroom. Near the top of the editing controls are some basic settings.
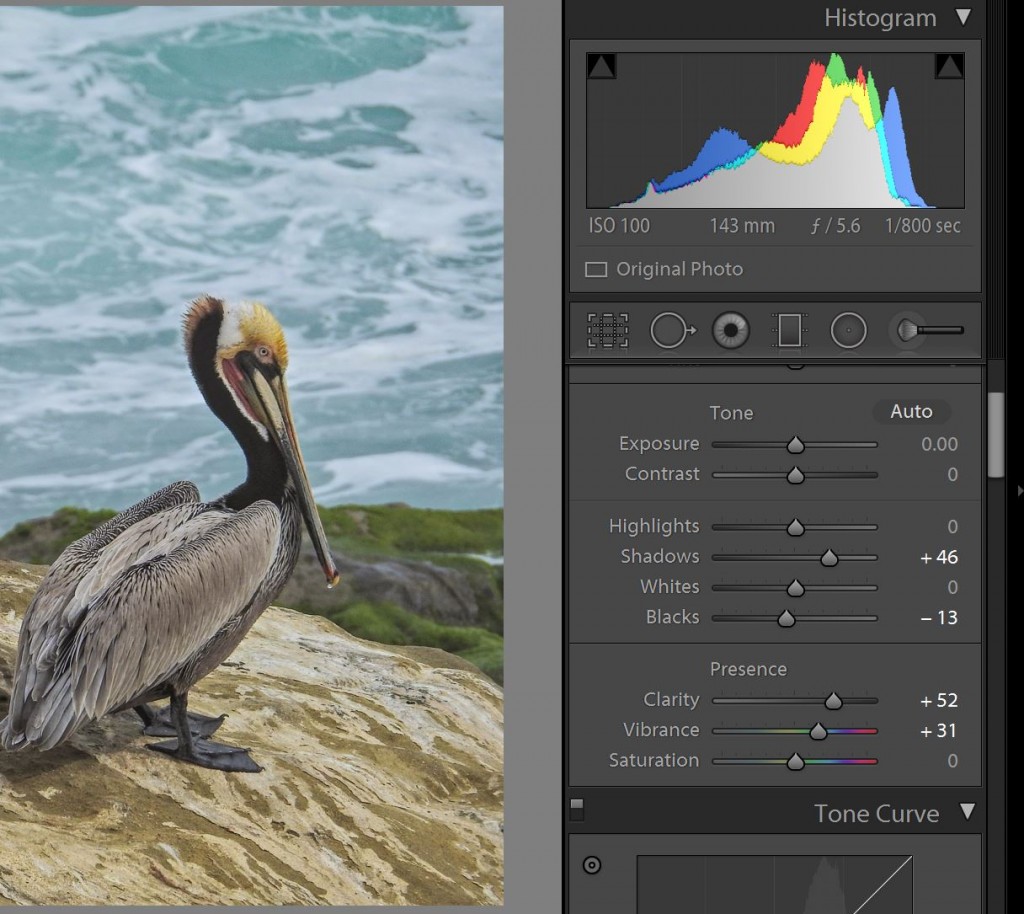
I intentionally underexpose my digital images by 1/3 EV by setting the exposure compensation to -1/3 on the camera. This maintains more of the highlight information in the original file. Therefore most of my images need a little boost in the brightness of the shadows. If you are doing this at home, just grab the Shadows slider and slide it to the right until you get the effect you want. Watch the image. Note what the slider does as you move it. Move it just enough to the right to achieve the degree of shadow lightening that you like.
Images from the Nikon Point and Shoot superzooms that I use are just a bit flat out of the camera. They lack pop. I could add pop by adjusting the contrast, but that would also whiten the whites and lights in the image and burn out whatever detail is there. Instead, I use the Blacks slider to make the blacks (and very dark colors) blacker. Slide the Blacks slider to the left until you get the effect you want.
Clarity is something like “local contrast”…it effects the way colors grade into one another when they are next to each other. Move the Clarity slider to the right to add Clarity until you get the effect you want. This also adds pop to the image.
Vibrance controls the saturation of the weakest colors in your image…and only the weakest. Moving it to the right adds vividness to the image. Be careful. Too much added Vibrance will make the bright colors “block up”…or lose detail and produce an unnatural, poster-like effect. Add just a bit of Vibrance.
Generally you do not want to, or need to, touch the other controls in this section. Remember you are creating a preset that will be applied to many images as you process. You can go back to the develop module after applying the preset and tweak other settings as needed…but you just want this preset of do the basic work.
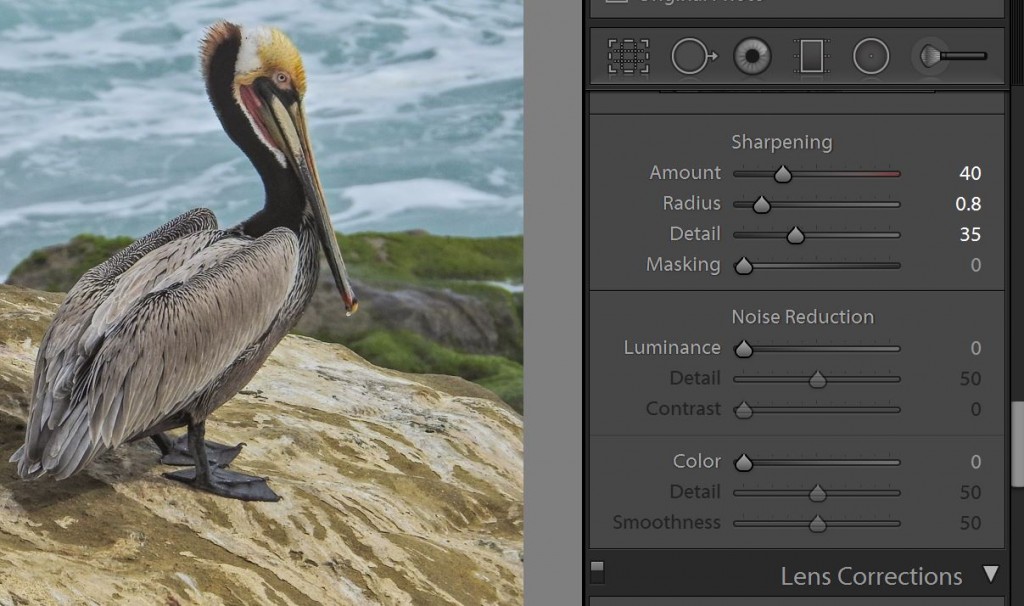
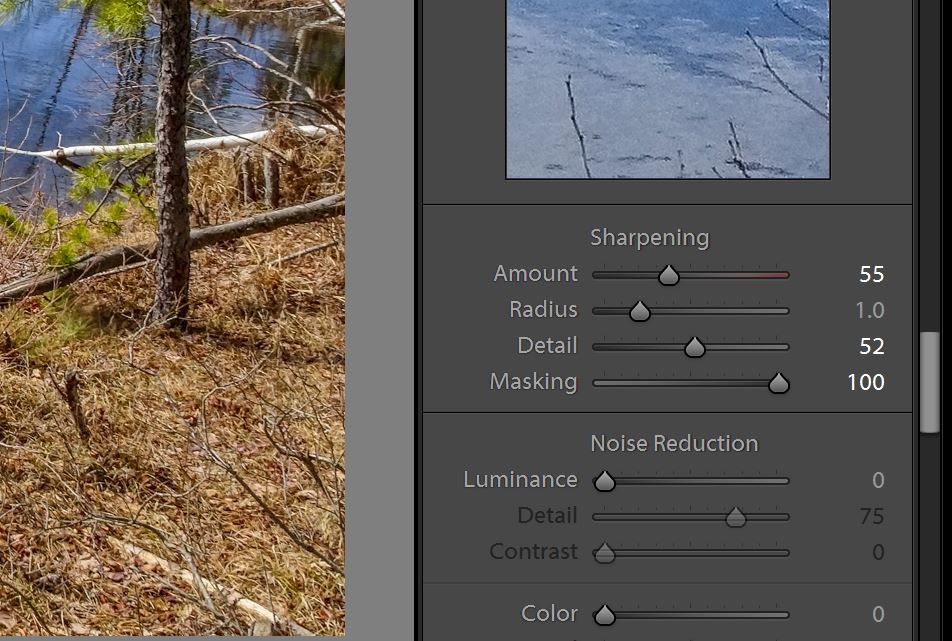
Next, for most images I use the existing Sharpen Scenic preset built into Lightroom. You can find it in the develop module in the left hand panel. When I apply it, it sets the sharpening controls as you see them here. You can achieve the same thing by sliding the controls to these positions yourself. All digital images require some sharpening. I actually turn down in-camera sharpening when I can, because generally sharpening in post does less damage to other parts of the image than the camera does. I do not recommend much more aggressive sharpening settings than you see here. You will not like the effects on overall image quality.
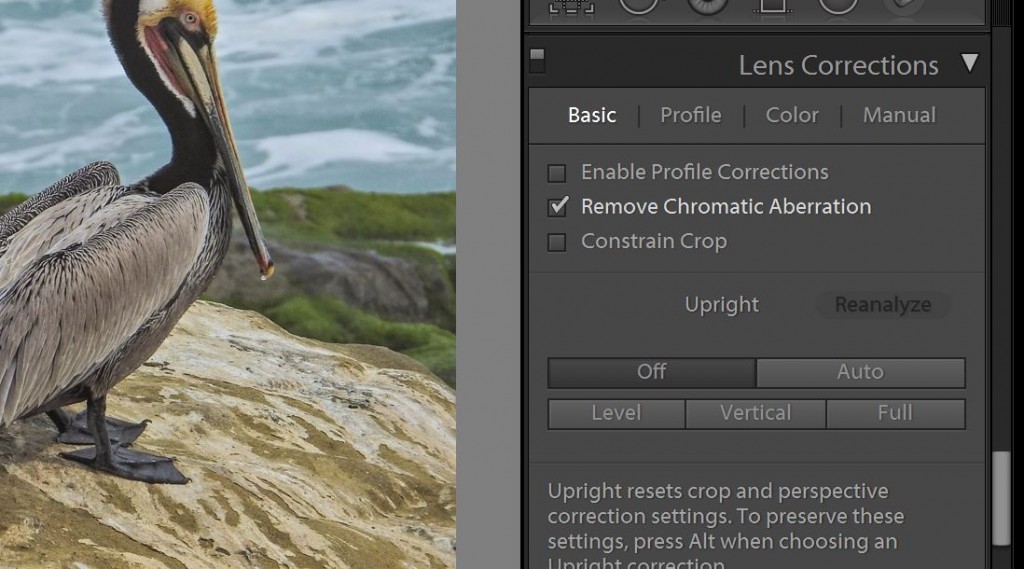
Just as all digital images can benefit from some sharpening, most digital images will benefit from Lightroom’s “Chromatic Aberration” filter. Chromatic Aberration is the little (or not so little) lines of green or pink (or blue and yellow) light that appear at the edges of things in your image, especially near the outer edges of the image, especially when the edge is against a white, light, or black background. It is a lens fault. Many cameras will already process it out when they create the jpeg…but turning on Lightroom’s filter can only help.
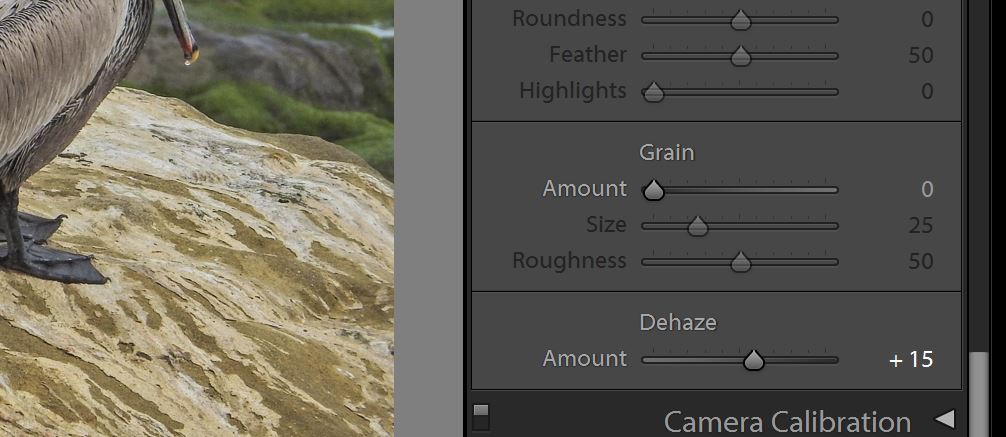
Finally, the latest version of Lightroom has a new filter called Dehaze. It works something like the Clarity filter above, but with the emphasis on the blue end of the spectrum. Blue light is the most likely to get scattered over the surface of the image, both from atmospheric haze, and from light scatter inside the lens of the camera. Therefore a filter that looks for the scattered blue light and removes it from the image improves both the clarity and the vividness of the image. Be careful here, as too much Dehaze will darken your whole image, and turn the blues toward black.
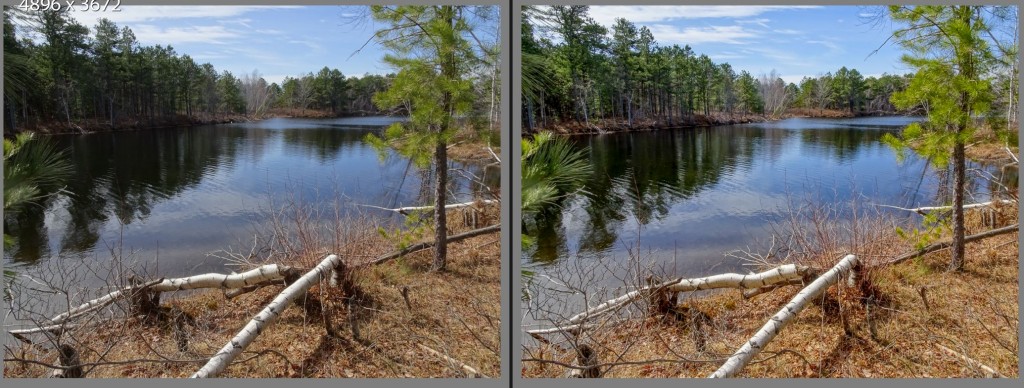
Here is a comparison of the edited (right) and unedited images.
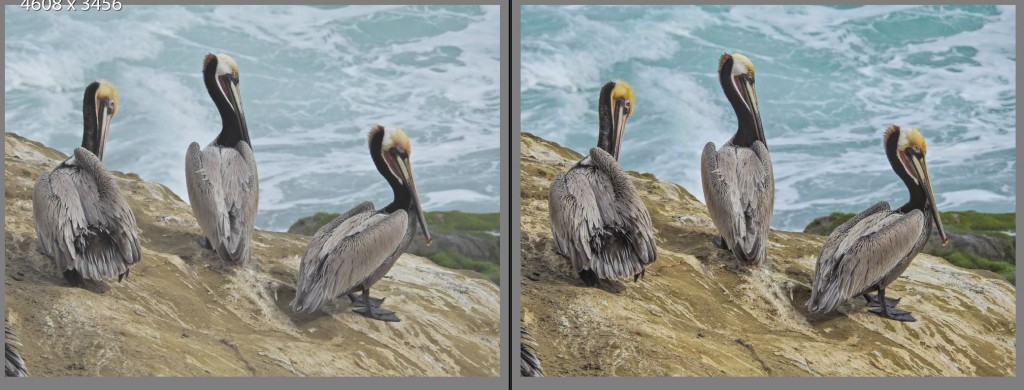
The difference is not dramatic, but it is enough to turn an okay image into one that is more satisfying.
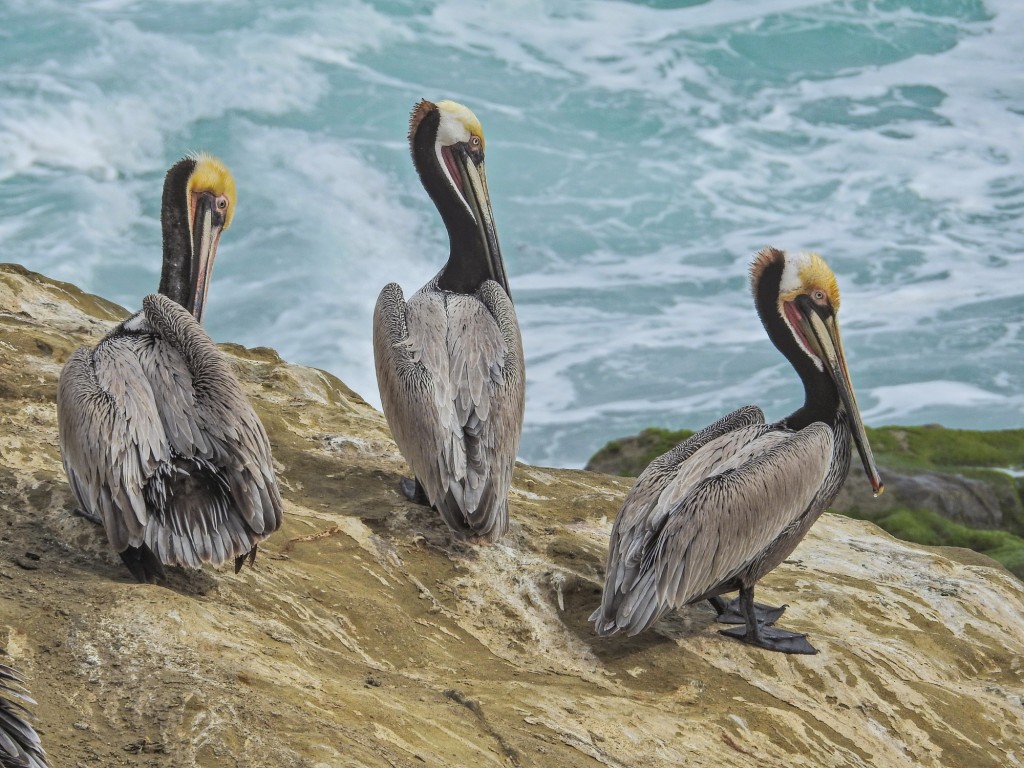
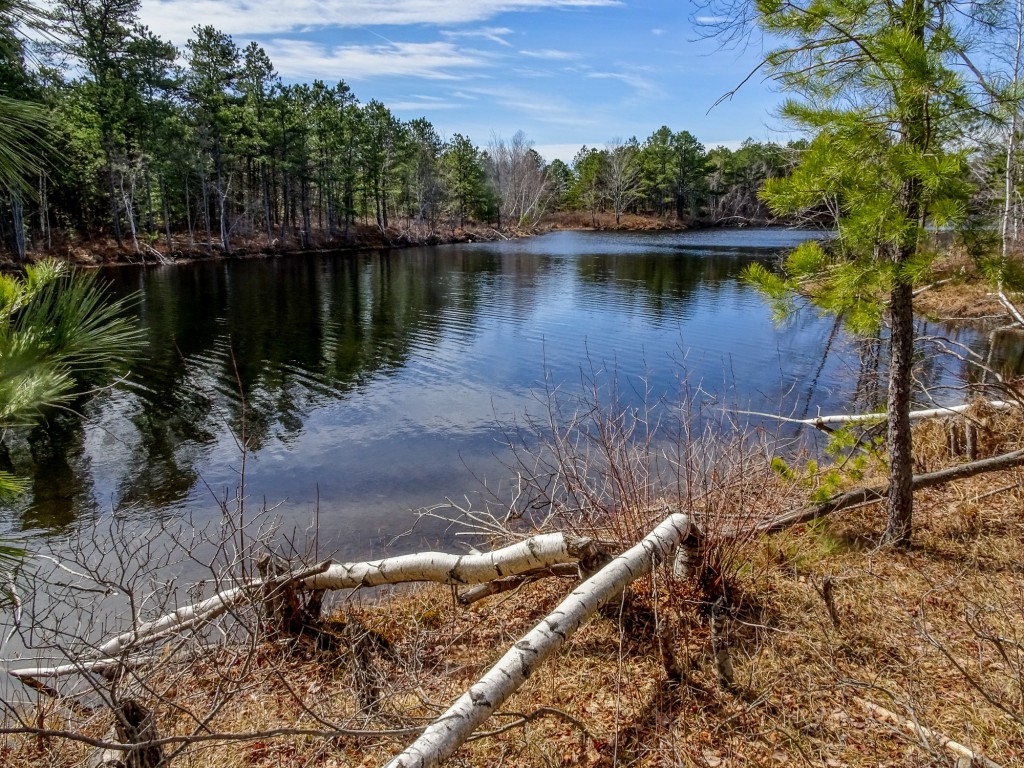
Here is the edited image at a larger size. Compare to the unedited image above.
Edit several images from your camera in this way…if your camera exposure system is working right, and you are using it right, you should notice that you are making just about the same edits on each photo. (A word about using the camera’s exposure system correctly. Use it! Do not mess with manual controls. Let the camera do the exposure. Today’s camera exposure systems are so accurate and so flexible that they will get the exposure correct about 95% of the time if you let them. That is one reason you can create presets in Lightroom. The files you will be working with will be consistently exposed.)
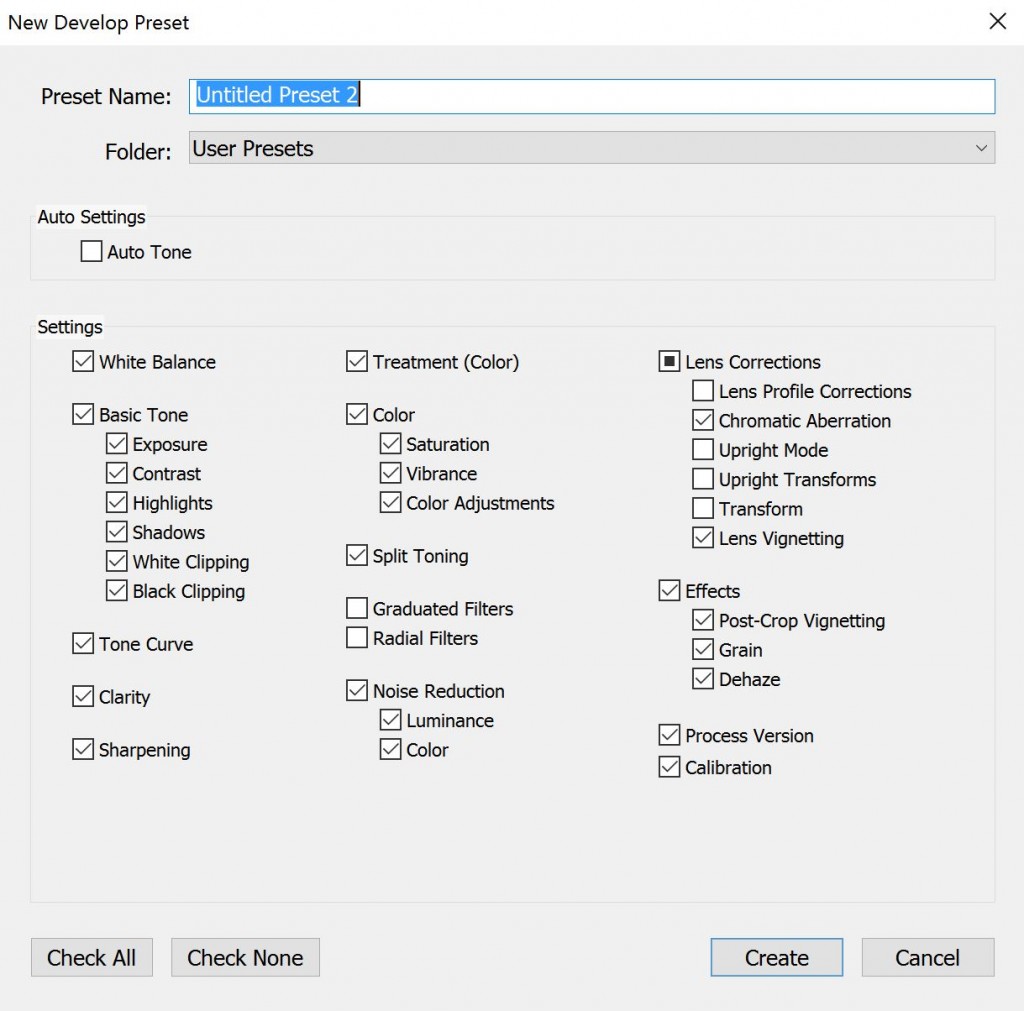
To create your first preset, open the best of the files you just edited in the Develop module. Look for the Presets section on the left hand develop panel. Click the little plus sign next to the Presets title. This will open a window displaying all your current settings, and providing a field at the top to name the preset. Name it “Standard” or give it the name of the camera or whatever.
The settings you have changed, and the settings that are necessary for every image, will already be checked in the list of settings. Just name your preset and click “Create”. It will be saved to your “user presets” folder, where Lightroom can find it when needed.
 Now that you have a preset created, you can apply it easily to either single files or multiple files.
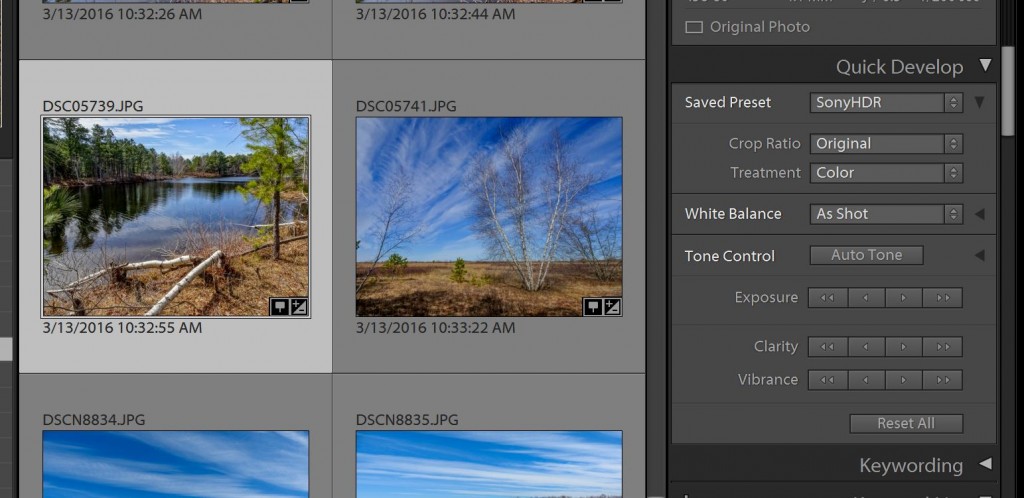
You don’t even have to open the Develop Module. In the Library Module, in the right hand panel, you will find a section near the top called “Quick Develop” and within that section a drop-down menu called “Saved Preset”. When you click the menu you should see your newly created preset in the list, under User Presets, in a sub-menu at the bottom. Select the image (or images) you want to apply the preset to, and then just select the preset from the menu. In seconds you will see your thumbnails update to the edited form of the image…or, if you only have one image open in Library, that image will update to show the finished edits. One click…that is all most of your images will need for processing, once you have your presets created. 🙂
The following illustrations show the difference in settings between my “standard” Nikon preset, and my Sony HDR preset. The Sony in-camera HDR files can handle some extra pop and some extra sharpening. I have applied a sharpening mask to keep the HDR artifacts from showing up in open sky.
 Chromatic Aberration and Dehaze settings are the same as for my basic Nikon preset.
Here is a comparison shot of the unedited HDR file and the file with the Sony HDR preset applied.
Note that the difference here is not so subtle. The Camera produced a file using the HDR technique that has enough information in it so that it can be processed into a very satisfying extended range image.
And the image was processed with a single click in Lightroom!
Again, you don’t need a lot of presets. 2-3 per camera you use. Once a preset is applied, if you still think you can improve the image using other editing controls in Lightroom, you can always open the Develop Module and make whatever changes you like. The great thing about Lightroom is that any changes you make will be added to the changes, or override the changes, you originally made with the preset…and any changes you make with either can undone instantly. The program does not actually make the changes you see on the monitor until you save or share the image. Your file is always preserved as the digital negative and you can start over with your edits any time you want.
The major complaint I hear about Lightroom is that it is too hard. It is actually the easiest program for image editing I have every used. I hope this article gives you the courage to dig out your copy, and to give it another try…or at least encourages you to create your first presets to release the power of Lightroom.
than you