Dramatic Landscapes: HDR

Perhaps the most difficult exposure problem is a scene with a high dynamic range like this. You need detail in the shadows, and yet you do not want the highlights of sun on water to burn out. In-camera HDR to the rescue.

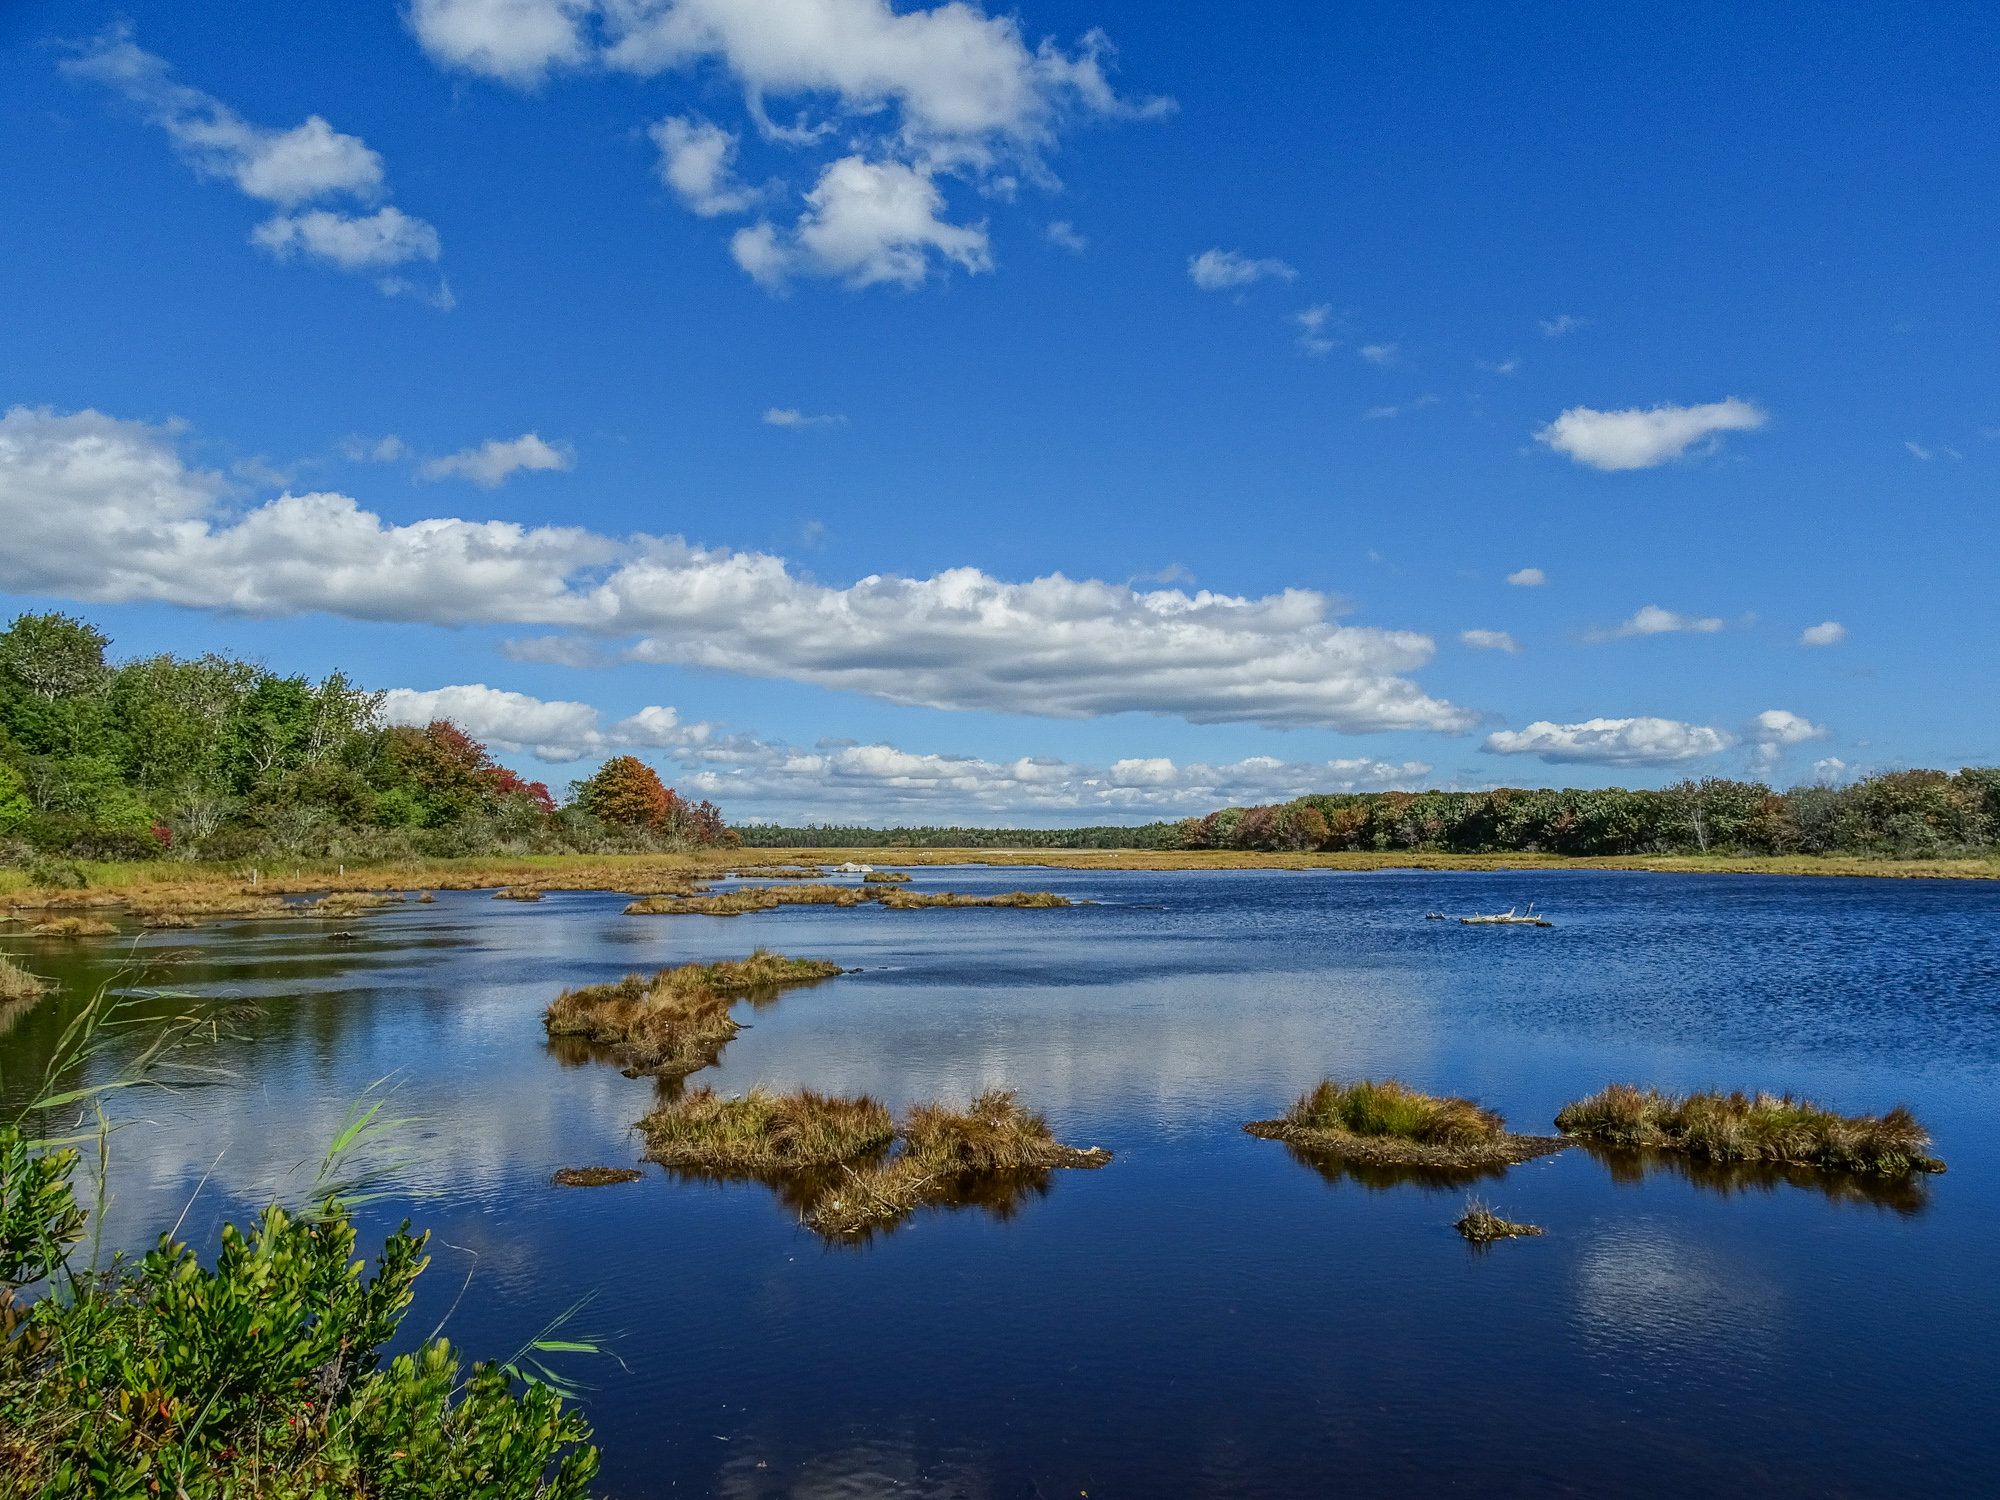
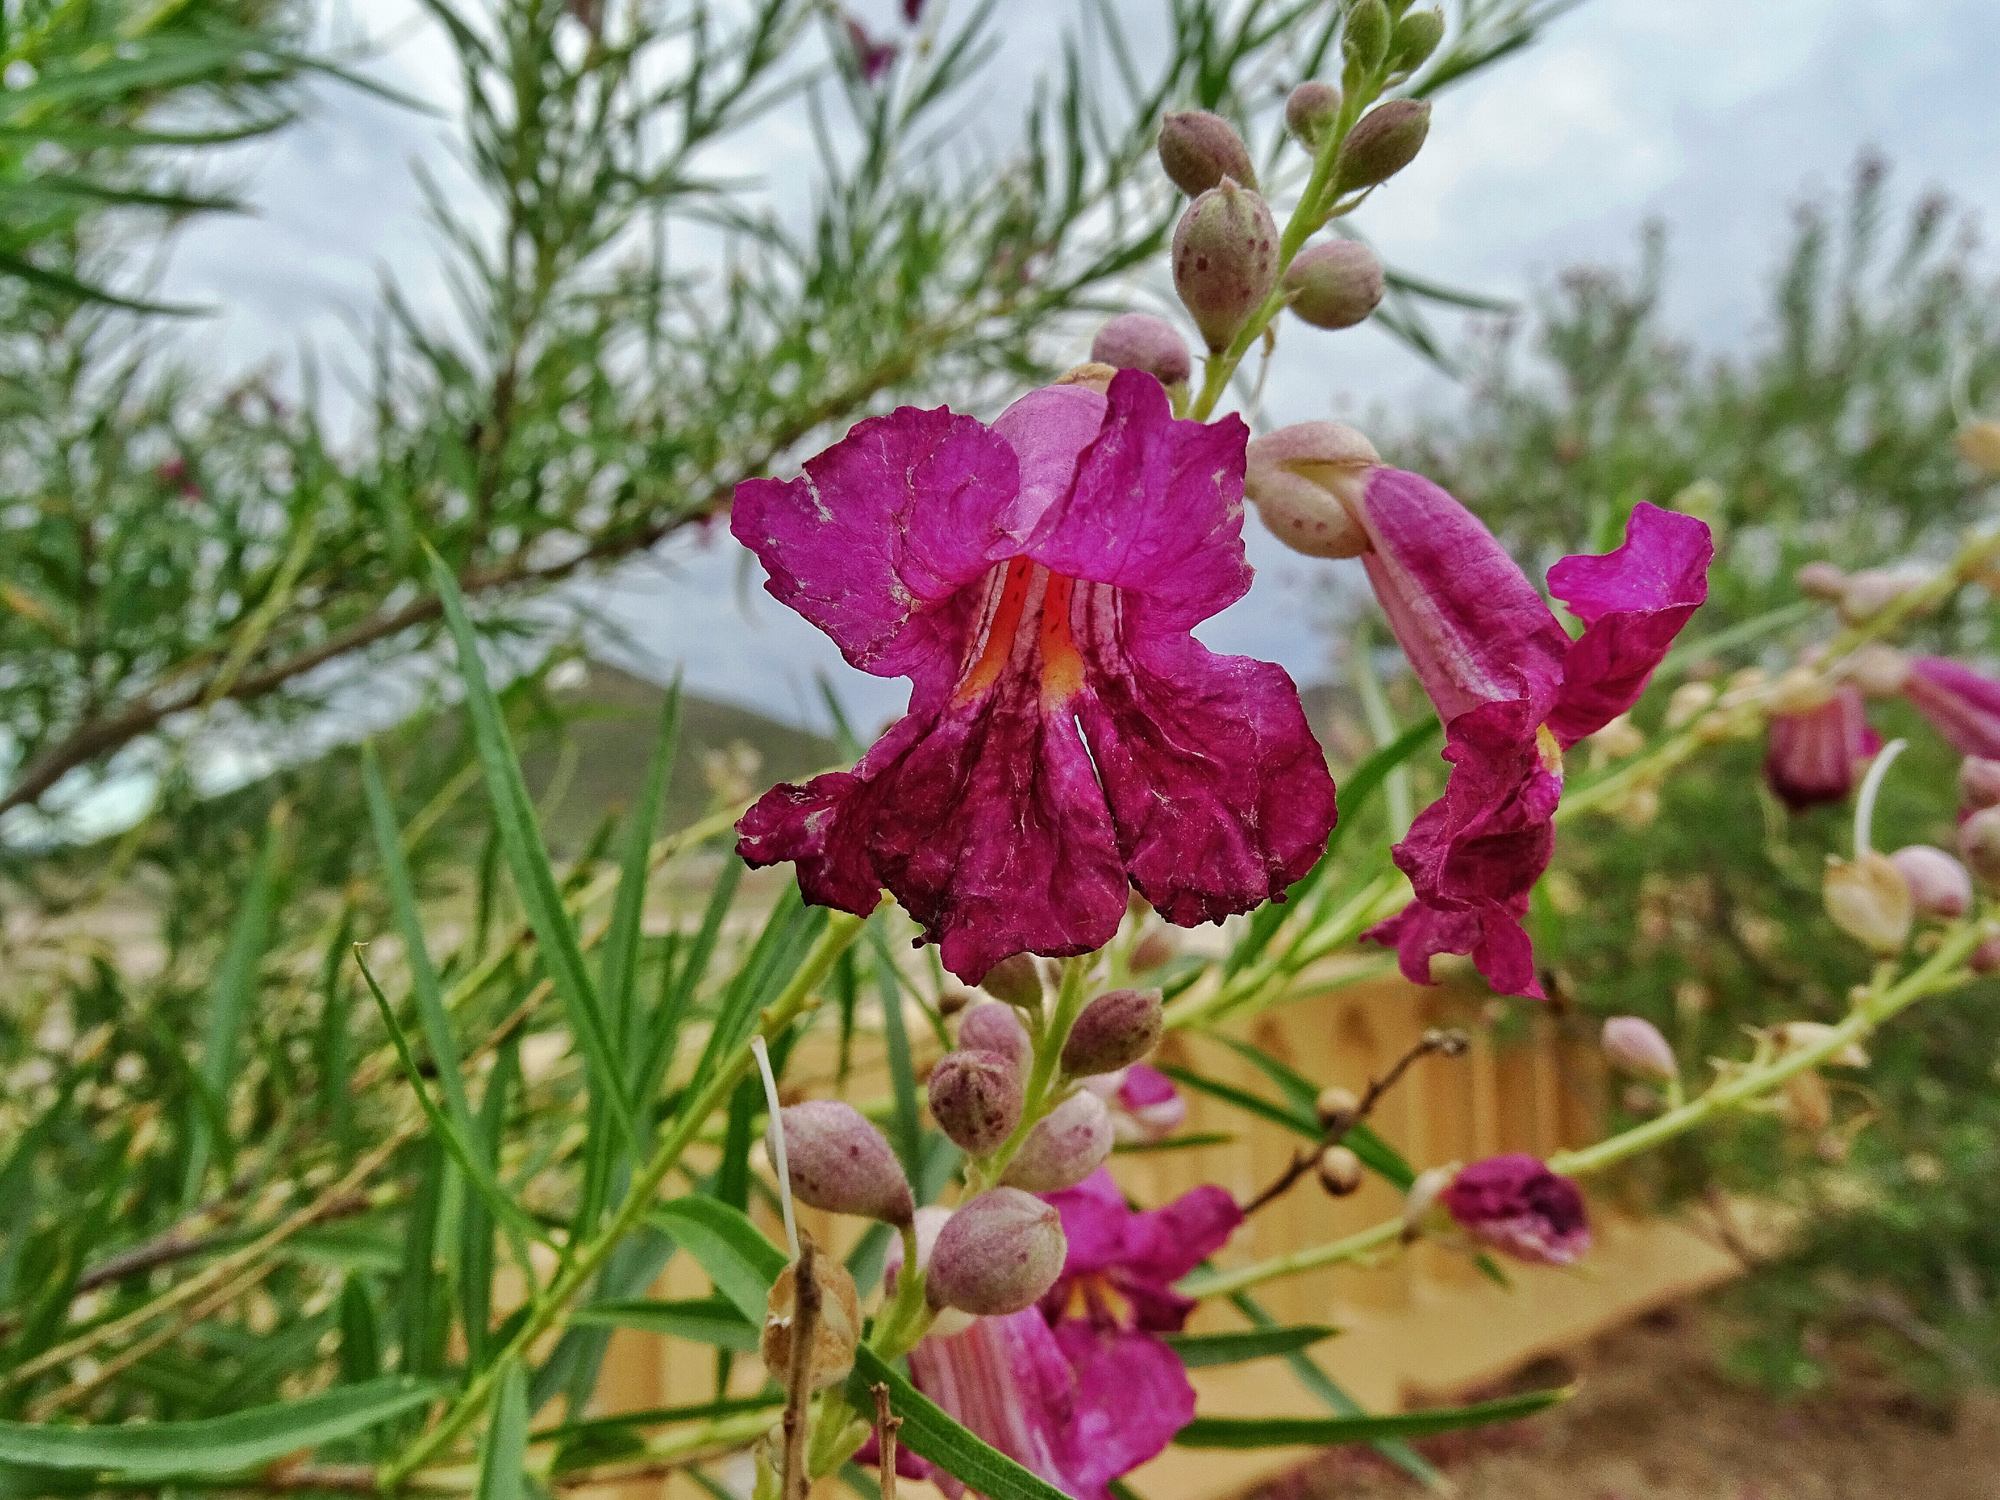
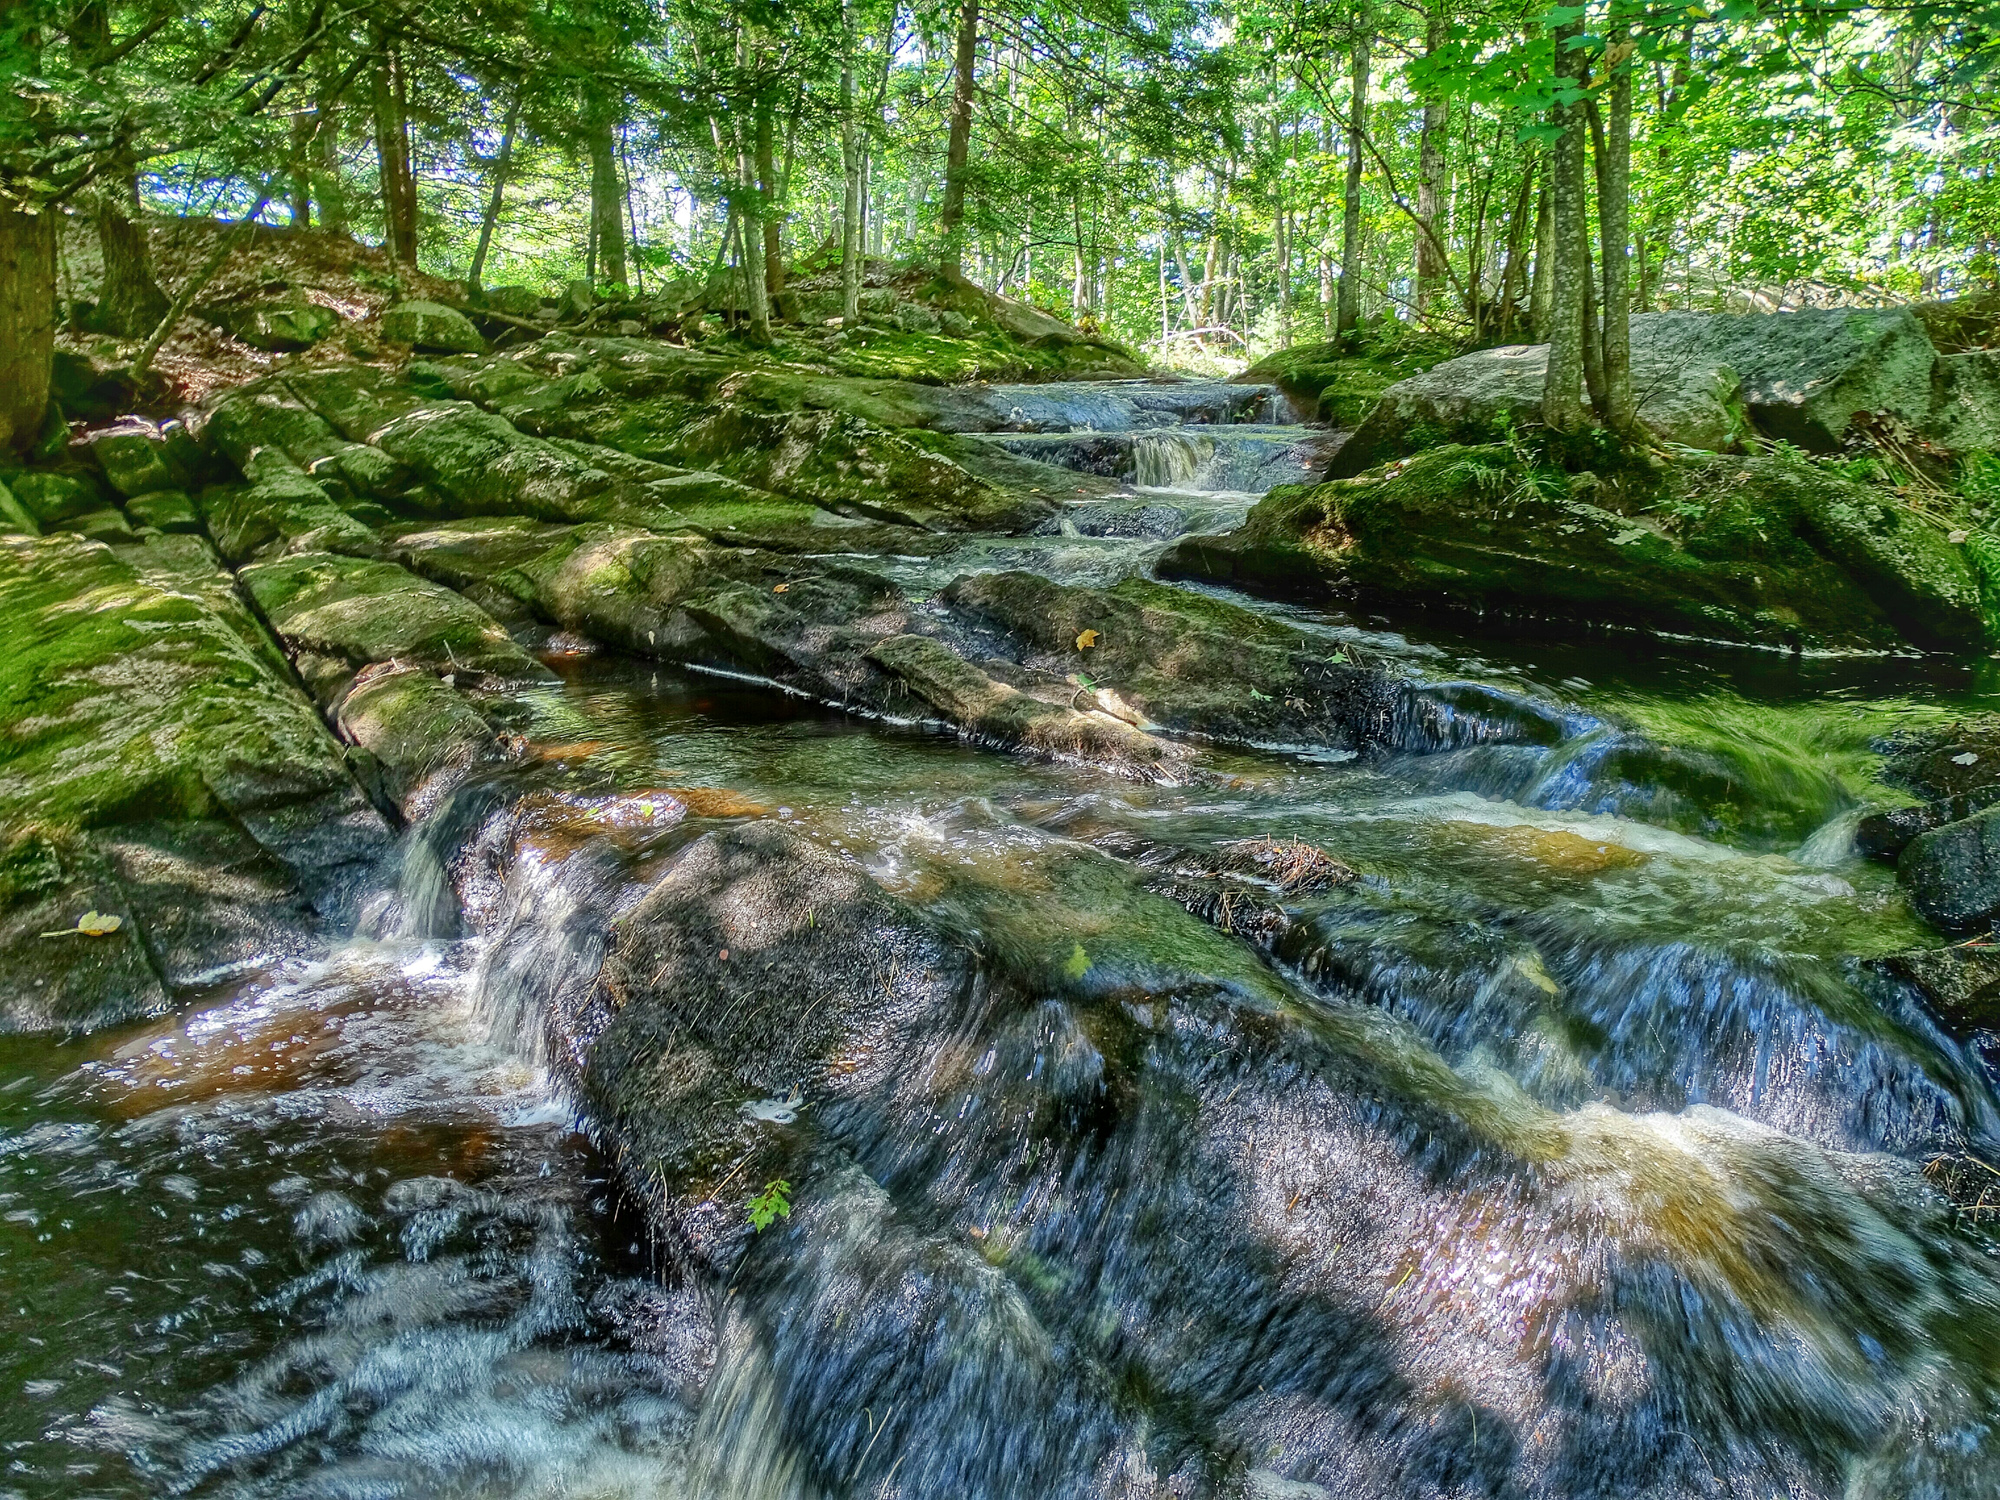
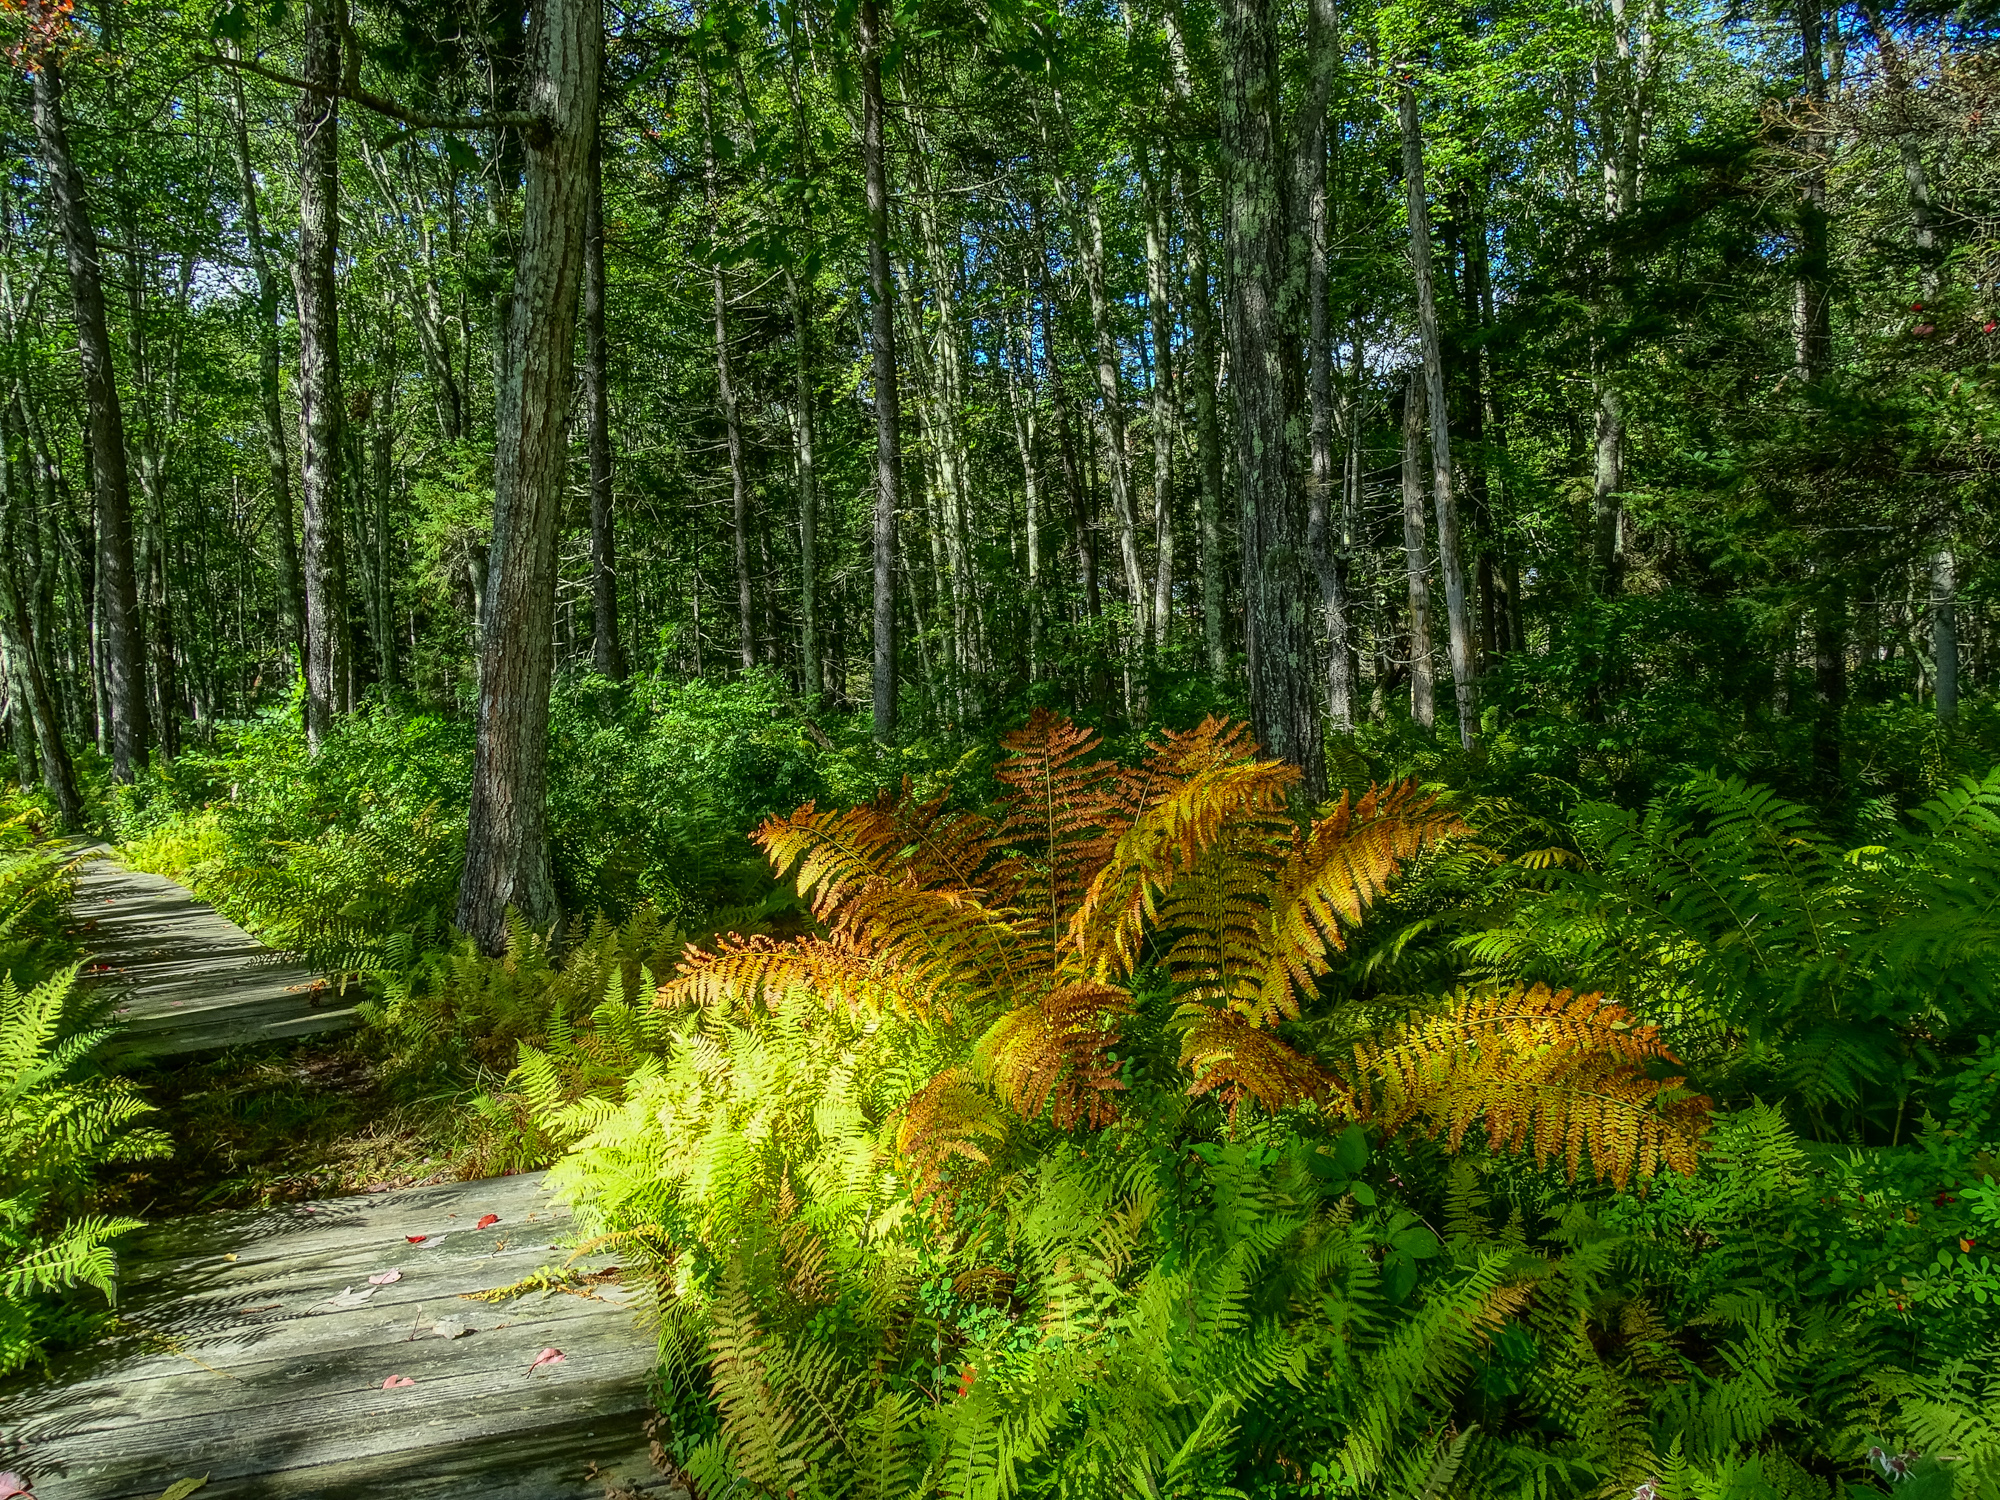
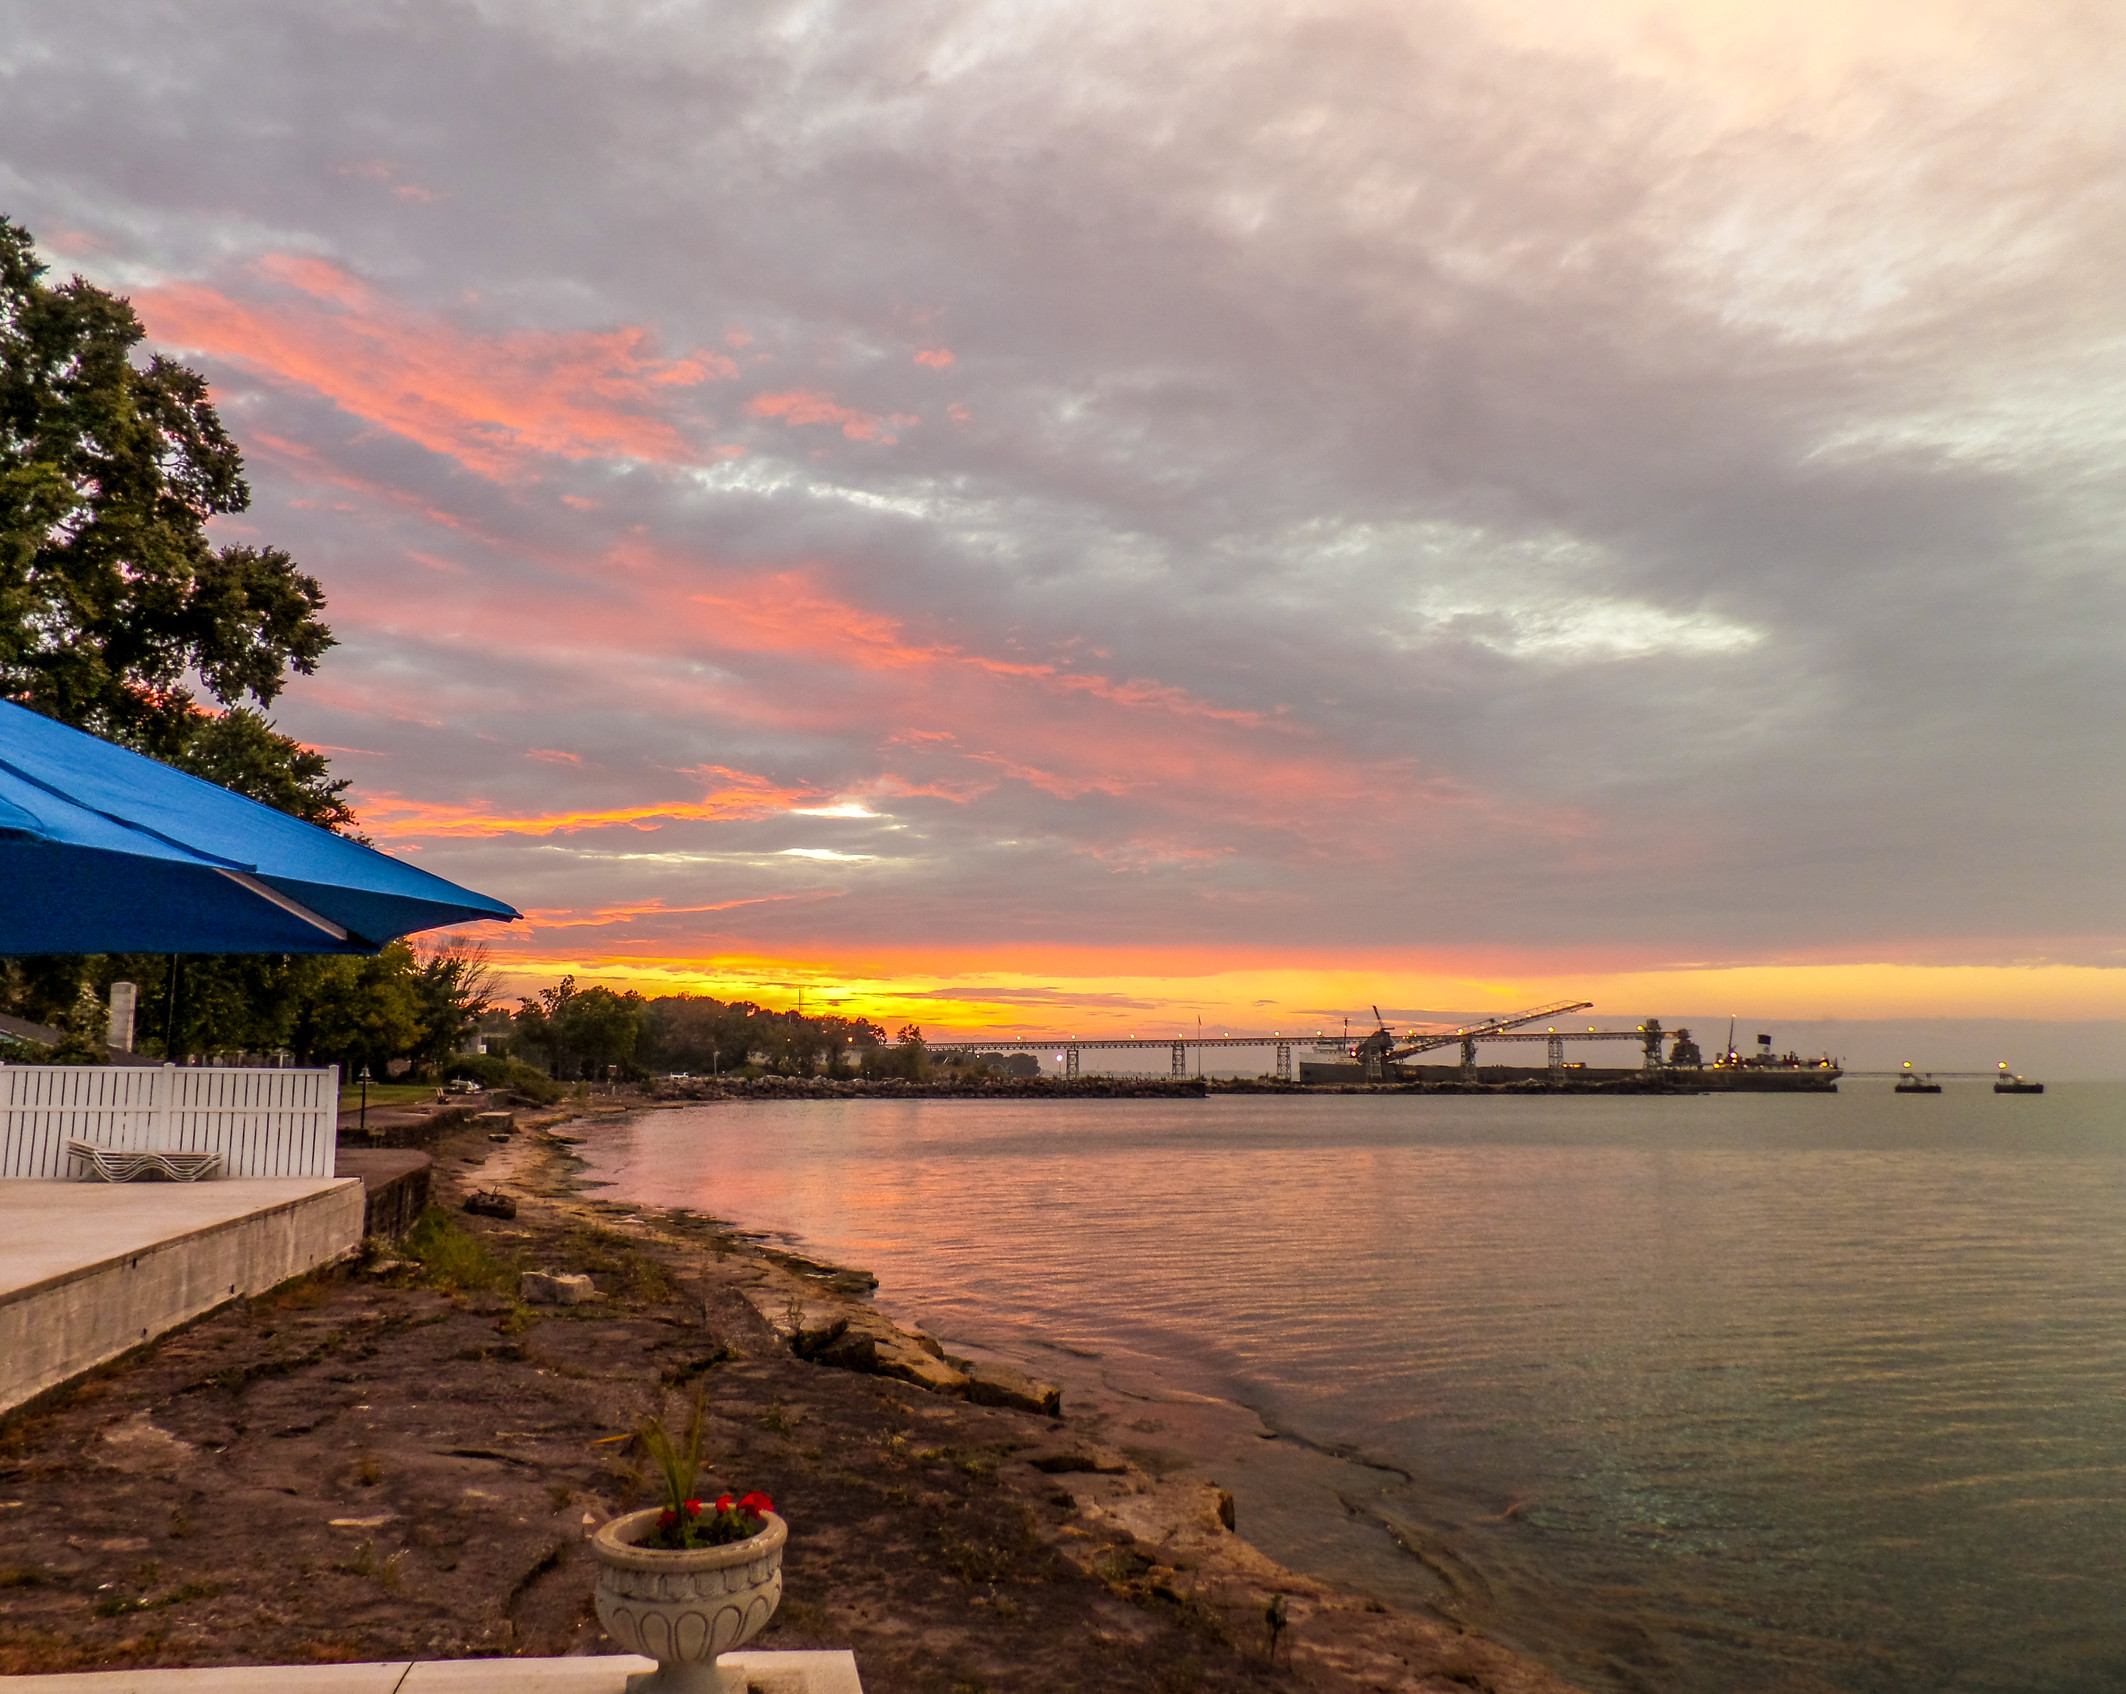
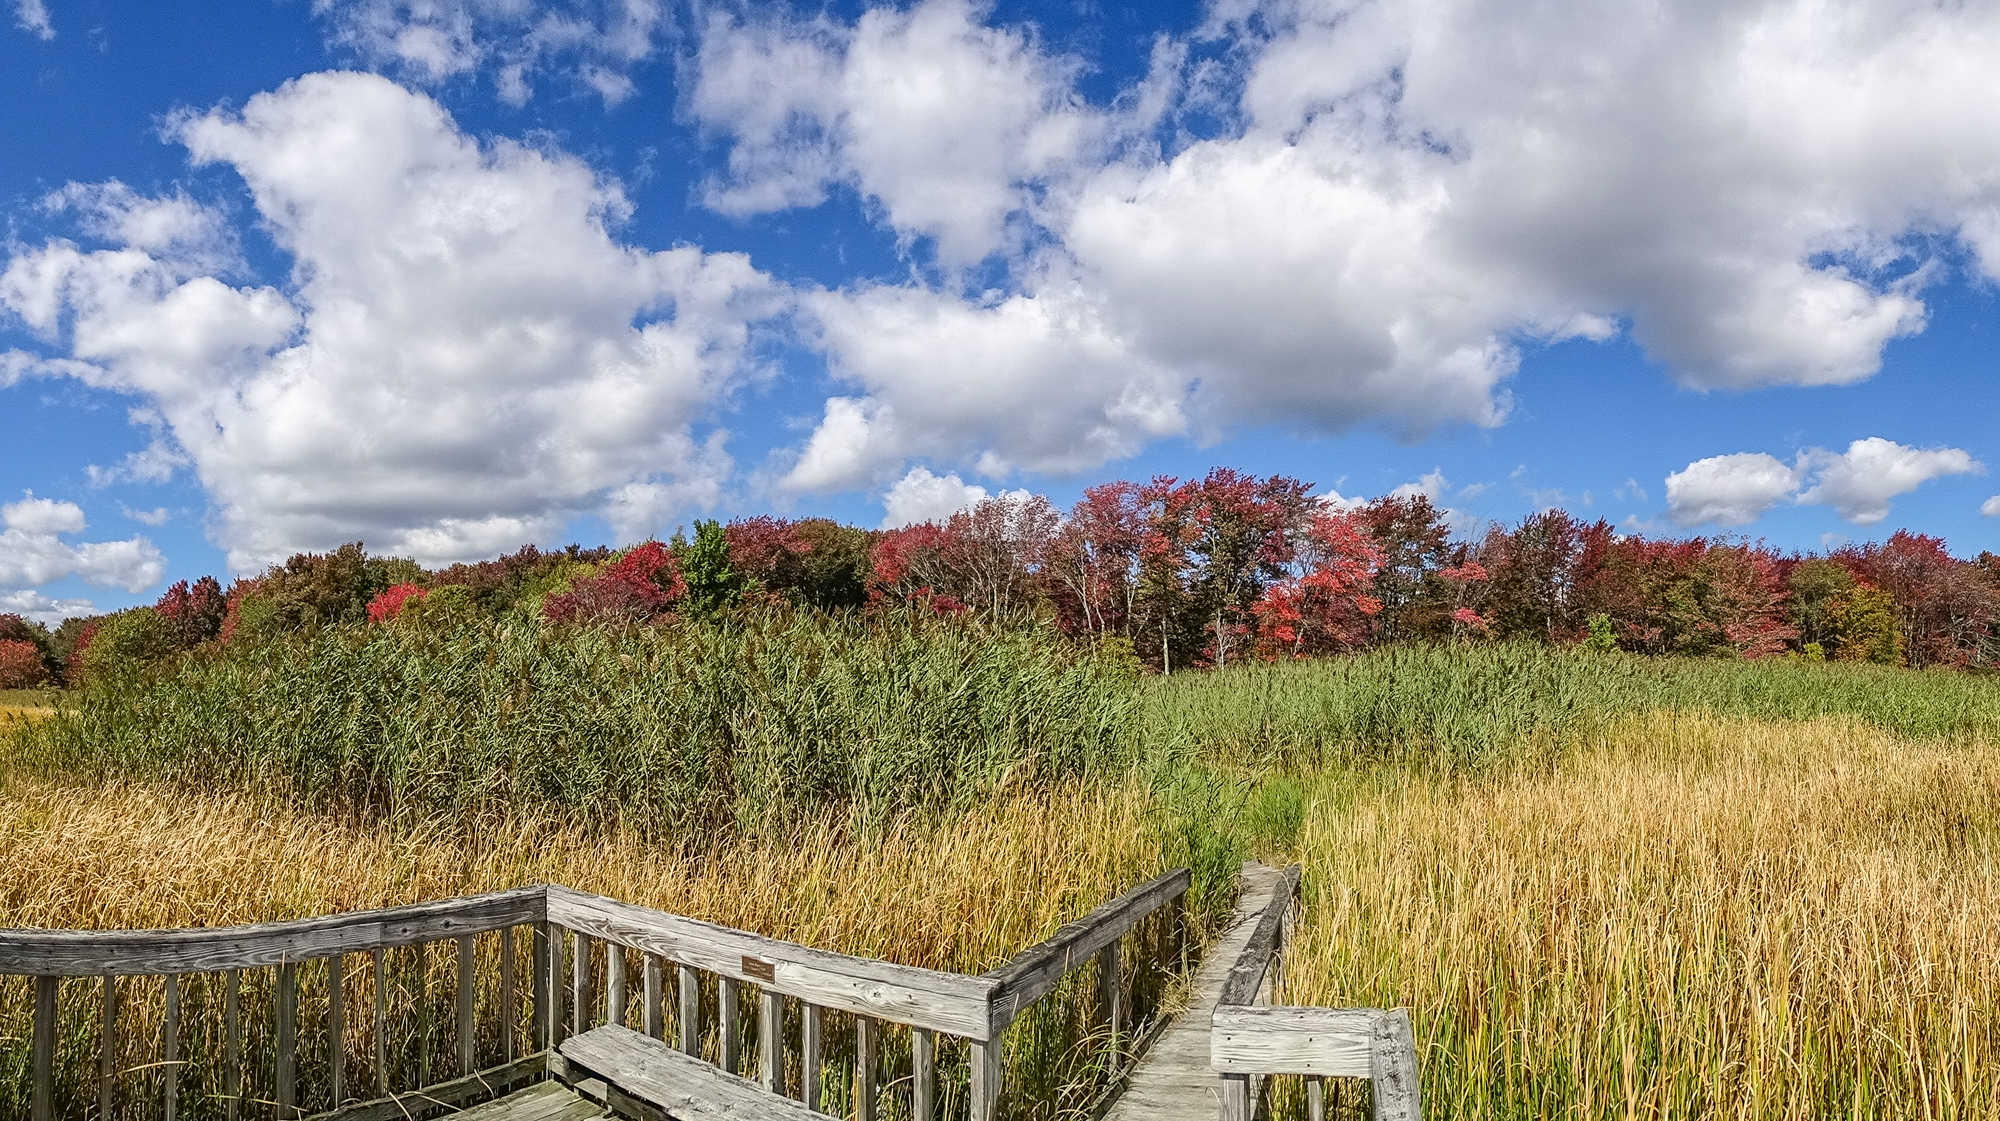
It is hard to resist a colorful landscape with big white clouds against a bright blue sky. Might be, those clouds are casting a pattern of moving shadows on the land that only adds interest. Or maybe your eye is caught by the tumbling water of a stream in deep forest, with sun breaking through, bringing out the peat brown highlights in the water. Or are you in a ferny glade under the tall canopy of maples or redwoods, reaching for that cathedral quiet and calm. Or you are out at sunset, confronted by the wonder of red and orange over the darkening (but not yet dark) landscape.

Too bad! Each of these represents one of the primary challenges that has faced the photographer since the beginning of the craft: the inability of any photo-sensitive material to capture the full range of light and dark…all the subtle shades of color…that the human eye can see.

Drama in the sky and in the foreground. Again, in-camera HDR, with further processing in Lightroom.

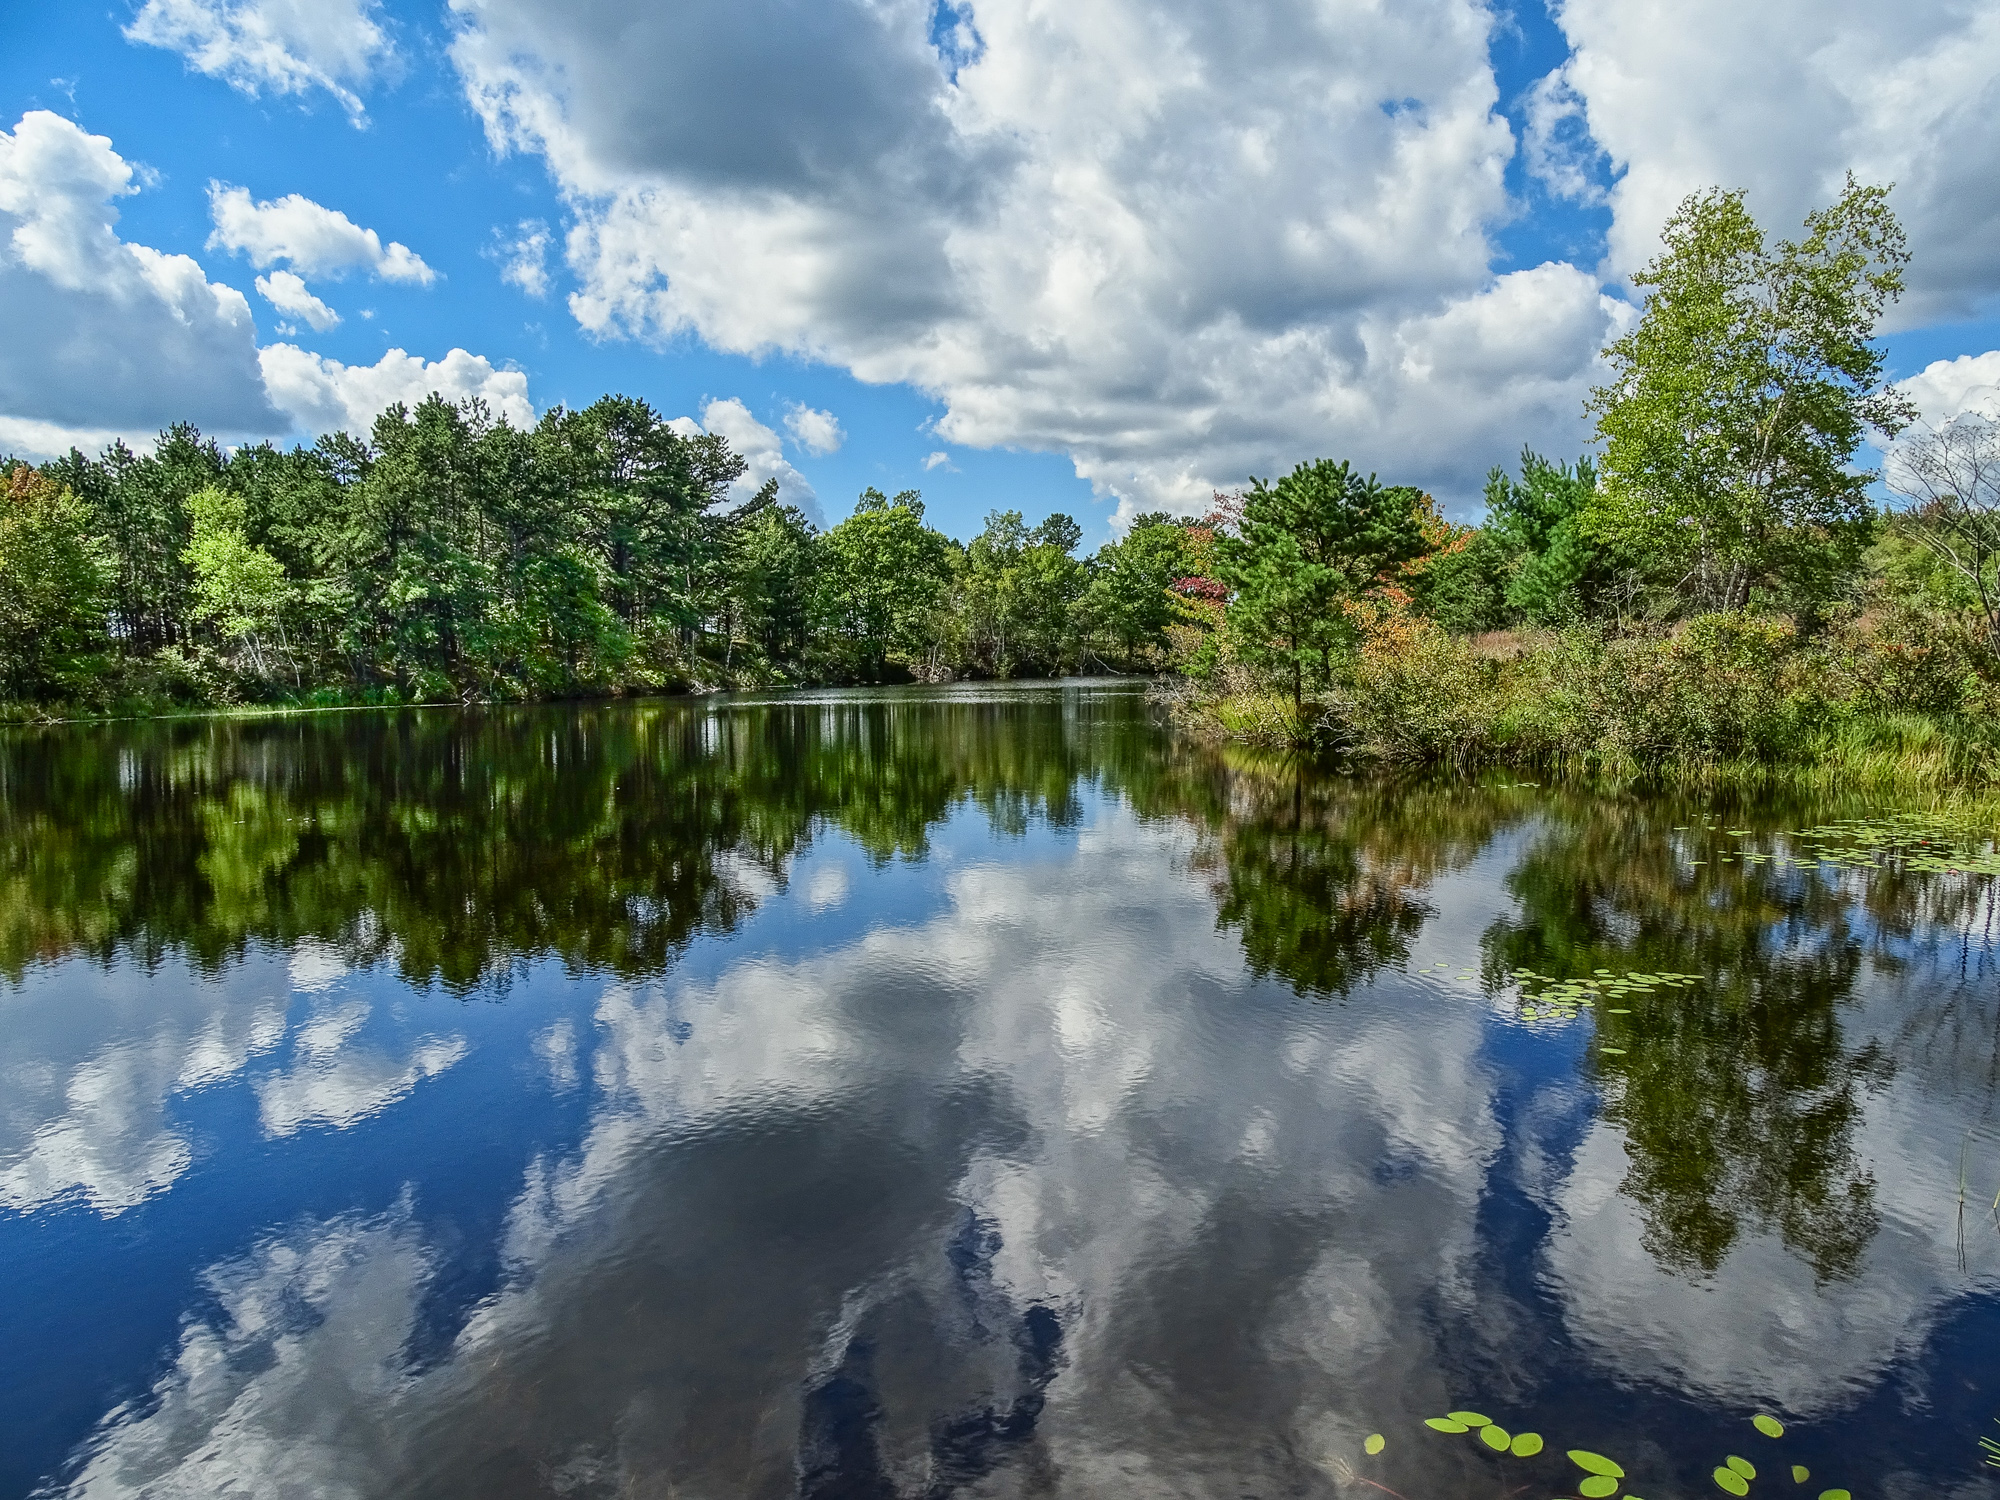
If your landscapes have a sky that is way too pale and clouds that are simply white blobs without detail; or they have wonderful skies, full of drama, but the land and foreground are full of unnatural inky black shadows and dark dull colors…if your stream in the forest has blinding white highlights where the sun struck it, and little detail in the shadow and that lovely peaty water is simply dirty dishrag brown…if the cathedral forest is a dark den haunted by bright specters where a sun shaft came through…if your sunset hangs above a landscape from a horror movie, all dark threatening shapes; or the reds and oranges are not the living flame you remember, but a dull wash across a grey sky…

…well then you have experienced first hand just how bad even the most modern senors are at catching what the eye sees…just how much trouble photo-sensitive materials have with the wide range of light and dark.

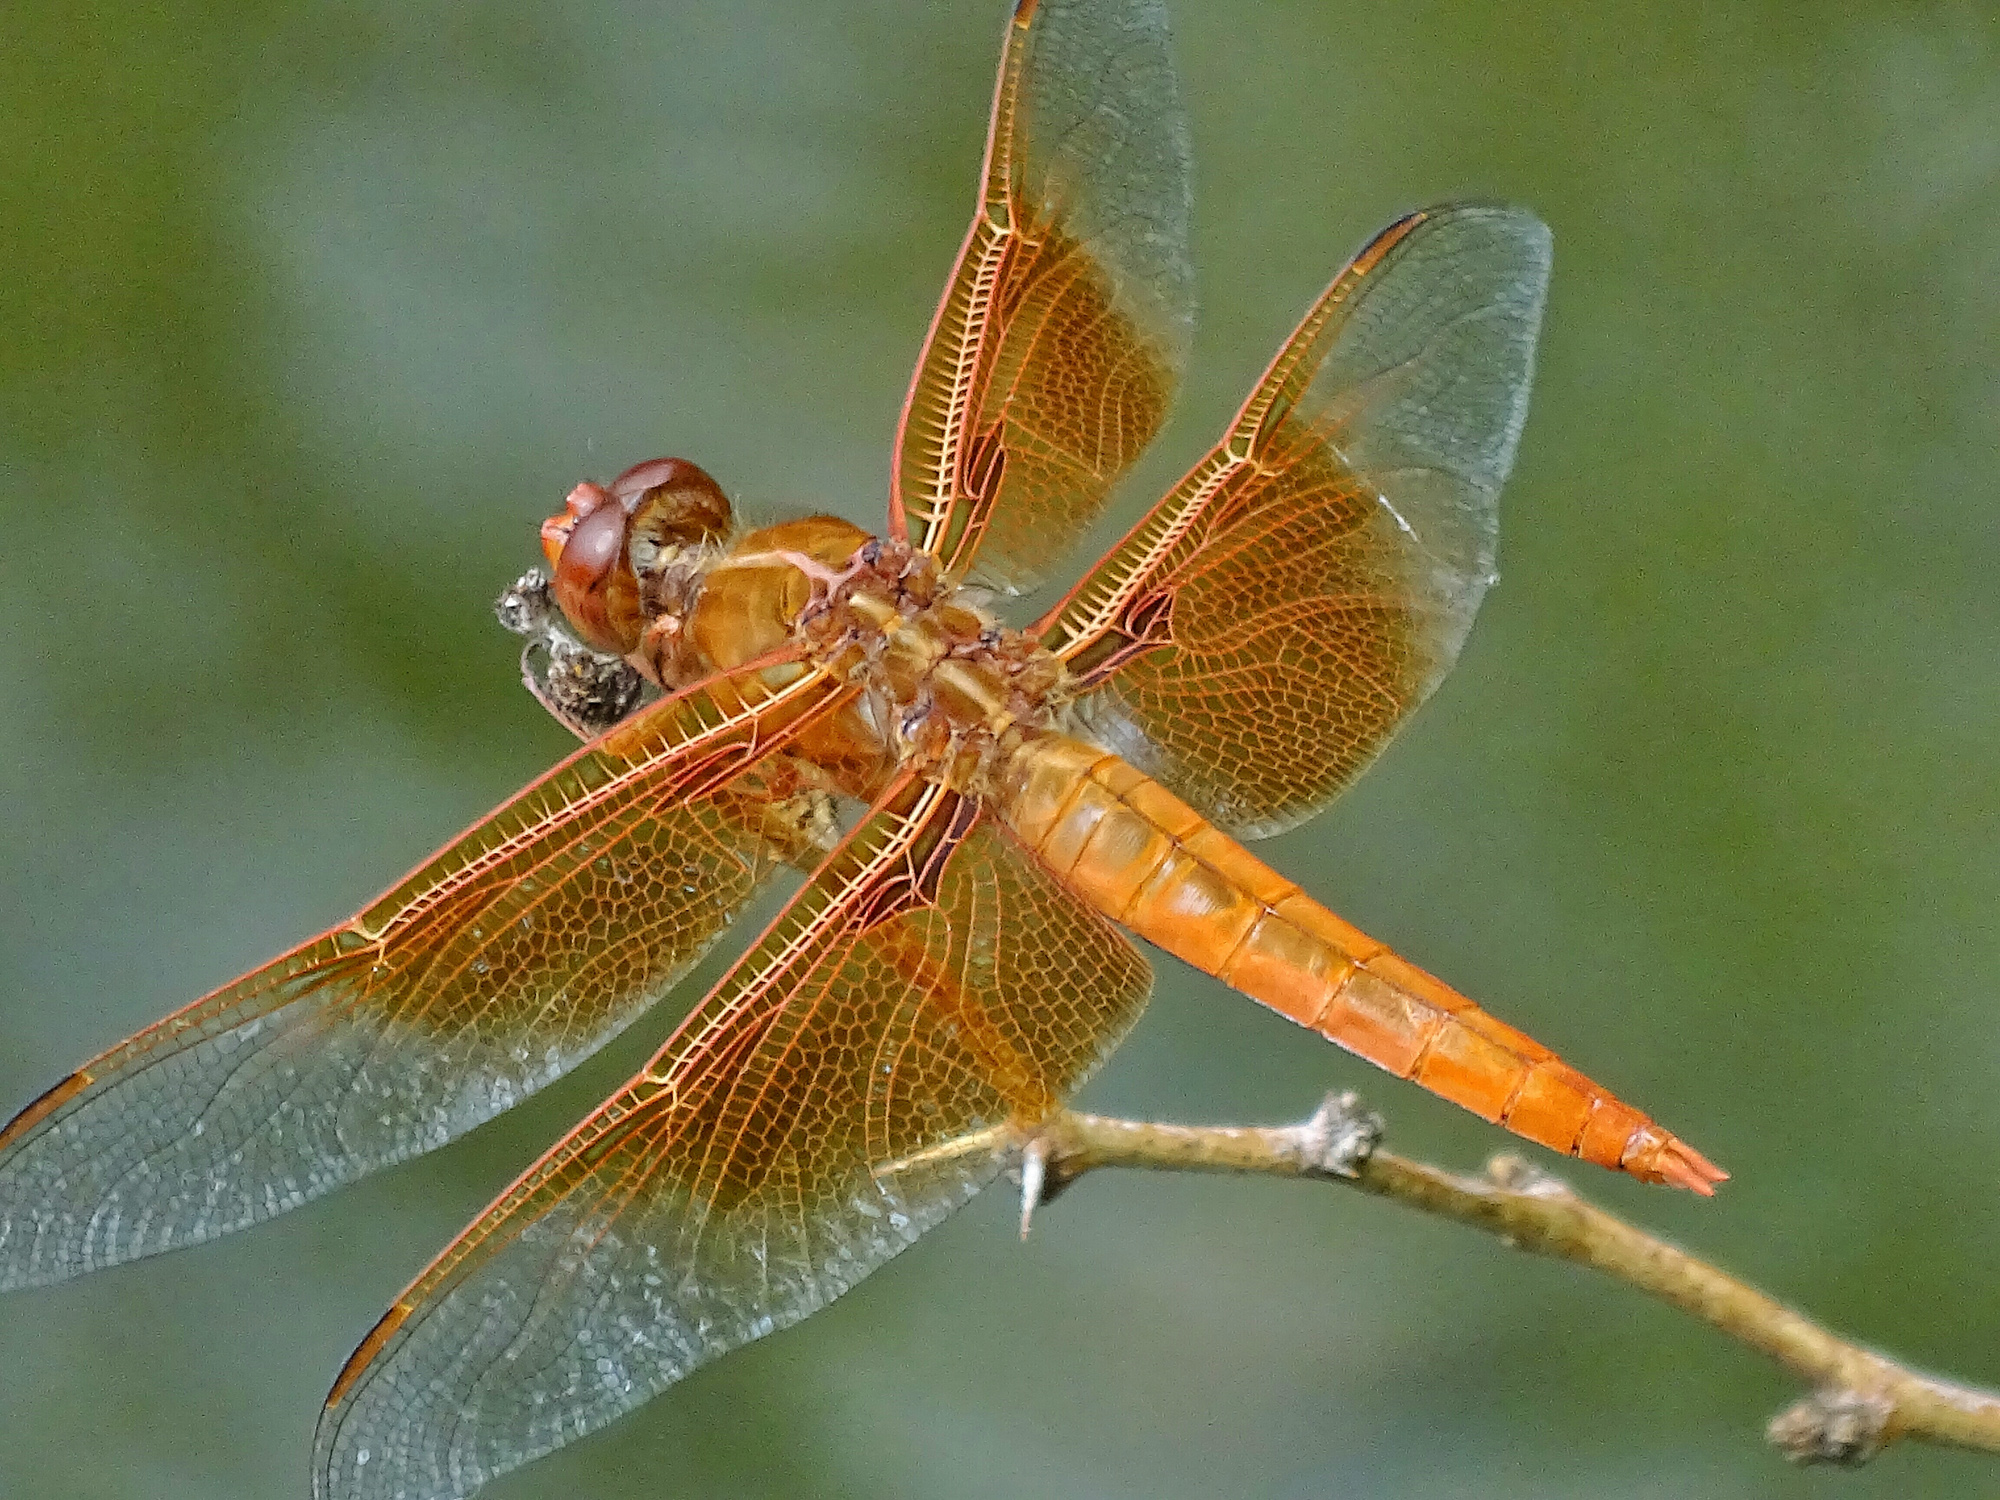
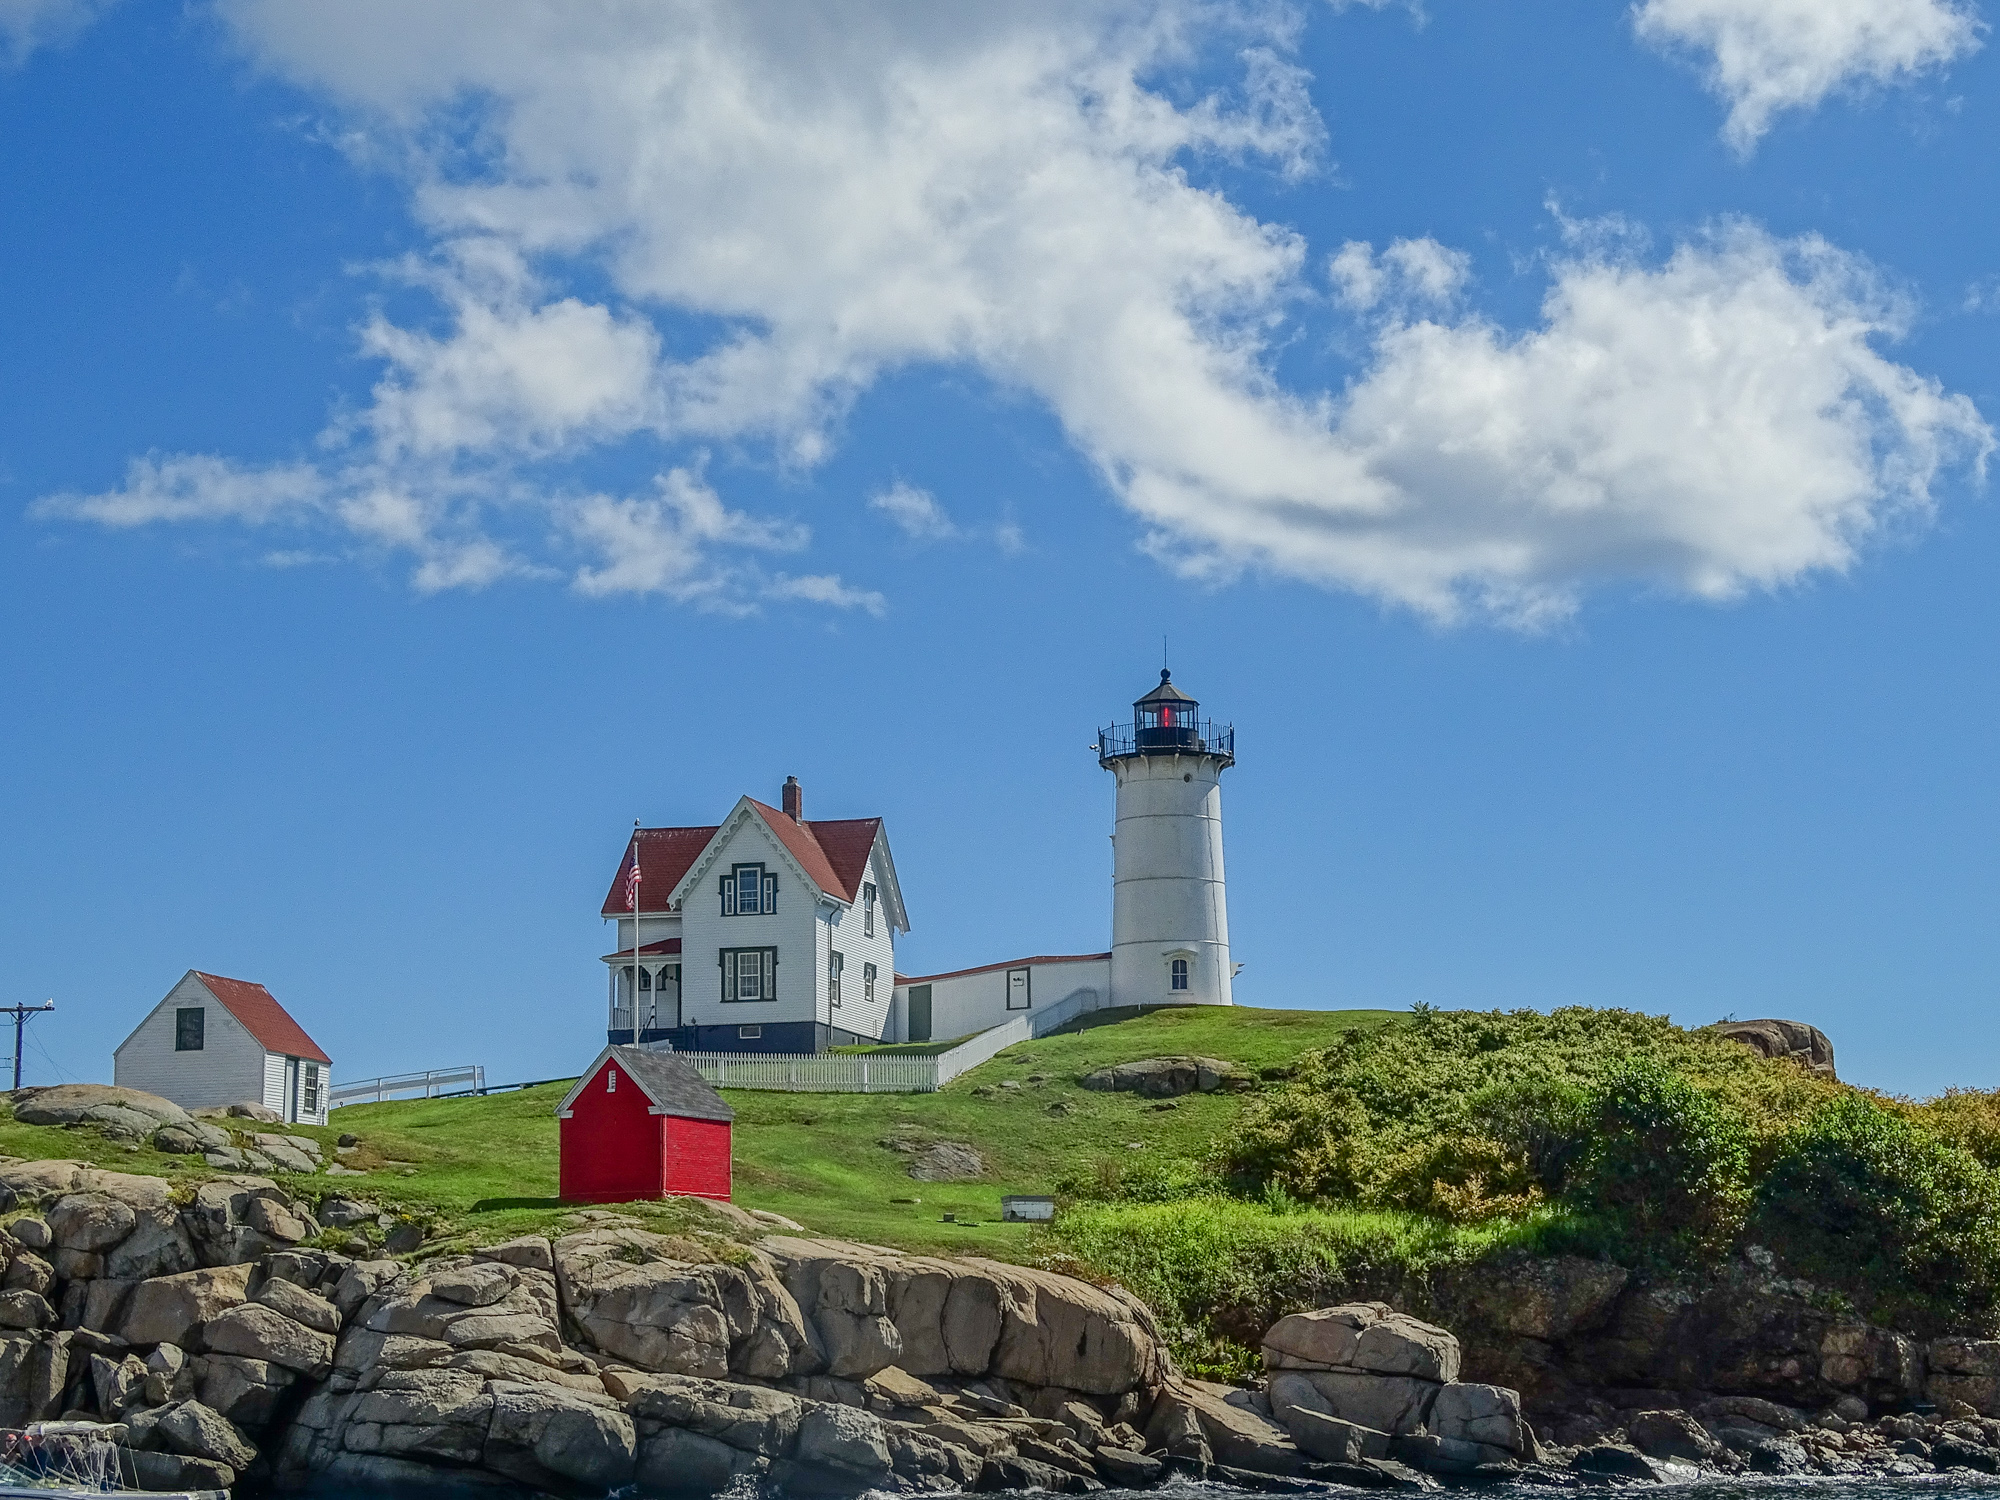
Yes, but we have all seen photographs, other people’s photographs, that do capture what we remember we saw, that scene that caught our eye in the first place. Like a painting. Like these images here. You have to wonder how it is done.

The cathedral forest effect. Another candidate for HDR.

The only way to do it is to somehow compress the full range of light and shadow…the full range of color…so that it fits in the limited range of the photo-sensitive material, or rather, to be accurate, in the limited range of whatever material is used to display the image…print paper, ink in the page of a magazine, the monitor on your computer or LCD screen on your laptop or tablet…but to do it so effectively that the eye is fooled into thinking it really sees that full range in the resulting image. It is a trick. It is always a trick, no matter how it is done.

Once upon a time, in the bad old days of film and wet processing, photographers put graduated filters in front of their landscape lenses that artificially darkened the sky so that landscape could be properly exposed. They would then, during processing, doge and burn sections of the print to bring up detail in the dark areas and subdue highlights in the bright areas. (I can remember putting my bare hands into the developer tray to hand rub shadows to bring them up.) If shooting slide film, where post-processing options were limited. they would intentionally underexpose the film and then push-process it in the darkroom, using a combination of higher temperatures and non-standard time to bring up the shadows. It was an art. It was a trick.

The first digital sensors where even worse at capturing the range of light and color than film. If you could go back and look at images from the digital cameras of 10 years ago, especially the P&Ss, you would immediately see how cartoony they look…how poster-like. It was one of the factors that convinced many dedicated film photographers that digital would never displace film.

In-camera HDR is not only for scenes that scream High Dynamic Range...it can bring out subtle detail in fog shots and on dull days.
In-camera HDR is not only for scenes that scream High Dynamic Range…it can bring out subtle detail in fog shots and on dull days.

Of course, with each new generation of digital sensors, and each new generation of on-board (in-camera) image processing software and hardware, the tonal range of digital images increased. We call that range, the range of light and dark and color that a sensor can capture: Dynamic Range. The Dynamic Range of digital sensors, especially the most modern back-illuminated CMOS sensors, surpassed the Dynamic Range of conventional film several years ago.

In addition, with the advent of digital post-processing, and the ever increasing sophistication of digital editing software, it has become possible to enhance the dynamic range of images. Photographers can take the RAW file that the sensor captures, and digitally manipulate shadows and highlights to produce the illusion of an extended range. Or they can take 3-6 separate exposures, each exposed for a different shadow/highlight balance, and them combine them in software so that something resembling the full range of light and shadow are displayed in the final image. Deep trickery! If done well, these techniques can produce a very natural looking dramatic landscape. (If done, in my opinion, badly, they can produce the kind of surreal, over-baked, hard images that give HDR a bad name among many landscape and nature photographers)

Three exposure HDR is about the only way to get a sunset with a natural looking foreground.

Unless you have access to those kinds of post-processing tricks, you probably continue to be disappointed in your attempts to capture the most dramatic scenes that confront you.

Or not.

If you are a Point and Shoot photographer and using Smart Auto (or Intelligent Auto, or Superior Auto, or whatever your camera maker calls it), then you are seeing just how good the modern on-board digital image processing software and hardware are at maximizing the Dynamic Range of today’s back-illuminated CMOS sensors. During jpeg conversion, today’s P&S superzooms apply the same trickery that photographers developed to deal with Dynamic Range in post-processing…automatically, before you ever see the image. Almost all recent P&Ss have some kind of Dynamic Range Compensation, or Dynamic Range Enhancement, built in, and Auto is the default mode in any of the Auto/Smart Auto programs. Some of the most recent P&Ss even allow you to control the degree of DRC when you use the Program Mode.

Sweep panorama mode uses Auto Dynamic Range Optimization on the Sony HX400V. Further processing in Lightroom yields a very natural looking image.

My experiments with DRC on superzooms has shown that the best implementations are very good indeed…providing a noticeable and useful increase in apparent Dynamic Range without producing an unnatural looking image. They keep the drama in dramatic landscapes without overdoing, or over-cooking, it. For general photography, keeping DRC on Auto works very well. And on those cameras that give you control of the feature, you can produce good results in even the most challenging situations (as in the stream in deep forest, or the cathedral in the pines).

What is more, camera makes started to build in on-board automated three exposure HDR a generation of cameras back. The first attempts were not very successful. Sensors and processing engines were not fast enough. The three exposures took a few seconds so a tripod was required, and they were separated in time by long enough so that any motion in the scene destroyed the illusion…and often the camera failed to get the three images lined up perfectly, leaving ghosts around even stationary objects. Or, worse in my opinion, the resulting image was overly flat, with so little variation in tone that it looked like an etching on metal. Not very satisfying at all.

Then came, as I mentioned, the back-illuminated CMOS sensors and truly fast image processing engines. The best of today’s P&S superzooms will do automatic in-camera, three exposure, HDR without a tripod. Some will let you control the exposure steps between the exposures to fine tune for different scenes. Almost all will produce a fairly natural looking image…an image that with just a little bit of work in any editing program, can make a very satisfying dramatic landscape, even in the most difficult situations.

Auto Dynamic Range Optimization in a macro shot, plus tweaking in Lighrtoom is quite successful here.

It is impossible for me to tell you exactly how to use these features on you particular camera, since every maker implements them differently. It is safe to say though, that if your camera is less than a year old, it has both Dynamic Range Compensation (whatever your maker calls it) and in-camera automatic three exposure HDR built in. Dig into the manual and the menus. Once you find it, experiment.

I keep 3 exposure HDR set up as one of my Custom Modes, so I can shift to it by simply turning the Mode Dial. I use it a lot…because I love dramatic landscape, and because it really does produce files that are easy to manipulate into very satisfying images.

In lieu of detailed instructions, I will simply outline how I use the features on my Sony HX400V superzoom.

I keep Dynamic Range Compensation (which Sony calls Dynamic Range Optimization) on Auto for Program mode, which covers my wildlife telephoto shots and macros. It is the default mode in Sweep Panorama and Sports mode, so I am covered for panos and flight shots.

High drama landscape! In-camera HDR is set on one of my Custom modes.

I have a Custom mode set to Auto HDR with exposures separated by a total of 6EV, and Exposure Compensation set to -7EV (to protect those white clouds in dramatic skies and the bright highlights in the forest). Because the exposures are so fast and so close together I do not use a tripod, but I am careful to steady the camera as much as is possible. I know better (from experience) than to to try HDR with close foreground elements in motion, as in a high wind…or sea shots with heavy surf where the water detail matters. On the other hand, the three exposures produce a satisfying blur, similar to the silky long exposure blur that is the current fashion in water shots, in rapidly moving water of streams.

Finally, all my HDR work (all my work for that matter) receives post-processing in Lightoom (or, when using an Android tablet, in Snapseed). My processing for 3 exposure HDR shots is essentially the same as it is for normal shots, but I find that shots taken with Auto Dynamic Range Optimization require a bit of extra work…some extra shadow and highlight control, etc…to produce the best results.

So there it is. Dynamic Range Compensation and auto HDR are powerful tools in today’s P&S superzooms. Give them a try. You will not regret it.

Natural without being over-cooked. That is my personal goal.


Program: beyond Smart (Auto :)

On a complex macro shot like this, having control of where the camera focuses, where exposure is determined, and depth of field can be critical. Program mode to the rescue.

As good as Smart Auto is on most modern P&S superzooms, there are a few things it does not do that the aspiring nature photographer will, eventually, want to do. I still recommend that the beginning P&S nature photographer start with Smart Auto, and, if your main interest is landscape, you can probably get satisfying results 99% of the time with Smart Auto pretty much forever.

However, if you shoot wildlife or macro, or even high dynamic range landscapes, you will want to temper exposure slightly to protect the whites and hot-highlights in your images from burning out (losing all detail and going pure white or pure red, or pure green, etc.).  And that is easier if you control the way the automation determines exposure…which areas of the image it is reading. You will also, from time to time, even if you shoot only landscapes, want to control depth of field…or how much of the image is in focus, front to back. Finally you will definitely want to be able to control what the auto-focus system locks on to when it determines focus.

A few of the more sophisticated Smart Auto systems now allow you to tweak the brightness of the image. Recent Sony cameras have Smart Auto controls for brightness, color, and vividness that allow you to override the auto settings. However I know of no Smart Auto system that allows you to control how the scene is metered to determine exposure, or to bias the exposure for depth of field, or to determine the focus point. By default, Smart Auto uses Multi-pattern metering for the scene and multi-point auto focus…that means it looks at a up to a dozen points in the scene and decides what you are most likely to be interested in. The system is very good at analyzing the scene for the content…but it generally fails when the subject of the image is small in relationship to the whole frame…as it is likely to be if it is a bird, beast, or wildflower.

If you put the camera in Program (generally the P on the control dial), you gain control over all these factors…plus the ability to bias the exposure for greater depth of field or faster shutter speeds.

This shot from a few years, and a few generations of P&S superzooms, ago demonstrates the limits of dynamic range. Note the loss of detail in the brightest whites in the clouds, even though the exposure was clearly biased for the sky at the expense of the land in the foreground.
You see the same burn-out here in the brightest whites, even though there have been advances in dynamic range compensation and this was taken at -1/3 EV Exposure Compensation.

To tame the highlights in the image, you use the Exposure Compensation settings. There is generally a button on the camera that gives you direct control of this setting. Most often it is one of the buttons on the 5 way Control Wheel on the back of the camera (center button surrounded by four buttons: top, bottom, and sides. On some cameras (Canon) there is also a wheel that rotates on the outside of all these buttons.). It will be marked with a +/- symbol, and sometimes with the letters EV. It might be an isolated button further up and to the right as well. Pressing it will bring up a scale on the LCD or in the viewfinder, which generally runs from -2 to +2 in 1/3 EV steps (EV is Exposure Value and it is a standardized scale that defines how much lighter or darker a scene will be than the measured value). When you first press the button, a pointer should be centered on the scale. Pressing the control wheel button that corresponds to the minus side (generally the button on the left, closest to the LCD) or rotating the outer wheel or the separate control wheel counter-clockwise, will move the pointer 1/3 of the way toward -1. Press again,or turn again, to move it further, etc.)

Most P&S superzooms that I have used require a setting of -1/3 or -2/3s EV to protect the highlights in the scene from burning out. If you go much more negative than that, the blacks and dark colors in the scene will block up...which is the equivalent term and the opposite effect to the highlights burning out…you lose all detail in the dark areas of the scene.

If you set the Exposure Compensation, the camera will remember it until you reset it, so, once you have determined how much -EV your camera and sensor (and your eye) likes you can just leave it set that way.

This shot of an American Avocet uses Auto Dynamic Range Compensation and -1/3 EV Exposure Compensation to hold the whites within range and maintain detail.

There may be times when you want to change it. For instance, if you have a bird or beast silhouetted against a bright background (sky, etc.) it might be helpful to set the Exposure Compensation to the plus side, so that you get more detail in the shadowed subject. In my experience this rarely works…and always leaves the background completely burnt out or way too bright. But you can try. 🙂 Generally I get better results through shadow processing in software after the fact.

Here is a case where you might be tempted to use plus EV exposure compensation. It rarely works. Images like this, with the bird backlighted against a bright sky are unlikely to be satisfying whatever you do.

Of course -1/3EV might be ideal for birds and wildlife, and even macros, where the subject is smaller than the frame, but you may find that more or less compensation is needed for landscapes…particularly landscapes with bright clouds in the sky. Today’s P&S automation systems all have some kind of Dynamic Range compensation built in…the image processing computer attempts to adjust for wide variations in the brightness in the scene in the processing of the jpeg image in the camera…but in my experience they still can’t handle the brightest whites in sun-lit clouds. For high Dynamic Range images I use the built in Dynamic Range compensation, special techniques like HDR (more in a future article on that) and even so, generally dial to the Exposure Compensation down to at least -2/3s EV.

Most cameras will allow you to create custom setting sets, so that you can create a wildlife and macro Custom set, and a Landscape custom set. More on that in another article as well.

For birds, wildlife, and macro, you will want to set the metering pattern to either Center (sometimes called Center-weighted) or Spot. This will be a menu setting and you will have to dig through the menu system (or the manual 🙂 to find it. (On Sony Cameras and Canon cameras, at least, it is also accessible in Program mode by pressing the Function button). Your choices are generally Mulit-pattern, Center, or Movable Spot.

As mentioned above, Multi-pattern reads a number of areas in the image, and creates a balanced exposure for the whole scene (or in Smart Auto it uses the multiple points to analyze the scene for the correct Smart Mode to apply). This works fine for landscapes and most of the subjects the engineers anticipated you would be taking photos of. However when you are photographing a bird or a bear or a bug from any distance, you want the bird etc. to be correctly exposed and you don’t care much about the surrounding foliage or landscape. Likewise when shooting macro, you want the flower or the insect correctly exposed, not the background. Multi-pattern metering may or may not get it right.

Center metering limits the area measured to a rough rectangle in the center of the viewfinder or LCD, while Movable Spot limits the area to the a very small circle or square that must be carefully placed over the exact object or subject you want to expose for. Generally in Spot, you can move the spot around the frame using the up/down/left/right buttons on the Control Wheel. This is handy for when you have the camera mounted on a tripod and need to meter off something that is not in the center of the frame…but generally too slow for anything but macro photography for the nature photographer. It is easier for the nature photographer, working without a tripod, to center on the subject, half press the shutter release to lock the exposure, and then move the camera to put the subject where you want it in the frame.

I generally use Center metering, as a good compromise, and one that I do not constantly have to think about.

Center metering was used here to make sure the fruit, which is the subject, is correctly exposed.

A final exposure tweak possible in Program is Program Shift. The the camera is programmed to respond to different light levels by choosing what the engineers feel is the best compromise between aperture (the size of the hole that passes light to the sensor) and shutter speed (which controls how long light falls on the sensor). Most P&S zooms are optimized for optical performance at wider (larger) apertures, so that the exposure system can keep the shutter speed high enough to avoid unnecessary camera shake fuzziness or blur from moving subjects. However, there are times…landscapes with a lot of depth and busy foregrounds, and almost all macro work…where you want greater depth of field than a wide aperture can provide. (Depth of field varies directly with the the size of the aperture…larger equals shallow depth…smaller equals greater depth. It is just physics. 🙂 Therefore you might want to shift the Program to a smaller aperture and a slower shutter speed…which is still reasonable given the excellent image stabilization in most P&S superzooms.

Traditionally the way to do that is to shift out of Program altogether and use Aperture Preferred metering…where you pick the aperture and the camera picks the shutter speed…but if your camera has Program Shift, and it is easy to access, there is no need to do that. Program shift gives you a range of choices for the correct exposure…balancing smaller apertures by automatically decreasing shutter speed, and vice versa, as you turn a control wheel (either the one surrounding the 5 way rocker Control on the back of the camera or a second dedicated wheel) or press the direction buttons on the 5 way rocker.  On Sony cameras it is really easy as the Program Shift control wheel falls right under your right thumb. On Canons it involves pressing two buttons at once to being up the control, and then using the wheel surrounding the 5 way control. Not so easy, but doable when you need it.

For a deep landscape like this, I use Program Shift for a smaller aperture and greater depth of field than the camera would give me on standard program. The same technique was used for the macro that heads up this article.

Last but not least, we come to focus placement. In Auto or Smart Auto, as I mentioned above, the camera checks focus on several areas of the scene. It either picks the most likely spot for focus, or picks a spot between what it judges to be the most important elements of the scene. It does tell you what it is doing. When you half press the shutter release, you get green (generally) boxes around the areas that it is planning to put into focus. You do have the option of letting off on the shutter release and giving it another chance to focus…or moving the frame slightly and trying again. All multi-pattern auto focus is biased toward the closest object to the camera.

A better way for the nature and wildlife photographer, as in exposure metering, is to switch the focus to a smaller area…either center focus or movable spot focus. Both work for focus the same way as they do for metering…directing the focus to objects and subjects near the center of the frame, or exactly under the spot. This is especially critical for telephoto work, where your depth of field is restricted by the focal length, and where the camera’s bias toward the closest subject is very likely to put focus on something in the foreground (grasses, leaves, twigs, etc.) instead of on the bird or beast you are attempting to photograph. In macro work, especially on a camera without a dedicated Macro mode, the focus is likely to fall on background objects instead of what you want…especially if you are a little too close to the subject for the camera to focus comfortably.

Again you will have to dig into the menu system to change the focus area…or, in Program, use the Function button on Canon or Sony cameras.

Center or spot focus allows you to place the focus where you want it for complex shots like this one of Cedar Waxwing in a field of Goldenrod.
Center or spot focus is also handy in macro work where you want to carefully control what is in focus. This shot uses both center focus and program shift, to achieve the desired effect.

I do about 60% of my shooting in Program mode, using one of my Custom setting memories. The rest of the time I use one of the specialized Modes…Sports, Macro, or In-camera HDR, depending on what I am shooting (once more, more on specialized modes in a future article). All of my birds and wildlife are shot in Program, except for birds in flight. All my Macro on the Sony cameras, and most of it on the Canon superzooms, is shot in Program.

Once you have graduated from Smart Auto (if and when you do :), Program is your smart choice. 🙂

Program does it!


Making Macro with P&S

If you develop the habit of looking closely at nature you will find all kinds of interesting and wonderful photo opportunities…moss, lichen, flowers, mushrooms and other fungi, bugs and even the intricate textures of rock and tree bark.

With a standard full sized  DSLR camera with interchangeable lenses you would need a dedicated macro lens, add-on macro lens/filters, or extension tubes between the camera body and a fixed focal length normal lens to take advantage of the macro world…and, most likely a tripod rigged to get down and close. Many also use a special flash called a ring-flash for close up work. Macro is somewhat of a specialty among serious photographers, requiring special equipment and techniques as well as the eye to see small.

Today’s P&S superzooms almost all have excellent macro ability. Many will focus to 1 to 2 centimeters from the front lens element at wide angle. Some, like the Canon SXxxHS series, will focus on something touching the front element. Many have dedicated Macro Modes, which not only bias the focus system for close focus, but often add some digital trickery to defocus the background to simulate (for better or worse, see below) the effect of a longer focal length macro lens on a full sized DSLR.

Wide angle macro. Sony HX400V.

P&S macro does have its disadvantages…so called. Both of the often sited disadvantages have a positive side that you can use to your advantage.

Characteristically P&S superzooms focus closest at their widest angle. This makes the kind of macros that show a close up view of you subject in its environment…with background or surroundings…easy and natural. And because the wide angle on a P&S is, in reality, a very short focal length lens (the actual focal length of a 24mm equivalent lens on a P&S is 4.3mm), and because the shorter the focal length of the lens the greater the depth of field, much of at background or surrounding will be in relatively good focus. This produces an interesting effect of its own, as the image above demonstrates, but it does not produce what most photographers and photo enthusiasts think of, or recognize as, the macro effect.  Because most macro work is done with full sized DSLRs and specialty lenses that have real focal lengths of between 60-100mm, or with add-on lens/filters or extension tubes that restrict the depth of field, we are used to seeing macros with the subject isolated against an out of focus background. In fact, the challenge for folks who shoot with real macro equipment is to get the whole subject in focus at the same time. That is much easier, though some care is still needed, with a P&S macro. Those cameras with a dedicated Macro mode often use special in-camera processing to mimic the full sized DSLR macro effect.

The other disadvantage of P&S macro is that with close focus at the wide angle end of the zoom and focus under 5mm you have to be really close to your subject…often too close for practical work. You get pollen on your lens. You spook the bug. Worse, you get in your own way…the shadow of the camera covers the subject in any kind of sun or strong daylight.

Let me say right here that one of the real advantages of P&S macro is that you almost never need a tripod. The image stabilization on today’s P&S superzooms is amazingly good. If you take a number of shots…or use the continuous shooting mode on your camera…you will get at least one sharp photo in almost any light. It is easy to do, since, with the exception of bugs, most macro subjects will not be moving much if at all.

Both of the disadvantages above can be overcome, at least in part, by using a slightly longer focal length on the zoom. This is not possible with all P&Ss, but it is with the three I am most familiar with.

Conventional macro with a 100mm equivalent macro lens on a APS-C mirror-less compact DSLR. ZEISS Touit 50mm Macro on Sony NEX 3N. Notice the fully out of focus background. Contrast that with the image above, taken a the wide end of a P&S zoom with an equivalent focal length of 24mm and a real focal length of 4.3mm.

The Nikon superzooms have (or had, last time I checked) a Macro Mode that sets the zoom at about 34mm equivalent. This is a good compromise…allowing a more comfortable  working distance, and a bit more separation between subject and background. Nikon emphasizes that separation with special background processing. At the same time, 34mm equivalent still has enough depth of field to make it possible to keep the whole of most macro subjects in focus at the same time.

Canon SXxxHS series cameras will focus, as above, on the front surface of the lens at wide angle…but if you move the zoom off wide angle you loose close focus all together. To overcome that, I always use the digital zoom…on the Canons there is a special processing mode that provides a 1.5 and 2x digital tel-extender that has remarkably good performance, especially with macro subjects where the sensor is flooded with detail. That puts me out at 36 and 48mm for good working distance, and still gives me the depth of field of the 24mm equivalent. Best of both worlds.

On the Sony, closest focus is also at full wide angle, where you can get to 1cm. However, you can zoom out to 50mm, or even 85mm, and still focus under 5cm. Again, that gives you a good working distance, good scale, and, with care, enough depth of field.

Both the Canon and the Sony allow for Program Shift while shooting macros. It is kind of difficult to access on current Canons as it involves simultaneously pushing two buttons, but on the Sony it is dead easy as Program Shift is the default action of the real control wheel under your thumb as you grip the camera. Program Shift on any camera allows you to increase or decrease the depth of field by adjusting the size of the aperture (f-stop) without upsetting the basic exposure (it automatically compensates by adjusting the shutter speed to keep exposure balanced). You don’t really need to understand shutter speeds and f-stops and exposure to use Program Shift for macros. All you need to know for well focused P&S macros is that you want a larger f-stop number (which corresponds to a smaller aperture). Most P&Ss will automatically select a larger aperture over a smaller one, so your basic exposure is going to be something like f3. You want to dial it up to f5.6 or f6.3. That will give you enough depth of field, on a P&S, for most subjects. The shutter speed will go down, making it harder to hold the camera still long enough to get your picture, but between the excellent image stabilization and taking a few shots of every subject, you should still get at least a few sharp images in almost any light.

Sony HX400V at about 80mm equivalent, using program shift for a smaller aperture, comes close to matching the macro effect of the dedicated 50mm macro on the Sony Mirror-less compact DSLR.
Sony HX400V at about 80mm equivalent, using program shift for a smaller aperture, comes close to matching the macro effect of the dedicated 50mm macro on the Sony Mirror-less Compact DSLR.

Lighting on macros, and especially avoiding the shadow of the camera, can be very tricky. All I can say is that if I take the time to try all the angles I can generally find one that works. Sometimes you still get camera shadow in the image, but as along as it does not distract from or obscure the subject it might be okay.

Circling the plant with the bee allowed me to get the camera's shadow out of the frame. Sony HX400V at about 90mm.
Circling the plant with the bee allowed me to get the camera’s shadow out of the frame. Sony HX400V at about 90mm.

Some of the best macros are taken in the indirect light of the forest floor. Again, the superior image stabilization of the P&S superzoom comes into play to allow these kinds of shots hand held.

At the same time there is nothing like the detail of a shot in full sun. I used all the tricks here, with the Sony HX400V.

Finally, don’t ignore the other end of the zoom, or anything in between when shooting macros. Many P&Ss will focus closely enough at the long end for a true macro effect, especially if you use digital zoom or one of the specialized processing modes that give an expanded zoom range. The Canon SXxxHS series focus (based on current models at the time of this writing) to under 5 feet at full telephoto. At 1800mm or 2400mm equivalent field of view (using the digital tel-extender) that can produce stunning macro results.

2400mm on the Canon SX50HS. Bordered Patch at the National Butterfly Center
wpid123-14079839954872_1.jpg
Flame Skimmer. Tucson Sonoran Desert Museum. Sony HX400V at 2400mm equivalent using Perfect Image Zoom.

So, are you ready to make macro with your P&S superzoom?